|
|
Post by Shytalk on Aug 20, 2013 20:47:45 GMT 1
The adjuster screws are about 2" long and something like M4 or M3 thread, I have got an old one knocking around if you need one but its not the best.
The parts you need are 10X-84131-00 Screw Rim Adjuster X 2.
341-84332-60 Spring X 2 - these fit over the adjuster screws above.
98506-05012 Screw Pan Head X 2 - these secure the front to the bowl assembly.
|
|
|
|
Post by Shytalk on Aug 20, 2013 9:41:19 GMT 1
Been trying to search through the forum for some advice on screen polishing My 31K resto has a very poor fairing screen which I'd like to bring back to clear if possible. It has some light scratches and is quite dull all over. What is the best polish to use on it ? I think I might have to use very fine wet/dry on some of the deeper stuff  I did a post years ago - it got lost in the upgrade so I have re done it :-- rdlccrazy.proboards.com/thread/22239/screen-refurbishment |
|
|
|
Post by Shytalk on Aug 20, 2013 9:36:20 GMT 1
I wrote and did this screen refurb guide a few years ago, but it got deleted when the site upgraded so I have dug it out from Gary Robbos Forum where it still lives and posted it up here again, the pastes I used back then were Farecla G3 for the coarser work then Farecla scratch remover for the finer work, there are probably a multitude of newer products out there now that will do the same or better job, the main thing to remember is to use a reasonable amount of water to keep things from drying out, it can get messy but the results are good, you won't ever remove a deep gouge but you can make it less obvious. It is intended as guide to show what can be done, and what I have done - this screen is still sitting on my F1, it is not the bible, so read it and use it; or part of it or ignore it, you may just save yourself a fair amount of money and effort trying to buy a decent replacement. As a lot of the screens are NLA I thought that I'd try to rejuvenate a scratched one, here's the how to. I spent quite a few hours on this screen, there were quite a few deep stone chips in various places and a couple of long scratches on the front, I've taken some pictures but some of the bits are hard to see in them : - 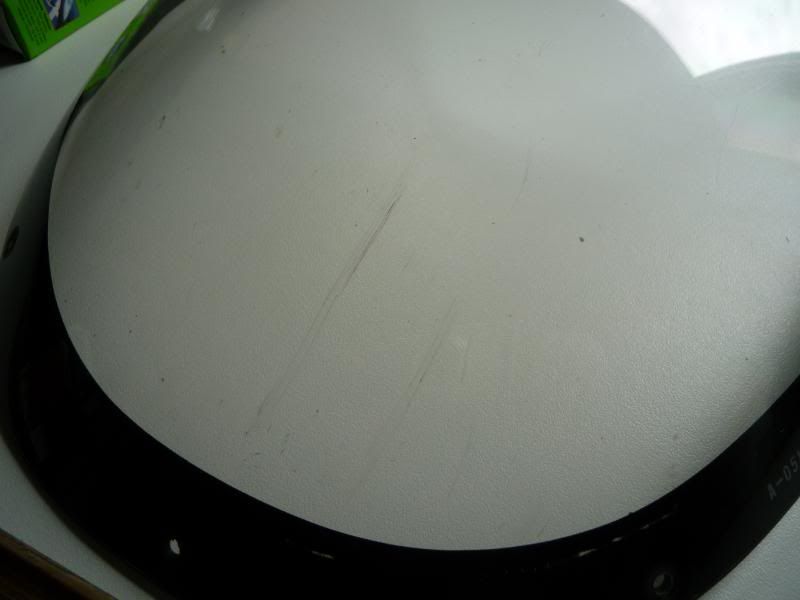 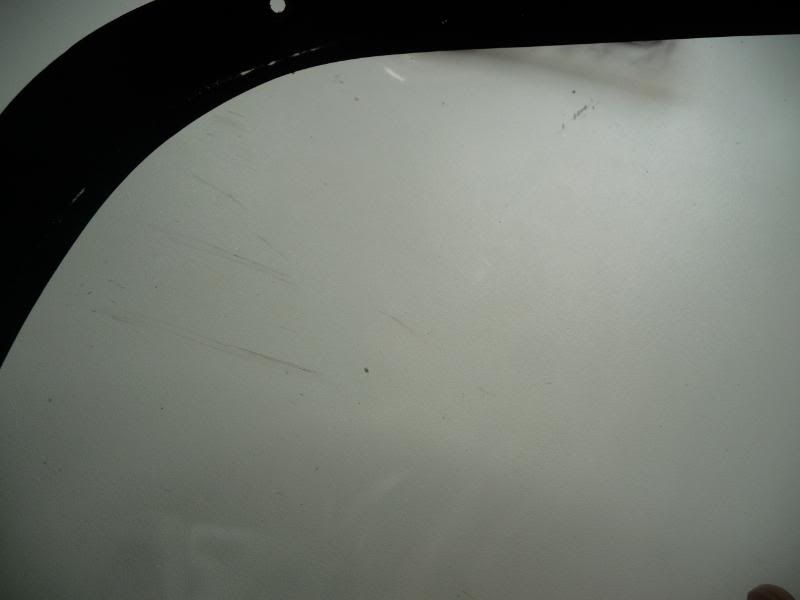 First task I do is mask the black inner paintwork with electrical tape : - 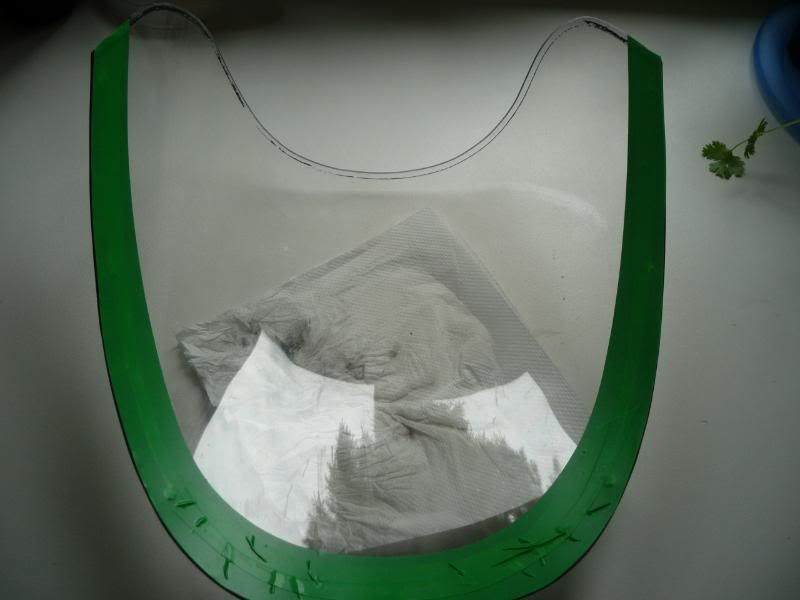 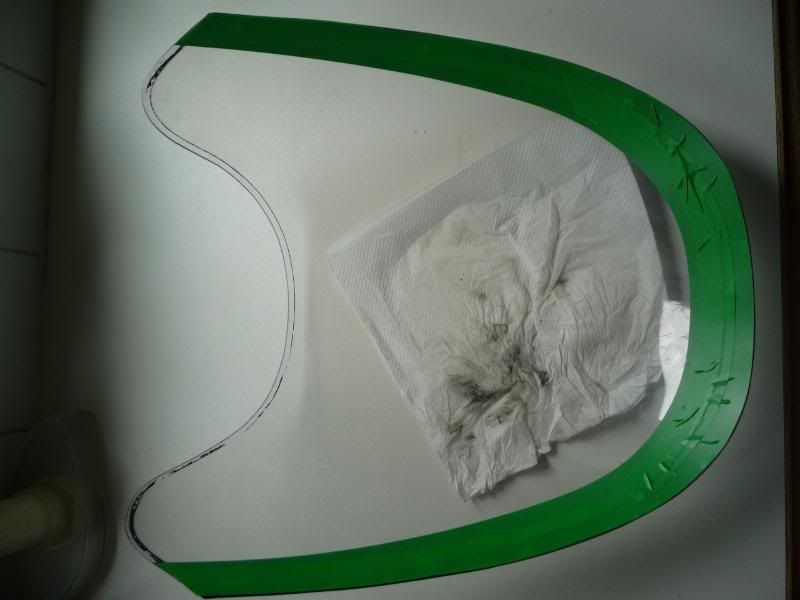 Next is the wet and dry, choose an area to work on and depending how deep the blemishes are I go to work with wet and dry - for light scratches I use 2000, for deep stuff I start off coarser then go to 2000 grade. In this one you might see 3 stone chips - in the reflection of the sky in the picture : - 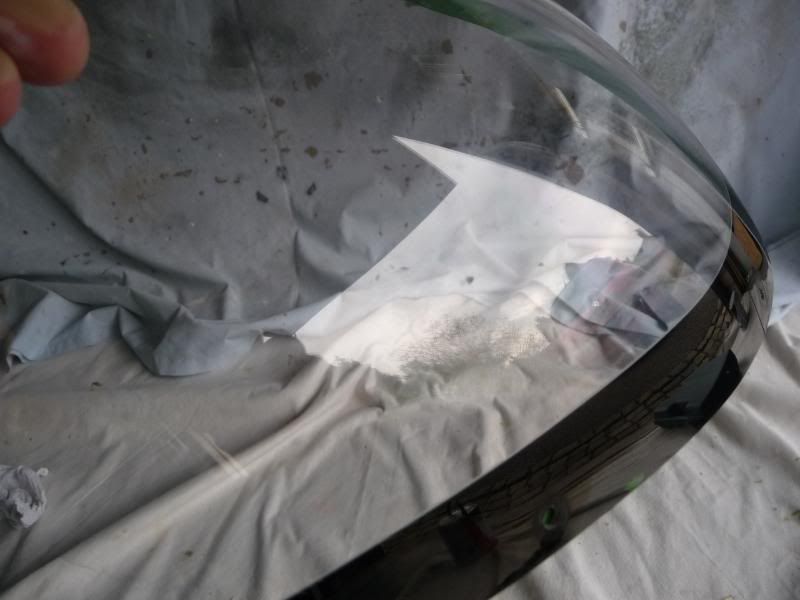 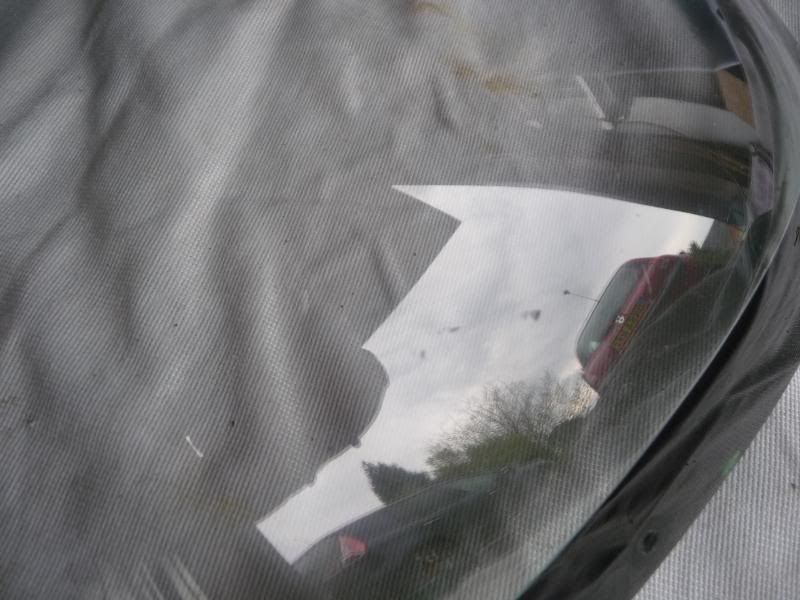 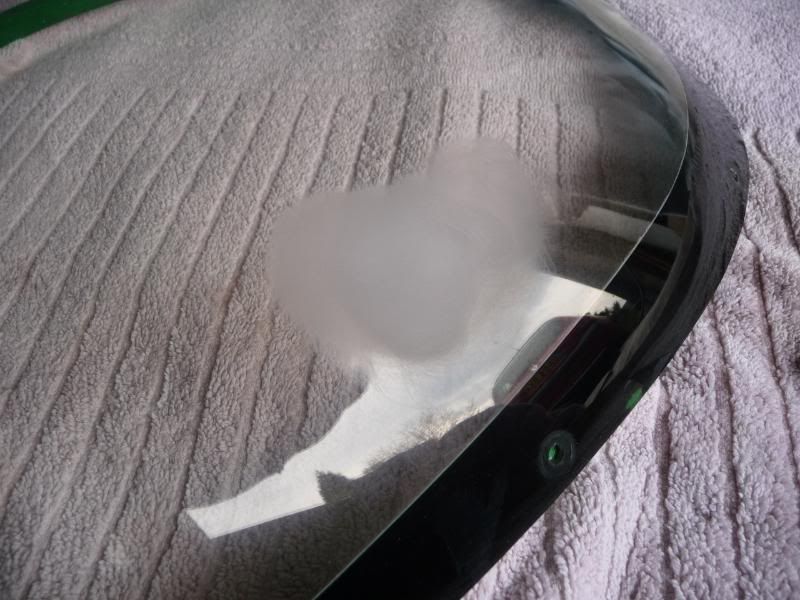 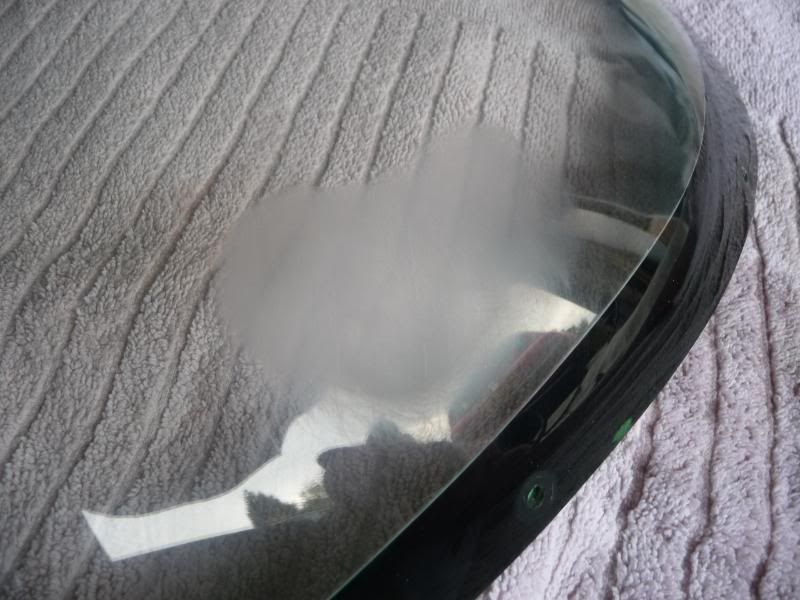 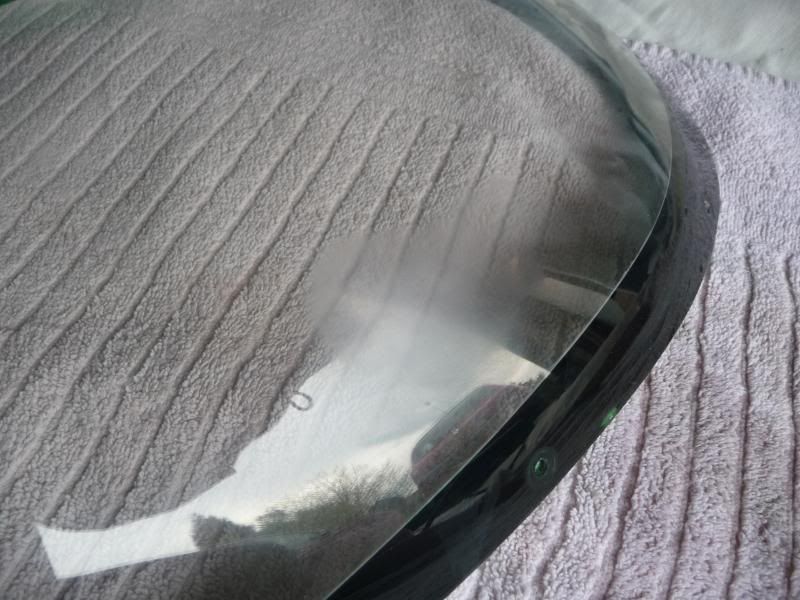 Then I get my scratch removing paste out, again, coarse first then fine later, I use it with a drill on slow speed - it can be done by hand but would take even longer : - 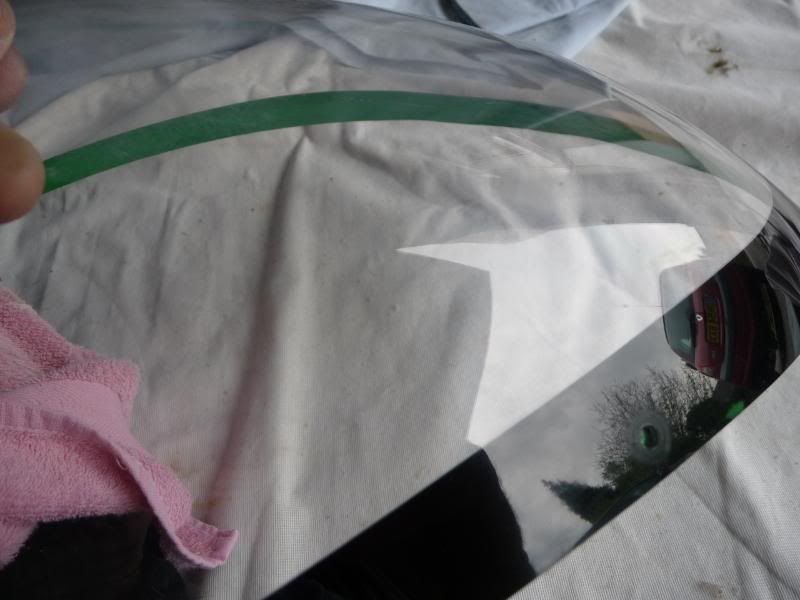 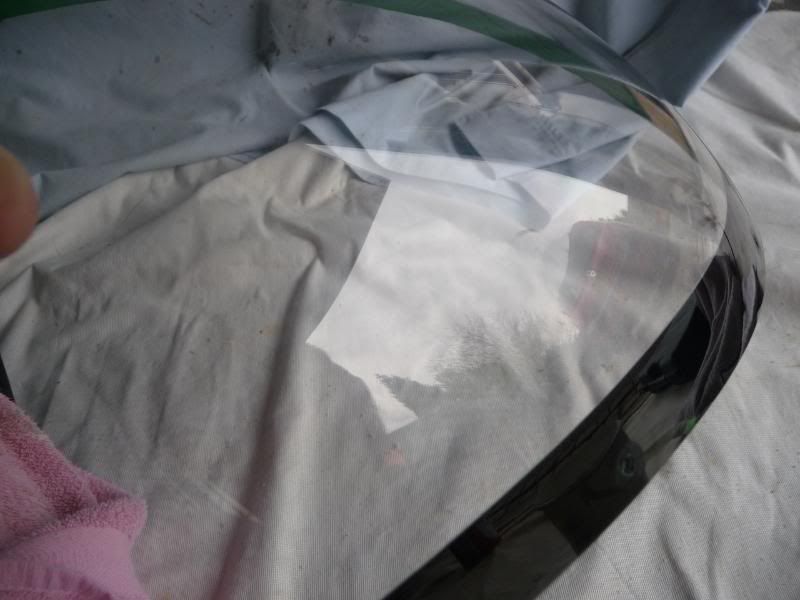 Some other areas : - 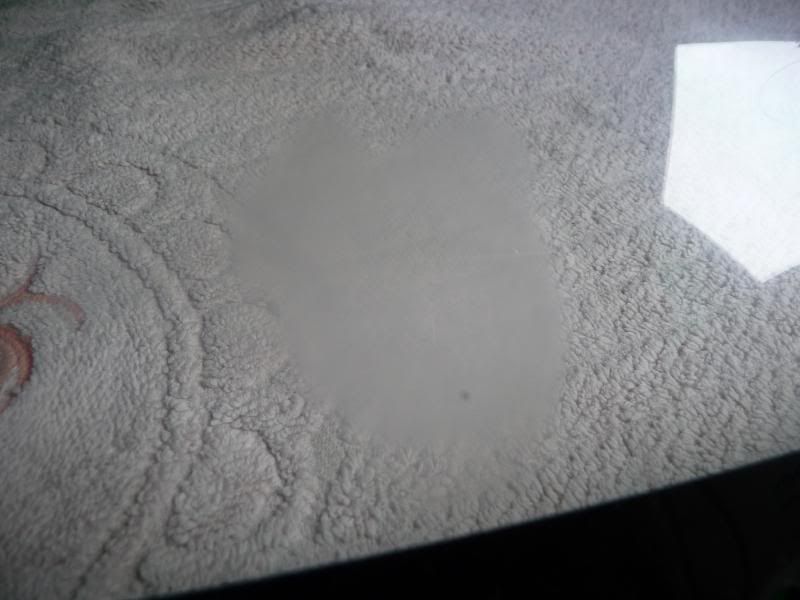 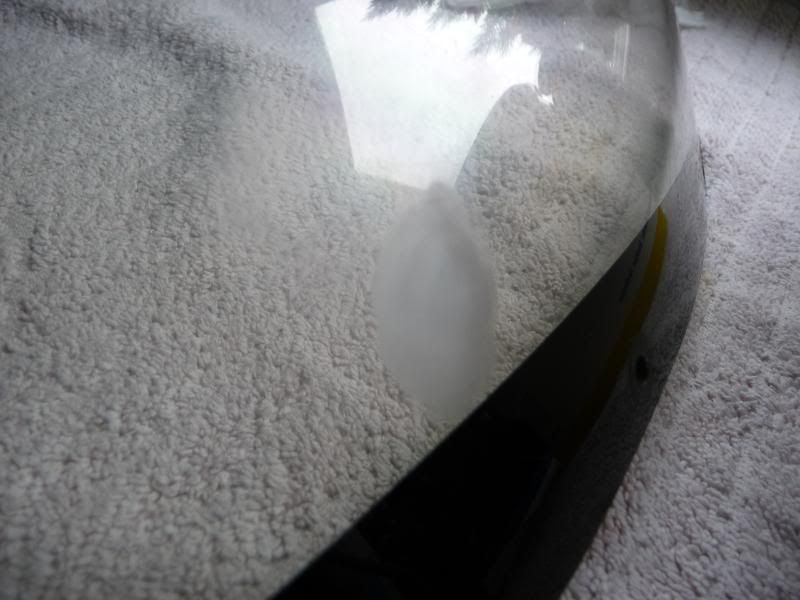 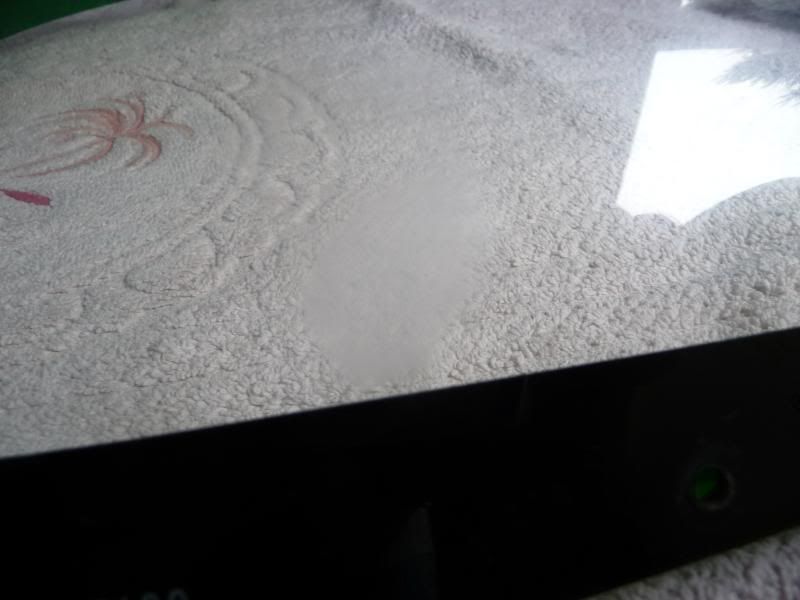 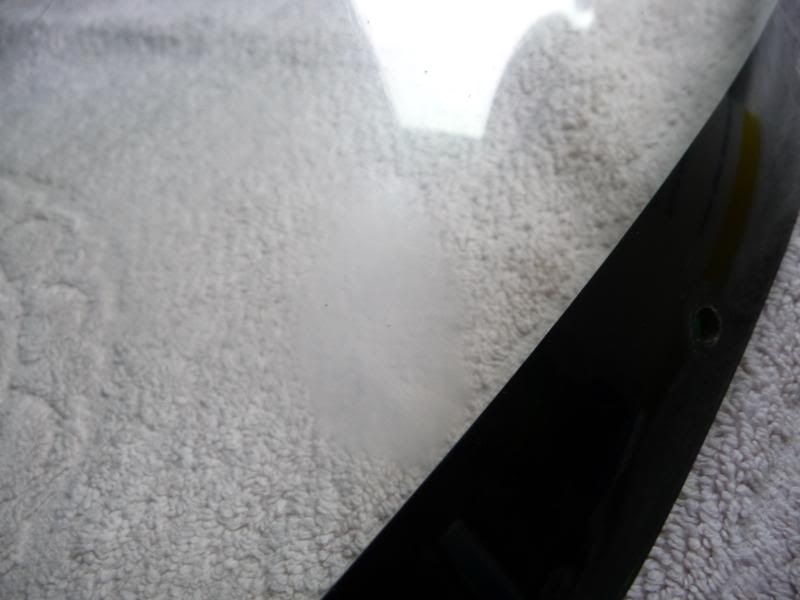 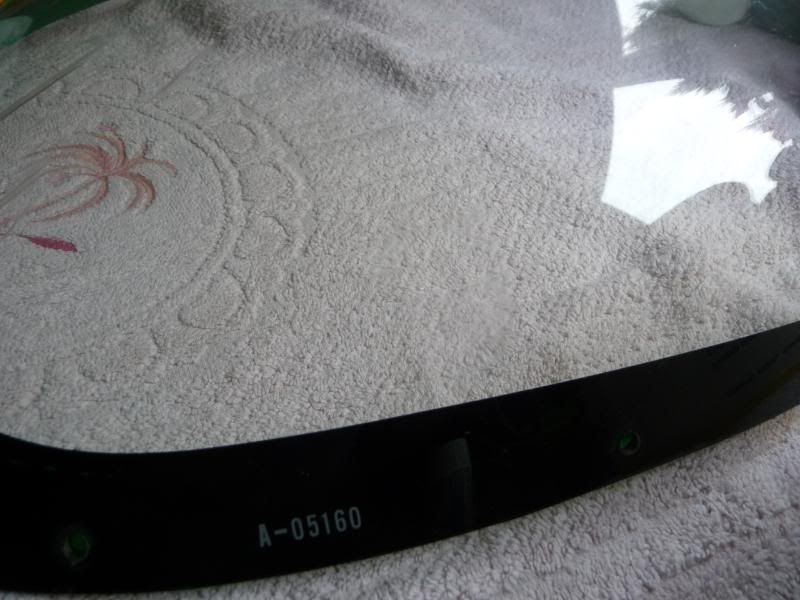 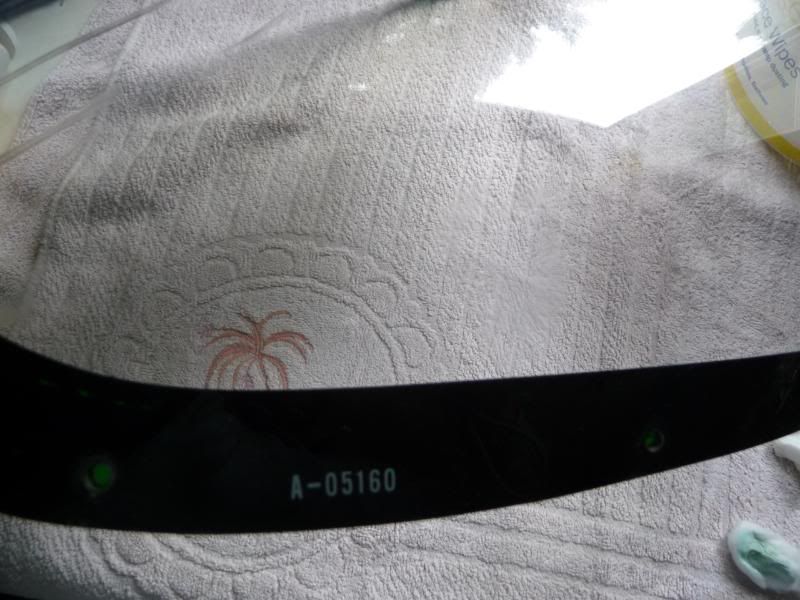 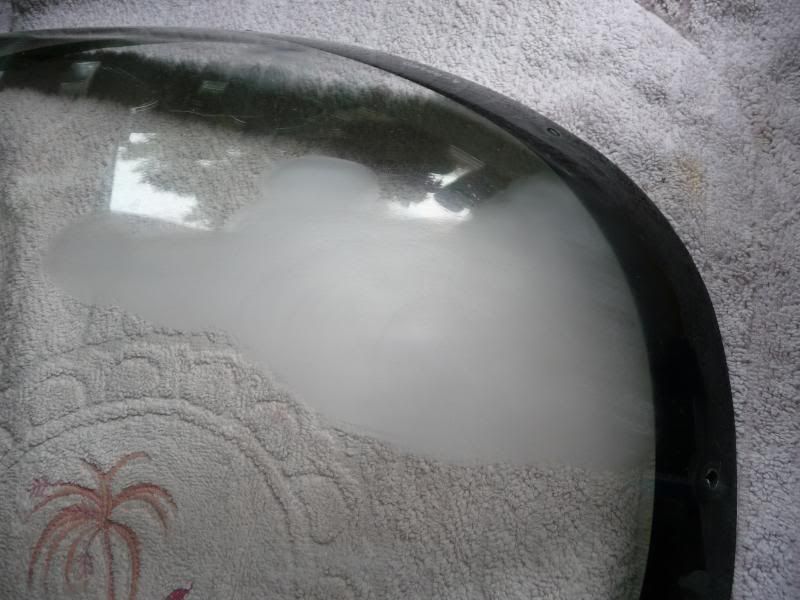 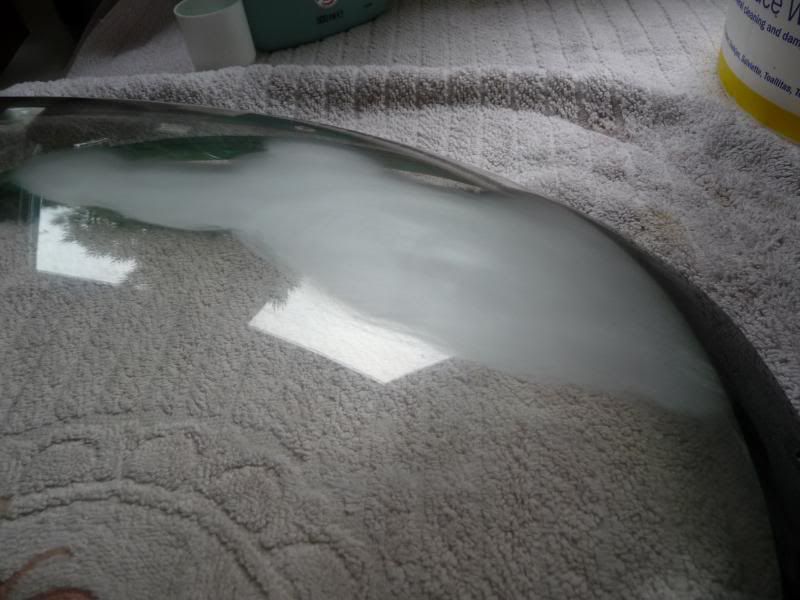 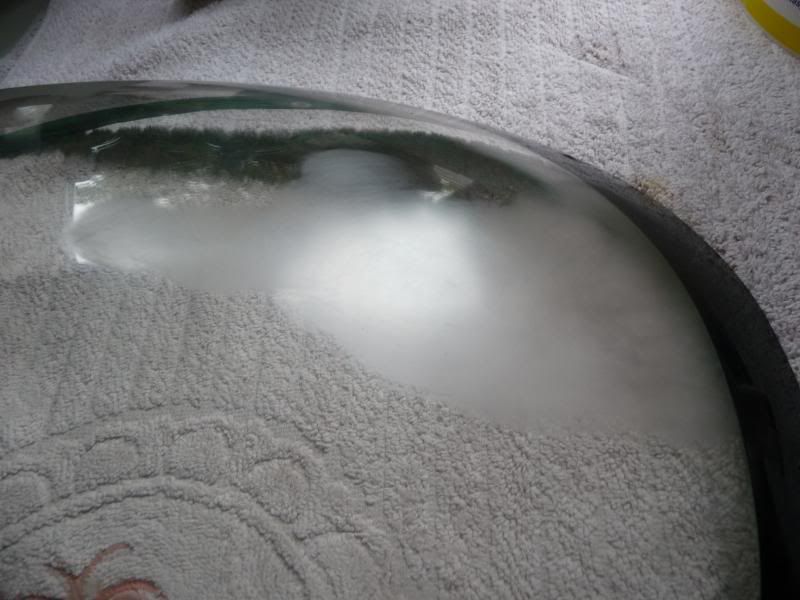 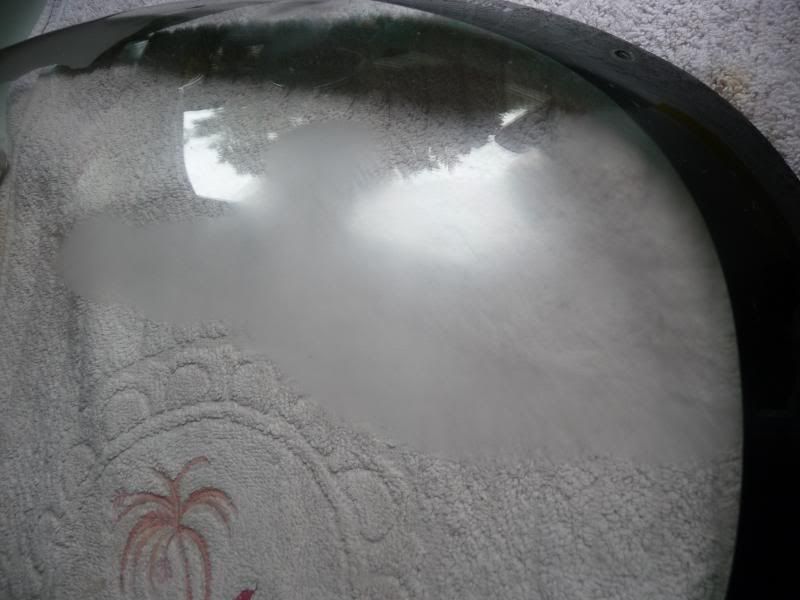 It does take some time and you have to be methodical as there are always scratches on both sides of the screen that need to be worked on, final touch is to remove the tape, mask off the clear part of the screen and respray the black edge, when that's dry give the screen a wax and polish : - 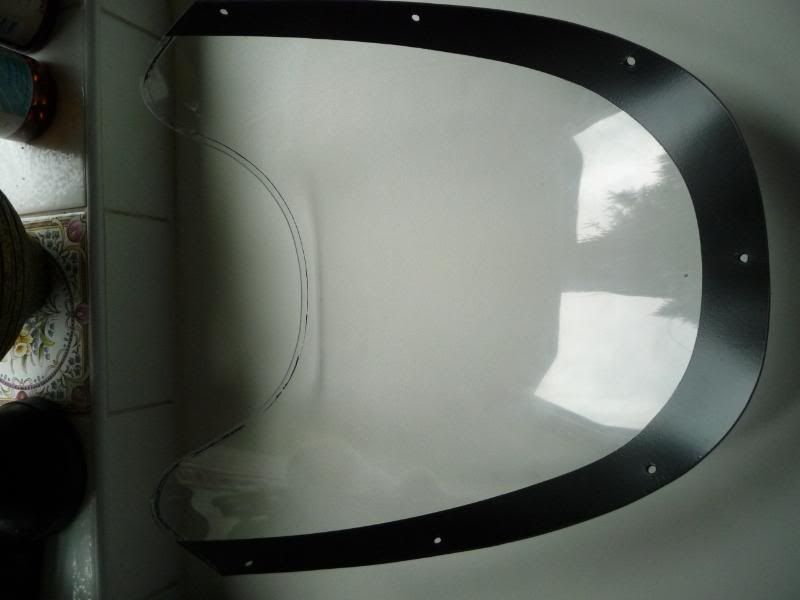 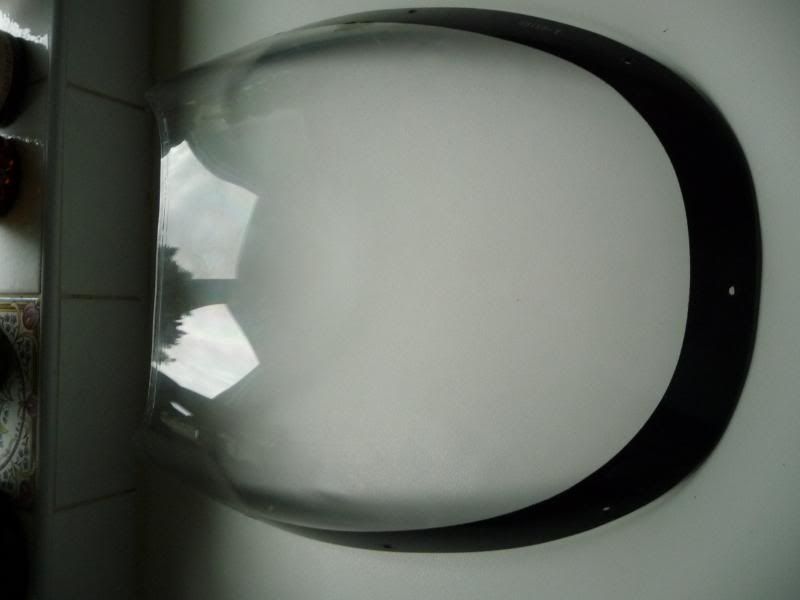 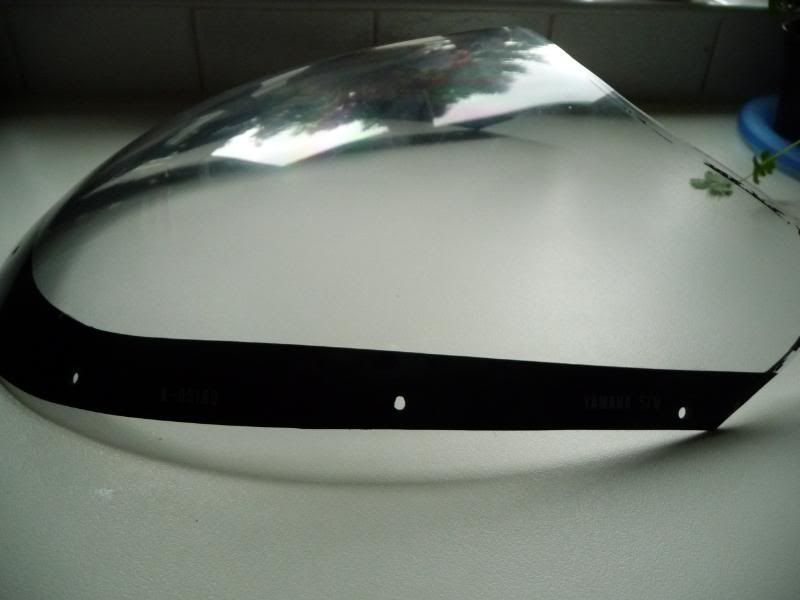 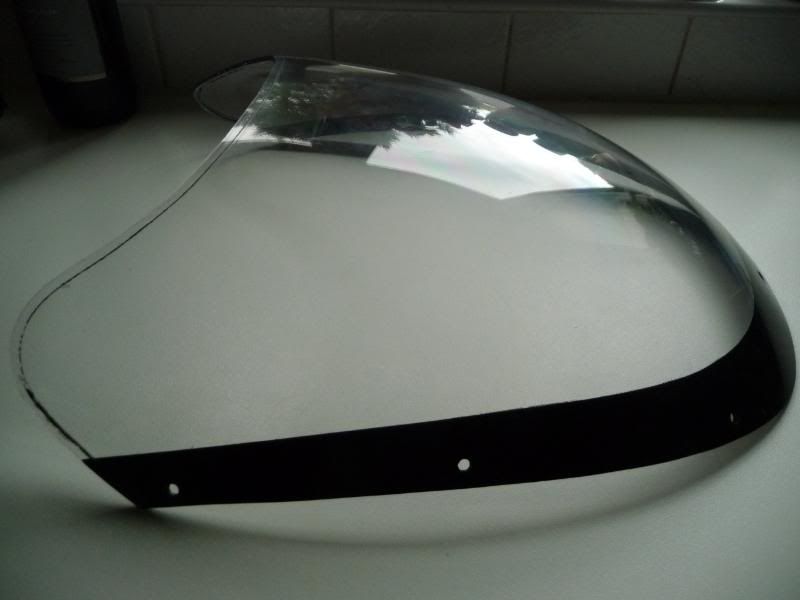 |
|
|
|
Post by Shytalk on Aug 4, 2013 12:51:57 GMT 1
As above I,ve got a 29k 50 cdi I think it's not sparking right has anyone got one or would plug mine too check before Iay out more cash Opinions please lads as I,ve been pushing it around most of the morning Of course I don't mind paying for your time cheers pete Pete, I can send you a CDi and a stator to try - but I'm away for a couple of weeks so you will have to wait until I return before I can post, if you can wait until then I'll be happy enough to help out. |
|
|
|
Post by Shytalk on Aug 4, 2013 12:44:10 GMT 1
Hyup all, I have been in contact with Yambits and they got hold of some OEM boot seals I've still got the part numbers if anyone needs them. If you have the part numbers I'd like them please. |
|
|
|
Post by Shytalk on Aug 1, 2013 14:08:36 GMT 1
Yes N1, F1 and Lc2 are all the same fitment. Steve As Steve says, they're the same fitment. |
|
|
|
Post by Shytalk on Jul 30, 2013 19:49:48 GMT 1
Decent bods to deal with.
|
|
|
|
Post by Shytalk on Jul 30, 2013 12:26:40 GMT 1
Problem is it could be any of the above..........most likey though are the stator or CDi.
|
|
|
|
Post by Shytalk on Jul 27, 2013 10:16:00 GMT 1
It may well be that the seal that you have is the wrong size and won't fit, I've come across so many different sizes over the years and most are too big.
|
|
|
|
Post by Shytalk on Jul 24, 2013 8:31:23 GMT 1
I've got one if you need one.
|
|
|
|
Post by Shytalk on Jul 22, 2013 19:37:20 GMT 1
You might try dropping VIN a PM, he's up in Cheltenham, I don't know whether he does work for others or if he has the time, but he certainly knows how to build. Worst case he can only say no.
|
|
|
|
Post by Shytalk on Jul 17, 2013 10:44:50 GMT 1
The problem with this is that the list will constantly change, some parts will become NLA whilst the opposite does also happen, whereby a one time NLA part becomes relisted.
If you have a correct part number........it doesn't even need to be the latest number, ring Fowlers or Granbys......your local dealer should be able to as well, ask for the price and availability, they will tell you the superceded part number and price or if it is NLA, most places are usually very helpful.
|
|
|
|
Post by Shytalk on Jul 16, 2013 10:09:14 GMT 1
Get a repair kit before you take it to pieces - Norbo sells them.
|
|
|
|
Post by Shytalk on Jul 8, 2013 16:41:56 GMT 1
Yes you can swap them, just need a bit of time and patience
|
|
|
|
Post by Shytalk on Jul 1, 2013 19:01:47 GMT 1
There should be a rubber piece around the throttle cable junction, it has a slot in it that slides onto said lug, its part of the cable assembly and not available as a spare part.
|
|
|
|
Post by Shytalk on Jun 26, 2013 19:21:24 GMT 1
Depends on the state of them really, you can just remove the pads and use the brakes as normal to pump them out, if they are on the bench you can use compressed air via compressor but as said its a potentially dangerous method, a safer alternative albeit messy is to connect a grease gun up to the bleed nipple, block the brake line hole with a bolt and pump grease into the caliper, its slow but safe.
|
|
|
|
Post by Shytalk on Jun 25, 2013 11:34:29 GMT 1
Well it's not the correct item for sure but I suppose if it works................
|
|
|
|
Post by Shytalk on Jun 17, 2013 12:01:55 GMT 1
Dave, heres my F1 - same layout  You should be able to make out the rear switch on the right with 2 wires coming off it, basically there is a circular metal plate that the switch clips into behind the frame tube, the spring end then attaches to the other hole mount on the brake lever. The clutch perch, you will need to gently prise it open to get it over the bars, a little grease or WD40 will help too. The headlight bolts onto the frame with 2 nut and bolt combinations, and there should be a couple of rubber grommets pear shaped around the hard white plastic of the shell too. |
|
|
|
Post by Shytalk on Jun 15, 2013 18:15:17 GMT 1
Slightly on topic, is the centre stand good enough to, say, remove a wheel and leave the bike balanced on (suitably tied/weighted down at the oppsite end). Id like to remove the front end on mine over the Winter. Yes, thats what the stand is there for, better to put a crate or the like under the exhausts if you're looking at removing the front end parts. |
|
|
|
Post by Shytalk on Jun 6, 2013 17:46:13 GMT 1
Its shrinking already Butch  You need a peg near the light switch to hang a pair of these on too  |
|
|
|
Post by Shytalk on Jun 6, 2013 10:31:15 GMT 1
Check around the bottom of the reed valve gaskets. Had a similar issue awhile back when bike was stood for a while. 2t had soaked through gaskets dripped onto crankcase & through the drain hole behind the barrels. OEB OEB what was the cure for yours? |
|
|
|
Post by Shytalk on Jun 5, 2013 8:30:33 GMT 1
From memory again, there are 2 U shaped brackets on the front either side of the air box, these locate onto 2 rubber bungs on the frame, then there is a bolt that fixes to the frame in the battery box compartment.
|
|
|
|
Post by Shytalk on Jun 2, 2013 14:07:24 GMT 1
Thanks for you input skaterboy , I know the pump is good as it wasn't just refurbed it was a replacement . Arrow , I must admit there was no way on this earth I could those retainters supplied with the lines on so I used some lock wire to secure them ,, do you think this was not one of my finer moments ? Why could you not use the retainers? If its clear tube then it'll be thicker so he won't be able to push the retainers over the spiggot and tube, stick with the Yamaha black tube and at least the clamps will fit as they need to. You know the pumps OK so why do you need to see the oil - the exhaust will tell you that its getting there. |
|
|
|
Post by Shytalk on Jun 2, 2013 13:59:32 GMT 1
Do you mean before i fit engine?
Yes before you fit the engine, it should be one of the first bits put into the frame because its a fiddle to get it into position, I think that you may need to remove the inner rear mudguard as well but you'll see if you give it a whirl
|
|
|
|
Post by Shytalk on Jun 2, 2013 11:40:06 GMT 1
Dave, you need to get the air box in first and also the rear shock, or at least the top mounting bolt in place for it.
|
|
|
|
Post by Shytalk on May 28, 2013 9:28:07 GMT 1
Yep the bottom picture isn't of standard wiring from the stator.
|
|
|
|
Post by Shytalk on May 23, 2013 10:35:04 GMT 1
Float valve is the usual cause, the rubber hardens over time and doesn't seal properly.
|
|
|
|
Post by Shytalk on May 12, 2013 16:09:24 GMT 1
Sounds most likely that the tank will have crap in it, or perhaps the tap assembly is gunked up.
First off get the carbs off again and clean them out. Then I'd personally try it again with the clean aux tank, if its OK then the issue is as above, have you put an in line fuel filter in?
|
|
|
|
Post by Shytalk on Apr 28, 2013 20:35:00 GMT 1
mmm redbimoto mmmmmmmmmmm ive bought some duff stuff off his ebay site Think you've got your sellers mixed up - Kev doesn't do ebay  |
|
|
|
Post by Shytalk on Apr 26, 2013 17:34:03 GMT 1
Head and barrels don't get that hot relative to exhausts, so paint coming off them is not a problem.
|
|


