|
|
Post by watchhislegs on May 3, 2013 23:57:42 GMT 1
I've got a 4hw frame sat next to me. it is 232mm between the mounting points although I am a bit pissed. might be 233mm. I can't stand up.
|
|
|
|
Post by watchhislegs on Apr 8, 2013 19:44:31 GMT 1
They need to stop putting bsb/wsb and moto gp on the same day, my relationship won't survive. great race though, glad to see Rossi injecting a bit of fun into what has been two quite boring years.
|
|
|
|
Post by watchhislegs on Apr 8, 2013 19:39:40 GMT 1
brilliant
|
|
|
|
Post by watchhislegs on Mar 31, 2013 12:03:59 GMT 1
if you're using an airline just wrap the caliper loosely in a blanket. it will stop the piston smashing your head open. still scares me every time I do it!
|
|
|
|
Post by watchhislegs on Mar 27, 2013 21:29:40 GMT 1
great stuff norbo, I'll be placing an order soon. top man
nico
|
|
|
|
Post by watchhislegs on Mar 21, 2013 21:53:54 GMT 1
cheers nik, I feel much better about life now. the gloom has gone.
|
|
|
|
Post by watchhislegs on Mar 21, 2013 0:54:52 GMT 1
cheers Kenny, I'll have a think about getting the switch off you. thanks for the pics, really helpful.
so, the f2 must have a specific side stand as the one I have doesn't have a tang on it. parts manual for non European models has a different number side stand marked 1ua instead of 29L.
anyone know if the switch and relay can be disconnected and you can run without it?
anyone got a f2 side stand they want to sell?
it's like a bloody jigsaw puzzle this build. fun though!
|
|
|
|
Post by watchhislegs on Mar 20, 2013 23:17:10 GMT 1
cheers matt, but how is the switch activated? I can't see anything on the actual side stand that will engage the switch. I hope I'm not being daft here.
anyone shed any light?
ta
|
|
|
|
Post by watchhislegs on Mar 20, 2013 1:14:40 GMT 1
I'm building a F2 from bits and have run into a problem with the side stand. The lugs are on the frame for the switch but I'm not sure how it is activated. I don't have the switch but I have a stand I got off someone on the forum (thanks mate).
Can someone post some pictures of their stand and show me what the crack is?
I've got one of norbo's looms and don't know whether the wiring is included on that loom for the switch and relay. from what I can see from the parts fiche some countries HD the switch and others didn't. I'm puzzled, and a bit tipsy so sorry for waffling on.
I'm off to bed and hopefully someone will have put me out of my misery by tomorrow night.
Thanks
Nico
|
|
|
|
Post by watchhislegs on Mar 16, 2013 18:30:12 GMT 1
is it the blanking plug for the tacho? they are blanked off on later rd's. it,s like a game this.
|
|
|
|
Post by watchhislegs on Mar 11, 2013 20:40:37 GMT 1
I was riding my mountain bike in Scotland over the weekend and it was that cold the mud froze on my bike. I kept slipping off the pedals. horrible.
|
|
|
|
Post by watchhislegs on Mar 6, 2013 0:30:07 GMT 1
Sad to see mate, at least you're OK though. Good luck with the rebuild, I'll be interested to see if it was the carb settings as I've got some pwk's on my build.
|
|
|
|
Post by watchhislegs on Mar 4, 2013 21:53:19 GMT 1
Do you want rd's or would you take anything?
|
|
|
|
Post by watchhislegs on Mar 2, 2013 19:33:57 GMT 1
Absolutely stunning mate.
|
|
|
|
Post by watchhislegs on Feb 24, 2013 14:48:57 GMT 1
Looks mint mate. Great work.
|
|
|
|
Post by watchhislegs on Feb 6, 2013 12:40:33 GMT 1
I like that you've used a swingarm that is a bit odd. Saves it from cluttering up the garage!
|
|
|
|
Post by watchhislegs on Feb 6, 2013 11:05:16 GMT 1
Great work mate. You've made it look easy. Can't wait to see it with a tz fairing on.
|
|
|
|
Post by watchhislegs on Jan 29, 2013 22:11:31 GMT 1
when you putting all this stuff on the website norbo? i've got money to burn.
sorry for the thread hijack.
|
|
|
|
Post by watchhislegs on Jan 20, 2013 11:54:12 GMT 1
Just chop down the stock footrests, you won't be able to mount the exhausts off them anymore though. anyine know hiw to insert pics into this forum from a tablet?
|
|
|
|
Post by watchhislegs on Jan 20, 2013 11:40:20 GMT 1
Looking good mate, keep up the good work and post the results!
|
|
|
|
Post by watchhislegs on Feb 6, 2012 0:16:26 GMT 1
Great idea, I'm on!
|
|
|
|
Post by watchhislegs on Dec 20, 2011 23:52:39 GMT 1
Going out is shit. Might as well stay in and do something useful instead of getting set on fire or bummed by a gang of yobs in the local pub car park.
|
|
|
|
Post by watchhislegs on Dec 20, 2011 23:43:37 GMT 1
Absolutely mint. Great work fella.
|
|
|
|
Post by watchhislegs on Dec 18, 2011 14:44:40 GMT 1
Looks terrifying. If you applied it to yourself you'd never have to wash as you'd never get dirty.
I like the video where he stands in a shitty puddle with some white sailor shoes on!
|
|
|
|
Post by watchhislegs on Dec 7, 2011 23:50:04 GMT 1
Bloody liberals
|
|
|
|
Post by watchhislegs on Nov 23, 2011 20:38:28 GMT 1
Looking good mate
|
|
|
|
Post by watchhislegs on Aug 25, 2011 23:24:36 GMT 1
Vinegar has its uses (on chips) but I find it doesn't really kill the rust the way I would like. Electrolysis or phosphoric acid is surely the way forward.
|
|
|
|
Post by watchhislegs on Jun 27, 2011 23:43:22 GMT 1
This POR stuff sounds like some crazy liquid. I let the mince container of POR dry out and then peeled it out. It was like I imagine kryptonite to be. Absolutely rock hard. I just hope my tank stands up to the rigour of petrol.
I did a lot of research prior to sealing the tank and everything I had seen pointed to POR being the best gear you could get, especially given the rise of ethanol in our petrol.
Ravedaddy; I encountered no frothing but I understand through your various travels you are no stranger to frothing (of one sort or another). I seem to remember there being explicit instructions not to shake too much or manipulate too vigorously (I'm not sure what I'm referring to here) and this may account for some of your froth problems. Either that or it was too wet inside.
I'd better stop now.
|
|
|
|
Post by watchhislegs on Jun 16, 2011 12:05:09 GMT 1
I used this method and the results were good. Costs bugger all too. I bought some strong phosphoric acid off ebay - pH Down. I think it was about £10. I also got some POR-15 off ebay as well. I think that was about £15 for a small pot. You could treat two fuel tanks with the amount they give you but I don't think it stores well so best do two at once if needs be. My palace doesn't have a garage so I did this in the back yard. I believe the reaction between the rust and acid lets off nerve gas which will kill you and your neighbours and dogs so this is why I didn't do it in my front room (I was smoking and drinking around it outside and I didn't die or blow up but you never can be too careful). I know you boys like pictures: 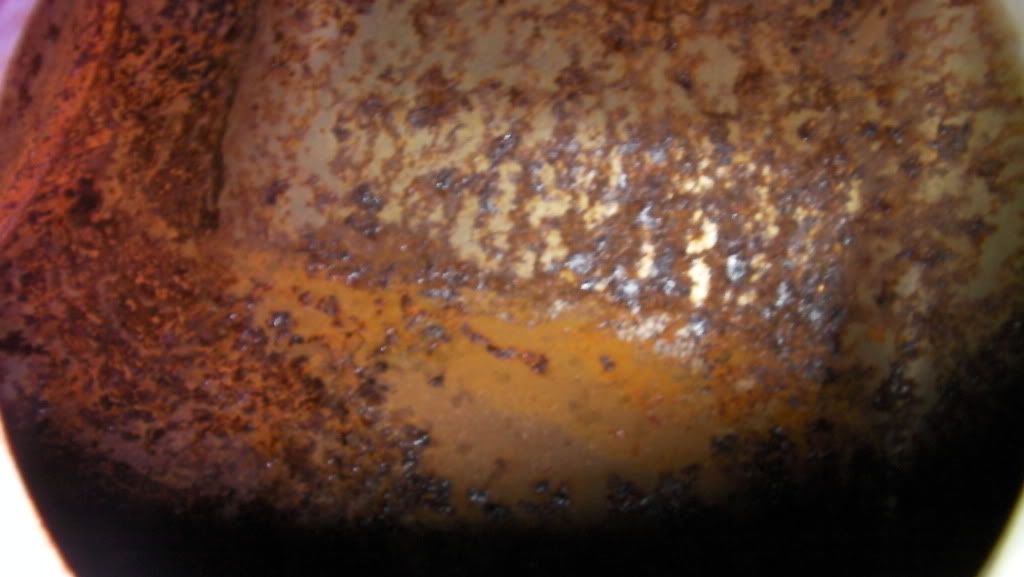 Dirty, rusty old tank.  I filled the tank in stages. I'd pour a little phosphoric acid in then a kettle full of boiling water. Repeat until there is no more acid left and the tank is brimming. I didn't bother covering the paintwork as it's getting sorted later. 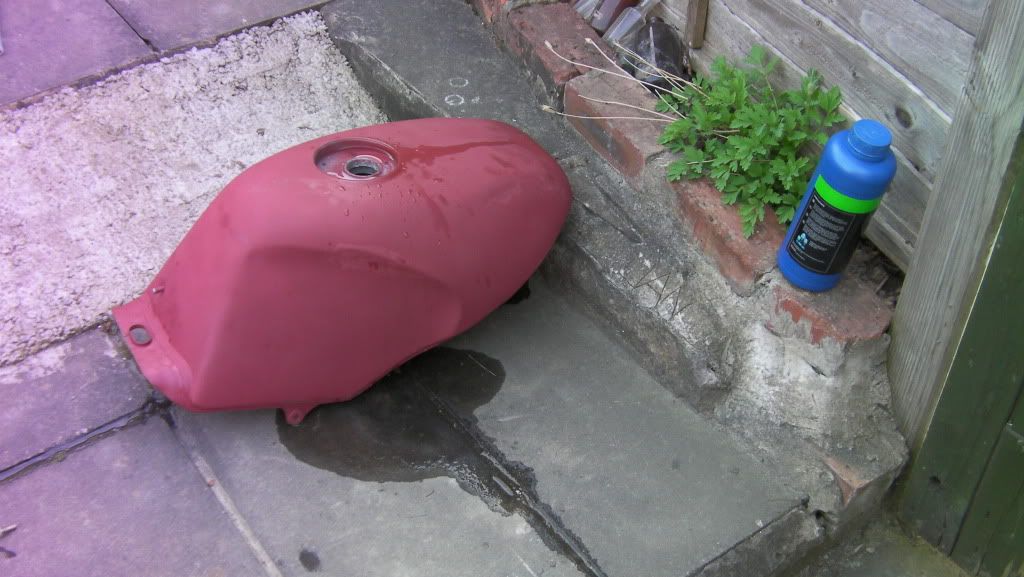 Tank is brimmed and has already sprung a pin hole leak. In true Blue Peter fashion you could use double sided tape but I had run out (I'd also run out of duct tape) so I used blue tack(!). It actually did the trick but was melting and bubbling. It pays to be prepared (unlike me). 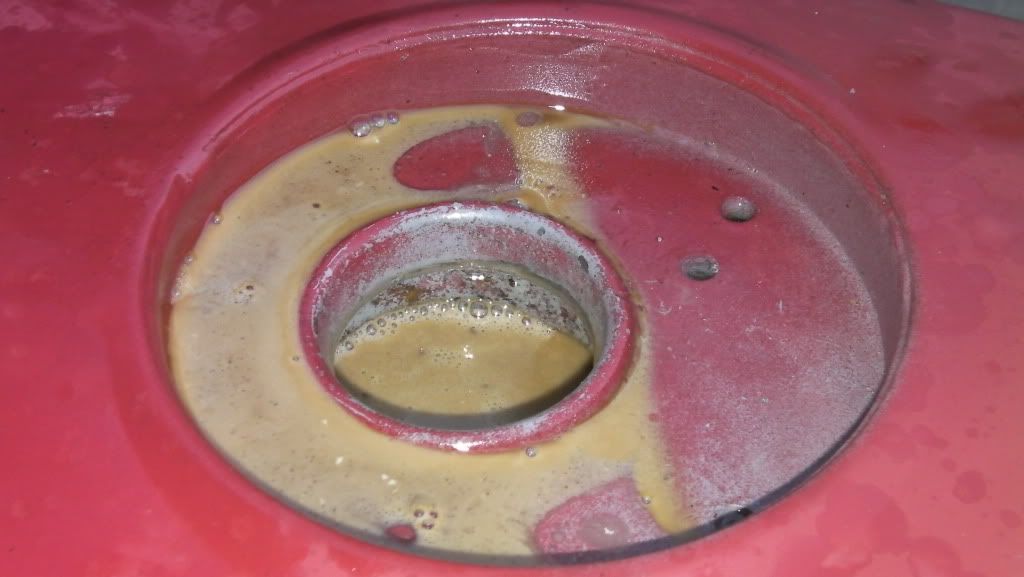 Sit back and watch the tank bubble and pop (mmmmm sweet smelling nerve gas). The tank will be hot to touch and will stay this way for a good couple of hours due to the reaction between the acid and the rust probably (I'm not a scientist as you've already gathered). 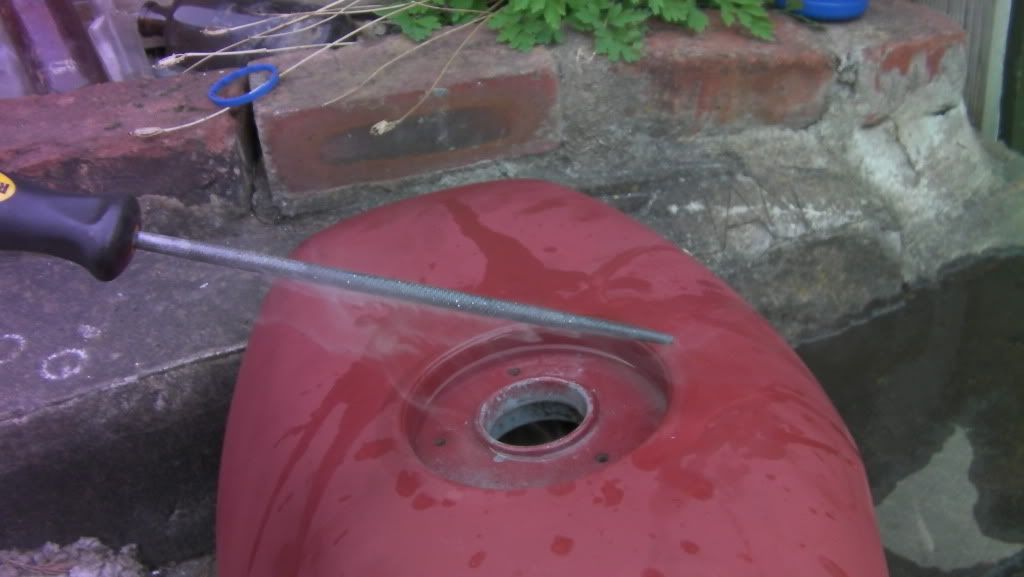 You can take this opportunity to dip various objects in the tank of eternal stench and watch as they magically smoke. 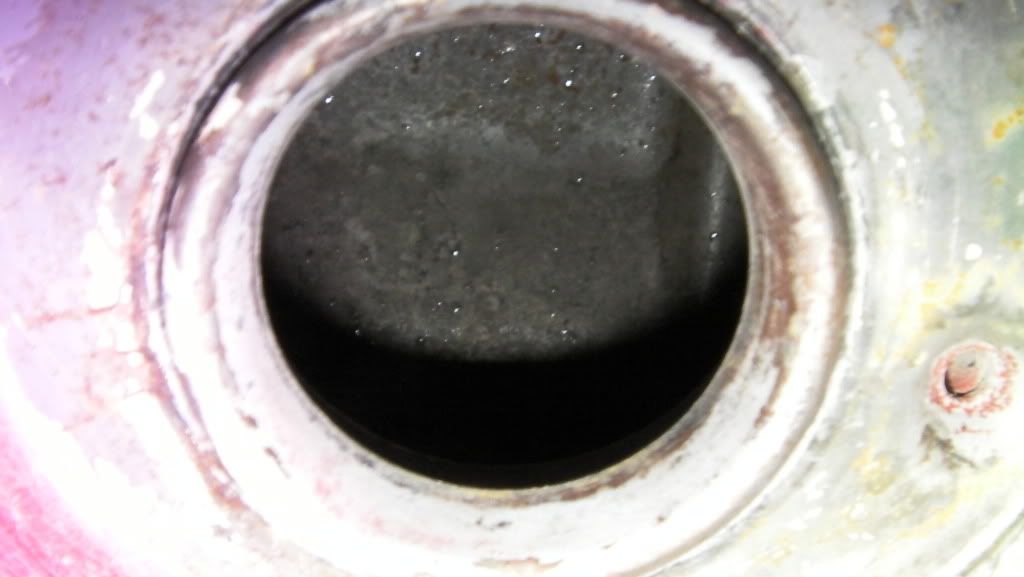 I left the tank over night and then poured the liquid left in the tank over the neighbours vegetable plot. The inside is now nice and clean. I then gave it a good wash in the bathtub using the shower. 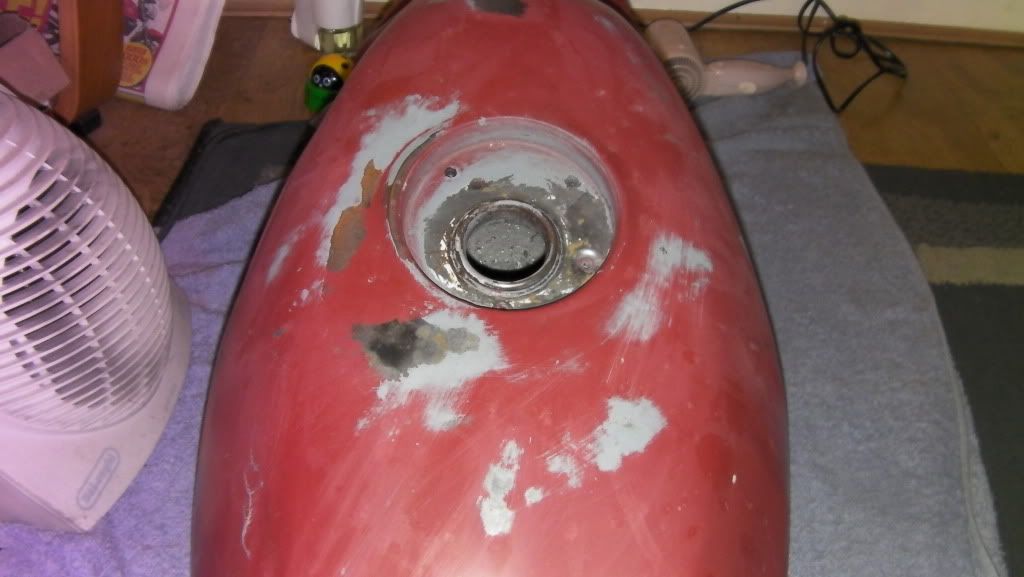 Next I gave it a good rub down with a towel and dried it thoroughly with a hair dryer and a coil heater. You have to make sure the inside of the tank is bone dry before you add the POR-15. Dry it as quickly as possible after rinsing to avoid flash rust. 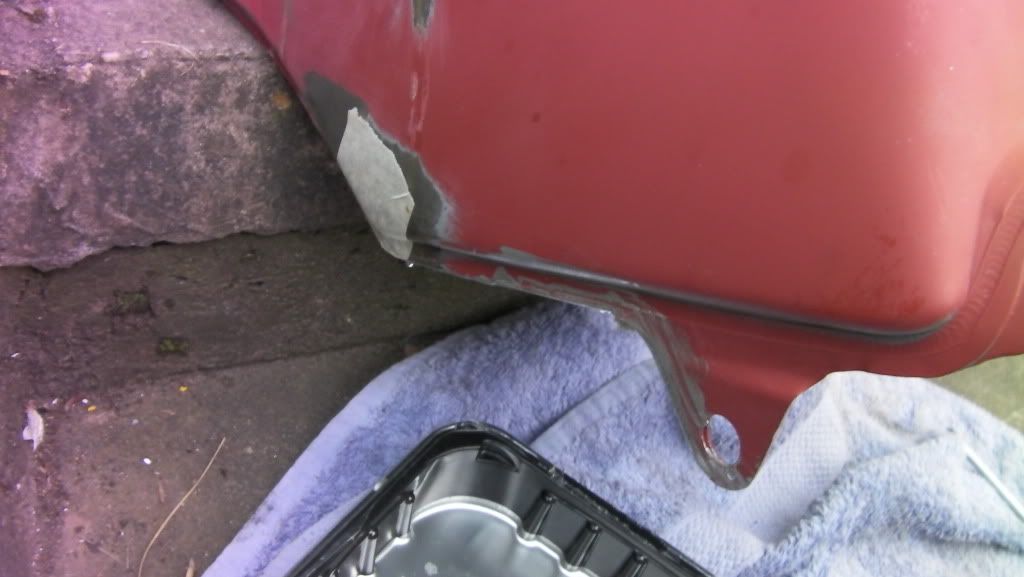 I then blocked up the fuel tap hole with a washer and plate and put some masking tape over the pinhole. I then tipped a full pot of POR-15 into the tank and sealed the fuel cap hole with a plastic bag and zip tie. I then swilled it around for what seemed like ages to make sure the inside of the tank was liberally coated. (it is probably best to look at the instructions on the POR-15 as I have little memory of these events due to the nerve gas). 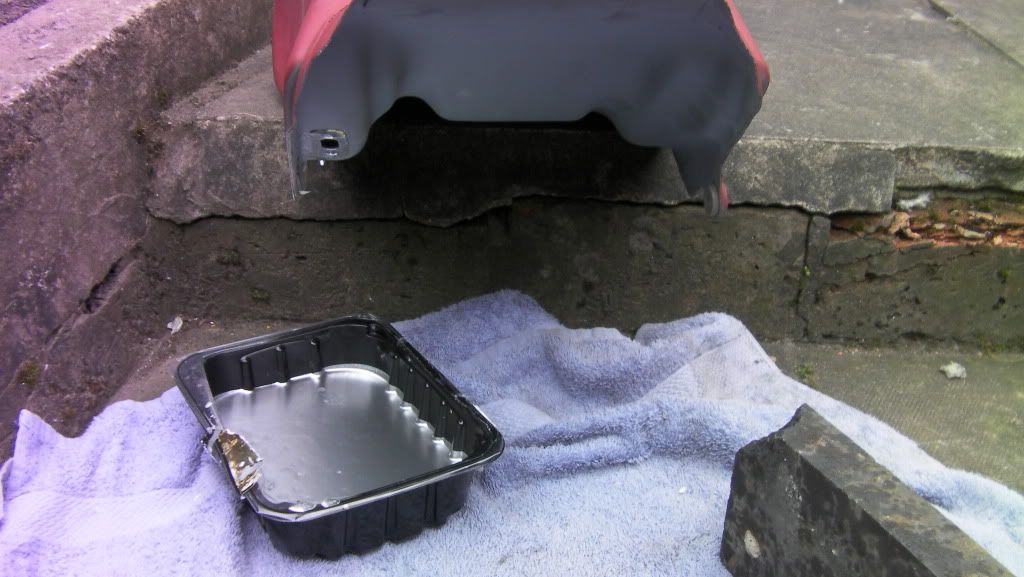 After a bit of time I drained the excess POR-15 out of the tank. An old mince container makes a great catch pot for the excess POR-15. You have to make sure you get all the excess out as it 'puddles' apparently. Anyhow, the results were positive: 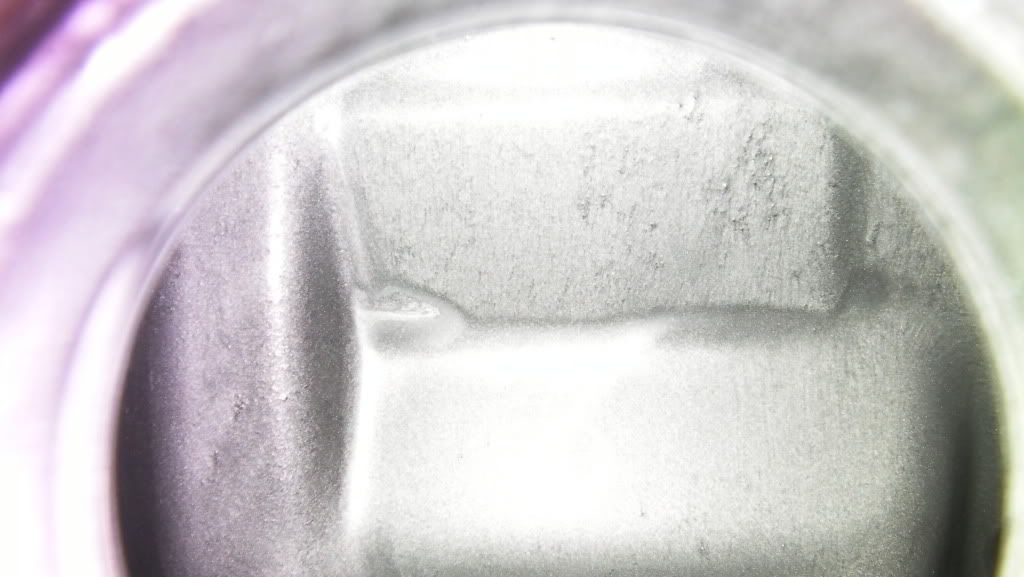  I haven't tested it with fuel yet but I have only heard good stuff about POR-15. There are other methods of rust extraction (vinegar, electrolysis, fish tank gravel) but this one seemed easiest for me and yielded positive results. Nico |
|
|
|
Post by watchhislegs on Jun 9, 2011 22:51:34 GMT 1
I used phosphoric acid and POR-15. It was terrifying but the results are great. I'll post some pics when I return from my trip to Budapest after the weekend. My camera will be full of pictures of crusty vessels then.
|
|

