|
|
Post by paul8899 on Aug 12, 2010 23:19:52 GMT 1
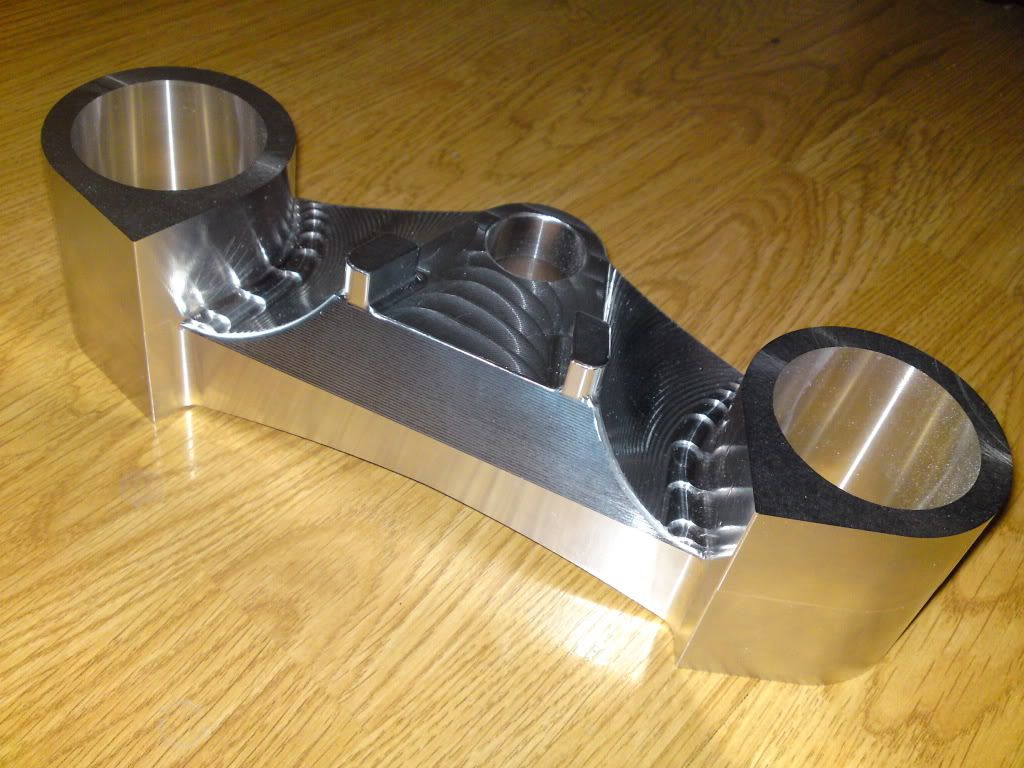
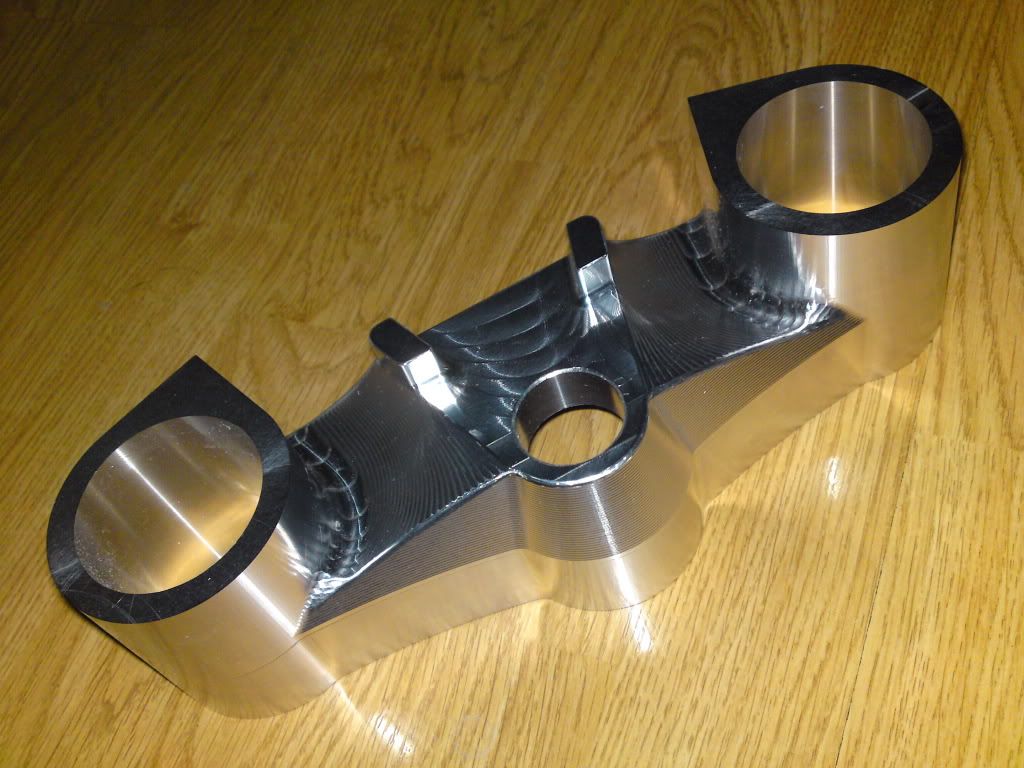
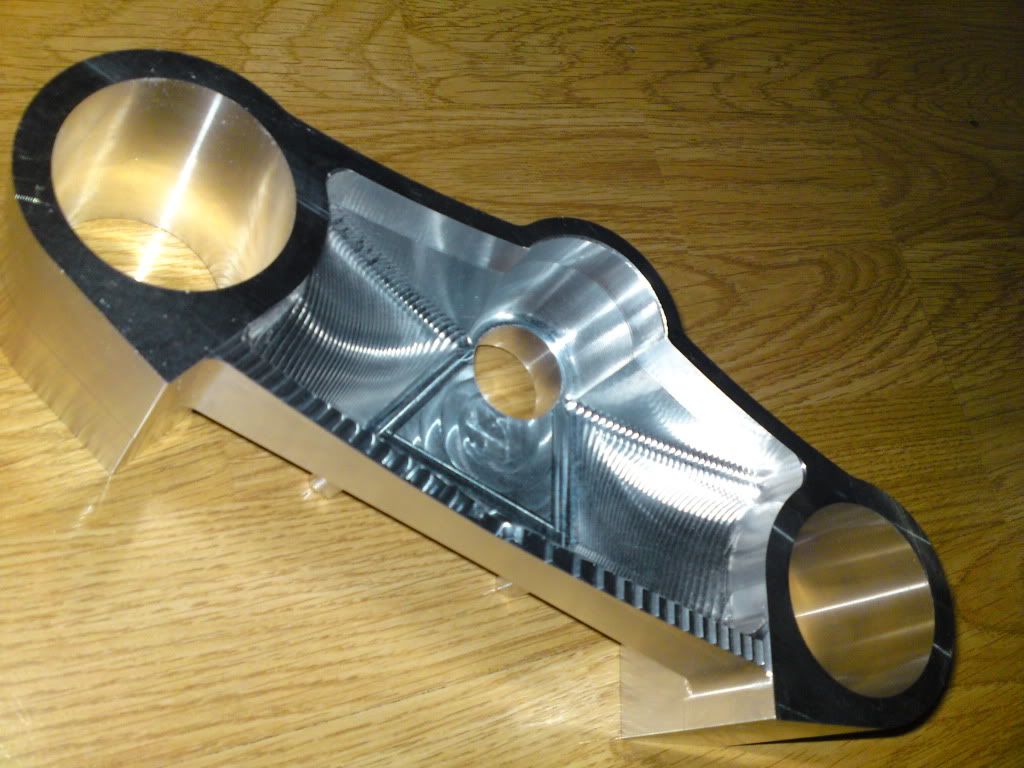
Hi all, Thought I'd put a few pictures up of my mito350 project. It started when I saw the yagiva 350 and I thought I'd have a go at making one of those. After deciding that I wanted to make mine a little bit different I hit the bay and bought the following bits. 05 evo frame 05 zx10r forks 08 zx10r wheels/discs/calipers 09 r6 swingarm I then set about making it all fit and ended up with this 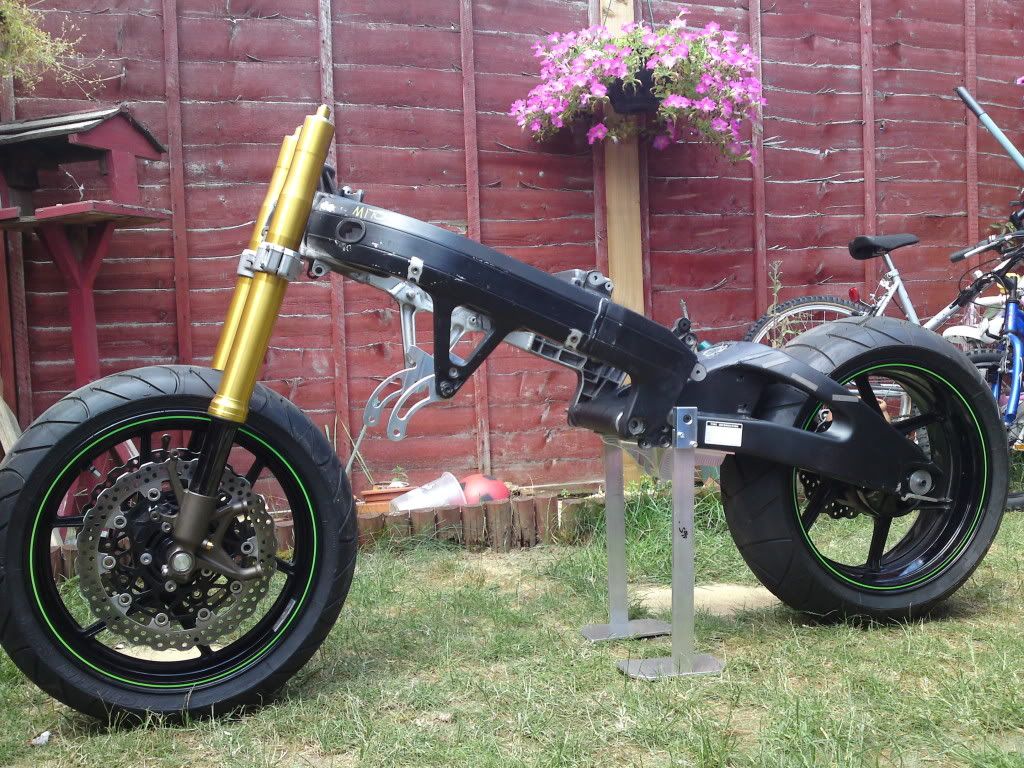 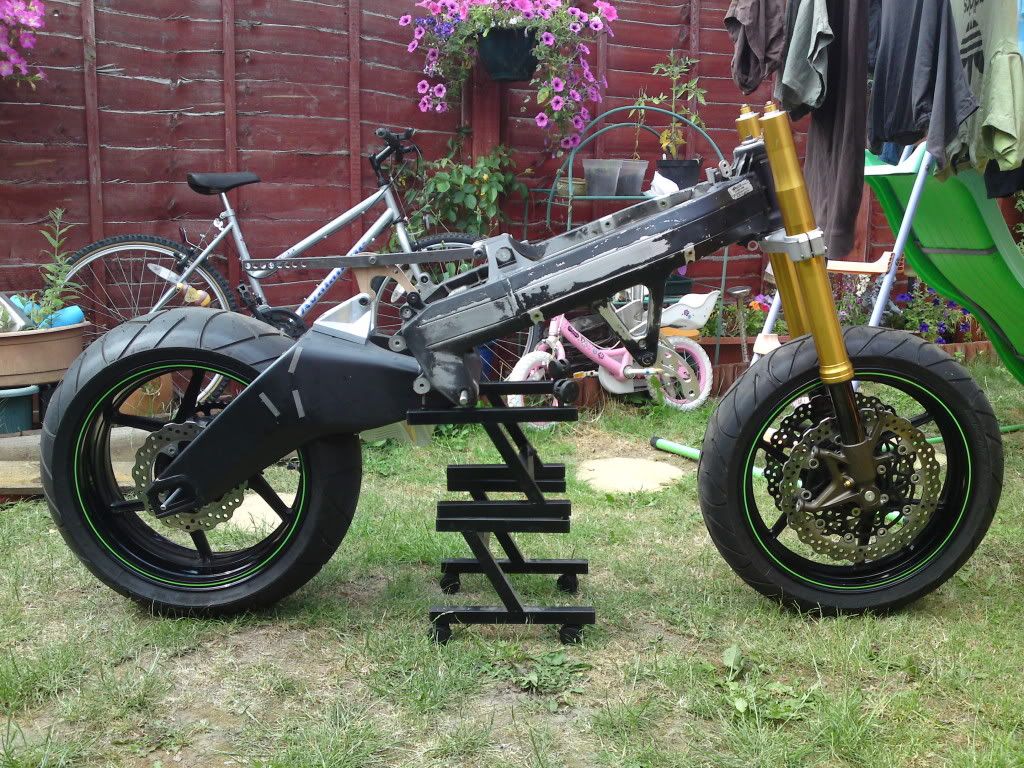 I made a set of mounts but the front ones covered the powervalve caps , which would be annoying so I made these 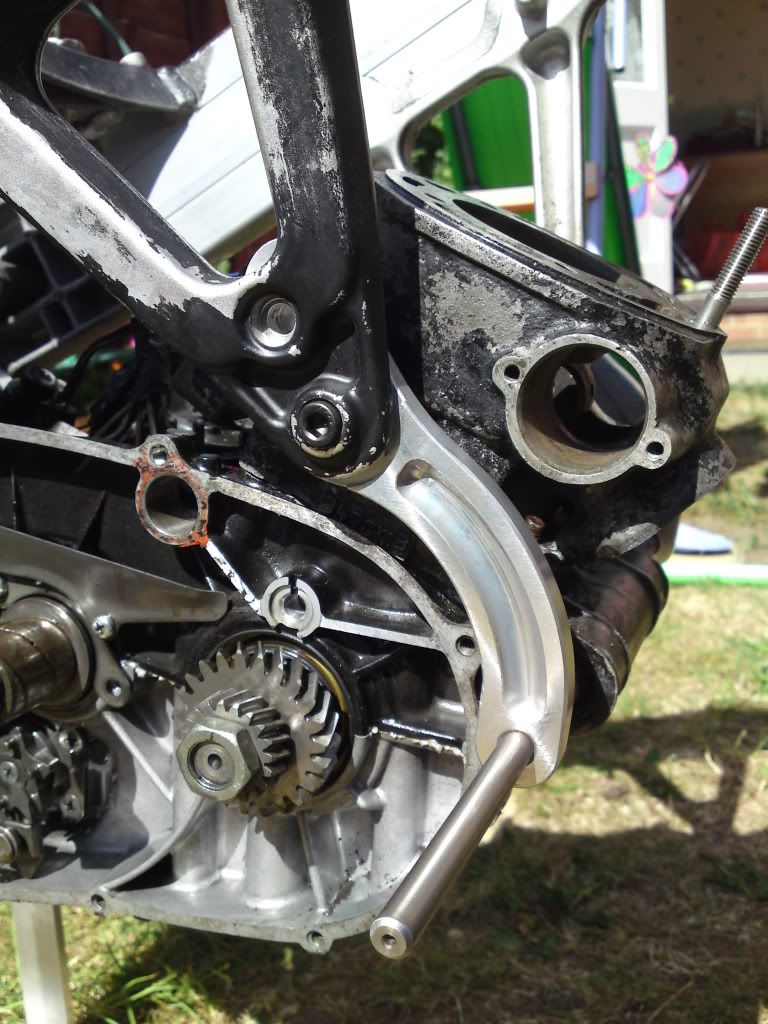 I then made a set of yokes to suit the 10r forks 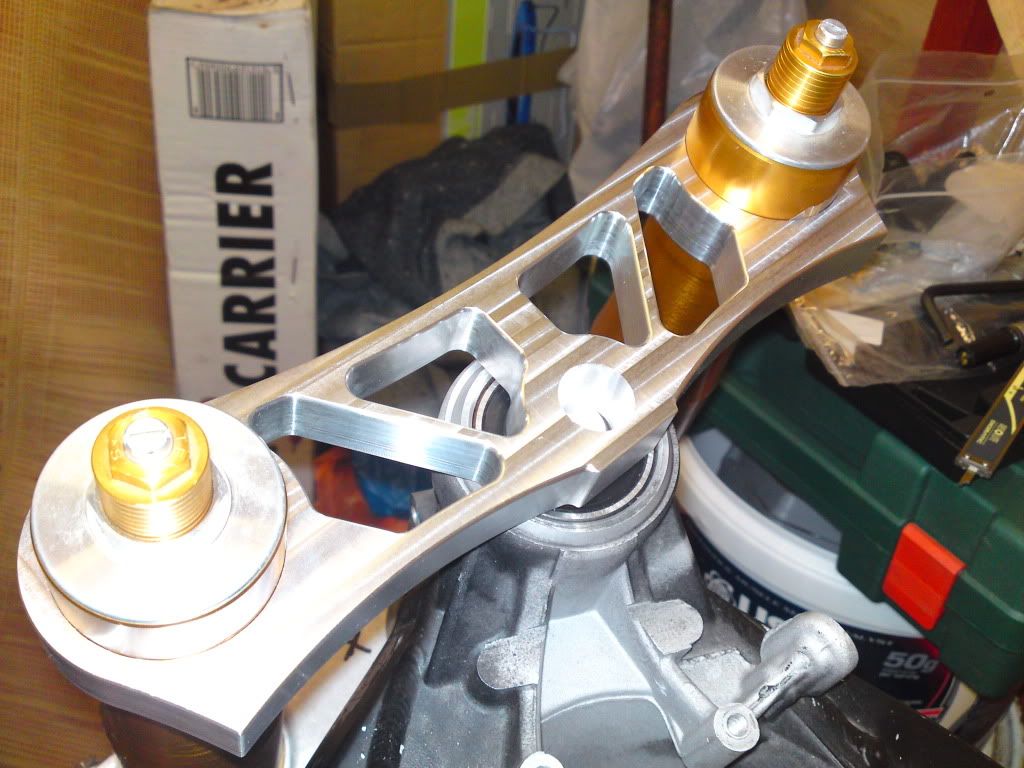 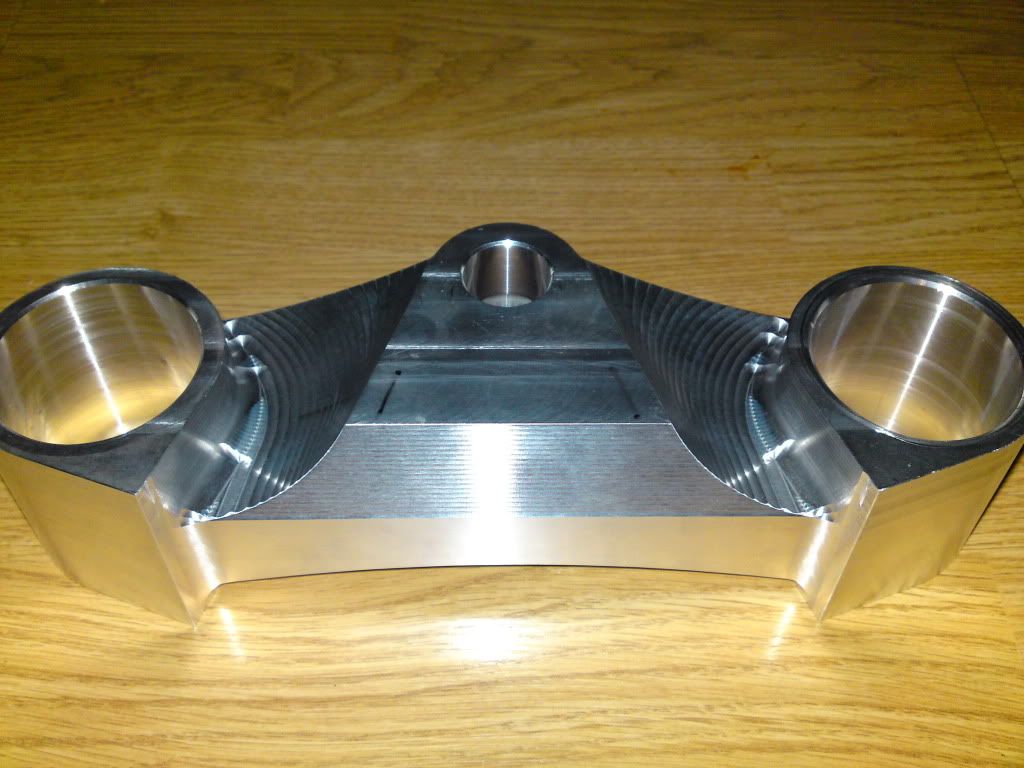 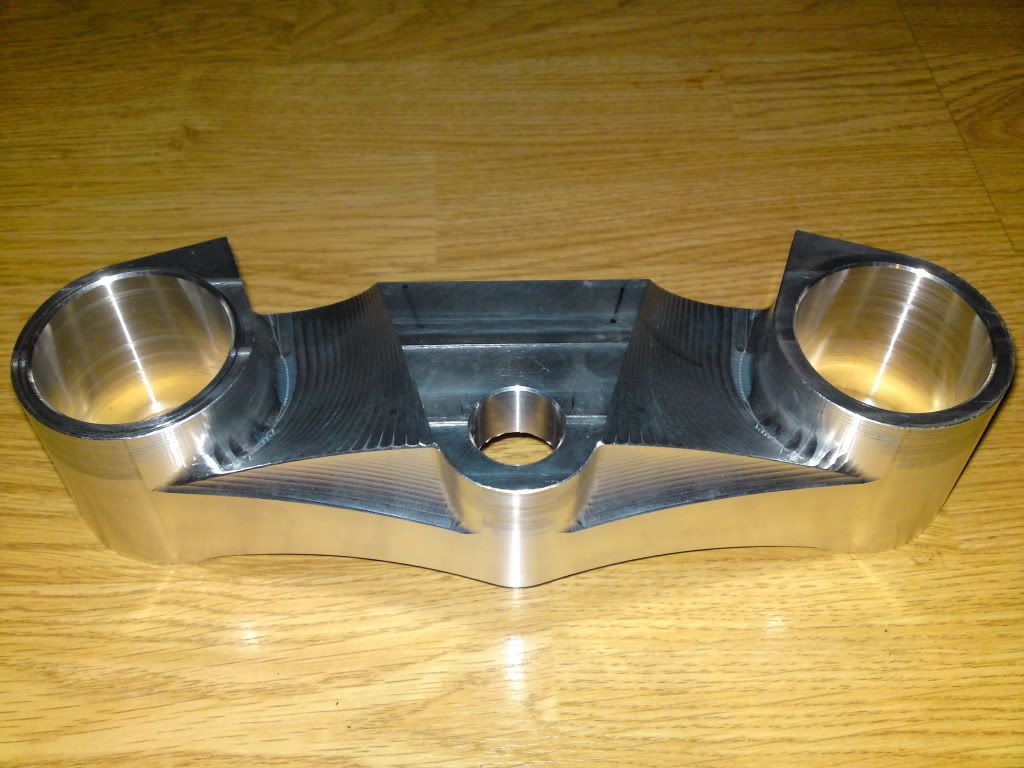 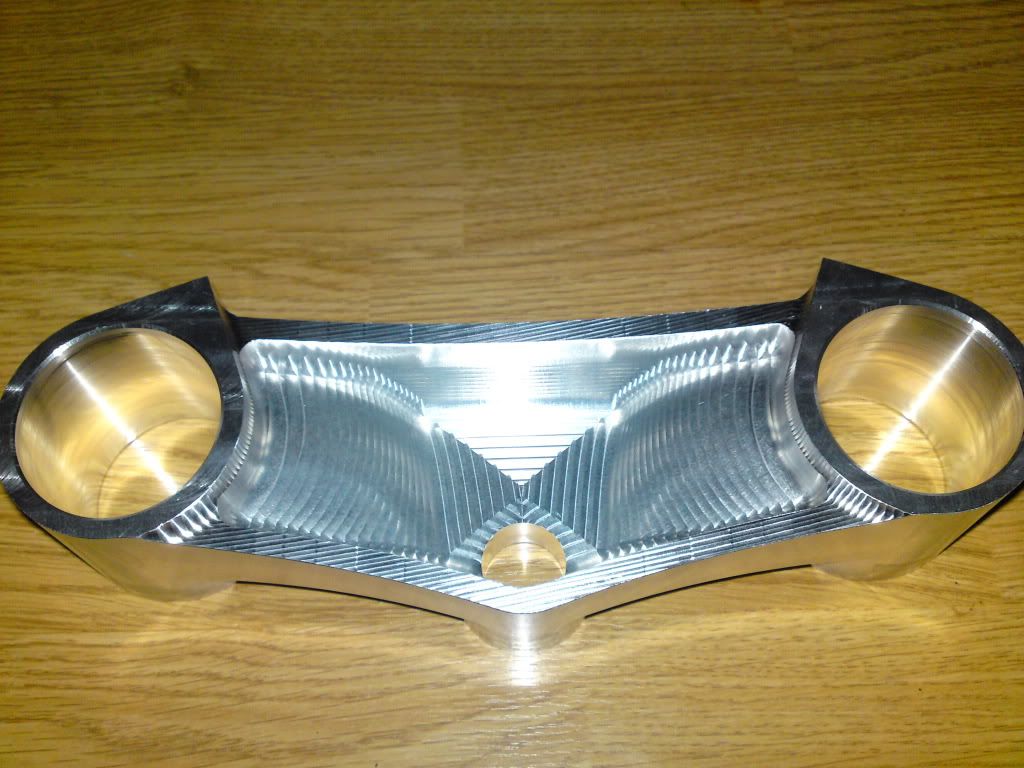 The top yoke is 20mm thick , the bottom one has a 7mm wall thickness and 20mm constant along the top face . Just have to make the stem up and finish the yokes off and on they go  To get the rear suspension to work how I want it to I'm having a set up like the pro link but rather than weld mounts onto the frame I'm having to have it upside down. Here's what it looks like with the mounts on. 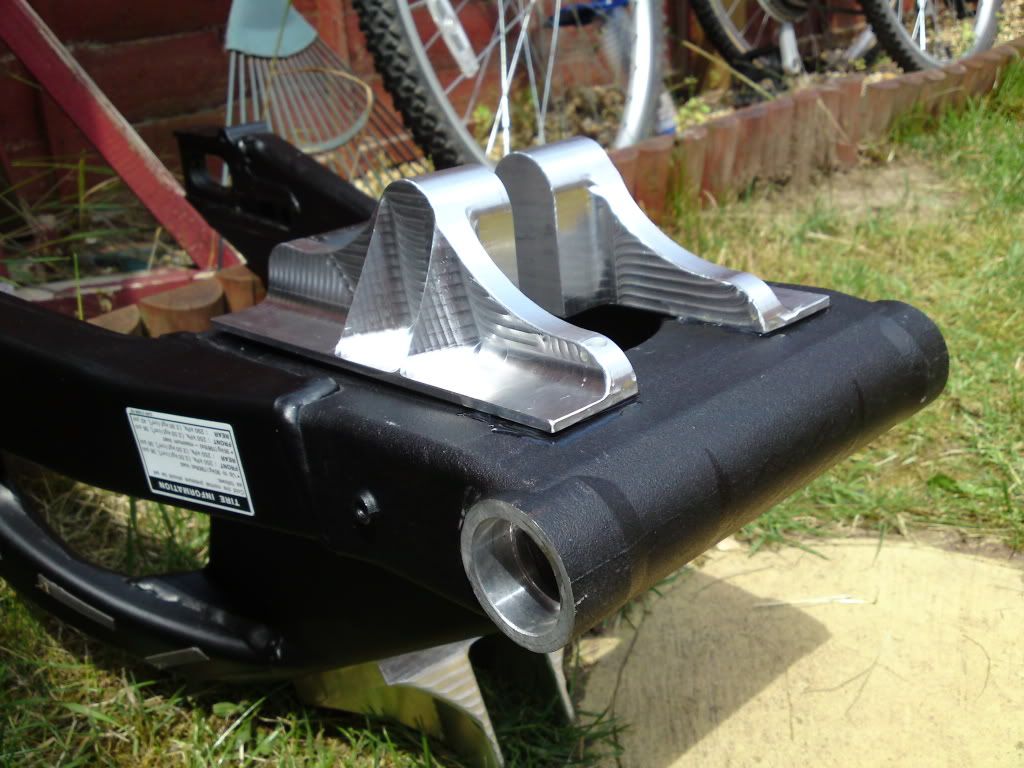 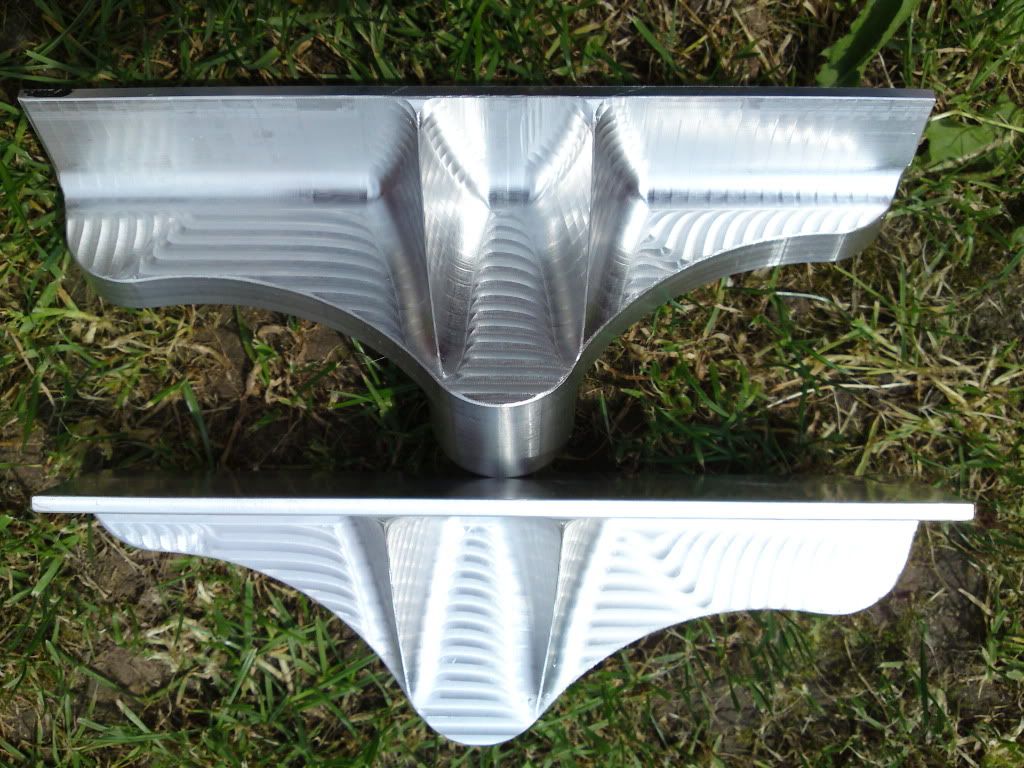 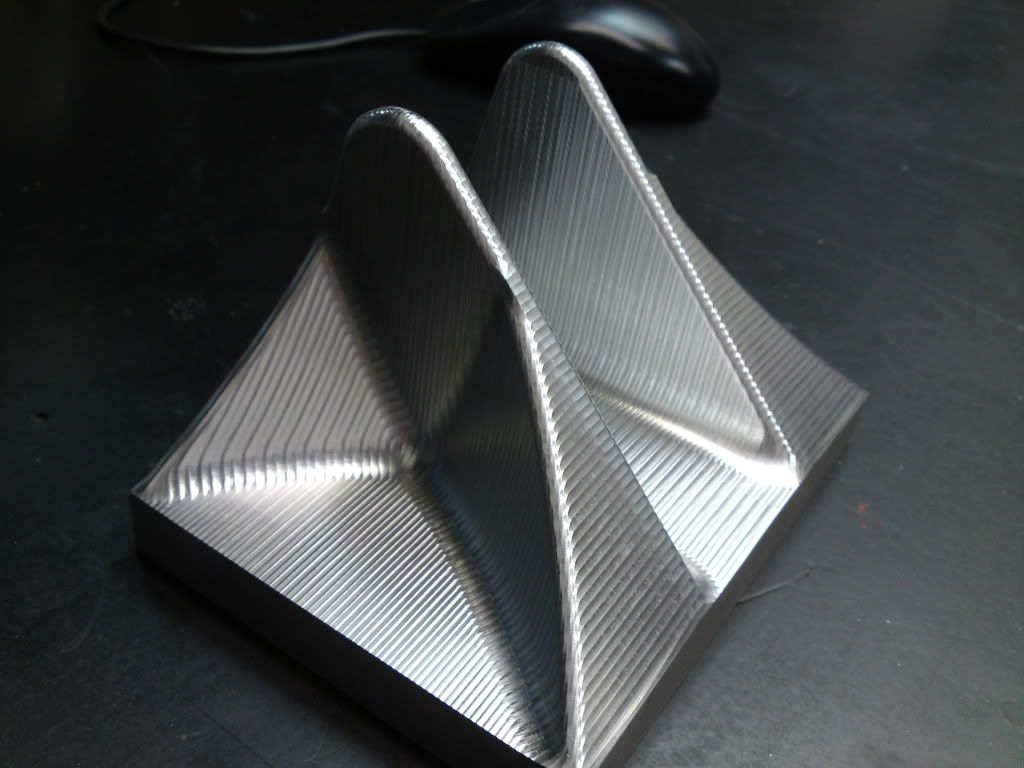 I still need to do a bit of machining on the mounts and get them welded on. I made up some wheel spacers and checked the chain run and luckily enough theres enough clearance between the tyre and the front sprocket (once I've got an offset one). I'm going to have to make a new sprocket carrier to bring it inboard a bit. Theres still a few jobs left to do before I can bolt it all together the main one is I have to cut the centre section out of the arm and make some bearing cups up. Once I have done this I can then bolt the engine and get the chain run right. What do you think of it so far ? Its taken me 3 months to get this far and I'm hoping to get it finished around christmas (ish) but you know how these things go ............... |
|
|
|
Post by ozzy on Aug 13, 2010 0:05:09 GMT 1
|
|
|
|
Post by vin on Aug 13, 2010 16:08:31 GMT 1
Love the machining  great project and I look forward to watching your progress  |
|
|
|
Post by lcowner on Aug 13, 2010 16:51:15 GMT 1
cnc mill i persume no way you get that finish wit ordinary mill.im a fitter/turner by trade myself .always likes the idea of having a mill n lathe in my ultimate workshop! sum day maybe....nice way to make a living making parts like dat.nice work m8
|
|
|
|
Post by paul8899 on Aug 13, 2010 18:48:43 GMT 1
Thanks for your positive comments, I haven't got a mill in my shed , just got an understanding boss  I'm not sure if I could make parts full time, I think that my hobby would turn into a job and it would take the fun out of it. I'm hoping that it will handle ok with the slightly bigger back tyre, just have to wait and see. I've decided to concentrate more on getting the bike finished off before I get the engine sorted, I'm hoping that it will be a bit more wallet friendly doing it that way as I can make most of the bits myself. I just have to stop myself looking at those 535 big bore kits though .... |
|
|
|
Post by scott on Aug 13, 2010 20:12:09 GMT 1
nice work m8 8-)that top yoke is the bizzo
|
|
|
|
Post by kennyroberts on Aug 13, 2010 22:44:07 GMT 1
very cool, i was in the same boat when working at an aircraft engineering company, with a good boss who let me make stuff up for my project, you have some great bits made up there, i look forward to seeing how the engine fits to that frame, how are you clamping the yokes onto the forks, ?
im watching this whole thing with much interest....good luck
|
|
|
|
Post by paul8899 on Aug 14, 2010 8:49:05 GMT 1
very cool, i was in the same boat when working at an aircraft engineering company, with a good boss who let me make stuff up for my project, you have some great bits made up there, i look forward to seeing how the engine fits to that frame, how are you clamping the yokes onto the forks, ? im watching this whole thing with much interest....good luck Heres an early fit of the engine in the frame 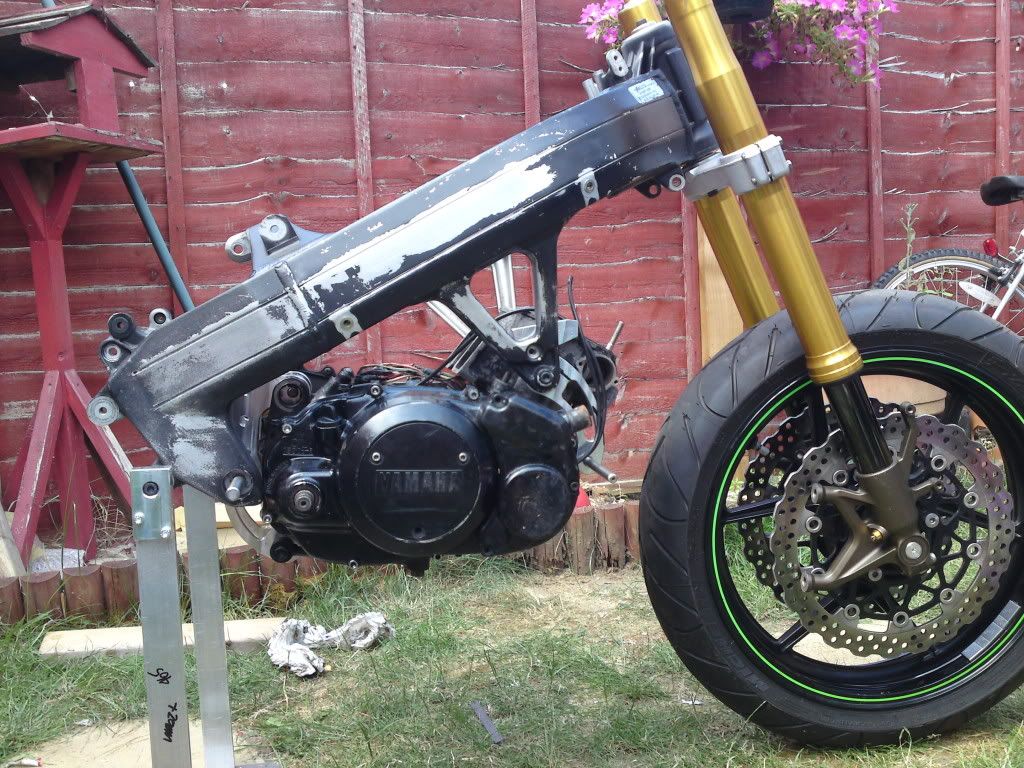 Its a bit tight side to side, about 5mm per side , but its in  The yokes will hold the forks like normal, I took the pictures up as they came off the machine  The yokes and mounts were made out of L168 billets, for the mounts I had to machine about 20mm off the thickness and about 25mm all round for the yokes. |
|
|
|
Post by paul8899 on Aug 21, 2010 19:27:54 GMT 1
Just finished off the top yoke and checked the screws for the bottom of the handlebars lined up, all fitted ok and it looks a bit like this 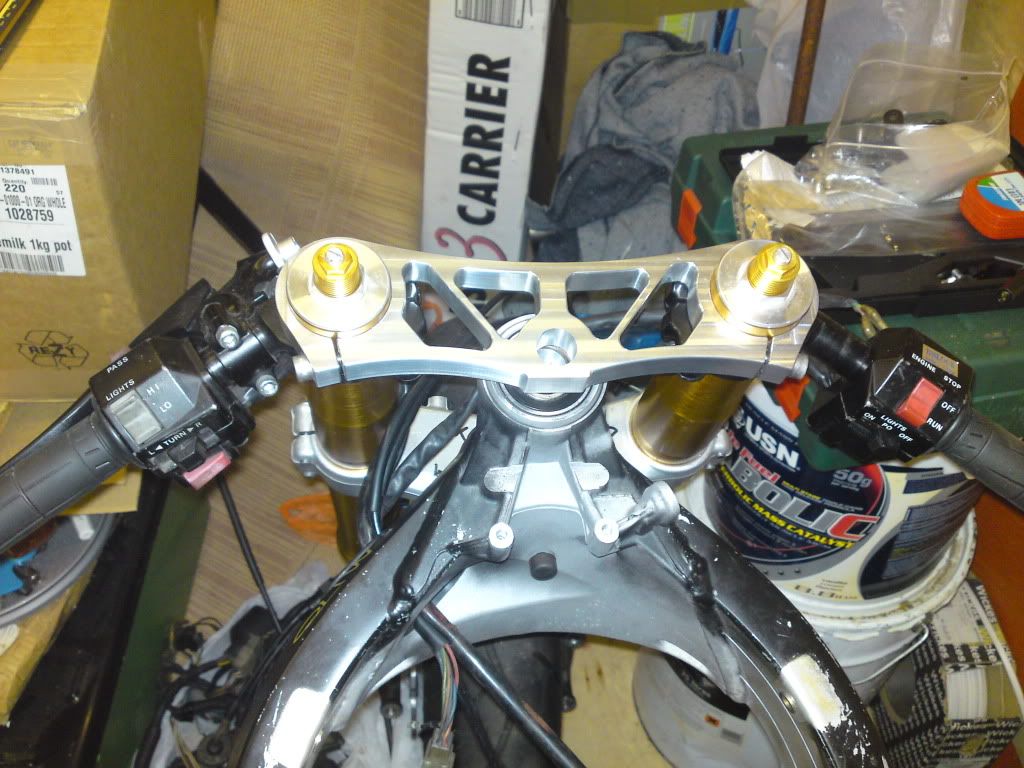 The eagle eyed among you might notice that I have fitted the standard switchgear, luckily enough the 10r handlebars and throttle are the same diameter as the 350. I just have to machine 4mm off the calipers, finish the stem off and the front end is basically finished |
|
|
|
Post by bubba on Aug 21, 2010 21:39:13 GMT 1
that is impressive work you have done there! its going to look well nutty when your done  love it! |
|
|
|
Post by paul8899 on Aug 24, 2010 21:03:23 GMT 1
Got my new seat unit and with the help of some gaffa tape I did a quick mock up before I try and make the subframe. It looks a bit like this 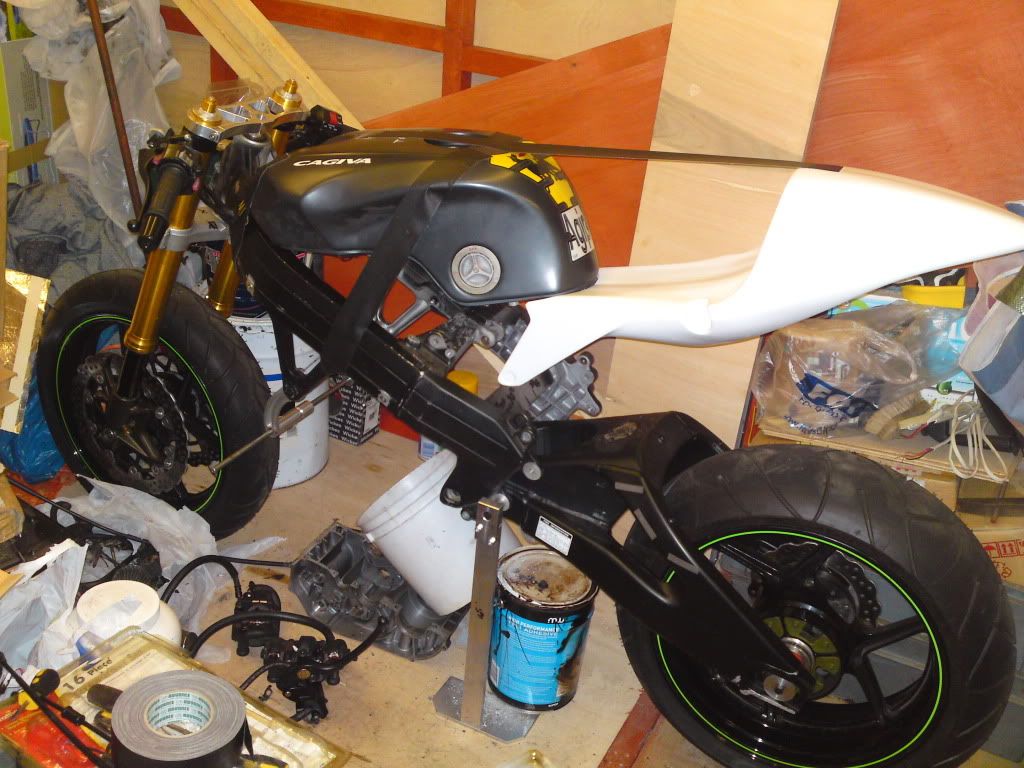 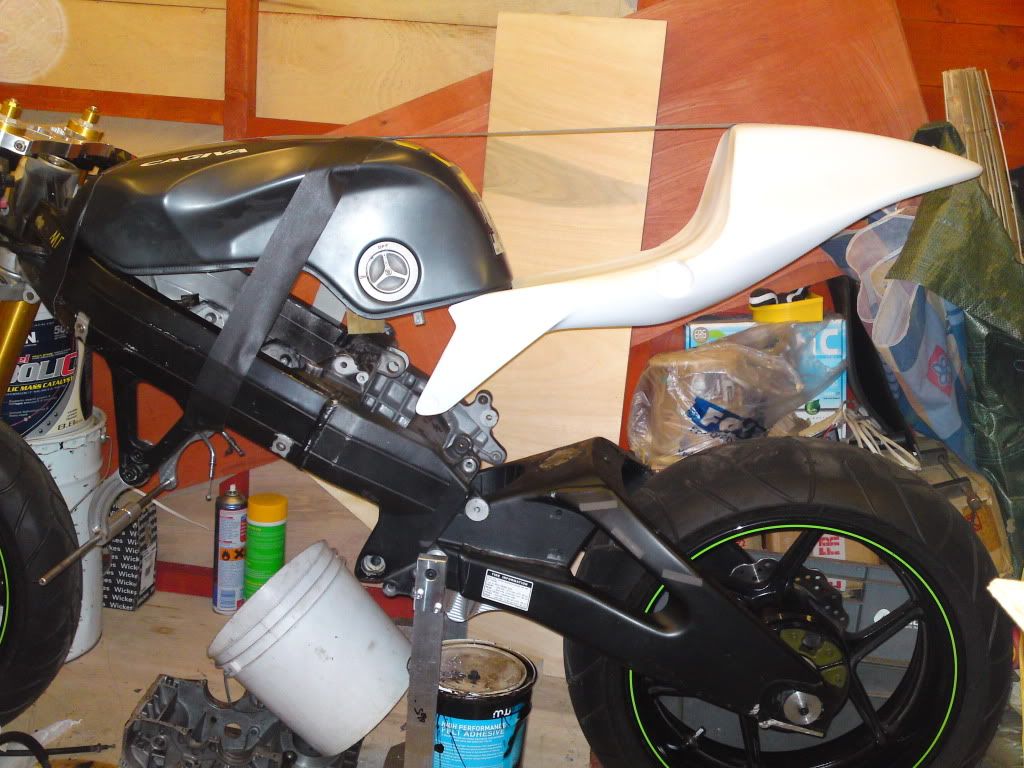 |
|
|
|
Post by bubba on Aug 24, 2010 21:22:19 GMT 1
looking mean!  whats that race seat unit for or is it a one off?  are you going for a full fairing on it? |
|
|
|
Post by paul8899 on Aug 24, 2010 22:13:00 GMT 1
the seat is off an rs125 and luckily enough it will fit with a bit of alteration of the frame. Im hoping to get a full fairing but I'm toying with the idea of just having the top half of the fairing on so I can show off the engine a bit
|
|
|
|
Post by Norbo on Aug 25, 2010 19:39:05 GMT 1
I think it would look good with just the top on but a full faring does finish them off as they look so sleek.
|
|
|
|
Post by bubba on Aug 25, 2010 21:28:54 GMT 1
a full race fairing with a projector mini headlight moulded in to it and set off to one side would look the buisness on that,  |
|
|
|
Post by paul8899 on Aug 25, 2010 22:12:31 GMT 1
I think it would look good with just the top on but a full faring does finish them off as they look so sleek. I know,part of me wants to only have the top half on so the engines on show but the other half likes the look of the full fairings. I saw a yzf125 today, fairing was nice and small, with some cut outs so you can see the engine. V expensive on ebay though and I can't find any aftermarket ones either  I could get a full fairing and take the bottom half off , best of both worlds  a full race fairing with a projector mini headlight moulded in to it and set off to one side would look the buisness on that,  Thats basically what I was thinking of doing. I'm going to get the subframe started,yokes finished and footrests made then I'll start to worry about what fairing to get (might change this though as I've seen a couple of fairings and I'm getting impatient ! ) |
|
|
|
Post by paul8899 on Sept 4, 2010 21:30:59 GMT 1
Had a nice and peaceful day today, mrs out , kids out playing so I thought I'd try and get a bit done on the bike today. So I set about cutting a lump out of the swingarm to accept the rear mount and after several hours hacksawing and filing it came out like this, I just have to make some inner bushes and get them welded in then I think thats about it 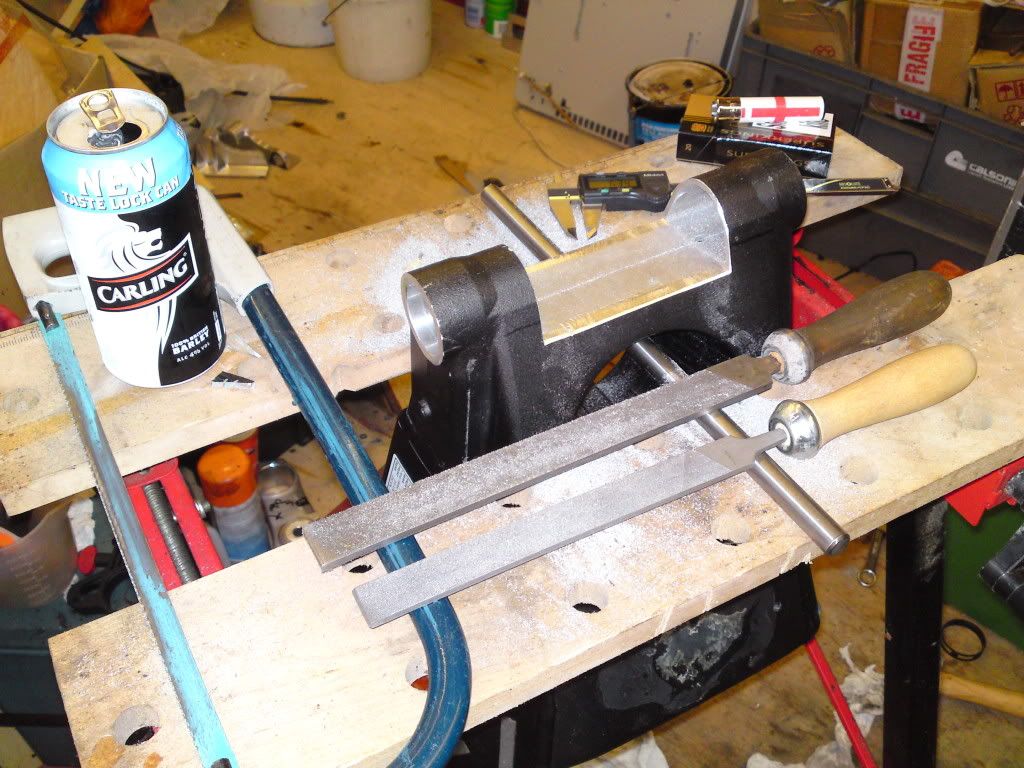 I then fitted the swingarm with the engine in place for the first time today and came across a couple of problems  it looks like I'll have to remake the rear mounts as they don't fit with the swingarm in place, I need to make the back of the mounts a bit thinner because they are about 10mm too wide. I'm hoping that I can get the swingarm to move with the mount in place as its a bit tight. The other problem was that the 2 bottom stays don't line up with the holes in the mount so I'm going to make some up to suit. I've also got round to fitting the yokes, they fit ok but they need a bit of tweaking as I put a 12mm spacer of the bottom of the stem which can be taken right back. I put this on there because it looked like the bottom yoke would hit the radiator mount but it won't. I've also started to make the rear subframe, just got the bottom spars to make then get some mounts welded to the frame then its almost there ! Anyway, here's what it looks like at the moment 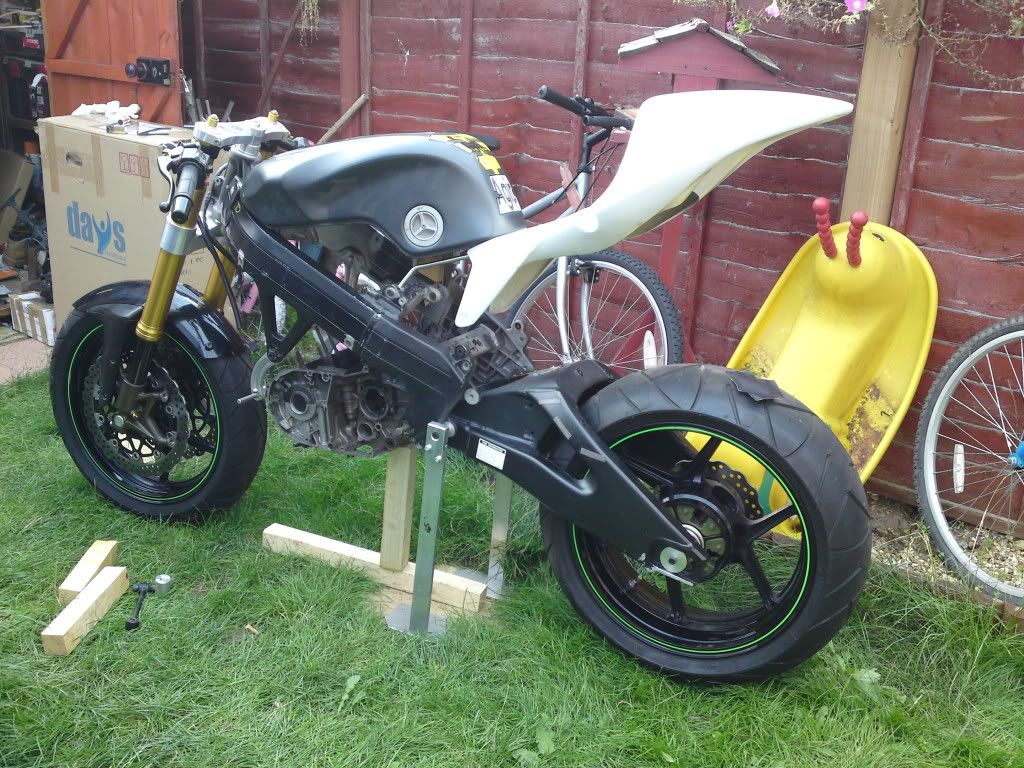 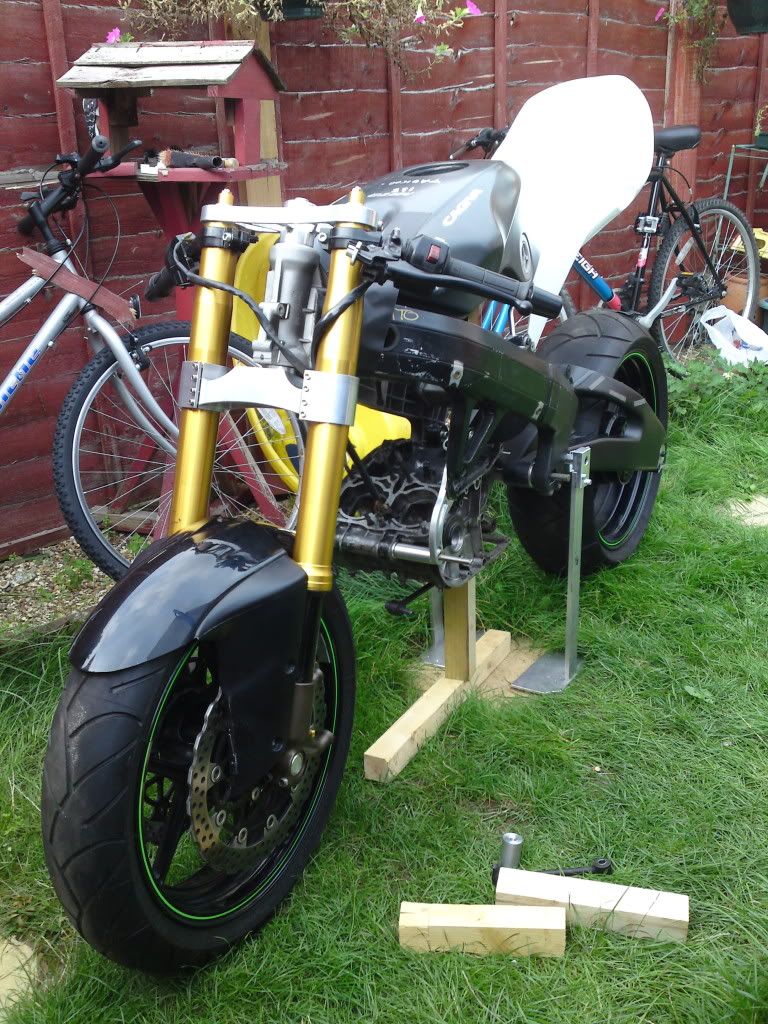 I had a look at the where I wanted the shock to go and it doesn't look like I'll be able to get the shock mounted vertically as theres not much room in there, so I'll have to have the shock mounted directly from the arm to the bike. I had a measure up of the front wheel / engine clearance and its a bit close ! To be honest I'm not entirely sure that the wheel won't clout the exhausts becuase I fitted one of the standard exhausts and it looks like they hit if the forks use all the travel ( fork seals touching the bottom leg ) When I get the exhausts made I'll mention it and see if they can tuck the downpipes in a bit. |
|
|
|
Post by paul8899 on Oct 2, 2010 11:46:08 GMT 1
the build is almost going quite smoothly. I found out that I have mounted the front mounts incorrectly. I thought that when fitting the ypvs engine in a mito evo frame that the original frame mount didn't need to be modified ( it does ) so the engine is sitting about 30mm too low as its shown in th pictures.
When I moved the mounts to the correct position the bottom of the frame spar fouls the cases, so I've either got to cut the bottom off the frame mount or re make the mounts and drop the engine about 5mm.
As I am going to have to remake the rear mounts so the cases clear the swingarm ( theres 2mm clearance at best ) I'll just knock up a new set of front mounts at the same time.
Once I have the mounts as I want them then the rest of it should be easy !
|
|
|
|
Post by paul8899 on Oct 2, 2010 11:51:45 GMT 1
Almost forgot that to get some travel on the swingarm I have to cut the middle section out of the front of the arm and get some plates welded back in. I've also made a start on the rear subframe as well, I just need to make a tank mount, some strengthening bars, a rear cradle and get it welded together and thats finished  I'll post some pictures up later. |
|
|
|
Post by JonW on Oct 6, 2010 23:47:33 GMT 1
Amazing machining work, love this build. Thanks for sharing  |
|
|
|
Post by paul8899 on Oct 15, 2010 13:25:54 GMT 1
Found a few hours at work this week to machine a new rear mount. This one puts the engine 6mm further forward and because of the changes I made it now clears the swingarm. I just have to make the front mounts up to suit the 6mm movement and hopefully it will all fit together nicely. 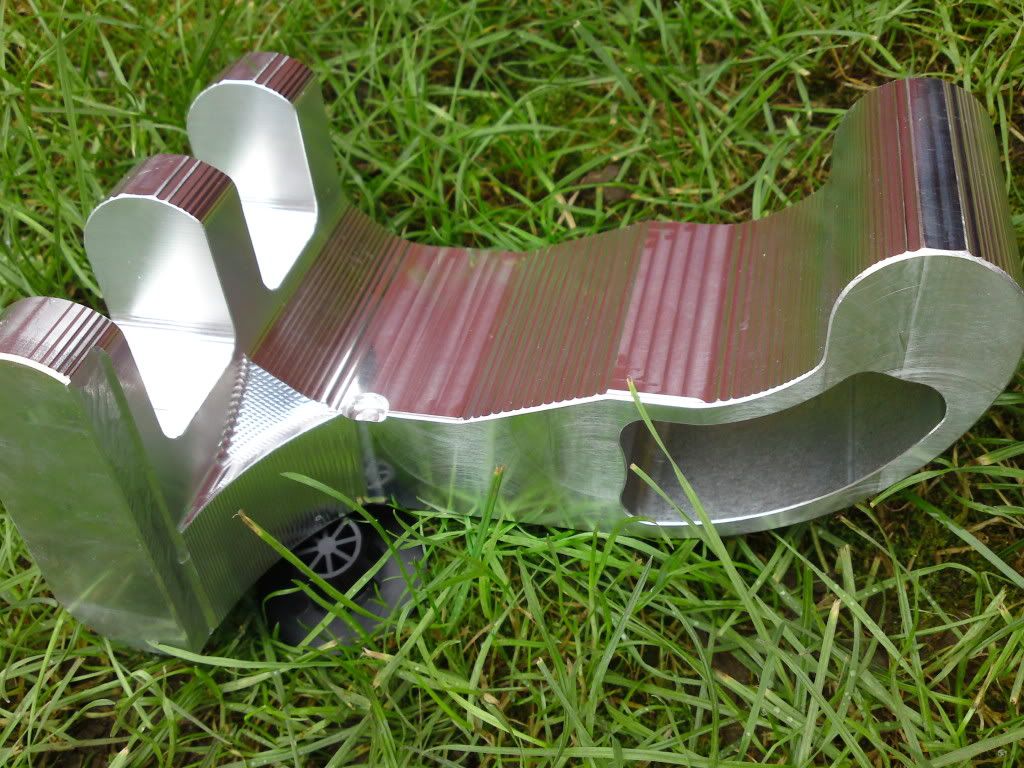 Forgot to mention its made out of a billet 4 X 9 X 5.25  So I don't think it will flex much now ! It took a while to machine this (about 20hrs) due to the fact its 5.25in tall and I had to have the cutter sticking out 3.5in. All I have to do now is make up some spacers and drill the holes in |
|
|
|
Post by gazilla on Oct 15, 2010 22:48:19 GMT 1
Looks like hours and hours of graft but will llok awesome when done.
|
|
|
|
Post by JonW on Oct 18, 2010 0:28:23 GMT 1
WOW! Im gobsmacked... love this thread  |
|
|
|
Post by paul8899 on Oct 21, 2010 21:09:45 GMT 1
Finally got round to fitting the rear mount tonight , fitted in ok . All I have to do is make up some new mount rubbers and then its finished. 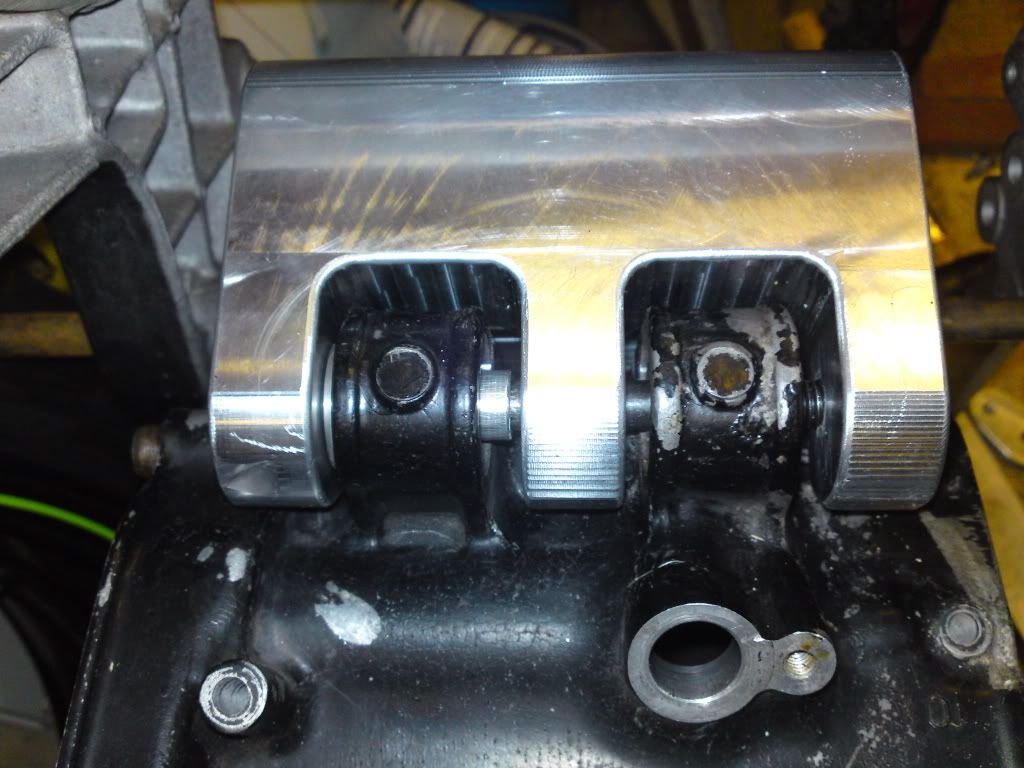 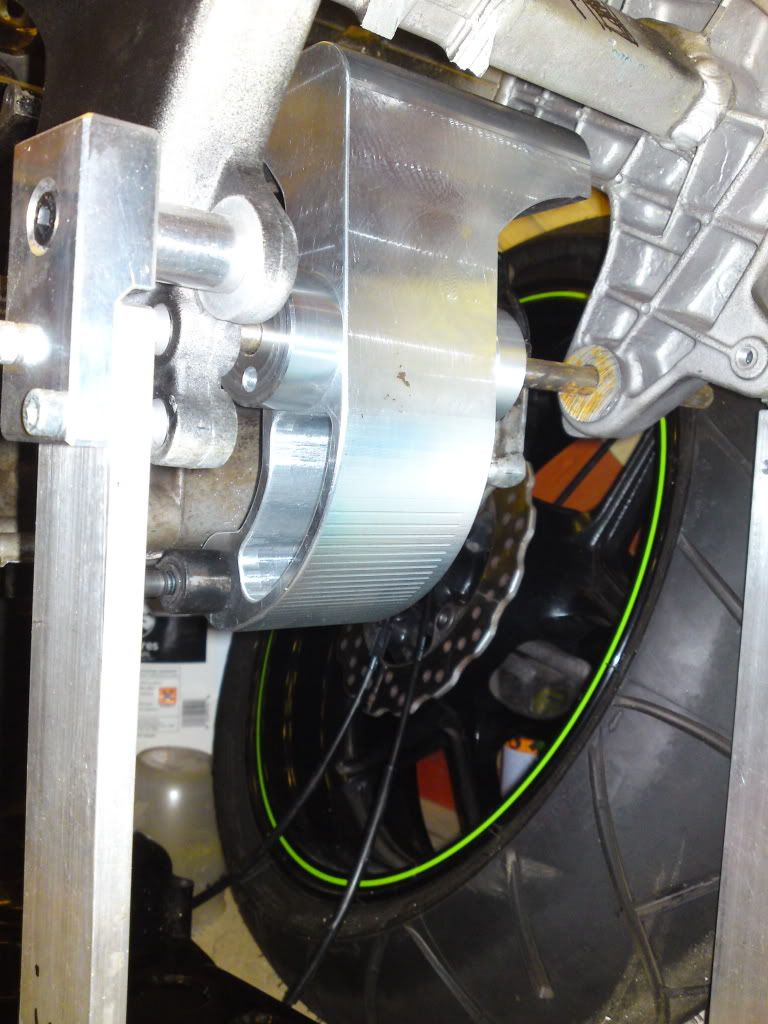 Being as I moved the engine forward 6mm to clear the swingarm I set about redesigning the front mounts to suit. When I did this I dropped the mount hole 6mm so it would hopefully clear the bottom of frame spar. This made about 10mm difference from the position of the engine when I used the original mounts, and the plastic cover clears the bottom lug by about 2mm  . I still need to file a bit off the bottom of the lug so I get about 5mm clearance just to be safe and I've got about an inch of clearance before the front wheel hits the cylinder head. 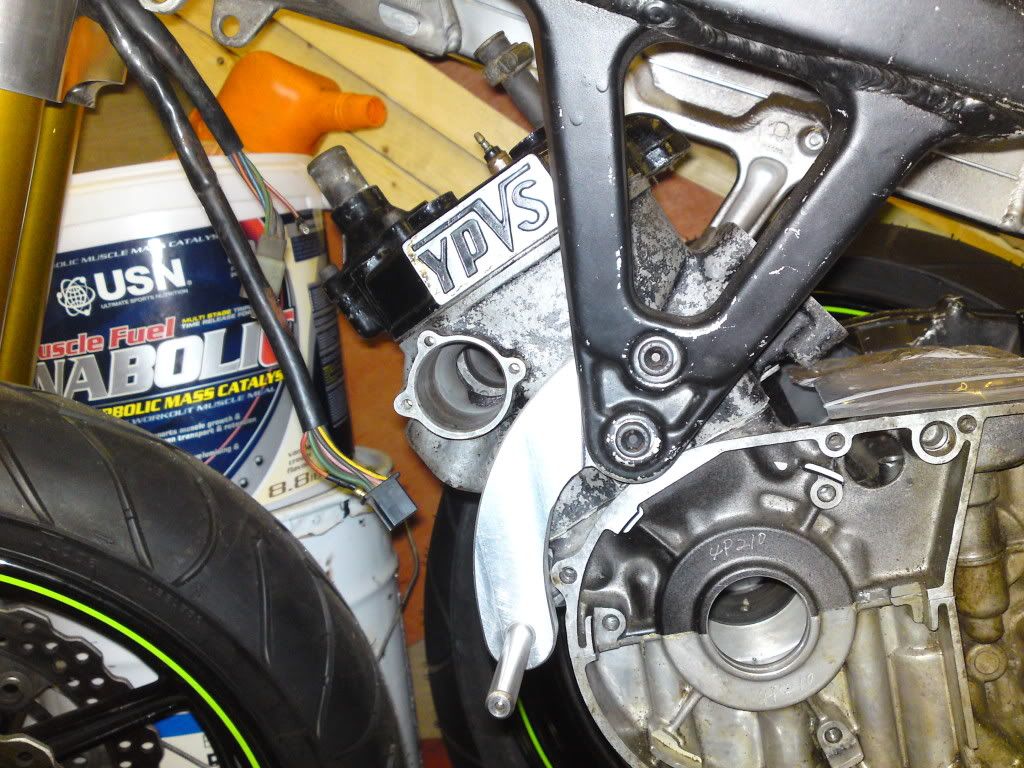 Next up is to cut the swingarm about a bit then I can start getting the chain alignment sorted. Once this is done all the other jobs left "should" be straight forward !! |
|
|
|
Post by paul8899 on Oct 23, 2010 19:34:57 GMT 1
I had a bit of spare time today and decided to have a go at the swingarm with my hacksaw. It took a while but I managed to get the middle bit out 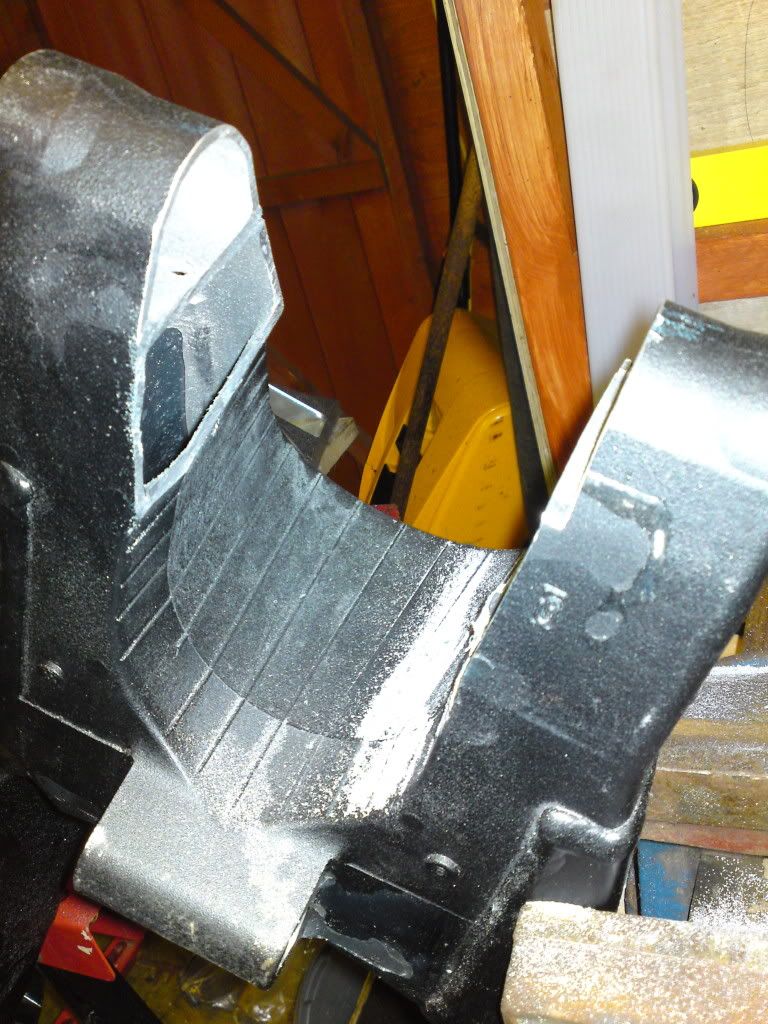 and here's a couple with the arm fitted 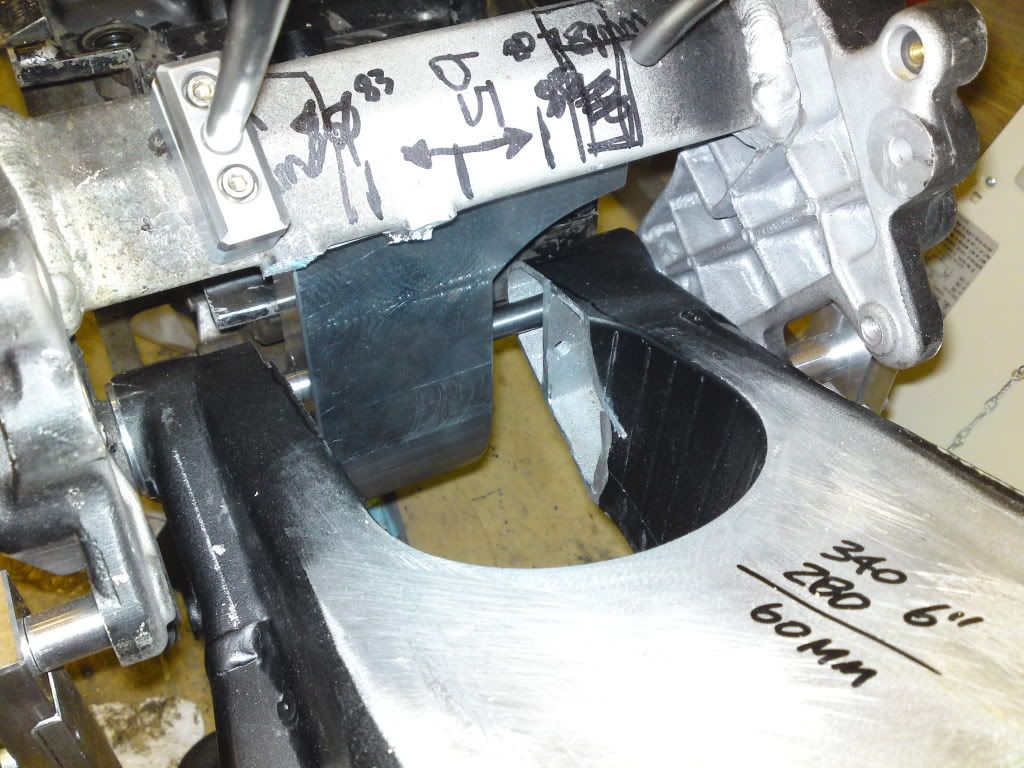 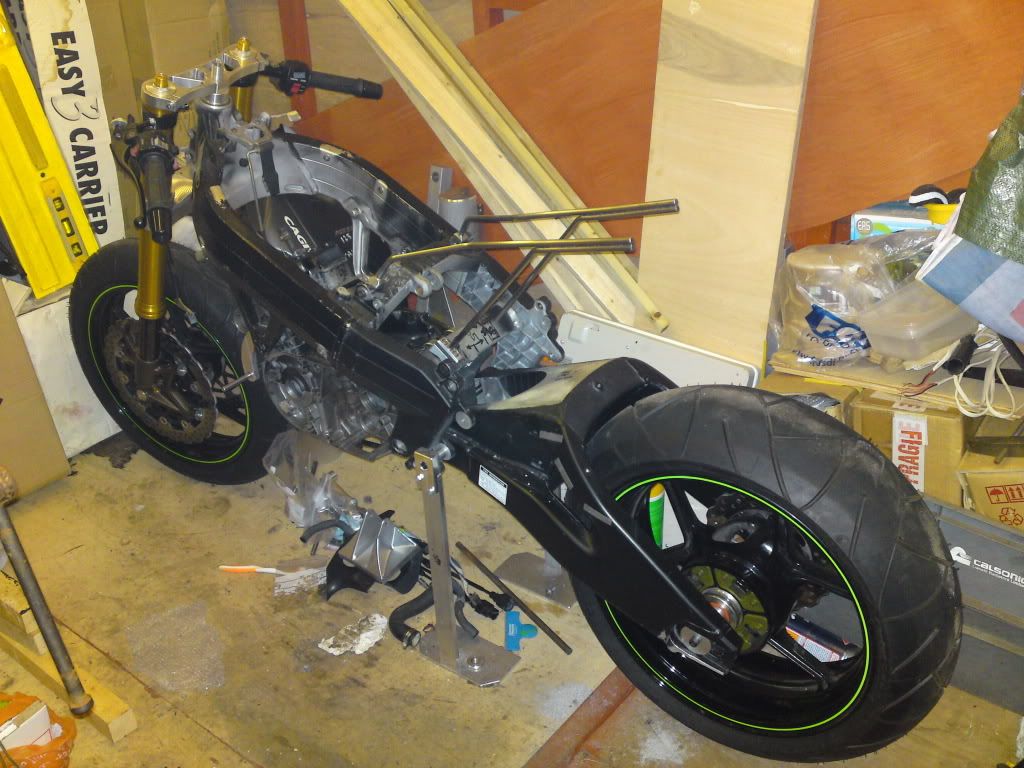 Next to do is finish the mounts off properly and get the engine position finalised, then I can make a start on the chain run. |
|
|
|
Post by paul8899 on Nov 19, 2010 15:07:41 GMT 1
I was going to finish of the bottom yoke this week by adding some lockstops. This involved milling some slots into the yoke and fitting them in. Instead of doing it this way I decided to make a new bottom as it will look a bit better and they would be stronger than having inserts in the yoke. While I was altering the model I made a few changes to it. The alterations are nothing too drastic as I was happy with the shape of the yoke, I've just altered a few thicknesses and made a bit more clearance where the stem goes in. Its going to look like this when it comes off the mill ( won't be green though ) 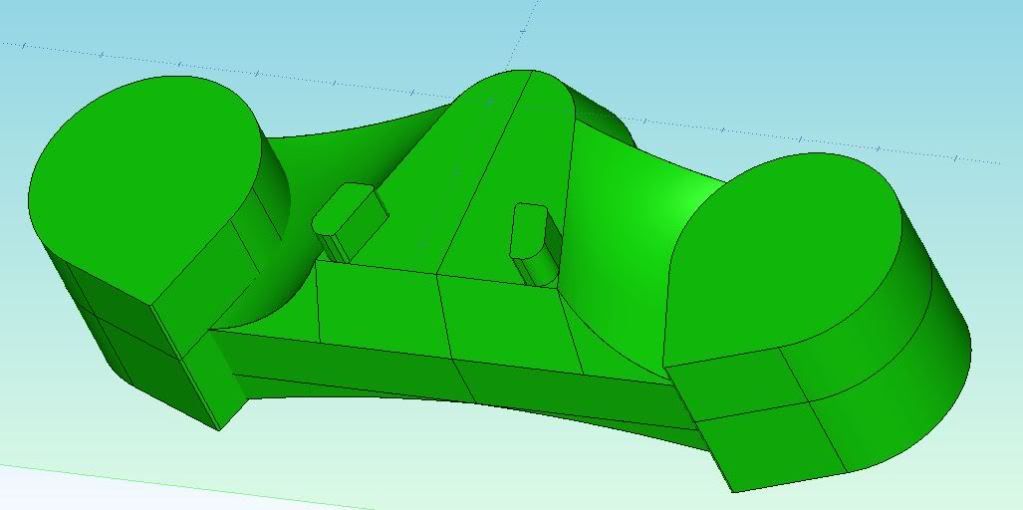 I'm hoping to get the milling finished over the weekend , I'll post some pics when its done. I'm not too sure what to do with the old yoke now, I might fit it on my R1 but it will probably just sit in a pile with the rest of the spare bits I have |
|
|
|
Post by paul8899 on Nov 22, 2010 20:28:18 GMT 1
|
|
|
|
Post by paul8899 on Nov 26, 2010 21:45:57 GMT 1
I machined the sprocket carrier back today, just had a trial fit and....................................
it looks like there's enough room for the chain ;D ;D ;D ;D
I've just got to make up some spacers for the wheel then get some final measurements for the carrier and front sprocket then I'll make a start at bracing the swingarm
|
|
hondablade
Thrash Merchant
   2 wheels ~ 2 Strokes
Posts: 301
|
Post by hondablade on Nov 26, 2010 22:31:13 GMT 1
How much we would all give to have access to a CNC machine for one off mods!! Great thread by the way right up my street with all the nice engineering touches you got on ya bike, very nice.
|
|
|
|
Post by paul8899 on Dec 3, 2010 14:05:10 GMT 1
I decided that the rear sprocket carrier was getting on my nerves so I spent a few hours on the pc and made a new one. 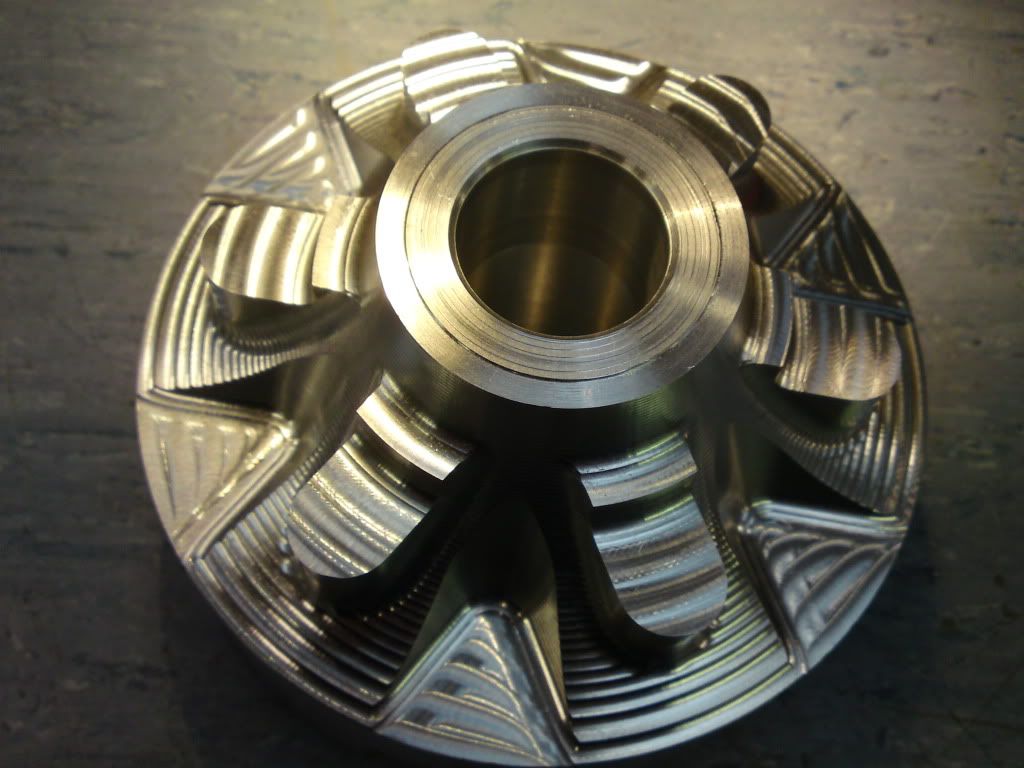 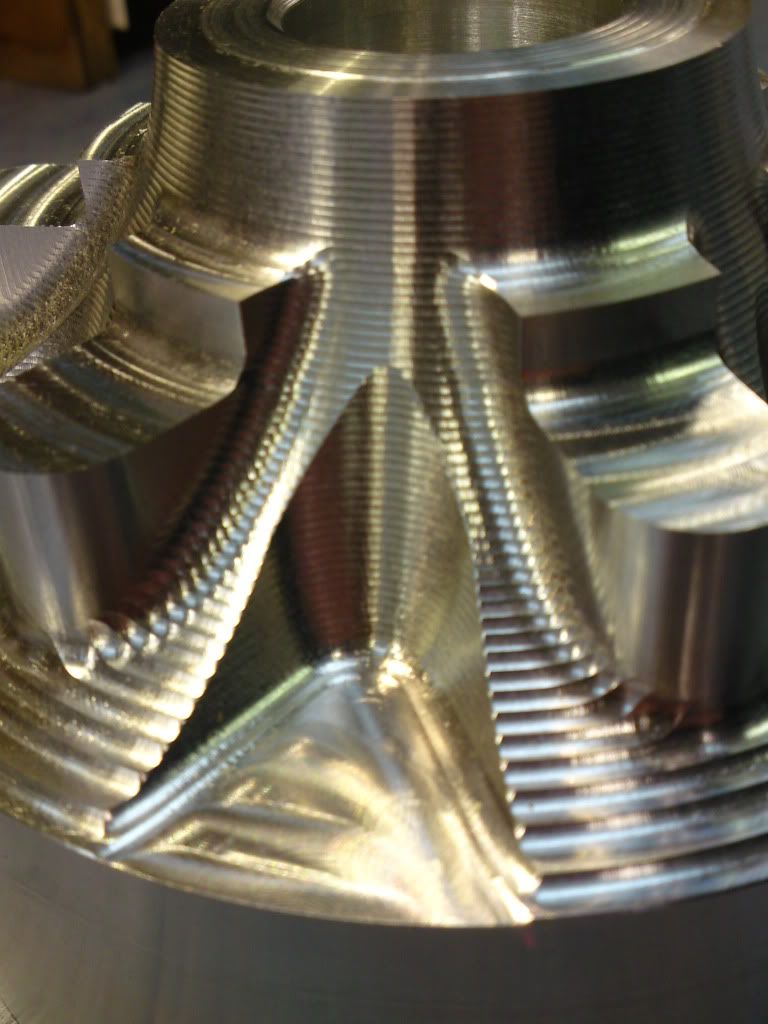 Just have to machine the bearing hole and the back face and thats another job jobbed. It might take a while because my shed is really cold ! |
|





 I could get a full fairing and take the bottom half off , best of both worlds


