|
|
Post by nikfubar on Mar 4, 2011 23:54:58 GMT 1
Very  although the rear suspension looks a bit stiff ;D ;D |
|
|
|
Post by paul8899 on Mar 27, 2011 11:02:28 GMT 1
Progress has been a bit slow lately , when I say slow it's actually a dead stop ! Bloody work keeps getting in the way  I made a couple of stem nuts up the other day ( notice the almost de-shelved R1  ) 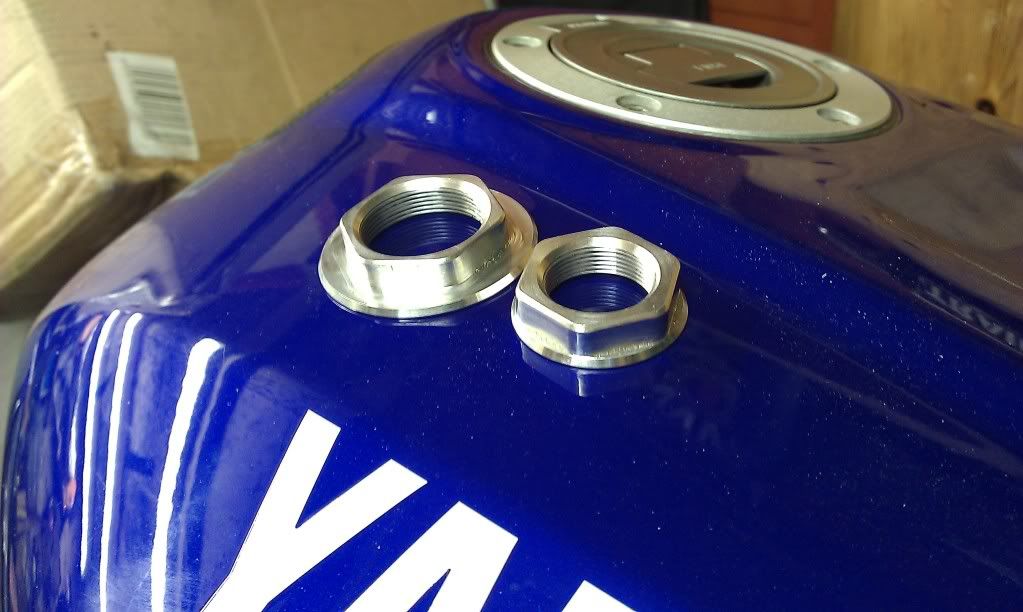 so all I have to do now is make the stem the right length , screw cut the threads on , do a little bit of machining on the top yoke to get the right height and then I can finally fit the new bottom yoke I made a few months ago ! I managed to sneak off into the shed yesterday to start to try and get the enigne to fit properly in the frame without the need to cut and weld the existing mounts and I ended up with this 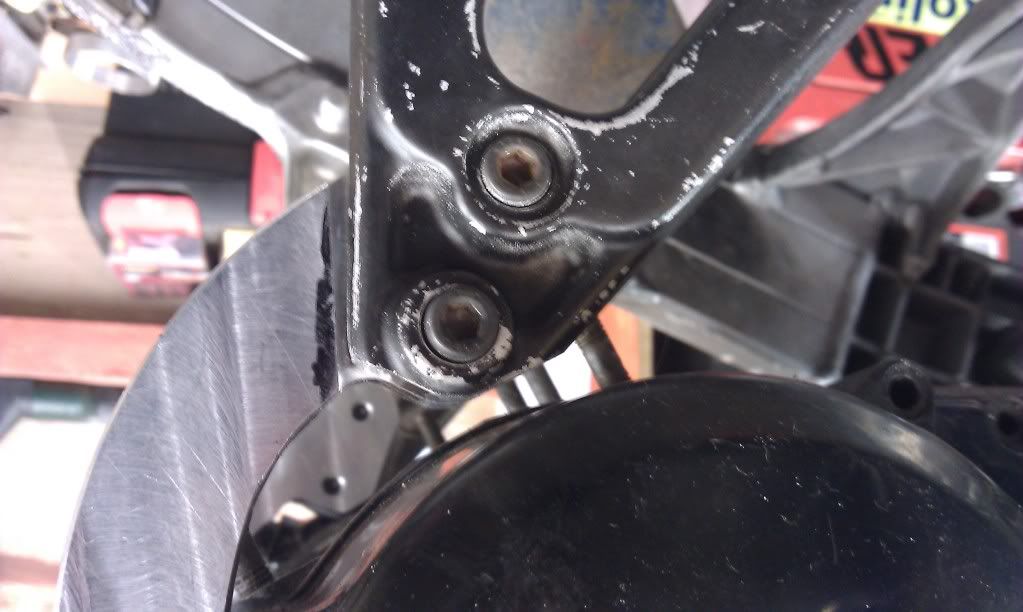 I now have 7mm of clearance between the engine cases / covers and the frame  It's sitting a bit low from where they sit normally but I altered the mounts so that its only about 6mm different from where they usually are , which I can live with I've also ordered the fairing , which should be here in about 2 weeks , so once I get that I can make a start on the brackets. There's still a few liittle jobs left but the main ones are to machine the swingarm ( it moved when it was welded ) , work out how to mount the rear caliper , sort out the footrest hangers and finish the subframe off . Once I have those bits done it should be reasonably easy to finish off as it's only the engine and electrics left and what could go wrong with that  |
|
|
|
Post by Norbo on Mar 29, 2011 7:19:34 GMT 1
At leaset your getting things dome work or not getting in the way progress is still hapening . and its looking well.
|
|
|
|
Post by paul8899 on Mar 30, 2011 22:22:42 GMT 1
Thanks, it's getting there but it's so frustrating not being able to just crack on and finish it. I had a bit of spare time and managed to finish the stem off , machine the top yoke down a bit ( so it sits nice and tight against the headstock ) , machined the ti spindle to the right length and thought I'd have a go at seeing if the new bottom yoke I made a few months ago actually fitted. 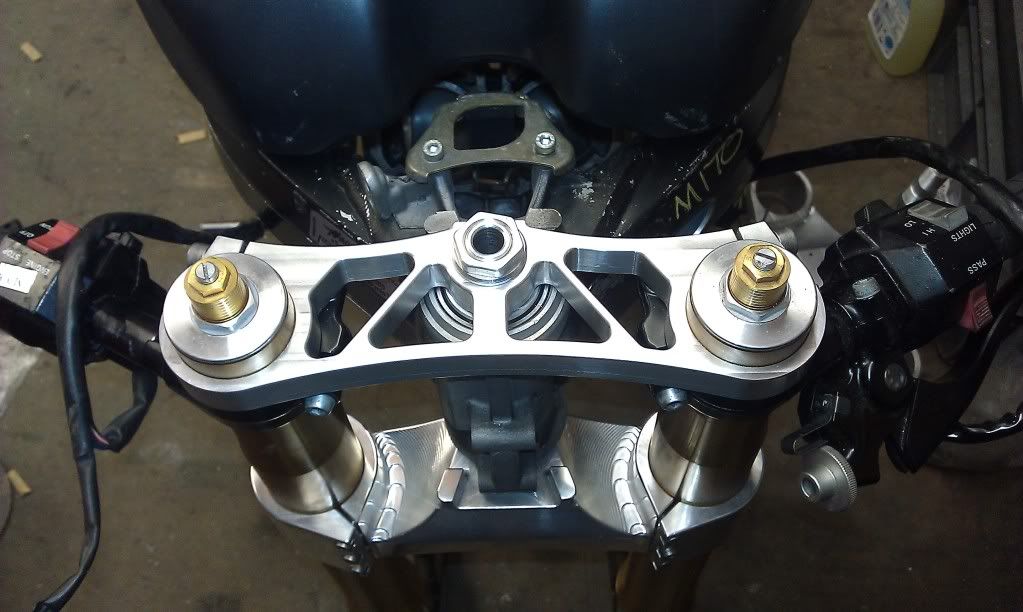 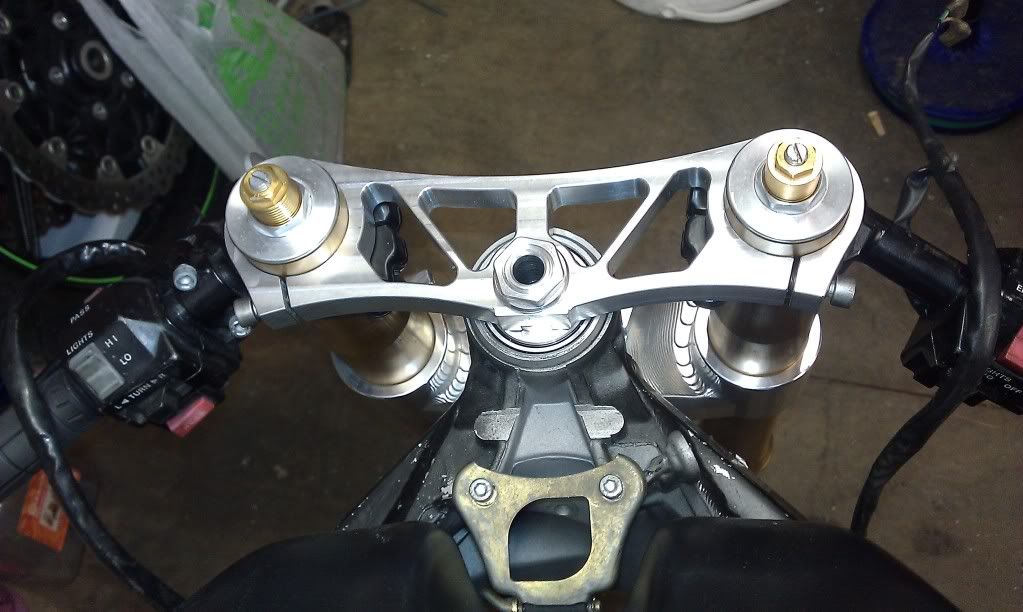 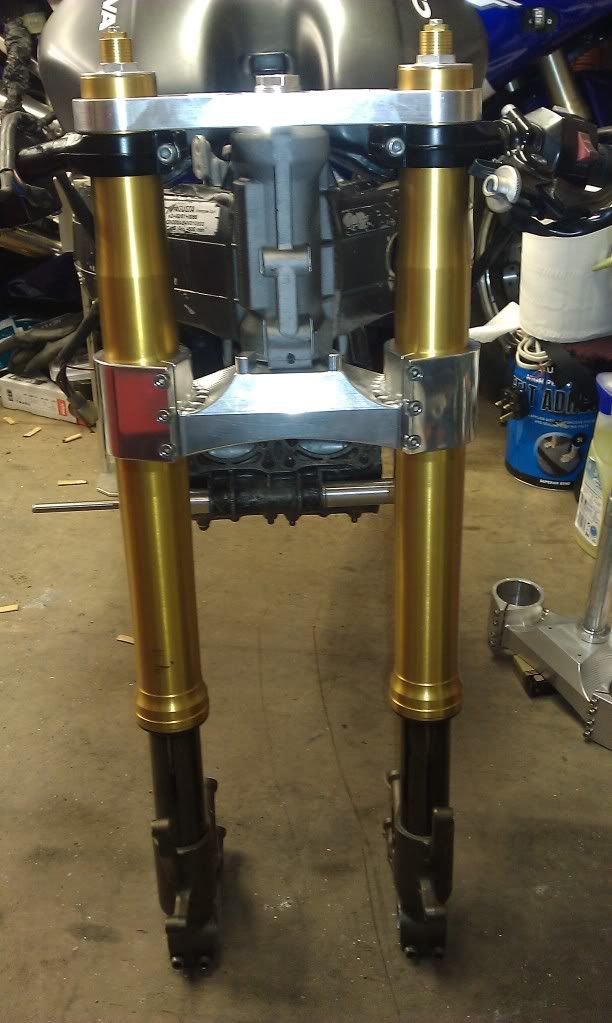 Luckily enough it all fits together nicely , I'm getting quite good at this  Next on the ever decreasing list of things to do is , machine 5mm off the calipers ( to fit the 08 brakes to the 05 discs ) , then either machine the swingarm up so it fits just right or try and find all the electric bits and try and work out how to fit them in the seat hump. |
|
|
|
Post by 1260dave on Mar 31, 2011 14:01:31 GMT 1
nice build what do you think it will weigh when its finished
|
|
|
|
Post by lcowner on Mar 31, 2011 14:46:49 GMT 1
stunning work,.............
|
|
|
|
Post by paul8899 on Mar 31, 2011 19:21:52 GMT 1
Thanks guys , it's finally starting to take shape and look like a real bike . I'm getting really impatient with building it now though , I want it done NOW !
I've had a weigh of everything I've got so far and it weighs 50 kgs , so I think that when it's finished I'm hoping it will be around the 110kg mark. Time will tell though !
|
|
|
|
Post by paul8899 on Apr 1, 2011 20:11:19 GMT 1
paul offer the old one up for sale mate i am sure someone on here will buy it. or knock up a top yoke and sell as a hibrid kit. jazz I might do that but I'm leaning towards fitting it to my R1 , making a kit does sound appealing though .... This week I found the time to machine the front spindle to the right length , make a bolt and I finally machined the calipers down so they fit properly on the discs. So it now looks almost like a proper bike  ( just have to squint a bit and use your imagination ) 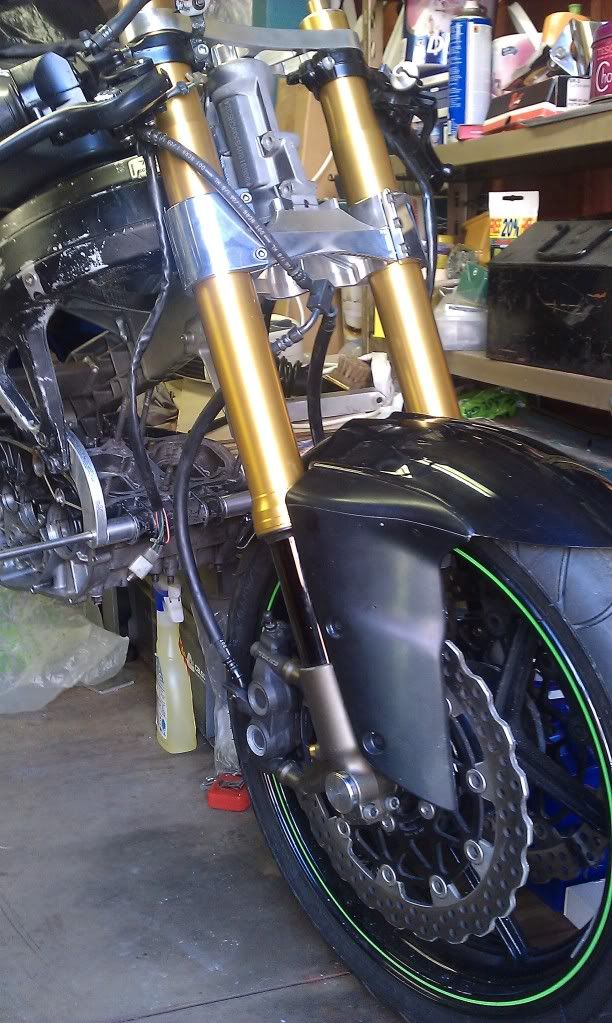 Next on the to do list is mount the front mudguard and have a think on how to finish the rear subframe off. |
|
|
|
Post by paul8899 on Apr 2, 2011 11:34:35 GMT 1
wonder if he'll be interested in a swap for some bits I'm going to need ?
|
|
|
|
Post by paul8899 on Apr 12, 2011 20:10:48 GMT 1
Got a bit bored over the weekend so I thought I'd have a go at lightening the rear engine mount as it looked a bit chunky ( and it weighed loads ) It started like this 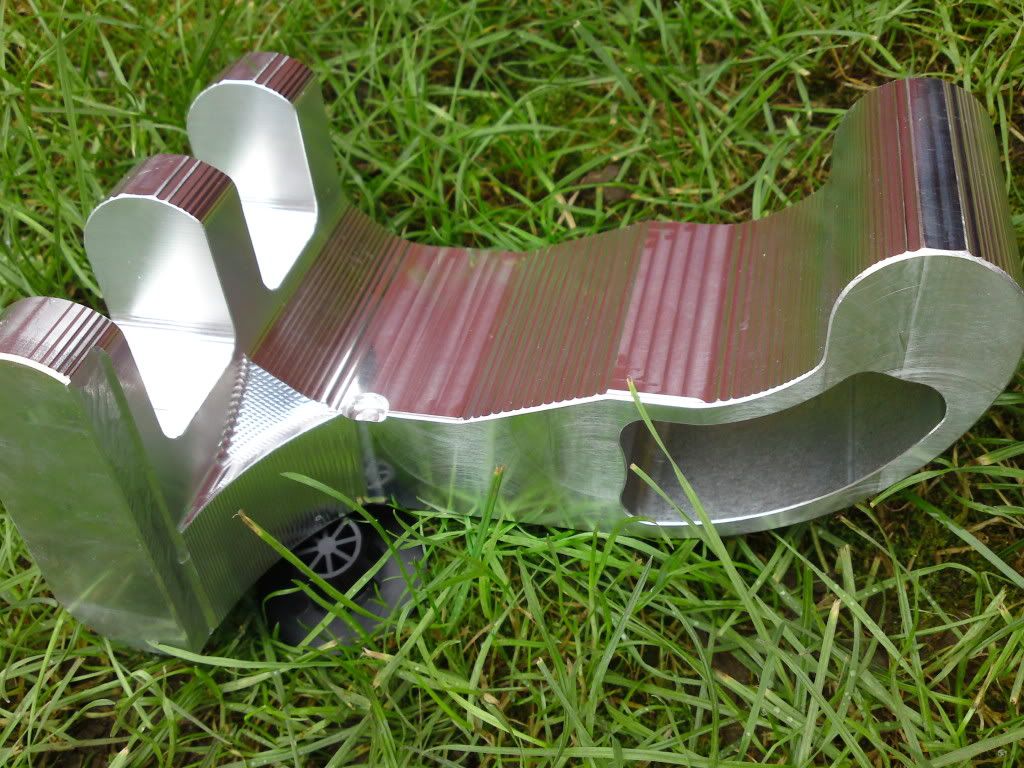 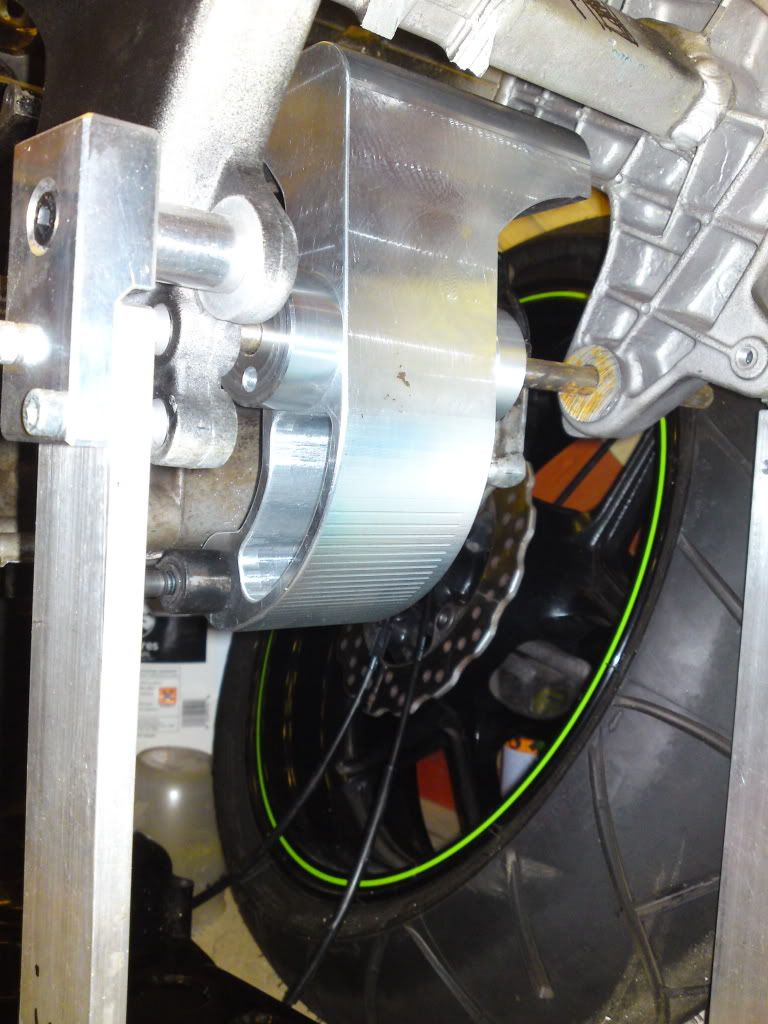 and it now looks like this 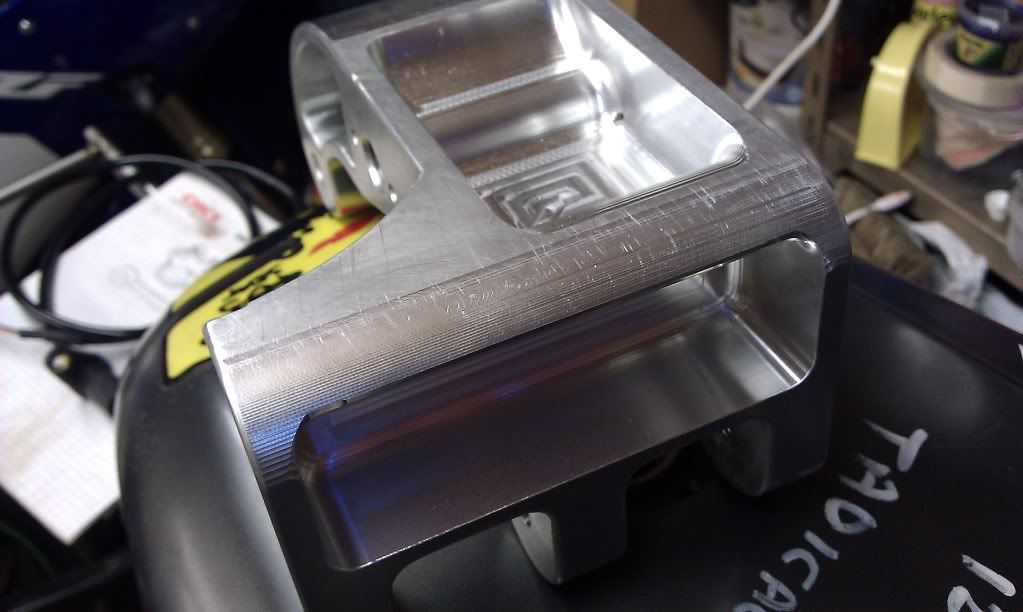 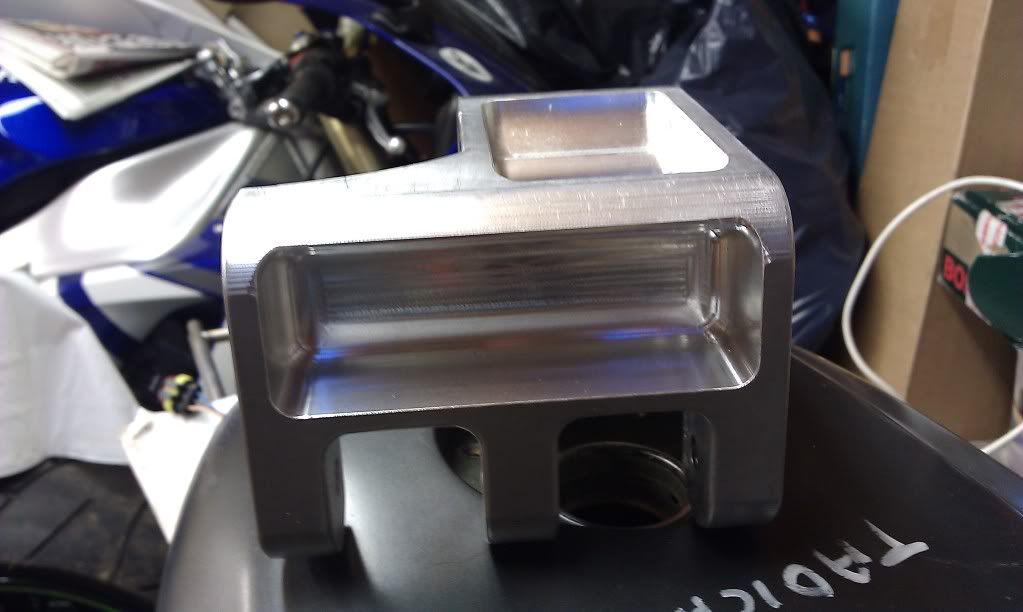 This has saved a load of weight and looks a bit nicer. It has an 8mm wall thickness all around so I think it will still be strong enough  I got a bit over eager and I forgot to weigh it before and after so I'll have a go at checking it on solidworks later on . I'm now in possesion of a headlight , sidestand and steering damper , so all I have to do is work out how to make the brackets up for fairing then thats basically the front COMPLETELY FINISHED , which if you look at it one way thats half done  |
|
|
|
Post by paul8899 on Apr 15, 2011 22:08:49 GMT 1
I had a quick weigh up on solidworks and the original mount weighed .9 of a kilo and they new one is .55 . Can't see that it's going to make a lot of difference but it all helps I suppose  Found out today that my fairing has turned up and is being delivered next week along with a HID kit for the headlight. So the next jobs on the to do list is mount the fairing / headlight / steering damper and clocks. I also had a proper look at the sidestand which has quite a bit of wear on it , seems like some peoples good ebay condition differs from mine . Looks like I'll be having a word with Bob The Welder soon ! I've found a few suitable rads but I'm having to hold off buying them until I get my barrels and crank back , which I'm really hoping to get in a week or so. Once I get those back I can then finally make the rubber bushes up and finalize the engine engine position. |
|
|
|
Post by flames on Apr 16, 2011 12:07:48 GMT 1
before you fit yr hid headlight,i dunno if it is true,but i have been told that apparently from nxt yr i think it is,all retro fitted hid lights will be m.o.t failures.i dont know why,but it may pay to check it out just in case bud.
|
|
|
|
Post by paul8899 on Apr 19, 2011 21:32:13 GMT 1
I'll have an ask before I fit it but its only a bulb and ballast box so its no biggie to change over. Should be getting the fairing delivered tomorrow and I've got some new powervalves and v force reeds on the way as well , just have to get my barrels and crank back then I can finish it off  |
|
|
|
Post by weegiboy on Apr 20, 2011 22:35:13 GMT 1
Chief
Im only a lowly beginner but i have just checked you're stream and progression , sh*t off pure eye candy/RD porn i can only dream of aspiring to this kind of wizardry , thanks for sharing , can't wait to see what you decide on either way i know it's going to be an absolute belter , ace nice one .
weegiboy
|
|
|
|
Post by paul8899 on Apr 24, 2011 15:52:23 GMT 1
I got my fairing and hid headlight last night and here's how it looks now , no photoshopping now 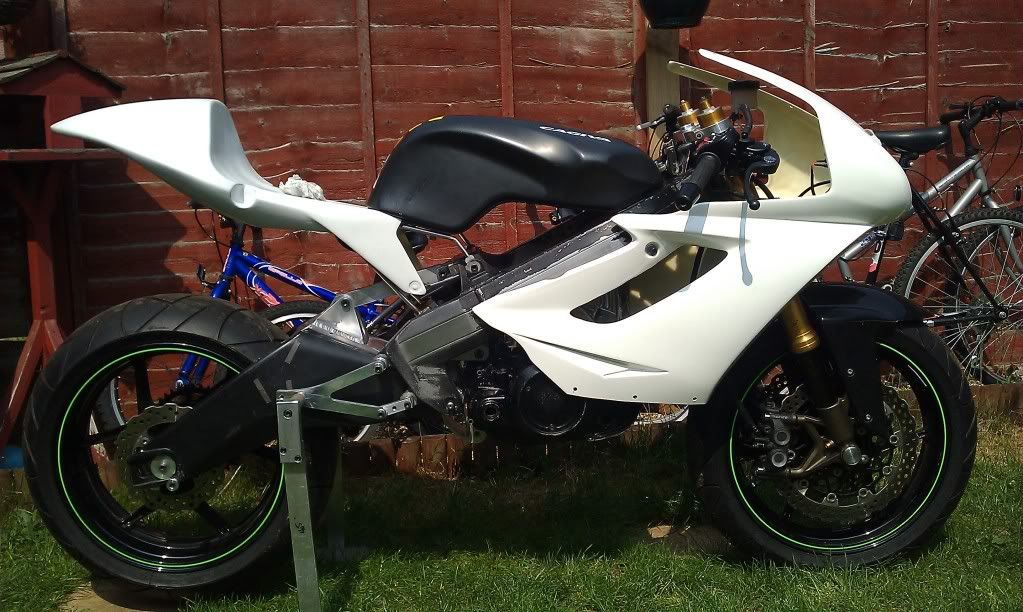 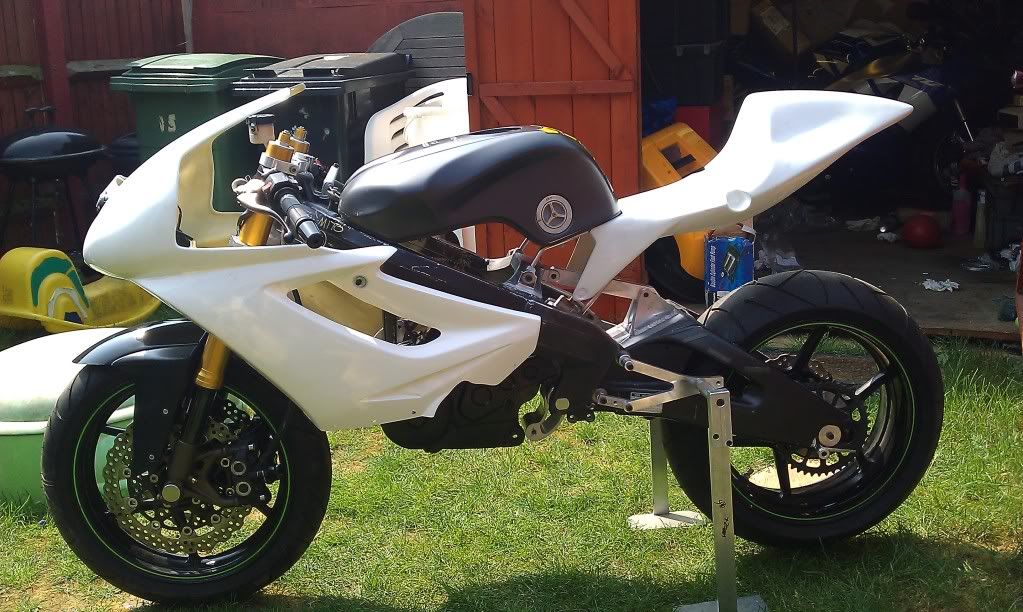 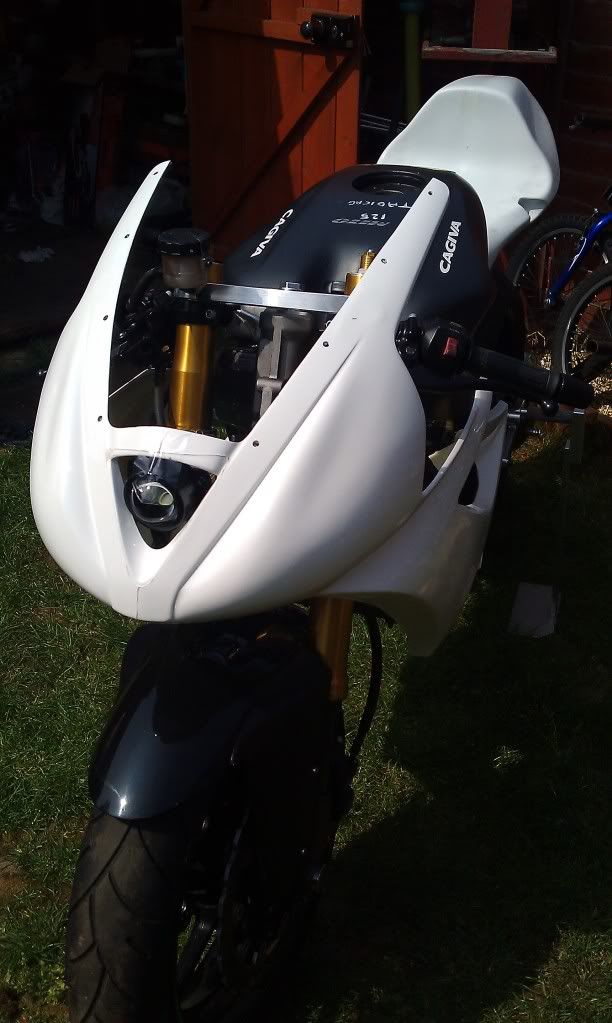 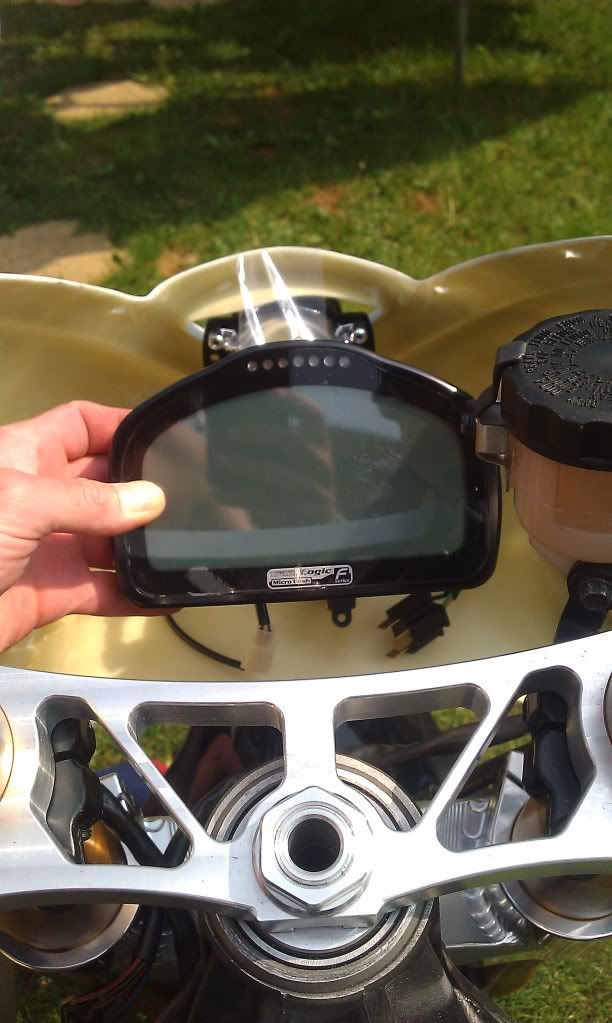 The fairing needs a bit of tidying up before it gets painted and I need to make the brackets up for the light and clocks but it seems to fit ok and there's plenty of space for the rads and gubbins . I got the fairing and hid kit from Mark at M+M motorcycles ( 01780 482277 ) and I am well impressed with the service. Can't recommend him enough The eagle eyed among you will also notice that I have fitted the engine in place , and this is the view from the side of the tank 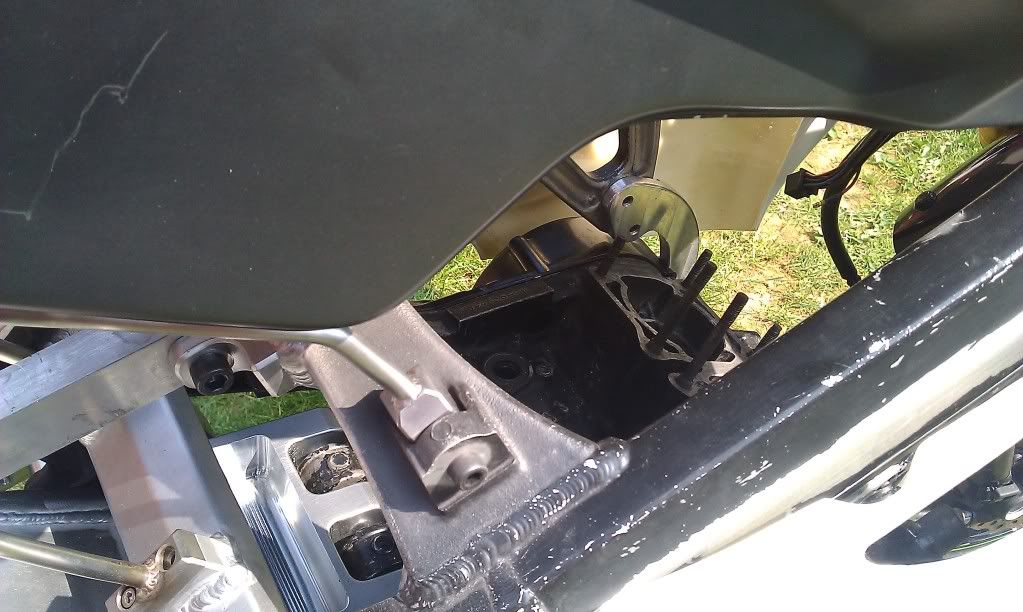 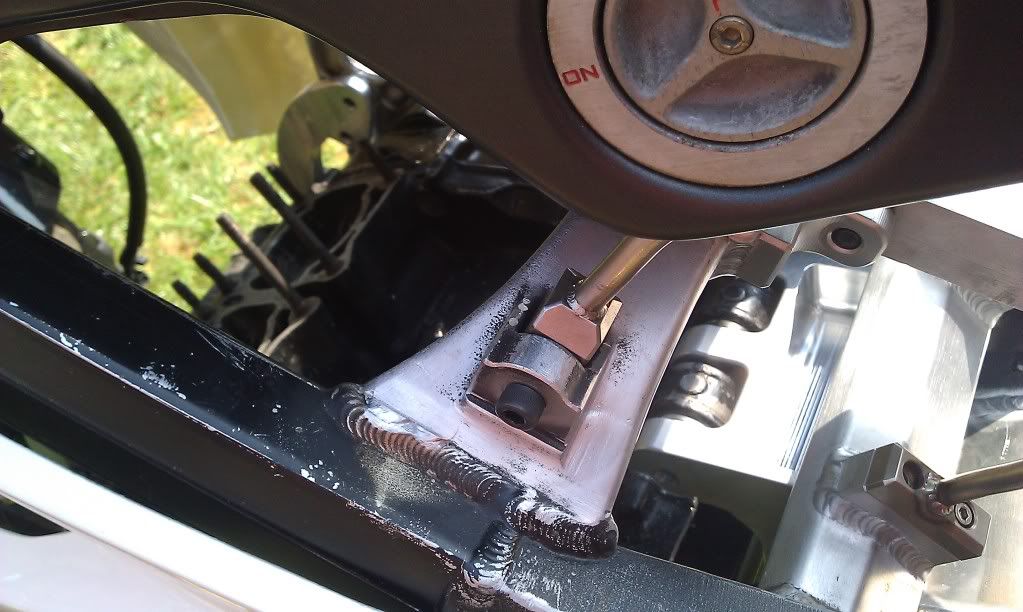 So when the engine is complete it will in full view which is exactly the look I wanted , whats the point of putting a different engine in if you can't see it ? I'm really hoping to get the barrels and crank back this week as I need them so I can work out the position of the rad and make the neccesary brackets up. The pockets on the rear mount look ok but you have to get in the right position to see them properly 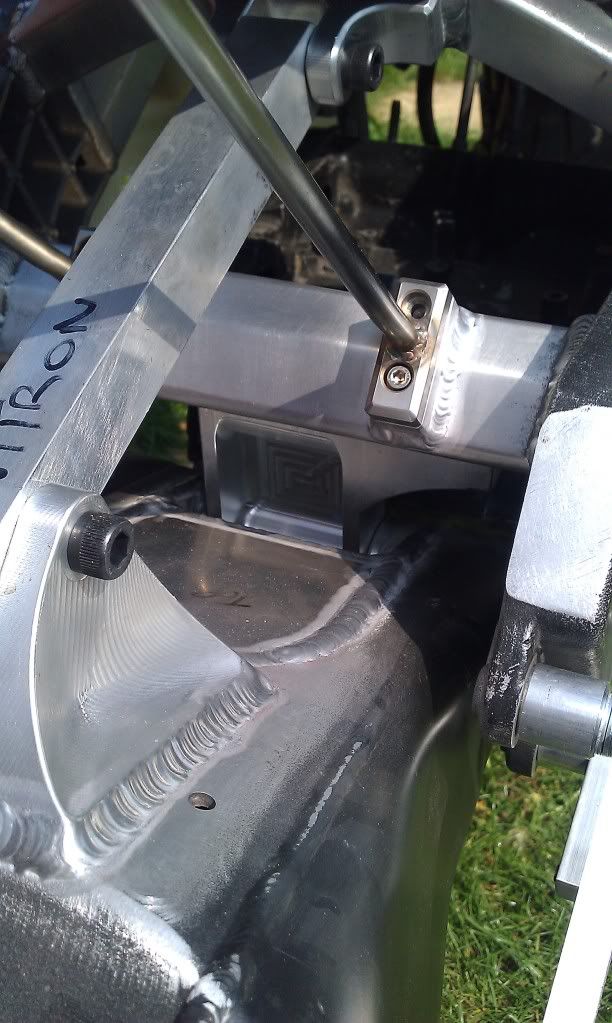 At least I know that the pockets are there ! I've also got a nice shiny set of billet powervalves and some v force reeds waiting to get sent to me once the screen comes in . All I need is a set of barrels to fit them to ! I'm thinking of getting a zeeltronic later on and am I right in thinking that it replaces the stock CDI unit , powervalve controller ? |
|
|
|
Post by LC'Adam on Apr 24, 2011 17:08:05 GMT 1
Quality that mate  What paint scheme are you going for?  Adam |
|
|
|
Post by paul8899 on Apr 24, 2011 17:16:37 GMT 1
Thanks, it's slowly getting there  This week I'm going with plain white but last week I wanted a speedblock scheme ! |
|
|
|
Post by lcowner on Apr 25, 2011 8:40:55 GMT 1
sunburst orange and white would look the bizz on that!
|
|
|
|
Post by paul8899 on May 6, 2011 0:04:30 GMT 1
After what seems like ages I finally got my head around how to model the footrest hangers exactly as I want them , they have a 40mm offset so they now clear the swingarm . They are going to look a bit like this when they are finished    This is the hardest part I've had to design so far and it's taken about 12 hours to model . I've had a measure up in solidworks and they weigh in at a massive 22 grams each . I'm still sticking to my plan of making all the bits from the front back as I found I was flitting around and not getting much finished, so the bits I'm making at the moment are the main fairing / headlight / clock mount which I'm hoping to get done by the end of next week (ish) |
|
|
|
Post by morton01 on May 6, 2011 1:15:03 GMT 1
Some quality aluminium work there...... bike looks stunning, well done!
The only thing I don't like about the project is Solidworks...you'd be much better off with inventor ;D ;D
Cheers
|
|
|
|
Post by paul8899 on May 8, 2011 20:47:25 GMT 1
Thanks, it's now getting to the stage where it's just the little bits that are left to do , well apart from getting my engine / exhausts / shock sorted. Hopefully won't be too long now as I've been messing about with this for a year now and to be honest I just want the bloody thing finished  While I was in the mood for designing bits I thought I'd have a go at designing a headlight bracket ( the headlight looked a bit crap on show ) and came up with this 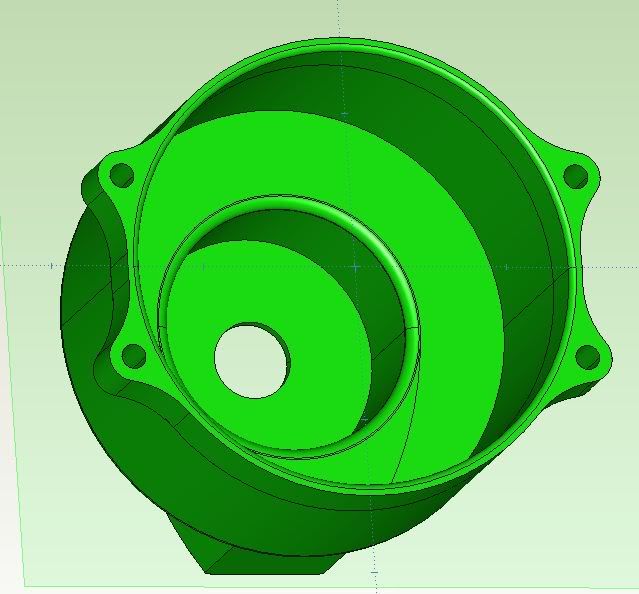 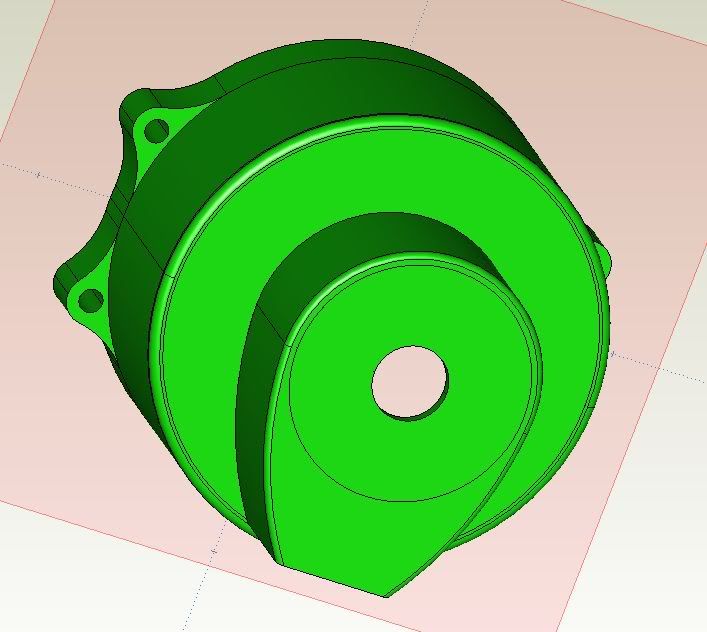 Its going to start life as a bit of 4 inch dia by 2.5 long lump . The front bit is 10mm deep and the rest has a 2mm wall thickness. I checked the run time and the machining time is 5 hours , so with setting up etc the time will be near to 6 hours Just off to work out the dash mount now then it's off to the mill I go  |
|
|
|
Post by paul8899 on May 12, 2011 22:40:59 GMT 1
Had a bit of spare machine time and thought that it was a bit of a waste so I made a start on the footrests. To get the required shape I started out with a 6 x 8.5 x 3 inch billet and after 7 hours of overnight machining it now looks like this 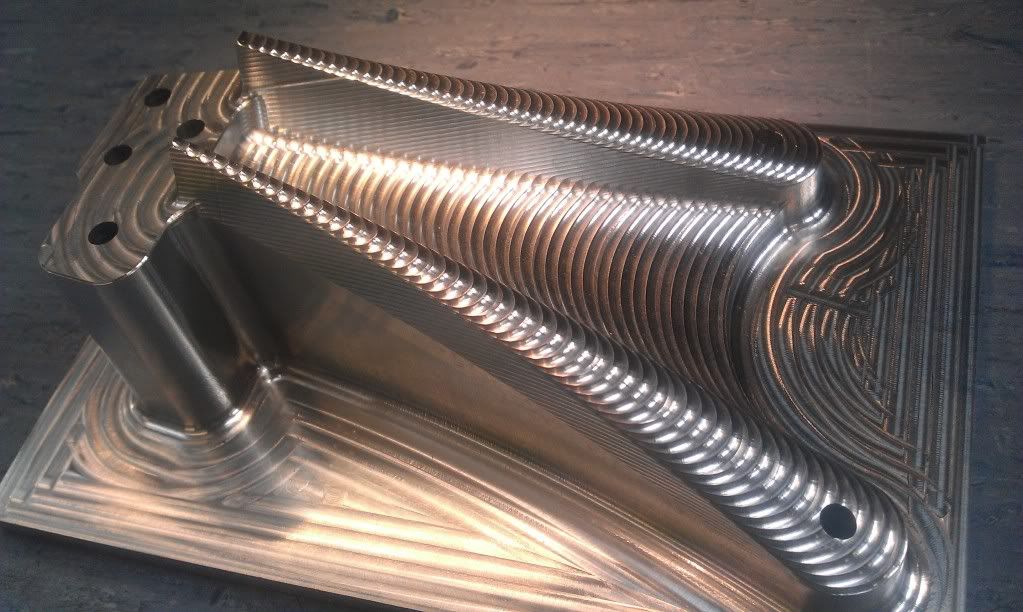 Next up is to work out how I am going to hold it to machine the back off , I think I know how to do it but I'll have to see. I also made a start the headlight / fairing bracket and this is what I came up with 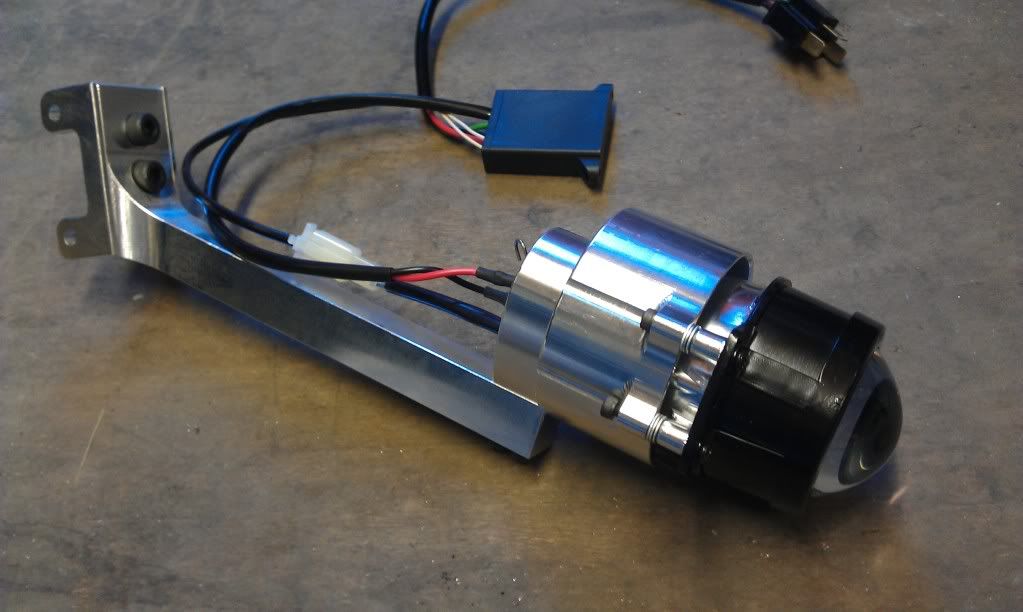 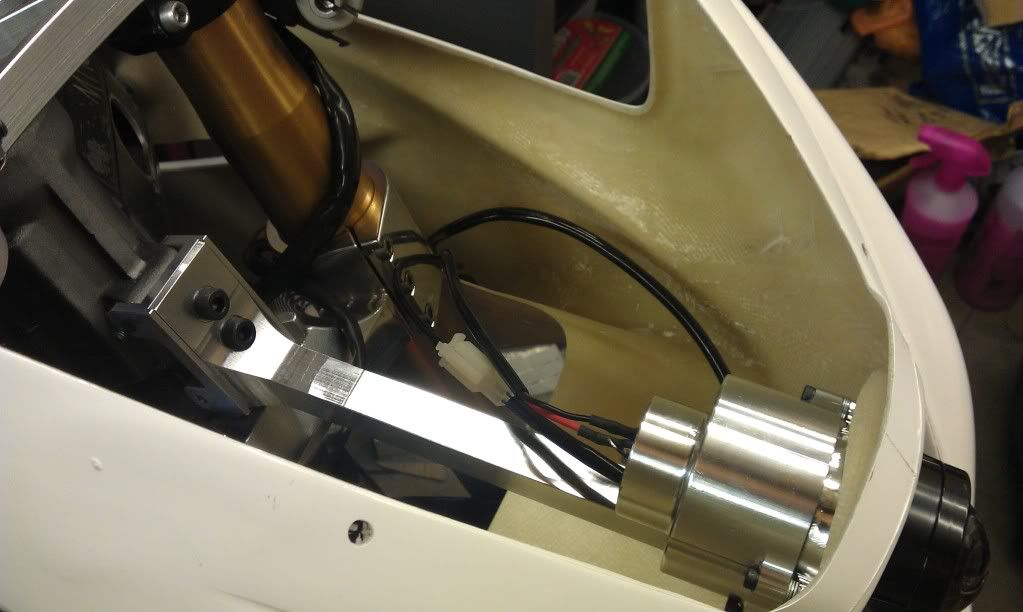 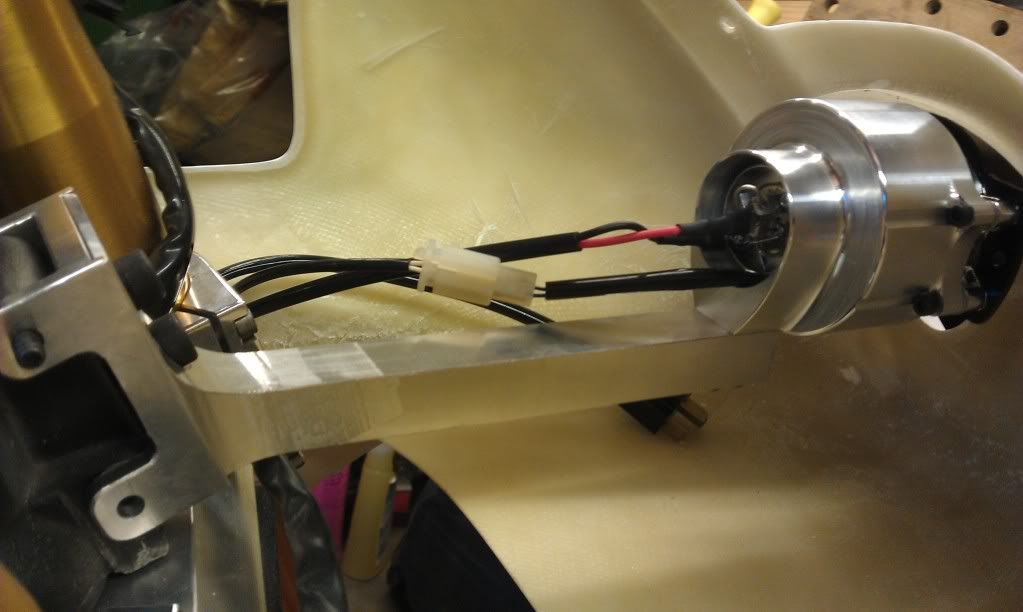 Just have to make the clock bracket and fairing mount , tidy it up a bit then that's all done. Once those bits are done I will make a start on the steering damper mounts and the ignition switch plate , slowly getting there ! |
|
|
|
Post by paul8899 on May 26, 2011 19:49:58 GMT 1
Spent a while thinking about how to machine the back of the hangers and I came up with this 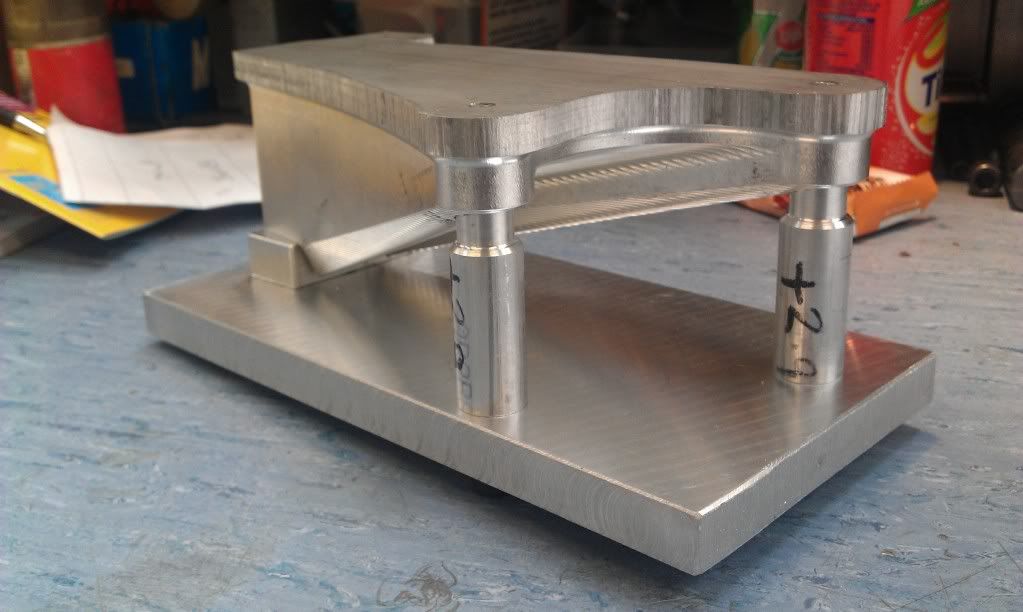 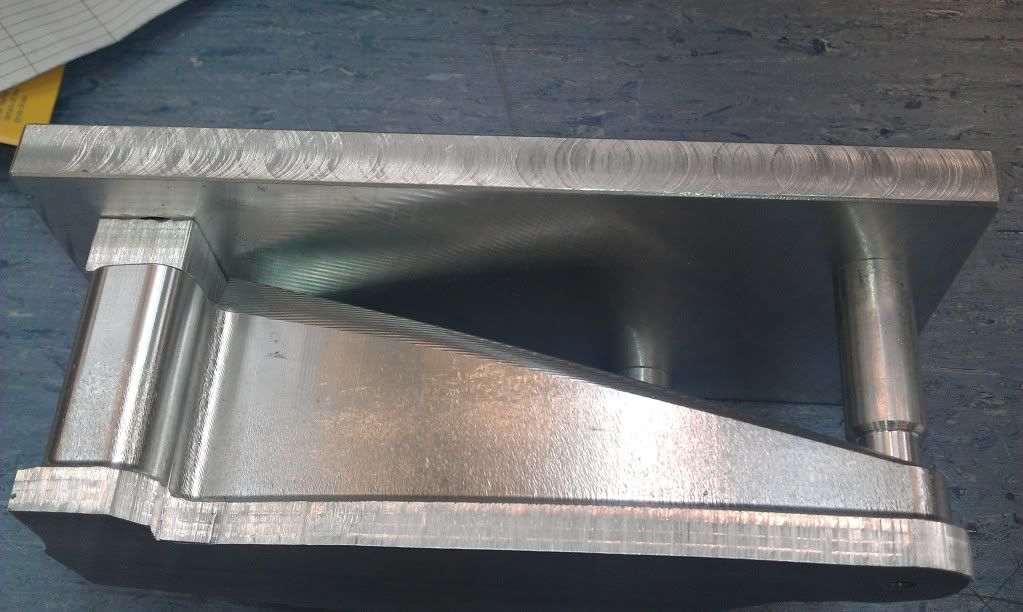 This uses the tapped holes for the footrest plate and is sturdy enough to be able to do this to it 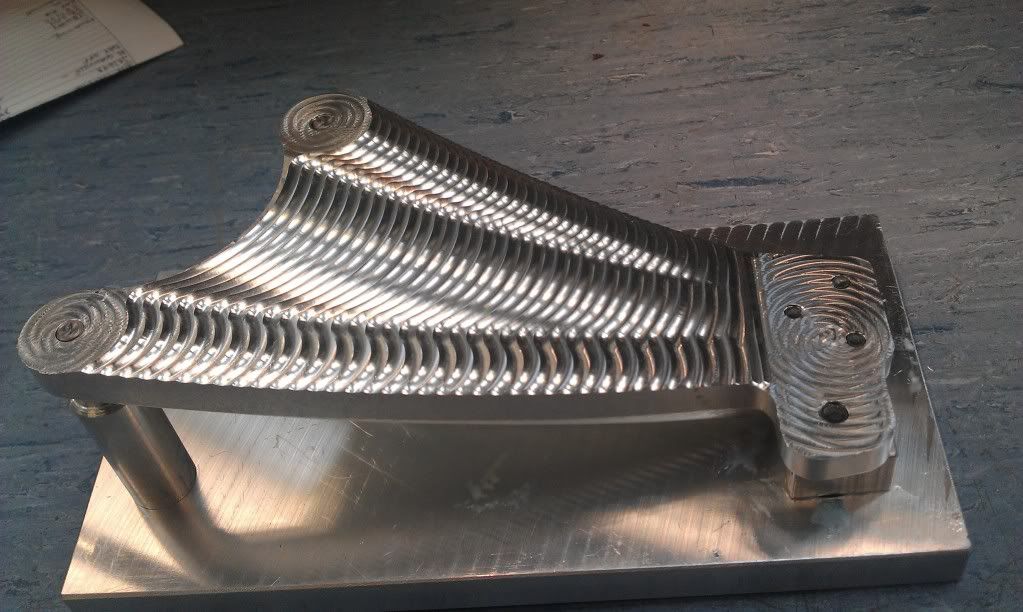 Hopefully find time to finish the other side off tomorrow  Here's what they look like when they are on the bike 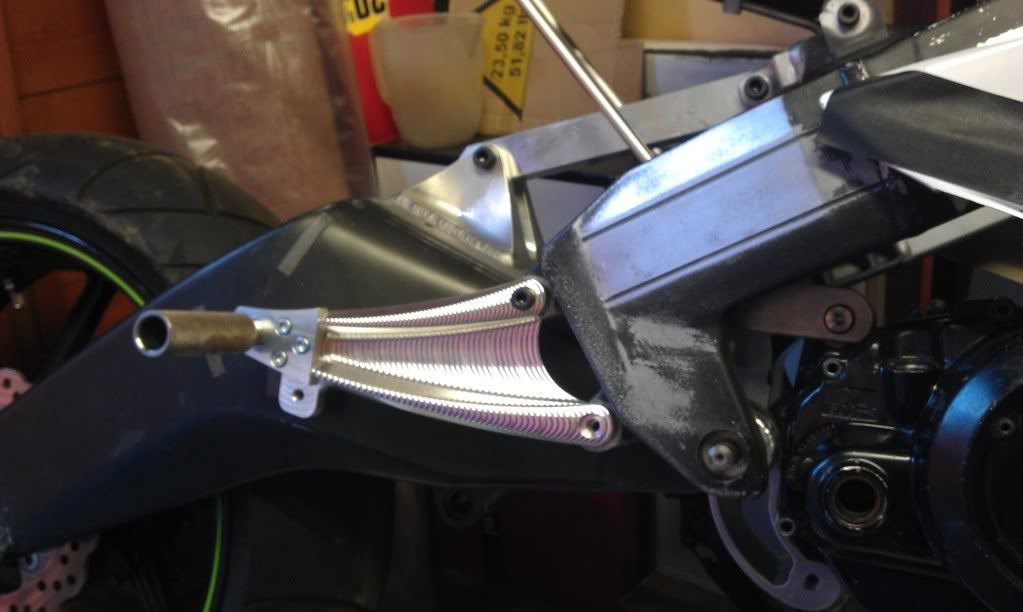 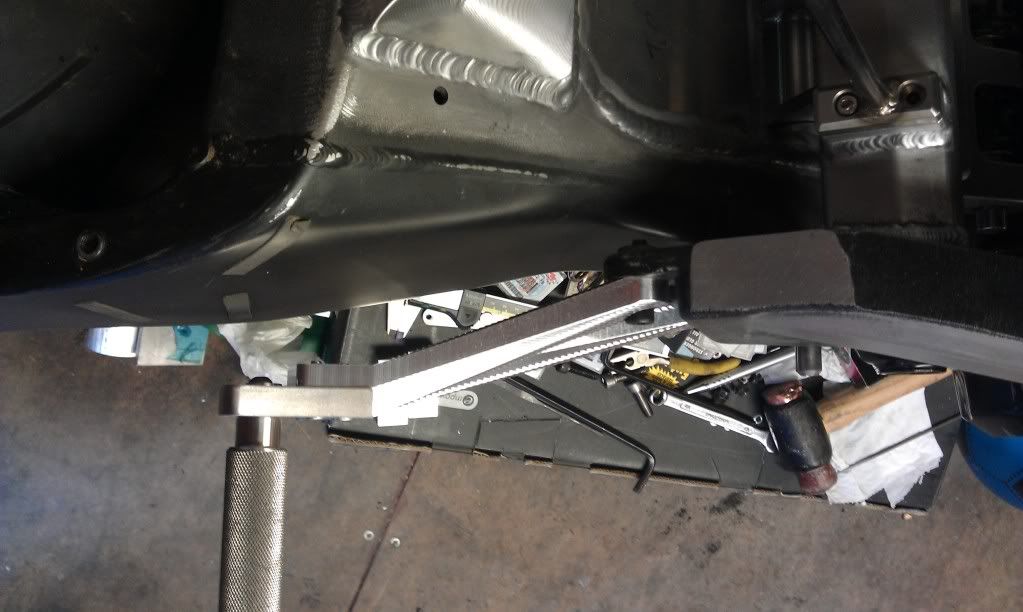 Just need a bit of tweaking to get them just right , then it's off to the anodisers ! |
|
|
|
Post by lcowner on May 28, 2011 8:14:22 GMT 1
this post really turns me on!!!!absolutely stunning m8.do u have any plans to sell any of ur stuff to joe public like me and others on here im sure u wud b busy as hell!
|
|
|
|
Post by paul8899 on May 28, 2011 13:06:24 GMT 1
Thanks, you wouldn't believe how long those hangers took to work out !
I could do , what are you after ?
|
|
|
|
Post by lcowner on May 30, 2011 13:25:46 GMT 1
im sure i will think of summit!!!
|
|
|
|
Post by jay92mito350 on Jun 6, 2011 1:08:51 GMT 1
Hi Paul8899. Your bikes looks absolutely stunning. I am doing my own 350 mito conversion I was wondering if you could make me a set of engine mounts please. If you could that would be immense. Thanks Jay.
|
|
|
|
Post by paul8899 on Jun 8, 2011 19:56:43 GMT 1
I found a few minutes to set this up on the machine and I thought that just in case I forget what bike it's for I did a bit of engraving as well. 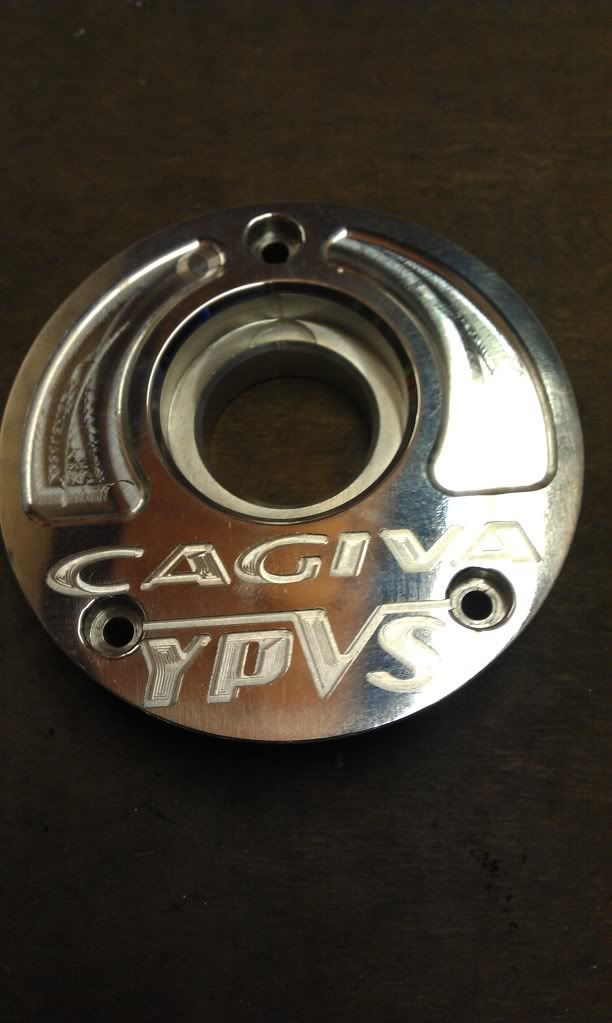 Just have to make the cap and screw cut it then it's finished  Next on the list is to make the clock bracket and steering damper mount . |
|
|
|
Post by paul8899 on Jun 22, 2011 22:55:53 GMT 1
Finally got around to finishing the cap off, 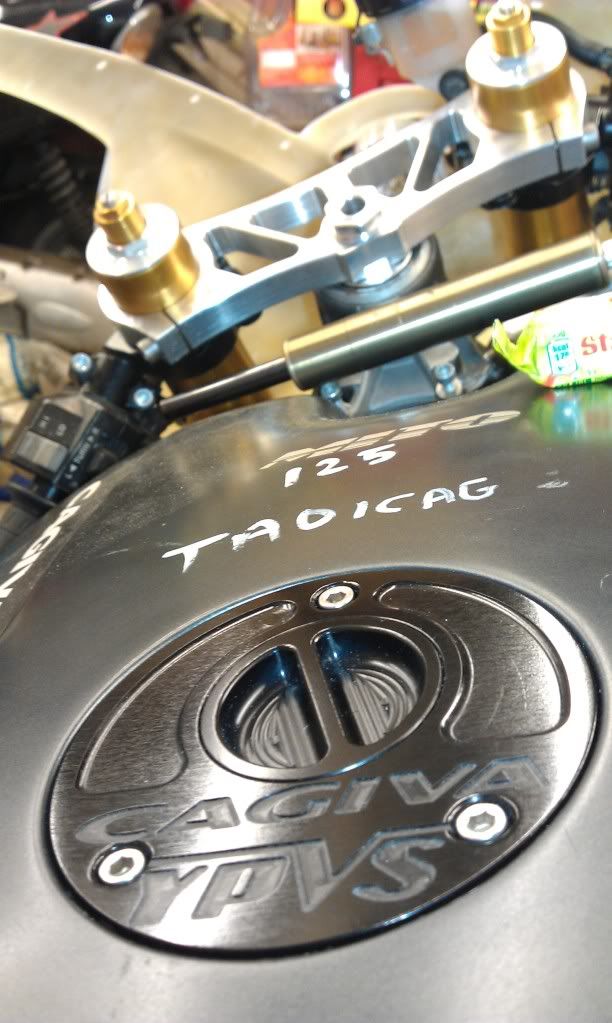 only got about a million other jobs to finish and it'll be on the road ! |
|
|
|
Post by paul8899 on Jul 9, 2011 22:03:49 GMT 1
I finally managed to find some time to make the front engine mount and rubbers up 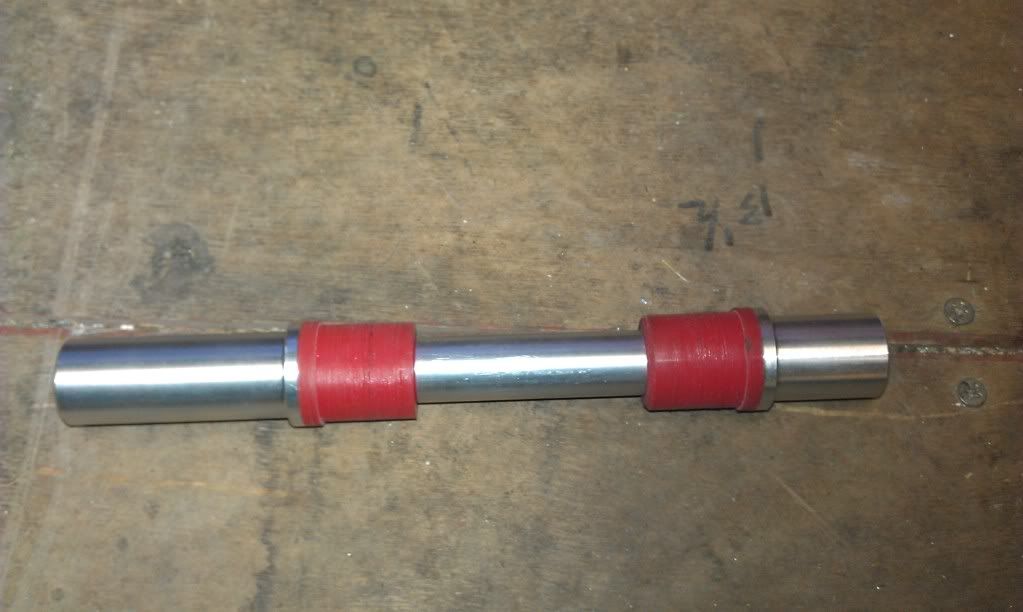 When I was making it I found that when I was putting the engine in the 2 spacers were really awkward to line up properly , so in a rare flash of logical thinking I made the inside shaft 20mm a side longer and counterbored the spacers. 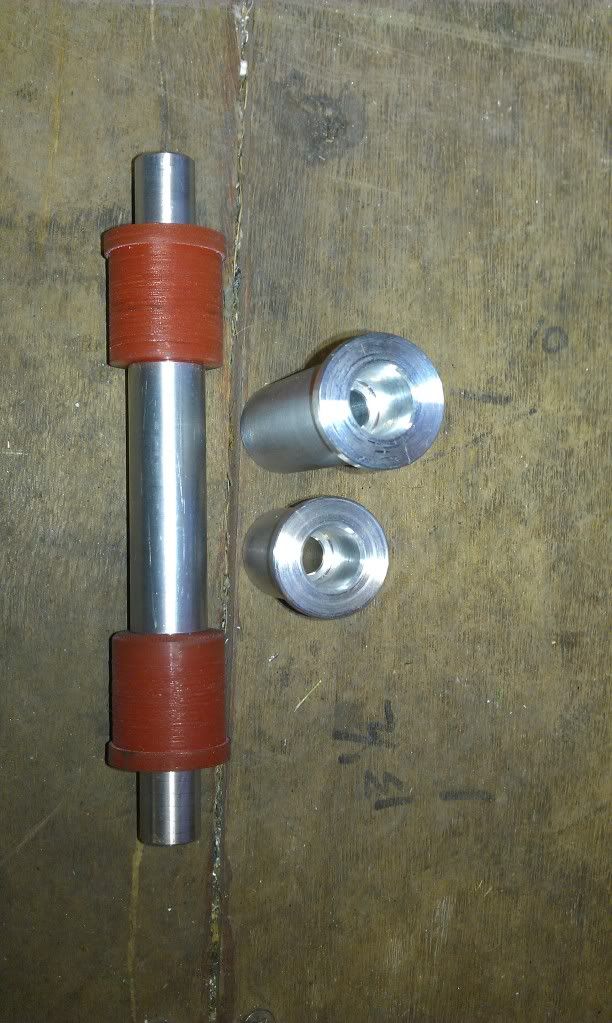 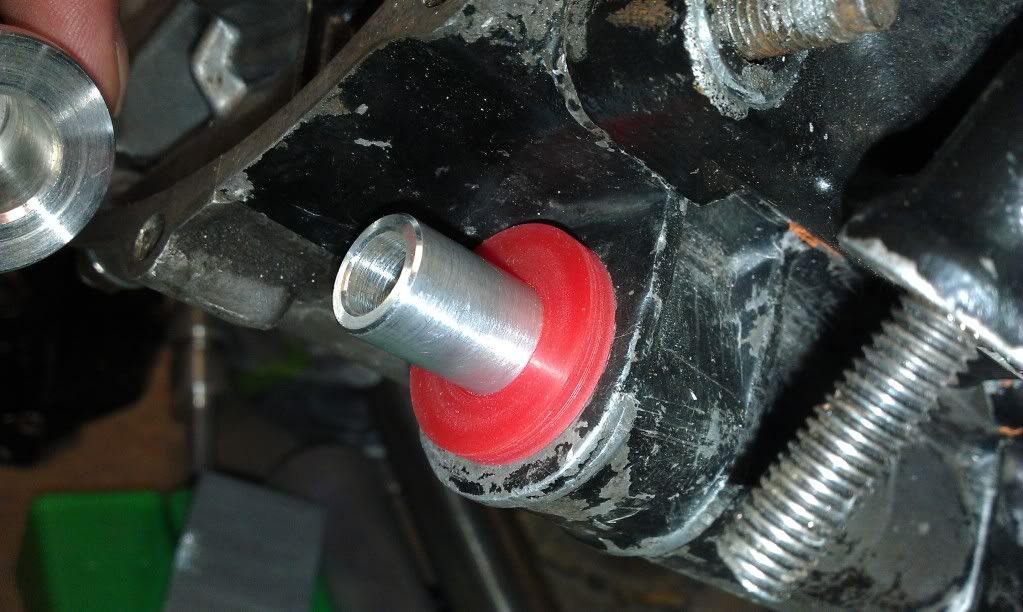 So now the spacers are already lined up which makes the engine a breeze to fit now  I also had a small delivery of these 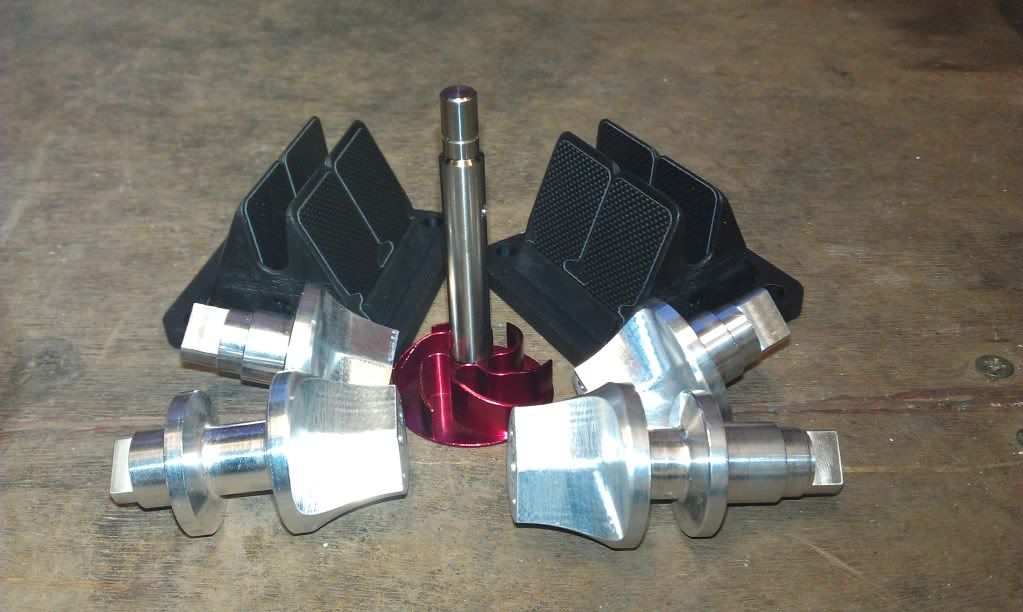 |
|