|
|
Post by richclare on Apr 16, 2017 9:56:46 GMT 1
To remove the bearing on the selector drum means removing the cross head screw first. I've never had one yet that's come out easily so I drill the head off, remove the cup washer and star head, which just pulls off, and then you can get some grips on the bolts shank and that usually turns out quite easily. Ignore the bolt in the pic, it's the new one; 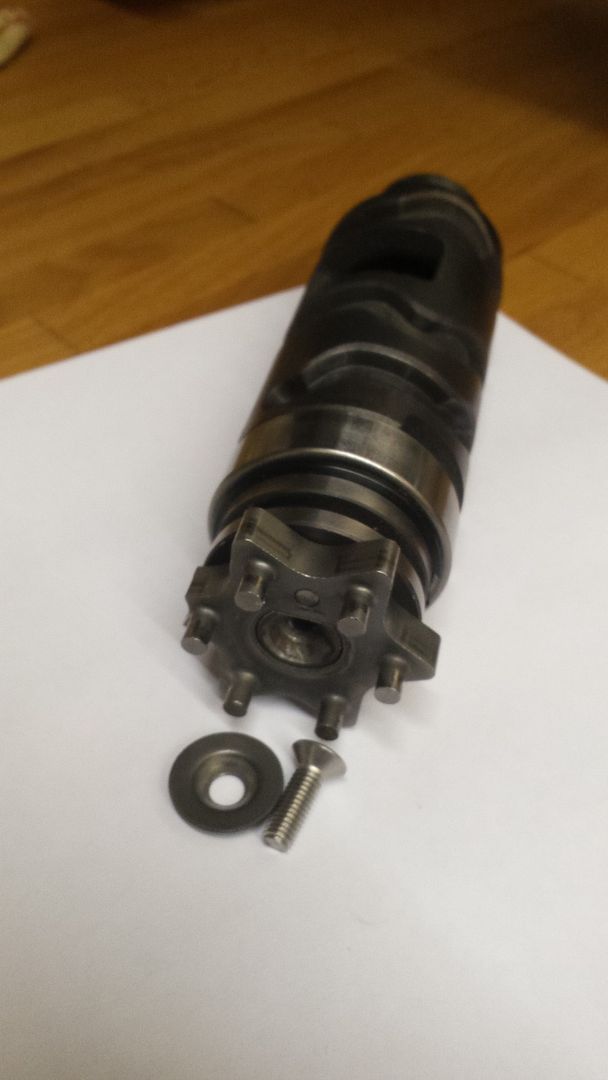 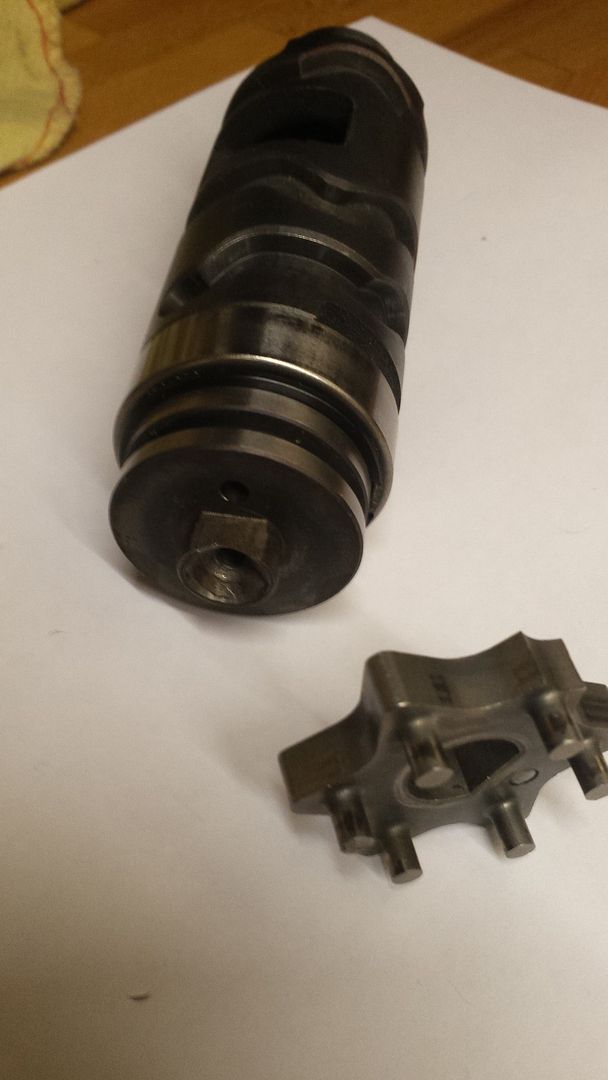 Once the star head is off you face a fiddly circlip, located directly above the bearing; 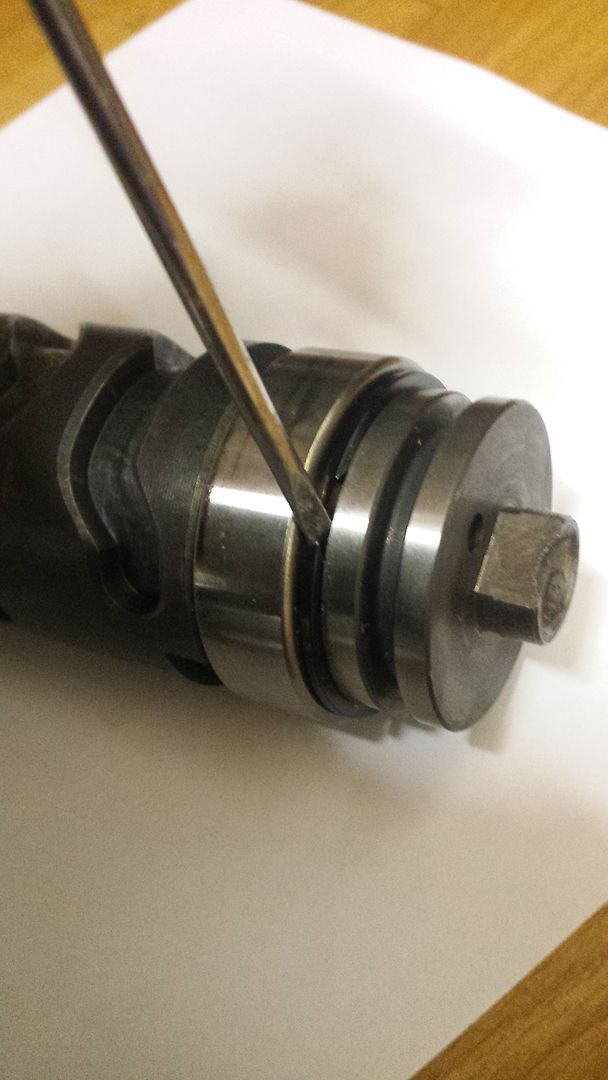 I gently prise it up with a small screwdriver. Once off the bearing just lifts off. I check the surface the bearing rotates on is in good nic and then it's a case replacing with new parts; 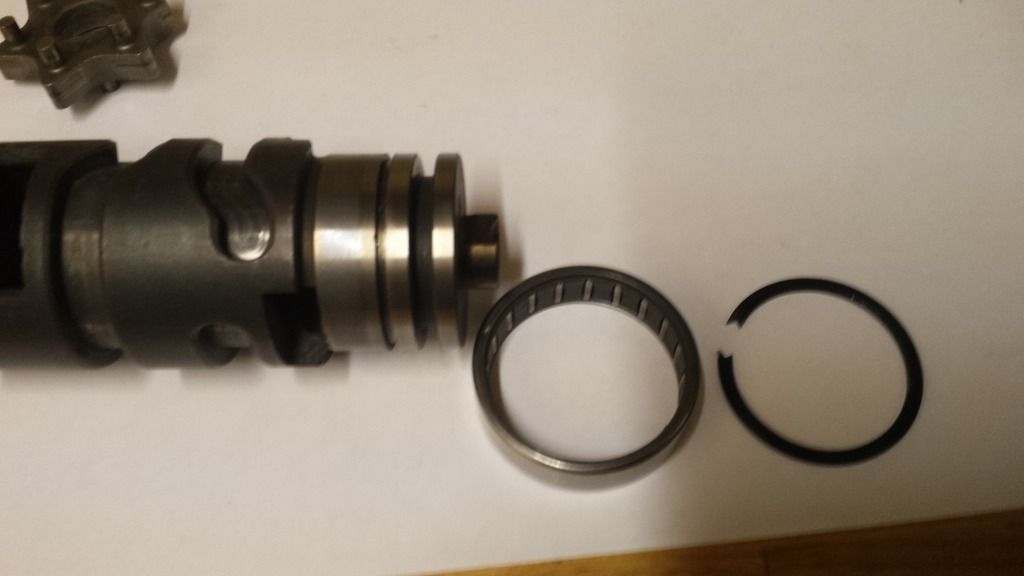 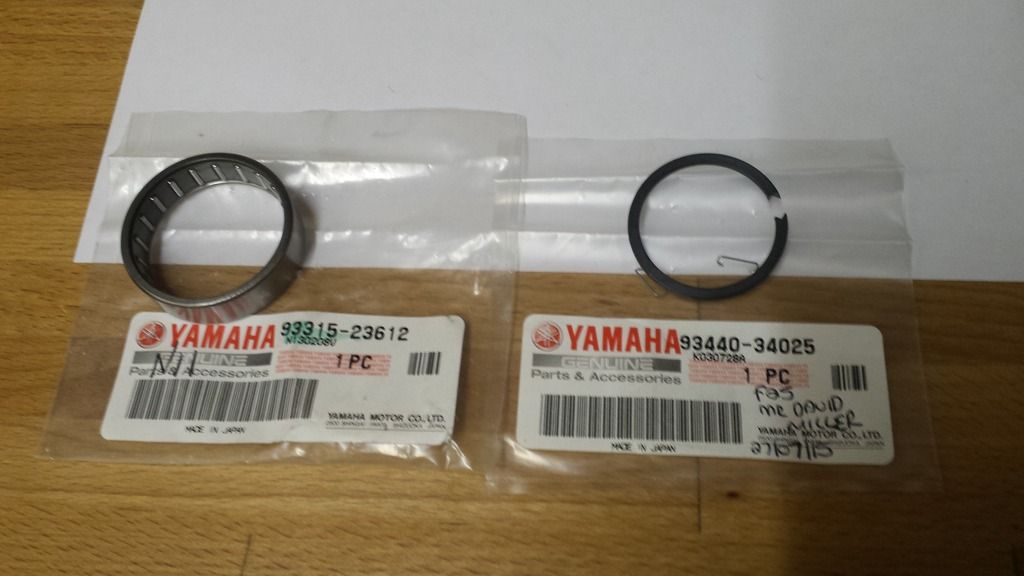 I submerge the new bearing in fresh gear oil before fitting. Worth checking the other end of the drum to make sure the brass plunger that makes contact for the neutral switch works properly by springing in and out; 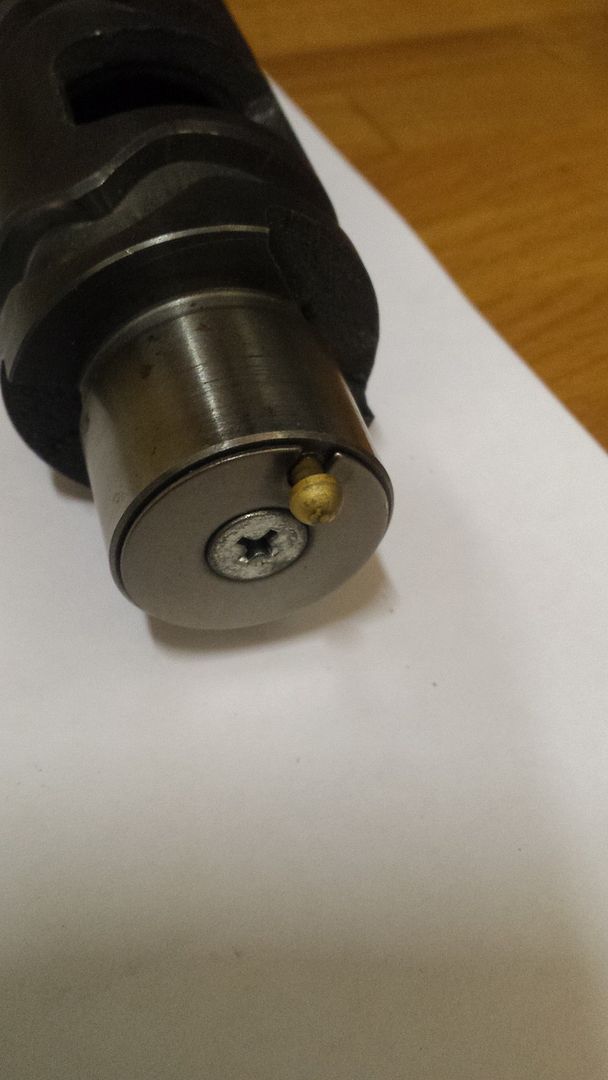 With the new bearing and circlip fitted, the last thing to do is smooth down any rough surfaces on the shift star; 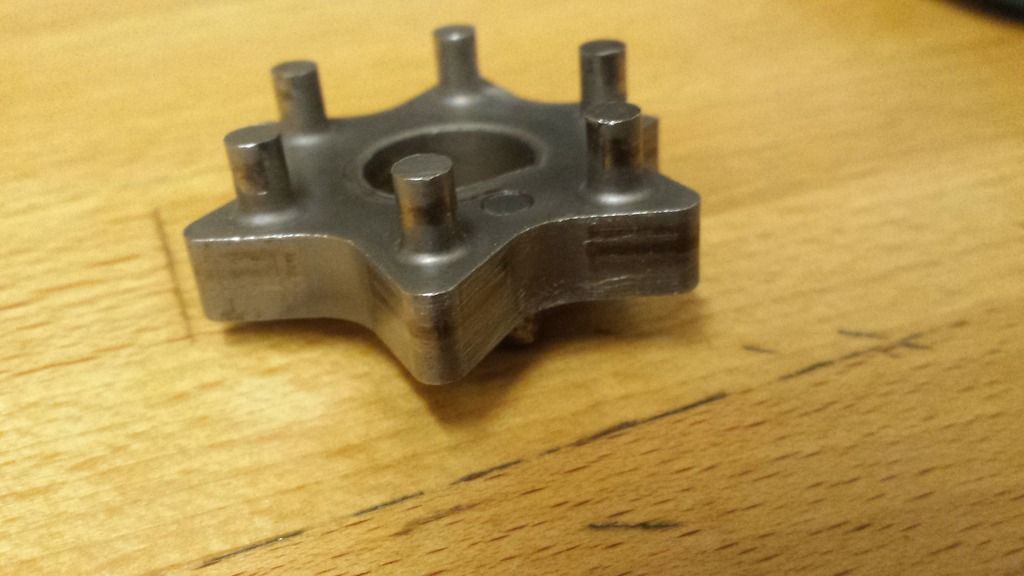 Looks worst than it is, the surface is marked but still fairly smooth to the touch. Still, a bit of emery paper makes it better. There is a pin on the star head that locates in a hole on the drum head, then the cup washer and then a new stainless cap head bolt - M5 12mm shank. I Loctite these in as I don't expect to change it again ! Hi Dusty, Thought I would add this into your thread... When I removed the old selector drum bearing the surface underneath was not as expected! On closer inspection the rough surface looks like the original casting and when it was machined down some of it was left. I don't think it will affect the function of the drum, what do you think? Have you ever come across similar? Sorry, forgot to add photo, doh! Cheers Rich  |
|
|
|
Post by richclare on Mar 3, 2017 21:03:23 GMT 1
There is something delicious about raw aluminium alloy..... yum yum!
|
|
|
|
Post by richclare on Feb 25, 2017 20:40:38 GMT 1
Hi Right, disclaimer first ! I haven't tried this yet - it may end up being too soft - not sure till I try. Basically an offcut of copper pipe, hammered flat at one end;  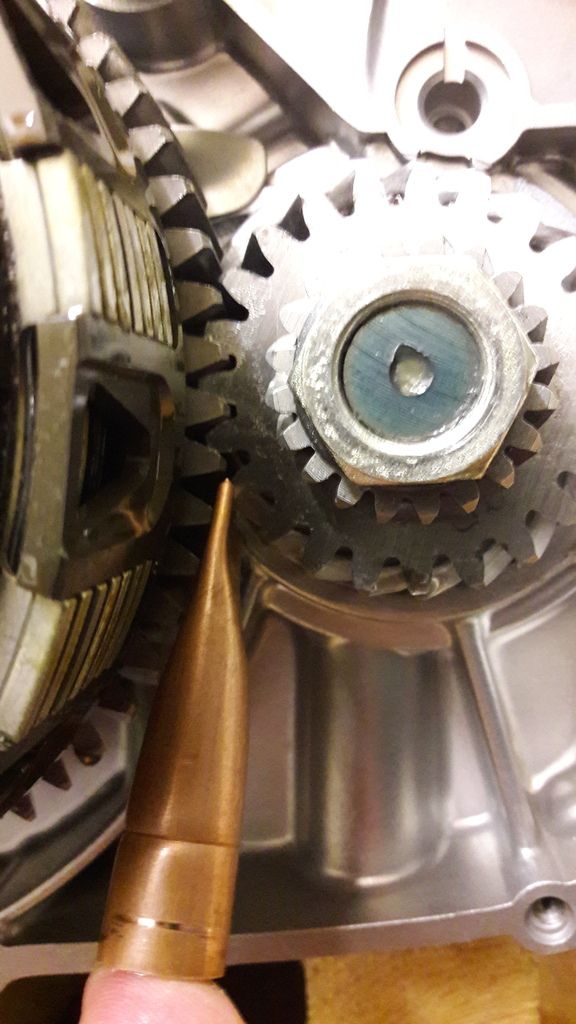 I thought a longer piece of metal would be easier to use than a coin. Plus I'm trying to keep rebuild costs down  I will try it tomorrow and let you know how good/bad it is. Dusty  Looks good to me Dusty. At least you know it's all copper! Good luck with the tightening. Rich |
|
|
|
Post by richclare on Feb 25, 2017 13:36:07 GMT 1
Hi Funny you mention locking the crank. I made a very specialised tool for doing it last night. Many use an old penny or two pence piece but it should be pre 1972 as newer coins have less copper in them so are harder apparantly ! My super special item solves that problem. Will post a pic tonight as im on the train to london for the day. Dusty Can't wait to see your special tool😉 Sorry couldn't resist. |
|
|
|
Post by richclare on Feb 25, 2017 10:41:24 GMT 1
Hi Dusty,
I'm looking forward to seeing your method for locking the crank to tighten the nut. I used the Haynes manual method which I think bent my crank when undoing it😠
I'm sure you may have a tried and tested method....
Looking forward to your weekend progress.
Rich
|
|
|
|
Post by richclare on Feb 17, 2017 18:52:14 GMT 1
Hi Dusty,
Nice to see what's inside the clutch basket!
Great to see your engine build thread is live again. Looking forward to those great pics.
Have a good and hassle-free weekend.
Rich
|
|
|
|
Post by richclare on Jan 1, 2017 12:26:01 GMT 1
Hey Dusty, Your thread was one of the first I came across when I first started on the forum. Your advice helped a lot when I dismantled the engine and when I bought all the bearings, seals and ancillary parts. I even marked the selector forks with insulation tape!  My 350 4L0 is still in the early stages of rebuild at the moment, so the engine build will happen in a couple of months when my fingers can feel the nuts and bolts!! I haven't persuaded my 'beloved' to build on the kitchen table yet.... Happy New Year to you and the Carbon LC is looking beautiful. Rich |
|
|
|
Post by richclare on Jan 1, 2017 11:20:43 GMT 1
Hi Dusty,
That's great news you are doing this.... it will help me with my engine build. Looking forward to those photos and tips.
Cheers,
Rich
|
|
|
|
Post by richclare on Dec 28, 2016 18:46:49 GMT 1
The problem you may have going to LC wheels is your calipers I have ap calipers and they are deeper than standard 4lo calipers so may interfere with the spokes on 4lo wheels. AP Calipers should not interfere with the LC wheel spokes when fitted to standard forks, was a popular upgrade BITD.   OEB Are these both your bikes OEB? Like the yellow and black one..... a lot! Rich |
|
|
|
Post by richclare on Dec 28, 2016 18:42:16 GMT 1
Hi Pete,
Nice bike and I quite like the black wheels as they are!
As Dusty said, it comes down to taste. Dusty's pics also show perfectly the difference and effect between the white and standard colours - personally I like the both, but each gives a certain style. I went through weeks of searching and looking at photos of LC wheels for my current bike!!!! In the end, I decided on standard for my project as it seems to go with most colour schemes and look classic.
Good luck with your choice ....
Rich
|
|
|
|
Post by richclare on Dec 18, 2016 17:44:26 GMT 1
Evenin' all,
I seem to have too much free play at the end of the swing arm after I put it in today. It has a needle roller bearing kit. I took it back out and the play is between the swing arm pivot bolt and swing arm inner sleeve. The bolt is a perfect fit through the frame so that seems in good condition. I packed the inner sleeve with grease and then reassembled everything - better and just a little free play. Is this quite normal?
Cheers
Rich
|
|
|
|
Post by richclare on Dec 18, 2016 10:27:09 GMT 1
Hi Dusty,
That is some list of bolts ! Very useful, thank you very much.
Rich
|
|
|
|
Post by richclare on Dec 17, 2016 23:12:27 GMT 1
Hi Dusty,
Your threads/projects are great fun to read and follow. Always nicely written and full of useful info to help less competent builders, like me!
This current bike looks really nice with nice detailing. Looking forward to the new paintwork.
Just a little question - the allen hex bolts that appear all over the bike are s/s I assume. I would like to do something similar but having problems identifying the types as I live in France. Are they all M** numbered threads?
Have a warm weekend in your bike 'snug'.
Cheers
Rich
|
|
|
|
Post by richclare on Dec 16, 2016 20:04:06 GMT 1
OK now everyone is just taking the pi**
|
|
|
|
Post by richclare on Dec 16, 2016 19:22:34 GMT 1
Have to wait til next Friday :-(
Dusty, not only do you have some rather nice bikes, you have starwars people as friends ! Sometimes life just isn't fair.....
Have a good weekend you all watching the film.
Rich
|
|
|
|
Post by richclare on Dec 3, 2016 17:40:02 GMT 1
Hi Veg,
Now they are some very nice presents that Santa brought you! Tank looks beautiful, even without paint!
Can you reveal the colour scheme?
Rich
|
|
|
|
Post by richclare on Nov 19, 2016 10:05:21 GMT 1
That's a good idea to make a 'bolt' pin ..... thanks 👍
|
|
|
|
Post by richclare on Nov 19, 2016 9:39:53 GMT 1
Your pin is clearly visible in your photo? Jon Hi Jon, That's a very kind offer. On this occasion I think it will be easier to do it myself as the postage to France might make it the most expensive pin in history Thanks again for the offer. Have a good weekend. Rich |
|
|
|
Post by richclare on Nov 18, 2016 16:24:58 GMT 1
Hi OEB,
Perfect photo, thank you! My footpeg is missing it's pin so I can ask a friendly welder to attach one for me. Thanks again.
Rich
|
|
|
|
Post by richclare on Nov 18, 2016 11:48:55 GMT 1
Hi, I have a RHS footpeg that refuses to stay up while kickstarting. I am guessing there is a spring involved but can't find any detailed photos of that area and what's missing. Could anyone help with a photo ? Many thanks, Rich  . |
|
|
|
Post by richclare on Nov 17, 2016 16:32:29 GMT 1
Hard to beat an Rd400 I bought a long time ago...  The leaflet that accompanied the seat reads: "A sumptuous "Chesterfield" inspired creation from the Stevie Wonder Design studios, crafted from the finest leatherette, and sculpted by the craftsmen at the RNIB, this seat is the last word in comfort. The deep buttoned pockets are handy for keeping loose change, sandwiches and spare spark plugs in for your journey and we guarantee our seat will long outlast your shitty 2 stroke" !! There was also a disclaimer that reads " We accept no liability for Testicular injury from hard braking should your knackers be caught in one of the "deep buttoned pockets". Please wear tight trousers when using this Chesterfield seat" Don't know if the firm are still in existence, but I've never seen another like it. Regards Dusty  Hi Dusty, You just made my day, thank you! I think I've just wet myself..... NURSE! |
|
|
|
Post by richclare on Nov 16, 2016 8:44:54 GMT 1
My other half said "it looks like a Subway!". Maybe the owner was in the restaurant business.
|
|
|
|
Post by richclare on Nov 13, 2016 18:54:13 GMT 1
I got the frame back from being powder - coated this week. Very pleased with the finish and the guy was a bike nut too! I had some time this weekend to start putting things back together, makes a pleasant change from dismantling!.... Also received a rather nice delivery from Arrow (I know it's only a pump, but it's a work of art).     Rich |
|
|
|
Post by richclare on Nov 12, 2016 18:19:34 GMT 1
Hi Everyone, Thanks for your friendly words of encouragement, much appreciated. Can anyone confirm if the dog gears, on my driveshaft, are in the correct orientation or not? In my photo they are in line but in other photos I've studied they are offset. Does it actually matter? Cheers Rich  |
|
|
|
Post by richclare on Nov 10, 2016 10:36:53 GMT 1
Hi Dave,
Not that far from you.... 13 bouche du Rhône.
Cheers, Rich
|
|
|
|
Post by richclare on Nov 5, 2016 22:51:25 GMT 1
Salut Xavier,
Thanks for the info. Monsieur Arrow has renovated my pump and sent another worm drive to try. It should arrive next week so will know which one works. Yes my bike is a 1980 model.
Thanks again for the info. I have visited your site already ☺
Do you live in France?
Cheers
Rich
|
|
|
|
Post by richclare on Oct 26, 2016 18:43:57 GMT 1
Overall dimensions 15.4cm x 4.0cm at centre 4.1cm at edges
Hole centres 9.2cm apart. Holes sit centre of both dimensions above.
Round headed securing screws 1.5cm x M? (not sure, would guess at M4)
If you need a photo, let me know.....
Rich
|
|
|
|
Post by richclare on Oct 23, 2016 18:47:21 GMT 1
Ev'nin chaps, before I take the plunge, has anyone had experience with matt black frame painting? Does it look OK or just plain stupid? More importantly does it show up imperfections more than satin or gloss? Would appreciate your thoughts.
Rich
|
|
|
|
Post by richclare on Oct 22, 2016 17:15:21 GMT 1
 Had the frame sand-blasted this week and will hopefully get it sprayed next week. Thinking about doing it matt black so the frame sits back and lets the shiney bits shine☺. Swing arm will be the same but maybe powder chrome - it might be a flip of a coin to decide. Rich |
|
|
|
Post by richclare on Oct 21, 2016 17:41:20 GMT 1
Had a go on one of those a long time ago.... definitely brings a smile to your face😊😊😊
Are you going for standard or custom colour scheme? Pepsi or Shirley perhaps 😉.
Have fun.
|
|


