|
|
Post by mak595 on Nov 17, 2018 7:59:51 GMT 1
Great pics and detail, my stuck in gear PV is turning up today so the gear selector pics could be very helpful !
|
|
|
|
Post by dusty350 on Nov 17, 2018 9:22:27 GMT 1
Hi Yep, check out your selector shaft and end of the drum first, otherwise you'll need to look at the forks which means cases apart, but that may be prudent anyway. Try spinning the clutch (gear clusters) when you try to change the gear - a spinning engine helps. Let us know what you find  Dusty  |
|
|
|
Post by tony1964 on Nov 17, 2018 11:24:07 GMT 1
Yet another well illustrated engine rebuild, you must be able to do these with your eyes closed by now Dusty.  Keep up the good work. Tony |
|
|
|
Post by dusty350 on Nov 17, 2018 19:08:35 GMT 1
Hi Tony I build every one like it's the first !! Triple check everything - a bit OCD really but cant help it. That's why they take so long !! I drove up to PJME on Wednesday to pick up my new Lc crank, rebored barrels and my Pv crank that they trued for me for next years project ! The crank sits into the cases easily, with the new crank seals fitted. I have smeared red rubber grease on the inside lip of the seals, and it's worth remembering the "castellations" on the clutch side seal face into the engine/bearing. Only use genuine Yam seals here - they are critical to safe and reliable running of the engine, and a pair are approx. £26.00 so not worth scrimping; 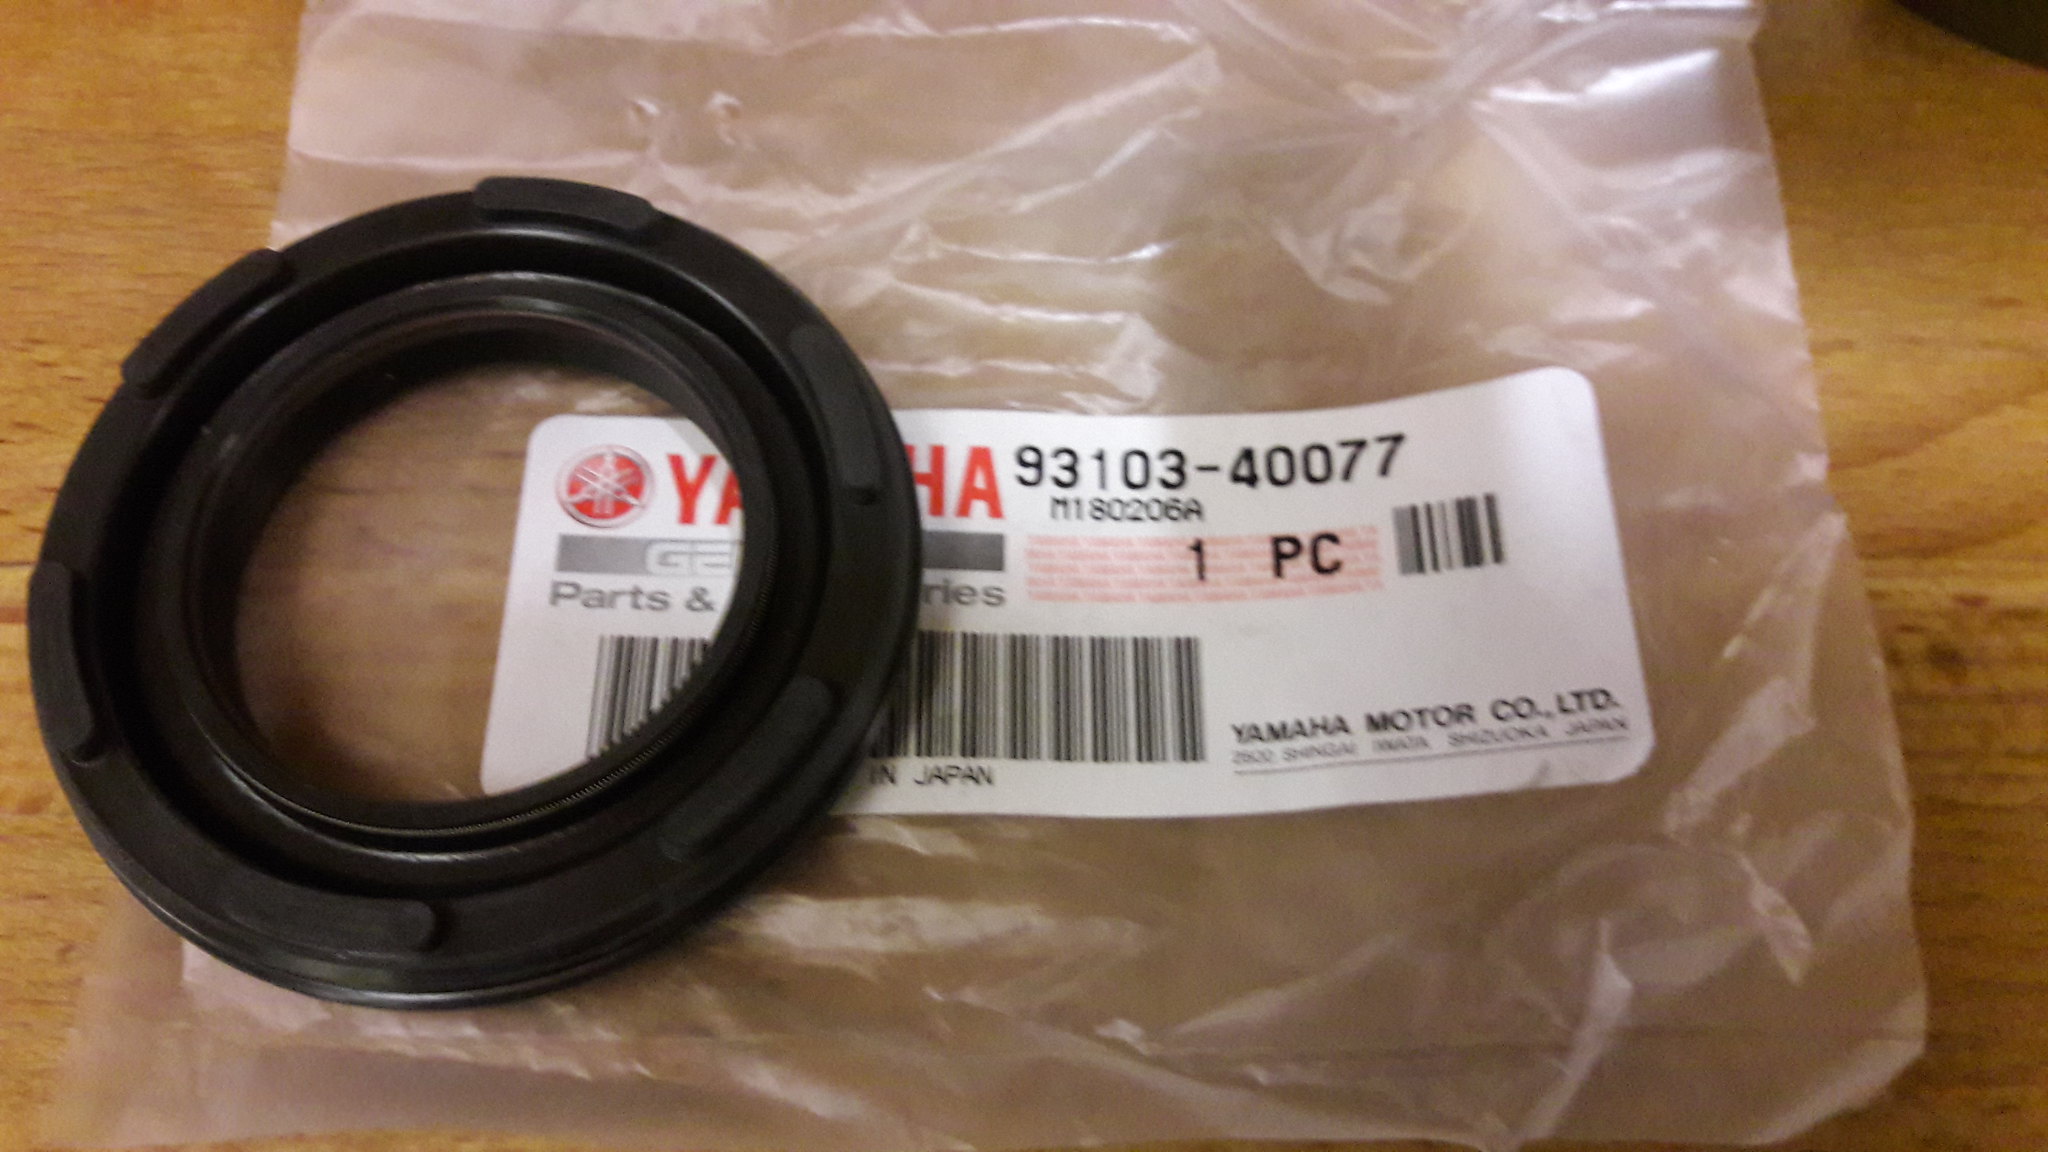 20181117_124319 20181117_124319 by David Miller, on Flickr  20181117_124249 20181117_124249 by David Miller, on Flickr With the crank sat in the case you will find it will rock a bit. The centre lab seal - the silver ally part, needs to seat in the case as it's an interference fit. I gently tap with a wooden drift. Also make sure the pips on the bearings sit in the little recesses in the front of the case; 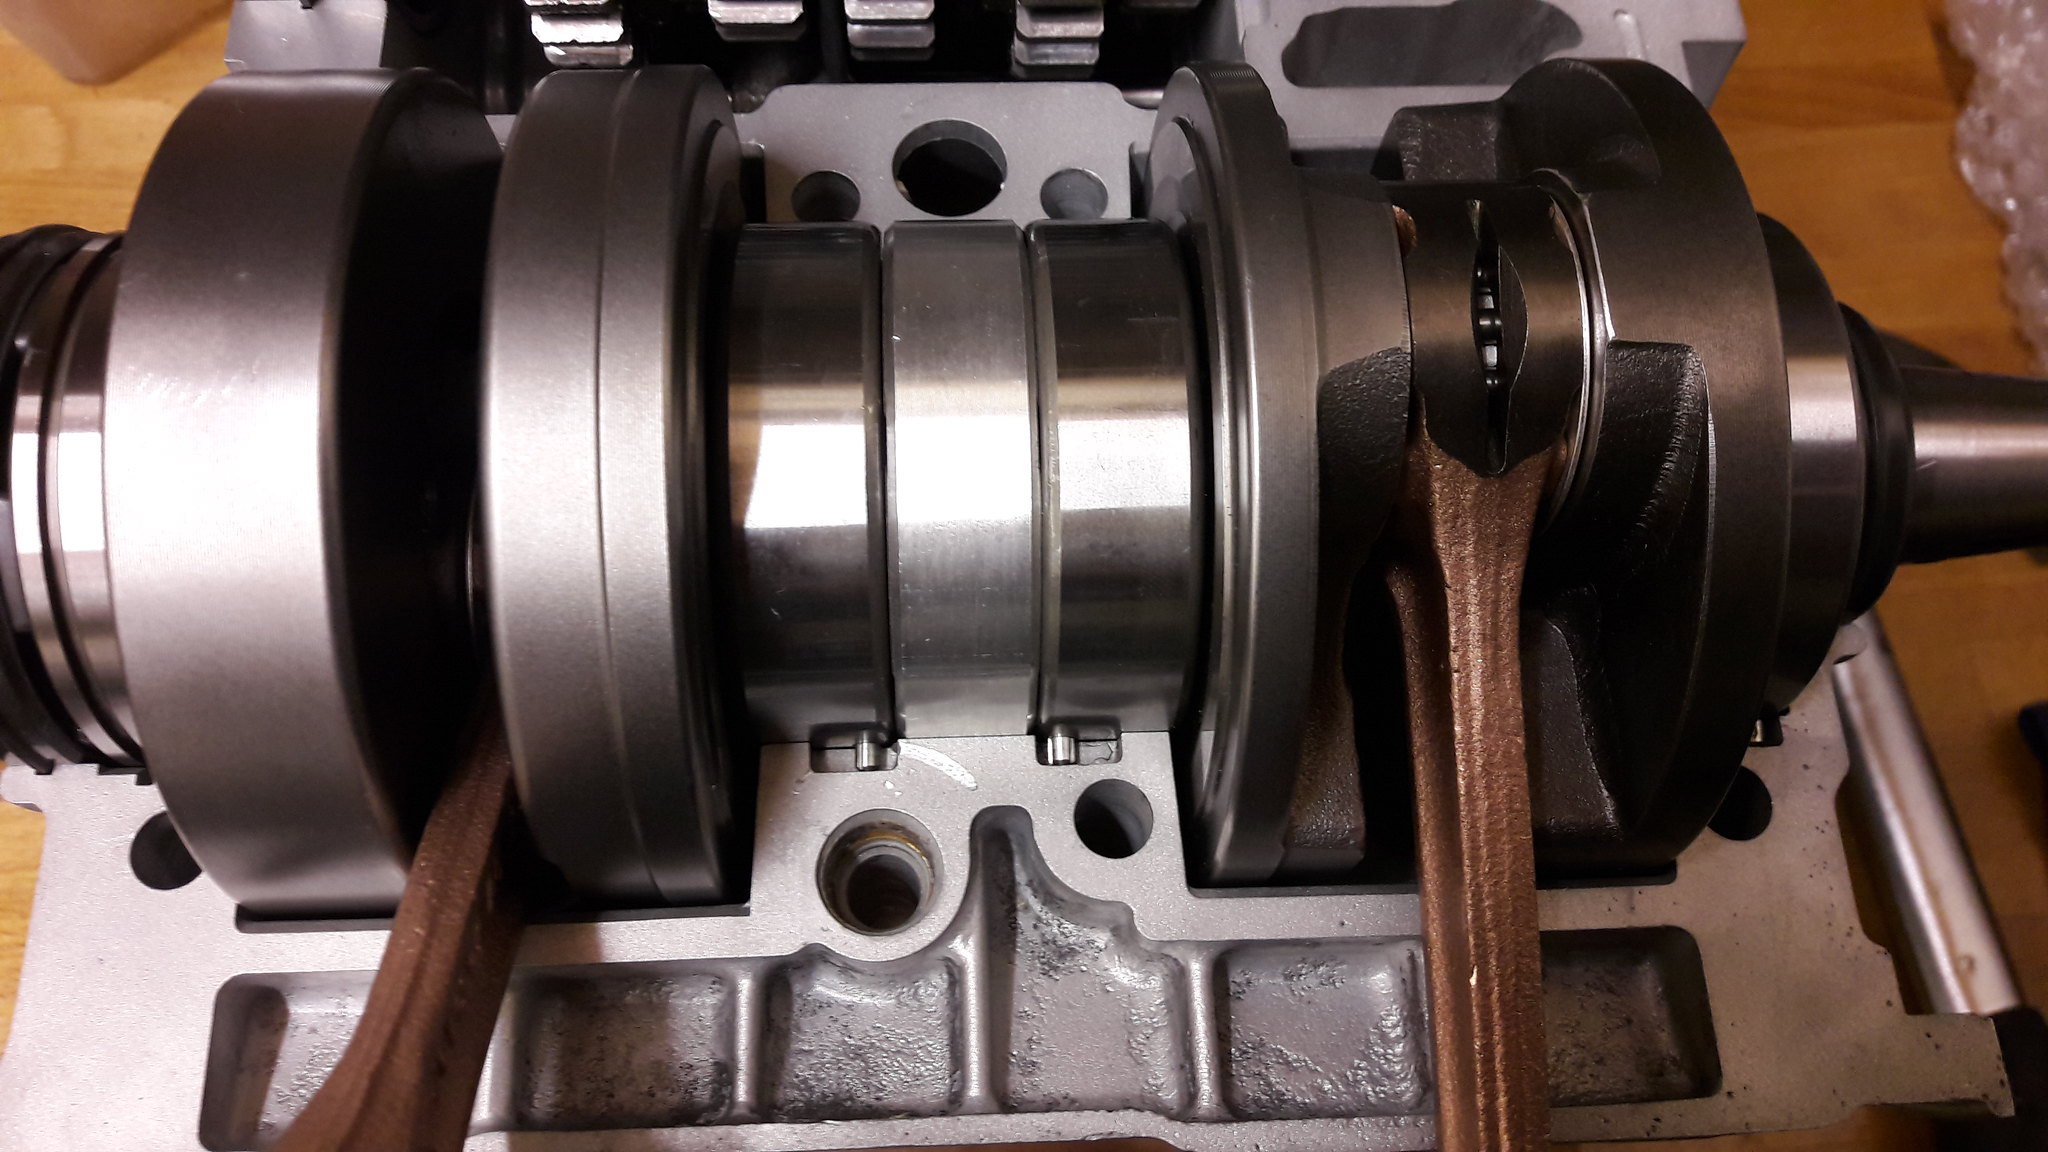 20181117_124844 20181117_124844 by David Miller, on Flickr 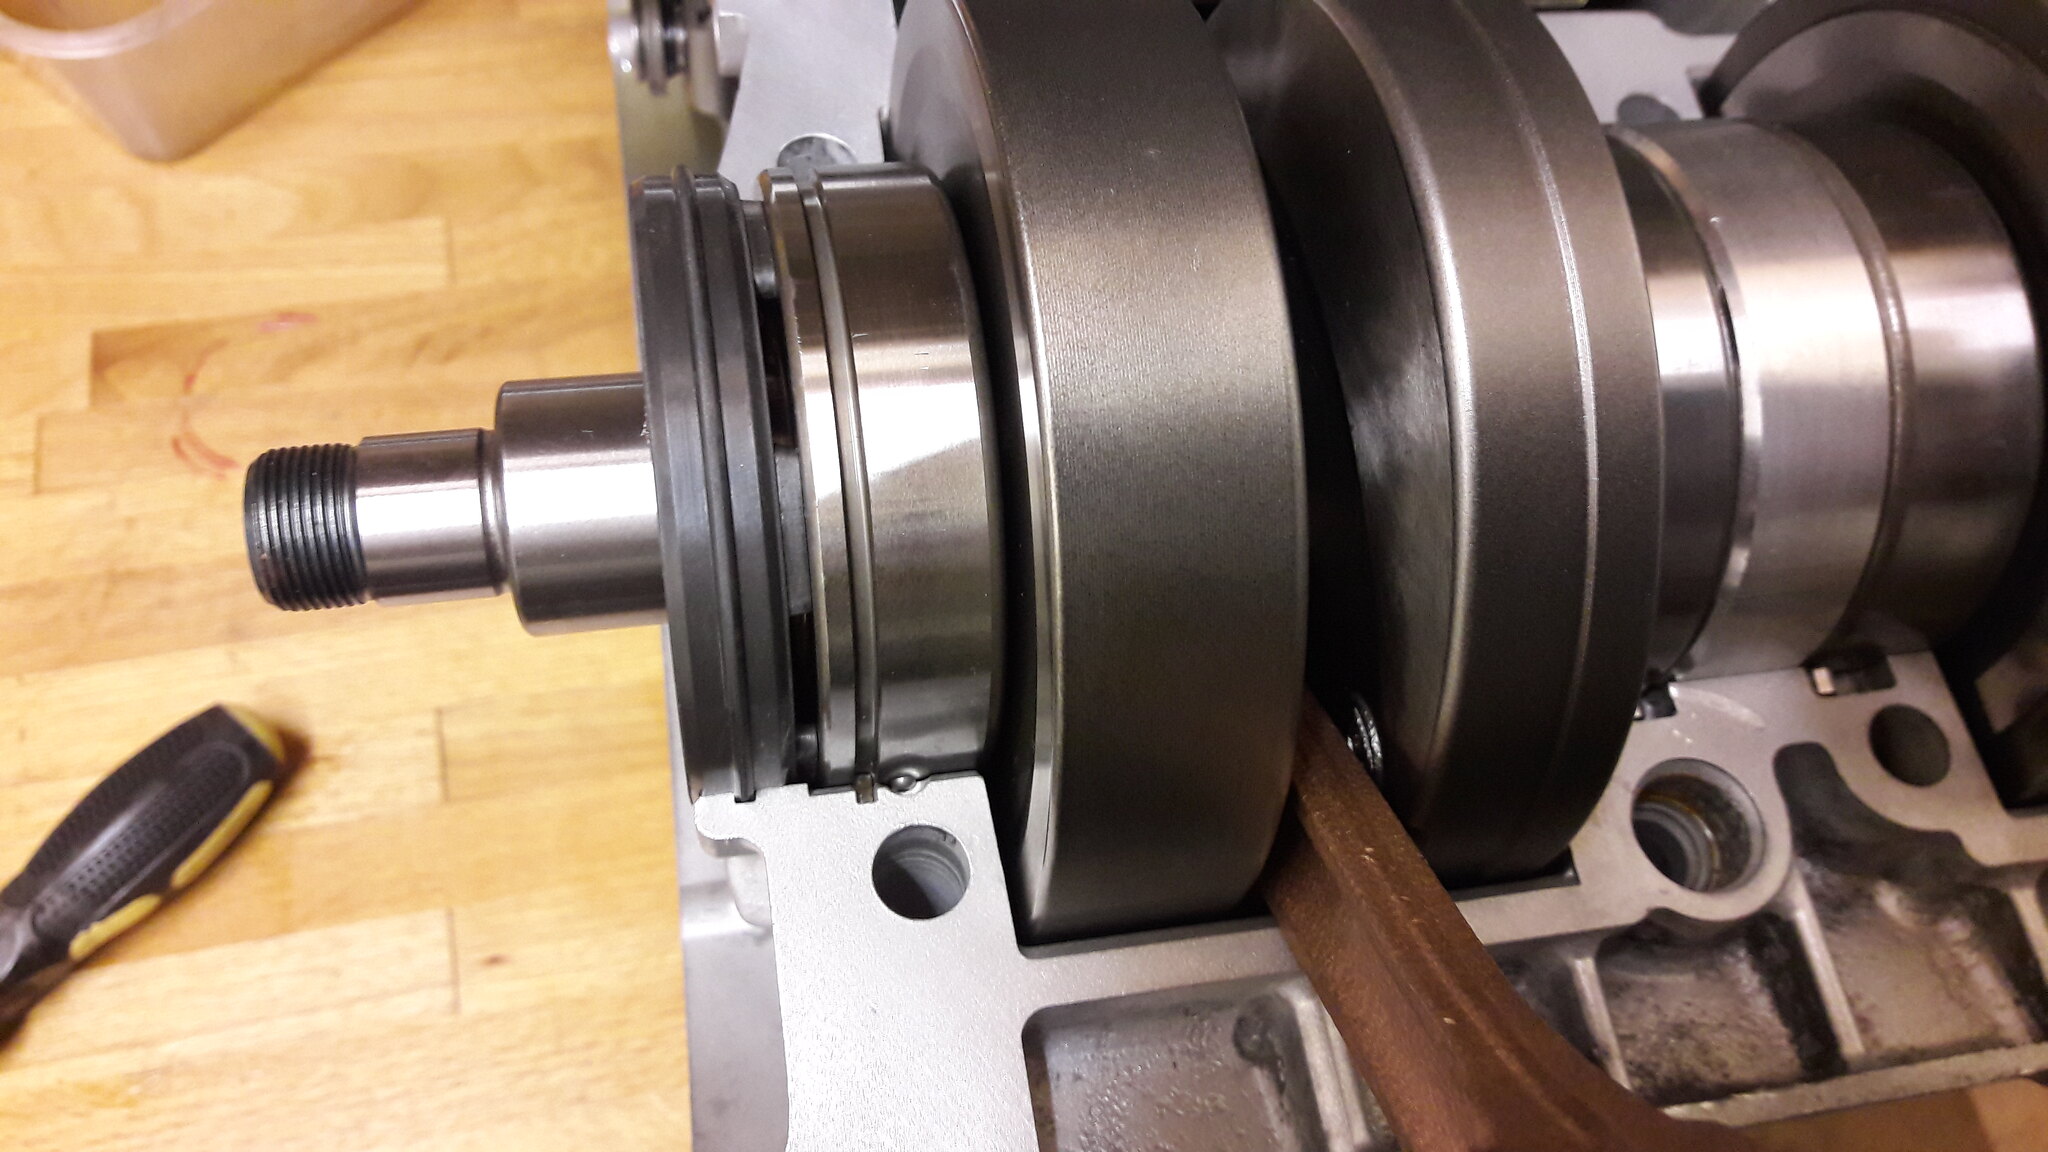 20181117_124850 20181117_124850 by David Miller, on Flickr Once I'm happy I fit the top case and tighten it up. I do this to check everything spins as it should with no binding. Once happy, I undo it all again and remove the top case (told you I was OCD !!) Then you can apply the case sealant - I use Threebond 1104, but I have also used 1194 and 1204 with equal success. I didn't take a pic but this gives you an idea of where to apply it; 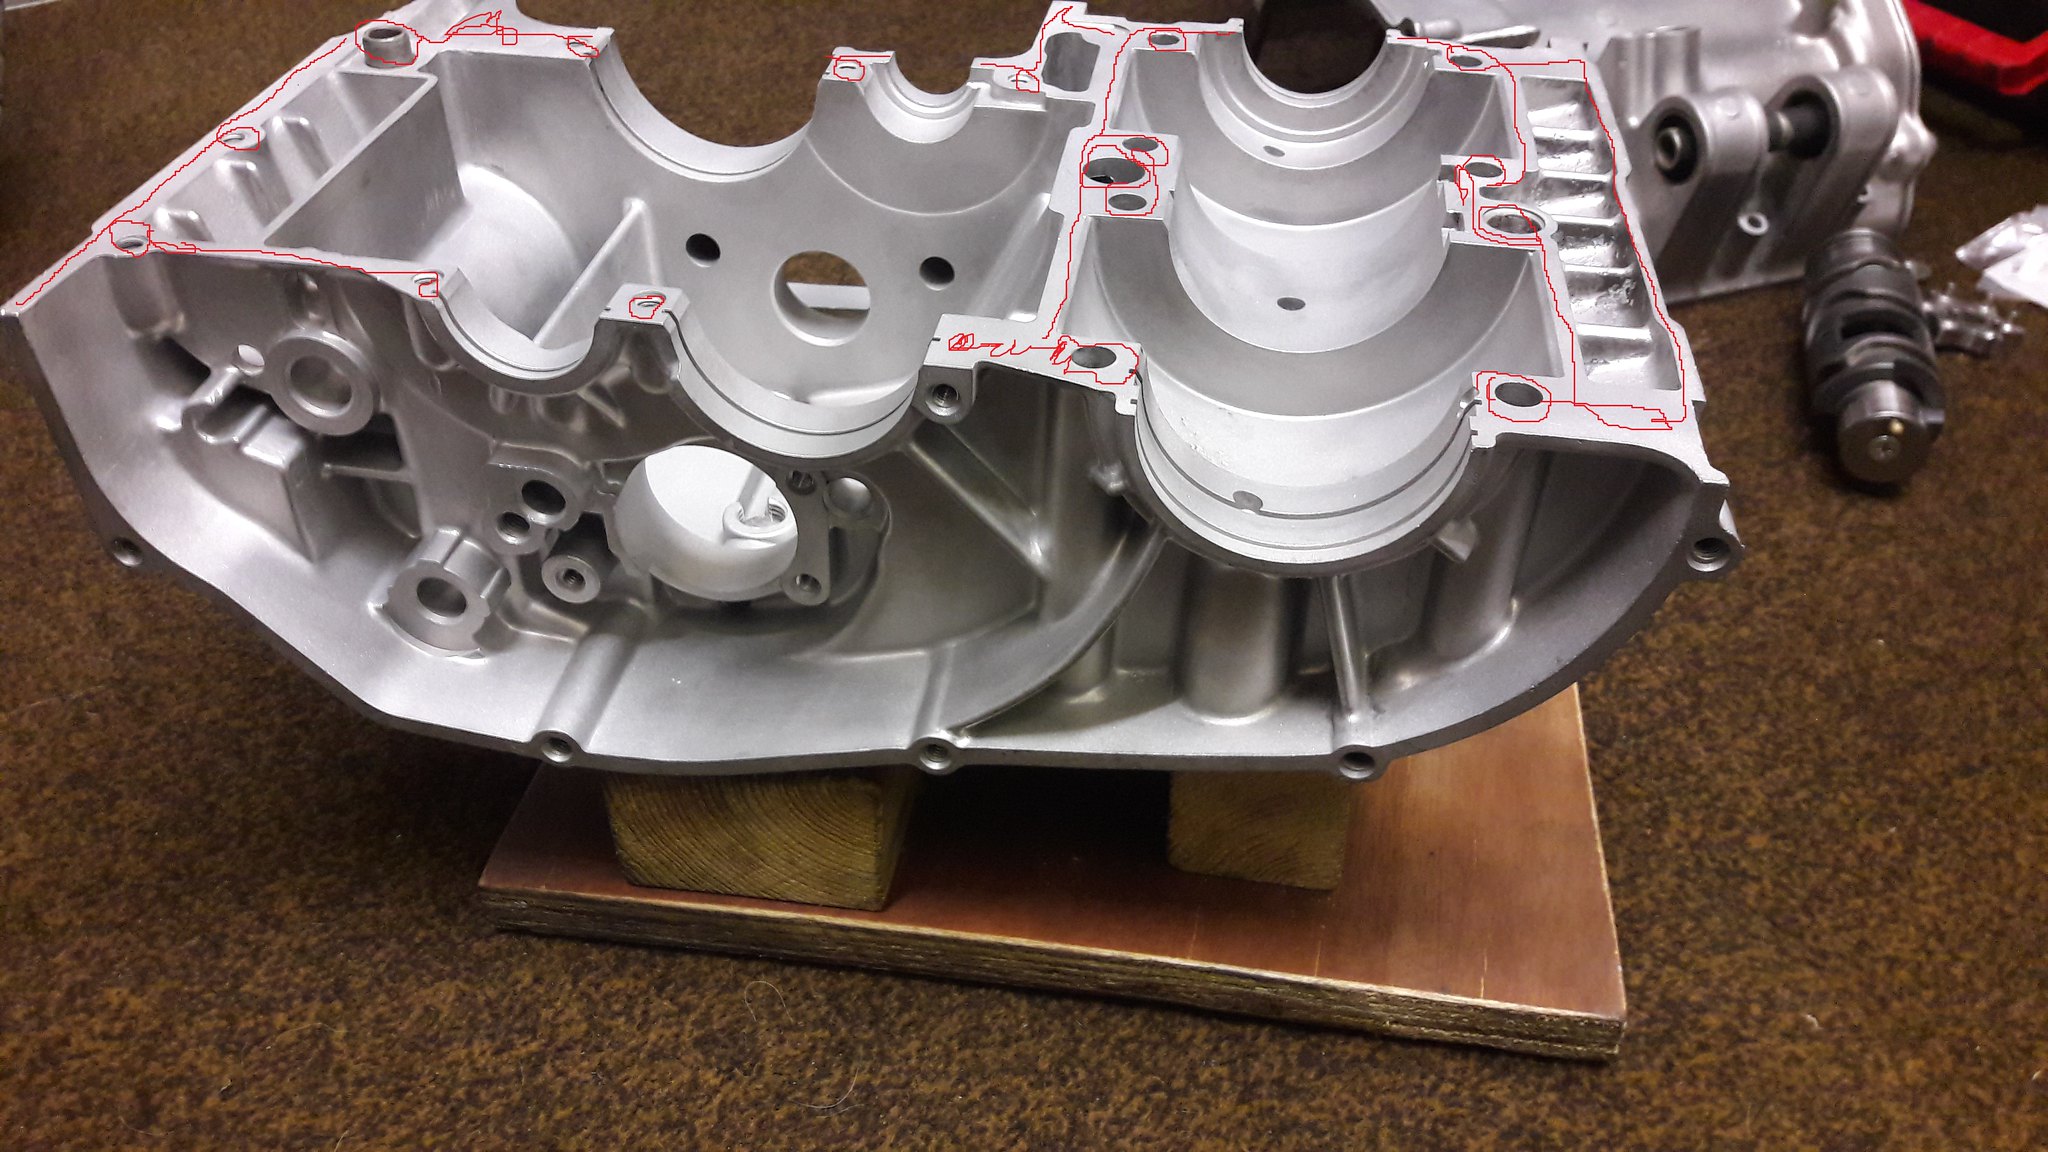 20181019_091649 20181019_091649 by David Miller, on Flickr It's messy stuff to apply - quite "stringy" that's why I do a dry run first. Once the cases are together you can fit new nylocs and washers under the engine and tighten up in sequence - the numbers 1-8 are embossed on the case underneath. Then you can do the top bolts which again, are in numerical order 9-16, but just before I tighten those I push home the clutch pushrod seal and output shaft seal as they push in a little easier at this point; 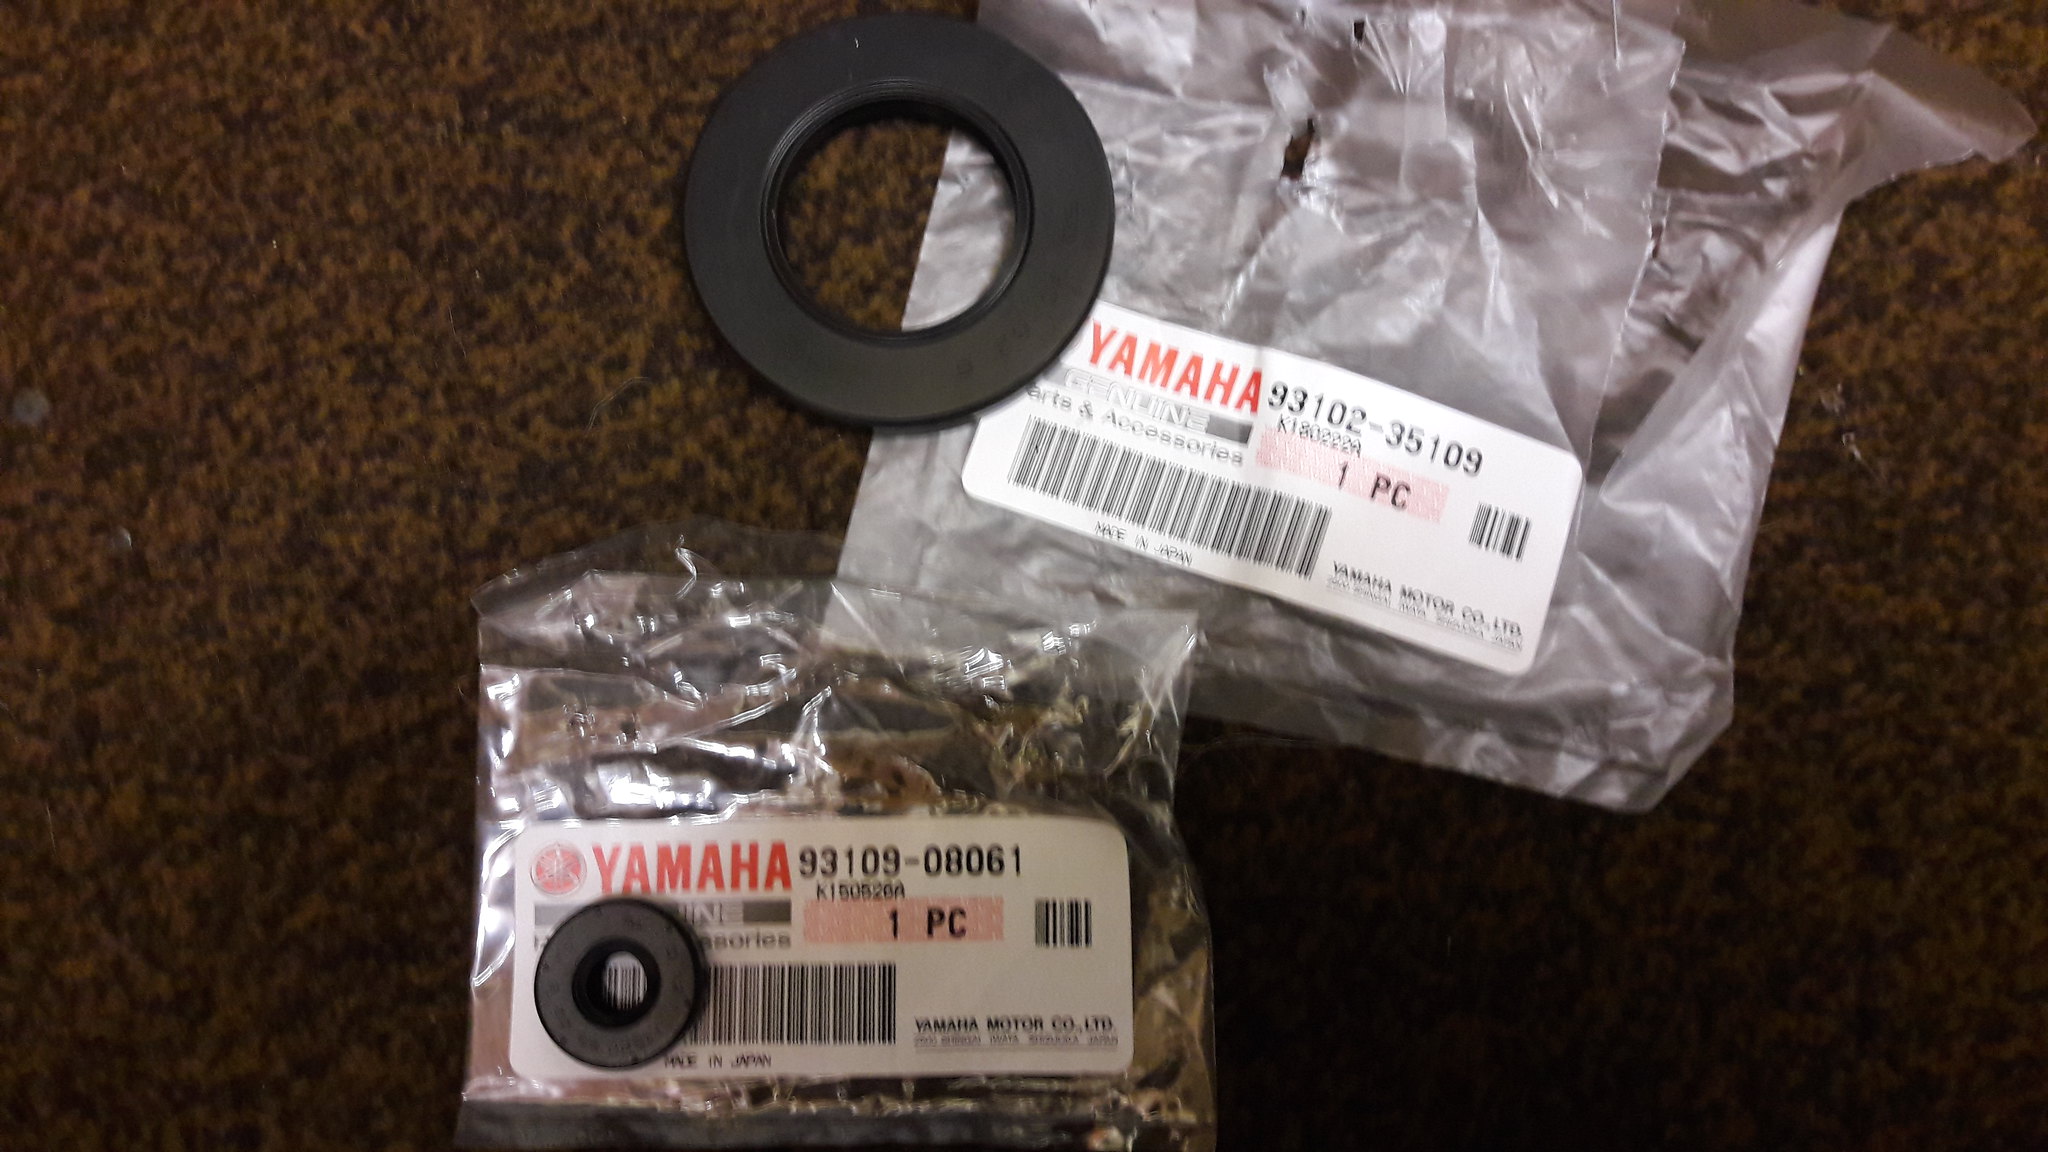 20181117_132233 20181117_132233 by David Miller, on Flickr Push rod seal is £3.11, and the output shaft seal is £8.18. So with everything bolted up tight, the clutch side will look like this; 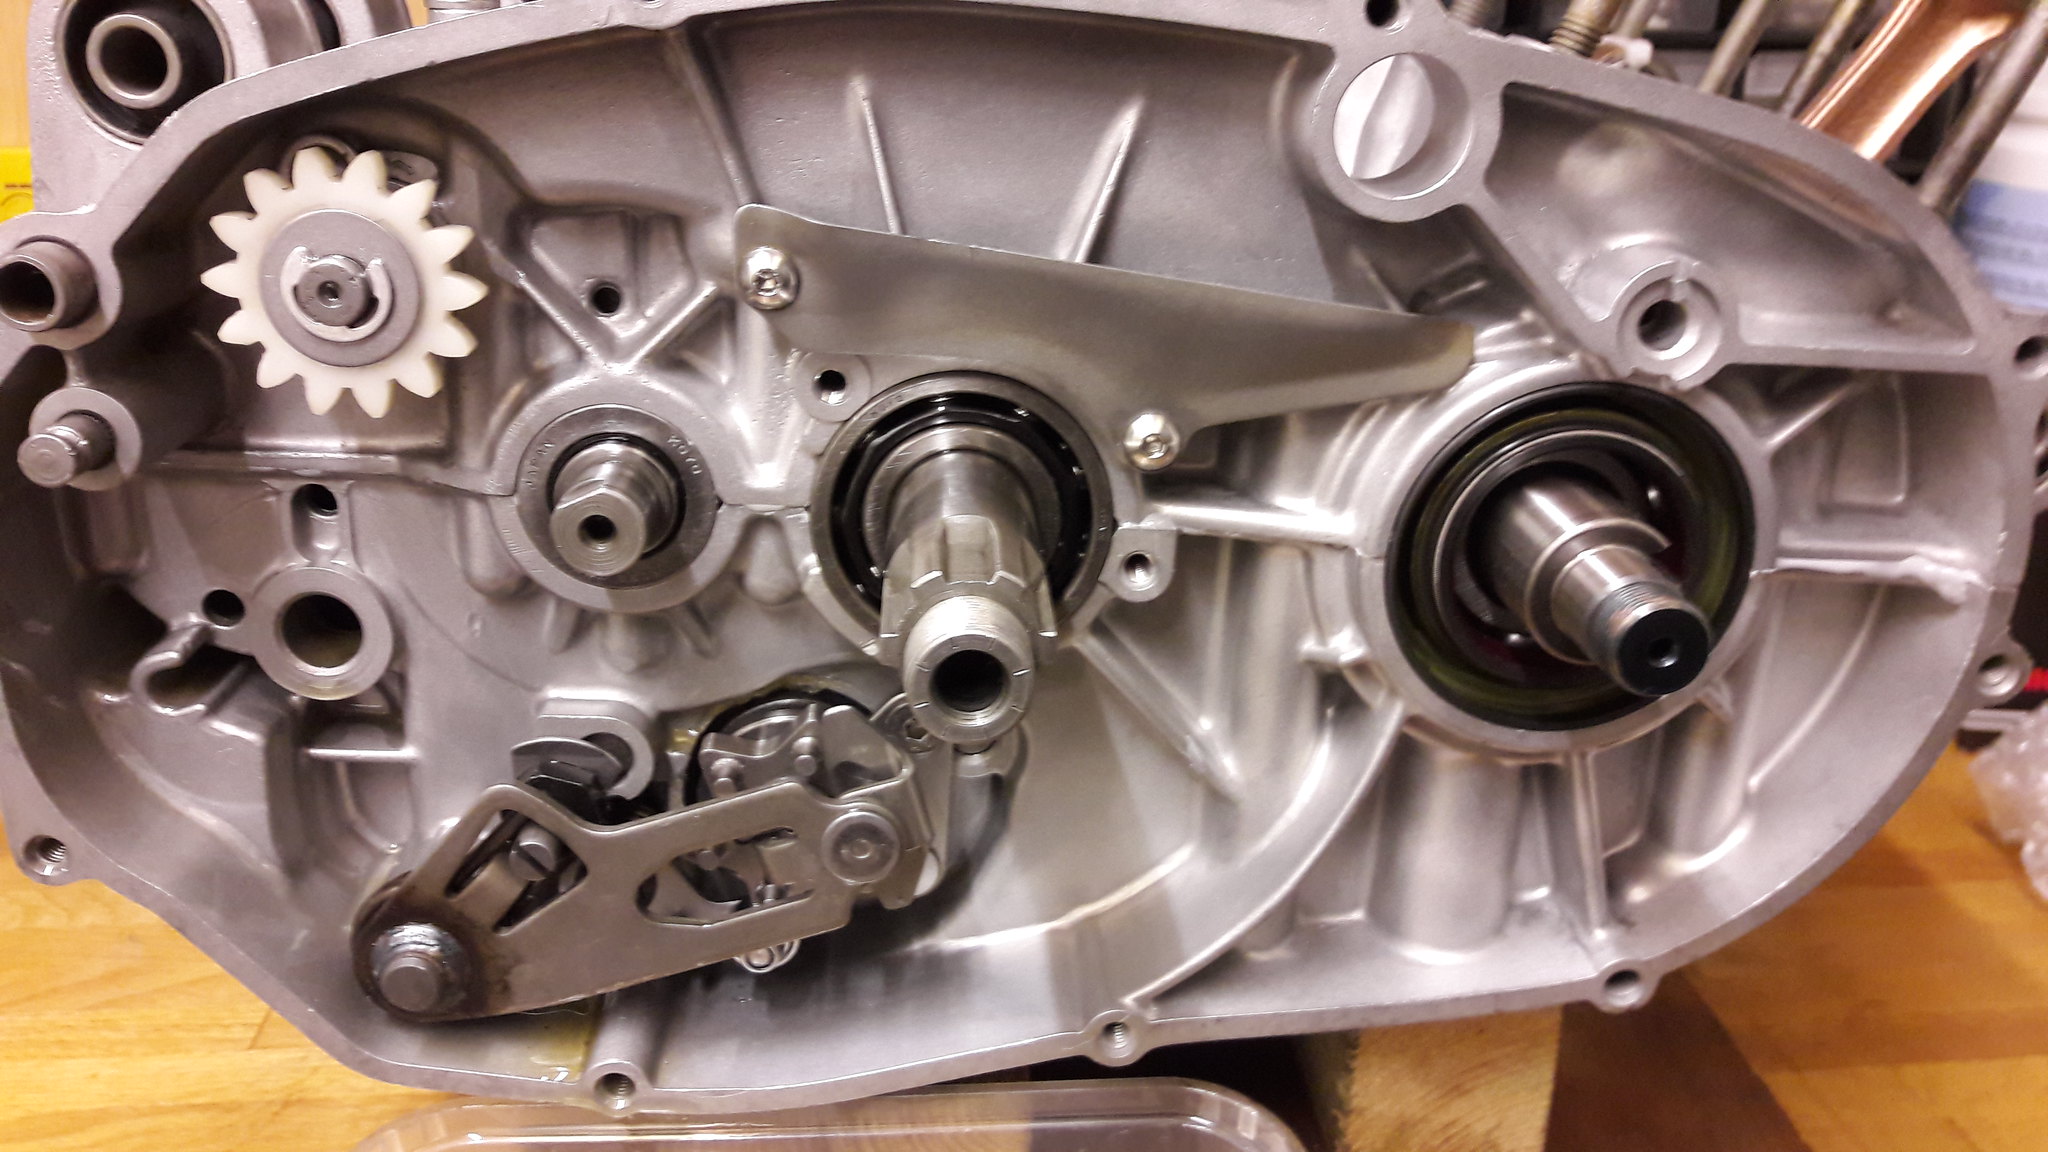 20181117_140139 20181117_140139 by David Miller, on Flickr And just to add, whilst walking the dogs during a break in the engine build this afternoon, I rescued a baby "Hoglet"; 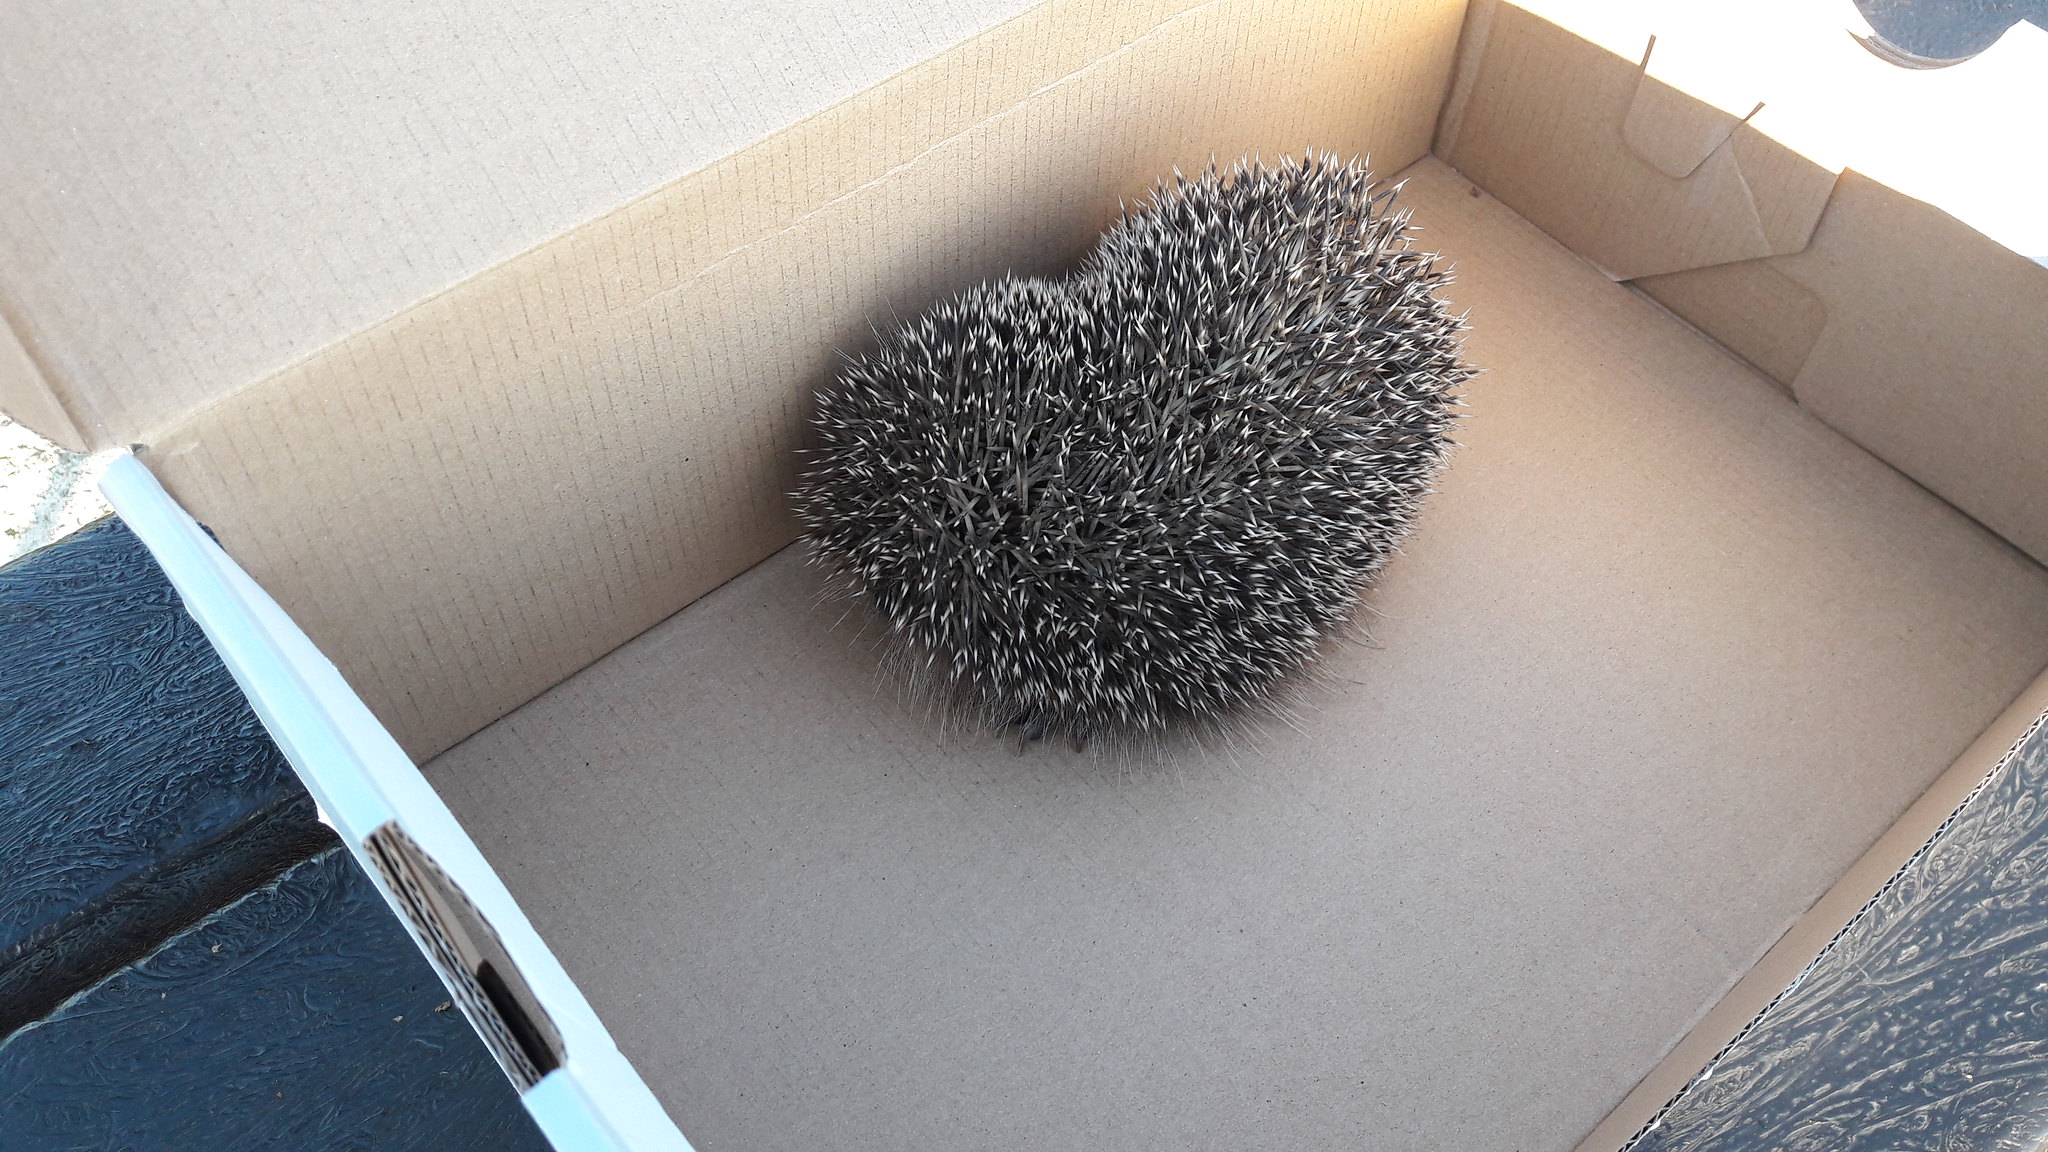 20181117_142913 20181117_142913 by David Miller, on Flickr Earnt some "Karma" points hopefully  Dusty |
|
|
|
Post by panzermatt on Nov 17, 2018 19:14:58 GMT 1
why is the pip on the large seal side bearing smaller than the others?
|
|
|
|
Post by bezzer on Nov 17, 2018 22:04:12 GMT 1
Nice one on the hedgehog rescue mate 👍🏻 The poor little blighters are in decline ☹️
|
|
|
|
Post by mak595 on Nov 17, 2018 23:28:28 GMT 1
Hi Yep, check out your selector shaft and end of the drum first, otherwise you'll need to look at the forks which means cases apart, but that may be prudent anyway. Try spinning the clutch (gear clusters) when you try to change the gear - a spinning engine helps. Let us know what you find  Dusty  Dusty, sorted it, the gear lever had no bolt so spinning on splines, i've started a build thread  |
|
|
|
Post by donkeychomp on Nov 17, 2018 23:35:18 GMT 1
When I was about 8 I found a wee hedgehog in the garden. Clearly in pain with a huge growth on it's back. My mum came out and we made a little hedgehog bed for it and she called a vet. No idea what he did but about 2 weeks later the growth had gone but the hog didn't want to leave. Then we found out why. It was female and gave birth! So the mum tended to the babies whilst we watched and fed them as best we could. Started leaving the door ajar at night to see if they would leave but they didn't for ages. Guess the warmth and free food was too tempting. The mum even let us pick up the little ones...I was very surprised at that. Eventually they did go one evening and we thought that would be the last we saw of them. But no. Every evening the family would park itself outside the back door and await me armed with milk and bread!
Great Karma Dusty!
Alex
|
|
|
|
Post by marsbar350 on Nov 17, 2018 23:37:41 GMT 1
im sure little beauts hibernate
|
|
|
|
Post by earthman on Nov 18, 2018 10:42:18 GMT 1
When I was about 8 I found a wee hedgehog in the garden. Clearly in pain with a huge growth on it's back. My mum came out and we made a little hedgehog bed for it and she called a vet. No idea what he did but about 2 weeks later the growth had gone but the hog didn't want to leave. Then we found out why. It was female and gave birth! So the mum tended to the babies whilst we watched and fed them as best we could. Started leaving the door ajar at night to see if they would leave but they didn't for ages. Guess the warmth and free food was too tempting. The mum even let us pick up the little ones...I was very surprised at that. Eventually they did go one evening and we thought that would be the last we saw of them. But no. Every evening the family would park itself outside the back door and await me armed with milk and bread! Great Karma Dusty! Alex Great story that, well done mum. Generally you know where you stand with animals, food, shelter and a bit of attention is all they need. I can understand why some say that they prefer them to dealing with other humans. |
|
|
|
Post by dusty350 on Nov 18, 2018 11:04:45 GMT 1
"Dave", the Hoglet, is with the Vet, so fingers crossed for him/her. Being out in the open in the middle of the day indicates a problem/illness though. I will keep you posted !!  Back to the engine. Next part to fit is the bearing retainer plate; 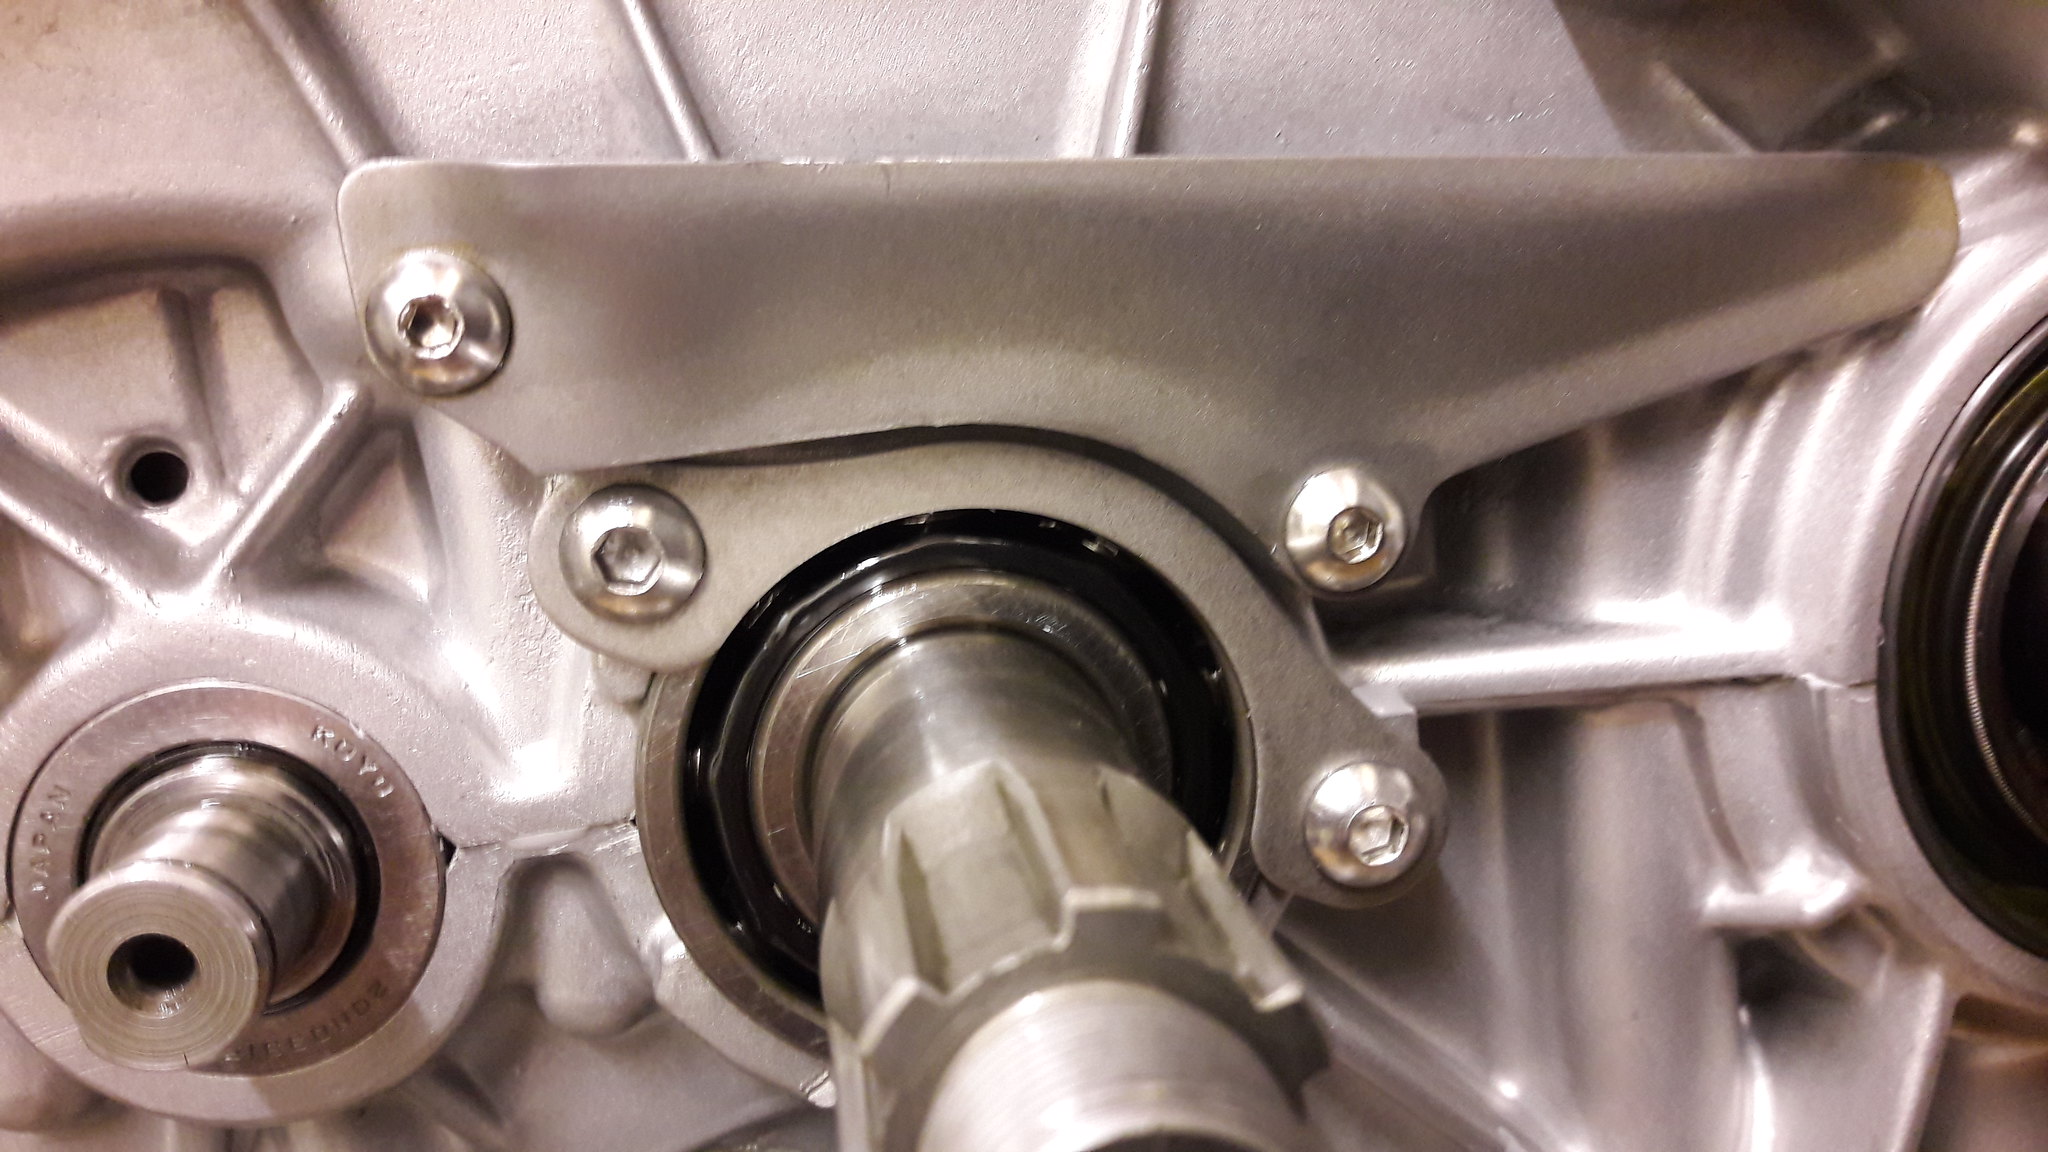 20181117_164914 20181117_164914 by David Miller, on Flickr Then, the first of the 2 clutch basket shims;  20181117_164935 20181117_164935 by David Miller, on Flickr Then the clutch drum spacer; 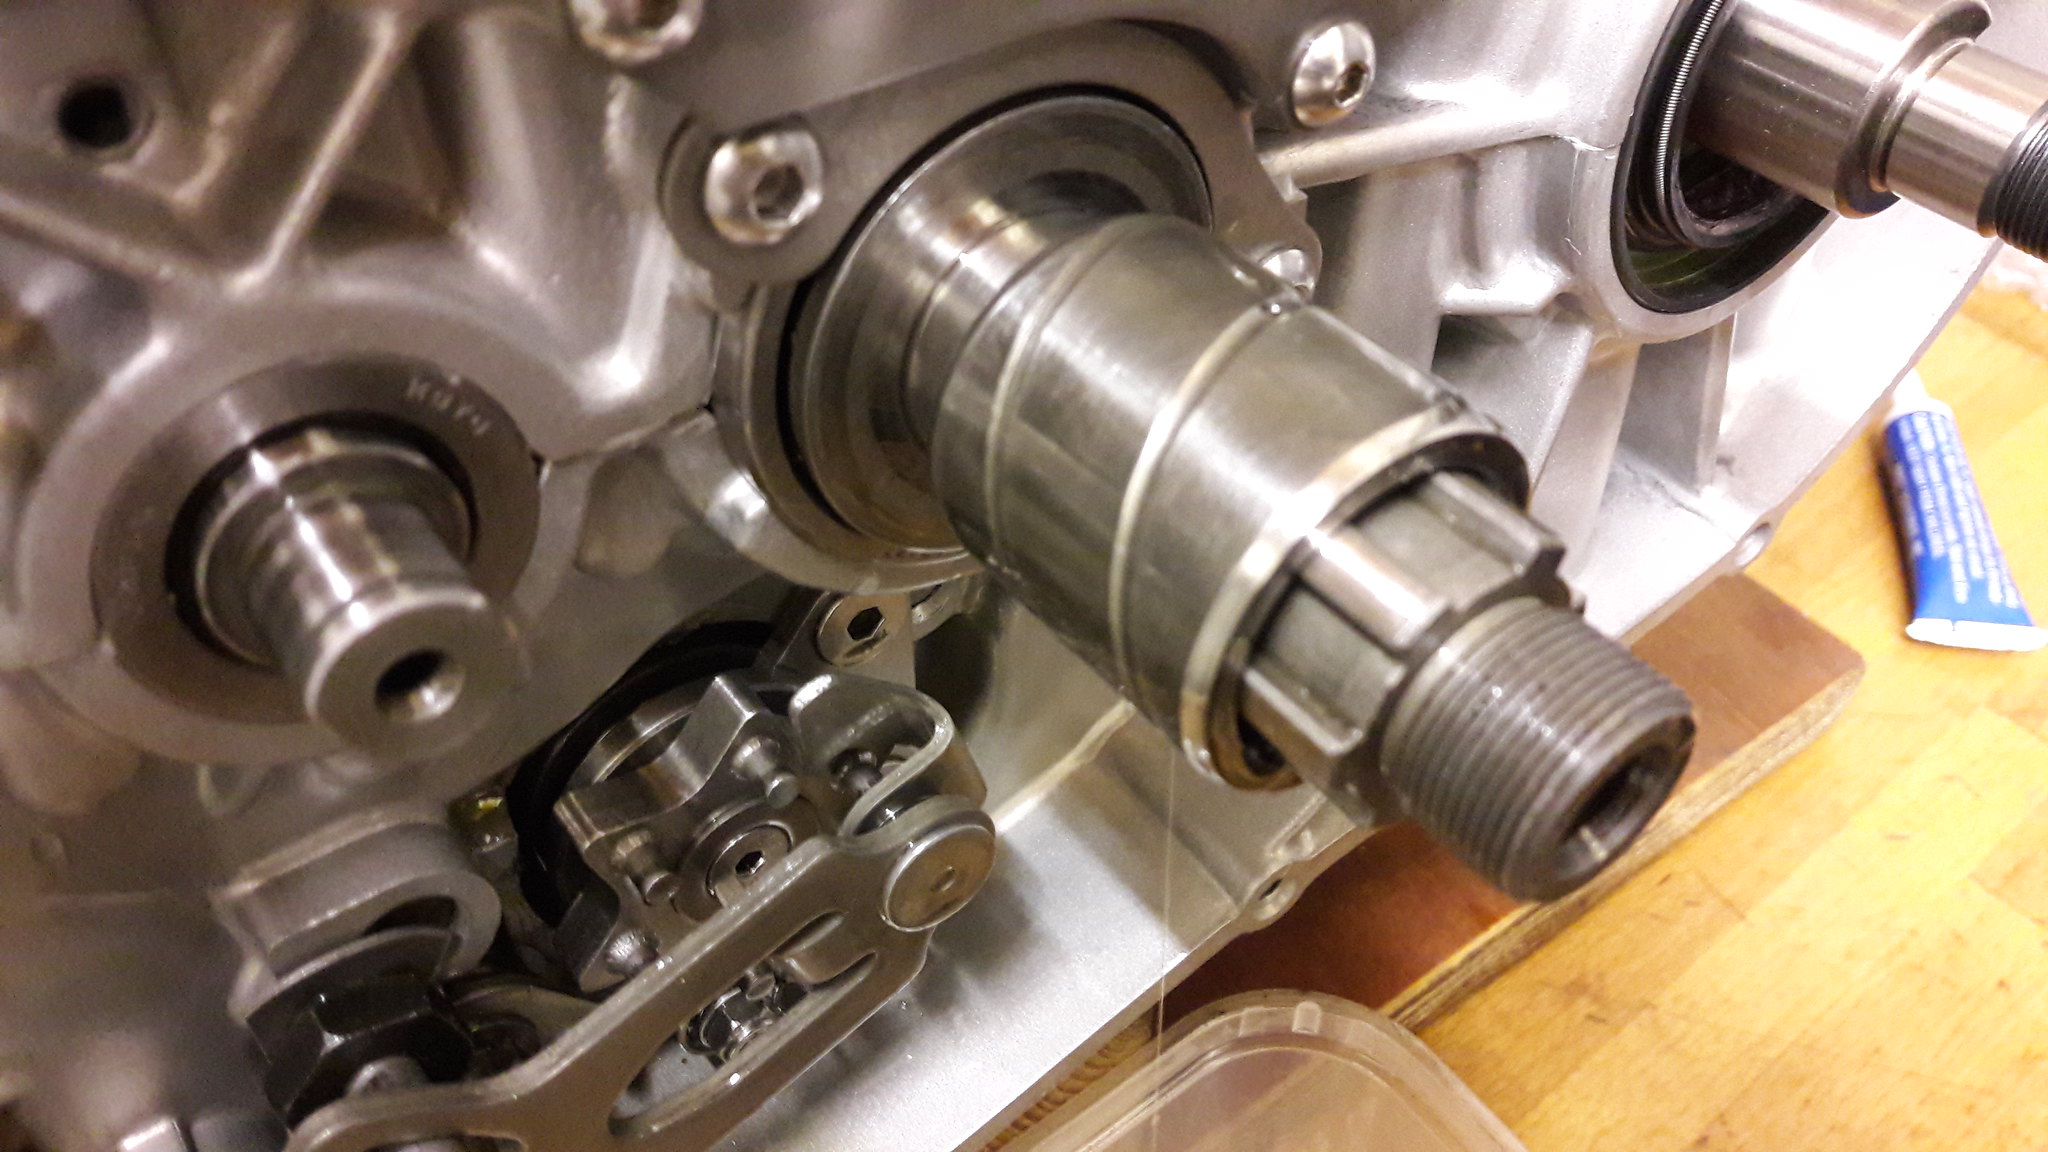 20181117_165023 20181117_165023 by David Miller, on Flickr The small shim that goes behind the idler gear; 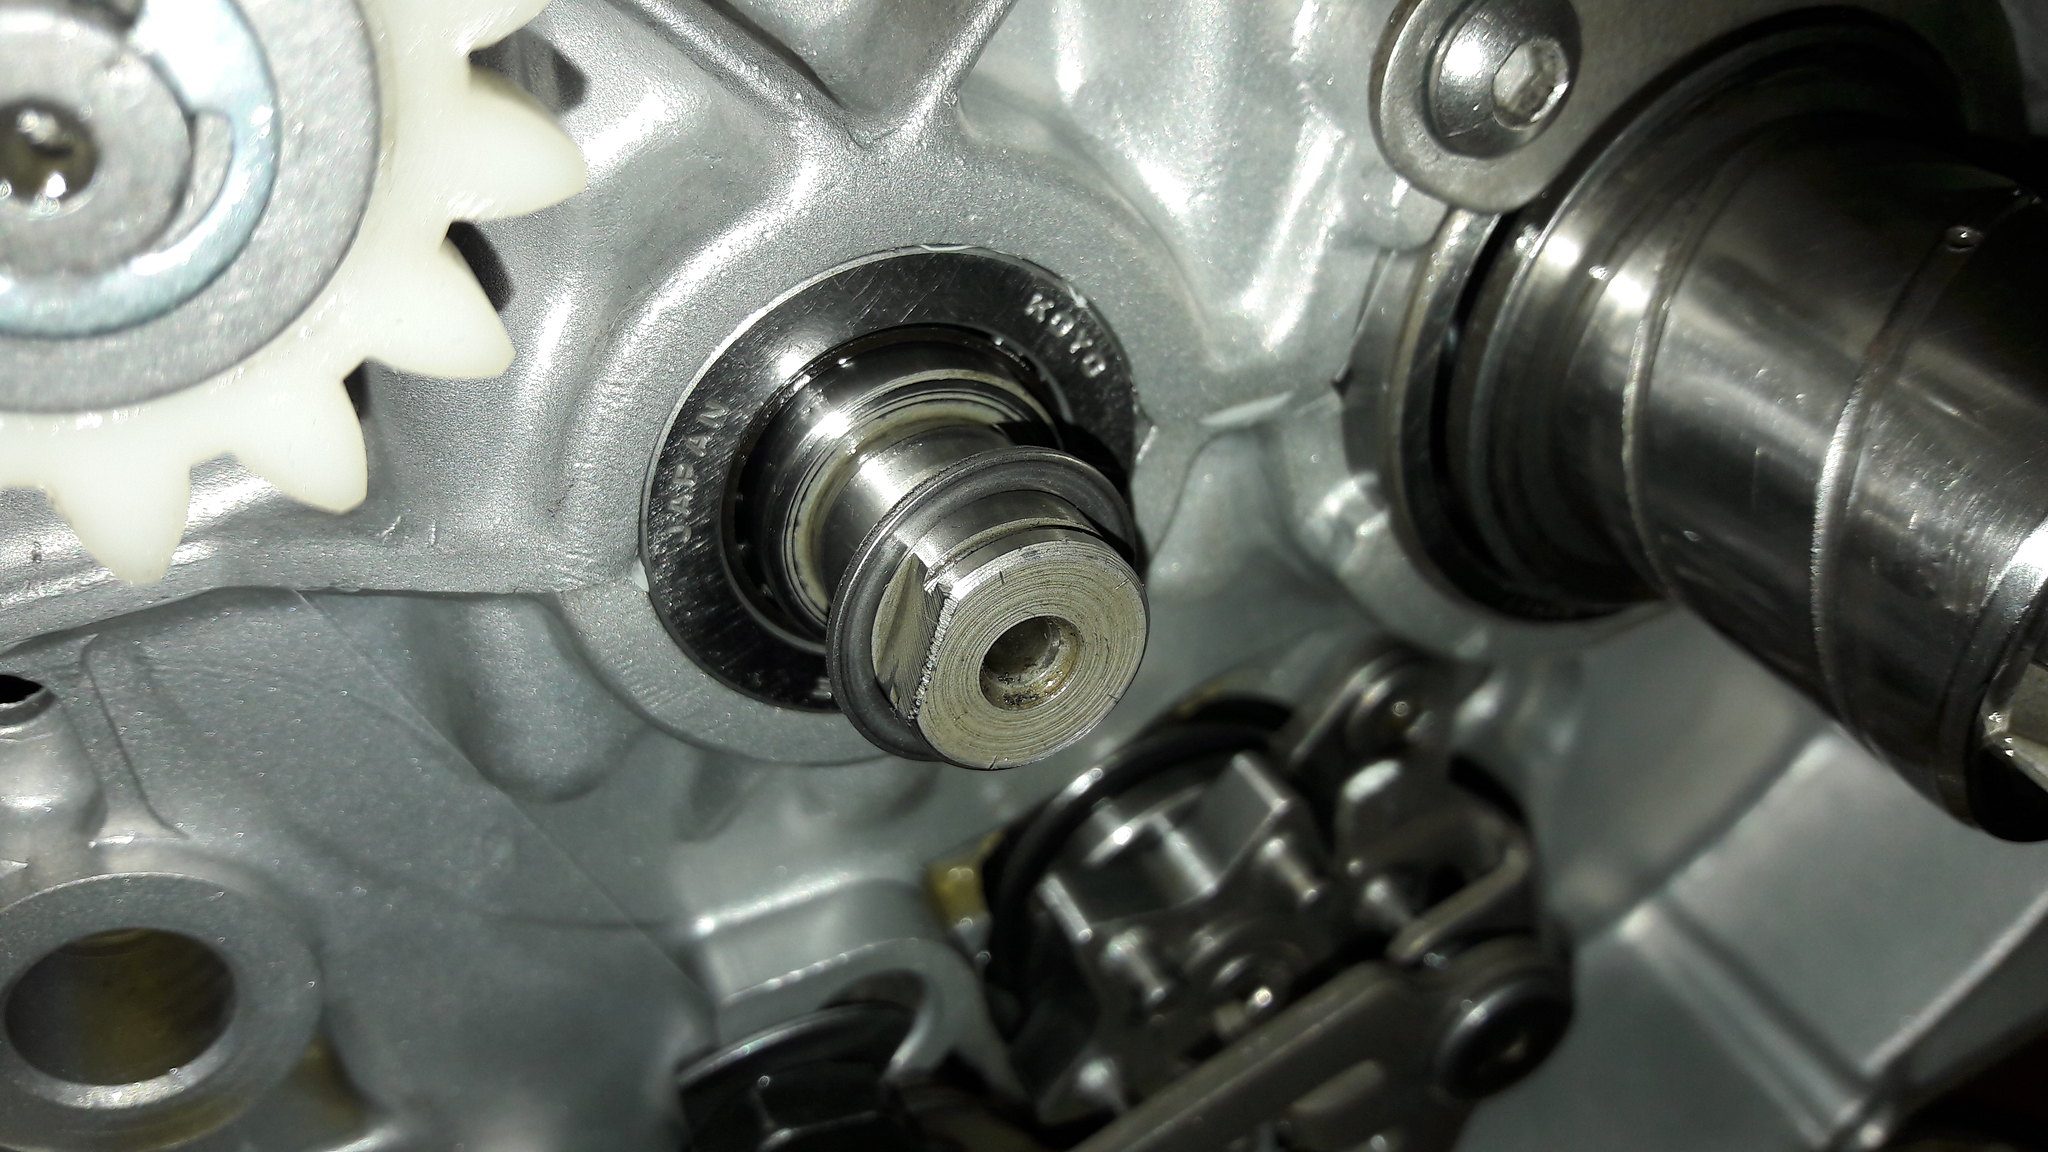 20181117_165607 20181117_165607 by David Miller, on Flickr Before I fit the idler gear and clutch drum, I want to check gear selector actuation is accurate, and then I will bend the lock tab over, as you wont get to it otherwise. Dusty  |
|
|
|
Post by panzermatt on Nov 18, 2018 12:28:34 GMT 1
 Why is this pip smaller? |
|
|
|
Post by dusty350 on Nov 18, 2018 12:41:07 GMT 1
On the subject of the clutch, mine was a little tired; 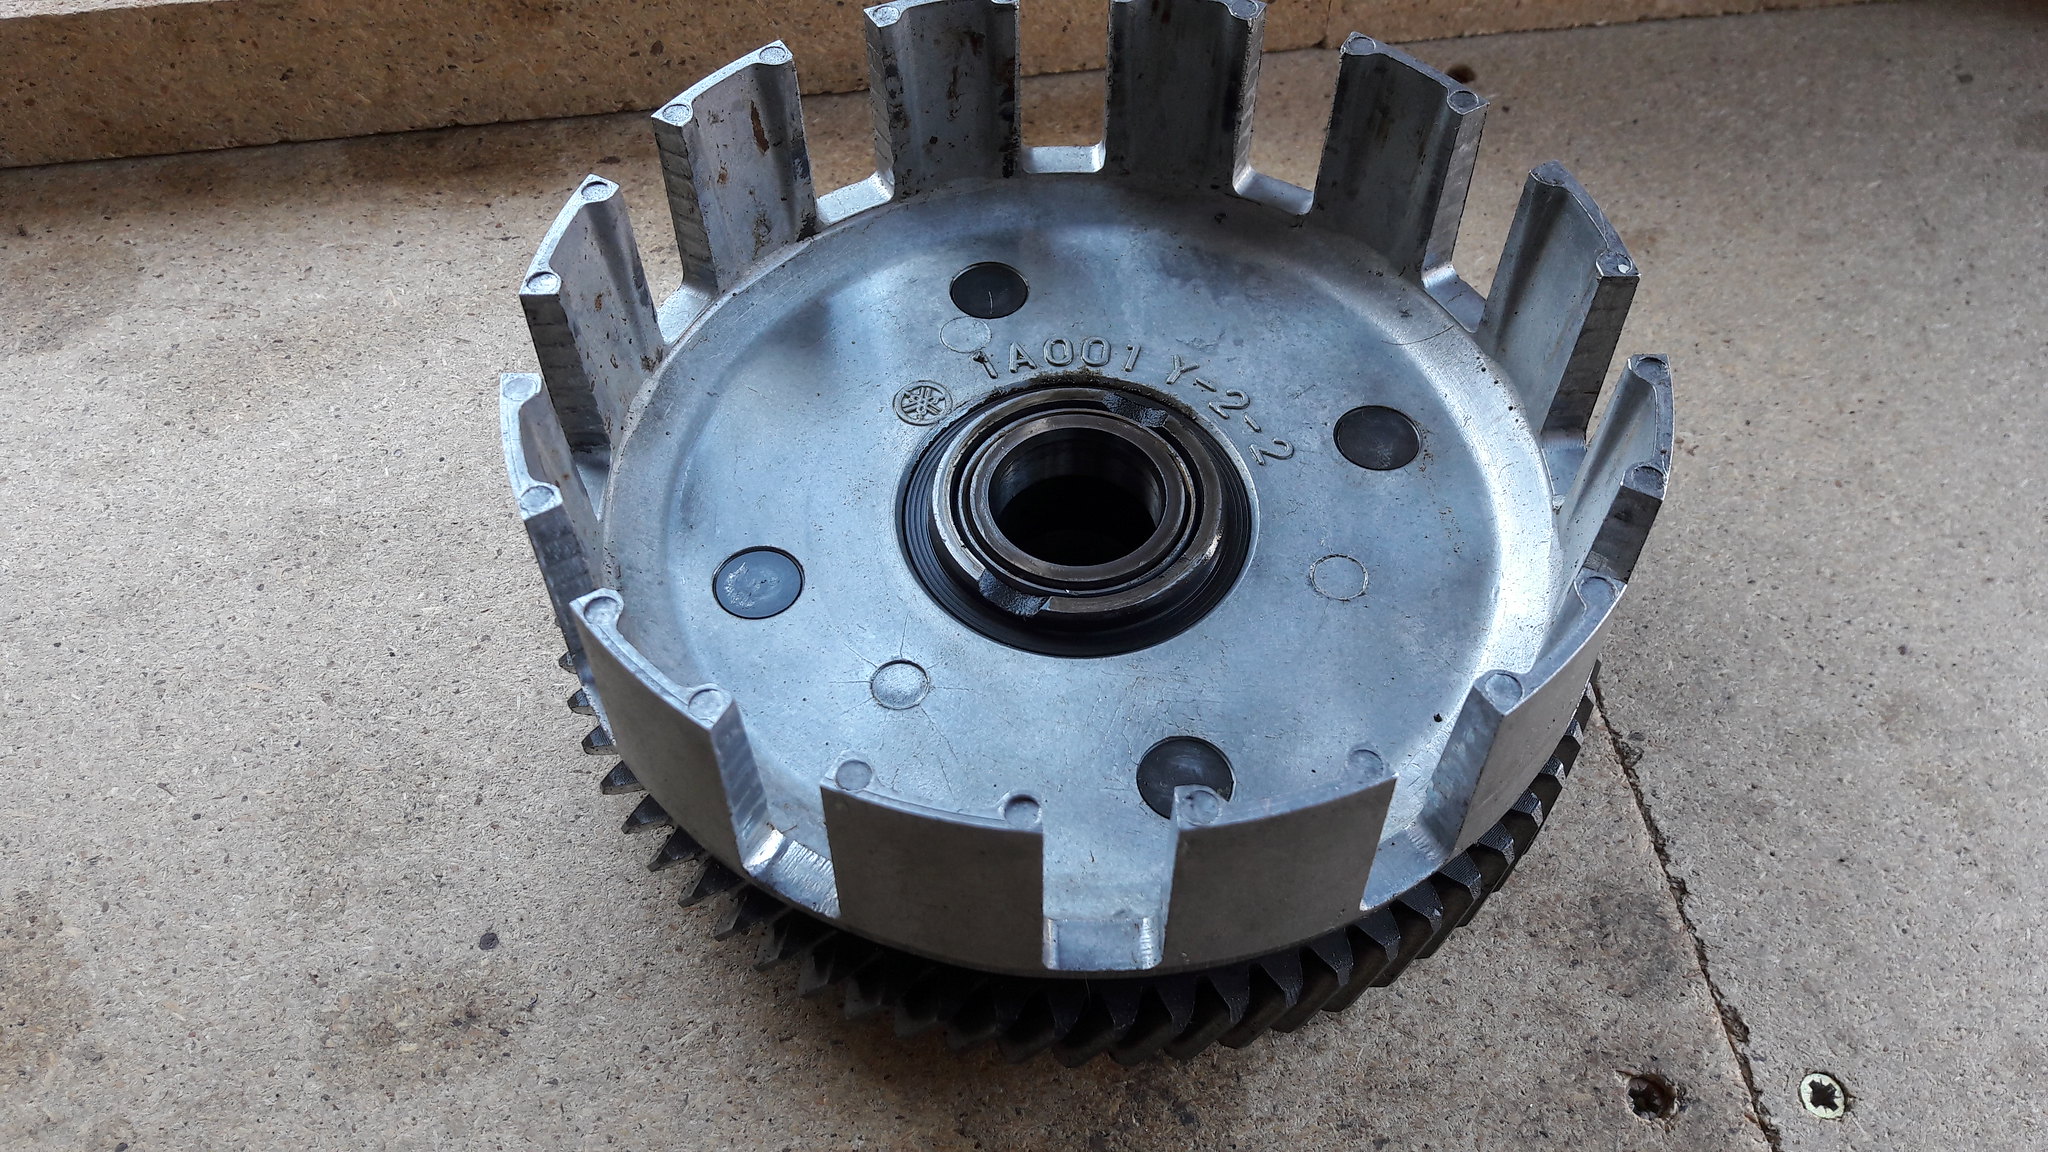 20181025_122713 20181025_122713 by David Miller, on Flickr It's worth knowing that the ridges on the clutch basket "fingers", caused by the plates, can be filed down if they are not too bad. A bit of rotational play between the ring gear and ally basket is acceptable/normal, but I like to fit a Mitaka billet basket on my engine rebuilds. To do this you need to remove the ally basket from the steel gear on the back. They are riveted together as standard; 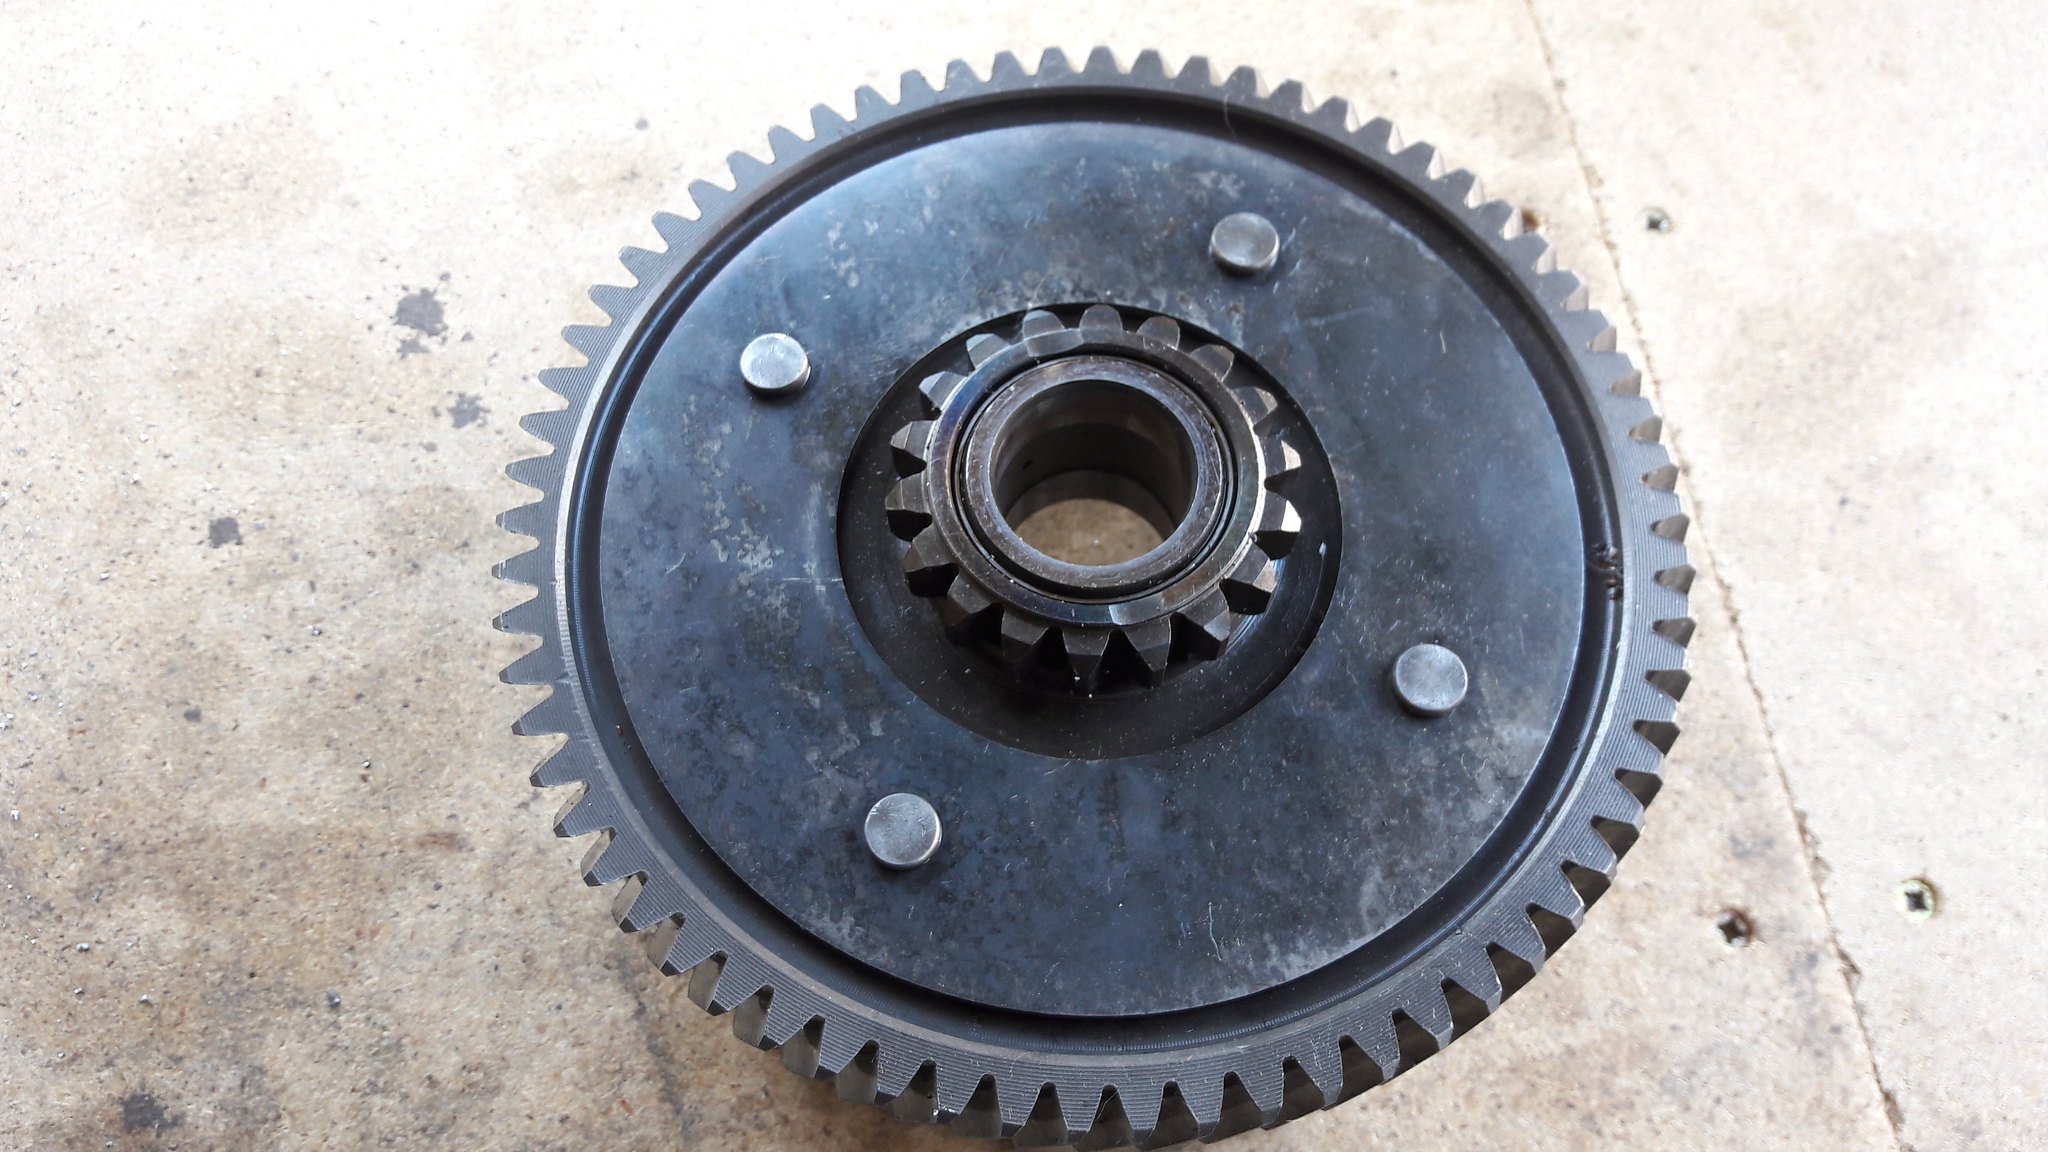 20181025_122719 20181025_122719 by David Miller, on Flickr So I drill some pilot holes after centre punching the rivets, and then a bigger drill bit to weaken the head so it can be knocked off; 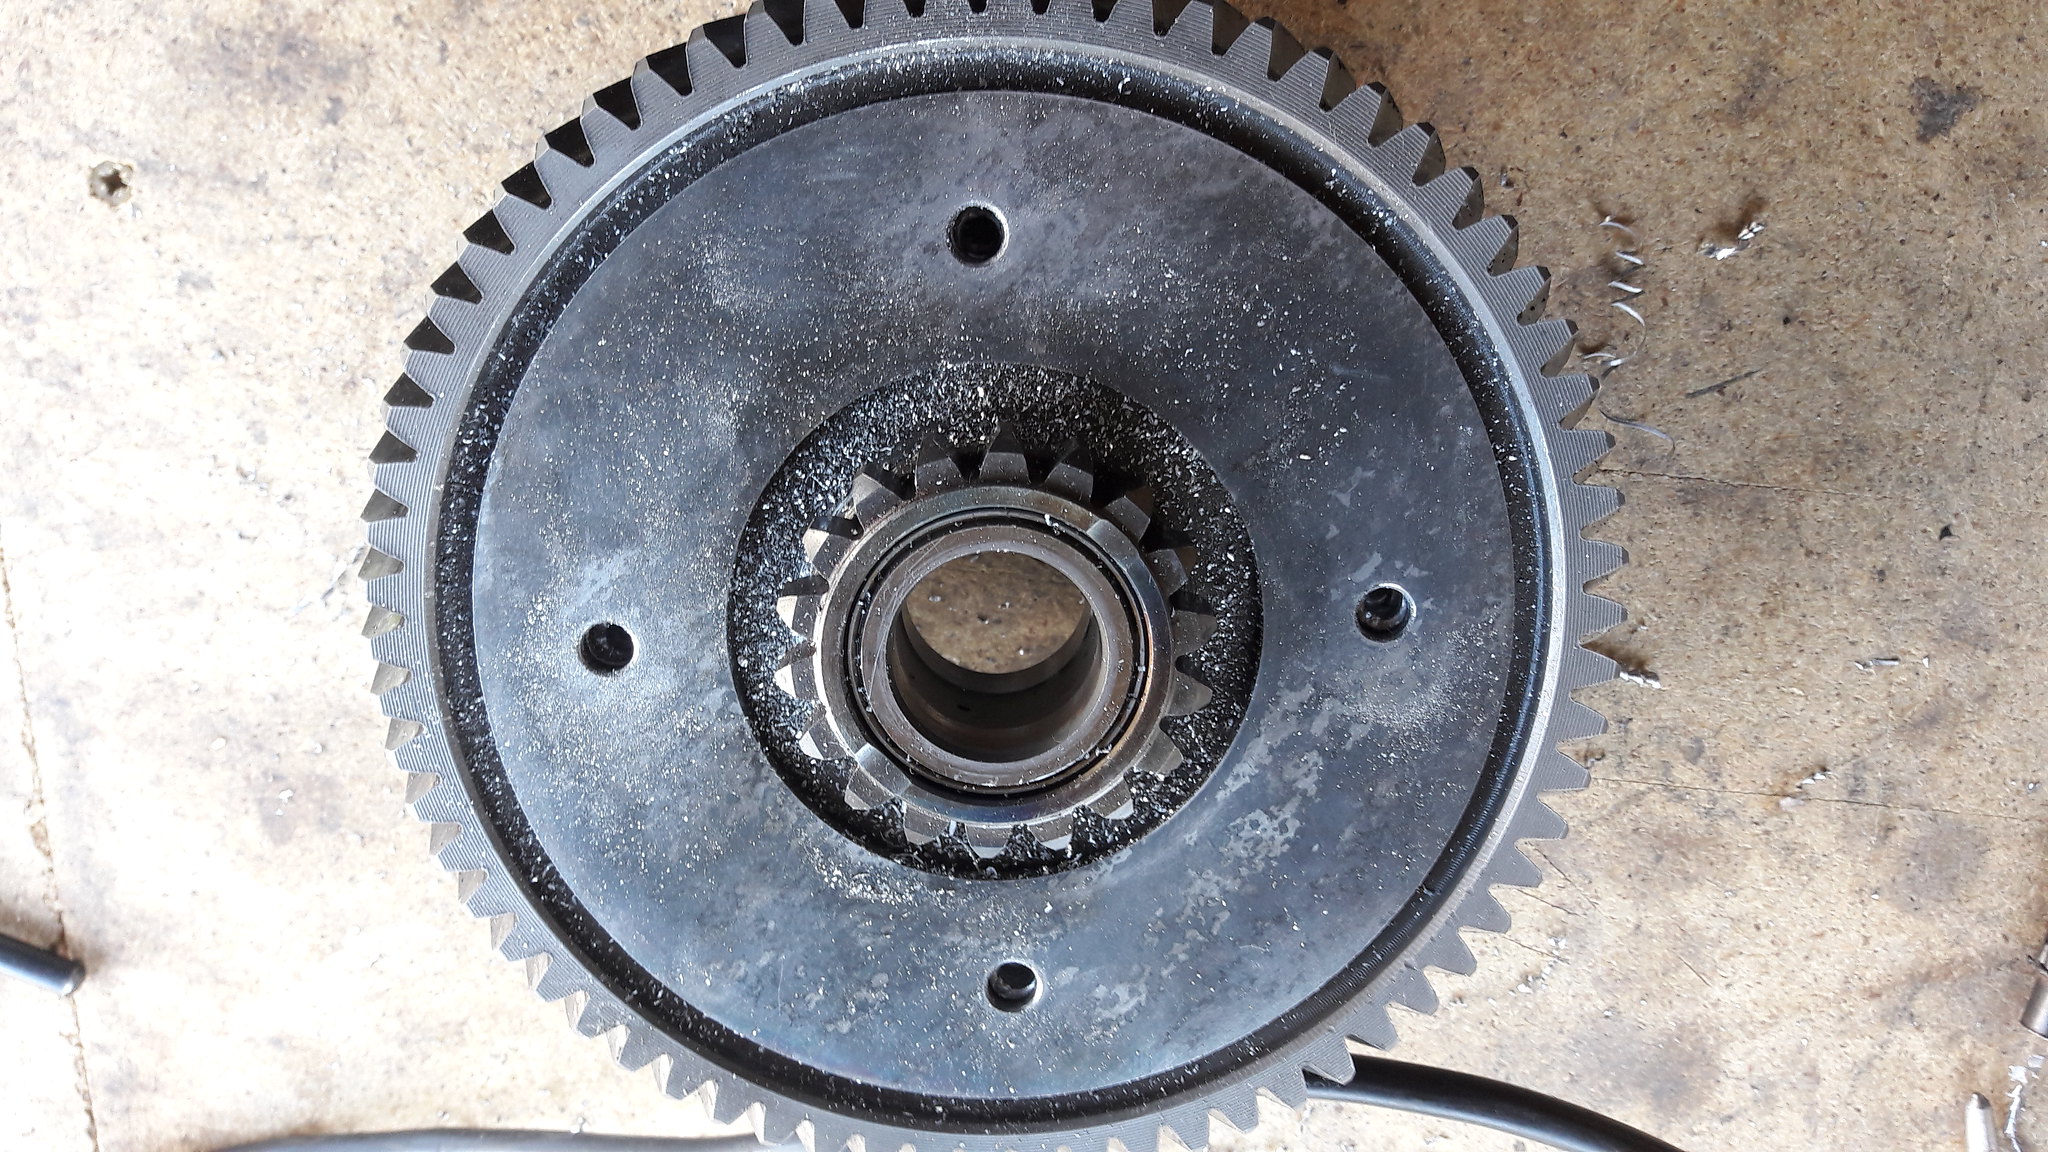 20181025_124556 20181025_124556 by David Miller, on Flickr This round plate now now lift off, revealing; 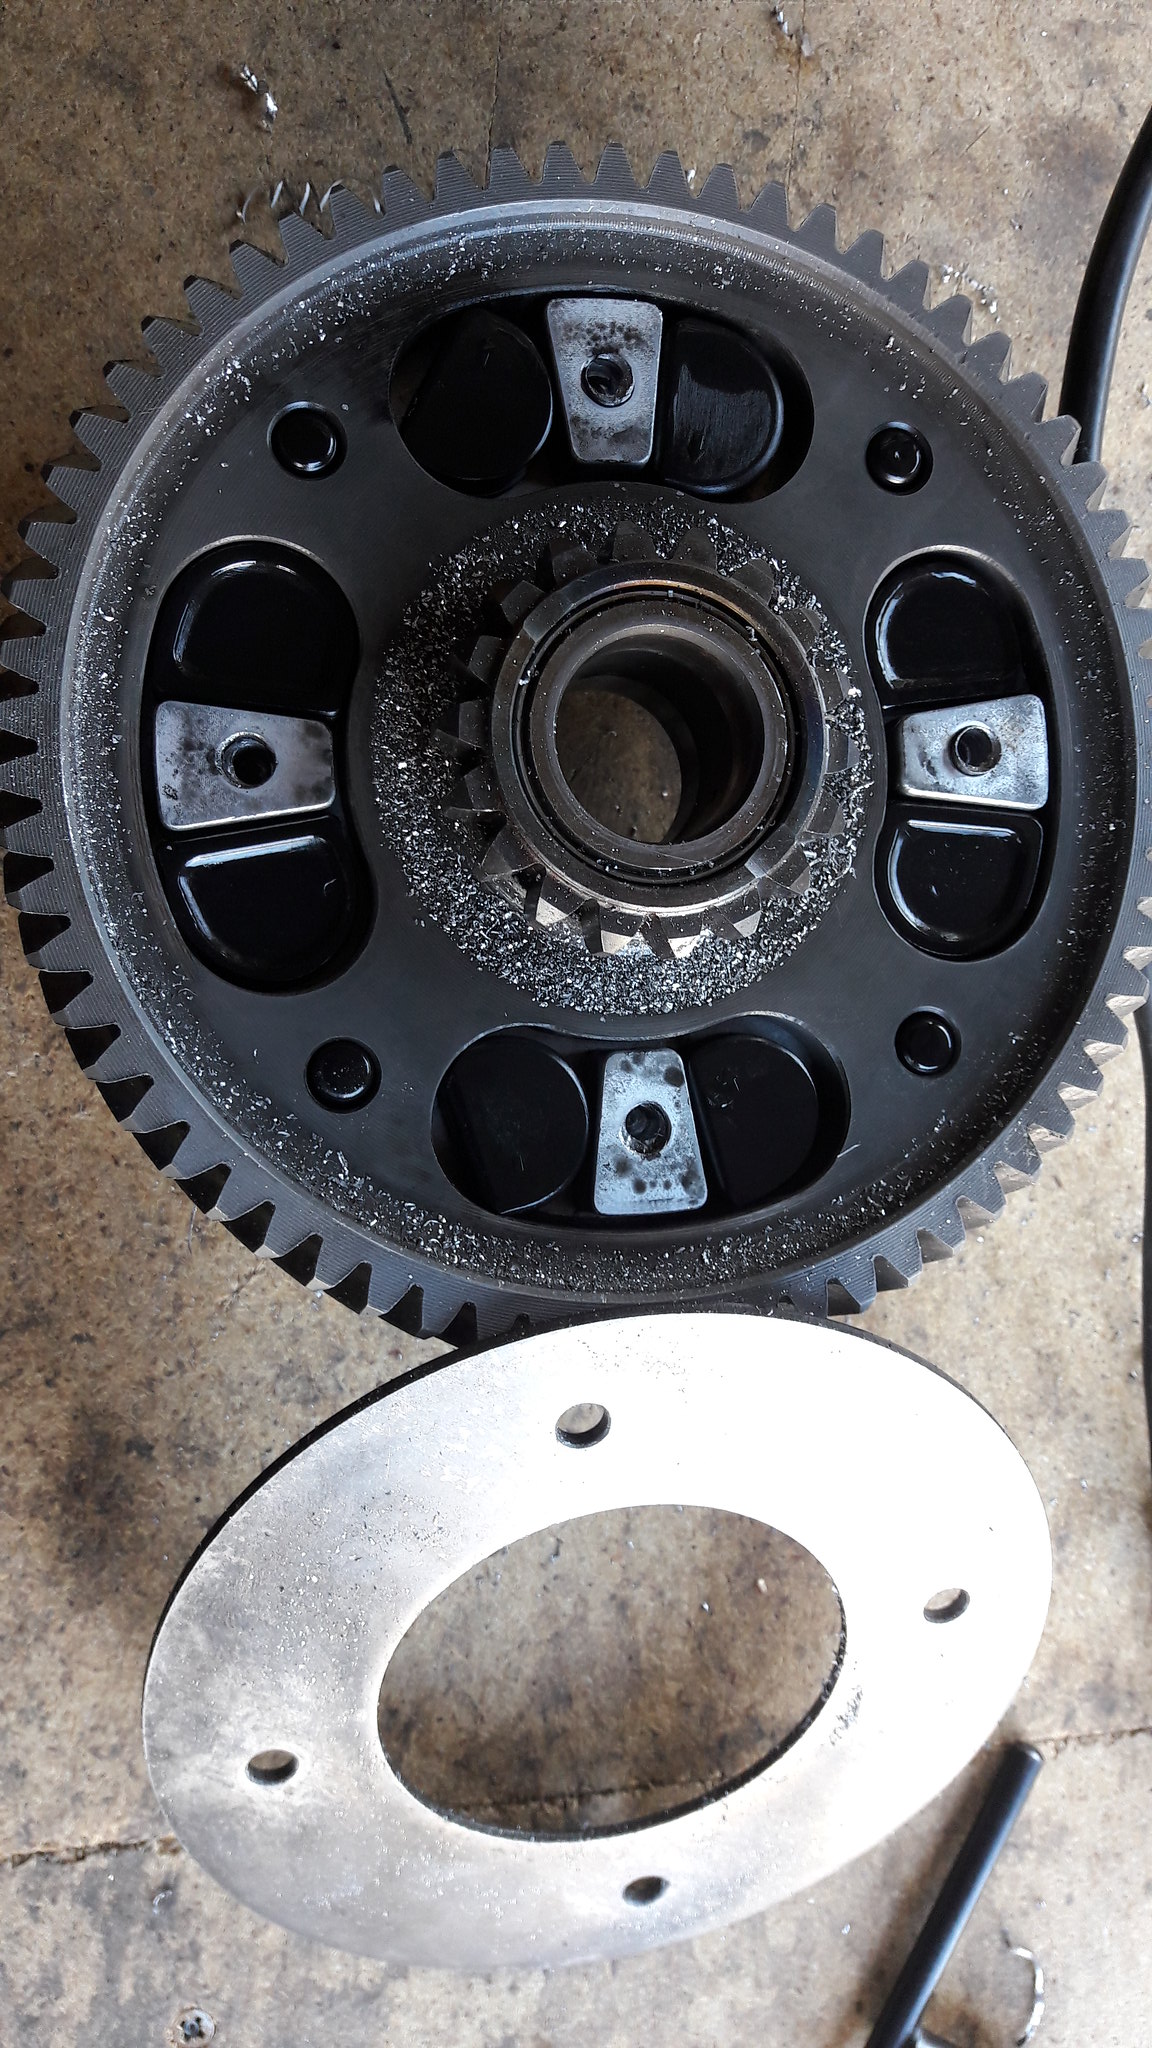 20181025_124617 20181025_124617 by David Miller, on Flickr 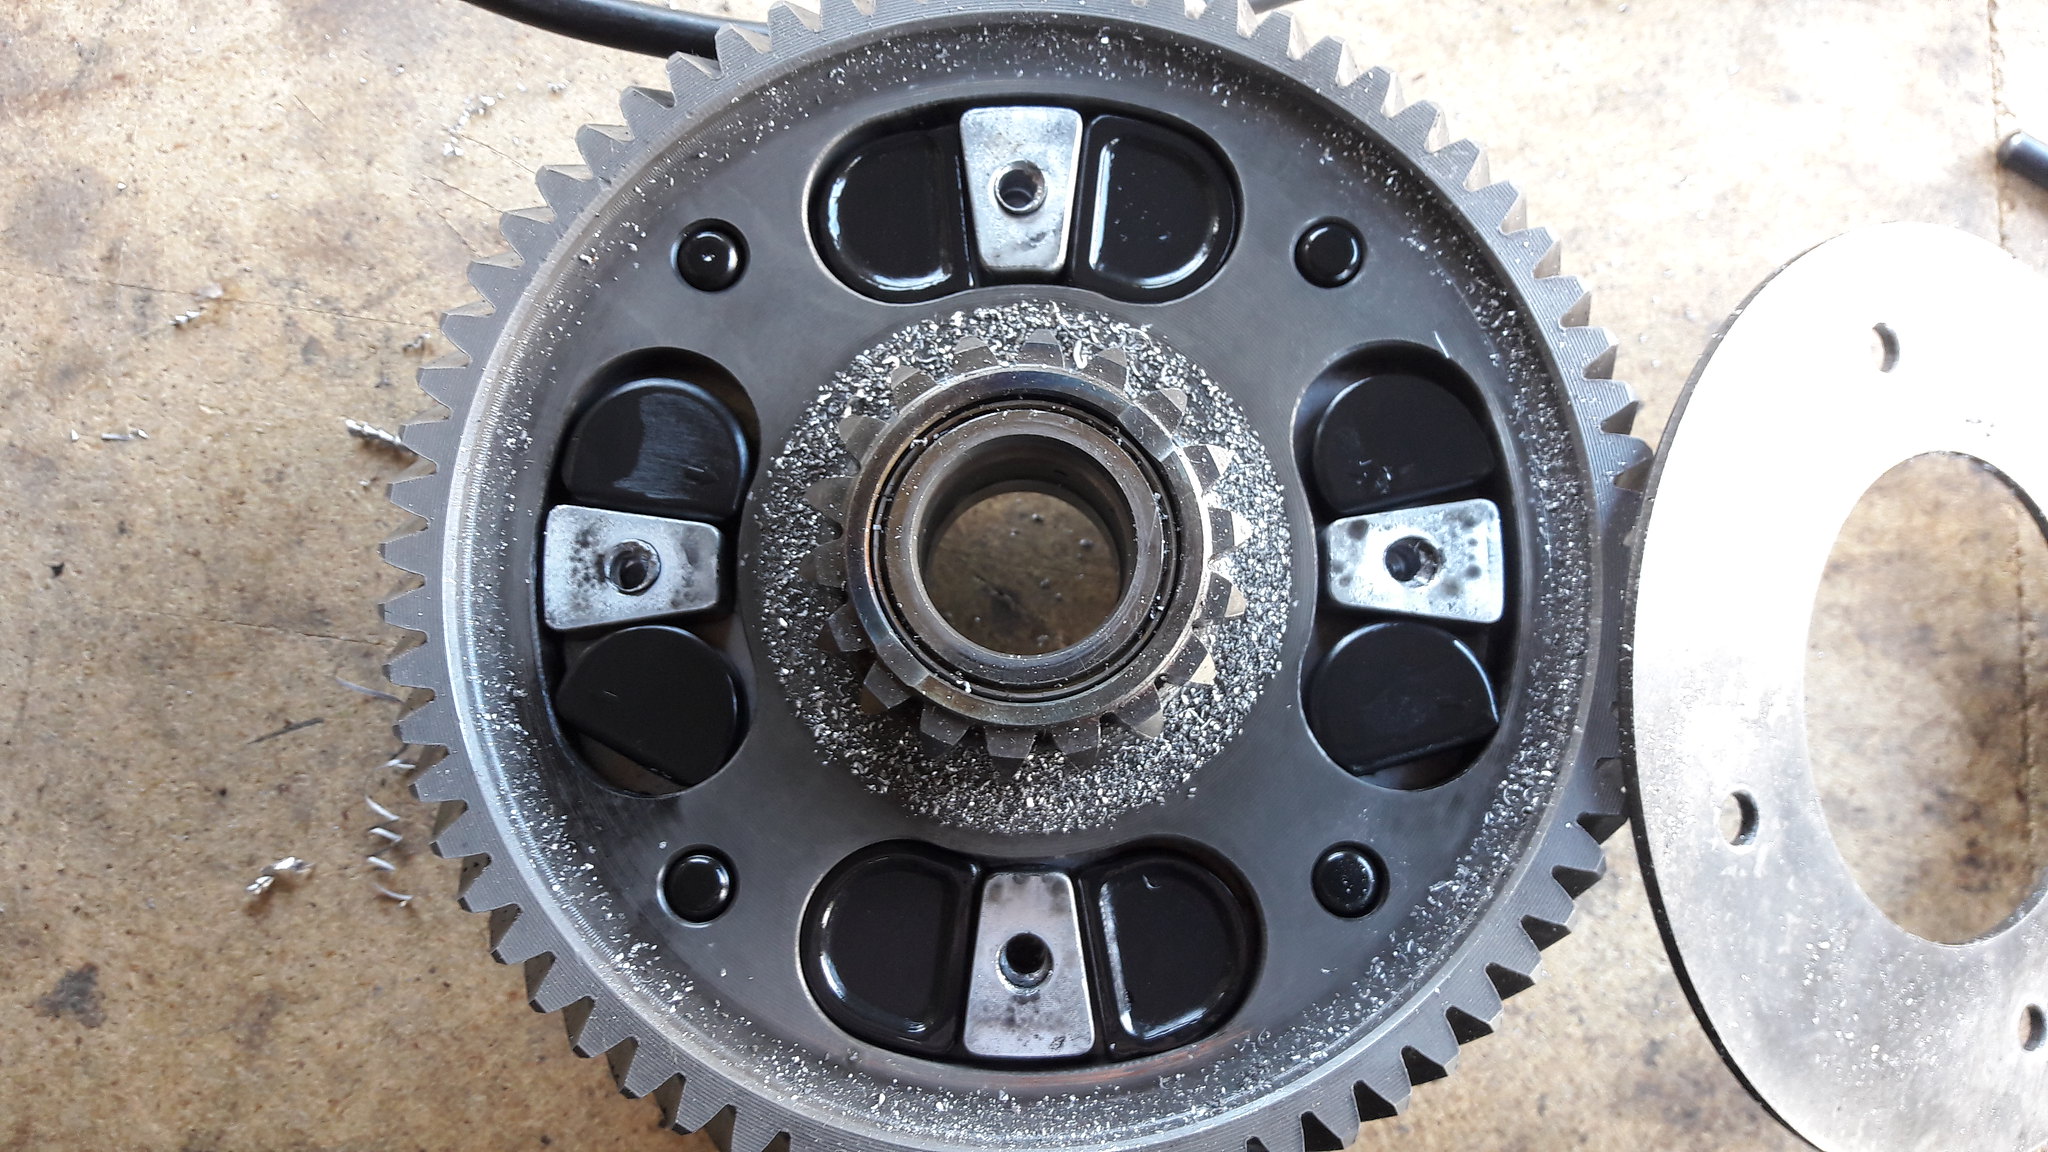 20181025_124659 20181025_124659 by David Miller, on Flickr Interesting to note that a couple of the rubber dampers have spun round in their positions. You can now wiggle the ring gear off;  20181025_124850 20181025_124850 by David Miller, on Flickr And that's all there is to the clutch. Rebuild is easy enough, starting with the new basket;  20181109_120014 20181109_120014 by David Miller, on Flickr Lay on the gasket; 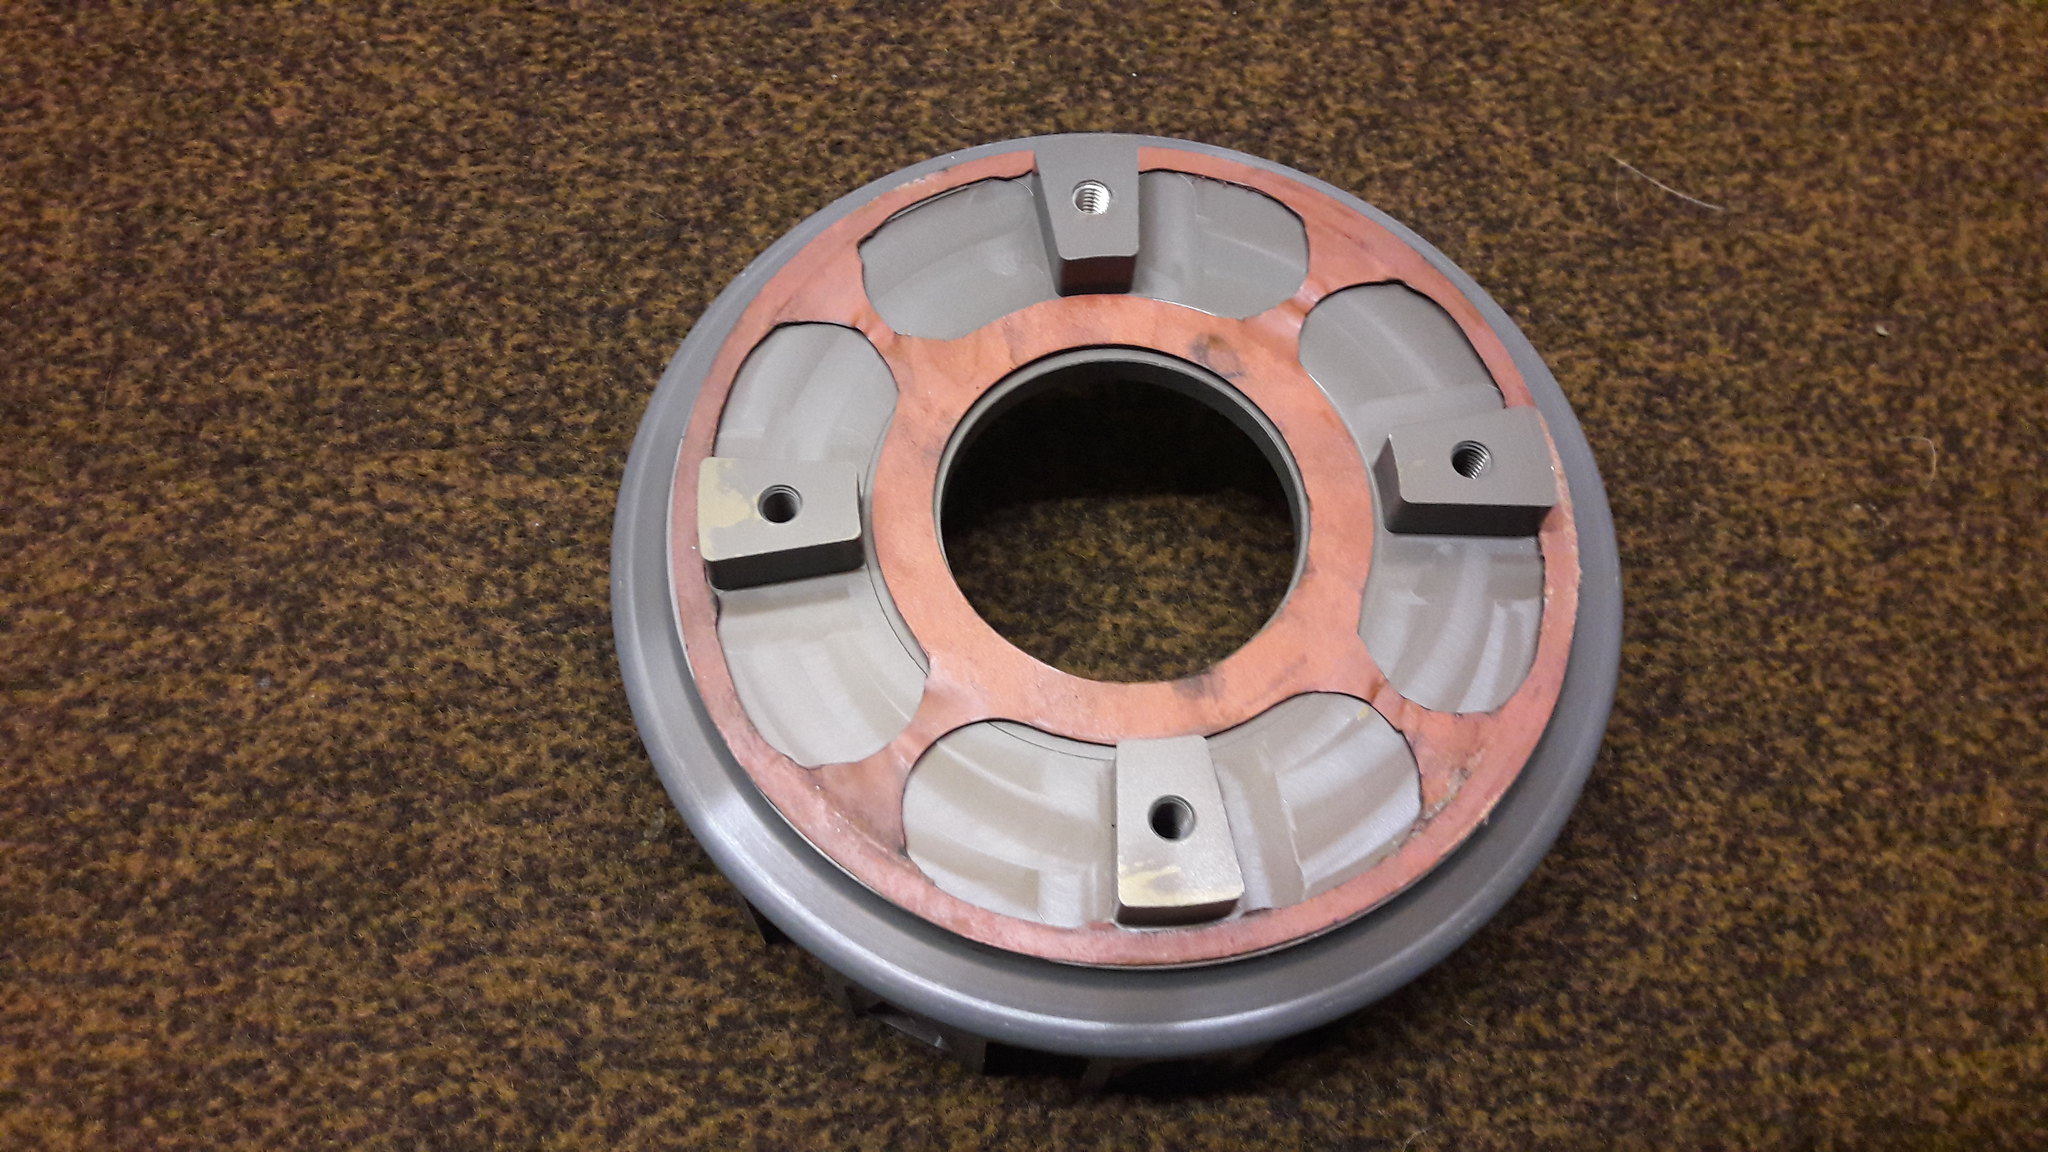 20181109_120027 20181109_120027 by David Miller, on Flickr 8 new rubber dampers from Martin at MBD; 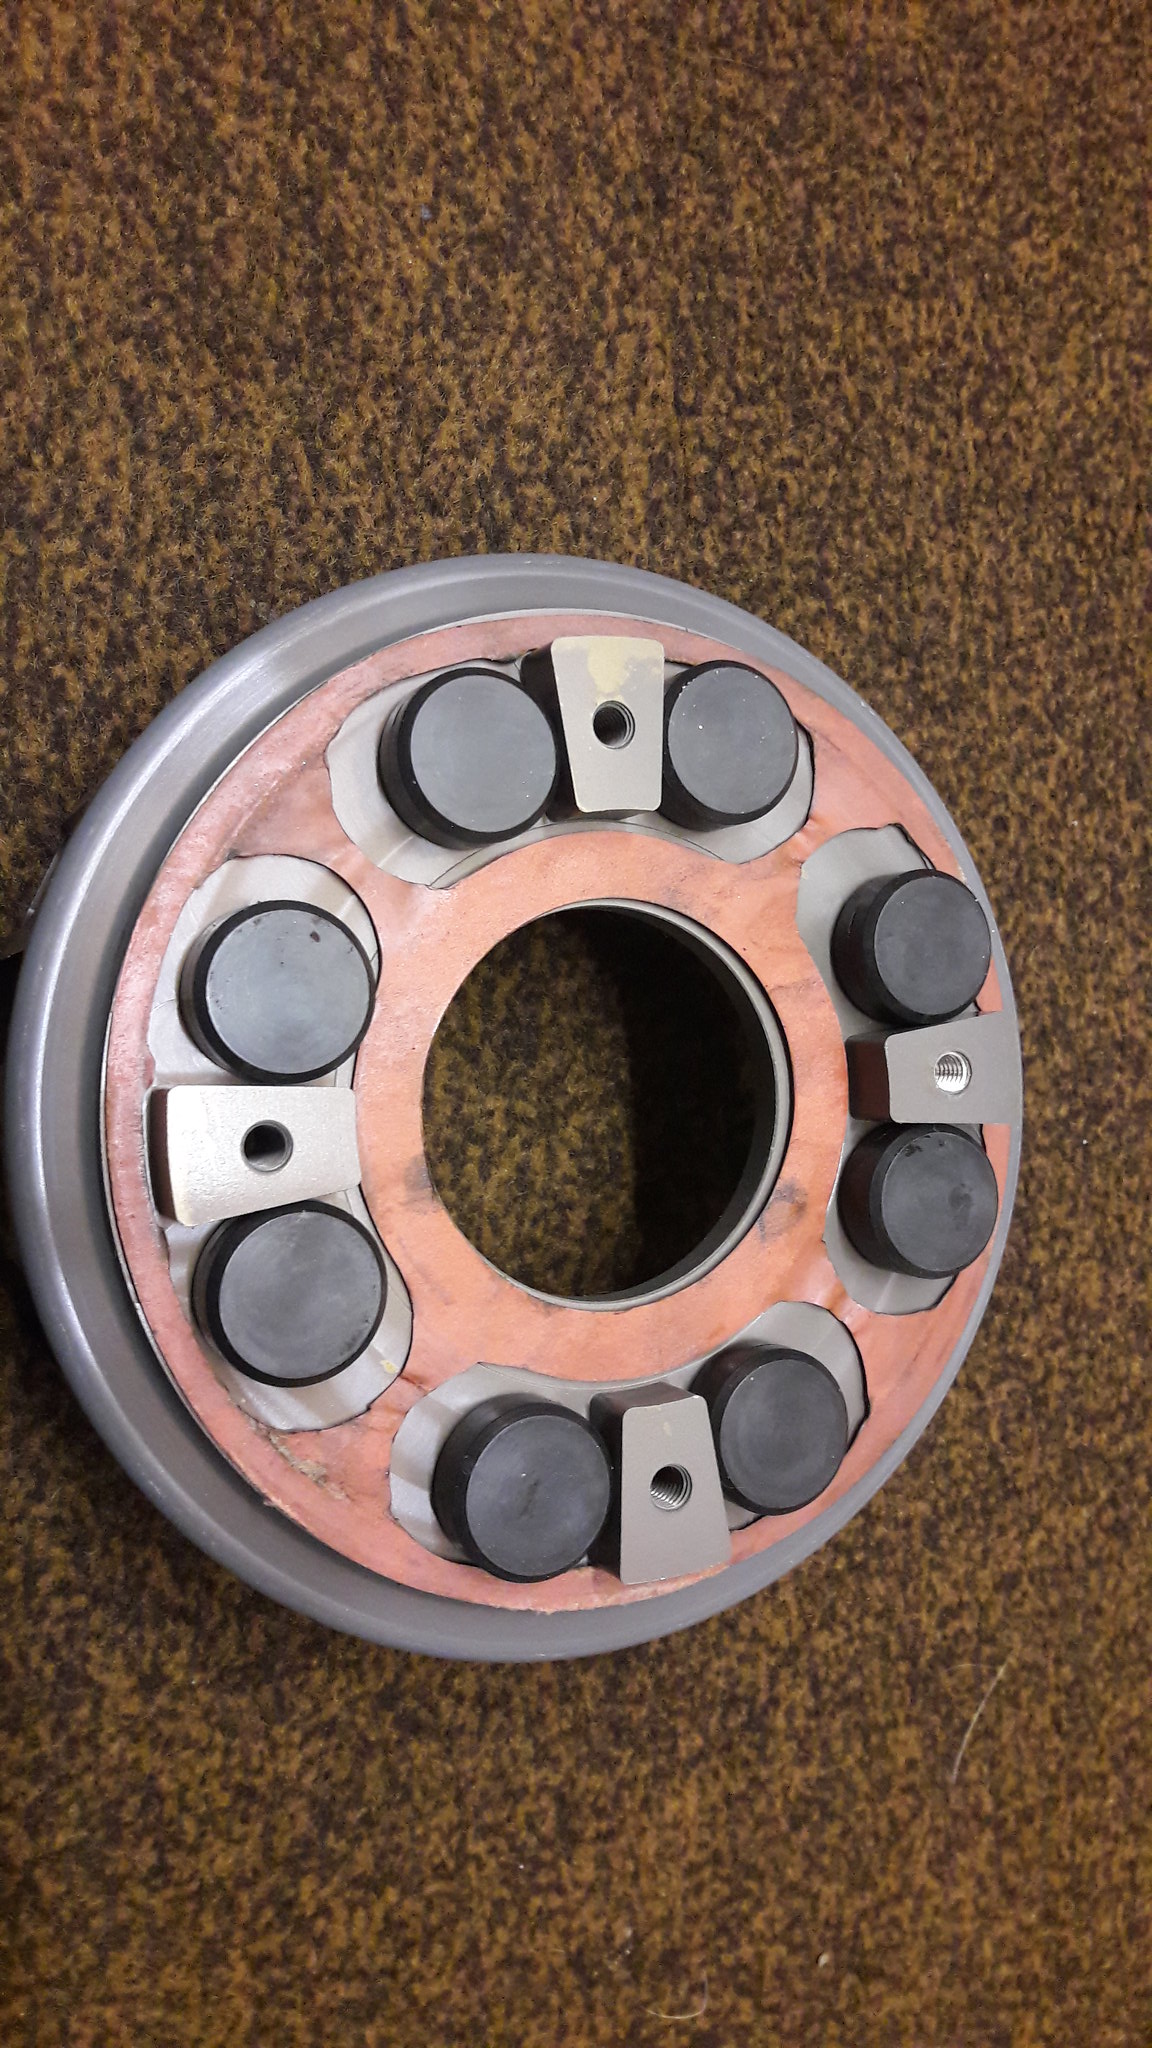 20181109_120056 20181109_120056 by David Miller, on Flickr Replace the ring gear; 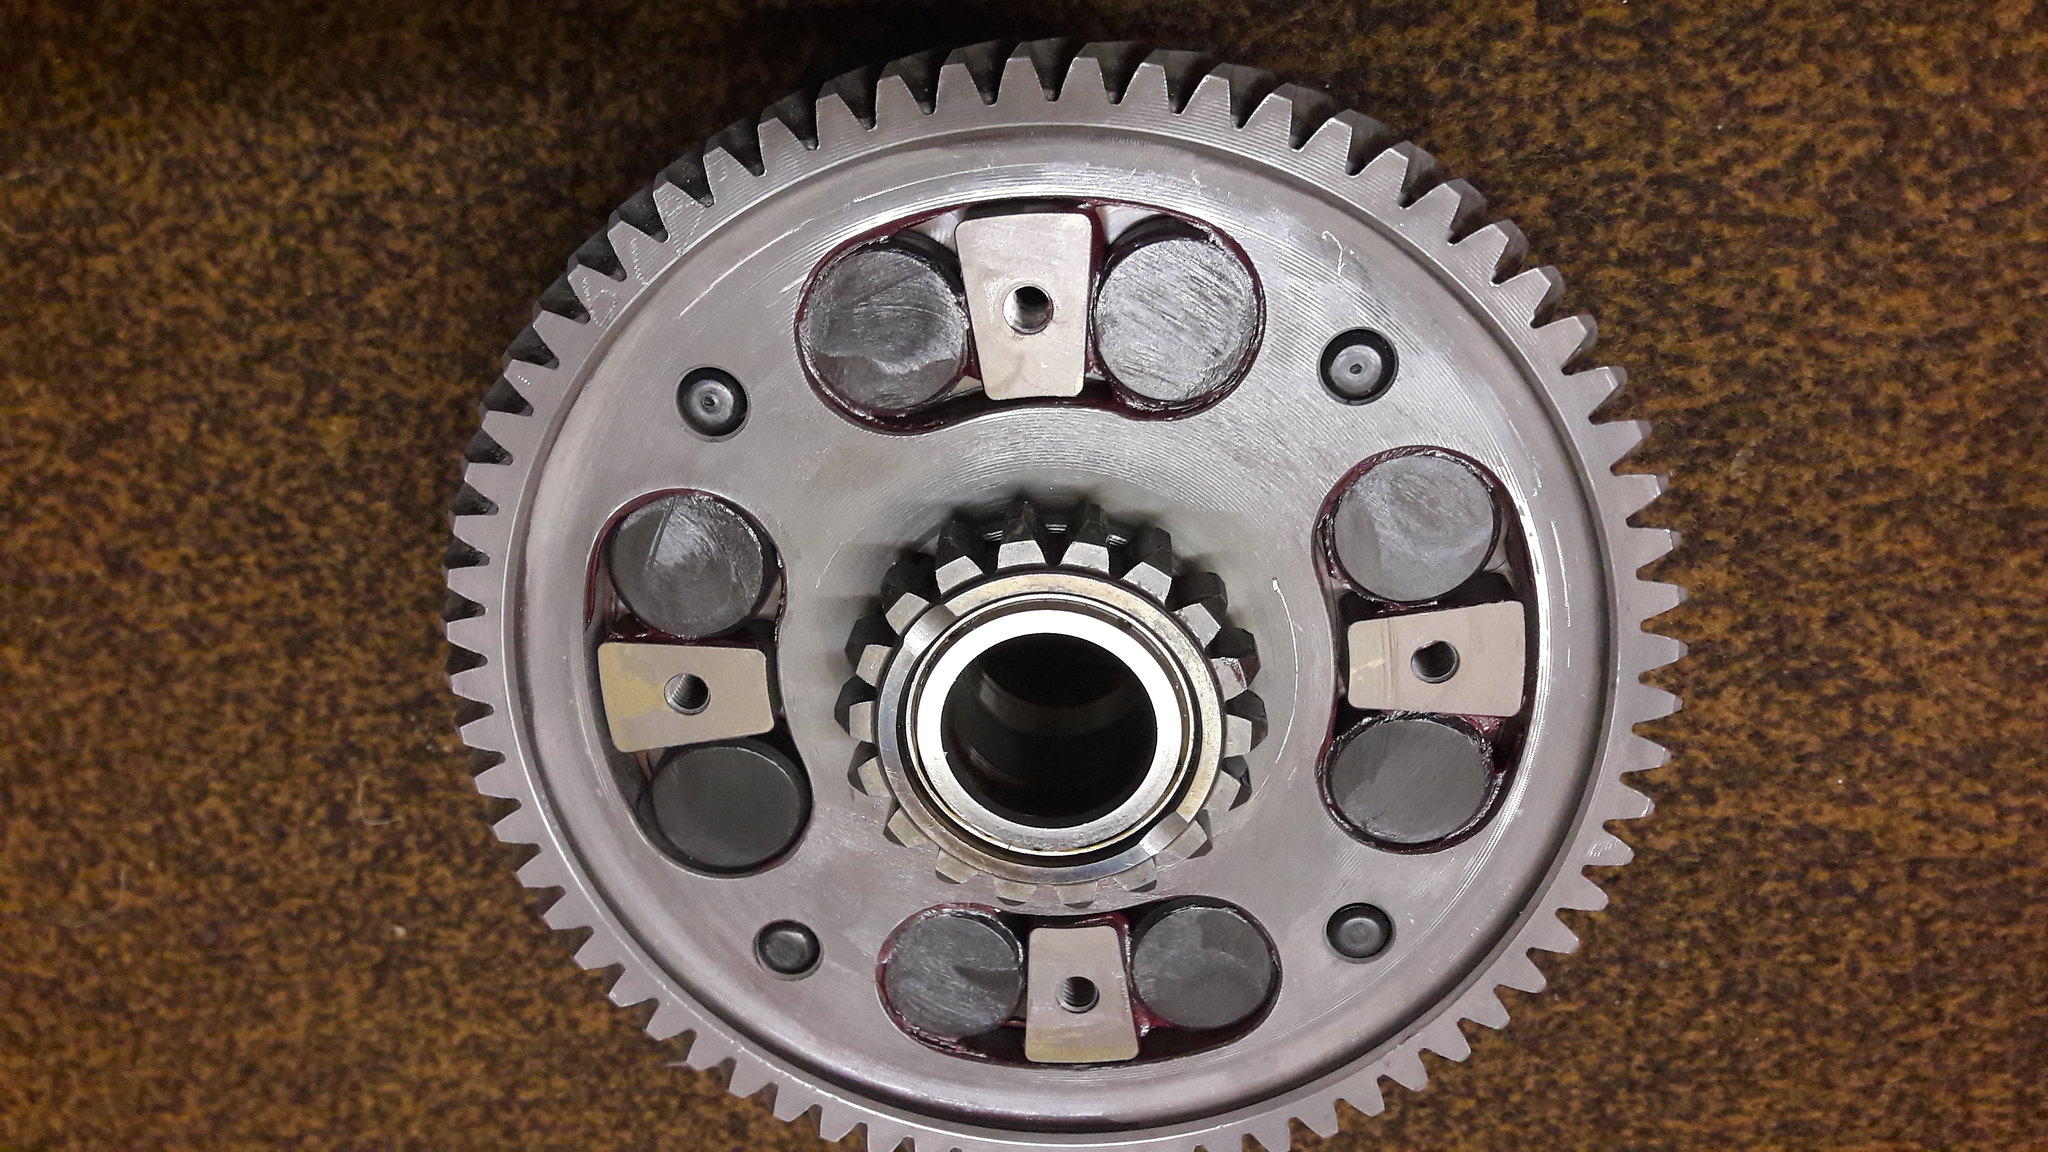 20181109_120811 20181109_120811 by David Miller, on Flickr Back plate next; 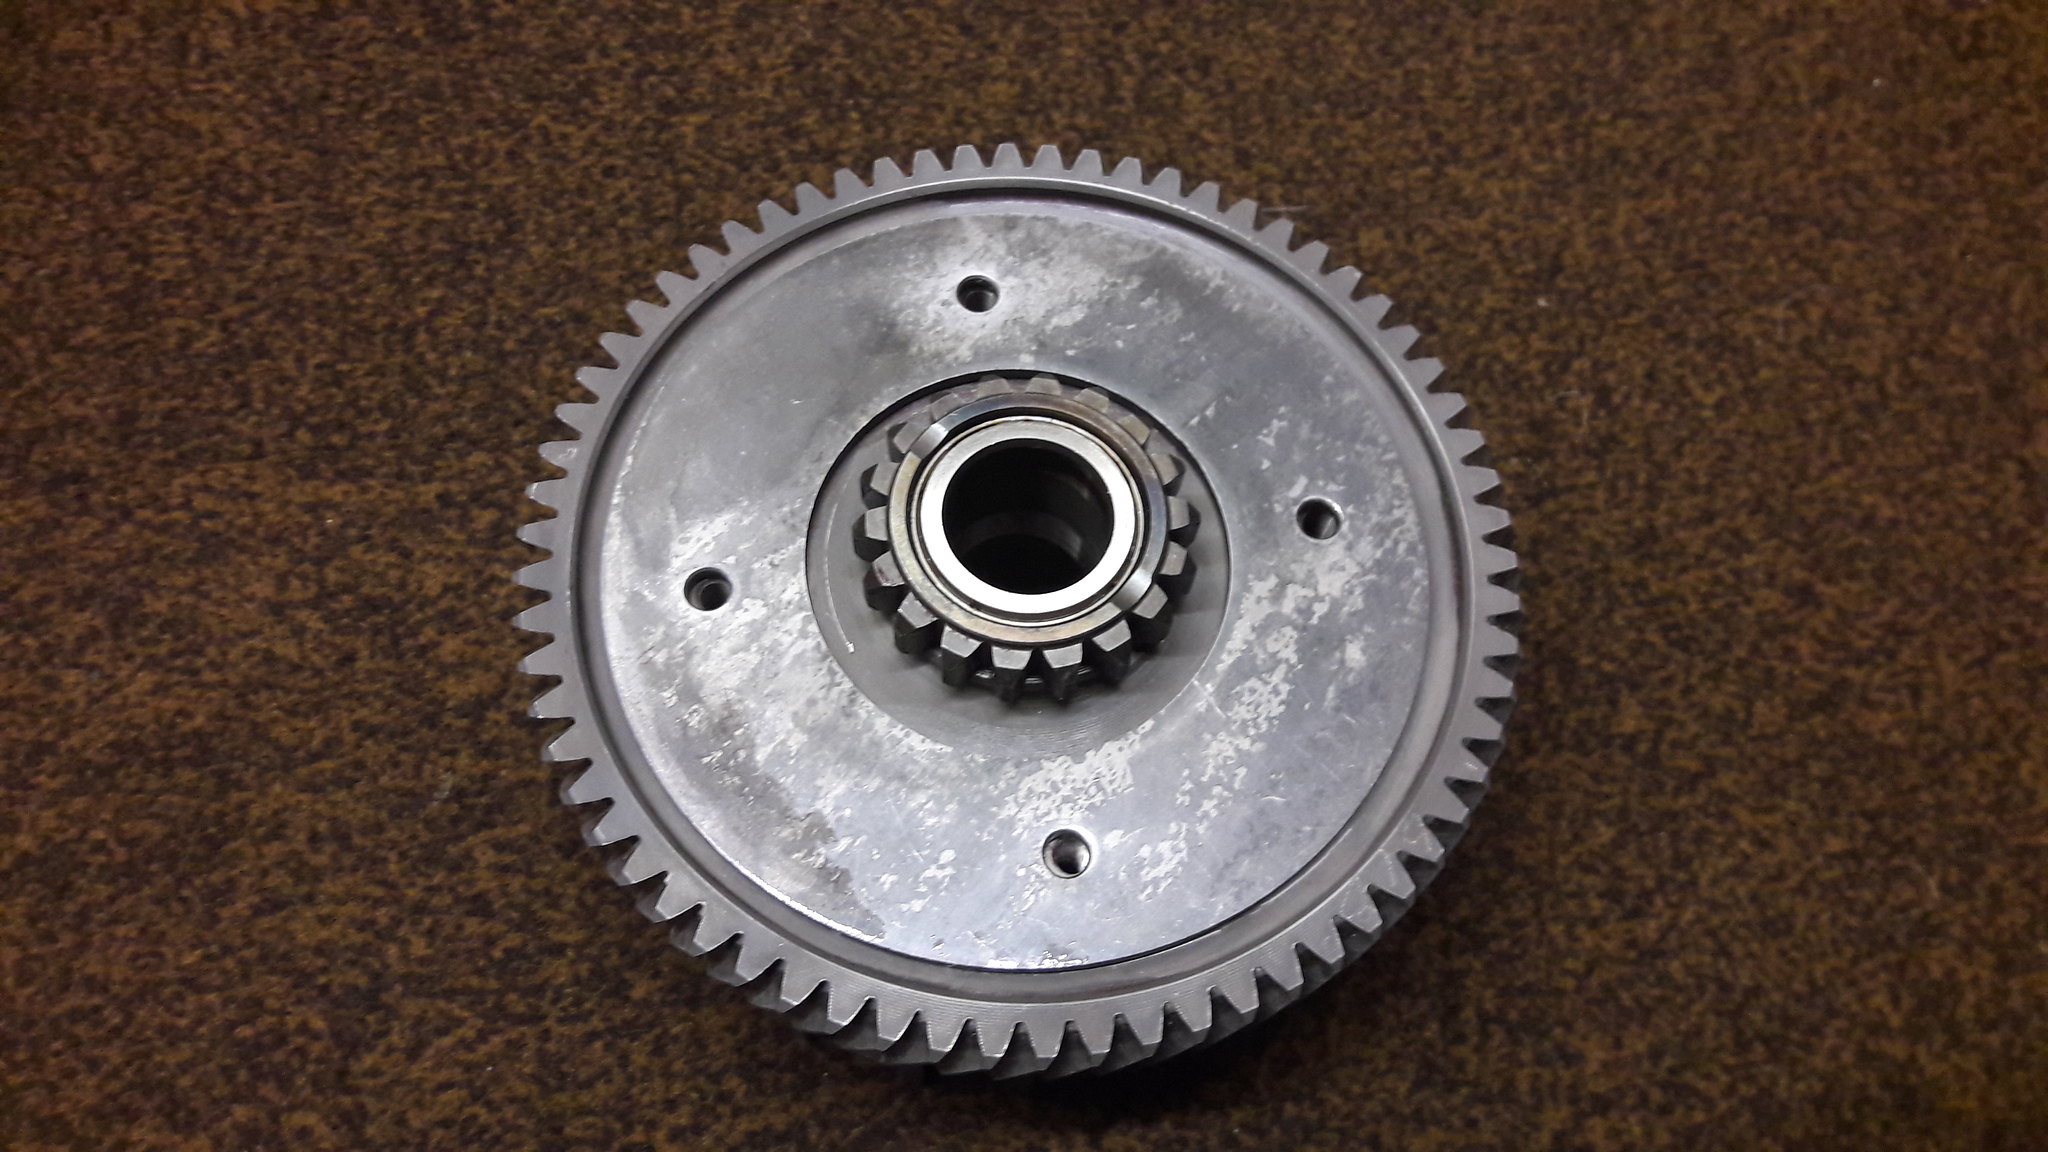 20181109_120828 20181109_120828 by David Miller, on Flickr And the 4 shallow headed bolts that secures the basket to the ring gear instead of rivets. I use high strength Loctite on these; 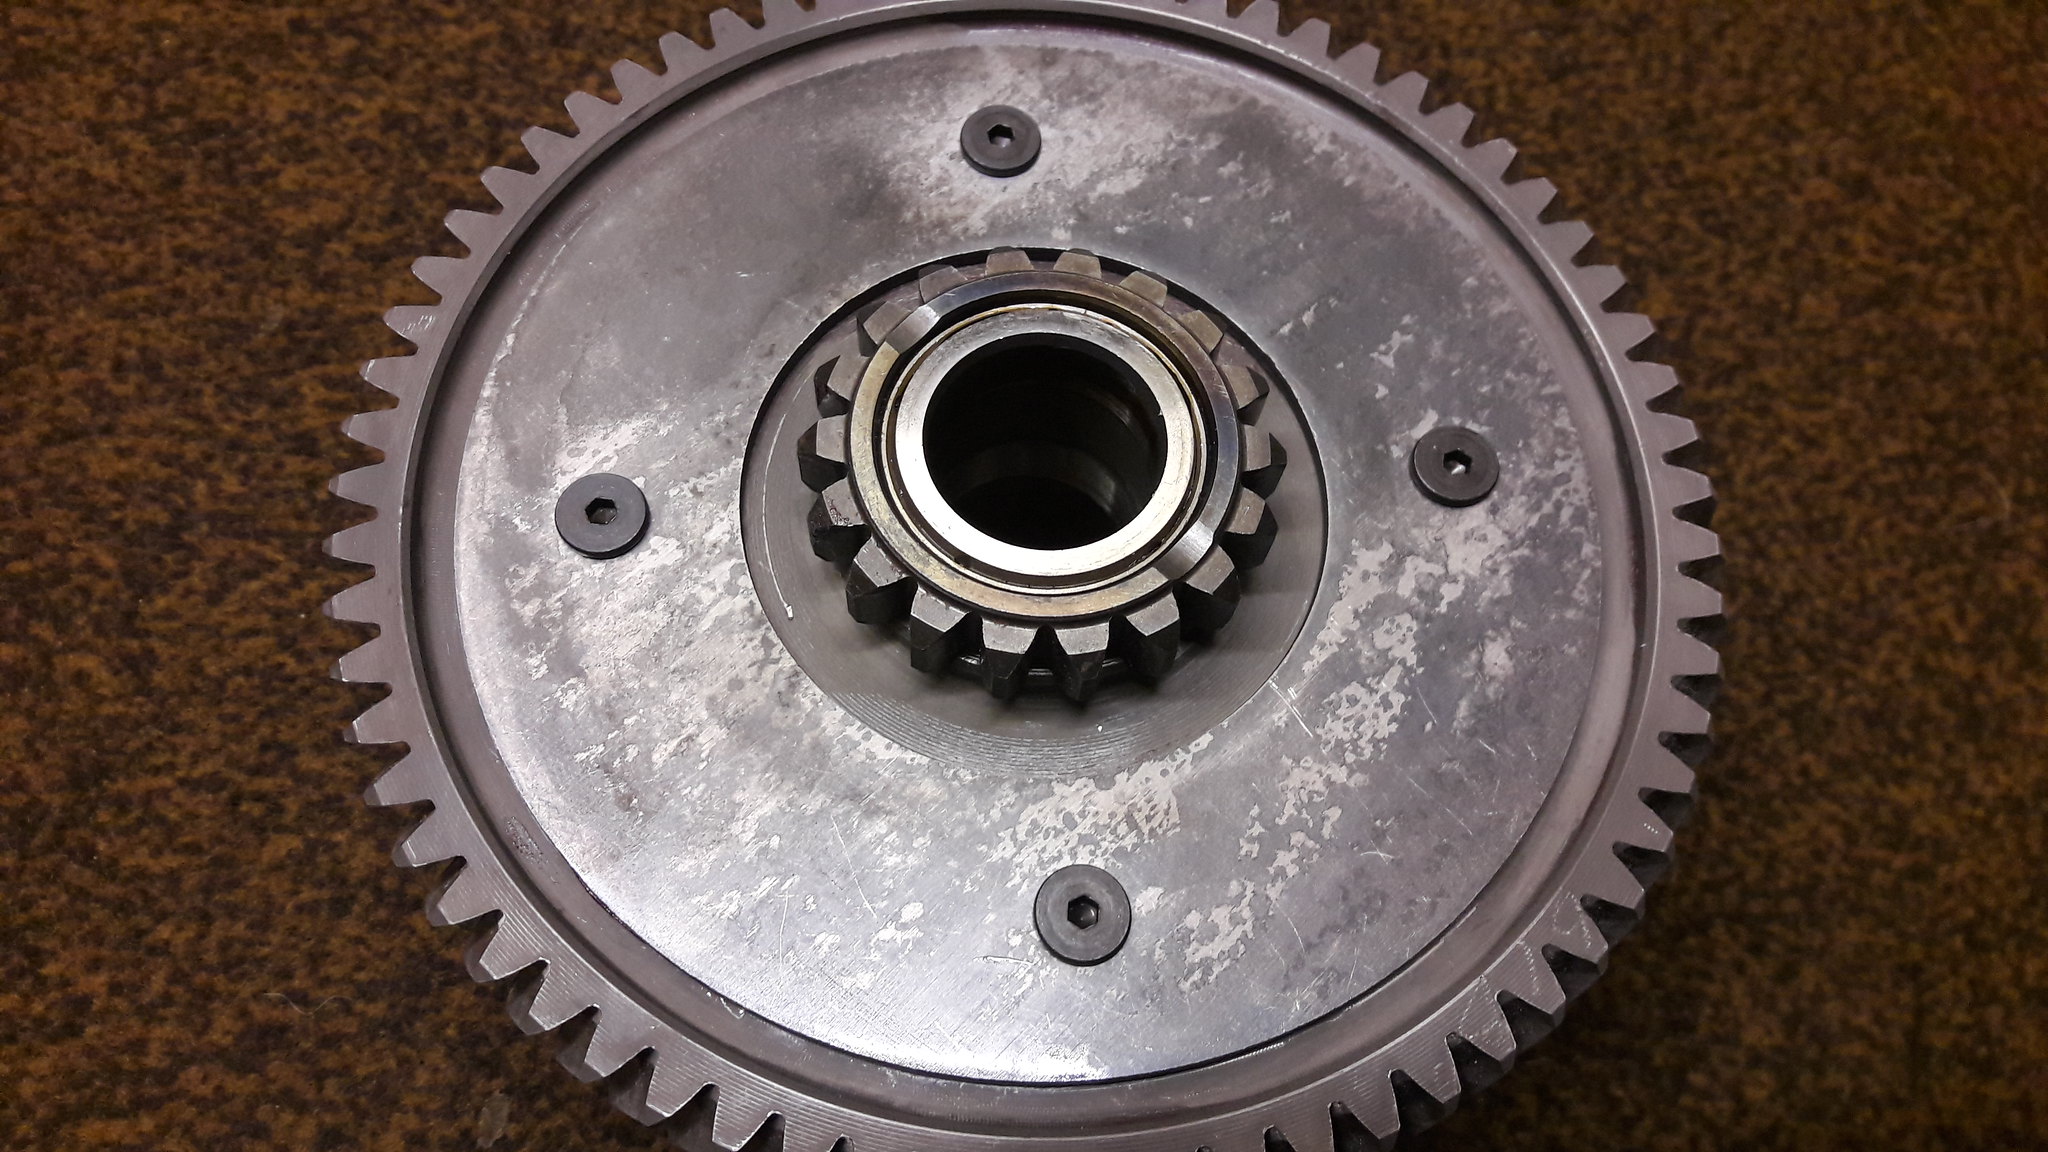 20181109_121501 20181109_121501 by David Miller, on Flickr And lastly, the rubber band that sits between basket and gear; 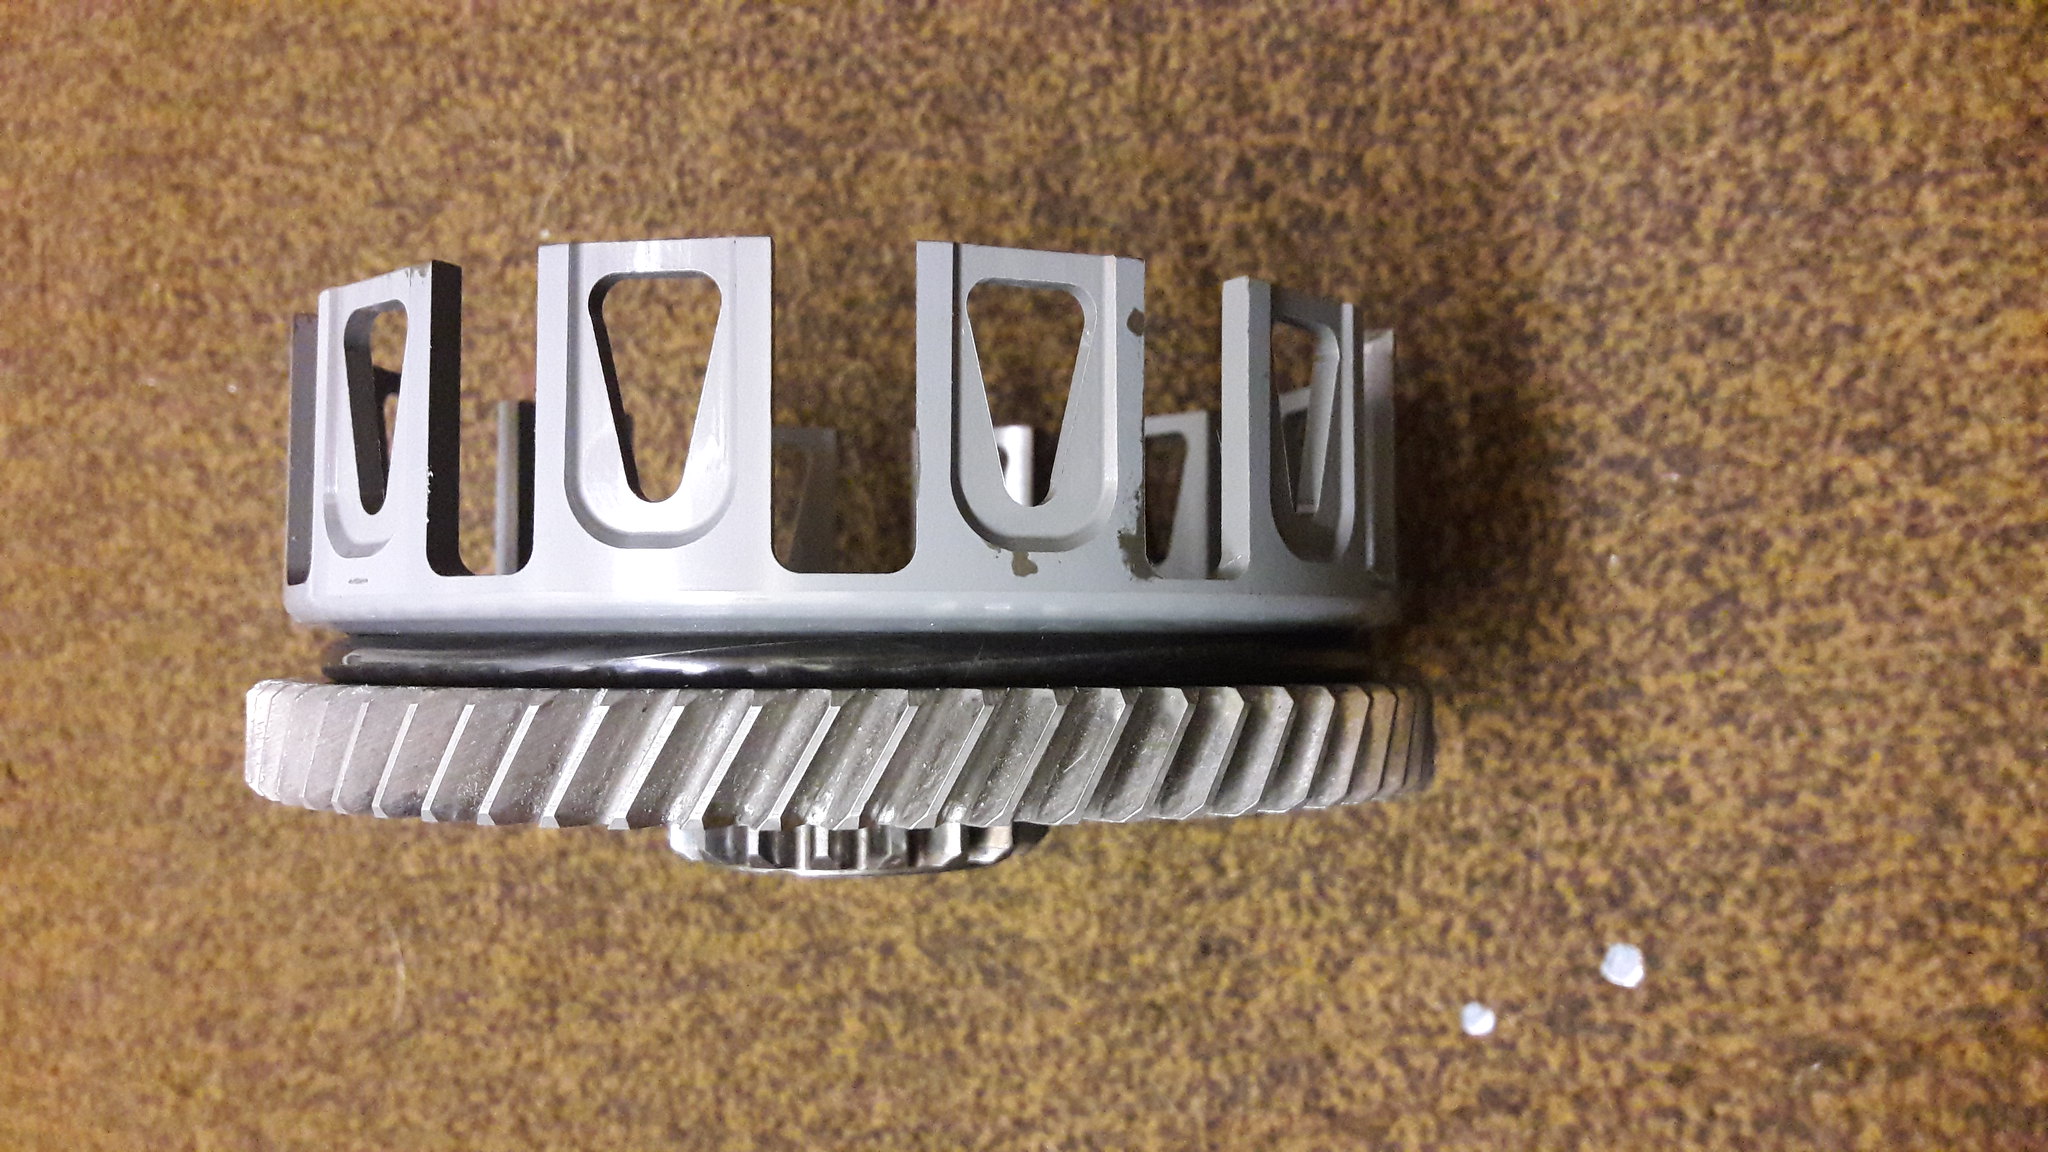 20181109_121812 20181109_121812 by David Miller, on Flickr Dusty  |
|
|
|
Post by dusty350 on Nov 18, 2018 12:44:16 GMT 1
Regards the pip on that bearing - don't know why. May just be the supplier of that bearing uses a smaller pip maybe ?? All the cranks I have ever had rebuilt, or bought brand new, have been the same. Dusty  |
|
|
|
Post by dusty350 on Nov 18, 2018 12:48:54 GMT 1
The other issue I had with this basket was the spacer that sits in the middle was a really tight fit which isn't normal. I had the force it out. The small gear on the back of the basket showed signs of getting hot, as did the inside edge of the spacer itself. Whilst it was all apart I smoothed down the brass insert that the spacer runs inside - couldn't find any obvious binding point, but it all runs smoothly now. Not had that issue before  Dusty  |
|
|
|
Post by dusty350 on Nov 29, 2018 11:13:59 GMT 1
Still waiting on some parts before I can progress the bottom end, so in the meantime I thought I would do some other bits to save time later on. I had a brand new, old stock 350Lc head sat in the cupboard that I am using on this build. As standard is was painted black all over. I decided against spraying it with engine enamel as there was no need, but I did mask it up and polish the out rim; 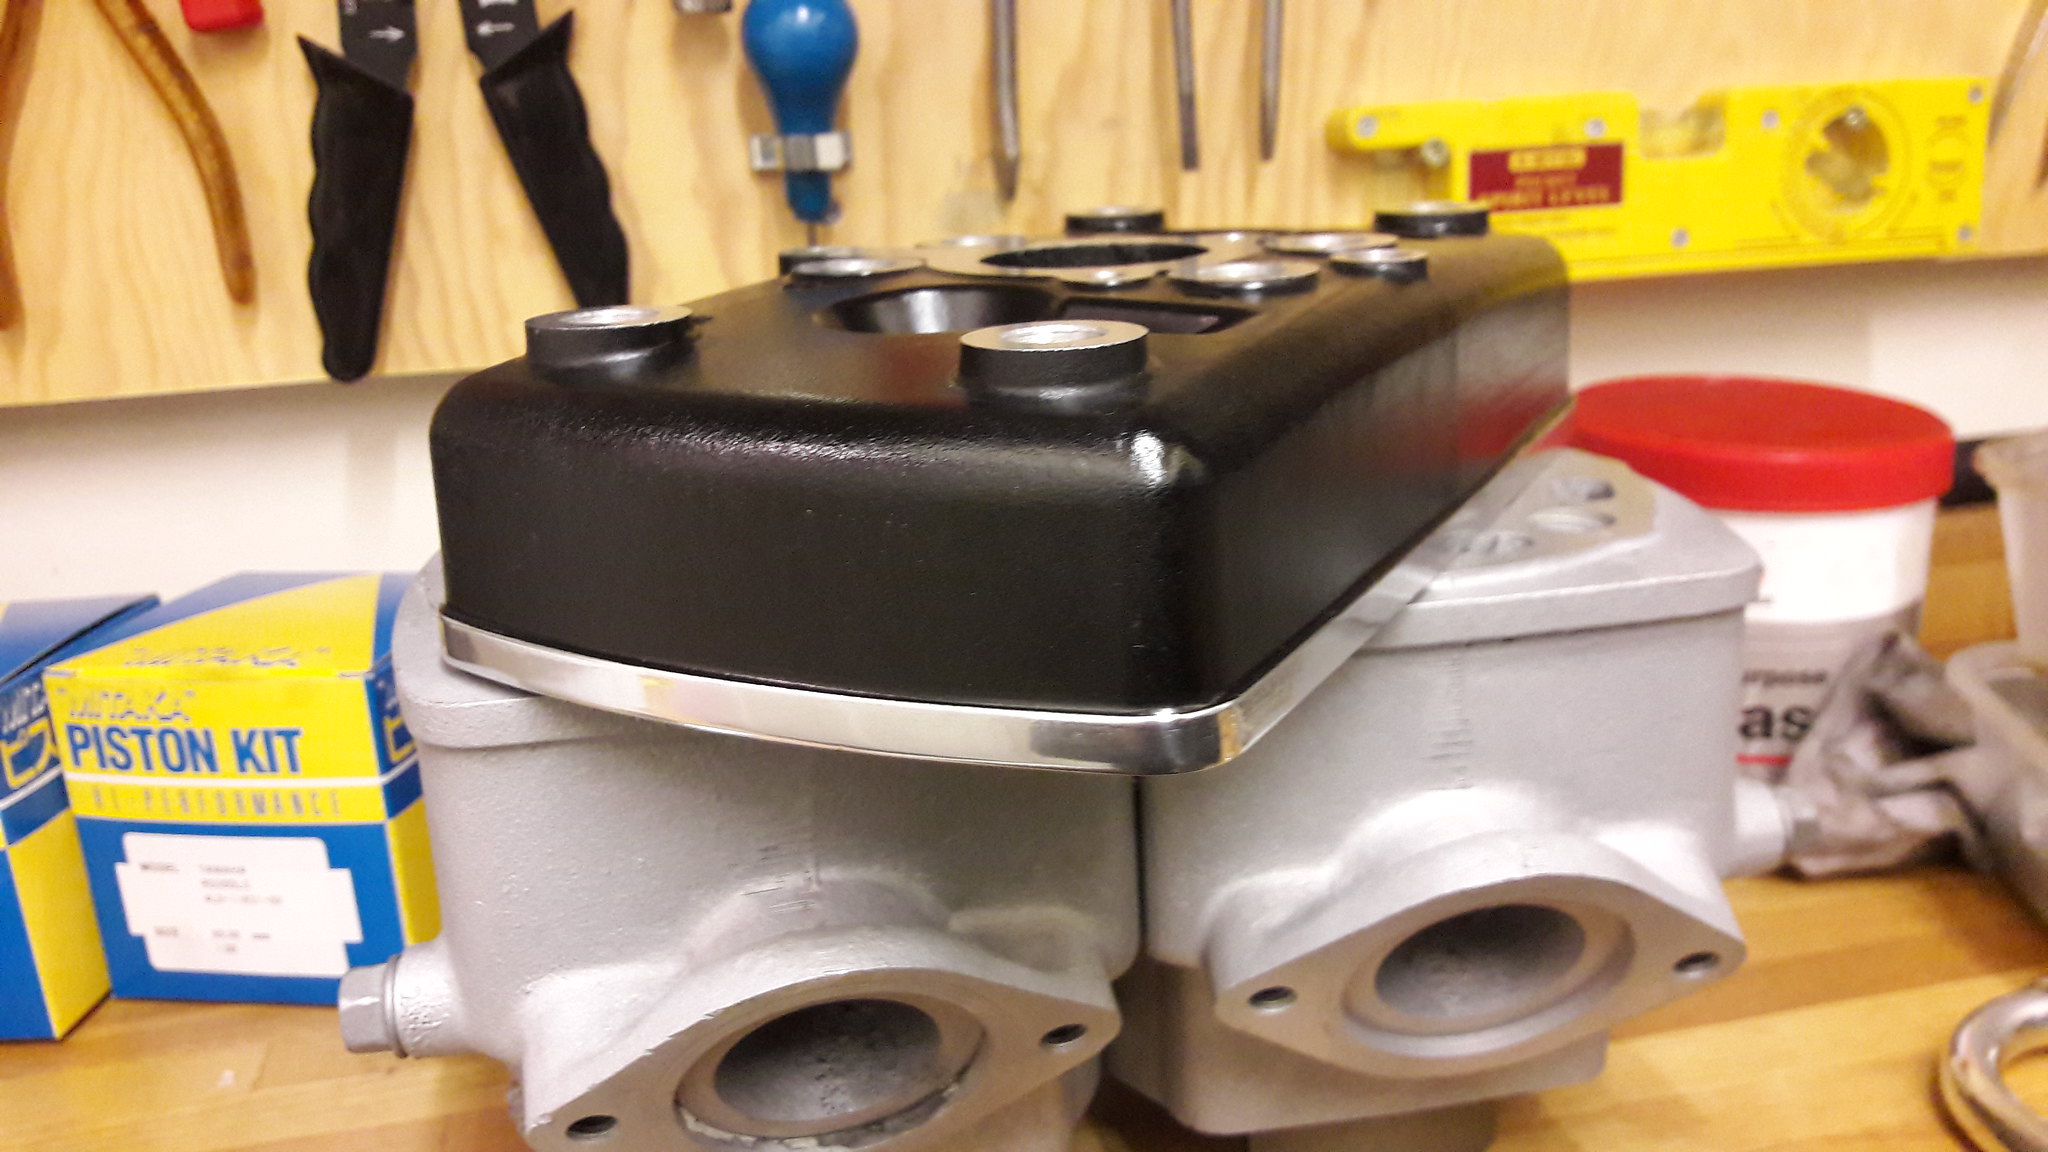 20181127_192834 20181127_192834 by David Miller, on Flickr That pic also shows the barrels that were bead blasted when I was getting the rebore done at PJME's. That finish can hold dirt a bit and looks a bit dull - it's perfect for spraying over, but I wanted the barrels in a bare finish. Found a new guy near me for vapour blasting, and it took him less than 10 minutes for the pair. I polished the outer rim on the barrels when I got home and gave them a final rinse out; 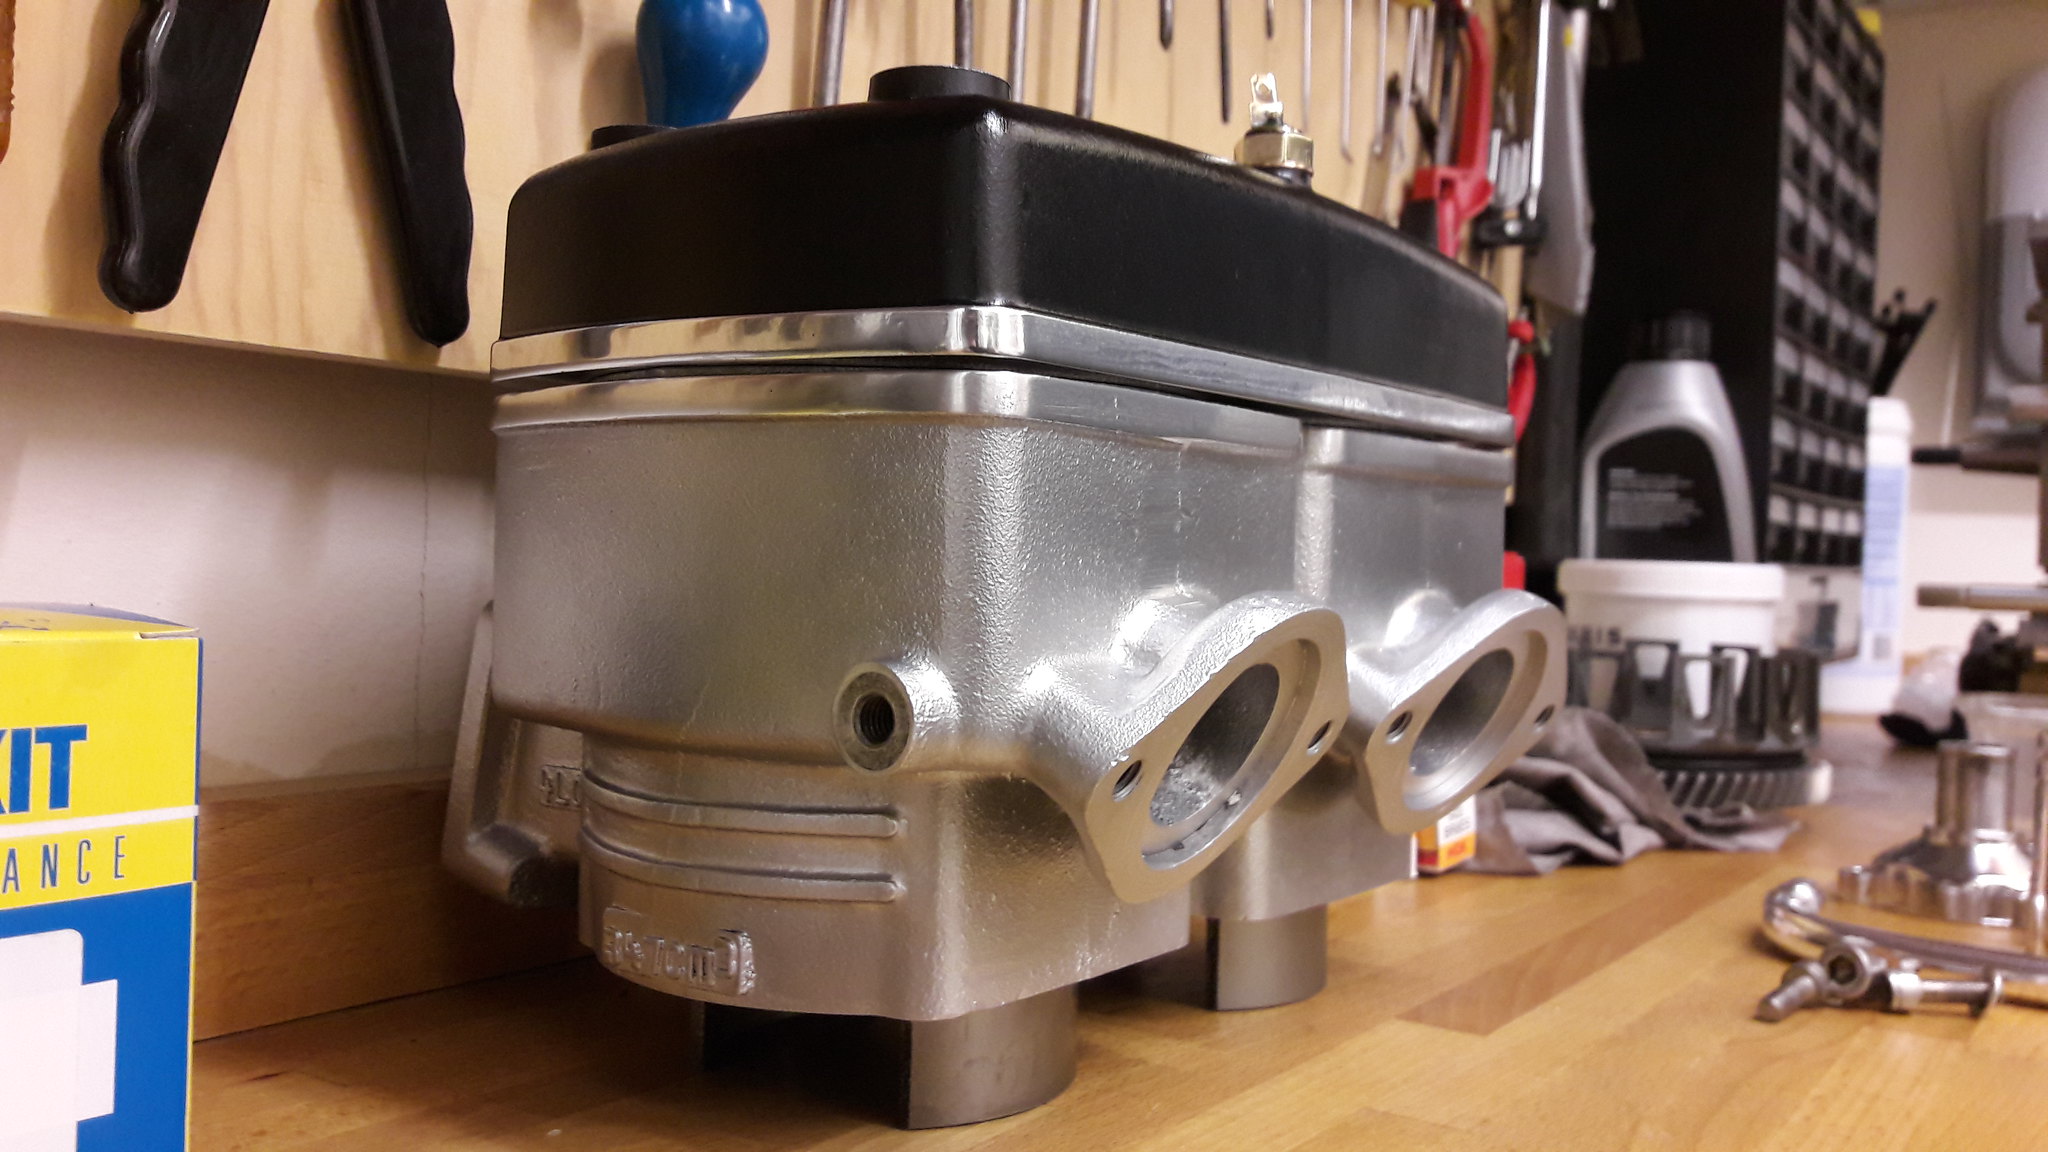 20181128_153727 20181128_153727 by David Miller, on Flickr Gave some other parts a bit of a polish as they were really scabby; 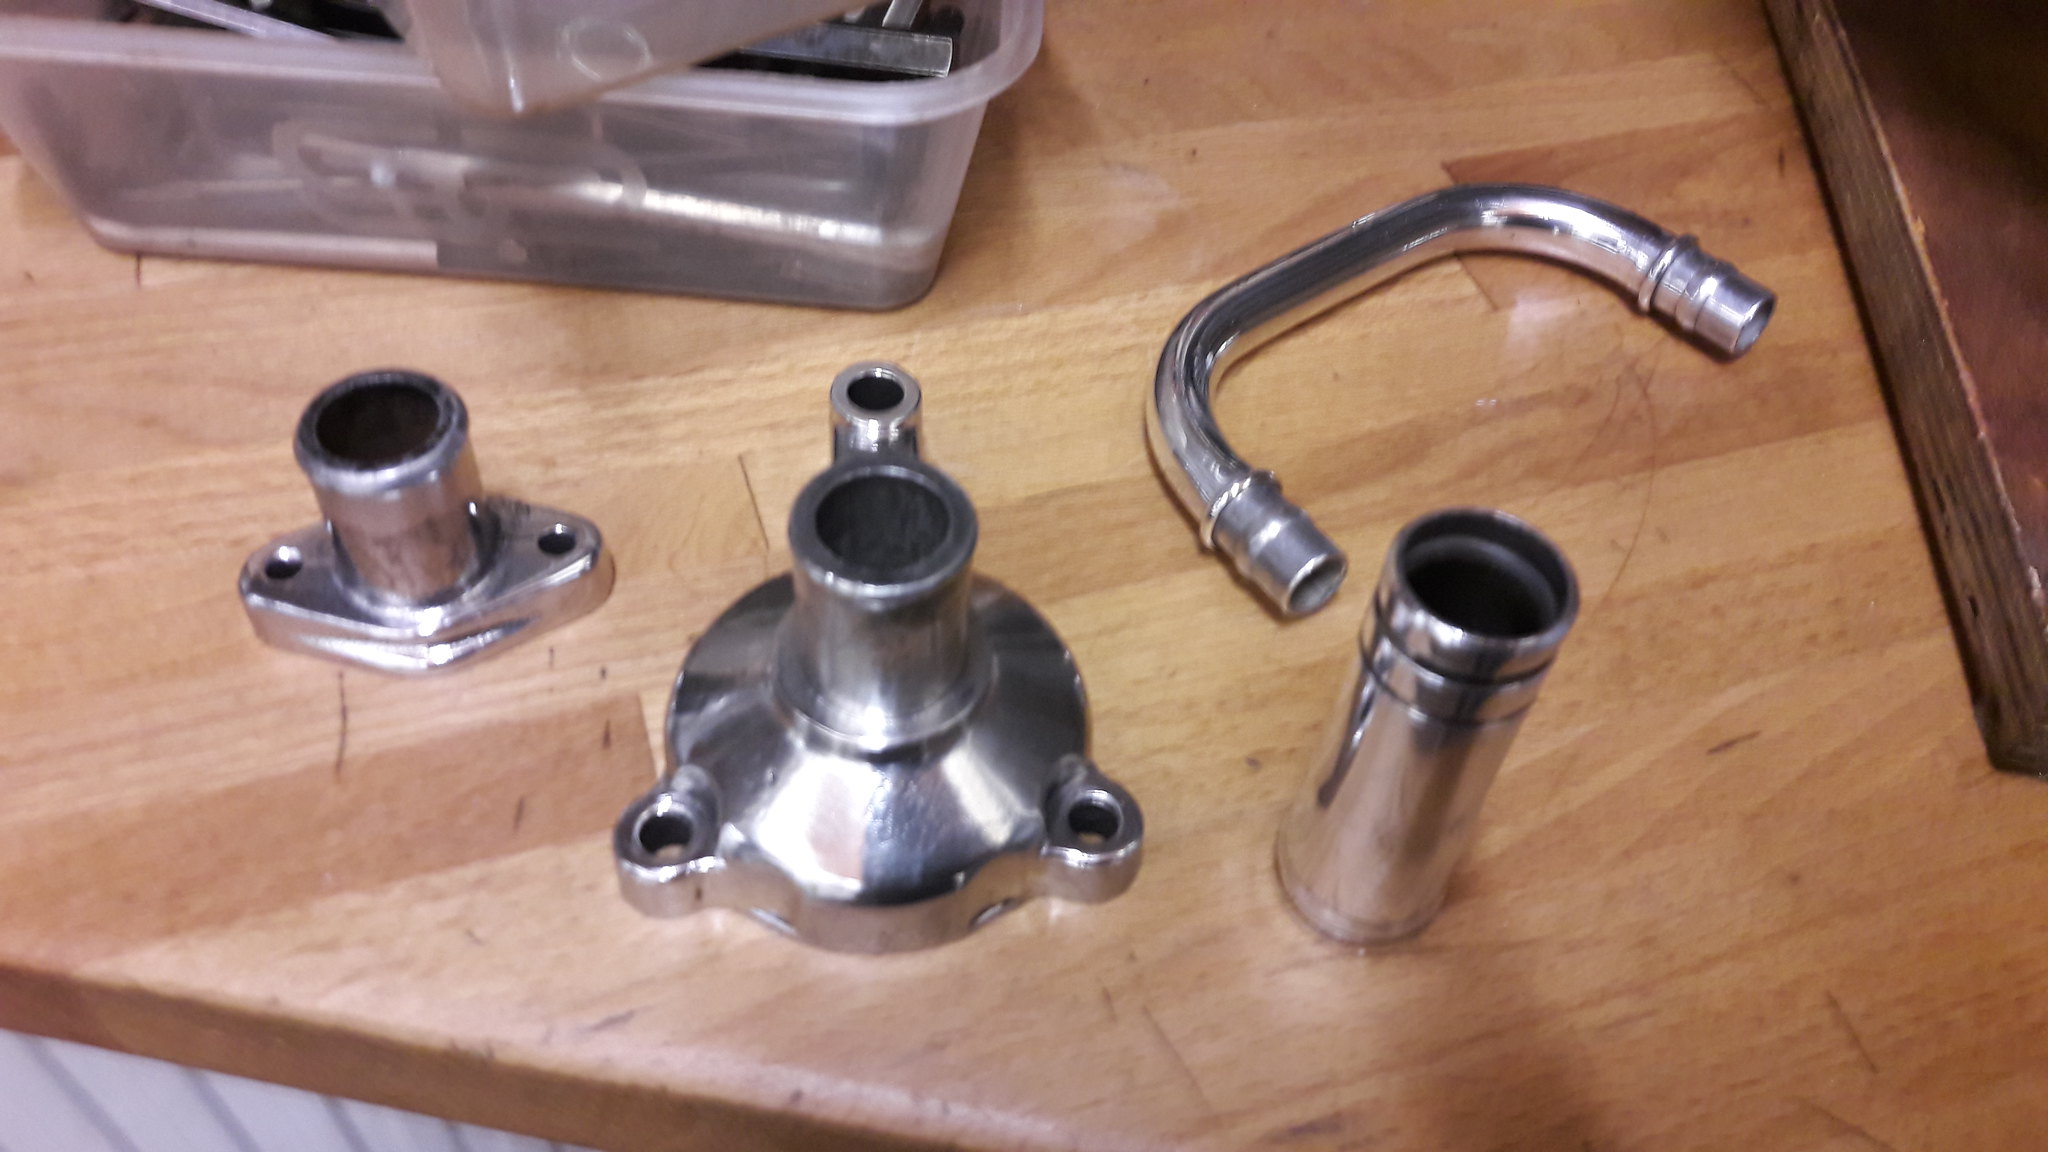 20181125_100256 20181125_100256 by David Miller, on Flickr Reed blocks will be next and I've just ordered 2 new Yam reed block rubbers from Norbo as mine were quite rough. Hopefully back to the bottom end next. Dusty  |
|
|
|
Post by skint on Nov 29, 2018 15:54:20 GMT 1
Hi dusty.
Absolutely loving this thread! Given me the push to rebuild my own. Wouldn't have done it without this.
Great finish on the head and barrels, what have you used to do these?
Keep up the good work!
Cheers
Paul.
|
|
|
|
Post by Tobyjugs on Nov 29, 2018 17:26:38 GMT 1
How did the little hedge hog fare?
|
|
|
|
Post by dusty350 on Nov 29, 2018 19:27:10 GMT 1
Hi Paint on the head is the standard Yamaha finish - not sure what they paint them with. As it's a new head I decided not to bother painting it this time. The barrels are vapour blasted - it leaves it a satin finish. I just buff them up with some decent car polish just to protect them a bit but don't really need to do that to them. Dave The Hoglet is doing ok as far as I know. Got an update last weekend and he is eating well and gaining weight.  Dusty  |
|
|
|
Post by skint on Nov 29, 2018 21:25:35 GMT 1
Hi dusty,
How are you getting the head and barrels that polished on the raised rim. Are you using a dreamed or something similar?
Good news about Dave :-)
Cheers
Paul.
|
|
|
|
Post by dusty350 on Nov 29, 2018 21:48:13 GMT 1
Hi Paul I used a foam abrasive block and some fine grit paper to get the paint off the rib on the head. I did the same with the rib on the barrels but that was a vapour blasted finish to start with. Once smooth, I went over again with the foam block but with some Solvol on it. I would normally get the buffing wheel set up but I wasn't after a really shiny edge this time. A previous owner had damaged the rib on one barrel where he had obviously prised the head off by wedging a screwdriver between head and barrel, and I did dress that out with a Dremel before polishing and you can hardly see it now. The engine I built last year had a gloss head and vapoured barrels, but I didn't polish the rib on those barrels; 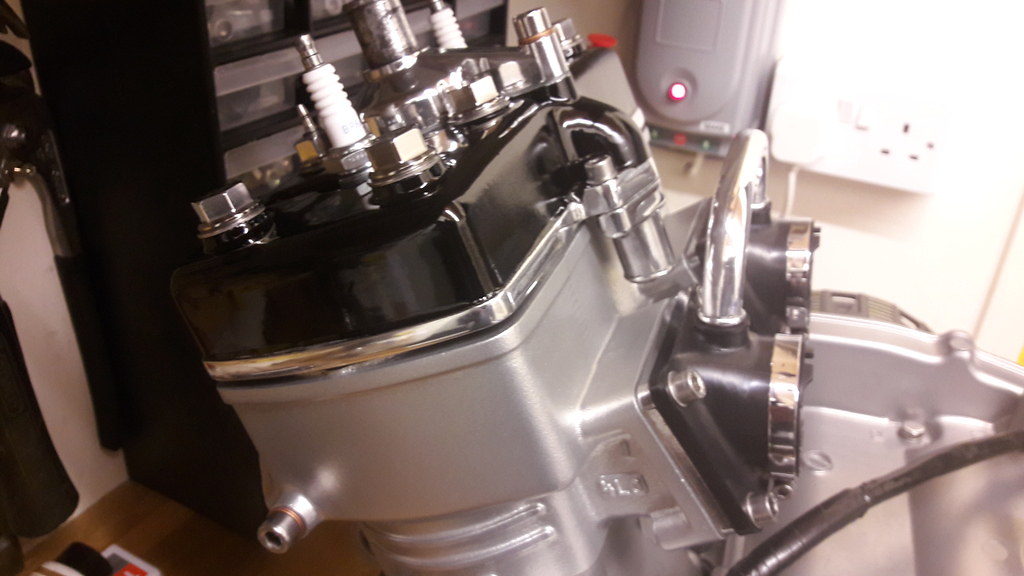 20170304_164839_zpsbdb5s6i6 20170304_164839_zpsbdb5s6i6 by David Miller, on Flickr So I just wanted to do this one a bit different to that. Dusty  |
|
|
|
Post by bezzer on Nov 29, 2018 22:22:25 GMT 1
Dusty, Could I ask if you treat your vapour blasted / polished surfaces with any type of protective coating? Like lacquer or similar?.
It’d be soul destroying to see such hard work and superb finish deteriorate.
Apologies if this is a daft question 😬
Regards bezzer
|
|
|
|
Post by dusty350 on Nov 29, 2018 23:33:53 GMT 1
Hi Bezzer
Good question mate. You can use ACF50 or something like it to coat the bare ally. I just apply a good car polish and buff it off. Vapour blasting seals the pores of the ally so the parts dont pick up dirt easily like they would with a dry media blast. I wouldnt lacquer as it may yellow with heat.
Dusty😊
|
|
|
|
Post by bezzer on Nov 29, 2018 23:47:29 GMT 1
Cheers Dusty, Interesting that the vapour blasting has that effect on the surface, never heard that before, but has to be an added bonus 👍🏻.
I have used ACF50 on my bikes when they’ve been laid up in the past, great product but not the cheapest! 😁
bezzer
|
|
|
|
Post by donkeychomp on Nov 29, 2018 23:58:07 GMT 1
Great news about Dave!
That engine is going to look so sweet. Very nice work Dusty.
Alex
|
|
|
|
Post by dusty350 on Dec 12, 2018 19:49:46 GMT 1
Bit of a delay due to work commitments, but back to it now ! Clutch - first shim and drum spacer were fitted last time, so now the rebuilt basket can slide on ; 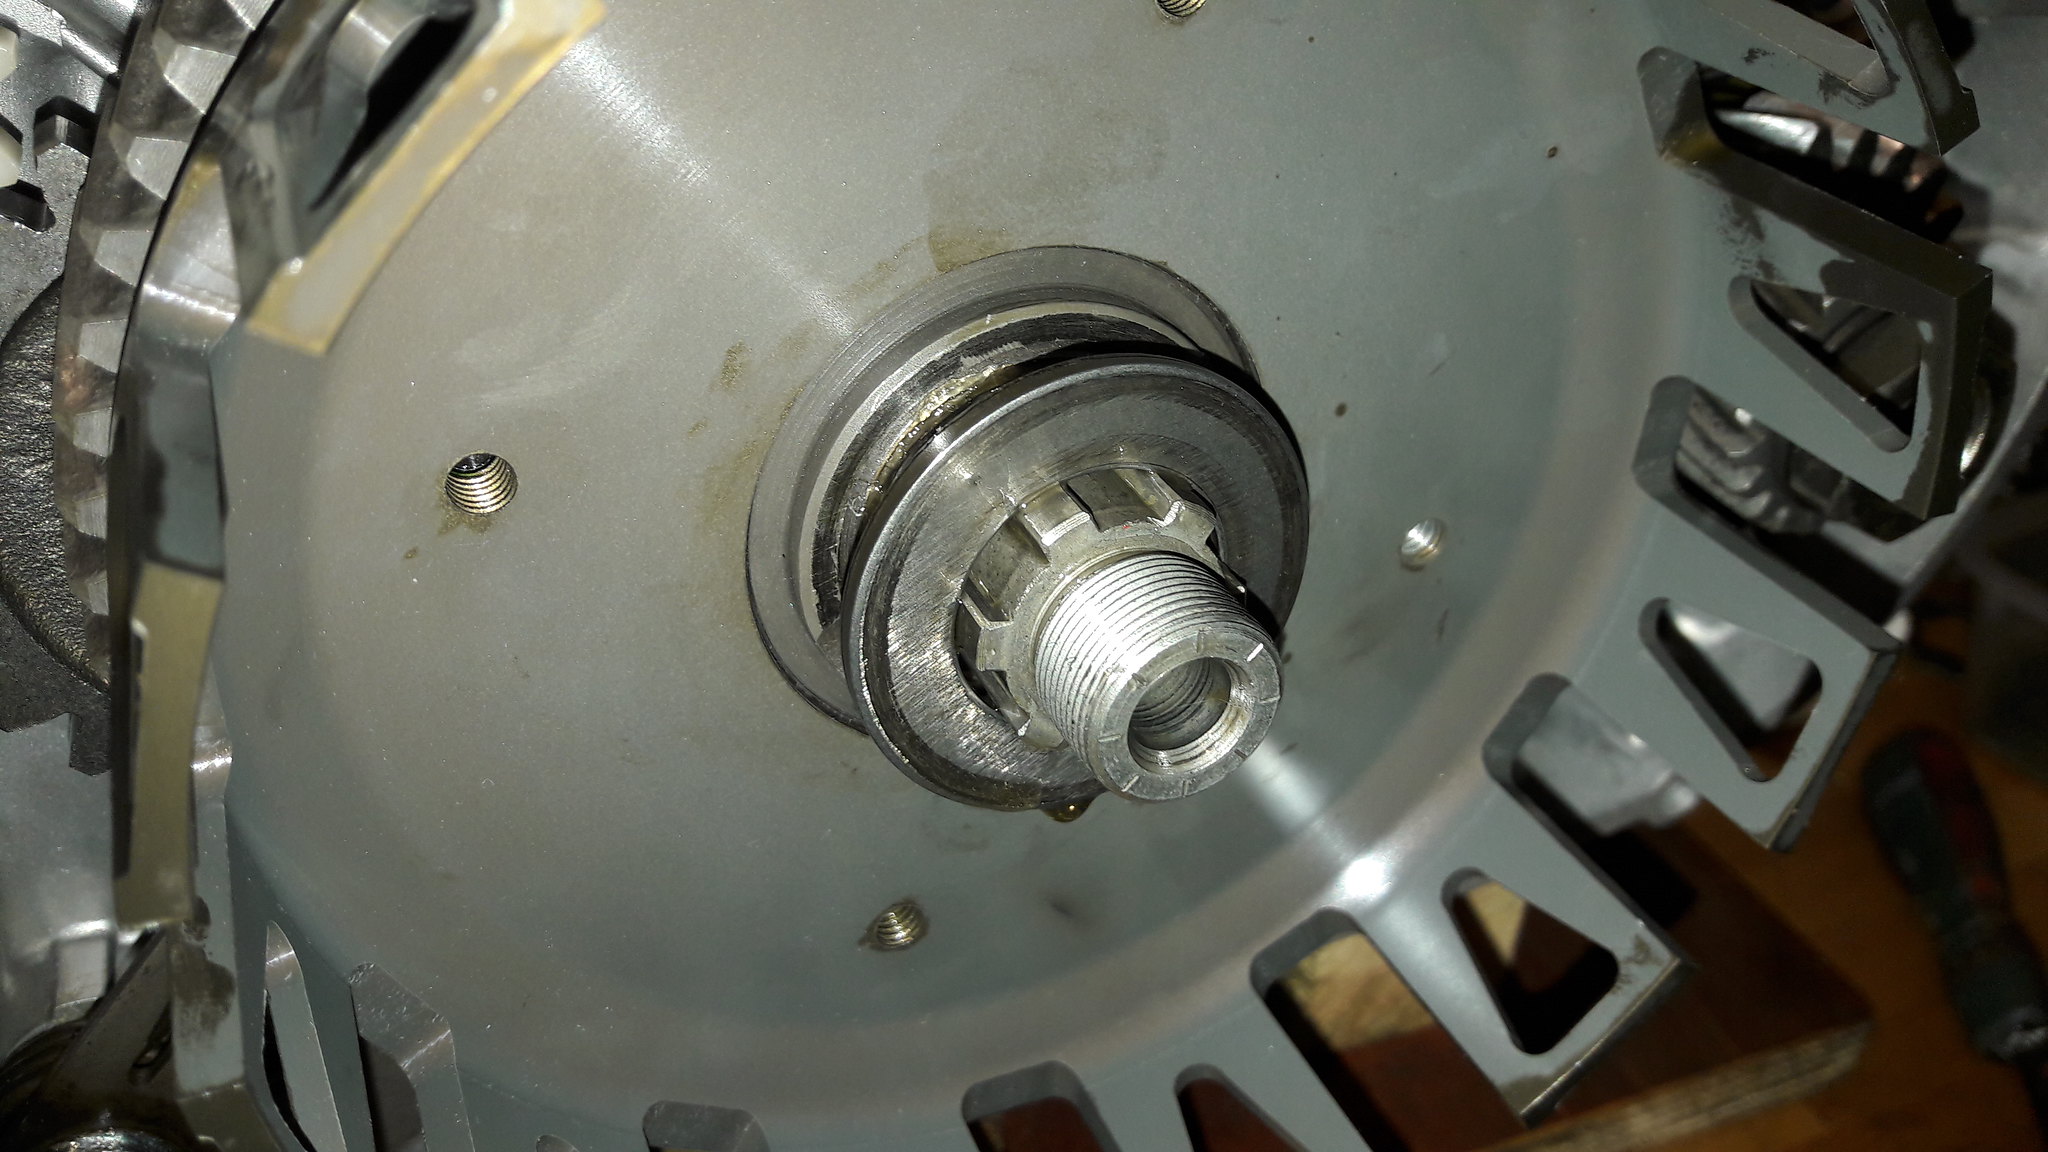 20181202_130713 20181202_130713 by David Miller, on Flickr And then the second shim. Both shims are exactly the same by the way. Then the inner drum slides into place; 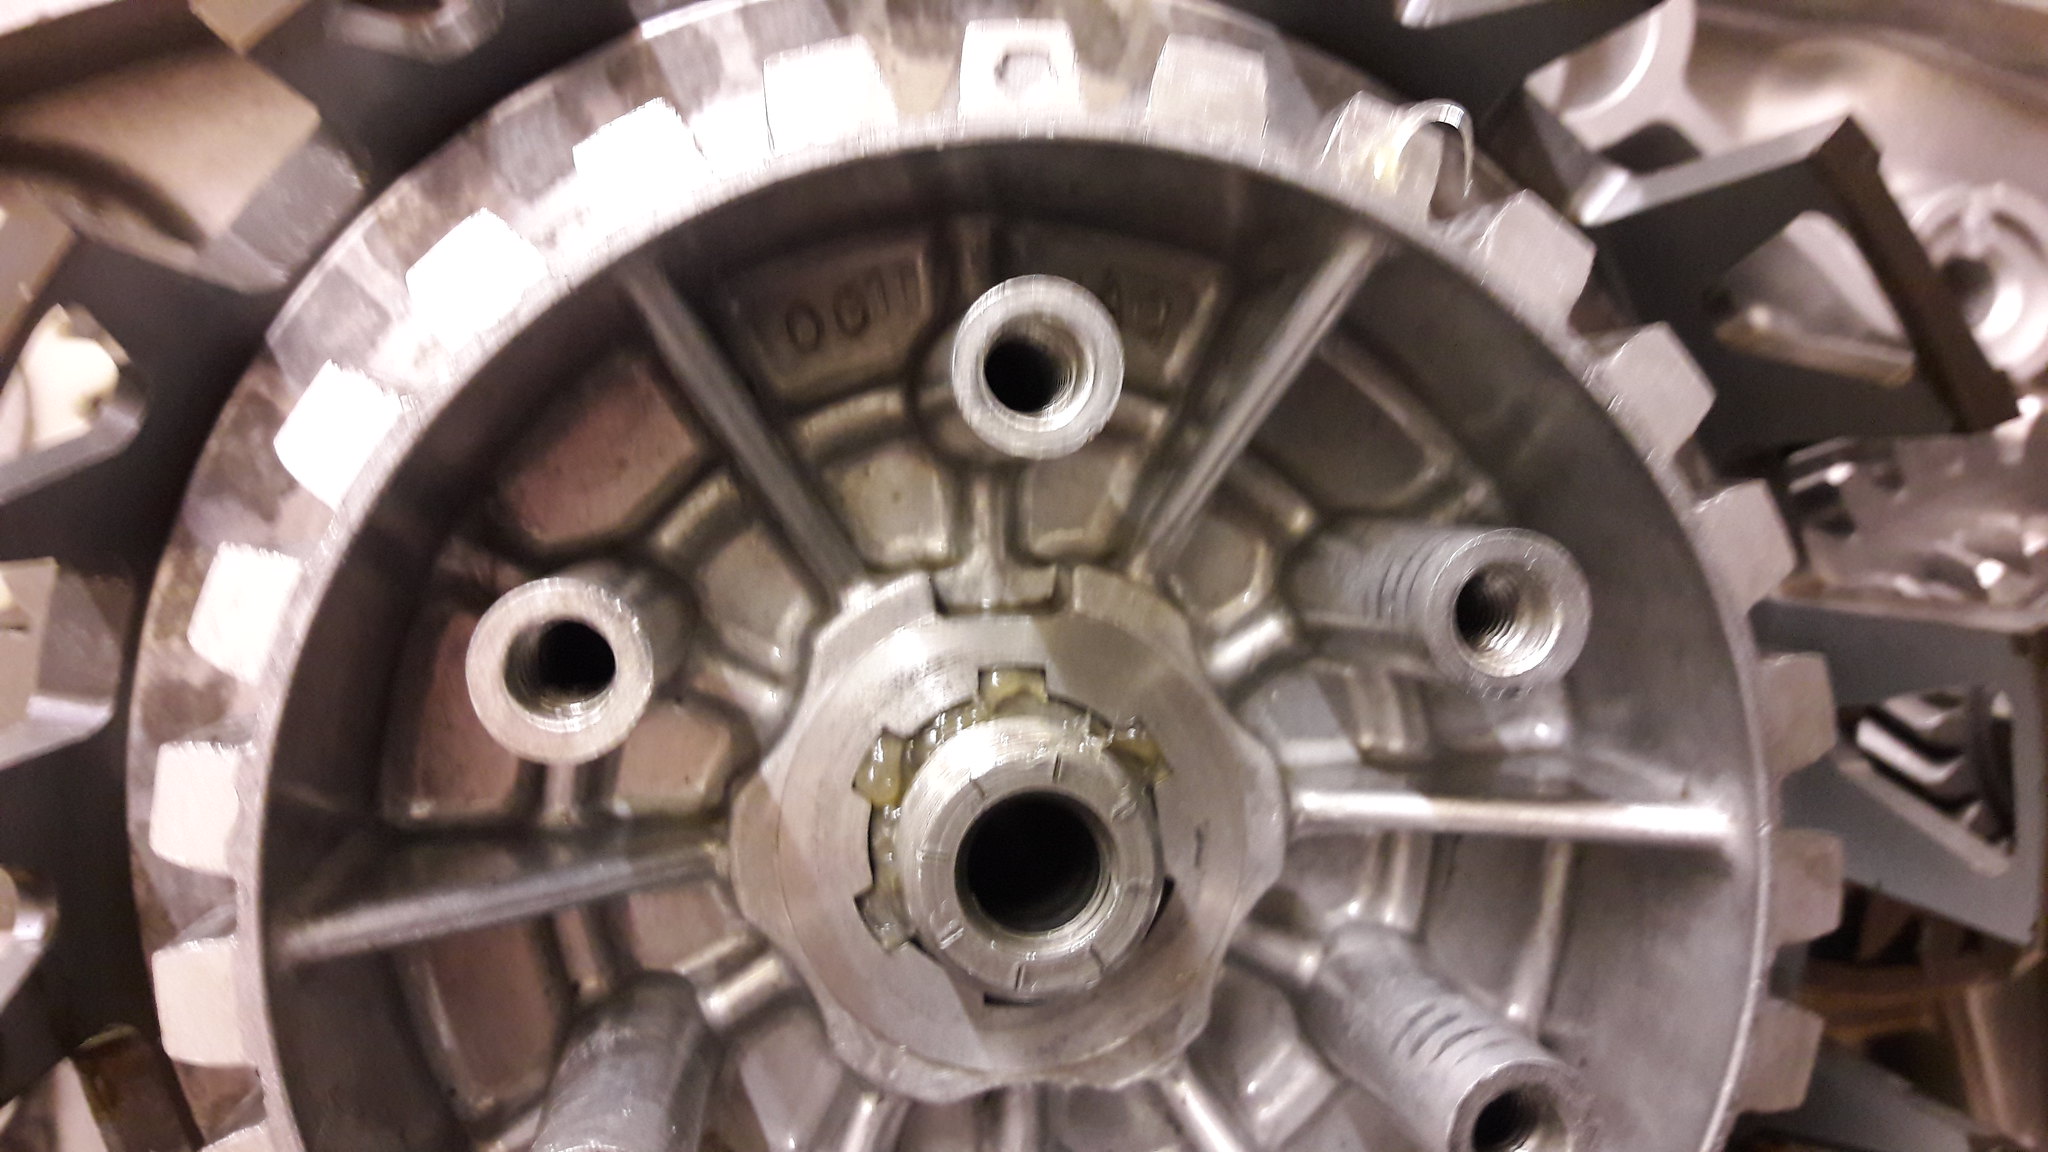 20181202_131753 20181202_131753 by David Miller, on Flickr And next is the lock washer; 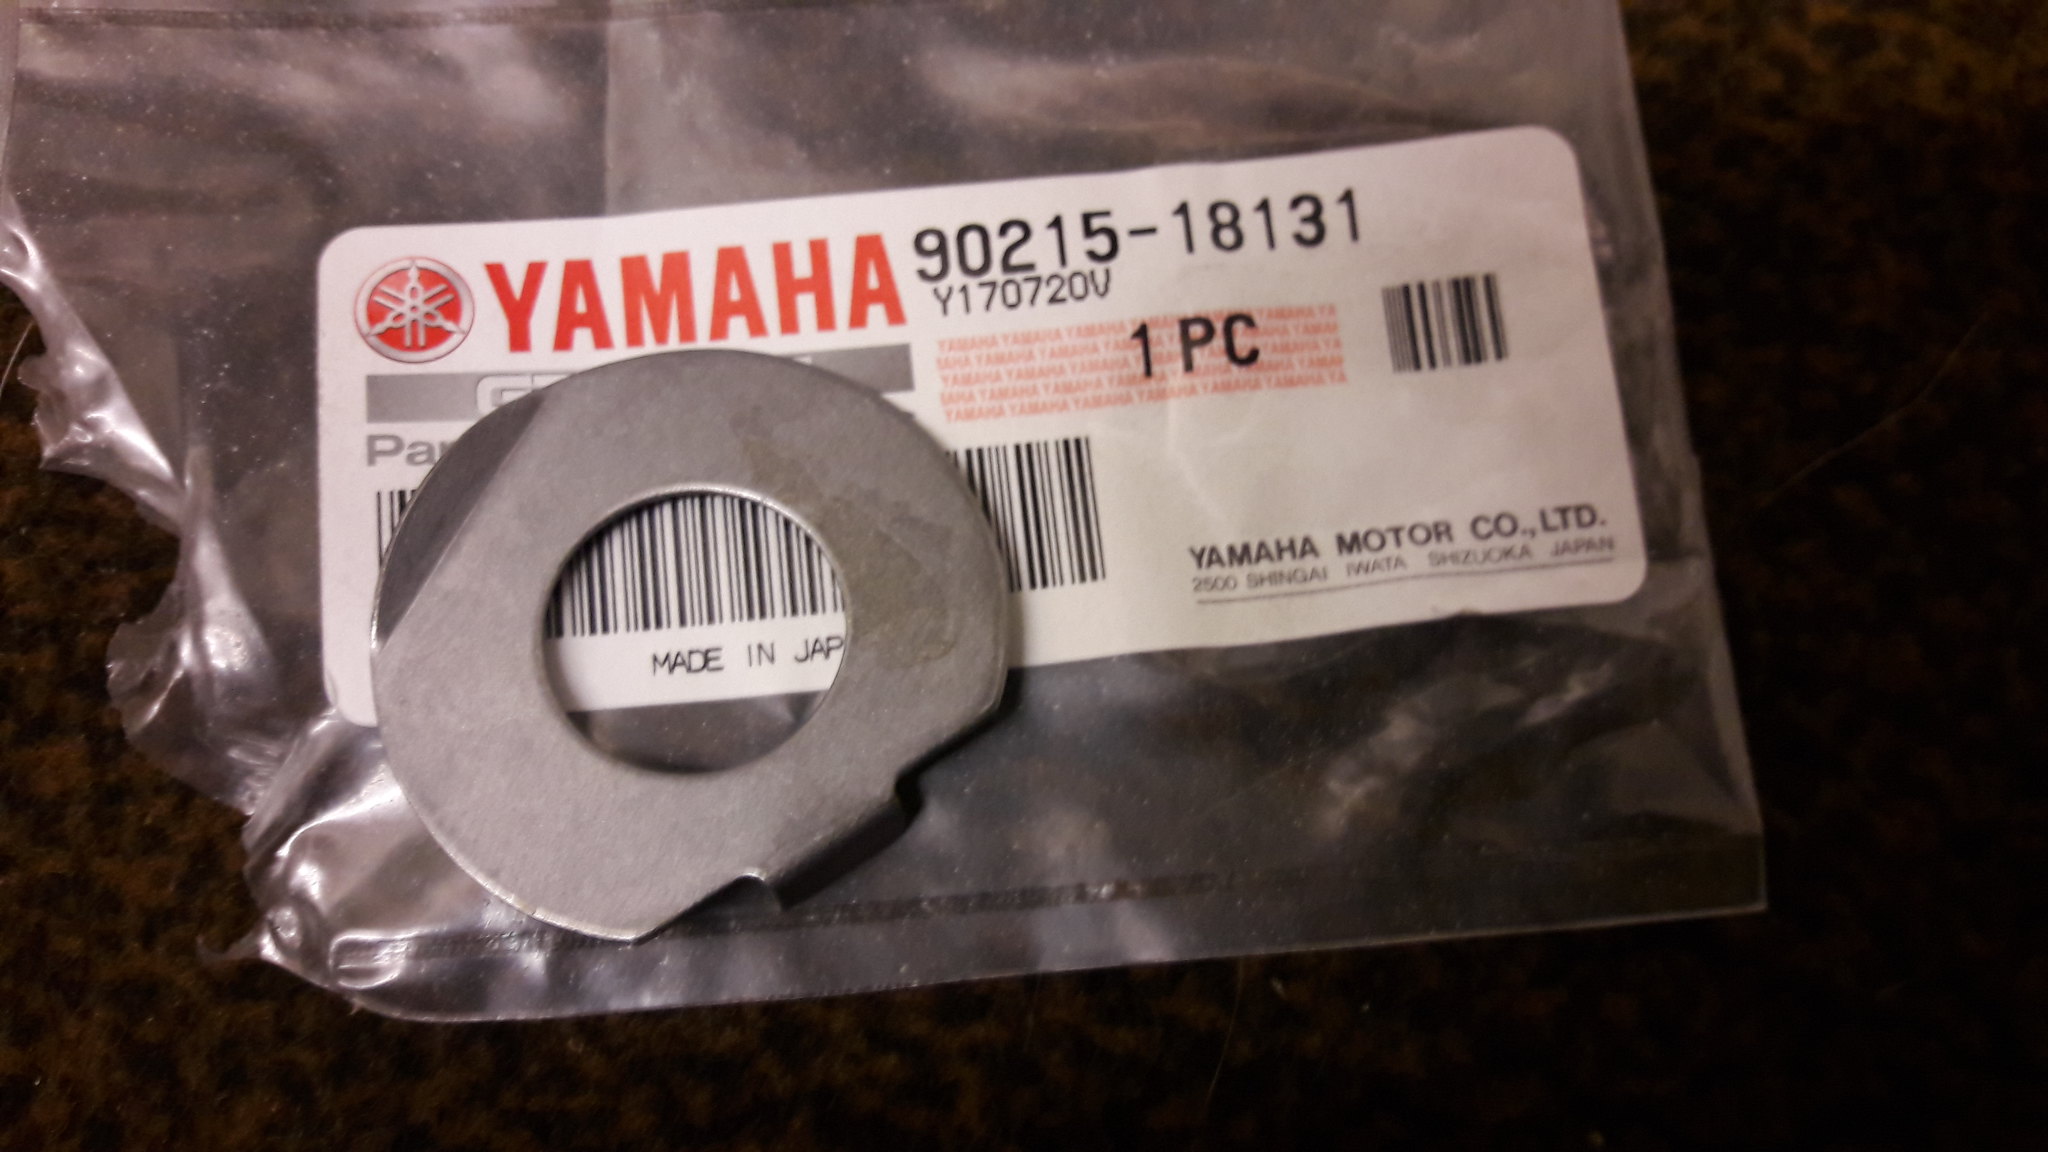 20181202_131742 20181202_131742 by David Miller, on Flickr That is £2.64 from Fowlers. Centre nut goes on finger tight for the mo. Next, it's the primary gear. The ring gear on the back of the clutch basket will have a number scribed on it's edge somewhere - likewise the main gear for the crank end. The 2 numbers, added up, should reach 155 +/- 1. I managed to source a correct 94 numbered main gear to replace the 91 I had (thanks Andrew  ) and fitted that with some red rubber grease applied to the seal for a nice easy fit.; 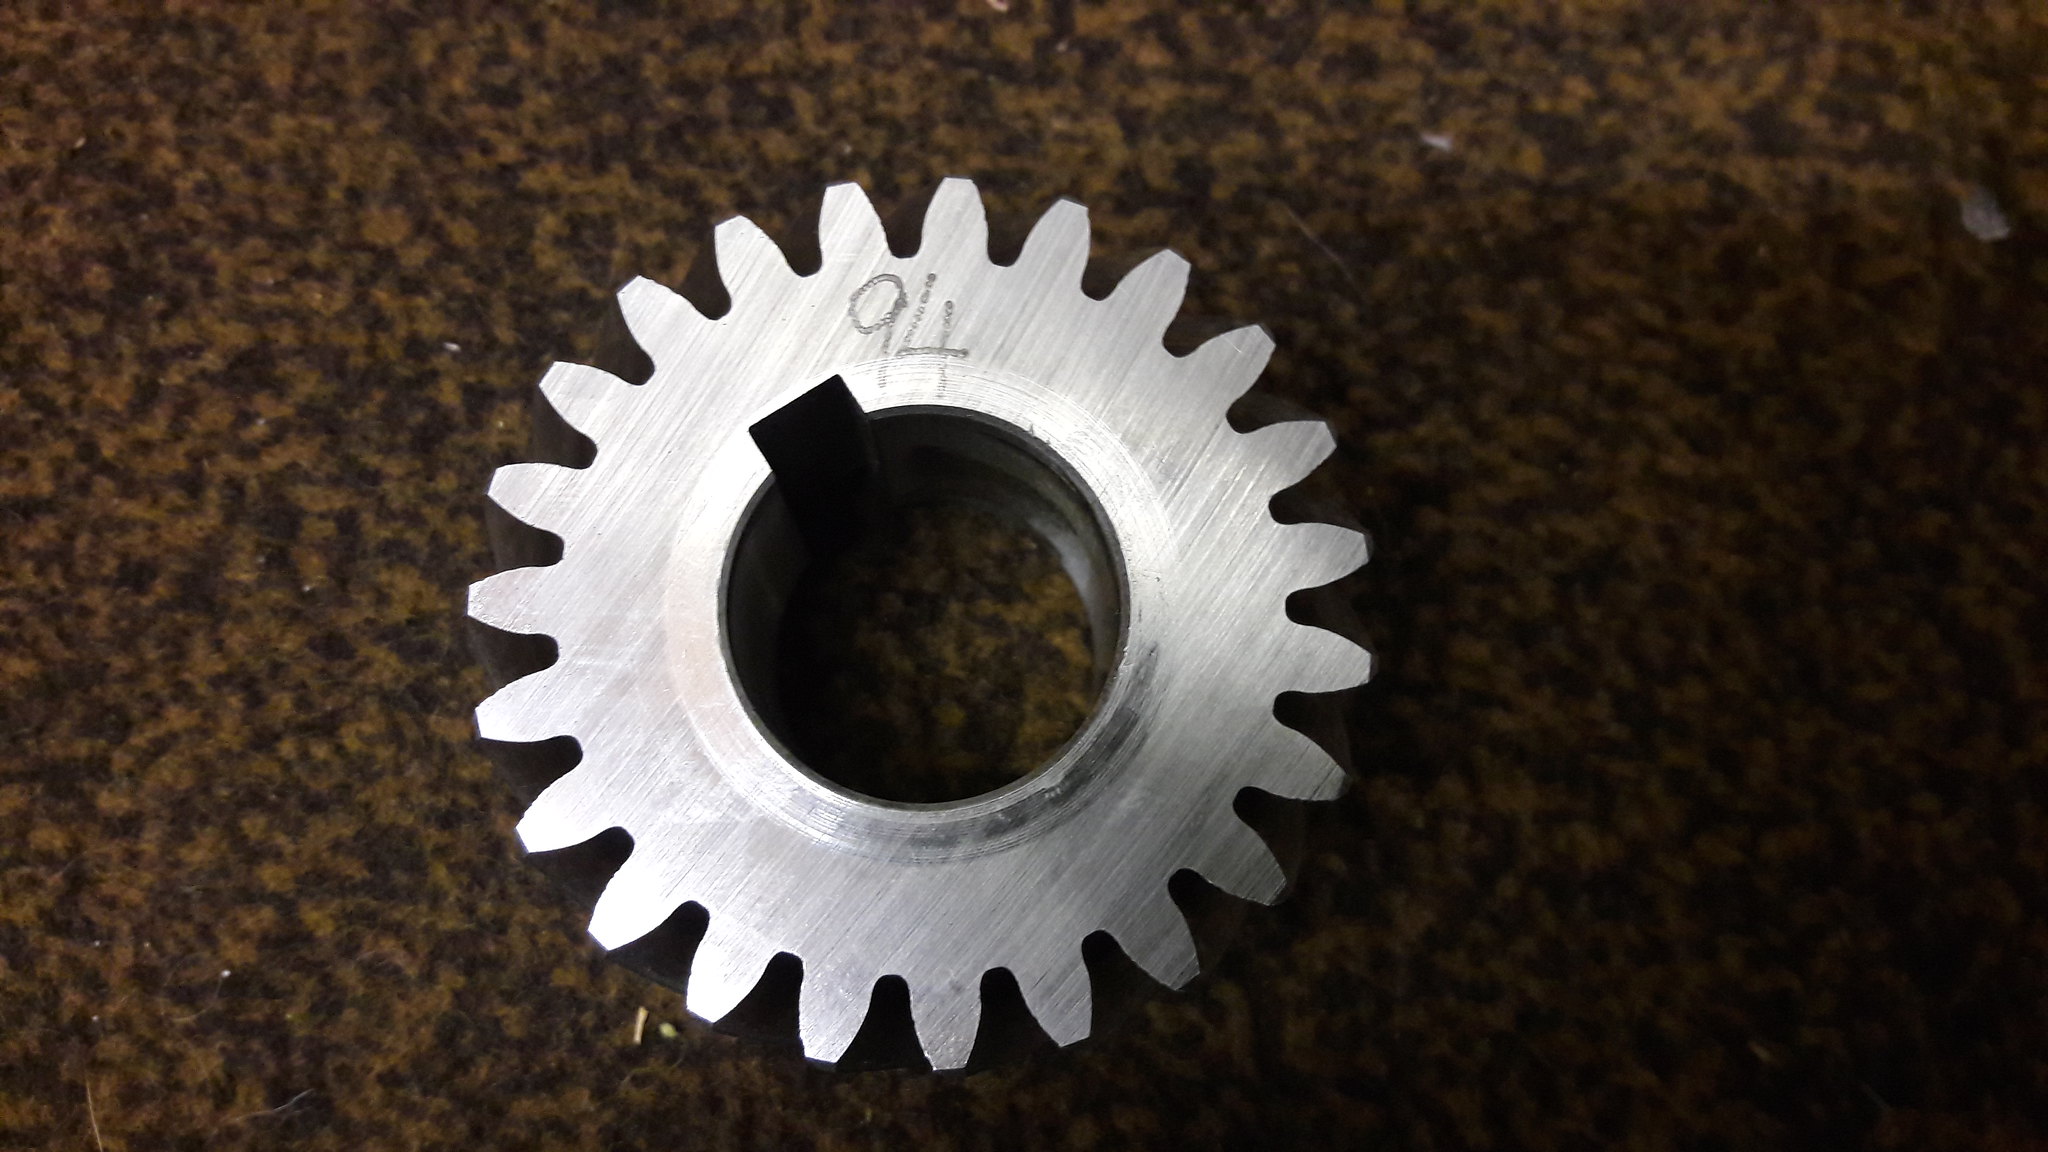 20181202_124636 20181202_124636 by David Miller, on Flickr A new square keyway; 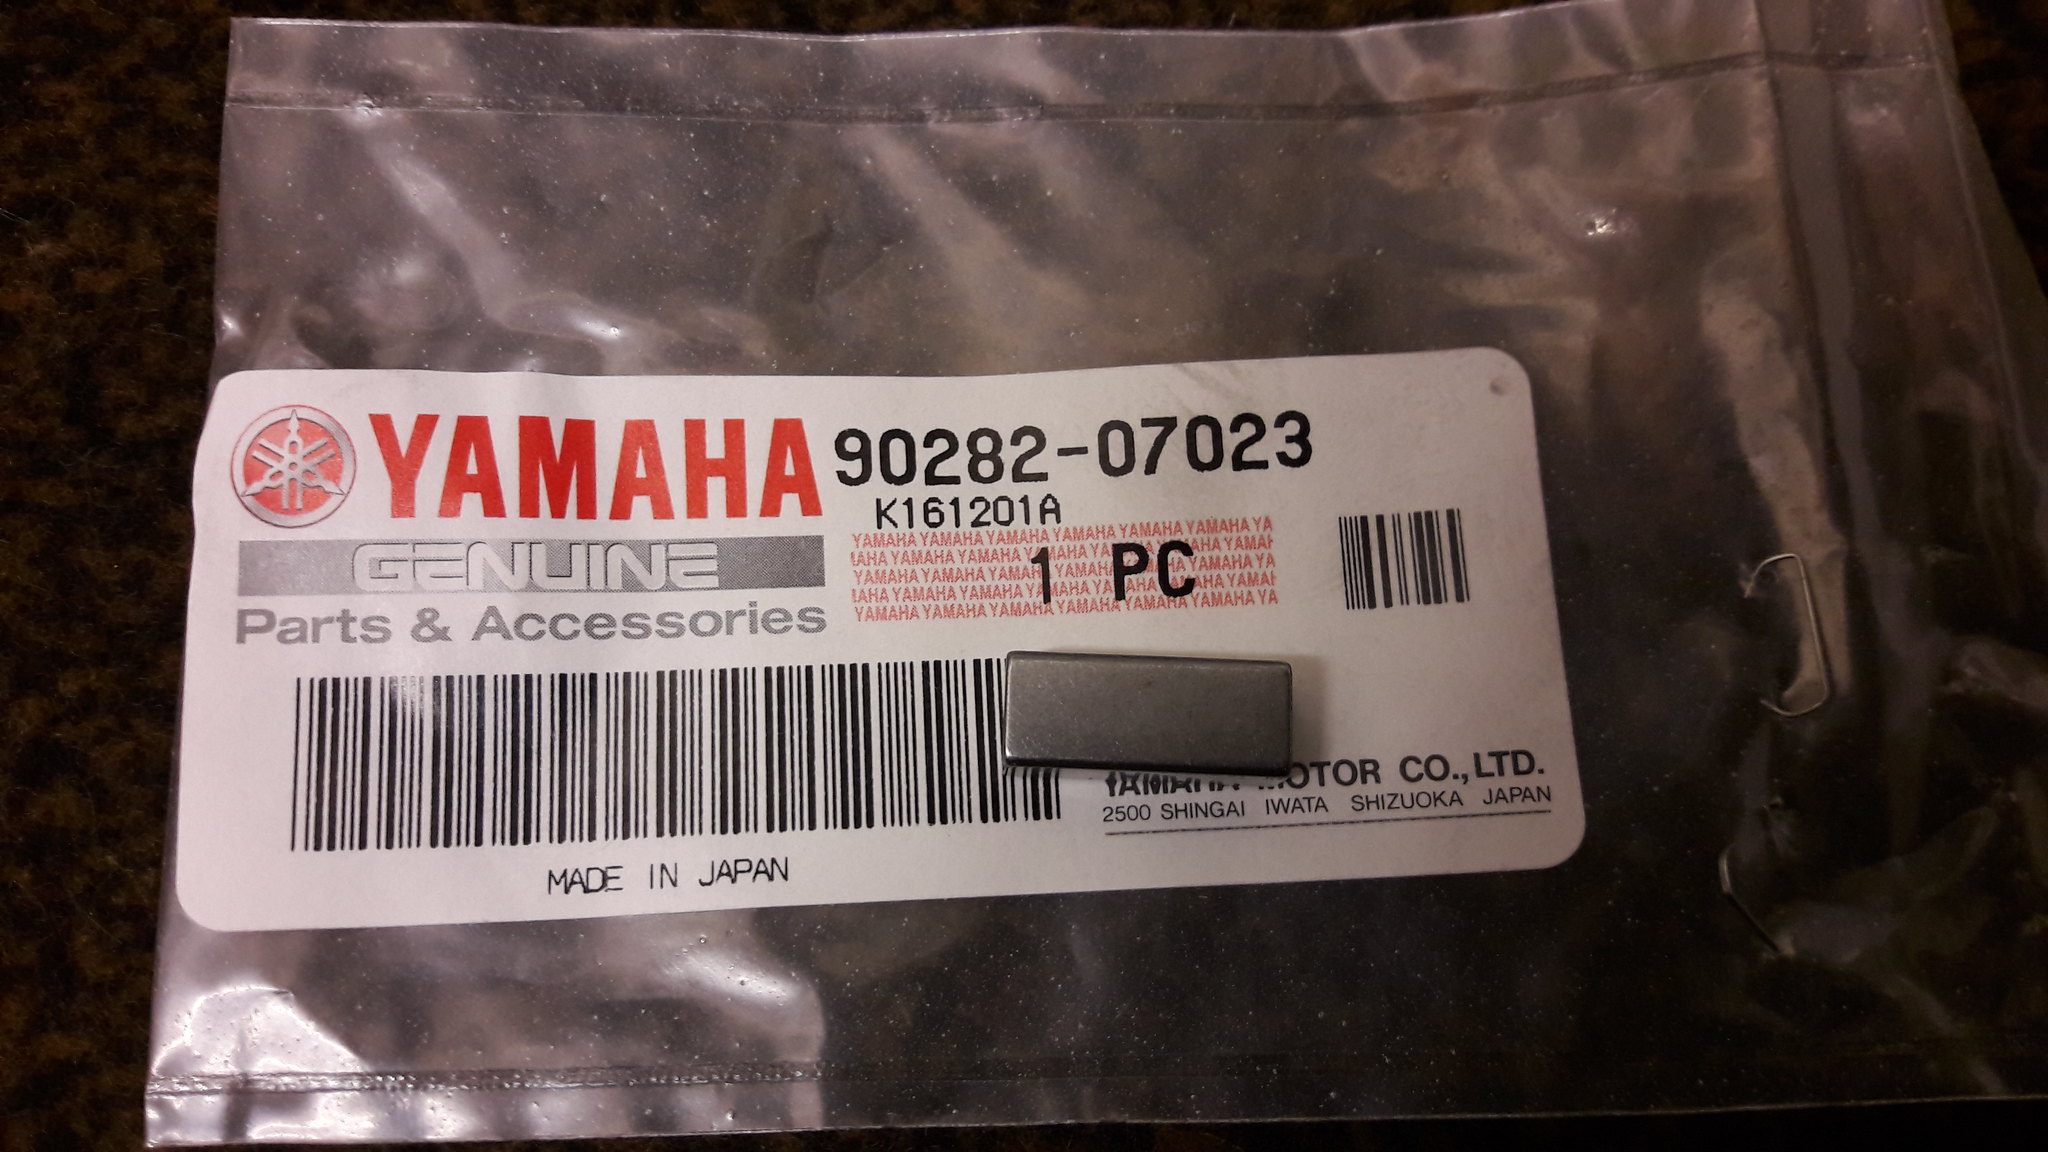 20181202_125318 20181202_125318 by David Miller, on Flickr £2.94, and a new Belville washer, £2.24; 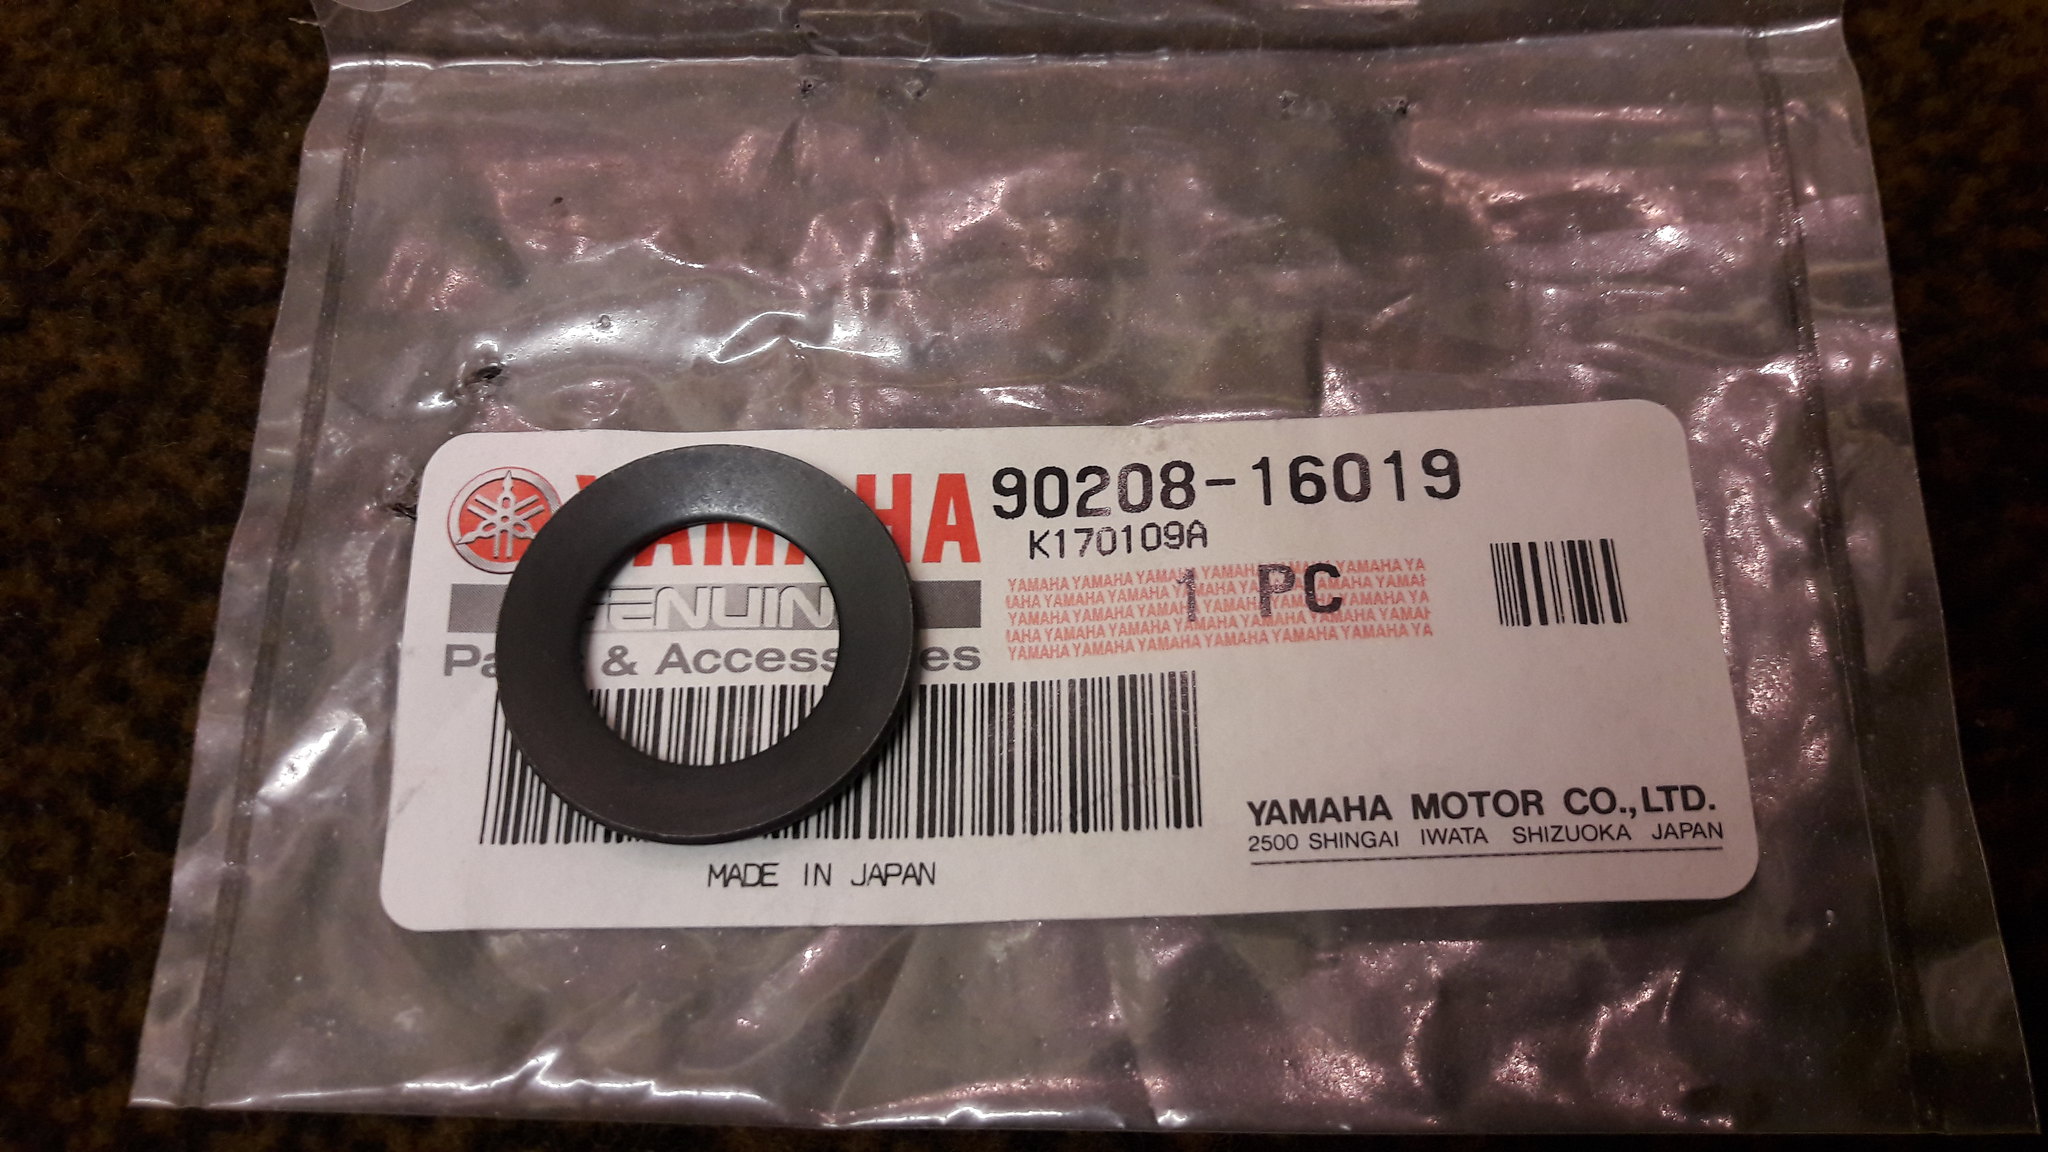 20181202_130128 20181202_130128 by David Miller, on Flickr I used some 3bond when fitting the square keyway - never done that before but due to reading other threads regards leaks from here I thought it wise to do. With the water pump gear fitted, I could now torque the clutch nut and primary drive nut - 47lb/ft for both; 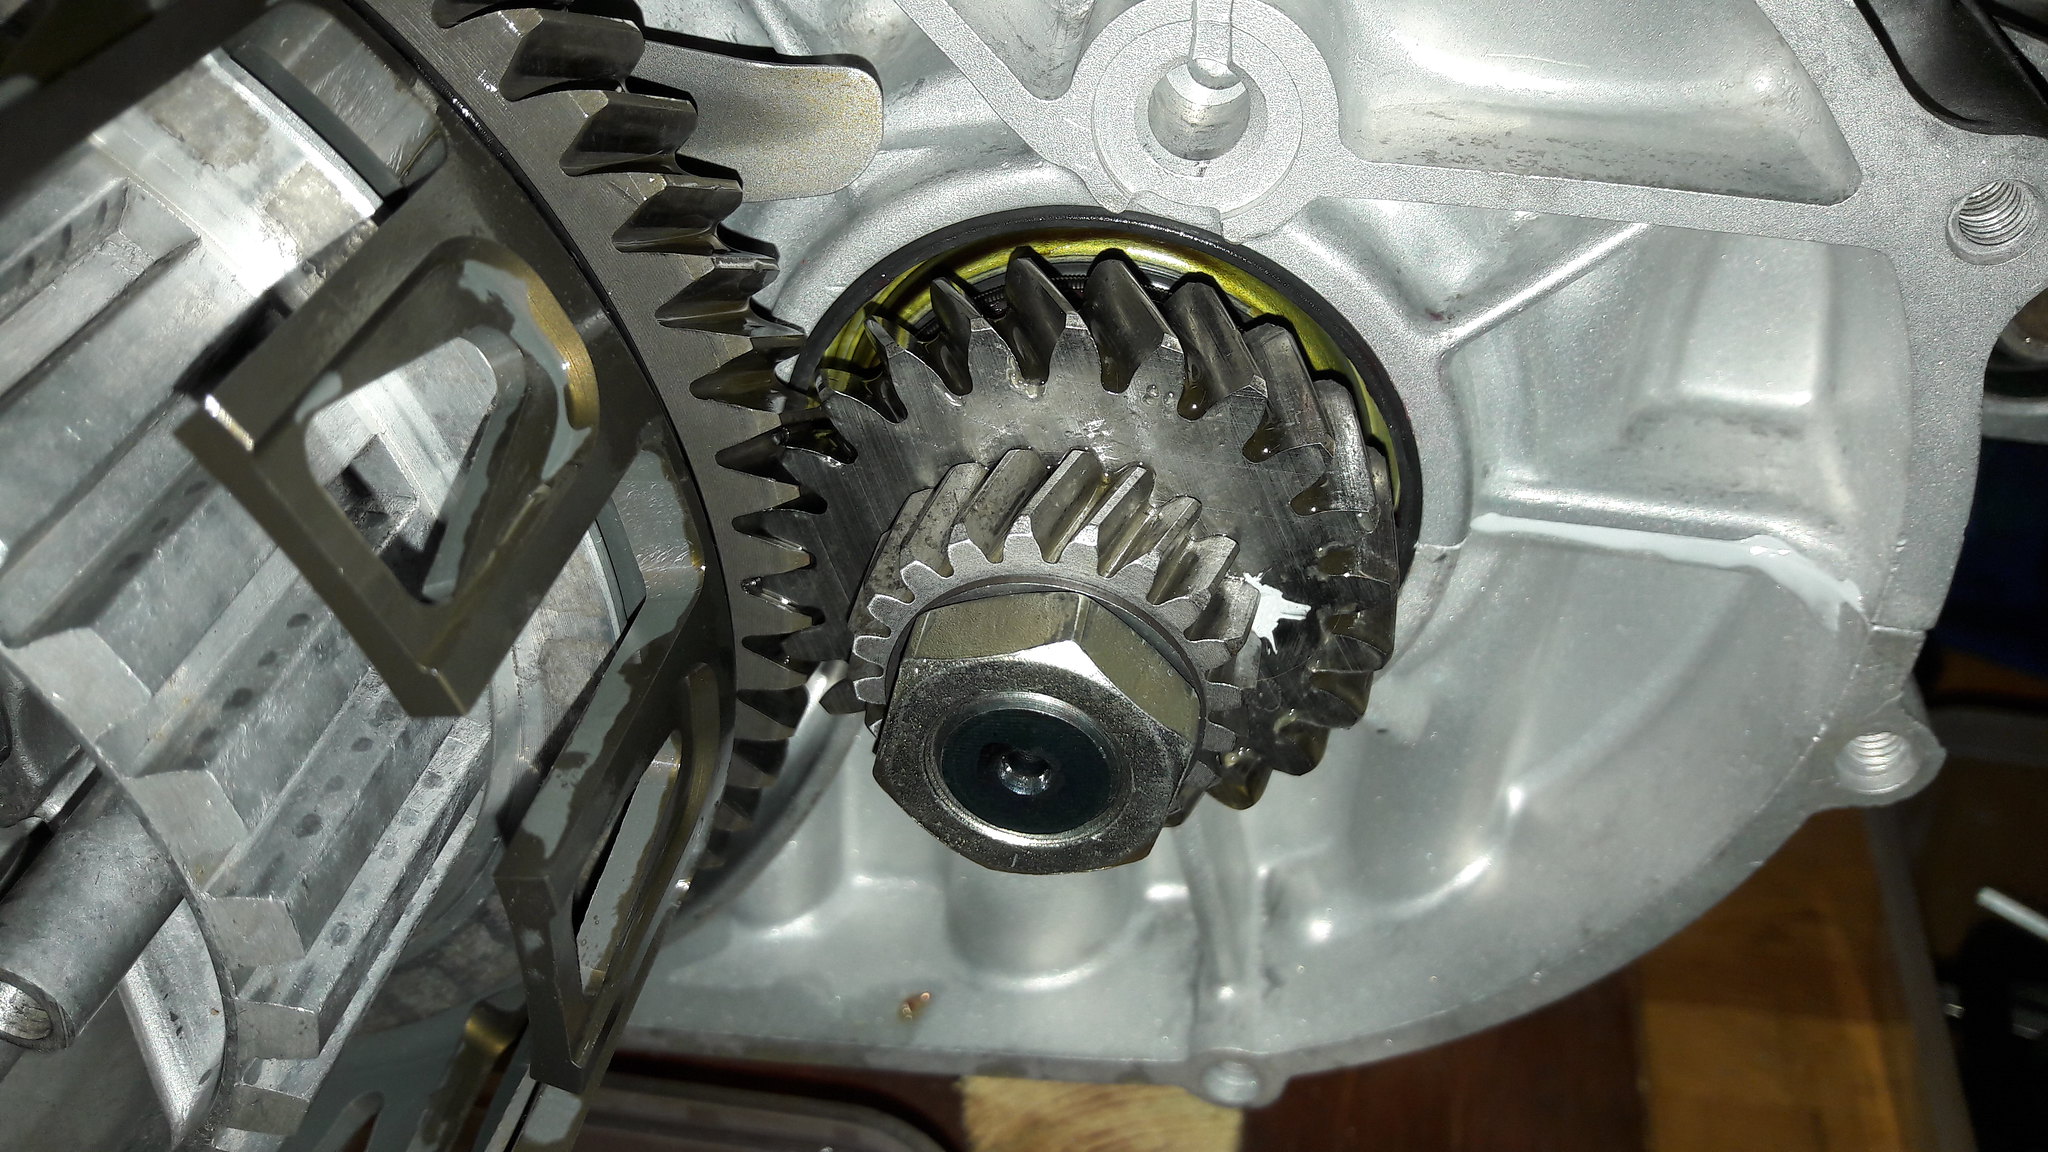 20181204_082613 20181204_082613 by David Miller, on Flickr 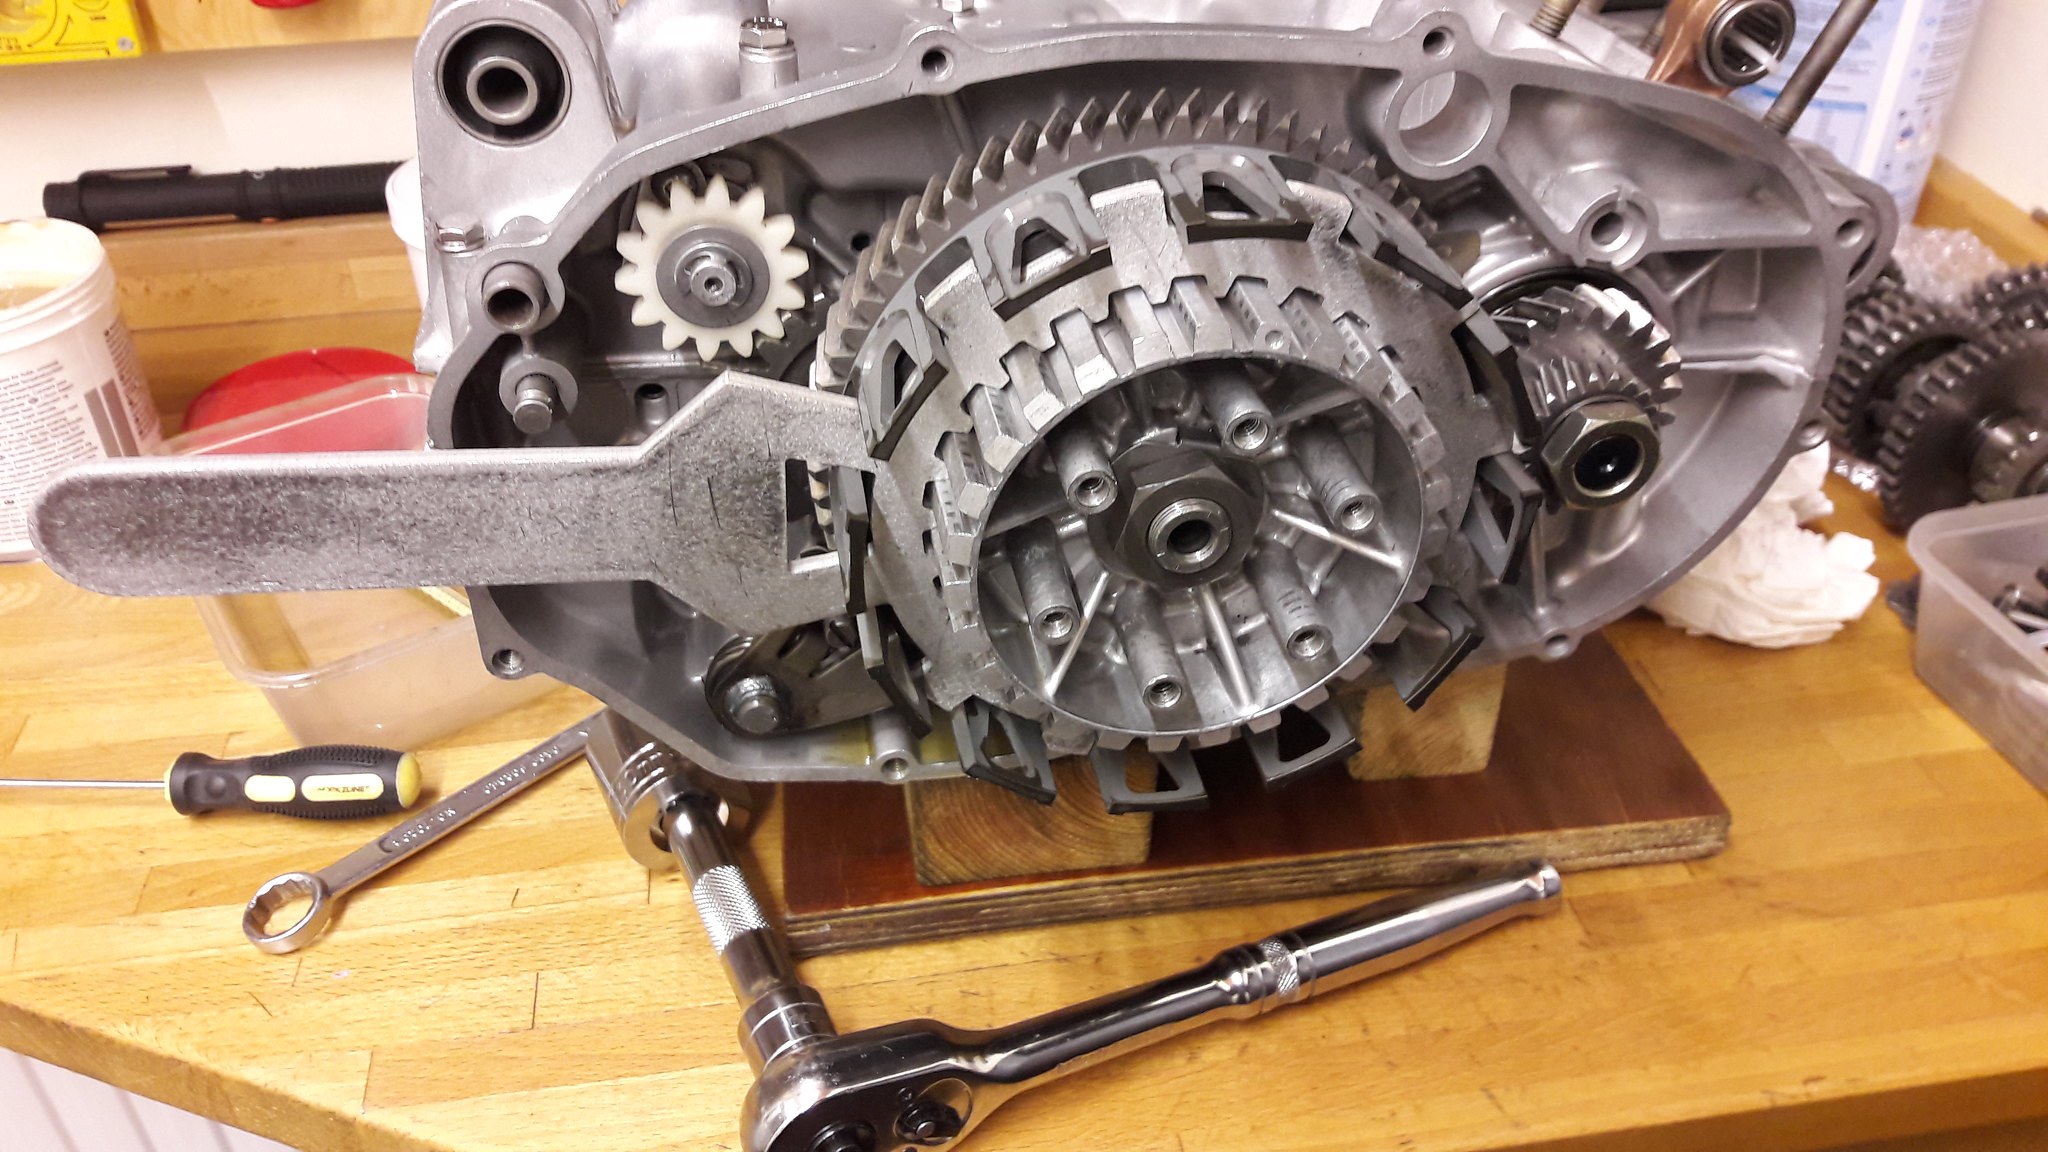 20181202_132110 20181202_132110 by David Miller, on Flickr I used the clutch tool and the copper pipe between the gears to lock it all up to get the correct torque. Dusty  |
|
|
|
Post by dusty350 on Dec 12, 2018 20:06:35 GMT 1
I meant to add, before I slid the clutch basket on I fitted the idler gear. Small shim first, then the gear and the washer with the flat on it that matches the shaft it slides onto, and then a new circlip; 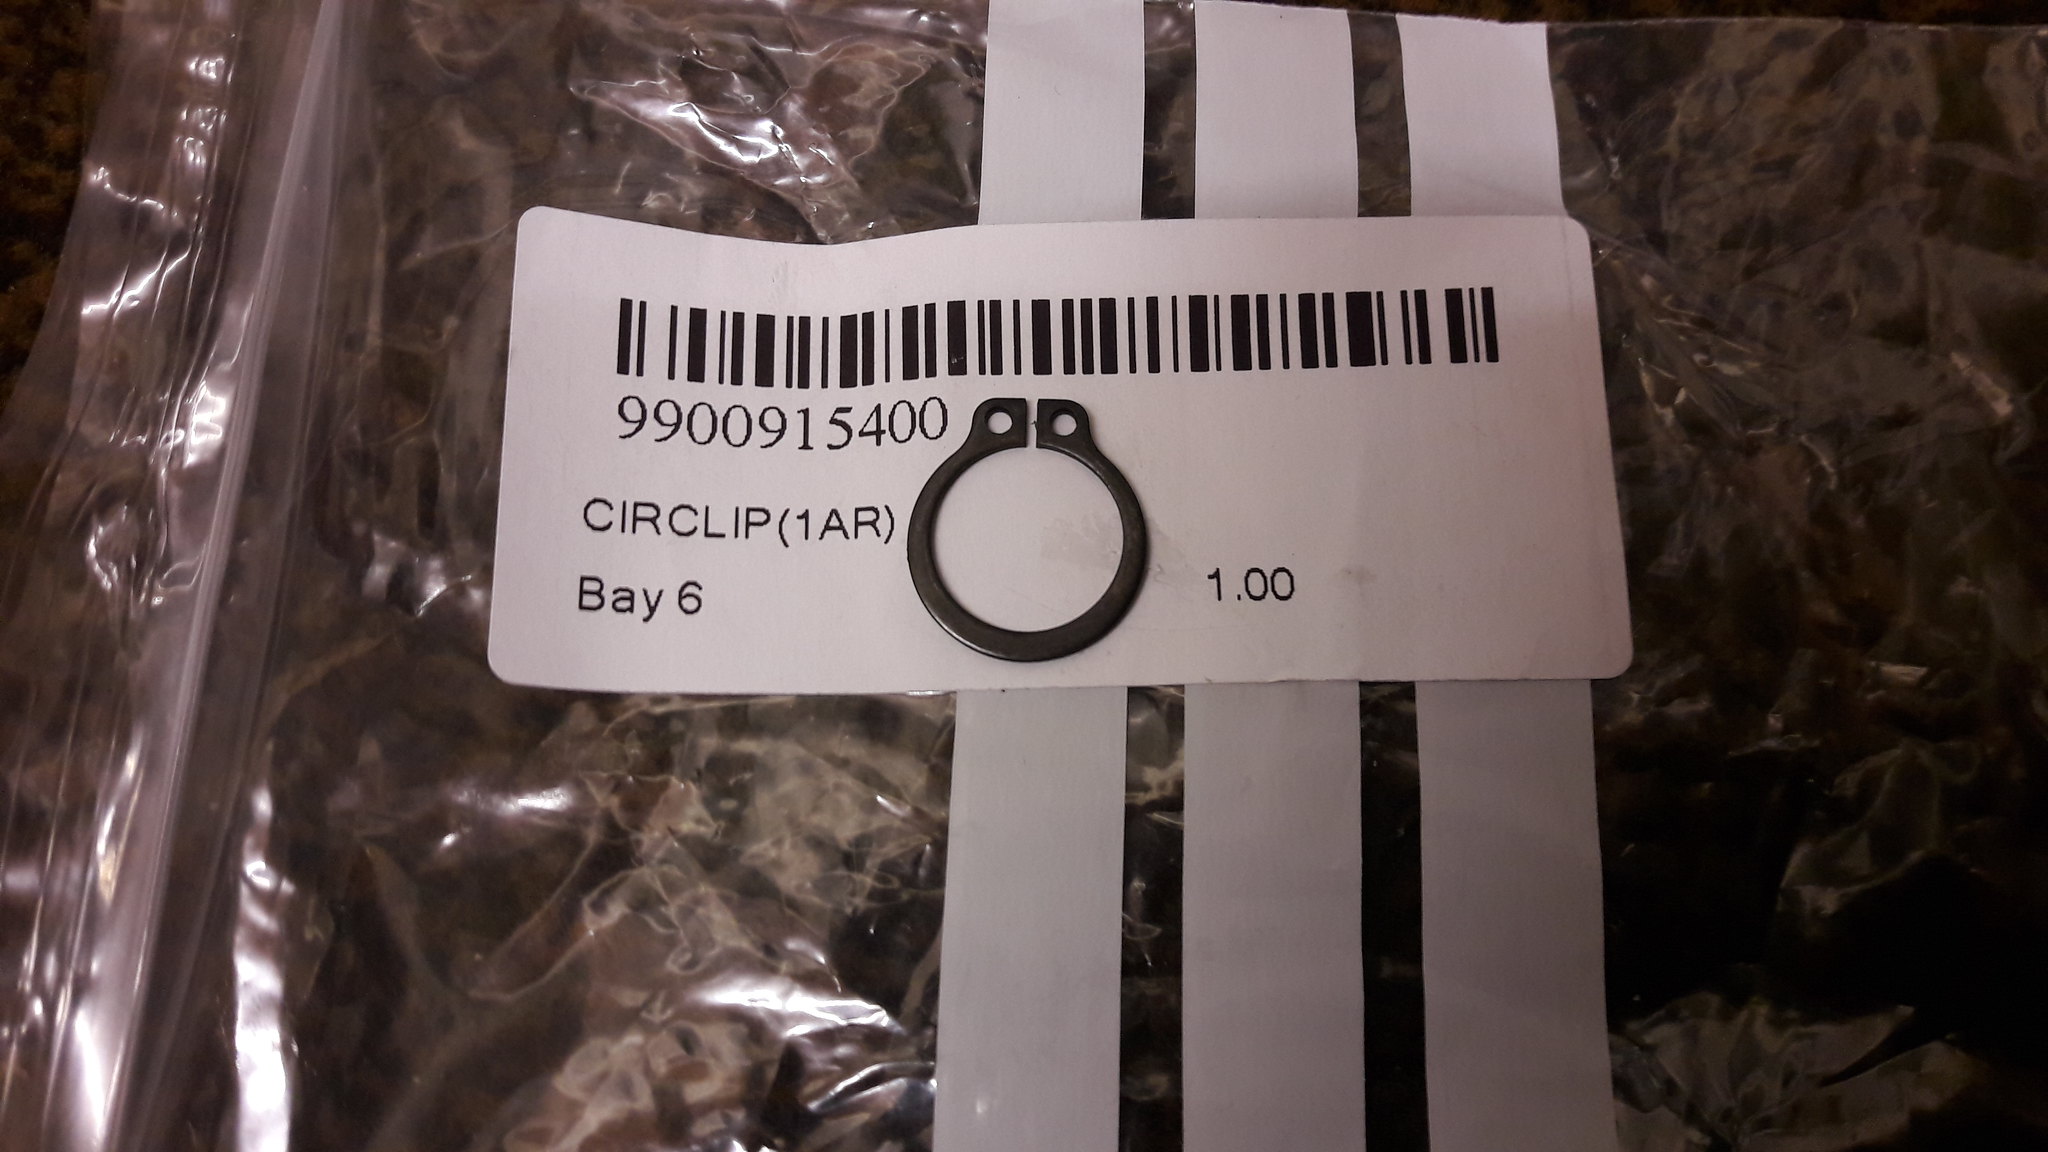 20181202_124622 20181202_124622 by David Miller, on Flickr Circlip is £1.55. Also fitted the water pipe with a new "O" ring and retaining clip; 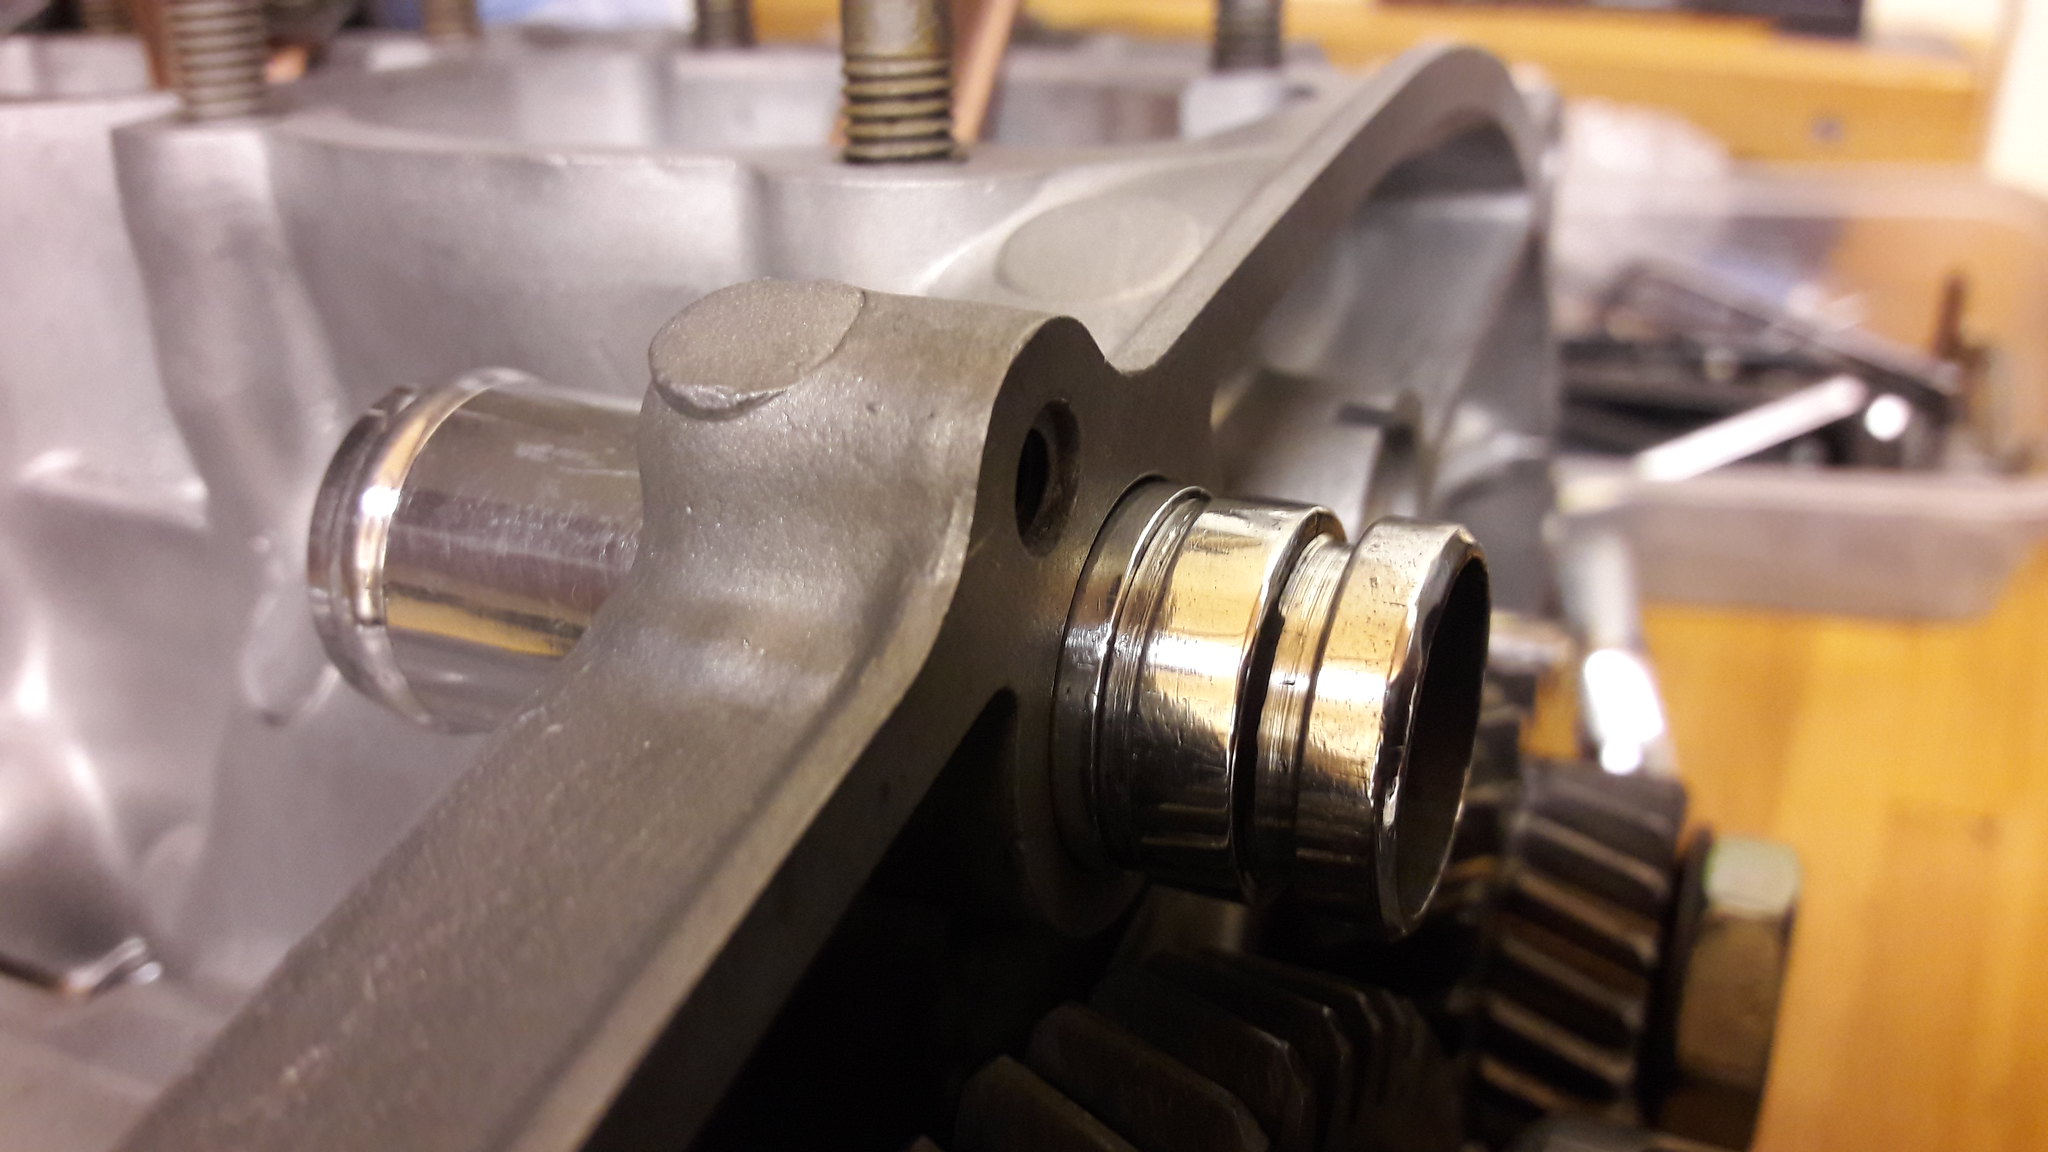 20181202_134520 20181202_134520 by David Miller, on Flickr 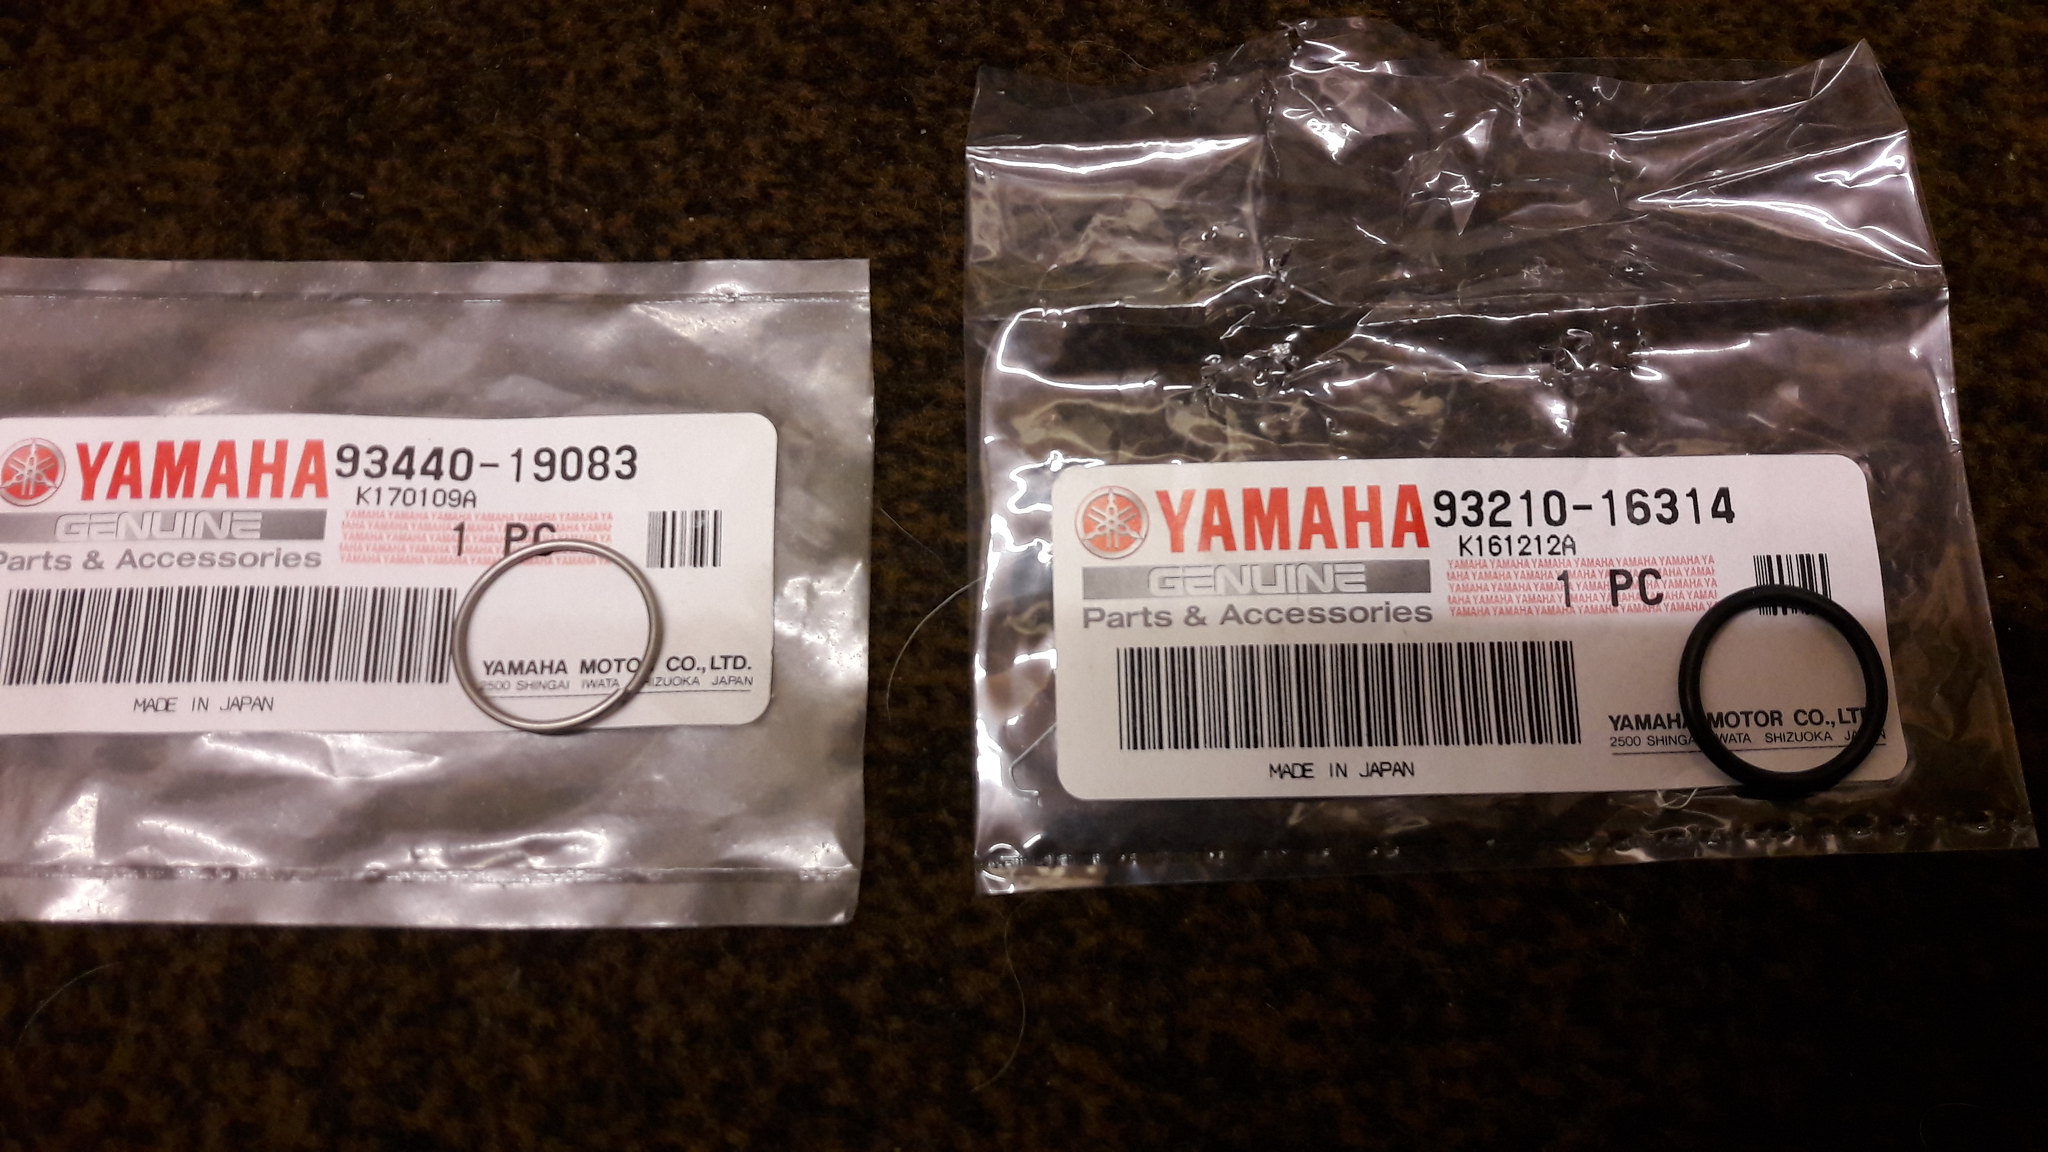 20181202_134635 20181202_134635 by David Miller, on Flickr Clip is £2.24, and "O" ring is £1.19. So now, the engine should look like this; 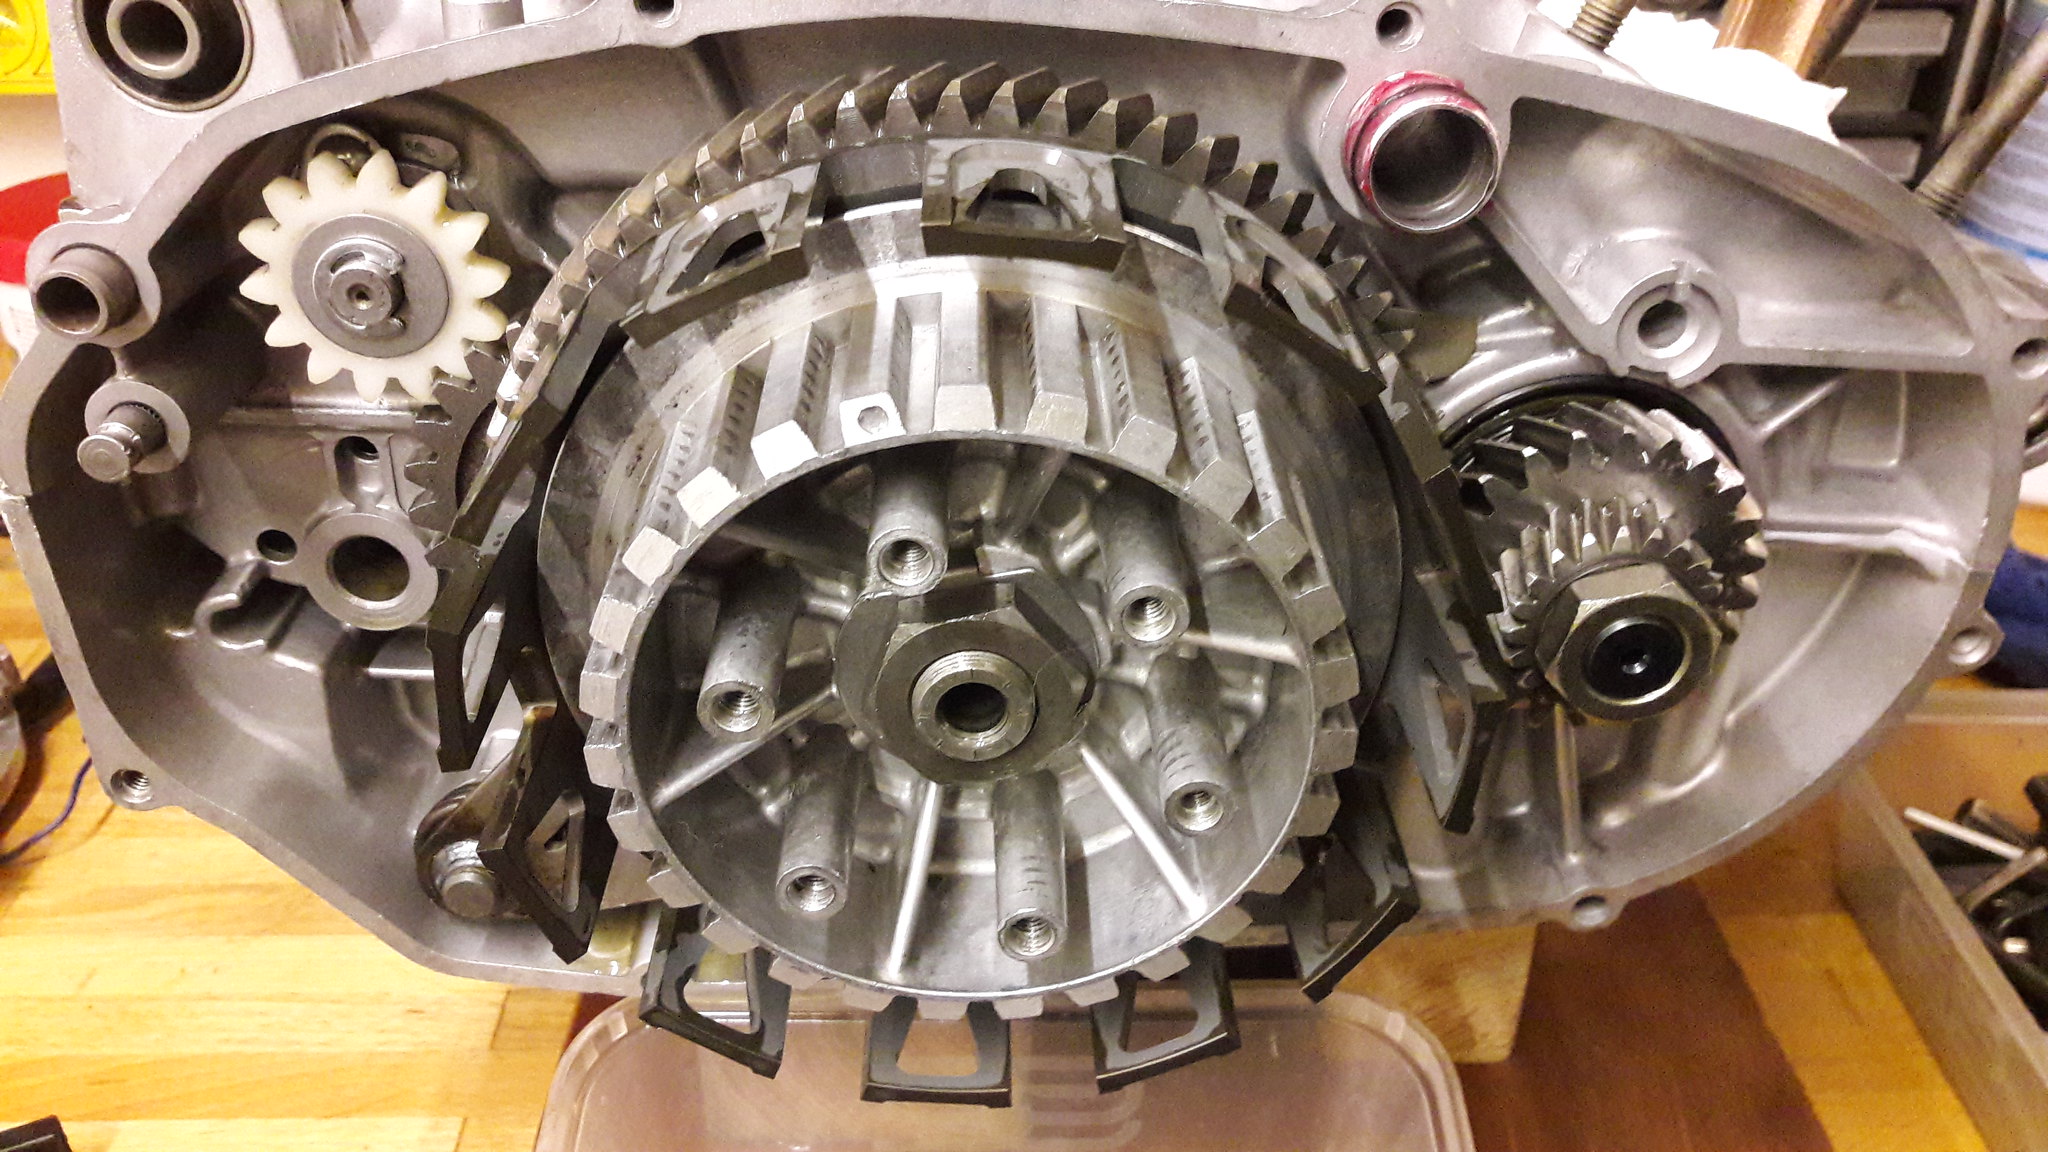 20181204_082621 20181204_082621 by David Miller, on Flickr Clutch plates next  Dusty  |
|
|
|
Post by oldbritguy on Dec 13, 2018 0:18:31 GMT 1
Great work Dusty and looking forward to doing my own engine soon. You have set the bar high - again!
It looks as though my motor has had work done prior to my ownership with new gaskets all over however like yourself, I need to know what lies inside.
Your meticulous and informative thread here will be referred to as I go along. Be prepares for some queries when I get stuck.
Do you order all of your anticipated new parts in advance or piecemeal when identified and also do you use a preferred supplier? Just nosey!
John
|
|
|
|
Post by dusty350 on Dec 13, 2018 7:55:13 GMT 1
Hi John
Gaskets and seals are a given for a rebuild - all genuine Yamaha for me although certain parts you can go with good pattern. I go with new gearbox bearings as I want it to be as good as it can be. Some parts could probably be re used but if in doubt i change.
I use Fowlers for genuine yam, and Norbo is very good too. I added curent prices to the thread to give an idea of costs but ive noticed the prices have gone up year on year so its not getting any cheaper. Any help i can give, just ask😉
Dusty😊
|
|
|
|
Post by donkeychomp on Dec 13, 2018 23:37:11 GMT 1
Looking good matey. One question...the circlips. Should I use gen Yamaha or ones from my box of clips? Bought about 100 in varying sizes a while back.
Alex
|
|