|
|
Post by tell7437 on Dec 18, 2016 23:45:33 GMT 1
Paint looks great, the sidepanels on the blue bike need some satin black on the bottom bit
|
|
|
|
Post by dusty350 on Dec 19, 2016 8:35:54 GMT 1
Hi The paint was done on the blue bike before I bought it and is a decent job. I wouldn't want to risk spoiling it by trying to add some satin black, although I have considered it in the past. What I would like to do is get the decals lacquered over at some point, but I have a long list of jobs that are gonna cost money before that tank and bodywork gets sorted !!  It's nice having more than one bike but it does mean that funds get spread out between them and it's difficult to finish any of them ! Regards Dusty  |
|
|
|
Post by mouse on Dec 19, 2016 8:59:24 GMT 1
Flip! that looks fantastic Dusty, Get all the bodywork on and post some pics, really really beautiful looking bike. Well done
Mouse
|
|
|
|
Post by rigga on Dec 19, 2016 12:39:43 GMT 1
That's the colour scheme I want on mine at some point, finish looks superb.
|
|
|
|
Post by mikee on Dec 19, 2016 16:23:26 GMT 1
Just spent a happy hour reading this
Top work as usual mate , lovely
Mike
|
|
|
|
Post by dusty350 on Dec 19, 2016 18:15:02 GMT 1
Cheers fellas, glad you like it so far I have liked that paint scheme since I first saw it on an Lc - there are a few around with it - and it harks back to an Rd400 that I had years ago which I painted myself and was quite similar. I thought it would work well with the gloss black wheels too and the black grab rail that was on the bike when I got it. I'm very impressed with the new tank - I'm no expert of course but I couldn't tell the difference between one of my originals and this one. Norbo has done a great job getting these made - it's going to keep our bikes alive even longer now I got some new side panel rubbers from Norbs so they will go on too. There is only a few more parts to bolt back on and then the rolling chassis will be finished for the time being. I will then need to concentrate on building the engine and getting it into the bike. Once mot'd I can apply for registration and an age related plate. Not sure which way to go with the pipes yet. Money is tight now and did think a can of bbq paint would suffice to finish the pipes, but I do like chrome ideally. The pipes are new so an ideal time to get them chromed I spose - it's just the cost that puts me off at the mo, but I have lots to do before I cross that bridge. I will strip and clean the clocks one evening - the cases are new but the glass needs a clean on the inside, plus I will check the bulbs whilst I'm at it. I want to cut a bit off the length of the bars too - feels like a mx bike when you sit on it !! They have been powdercoated so I will need to be careful. More pics soon. Dusty |
|
|
|
Post by yamark on Dec 19, 2016 18:21:17 GMT 1
Dusty, that looks amazing. One of my favourite LC paint schemes that I was considering for the triple, but you've beat me to it. Curse you Dusty  The finish looks perfect, and that matches the rest of the bike and work you've done.
Superb mate |
|
|
|
Post by dusty350 on Dec 19, 2016 18:54:16 GMT 1
Cheers Mark I trawled through lots of pics looking at paint schemes but kept coming back to this one. The white/red is a nod to the Tz paint scheme, and the speed blocks are very much 2 stroke Yam from back in the day. I didn't want the Kenny Roberts signature though, plus I asked Mark to leave the "350" badges off the side panels, for a cleaner look. The tank speedblocks have a step in them which I think works really well as opposed to a uniform width decal, imo. The muddie will have 2 decals on the shoulders of the guard as opposed to one central strip like on my blue 'brid Mark Cordwell's reputation is well earned. He had a yellow over white with black speedblock paint set on the bench and it looked stunning, and I am over the moon with mine. Now I want another new set for the 385 - something totally different colour wise - a lary scheme that will suit the 385 engine and pipes. But that's next year !! Hope you are well mate, and if you want a "clock refurb" evening, let me know as I am stripping mine soon Regards Dusty |
|
|
|
Post by yamark on Dec 19, 2016 19:31:57 GMT 1
Perfect mate, let me know when your "delving into your clocks" Speak soon mate |
|
|
|
Post by dusty350 on Dec 21, 2016 11:10:30 GMT 1
Hi I fitted the rear brake system last night. You may remember I removed the standard Rgv caliper hanger and used a billet Tyga hanger, along with a Brembo caliper and Goodridge hose. I elected for this as all the items are new and I felt it would save time and some money at this stage of the build; 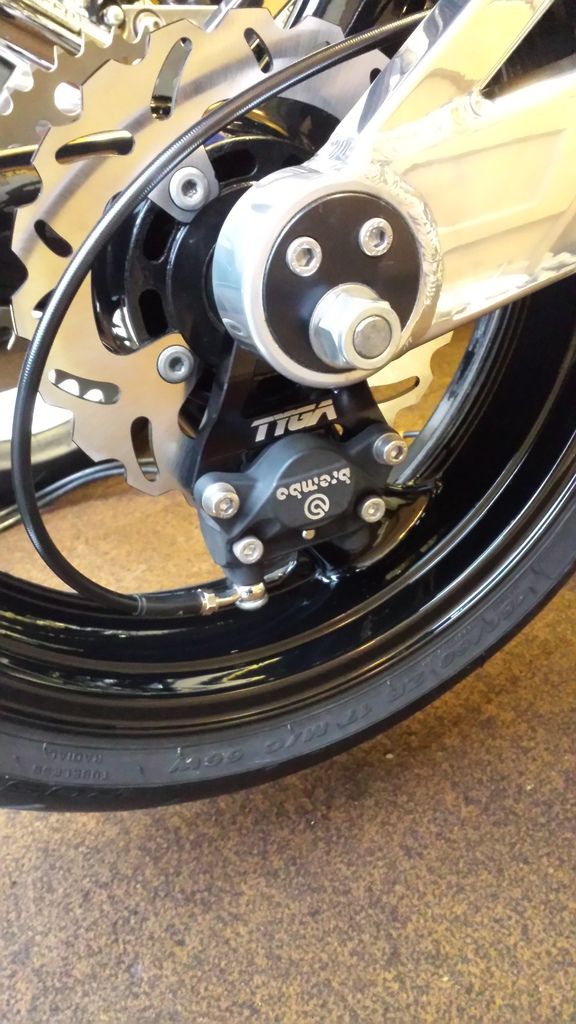 Anyone fitting a rear disc set up on an Lc will know there is a need to have a way of actuating the rear master cylinder. I have posted this pic earlier, but this is how it's been done here; 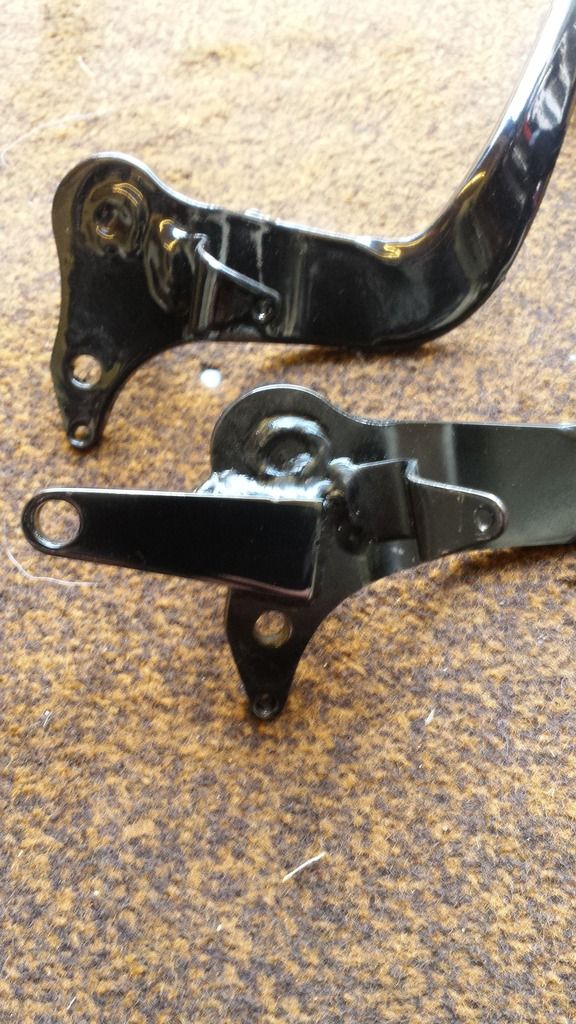 This works well for operating the brake, but the large diameter of the Lc return spring means it interferes with the actuating rod, so a narrower spring is needed. When I did this mod on my blue bike, I used a spring from a spares box of unknown origin, but as I had only 1 like it I wasn't able to replicate it for this one. Then I thought a Gibson/Allspeed retaining spring would probably work; 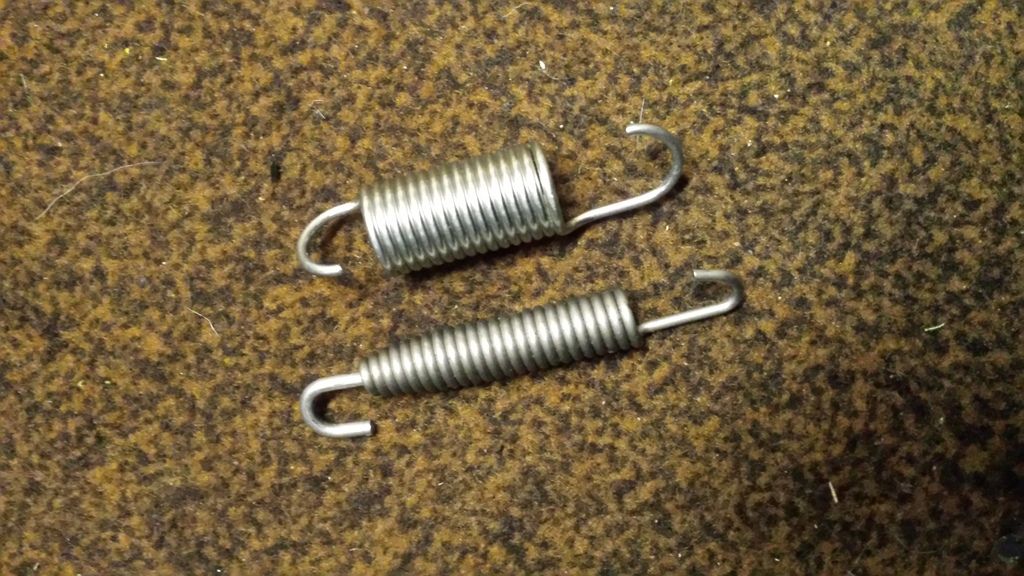 It looks close in the pic but just clears it. The Gibson spring has a "floating" hook at one end meaning you can get the orientation correct as one end is opposed to the other by 90 degrees; 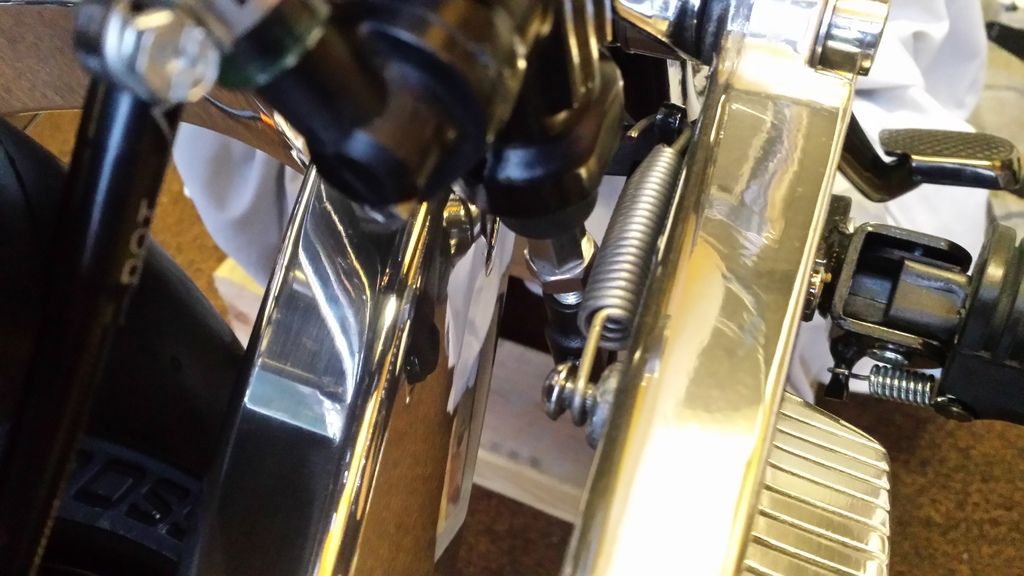 I now need a "P" clip to hold the top of the fluid pipe to the frame and it's done. Dusty |
|
|
|
Post by dusty350 on Dec 21, 2016 11:13:23 GMT 1
 Dusty |
|
|
|
Carbon Lc
Dec 21, 2016 11:41:45 GMT 1
via mobile
Post by veg on Dec 21, 2016 11:41:45 GMT 1
Will you stop posting these great pictures I keep going into my garage And looking at my bike and can't do anymore until I get my bits back and it is driving me mad .
Lovely looking bike dusty
|
|
|
|
Post by jumpstart on Dec 21, 2016 13:41:28 GMT 1
really great work dusty, are you going to do a clock refurb on this thread, it would help me and a few others on here,
|
|
|
|
Post by dusty350 on Dec 21, 2016 14:32:17 GMT 1
Hi Funny you should mention that !! Clock refurb is tomorrows job Mark - Yamark - is coming over and we will do both his and mine at the same time. I did do a thread on it before but will update it tomorrow hopefully. I'm just cleaning mine this time but I think Mark is changing dial faces so I will take lots of pics and post them for info. Thanks for the kind words Veg Regards Dusty |
|
|
|
Post by veg on Dec 21, 2016 14:54:10 GMT 1
Be interested in the clock refurb, Im going Koso i think in the standard binnacles. Enjoy
|
|
|
|
Post by dusty350 on Dec 21, 2016 14:59:21 GMT 1
Hi Veg Pretty sure Muttsnuts has done something like that, and I think Trubrit also ? Not the easiest of jobs but certainly possible. Dusty |
|
|
|
Post by dusty350 on Dec 21, 2016 15:15:26 GMT 1
So, whilst in the "shed of dread" this morning looking for a "P" clip, I found part of an old steering damper mount kit from when I had my Rd400 back in the 80's. A quick clean up, and then it was screwed into the spare boss on the frame and now I have somewhere for the fluid pipe to sit. I could have just used a cable tie but I get a lot of satisfaction from little jobs like this These brake fluid pipes can sweat a bit so I wanted to keep it away from frame, so another small job done; 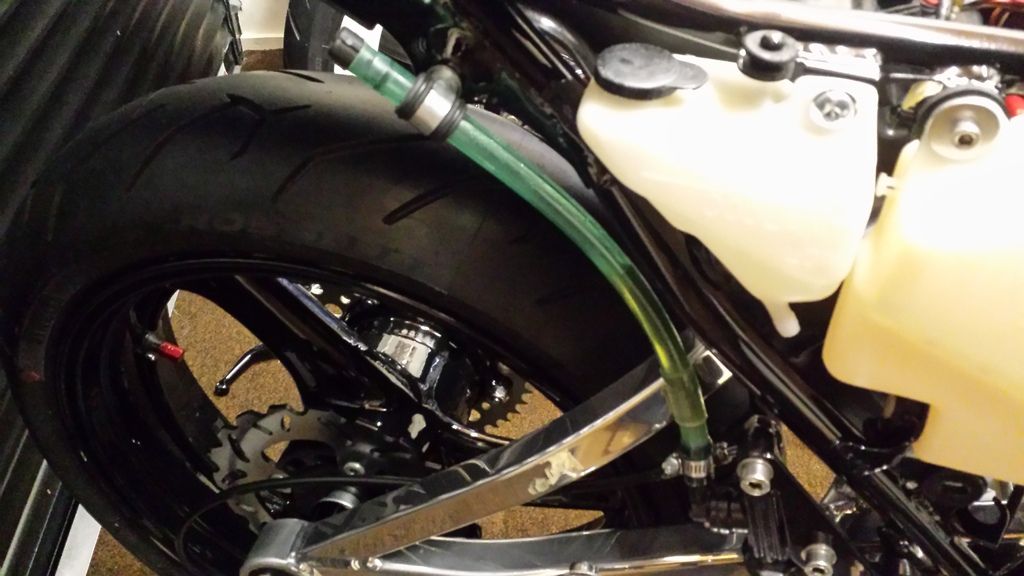 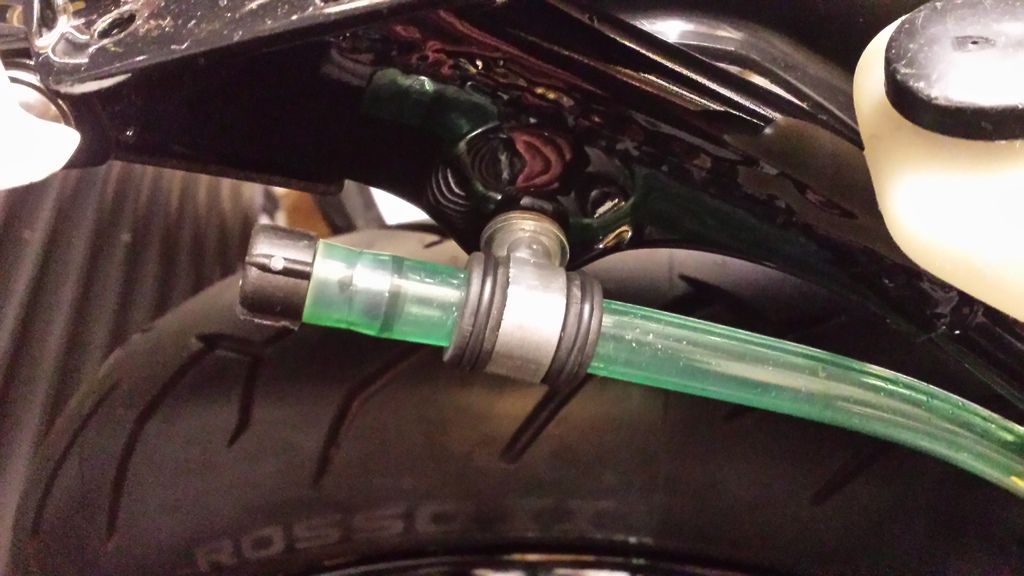 Dusty |
|
|
|
Post by scootjockey on Dec 22, 2016 16:00:59 GMT 1
Dusty you and Mark want to have a word with the BBC regarding to the clock refurbishment, if James May can pull a couple of million viewers building an electric guitar I'm sure the both of you could get a couple of million with the bike builds !
|
|
|
|
Post by dusty350 on Dec 22, 2016 18:43:20 GMT 1
Haha, not sure about that ! I am no expert, but I have dismantled them on a few occasions in the past - and even managed to get them back together again !! I'm just sorting the pics to Photobucket and then I will post them up. All went well - mine were apart just for cleaning but Mark swapped the tacho cases over on his. Pics soon Dusty |
|
|
|
Post by yamark on Dec 22, 2016 21:29:31 GMT 1
Thanks Dusty, for the tutorial on the clocks today (and the tea). Now that I've been shown how to dismantle the clocks I'm confident I can do a set on my own. When I got home, I dismantled a battered bargain basement LC speedo, which the needle was very slow and stuck in a couple of places. The problem was a build up of old sticky clear grease that had worked its way between the 2 dome cups (near where the cable connects to the speedo). Once cleaned, it turns freely and the needle returns back quickly. Result |
|
|
|
Post by dusty350 on Dec 22, 2016 22:57:16 GMT 1
Hi Mark As always, good to see you today Photobucket is being very tetchy tonight, but I have uploaded most of my pics now. Feel free to add any of yours if you wish My clocks were stripped purely for cleaning the glass. As Mark said he had other issues with his, including swapping over the plastic case on the tacho as one was damaged, but I will run through the basic idea of stripping them for those that want a go themselves. First, remove the 4 dome nuts on the back and remove the back case and clock bracket; 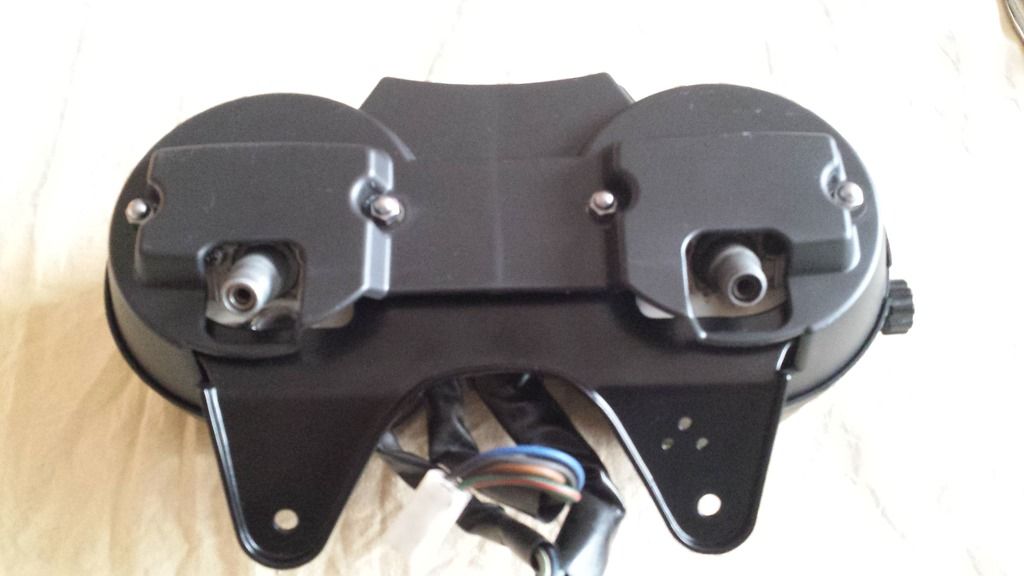 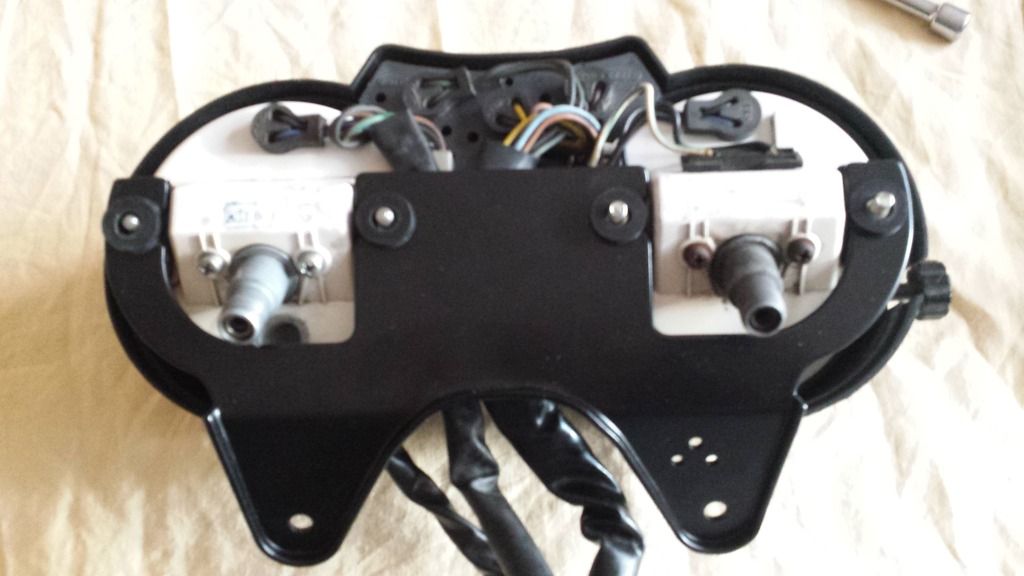 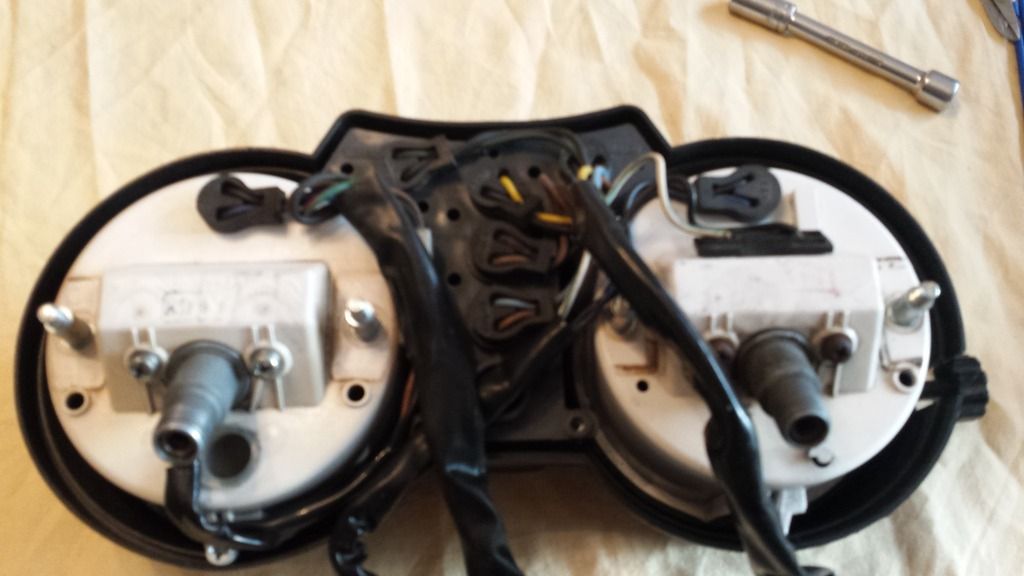 It's worth noting how the cables route through the bottom of the rear cover - makes reassembly easier. Don't ask me how I know this  I removed my tacho first by popping out the bulb holder and disconnecting the wire block. There are 2 screws that hold it in the case, at 2 and 6 o clock. Once removed the tacho lifts straight out. The rim that holds the glass in place needs to be removed and it's been crimped on in the factory; 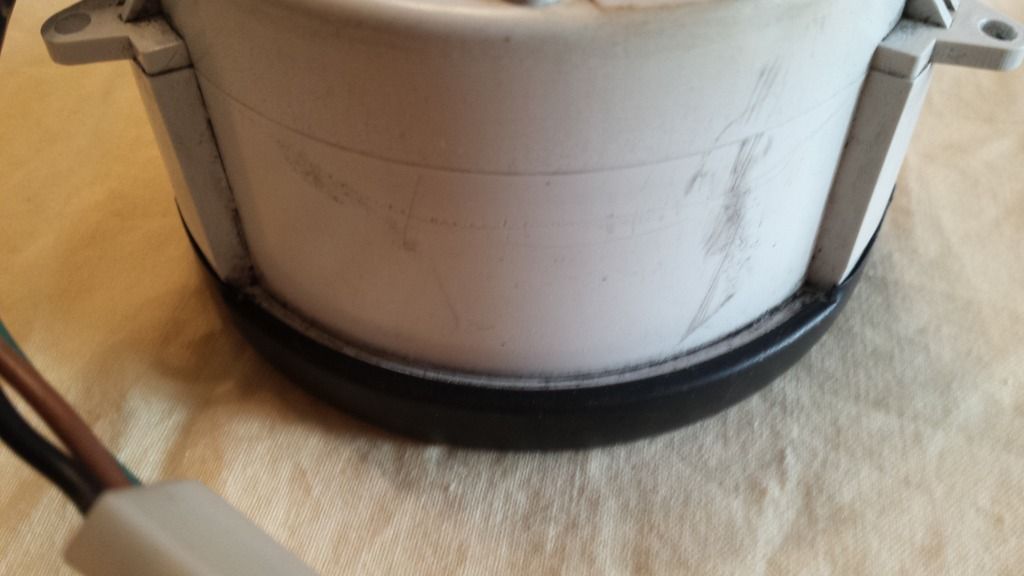 There is no easy way of doing this, but you have to work a flat bladed driver under the edge of the crimped part and edge it upwards. You need to edge along very slowly and gently. easing the metal up as you go; 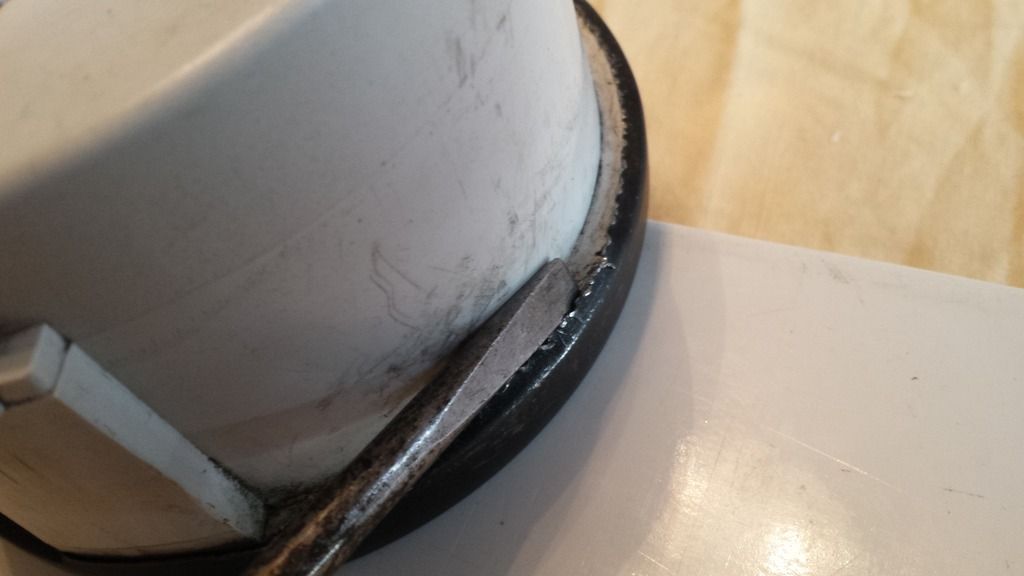 Although it's thin, the metal is tough and it can take a few go's to peel it up enough. Then once done , I mark with a pencil a line on rim and case to make reassembly easier; 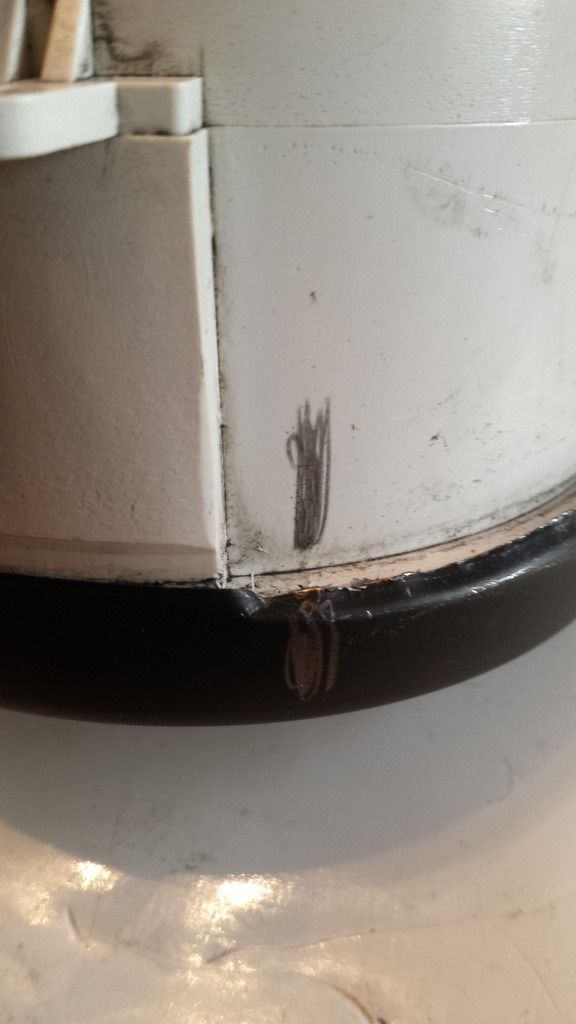 And then , using a flat screwdriver again, you can, gently, ease the rim away from the casing; 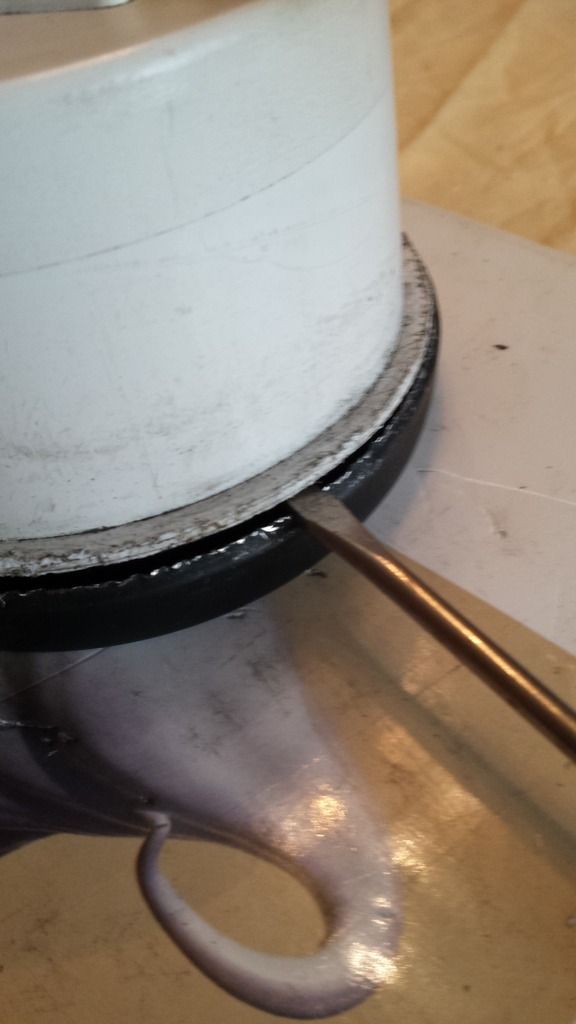 |
|
|
|
Post by dusty350 on Dec 22, 2016 23:07:46 GMT 1
So now the rim is away from the casing you will find a rubber gasket first, which is easily removable; 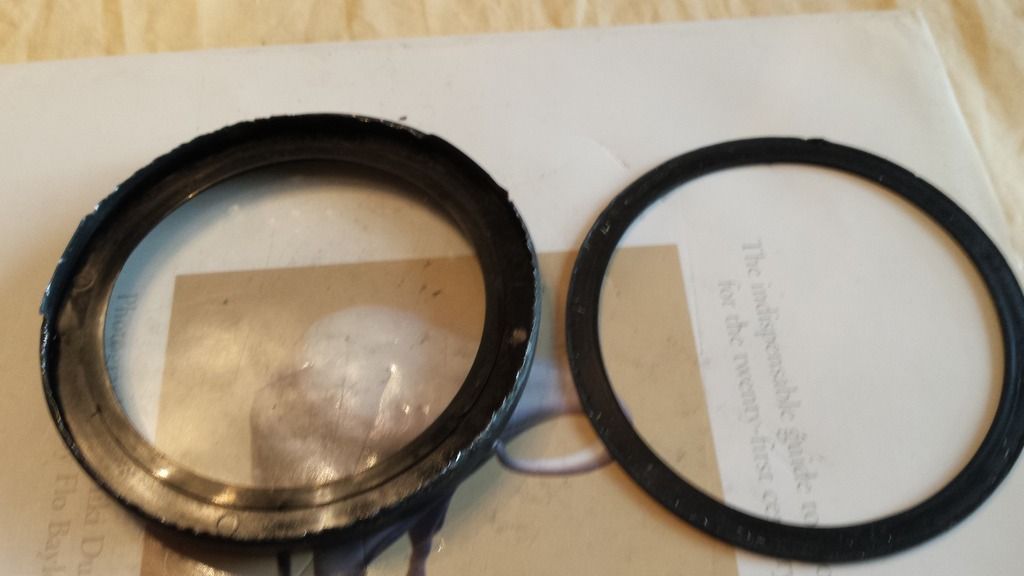 Next is a plastic "ring" which should also lift out, although it can stick as it's been compressed in there for about 35 years !!; 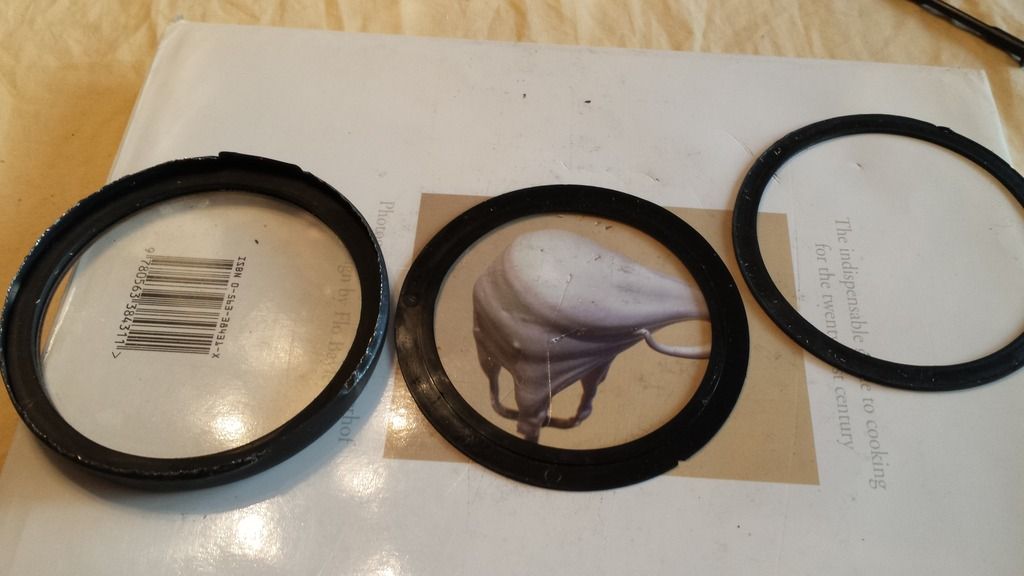 And lastly there is another rubber gasket bonded against the lens. I leave this alone as it never wants to part company with the lens, and it's the first line of defense against the elements, so I leave it alone if it seems ok. You can now clean the lens internally which often has a varnish like film of crud on it. It's amazing how clean it looks afterwards. If you were delving deeperinto the tacho/speedo, and want to remove the needle, this is the tricky part. |
|
|
|
Post by dusty350 on Dec 22, 2016 23:33:25 GMT 1
This pic shows how little room there is between the clock face and the underside of the needle; 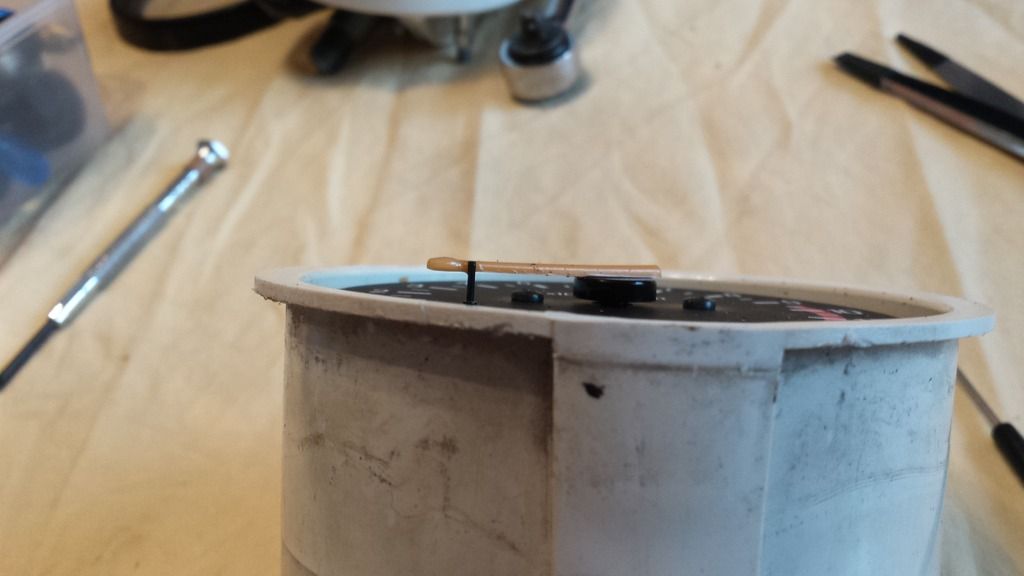 You will need to find a way of easing the needle off it's mounting pin, not easily done as ideally you want a 2 pronged tool under the needle to ease it upwards. Remember these needles are very brittle now and easily snapped. Before removing it completely, ease the needle over the "stop" pin that's in the clock face - this allows the needle to settle just below the pin. This is where you draw a pencil line on the casing in line with the needle so that when you put it back on, you line it up with the pencil mark and then ease it back over the stop and it should read correctly when operational. Once the needle is off you can undo the 2 screws on the face and it will come away. There are 2 screws on the back of the clock casing - if you want to remove the workings from the case you need to undo these and it will lift out. Assuming you've done what you need to do, you need to refit the rim to the case. You may need your flat blade again to help tease it back on, but once on and lined up with the pencil mark, you can start to "crimp" it back on. I use pliers, with tape on the side that goes against the rim to protect it. I then apply pressure on the pliers and push the underside (the crimp part) towards the casing, closing up the metal you originally peeled back. I don't think you'll ever get it totally flat - you would end up damaging the front face of the rim, but with patience you will get it fairly close, and it wont come off on it's own for sure. As I say, I'm certainly no expert, and there may be others that have done this and found an alternative way of doing it or an ideal tool for the job, but as a diy job it's worked for me. I have found the link to the previous set I did, and there are more pics there- starts about 3/4 of the way down on page 3. rdlccrazy.proboards.com/thread/14843/yamasaki-hybrid-long-term-buildHope that helps Dusty |
|
|
|
Post by dusty350 on Dec 22, 2016 23:38:54 GMT 1
Forgot to add, when removing the rim from the speedo casing, which is done in exactly the same way, I first remove the trip knob so it doesn't get damaged. Just turn it clockwise and it will undo and come away.
Dusty
|
|
|
|
Post by dusty350 on Dec 23, 2016 8:48:38 GMT 1
And clocks back on the bike; 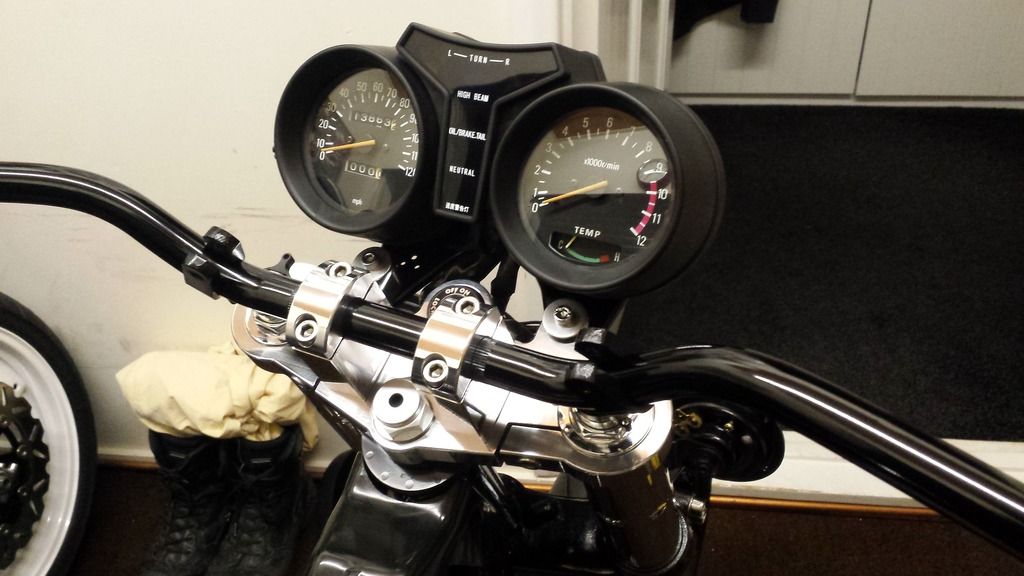 Wasn't sure whether to mount them above the yoke as opposed to the standard below the yoke. Above is my personal fave look but affects the way the clocks/headlight and horns look together, and possibly cable length. And I'm looking at different options for the bars too. These are too wide - I reckon an inch off each end to look better. I do have some different Renthals in the shed of dread, I may offer those up. More soon Dusty |
|
|
|
Post by muttsnuts on Dec 23, 2016 15:03:38 GMT 1
looking good Dusty, and yes, I've done the Koso clocks in the standard cases for my 421  |
|
|
|
Carbon Lc
Dec 23, 2016 15:54:33 GMT 1
via mobile
Post by veg on Dec 23, 2016 15:54:33 GMT 1
May need to pick your brain about the conversion if that's ok
|
|
|
|
Post by dusty350 on Dec 23, 2016 16:16:32 GMT 1
Pretty sure it was you Mutts They do look awesome and well worth the effort. Dusty |
|
|
|
Post by headcoats on Dec 23, 2016 16:25:18 GMT 1
I did the clock build , well the tacho (x3) and didn't mark the needle by popping it over the stop like you stated 
Only solution I can think is to get the handheld zeel programmer , plug in and mount tach loosely and as I rev it , keep checking the digital readout against the pig in a poke tacho and slightly twist the needle one way or the other 
Might make it more accurate LOL ! |
|
|
|
Post by dusty350 on Dec 23, 2016 18:07:07 GMT 1
I only knew about it as I read somewhere that they are pre tensioned - makes sense really as it makes sure it will always come to rest on the stop pin. As the pic in the link shows, it's not a huge amount but obviously will give a wrong reading if you don't do it. And, as you say, they aren't the most accurate anyway !! Dusty |
|