|
|
Post by headcoats on Dec 23, 2016 20:52:27 GMT 1
At the moment they are set to just kiss the stop 
How far below the stop in mm do you think it's set at ? |
|
|
|
Post by stusco on Dec 23, 2016 20:56:46 GMT 1
The first time I eased the needle over the stop removed it changed the faces refitted the needle I forgot to ease it back never noticed until I went to test drive
You could hear the swearing a mile away
|
|
|
|
Post by dusty350 on Dec 23, 2016 23:50:09 GMT 1
Hi Headcoats It's not a huge amount - couple of mm's maybe. There is a pic in the link but I didn't take one this time although Yamark might have done as he was taking pics as well as me, and it was his tacho that we lifted the needle on. The needle removal is the most tense moment when stripping these - they are so fragile that they are easily snapped. Mark did have a spare but thankfully it's brief trip to the other side of the stop pin left it intact. Ideally a very thin, pronged implement would be ideal to ease the needle off it's drive spindle. I have improvised with the scissors but they are not ideal, and I think I had a bit of luck when I did the previous set using them. Dusty  |
|
|
|
Post by headcoats on Dec 24, 2016 10:20:29 GMT 1
I did my needles with long nose thin pliers with tape on the teeth and held the shaft underneath and twisted the needle off by holding the middle circular part only
Like you say they are very fragile |
|
|
|
Post by dusty350 on Dec 24, 2016 17:12:20 GMT 1
So I have been trying different handlebars on the bike. I have another pair of Renthals that are a different shape - the bends are steeper and the overall height is slightly higher. They didn't look any better so I put the originals back on. I felt they were too wide so after doing some measurements, I decided to carefully cut 3cm off each end. Doesn't sound much but it's made a huge difference to the look of the bars; 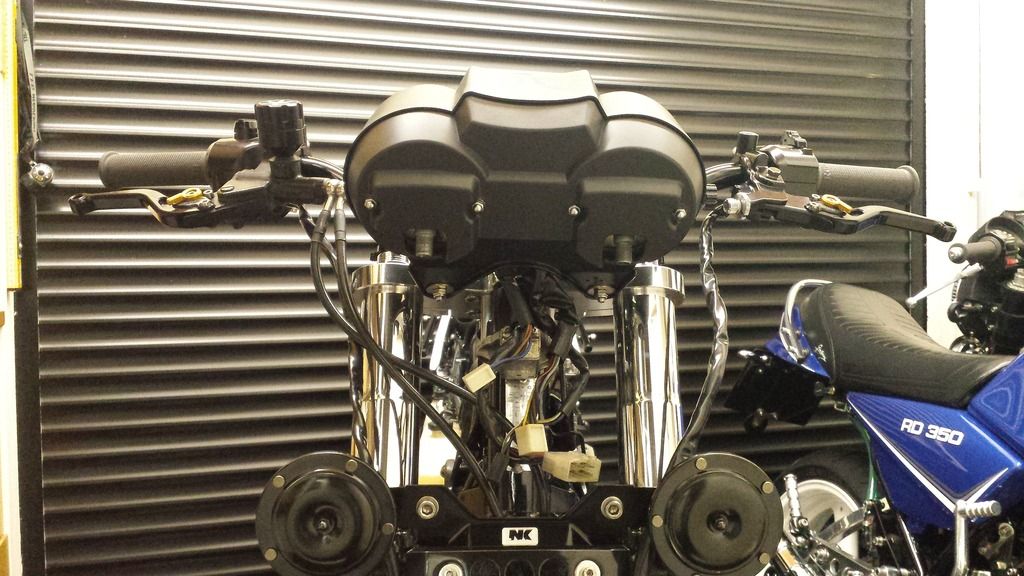 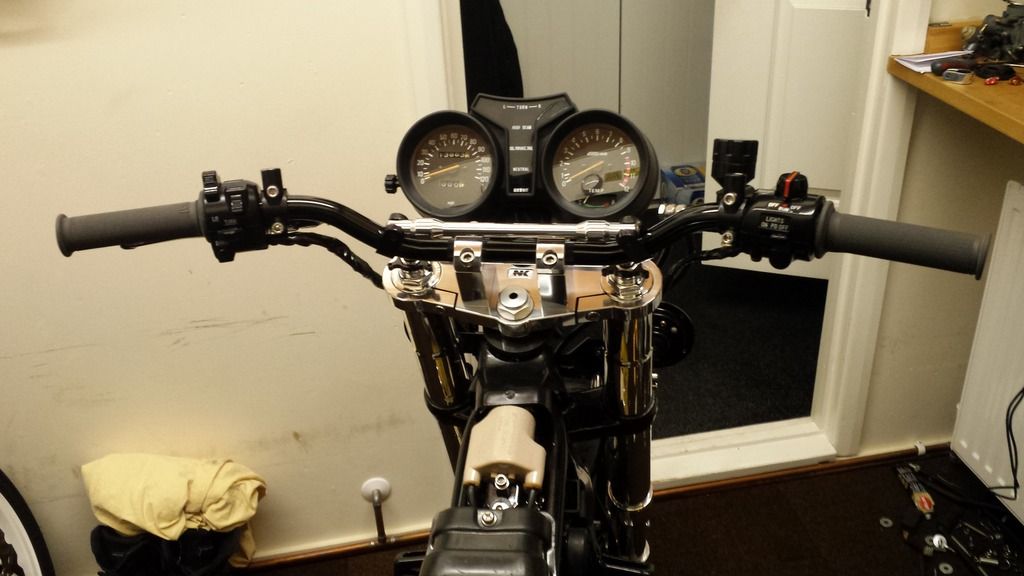 The other thing that made the bars look wide was the cross brace, so I took the brace of the other bars as it was shorter and a nicer shape. It was anodised black, so it got 20 minutes on the polishing wheel to improve it; 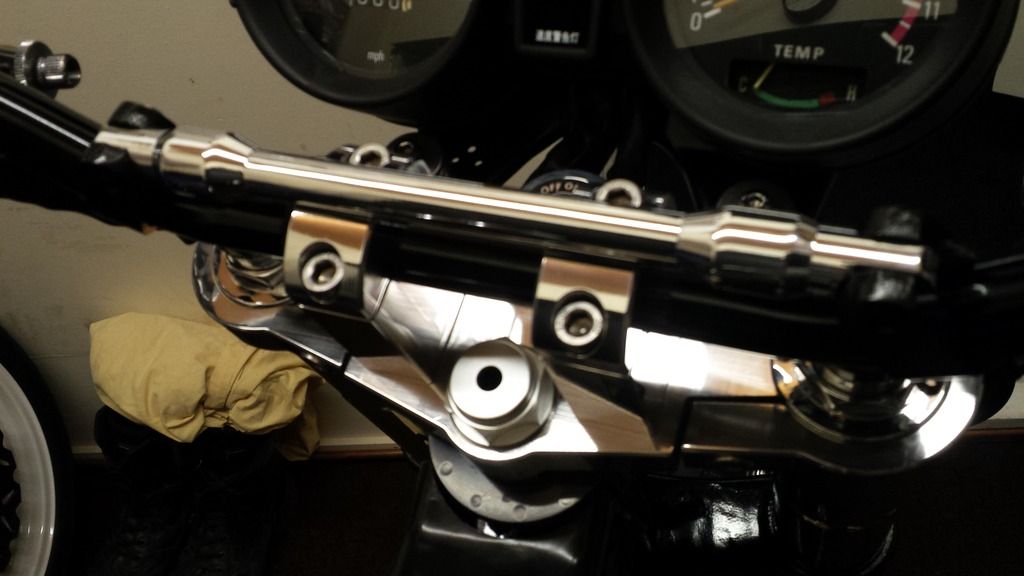 Probably doing nothing now regards bracing, but I plan to fit a more accurate temp gauge in the future and may mount it on the brace. Headlight brackets next  Dusty |
|
|
|
Post by mattybeckett on Dec 24, 2016 20:52:51 GMT 1
Forgot to add, when removing the rim from the speedo casing, which is done in exactly the same way, I first remove the trip knob so it doesn't get damaged. Just turn it clockwise and it will undo and come away. Dusty Regarding removing brittle needles over the stop... i always put marks on the disc that moves in sync with the needle at the back of clock, then simply use a kitchen fork under the needle with a little bit of packing and the needle will come off without damage if careful . Then hold disc in place with marks and gently push needle back on. But this does involve only removing the 2 screws and removing the clock unit from plastic casing. This saves having to bend and break the brittle needle over the stop. |
|
|
|
Post by LC_BOTT on Dec 24, 2016 21:50:35 GMT 1
|
|
|
|
Post by dusty350 on Dec 26, 2016 10:06:23 GMT 1
Great link Lc Bott If I was going to strip any more clocks I would definitely get a couple of those as spares, or even to change over anyway as the originals must fade somewhat. Dusty |
|
|
|
Post by headcoats on Dec 26, 2016 11:24:21 GMT 1
looks good !
Are those needles exact copies ? |
|
|
|
Post by stusco on Dec 26, 2016 11:44:52 GMT 1
looks good !
Are those needles exact copies ? Yes |
|
|
|
Post by yamark on Dec 26, 2016 12:24:09 GMT 1
At the moment they are set to just kiss the stop
How far below the stop in mm do you think it's set at ? Thanks to Dusty (his personal tutorial), I've dismantled 2 tachometers and 2 speedos. I eased the needle over the stop and all of them settled about 4mm below the stop (I mark the edge of the dial with pencil)
HTH Mark
|
|
|
|
Post by headcoats on Dec 26, 2016 12:44:13 GMT 1
4mm then Thanks  |
|
|
|
Post by cb250g5 on Dec 26, 2016 13:04:46 GMT 1
|
|
|
|
Post by dusty350 on Dec 26, 2016 17:46:23 GMT 1
Hi For less than £14.00 it's worth you giving it a go. My only concern is whether it's gonna fail whilst in use - even a slight leak could do a lot of damage to paintwork. Don't think you can beat Jap parts for quality imo. Dusty |
|
|
|
Post by 4l04ever on Dec 26, 2016 21:03:58 GMT 1
I had one of the cheap Brembo copy TDM850 master cylinders, but it leaked and the hose was shite too. The small reservoir was okay though.
|
|
|
|
Post by dusty350 on Dec 30, 2016 23:40:18 GMT 1
Hi So,headlight brackets and shell back on now; 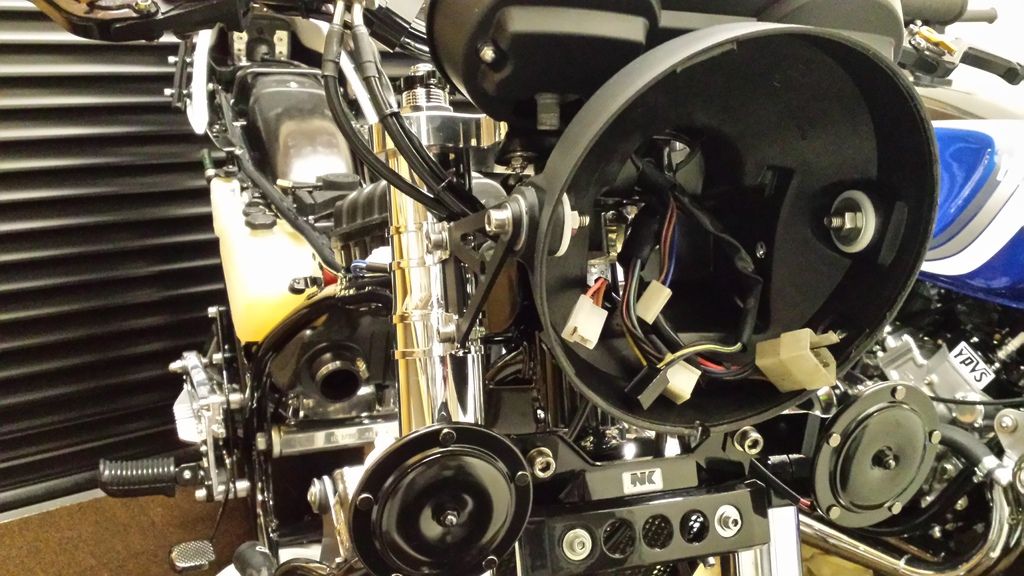 Need to choose some suitable mini indicators to add to the front, and I bought a twin horn loom from Norbo to keep the wiring neat and tidy. I fitted the rad back on - with new rad guard spacers from Norbo. The original spacers were 4 bits of chromed copper water pipe, so it needed the proper kit to look right. The only issue I had was the 4 captive rivnut type fixings on the rad weren't great. This is a Chinese rad which looks well made, but as is often the case with these, the rad guard fixings are both the wrong size - M6 instead of M5, and very slightly out of line. The only option was to drill them out and use a longer bolt, with a nyloc on the back; 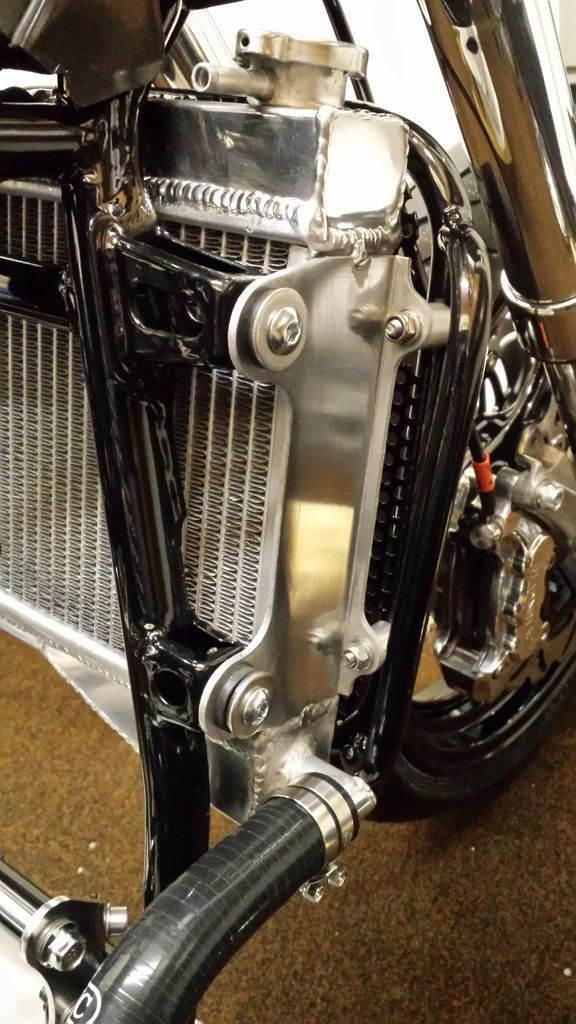 Rolling chassis is nearly done now. Will add the loom and connect as much up as possible, and then start on the engine. Dusty |
|
|
|
Post by tell7437 on Dec 30, 2016 23:51:55 GMT 1
Did your rad clear the right hand frame rail at the top, had to put a well placed dent in mine (rad not frame) to get clearance
|
|
|
|
Post by dusty350 on Dec 31, 2016 0:07:04 GMT 1
Hi No issues with it fitting the frame. I used new mounting rubbers - again from Norbo - which made it a snug fit but only coz the rubbers are new and not compressed like old ones. I will take the rad off again when I eventually fit the engine, and as it's new I will flush it to be on the safe side before refitting it. It's easier to bolt it to the bike than have it sitting around on the garage floor. I'd probably end up treading on it !! Dusty |
|
|
|
Post by dusty350 on Jan 10, 2017 22:11:17 GMT 1
Hi My mudguard arrived from Mark Cordwell today. I dropped it off when I picked up the other bodywork, and with Xmas in the way it only just arrived back today. Excellent work by Mark, and I'm pleased with the twin decals that I chose; 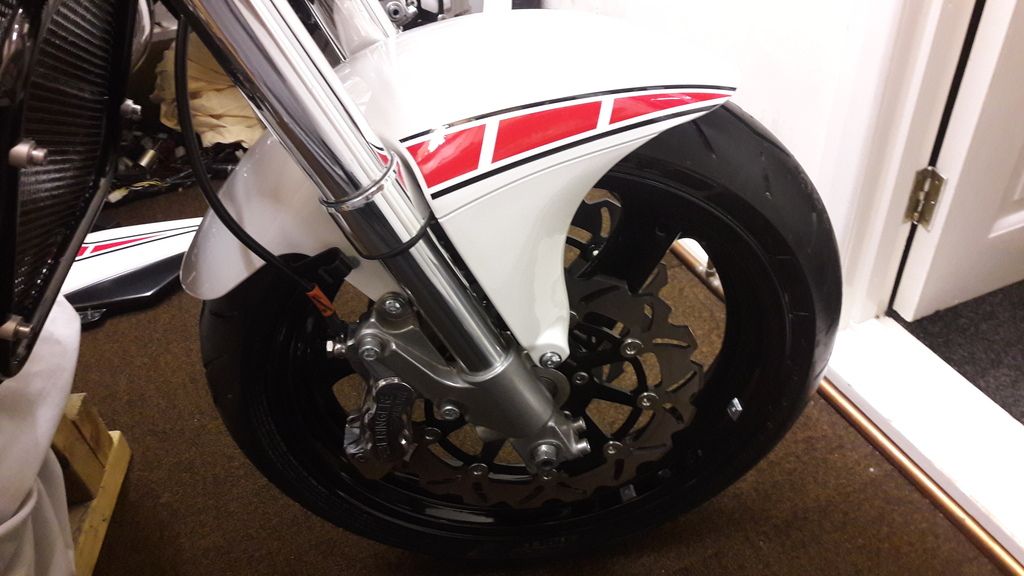 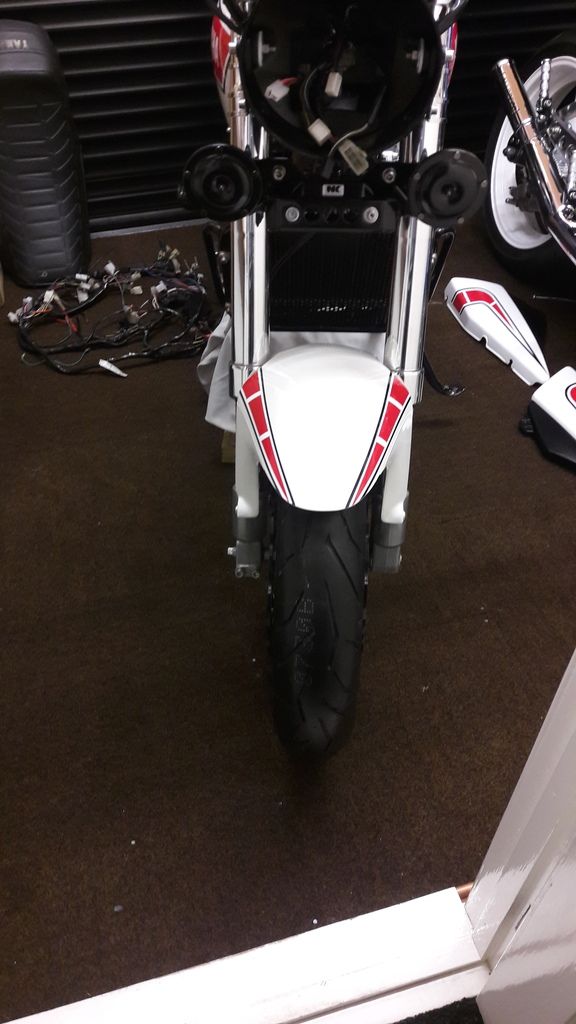 I've got two Lc looms - an original and an aftermarket one. Just need to decide which one to use . Then I can fit that and test the electrical system. I also need to choose some indicators that will suit the bike. Dusty |
|
|
|
Post by carioca656 on Jan 10, 2017 22:39:12 GMT 1
you can get these for less that that and there ok we use them on pit bike supermoto's enter pitbike rear brake into ebay search they work ok |
|
|
|
Post by jakethepeg007 on Jan 10, 2017 23:57:49 GMT 1
|
|
|
|
Post by mouse on Jan 11, 2017 10:36:24 GMT 1
Come on Dusty, show the rest of the paintwork!!
I've got some new mini indicators, still in their packaging that you can have if you like?
Mouse
|
|
|
|
Post by dusty350 on Jan 11, 2017 11:42:06 GMT 1
Hi Andrew It doesn't look right putting all the bodywork on with no engine fitted . I might save that pic for when it's all together. There are a few about with this scheme, plus black wheels, grab rail etc so it isn't a unique design. I'm saving that for the 385 !! Would be interested in seeing the indicators you have Was going to look at Kempton - it's a week on Saturday - fancy a trip ? Not usually much there for our bikes but good for nuts/bolts and various bits and bobs. Jake -great link, thanks. I will leave mine as it is now but it's worth knowing you can get them. I think the Chinese rads often have a problem in the guard fixings so it's good to know the Rivnuts can be replaced easily enough. Regards Dusty |
|
|
|
Post by jakethepeg007 on Jan 11, 2017 22:18:01 GMT 1
Dusty, I replaced the nuts on my standard radiator, wasted a few nuts to see how it works, but also a good repair for the battery box strap!
Cheers
|
|
|
|
Carbon Lc
Jan 12, 2017 0:18:10 GMT 1
via mobile
Post by Slabsideian on Jan 12, 2017 0:18:10 GMT 1
Wow you don't muck about dusty. I hunted around for the smallest indicators I could find. Found them on eBay with resistors. Check what they look like in my build thread and I can send you the link ( if I can find it 😬) Keep cracking love those colours 👍🏻👍🏻
|
|
|
|
Post by Mr Kipling on Jan 12, 2017 2:06:28 GMT 1
+1 liking those colours , its coming on great , its always nice to see a bike with some siblings.. top job ...
|
|
|
|
Post by mouse on Jan 12, 2017 7:55:22 GMT 1
Hi Andrew It doesn't look right putting all the bodywork on with no engine fitted . I might save that pic for when it's all together. There are a few about with this scheme, plus black wheels, grab rail etc so it isn't a unique design. I'm saving that for the 385 !! Would be interested in seeing the indicators you have Was going to look at Kempton - it's a week on Saturday - fancy a trip ? Not usually much there for our bikes but good for nuts/bolts and various bits and bobs. Jake -great link, thanks. I will leave mine as it is now but it's worth knowing you can get them. I think the Chinese rads often have a problem in the guard fixings so it's good to know the Rivnuts can be replaced easily enough. Regards Dusty Hi Dusty would be up for Kempton, just need to dig out the indicators, will text you a photo ATB Mouse |
|
|
|
Post by dusty350 on Jan 12, 2017 11:04:12 GMT 1
Hi Andrew I will speak to you about Kempton then. Gotta make the most of it, looks like it will be under 3000 new homes if the Jockey club manage to sell the course !! Thanks for the comments guys. It is coming on quite quickly (by my standards  ), but that is due mainly to many of the parts already refurbed or new by the previous owner, so cant take credit for those. Once I fit the loom, add indicators and bleed front brakes the rolling chassis will be done. I am buying a new crank from PJME now - will pick it up when we visit my wife's cousin in Rugely, so next couple of weeks, so then my attention will turn to the engine, which is a separate build thread on here. I am taking my barrels and pistons for them to check whilst I'm there - they look good but would like a pro opinion on them before I rebuild the top end. Thanks Ian, if you find the link to your indicators that would be great, but no rush. Hopefully you will see it completed at MOT time !! Regards Dusty |
|
|
|
Carbon Lc
Jan 13, 2017 0:28:23 GMT 1
via mobile
Post by Slabsideian on Jan 13, 2017 0:28:23 GMT 1
|
|
|
|
Post by dusty350 on Jan 13, 2017 9:16:50 GMT 1
Cheers Ian Thanks for the link. They do look small !! I will get in touch about you testing it hopefully in Spring with any luck. I'm hoping the pistons and bores will be ok - will save another £170 if I can avoid a rebore. Pipes may get a black rattle can job if funds are too tight, which would probably look ok with the white paint scheme. Certainly would have been too dark with the carbon bodywork. Dusty |
|


 ), but that is due mainly to many of the parts already refurbed or new by the previous owner, so cant take credit for those. Once I fit the loom, add indicators and bleed front brakes the rolling chassis will be done. I am buying a new crank from PJME now - will pick it up when we visit my wife's cousin in Rugely, so next couple of weeks, so then my attention will turn to the engine, which is a separate build thread on here. I am taking my barrels and pistons for them to check whilst I'm there - they look good but would like a pro opinion on them before I rebuild the top end.