|
|
Post by dusty350 on May 24, 2022 21:48:31 GMT 1
This will be another pic heavy rebuild of the 350Lc engine that came out of the FZRD project donor bike. I thought I would make this a separate thread as it's "in progress" - the rolling chassis build could be some time yet ! As before, I will include part numbers and prices where possible, and the difference this time is I will start with the strip down, which I haven't done with the last 2 Lc engine threads. I often find the strip down the hardest part, so including the pics may help. The engine was a runner in the bike, and sounded ok, but I thought it wise not to test ride it or run it for long as it had been stood for about a year when I got it, and not sure of it's exact running history before that;  20220430_141928 20220430_141928 by dusty miller, on Flickr  20220501_145529 20220501_145529 by dusty miller, on Flickr  |
|
|
|
Post by donkeychomp on May 24, 2022 22:33:29 GMT 1
This is going to help me a LOT Dusty. I still think I'll need some assistance though...
Alex
|
|
|
|
Post by charles13 on May 24, 2022 23:59:50 GMT 1
Dusty, what didn’t you like about the fzrd?
|
|
|
|
Post by dusty350 on May 25, 2022 7:03:51 GMT 1
There is nothing wrong with the Fzr, apart from the way it's been modified. It's very much "home made" - nothing wrong with that, most of us do "home made" on our bikes - me very much included, but it could have been done so much better. The engine mountings were cobbled together with whatever was to hand, which complicated things greatly. It's actually quite a straightforward conversion, thanks to a wide frame and a smaller engine than it was designed for. I have plans for it, mainly a new cradle with better mounts and ali spacers for the engine and rad. I was gonna sell the Banana arm, but may well keep it in there with the addition of the correct Rgv wheel and brake set up. It will be a project in it's own right and I plan to do a build thread on it when I get started. Not sure if this 350 engine will end up back in it - a Pv would look good and plenty of room for servo and control boxes. A rethink would make it quite a nice special, and a bit different too  Dusty  |
|
|
|
Post by charles13 on May 25, 2022 13:16:24 GMT 1
I should really have known it wasn’t up to your level after seeing your builds all over the internet. You are a great example to newer builder’s like me who observe and learn from these level of builds
|
|
|
|
Post by dusty350 on May 25, 2022 20:15:59 GMT 1
Thanks, but I'm no better than anyone else. It's all about detail - the more time and effort you take on even the smallest parts makes a big difference to the completed bike. I'm in awe of some of the guys on here that can fabricate new parts from scratch - I would love to have those skills ! Plus you need tradesmen that you can trust to do the jobs you cant - paint/powdercoat/ engineered parts etc. I'm lucky to have those guys available when I need them  Dusty  |
|
|
|
Post by dusty350 on Jun 11, 2022 22:15:39 GMT 1
Back to this now after a hectic few weeks ! As said, I will list the stripdown and rebuild in this thread to keep it all in one place. The stripdown is documented in the FZRD rebuild thread so you'll find it there too. As always, this is my take on doing an engine rebuild - I'm not a pro mechanic, so your way may differ to mine, and that's fine  The plan is to end up with a fairly standard 350Lc engine with a standard bore for future longevity, using genuine Yam parts or the best pattern available. Whilst the engine was still in the frame, I removed the left side case and hydraulic clutch actuator. I drained the gearbox oil by removing the drain plug underneath the engine, and also drained the coolant via the cylinder drain bolts, hoses and loosened water pump cover plate. Now is a good time to loosen the sprocket nut too, especially if you dont have a rattle gun. Chain was a split link item so that was easily removed. Tacho cable removed, and wiring disconnected. Engine bolts removed and I could sit the lump on a wooden stand;  20220501_144010 20220501_144010 by dusty miller, on Flickr Then up onto the bench for further disassembly;  20220501_160751 20220501_160751 by dusty miller, on Flickr  20220501_145529 20220501_145529 by dusty miller, on Flickr  20220501_145539 20220501_145539 by dusty miller, on Flickr My home made wooden stand is pressed into use once again. A couple off offcuts of 3x2 screwed to a ply base allow the engine to sit, ready to be stripped. Felt pads on the underside of the ply mean you can spin it around easily to get to each side. The base really comes into it's own for reassembly, but it's still useful at this point. I had already removed the cylinder head whilst the engine was still in the frame to get an idea of bore size and condition, so the cylinder head bolts were already loose/removed. I'm always keen to see whats going on in the clutch casing, so the side case was removed next - no problems there as hex head bolts were used, so no chewed up standard screws that can often cause headaches ! Once the case is off we can see the clutch; 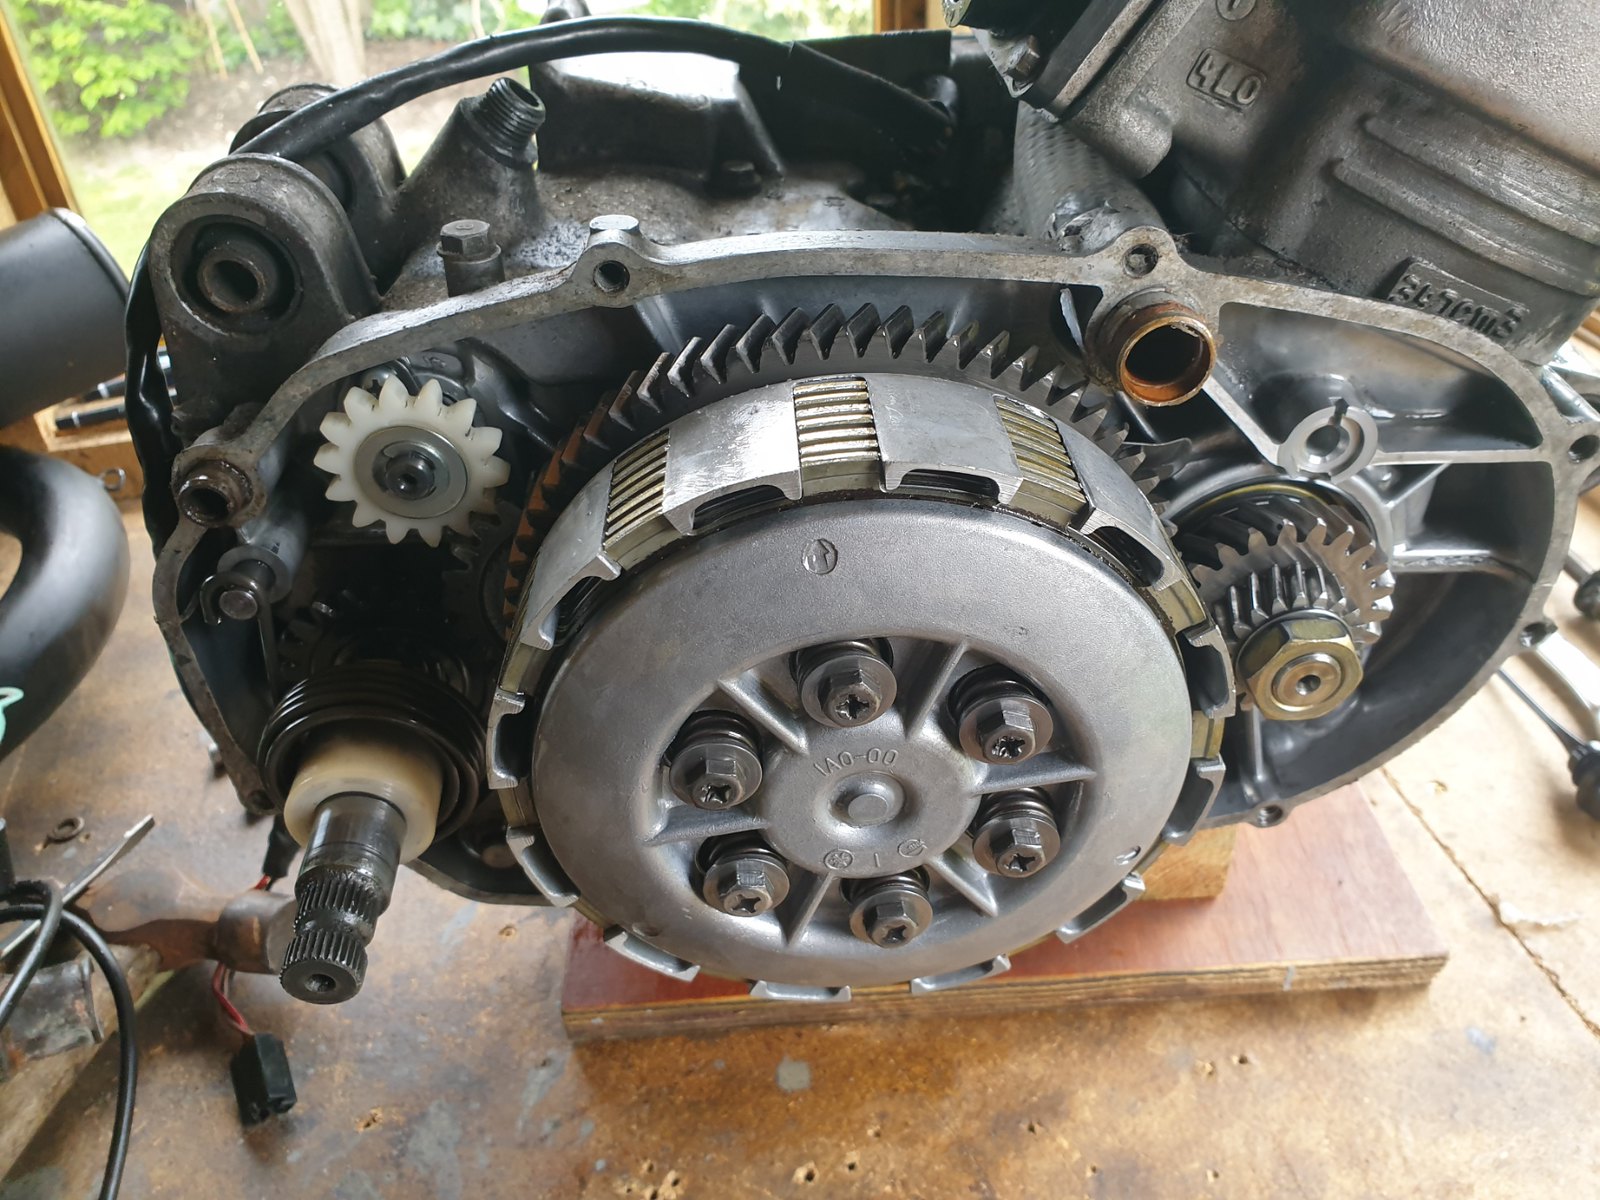 20220501_151317 20220501_151317 by dusty miller, on Flickr No nasty surprises so far. Clutch plates look new/aftermarket. Basket has all it's "fingers", and no signs of hamfisted spannering by previous multiple owners, yet ! No set order for disassembly at this point, but I spin the engine around to tackle the rotor next. These can be very tight on the crank taper. I removed the centre nut using my cheapo Aldi/Lidl rattle gun with a selection of extension bars allowing use of the correct sized socket. As pointed out in the other thread, I am using standard sockets and not impact sockets. I had no problems at all, but you may want to wrap some tape around your sockets if they aren't impact rated - thanks to Stusco for that tip  Luckily, none of the nuts were overtight, and the rattle gun makes life so much easier. The rotor is held with a rotor holding tool (ebay) to make life easy, but the rattle gun means it's almost not needed;  20220502_135322 20220502_135322 by dusty miller, on Flickr With the nut removed, I can also remove the large spring washer. The plain washer can be a fiddle to get out, but a small magnet sorts it. Then wind in the rotor puller fully, then when you are happy it's in as far as it can go, tighten the centre bolt in against the end of the crank  20220502_135808 20220502_135808 by dusty miller, on Flickr It's important you have the puller wound in as far as it can go. Check the rotors internal threads are clean beforehand to aid it's fitting. I've seen rotors with stripped threads where the puller hasn't gone far enough in, and stripped the threads because of that. Once fully seated, the internal bolt of the puller is tightened. A gentle tap with a hammer on the end of the puller bolt is often enough to free the rotor from the crank. Some guys pour boiling water over the rotor if they still dont budge - the expansion from the heat often enough to gain movement. It can release it's grip with a real "crack", but once it's off, it will reveal the generator;  20220502_135920 20220502_135920 by dusty miller, on Flickr As components are removed, they are put into clear freezer bags pinched from the kitchen. In time, each part will be cleaned and assessed for condition/repair/replacement. You can make a note of damaged or missing parts at this point and start the search for replacements, possibly saving time later on. Whilst you have the rotor holding tool nearby, you can use it to lock the sprocket if you haven't already loosened it. It sits over the teeth and prevents rotation as you rattle gun the centre nut;  20220502_140245 20220502_140245 by dusty miller, on Flickr The generator can be removed by undoing the bolts in the back plate, and once removed you can see some scribed letters/numbers on the top and bottom cases which, ideally should be the same, indicating a matched pair of cases;  20220502_142336 20220502_142336 by dusty miller, on Flickr Thankfully, these match ! Dusty  |
|
|
|
Post by donkeychomp on Jun 11, 2022 23:15:37 GMT 1
Watching with interest mate. Already a little lost but no surprises there!
Alex
|
|
|
|
Post by abar121 on Jun 12, 2022 9:04:50 GMT 1
Looking good! I've got one to do in a few months, will refer back to this one.
Even though I've done a good few now, it really helps to remember the best order to remove stuff, especially the rotating gubbins.
|
|
|
|
Post by dusty350 on Jun 12, 2022 19:26:12 GMT 1
Dont worry Alex - you only need the rebuild bit !!  Spin the engine around again to remove parts from the clutch casing. Unhook the spring and pull the kickstart shaft away from it's housing first. Then undo the 6 clutch spring bolts;  20220502_143945 20220502_143945 by dusty miller, on Flickr With the bolts and springs out of the way, the pressure plate lifts off revealing the clutch plates;  20220502_144042 20220502_144042 by dusty miller, on Flickr Looks like EBC plates with the pin planished steels. Remove the centre "mushroom", then remove the plates and rubbers;  20220502_144438 20220502_144438 by dusty miller, on Flickr With the plates removed, you now have room to fit your clutch holding tool as you need to undo the central nut. You can also loosen the primary drive nut at this point. A flattened piece of copper tube can go between the primary and driven gear to help lock it up, or even rag will help stop movement. Back to the clutch nut - a tab washer needs knocking back first, and then with the tool in place, the rattle gun spins it off easily. These nuts can be very tight, but this was no problem thankfully. The inner hub can now pull out, along with the thrust washer that sits behind it;  20220502_144658 20220502_144658 by dusty miller, on Flickr  20220502_144828 20220502_144828 by dusty miller, on Flickr The main basket can now slide off, and you'll see the inner bush, and another thrust washer, identical to the first you removed; 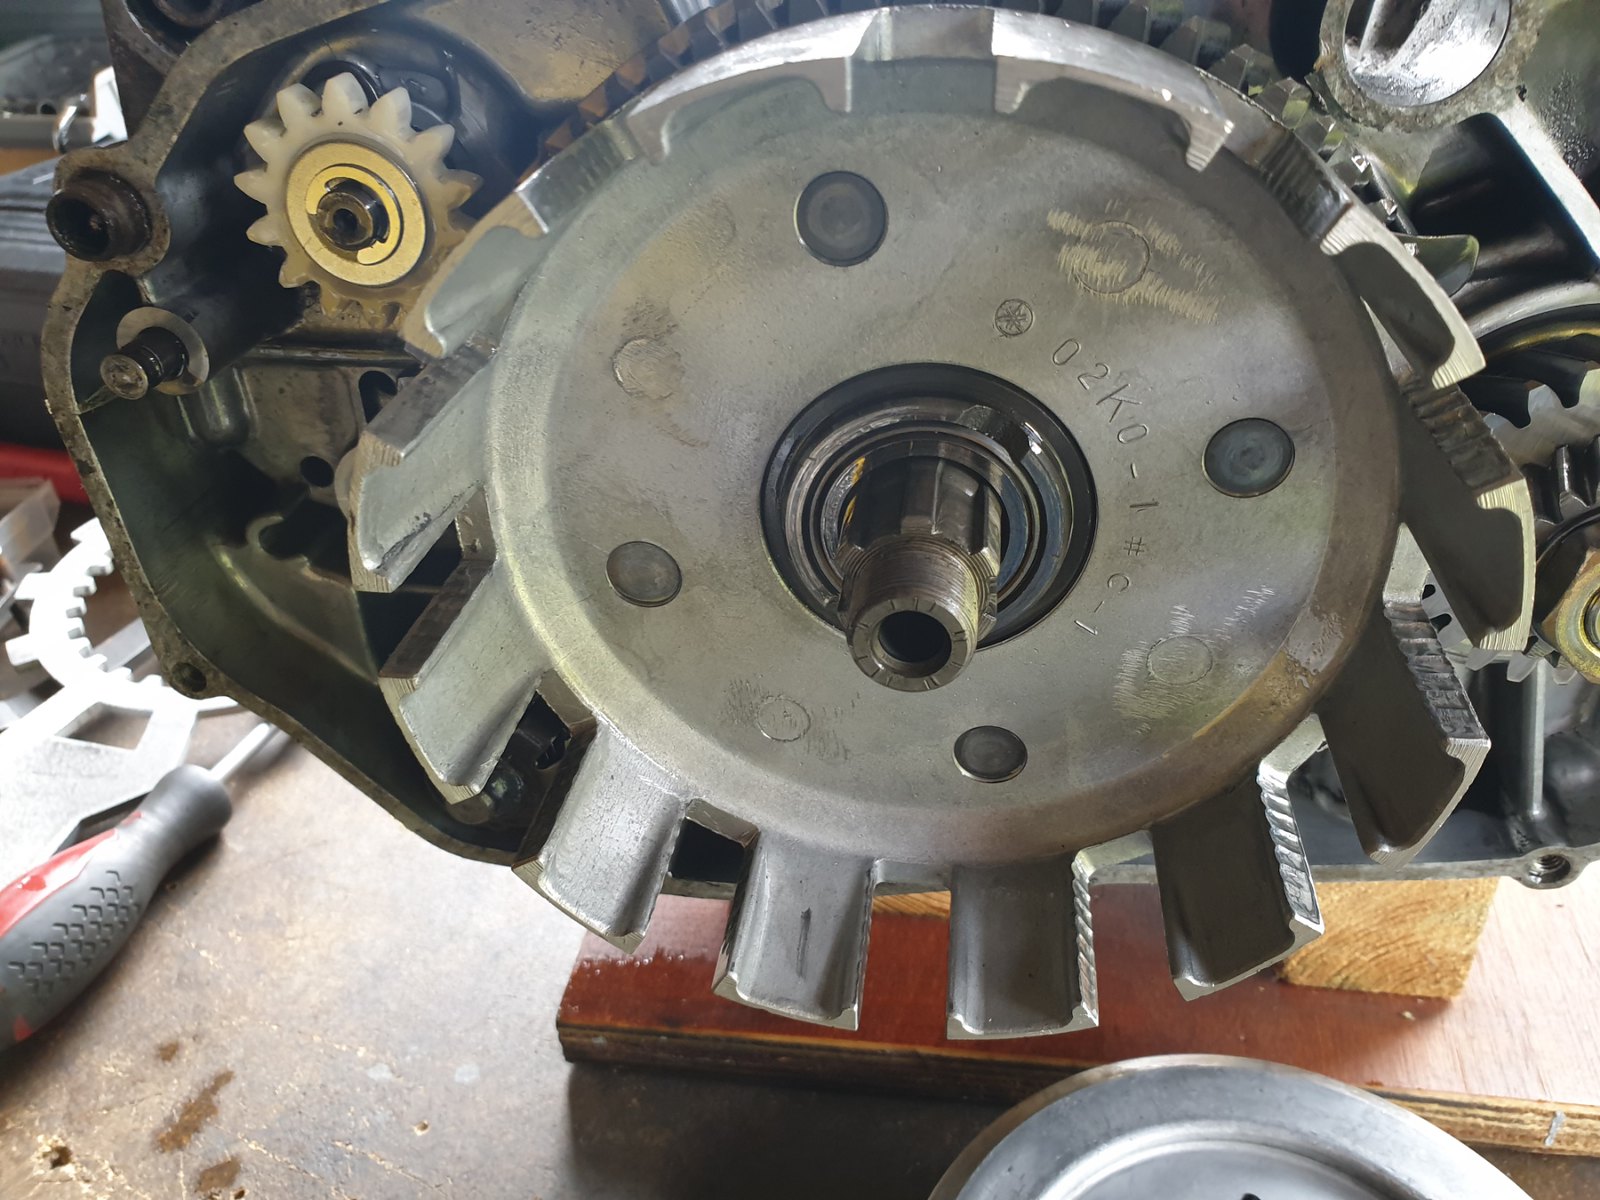 20220502_144830 20220502_144830 by dusty miller, on Flickr  20220502_145506 20220502_145506 by dusty miller, on Flickr  |
|
|
|
Post by donkeychomp on Jun 12, 2022 21:47:11 GMT 1
Now THAT I have done before lol.
Alex
|
|
|
|
Post by dusty350 on Jun 14, 2022 7:58:18 GMT 1
With the basket now removed, I take off the primary and smaller gear from the crank end. With the basket off, you can pull out the gear selector shaft;  20220502_145943 20220502_145943 by dusty miller, on Flickr  20220502_145958 20220502_145958 by dusty miller, on Flickr It's now a case of just removing the last components. Standard screws are JIS, so a correct tool will greatly aid removal - they chew up fairly easily otherwise, plus they can be very tight. Again, a rattle gun makes removal much less troublesome, and I lay the engine on it's side on my wooden stand - so the left side crank end is between the wood supports and allows the engine to sit flat on it's casing, so I can exert maximum pressure on the fasteners to stop the tool slipping and chewing up the screw heads. Idler gear is held on with a circlip - dont forget the very fine shim that sits behind this gear  . Each component and it's fasteners go into separate freezer bags. I change all the internal screws and bolts, so keeping the old fasteners makes matching up new ones a lot easier. There is a half moon shaped bearing retainer behind the clutch basket - you must remove this to split the cases as it bolts between the 2 halves. Once removed, you are then onto the casing top bolts and the 8 nuts underneath the engine. When all fasteners are removed, you are ready to split the top case from the bottom. A rubber or hide mallet will help as sealant will have stuck them together. Or you an use some wood as a drift, to prevent damage when encouraging the cases to split. Once you have broken the seal, you can wiggle the top from the bottom, and then you are into the bottom end of the engine; 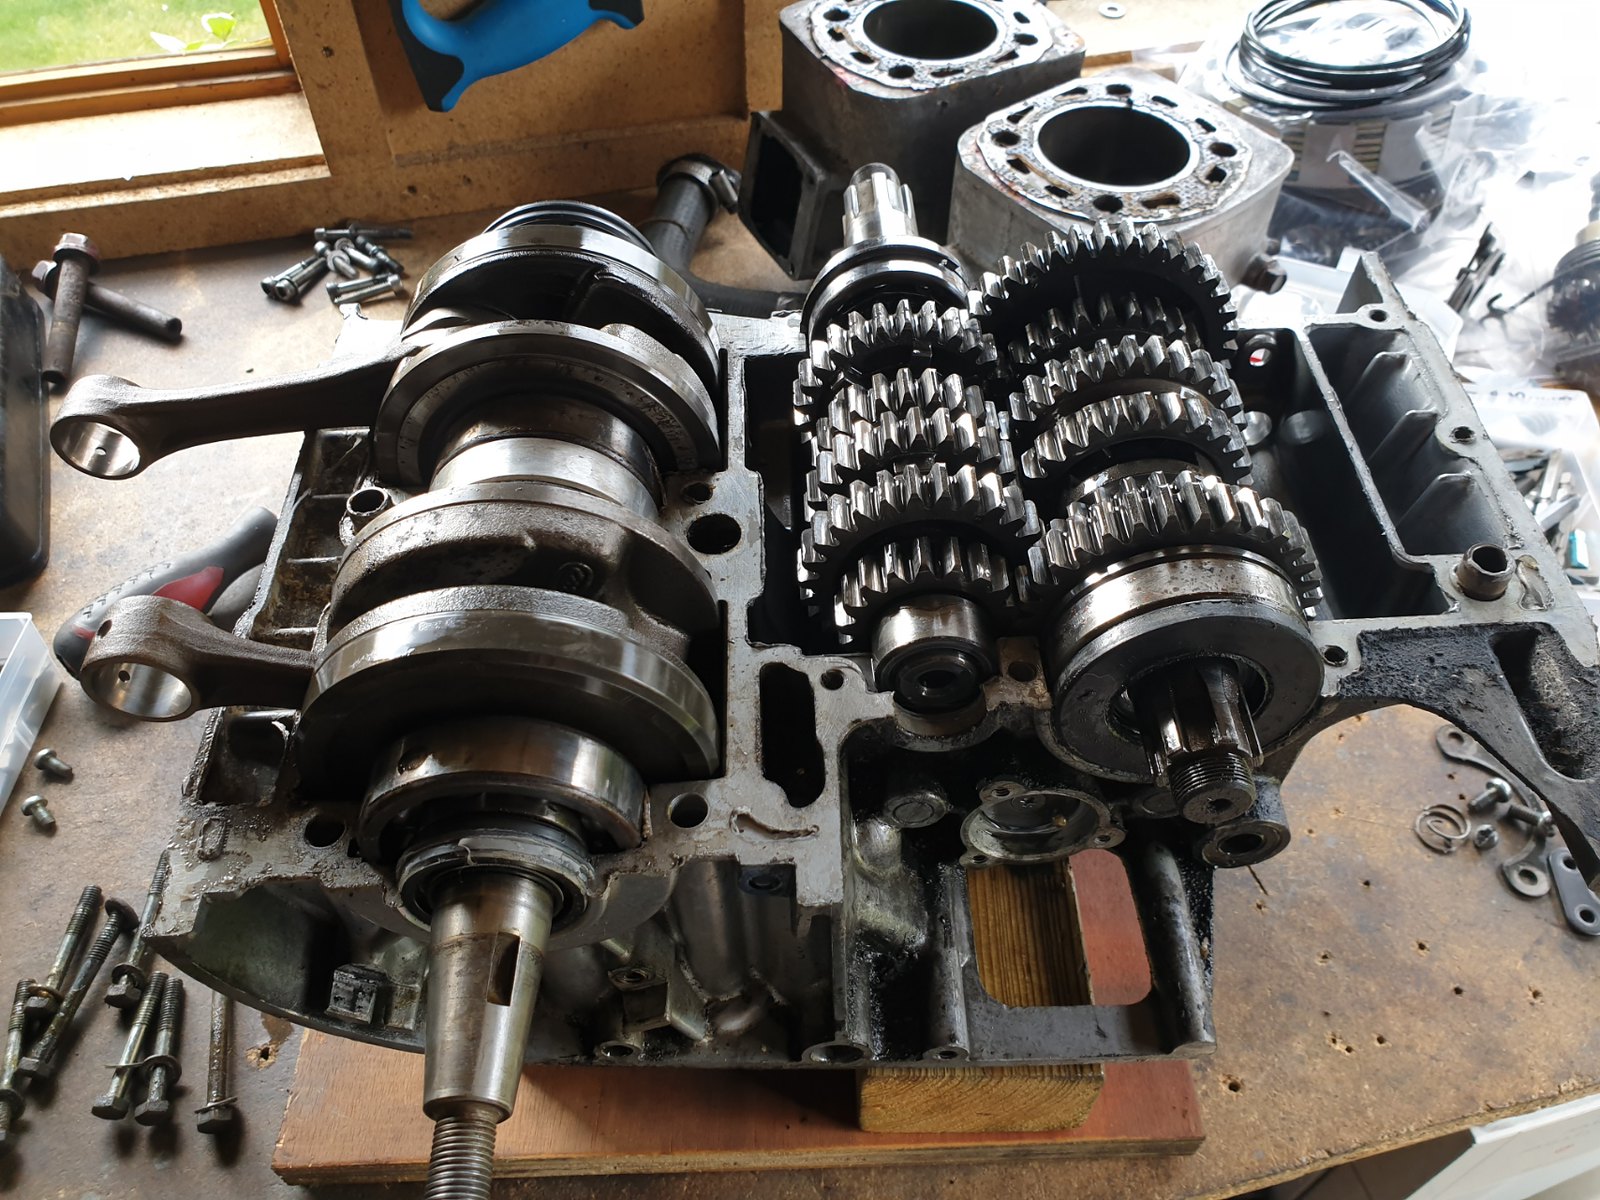 20220502_162313 20220502_162313 by dusty miller, on Flickr  |
|
|
|
Post by shaunthe2nd on Jun 14, 2022 8:19:56 GMT 1
Nice thread as always Dusty.
I find those little JIS screws, the domed and the countersunk ones offer most resistance to removal.
I put a bit of heat on them once, but accidently melted the plastic tacho sprocket, so be careful anyone who tries that!
|
|
|
|
Post by dusty350 on Jun 15, 2022 7:50:54 GMT 1
Totally agree Shaun - heat can really help with certain fasteners  Both gear clusters will now lift out from the bottom case. Note there is one large, half moon shaped circlip, and one smaller one that sits in casing grooves below the gearbox bearings. They are often well seated in the grooves but will usually come free fairly easily. The crank will also lift out now, but often needs some wiggling as the central lab seal sits it tight into the bottom case. With the gear clusters removed, you can see the selector forks and drum;  20220502_163233 20220502_163233 by dusty miller, on Flickr 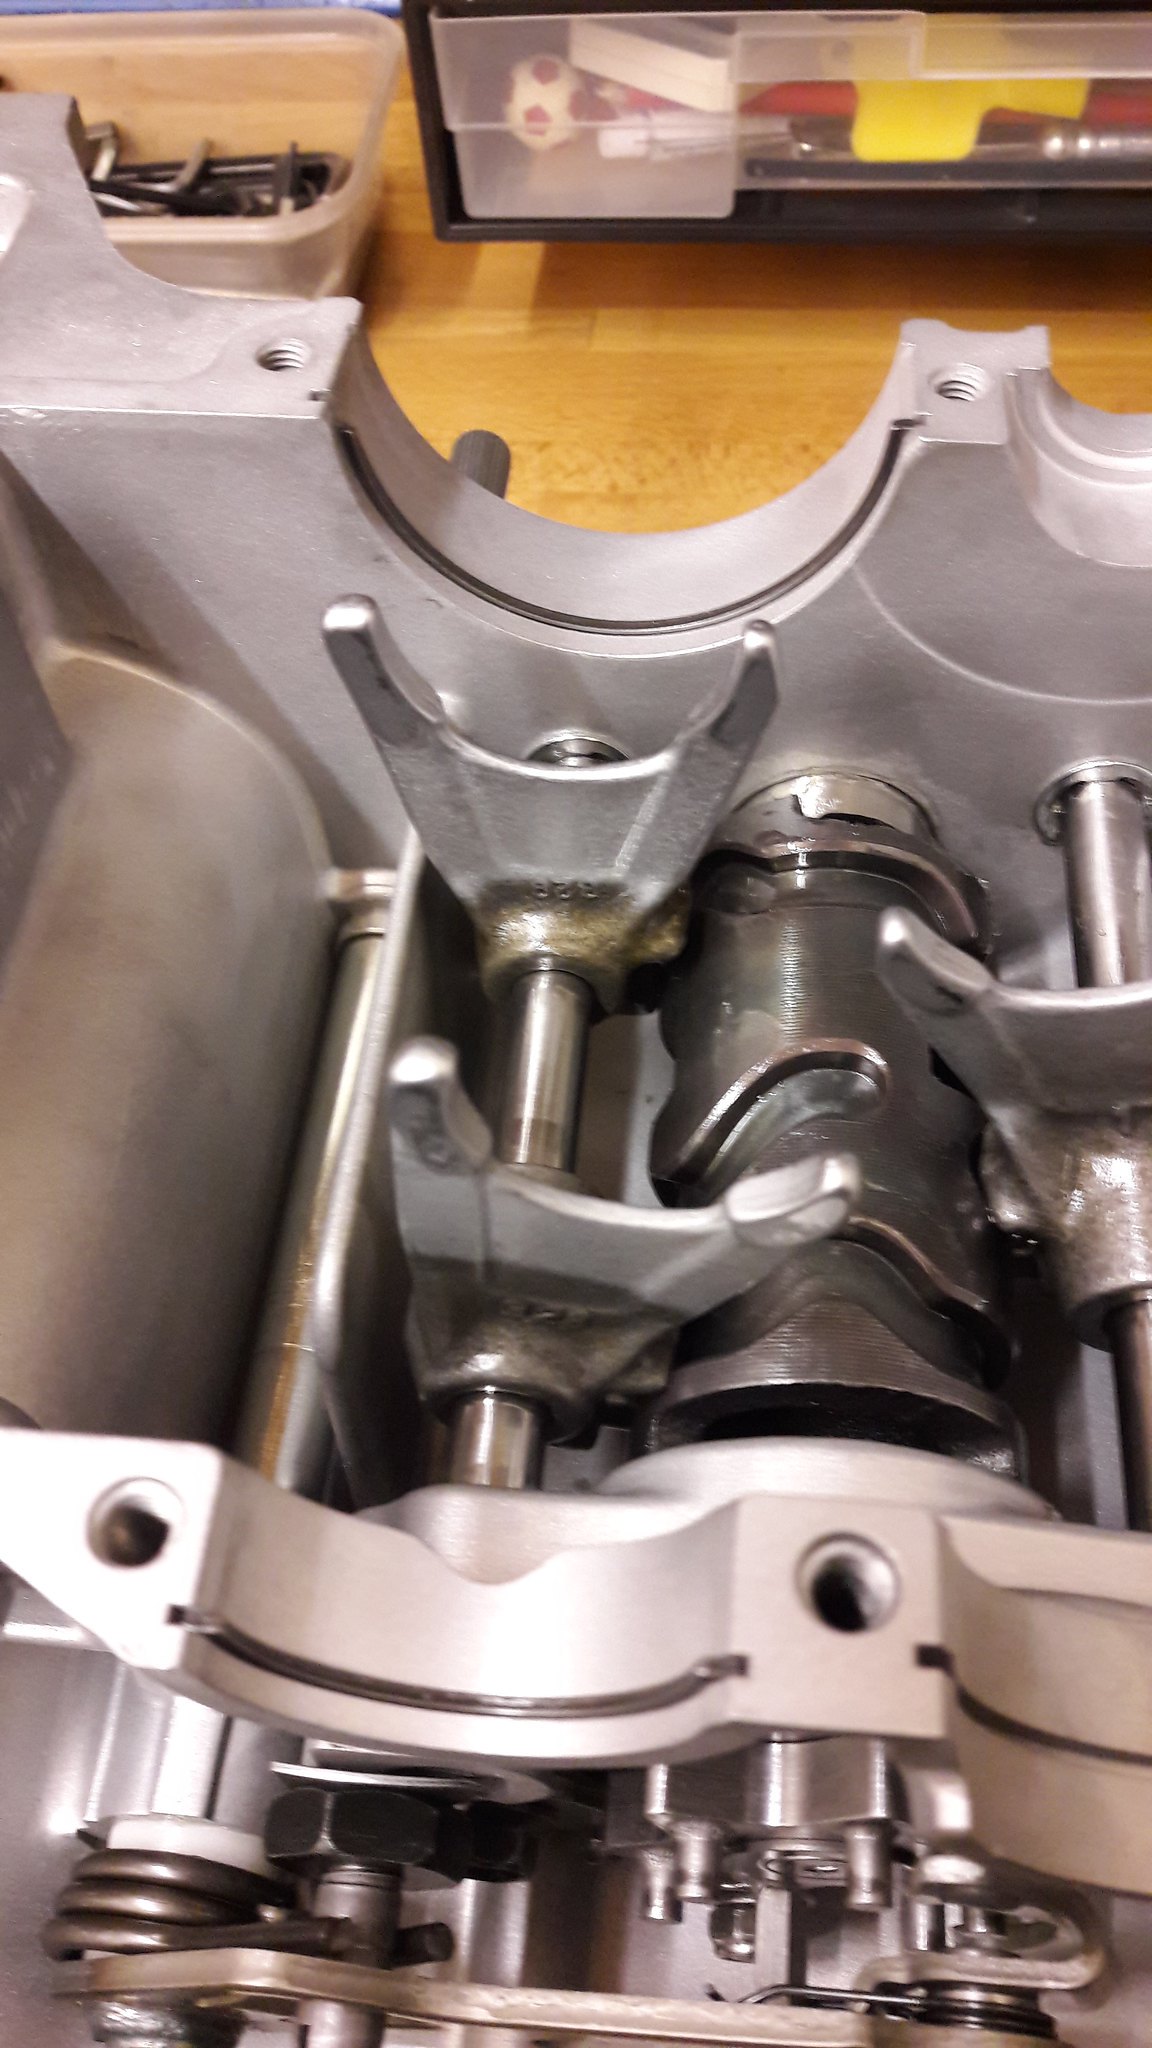 45715986541_0042d013b9_k 45715986541_0042d013b9_k by dusty miller, on Flickr Circlips at the end of the forks need to be removed before the shafts can slide out, you can see them in the above pic, along with the half moon clips, allowing the forks to come off the shafts and be lifted free. The drum also slides out - provided you removed the end plate that secures it. And that's it. I remove all screws, bolts etc as the cases are gonna be vapour blasted. I fit old bolts into all threads so no media sits in the bottom of a blind hole. I now go over the cases looking for any damage or problems that might need addressing before going any further. Now is the time to repair any stripped threads. Thankfully these cases are fine, so Jamie will vapour them and then the rebuild will start. Dusty  |
|
|
|
Post by cbm on Jun 15, 2022 8:15:19 GMT 1
Nice thread as always Dusty. I find those little JIS screws, the domed and the countersunk ones offer most resistance to removal. I put a bit of heat on them once, but accidently melted the plastic tacho sprocket, so be careful anyone who tries that! Treat yourself to a couple of these, not cheap but you can use them as regular screwdrivers too, Happy Days  JIS Impact driver JIS Impact driver |
|
|
|
Post by shaunthe2nd on Jun 15, 2022 8:36:40 GMT 1
Nice thread as always Dusty. I find those little JIS screws, the domed and the countersunk ones offer most resistance to removal. I put a bit of heat on them once, but accidently melted the plastic tacho sprocket, so be careful anyone who tries that! Treat yourself to a couple of these, not cheap but you can use them as regular screwdrivers too, Happy Days  JIS Impact driver JIS Impact driver I ended up buying some JIS attachments for my rattle gun, definitely improves things. I also remove the plastic gears before going near them with hot flame! |
|
|
|
Post by mouse on Jun 15, 2022 17:21:01 GMT 1
Great job and no horrors lurking within!
Mouse
|
|
|
|
Post by arrdy350 on Jun 15, 2022 17:45:57 GMT 1
Great thread Dusty 😃
Nice and easy step by step guide. Have you done one for a YPVS ?
|
|
|
|
Post by dusty350 on Jun 15, 2022 19:01:18 GMT 1
I've rebuilt them but not done a proper thread on one. To be honest, the process is virtually identical, with the exception of the Pv's up top - easy enough to dismantle - and the clutch actuator for the bottom end, but if you can strip an Lc, a Pv wont worry you   |
|
|
|
Post by dusty350 on Jun 15, 2022 19:23:58 GMT 1
With all removable components safely bagged up, the cases are inspected for any damage. 1 bolt had sheared on me -the top one that helps hold the tacho drive shaft retaining plate in place (often the most difficult to remove, and not the first one to snap on me), but otherwise all threads are good, and there appears to be no damage or cracks to the cases. Old bolts and screws are fitted to all the threadways, and the cases are off to Jamie for vapour blasting;  20220519_115111 20220519_115111 by dusty miller, on Flickr  20220519_115119 20220519_115119 by dusty miller, on Flickr  20220519_115128 20220519_115128 by dusty miller, on Flickr They did get a prewash with some stale petrol to aid examination prior to blasting, plus I think it's good etiquette to hand over cases that aren't covered in oil and crud. Dusty  |
|
|
|
Post by donkeychomp on Jun 15, 2022 21:20:20 GMT 1
Very polite!
Alex
|
|
|
|
Post by JonW on Jun 17, 2022 2:11:42 GMT 1
Nice work Dusty.
Totally agree on the pre-cleaning. I remember dropping in a frame many many years back for blasting and the guy getting irate that it had some chain lube on it. Since then Ive always cleaned all the old oil and crud off as best i can before i take anyone any parts and its served me well i think, people are more likely to do your job quicker if its simple and wont ruin their tank/media etc.
|
|
|
|
Post by dusty350 on Jun 17, 2022 20:34:10 GMT 1
Cases done;  20220617_163528 20220617_163528 by dusty miller, on Flickr Jamie did a great job as usual. Forgot to add that just before they went to Jamie, I took the bottom case to my local engineering guys so they could fit the steel insert for the shift shaft. I had one left over, unused from my 400e build. Same dimensions as Norbo's but slightly longer, but as I already had it I thought might as well use it;  20220617_163548 20220617_163548 by dusty miller, on Flickr  20220617_163607 20220617_163607 by dusty miller, on Flickr I'm ready to start building the bottom end now. A big order went into Fowlers in the week, with most parts from stock, delivered a day later. Some of the parts were out of stock, and will be 10 -14 days away but nothing that affects the early part of the build. I'm just collating all the part number info, and then I'll start posting it up  Dusty  |
|
|
|
Post by sidney81 on Jun 17, 2022 22:14:18 GMT 1
Looking beautiful dusty 😊
|
|
|
|
Post by dusty350 on Jun 25, 2022 10:36:24 GMT 1
After quite an expensive parts order to Fowlers, I can now start rebuilding the bottom end. I will list part numbers as I go, and include new numbers where necessary, and the price as of June 22, in the hope it helps anyone contemplating a rebuild with parts numbers and costs. The last Lc engine build I documented was October 2018, so it will be interesting the see any price differences on parts in 4 years. Fowlers had the vast majority in stock, delivered next day, and the parts that were backordered were with me within 10 days. Starting at the very bottom of the engine, the first new part is the sump plug gasket. Official Yamaha part number is 4F4 14766 00, and is a salty £8.83, £1.47 more than 4 years ago. A much cheaper alternative is a Honda ali crush gasket that fits an works perfectly, part number 94109 14000, and costs just £1.00;  20220625_092922 20220625_092922 by dusty miller, on Flickr With the sump bolt lightly greased, the bolt and washer can be fitted, and torqued to 14ft/lbs;  20220625_093210 20220625_093210 by dusty miller, on Flickr Where the sump bolt had been blasted, I need to protect the surface from corrosion. Once tightened, I paint the bolt head with a satin enamel paint to stop it rusting. Once dry, it will sit on the engine stand ready for the next part;  20220625_094044 20220625_094044 by dusty miller, on Flickr Dusty  |
|
|
|
Post by sidney81 on Jun 25, 2022 19:21:30 GMT 1
This will be really helpful for me 😃
|
|
|
|
Post by dusty350 on Jun 25, 2022 21:04:48 GMT 1
Easy engine to do Chris, you'll breeze it  With the bottom case now sat on it's stand I'm ready to start opening up the freezer bags of parts, stored since strip down. The first part to clean is the selector drum. I use Chinese takeaway tubs for items like this, with clean petrol as the cleaning media 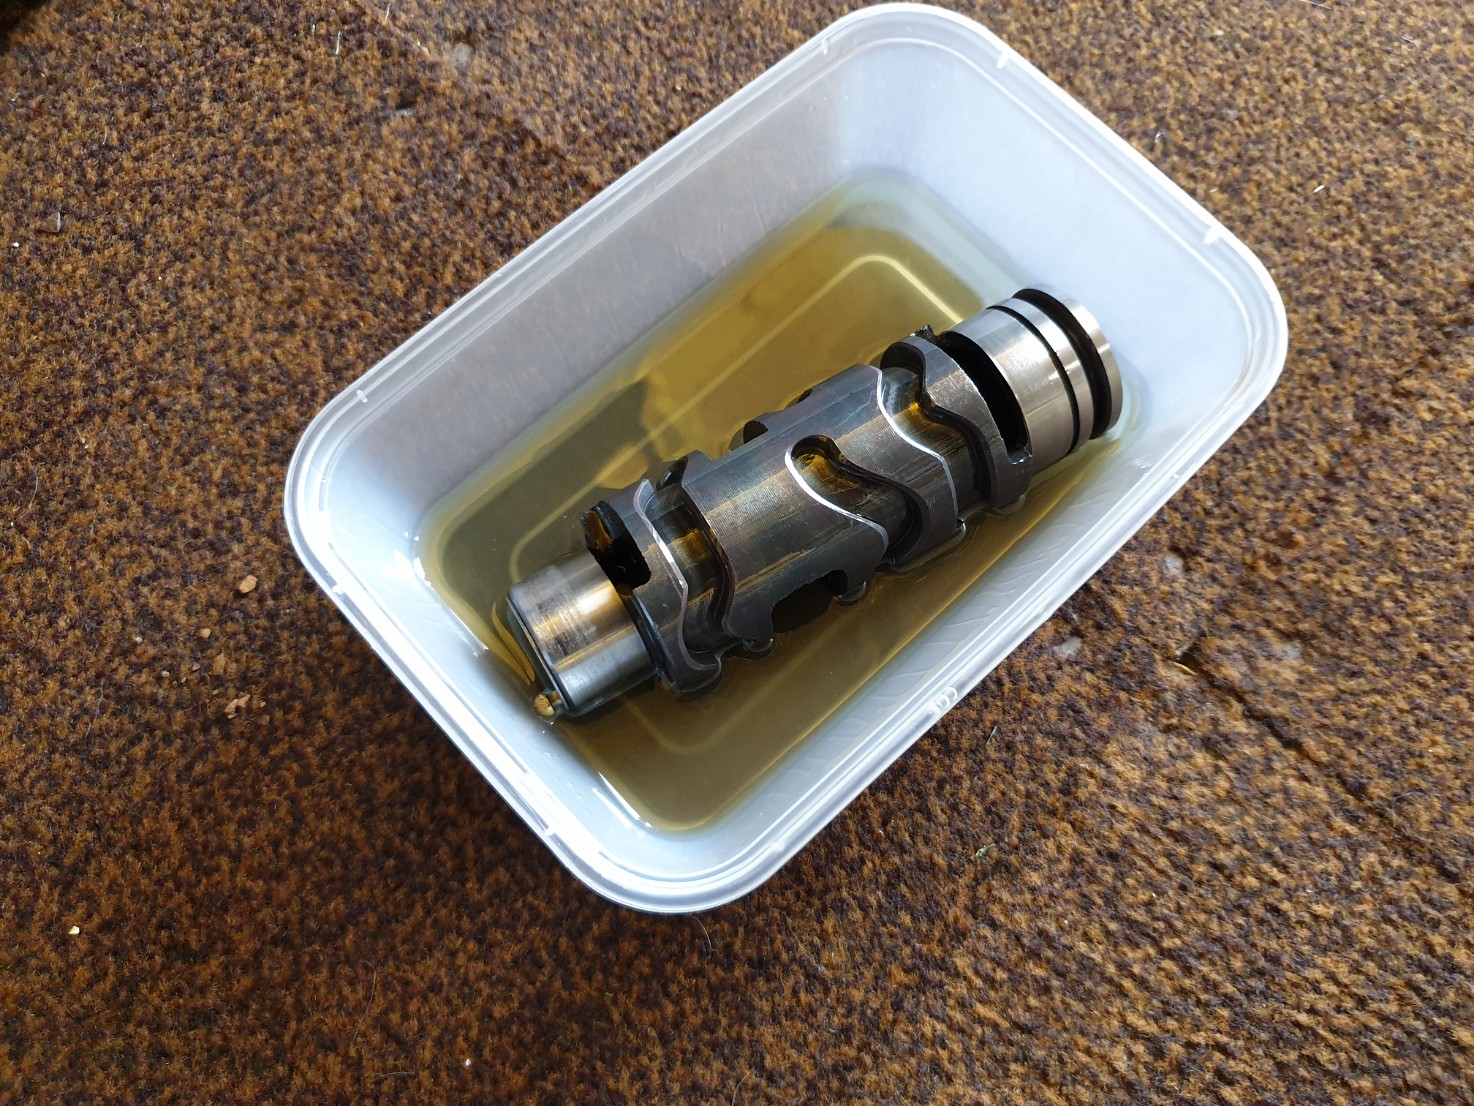 20220625_095307 20220625_095307 by dusty miller, on Flickr This wasn't too dirty, but the residue left over proves it's always worth a rinse;  20220625_095952 20220625_095952 by dusty miller, on Flickr I had loosened the JIS screw at the star end of the drum when It was still in situ during stripdown. With the screw removed, the countersunk washer comes next, and then the shift star can be removed - they can be a tight fit, plus there is a small pin that helps locate it which may come away with the star. Then there is a circlip that needs removing, which then allows the bearing to lift free;  20220625_094732 20220625_094732 by dusty miller, on Flickr 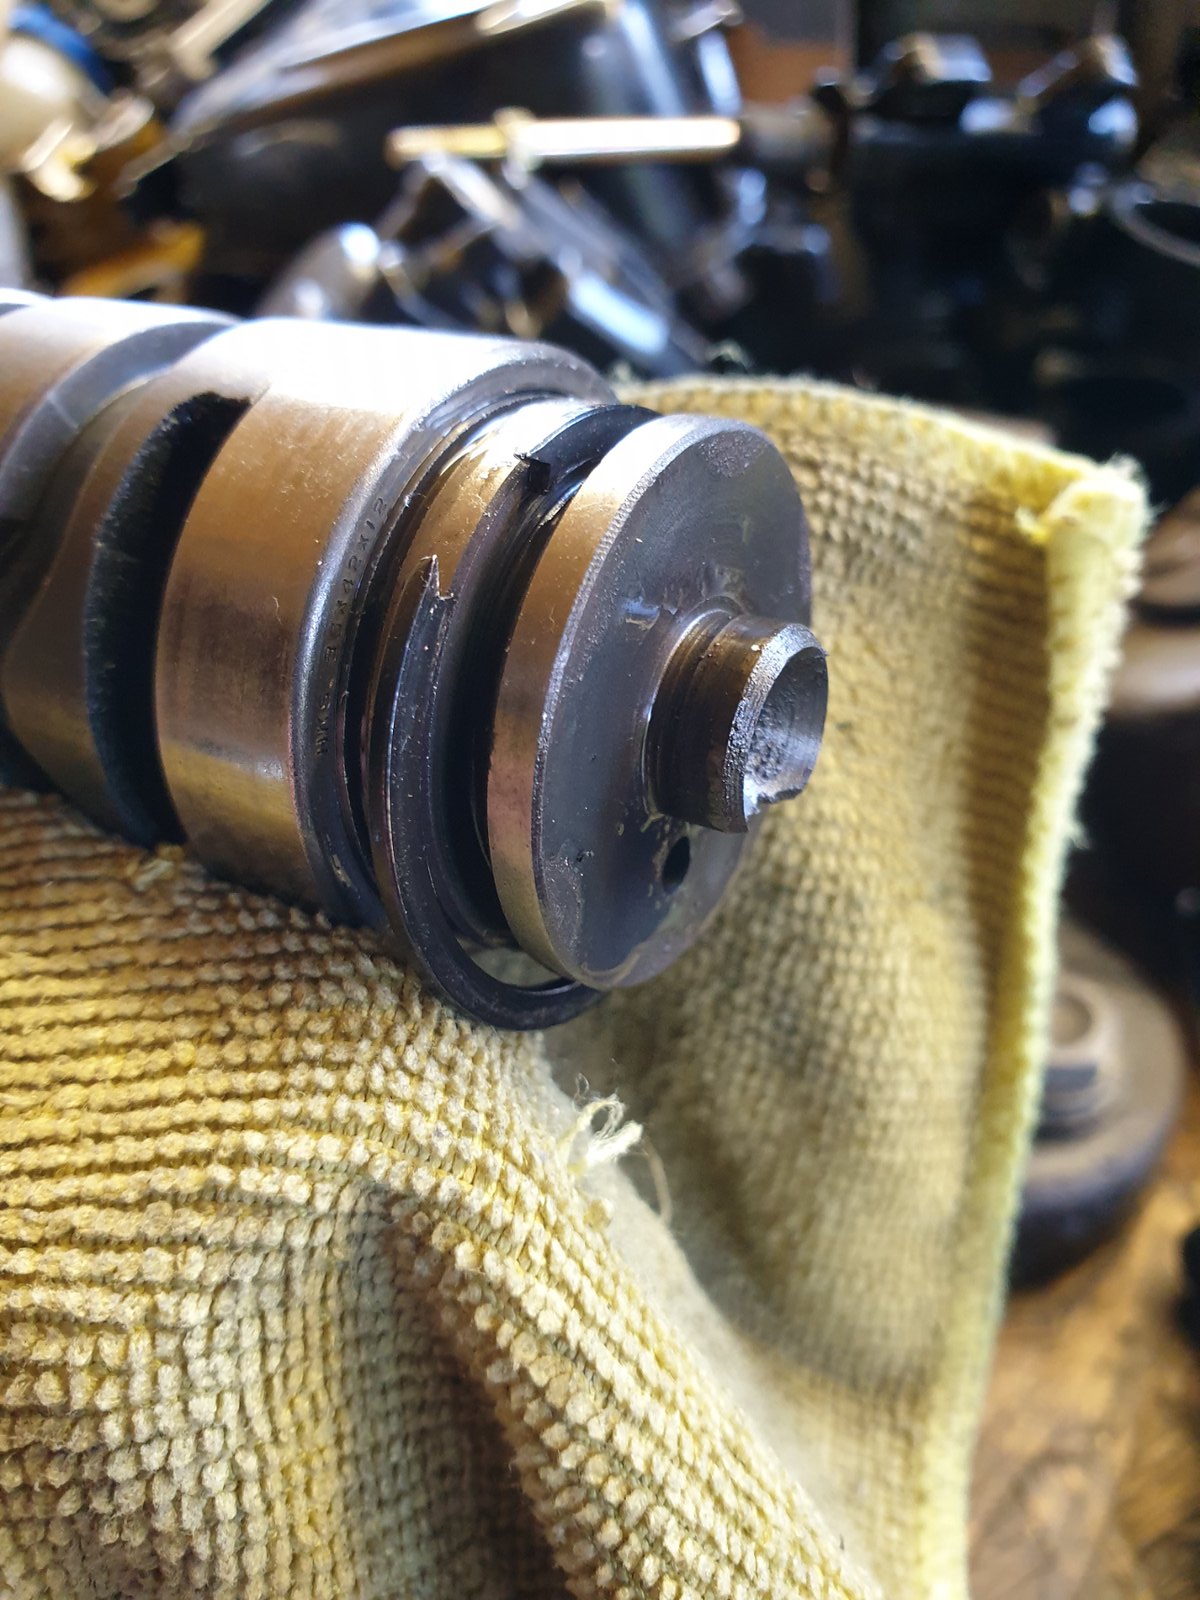 20220625_095036 20220625_095036 by dusty miller, on Flickr The shift drum itself is fairly simple. The areas that are worth checking are the surface the bearing runs on, and the neutral switch plunger at the opposite end to the star that needs to spring back when depressed;  20220625_153348 20220625_153348 by dusty miller, on Flickr Happy that everything is ok, I can start to reassemble with a new bearing and circlip;  20220625_094311 20220625_094311 by dusty miller, on Flickr Bearing is £15.11, and the circlip £4.00. Some clean Light Gear oil is applied to the bearing and the drum , and it's bearing, circlip, shift star, locating pin and finally counter sunk washer and central screw. Alan Kelly very kindly modded my shift star for me again, taking the points off the star to help with neutral selection - thanks Al, you are a, erm , Star   This mod definitely allows the drum to rotate more easily, and will be allied to the Shift Pro style mod, more of which later; 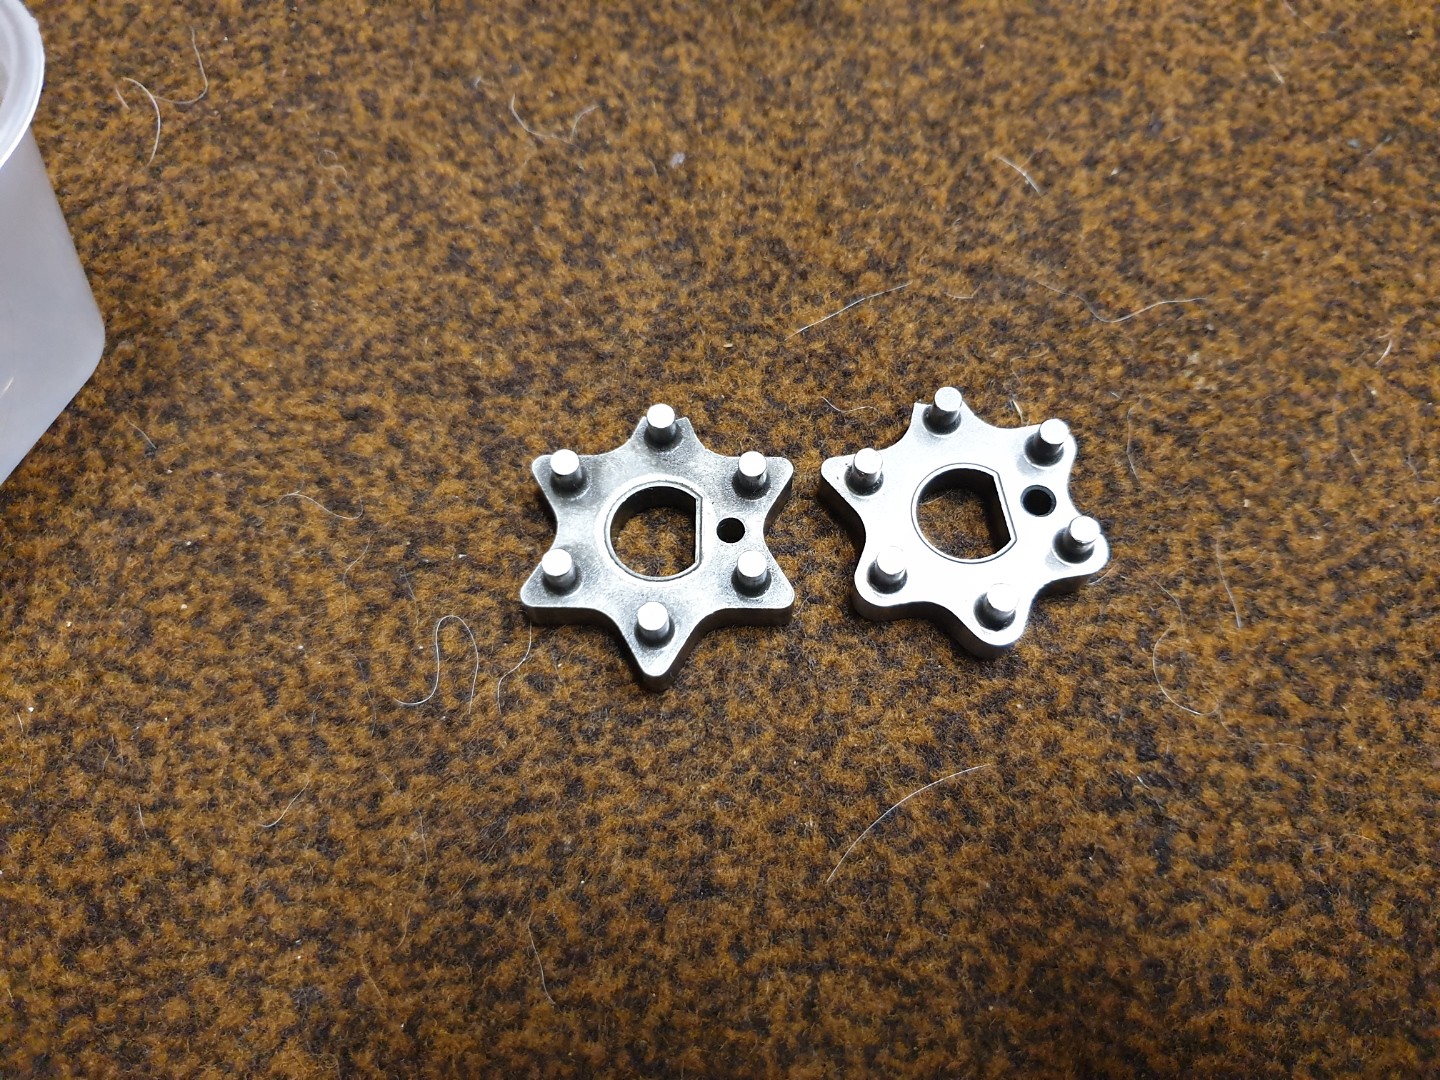 20220625_153831 20220625_153831 by dusty miller, on Flickr  20220625_162935 20220625_162935 by dusty miller, on Flickr You can see the counter sunk washer helps trap the locating pin so it cant come loose. I can now fit the drum back into the case;  20220625_163414 20220625_163414 by dusty miller, on Flickr Lightly oiled' it slips into place. Before you fit the retaining plate at the star end, you need to fit the front, short, selector fork rod and the fork itself;  20220625_165814 20220625_165814 by dusty miller, on Flickr  20220625_170017 20220625_170017 by dusty miller, on Flickr Make sure the drum is in the neutral position to make life easier. The cut out on the star should be around the 6 o clock position for the selector forks to sit in the drum grooves correctly;  20220625_165806 20220625_165806 by dusty miller, on Flickr With the rod and fork in place, you can fit a new circlip that prevents the rod from moving to the left. One circlip for each rod. £1.37 each;  20220625_170809 20220625_170809 by dusty miller, on Flickr I dab some grease on the casing above the groove on the rod and stick the circlip to it, then just push down on the circlip so it clips into it's groove. Makes it easy to fit, and prevents dropping the circlip in under the drum; 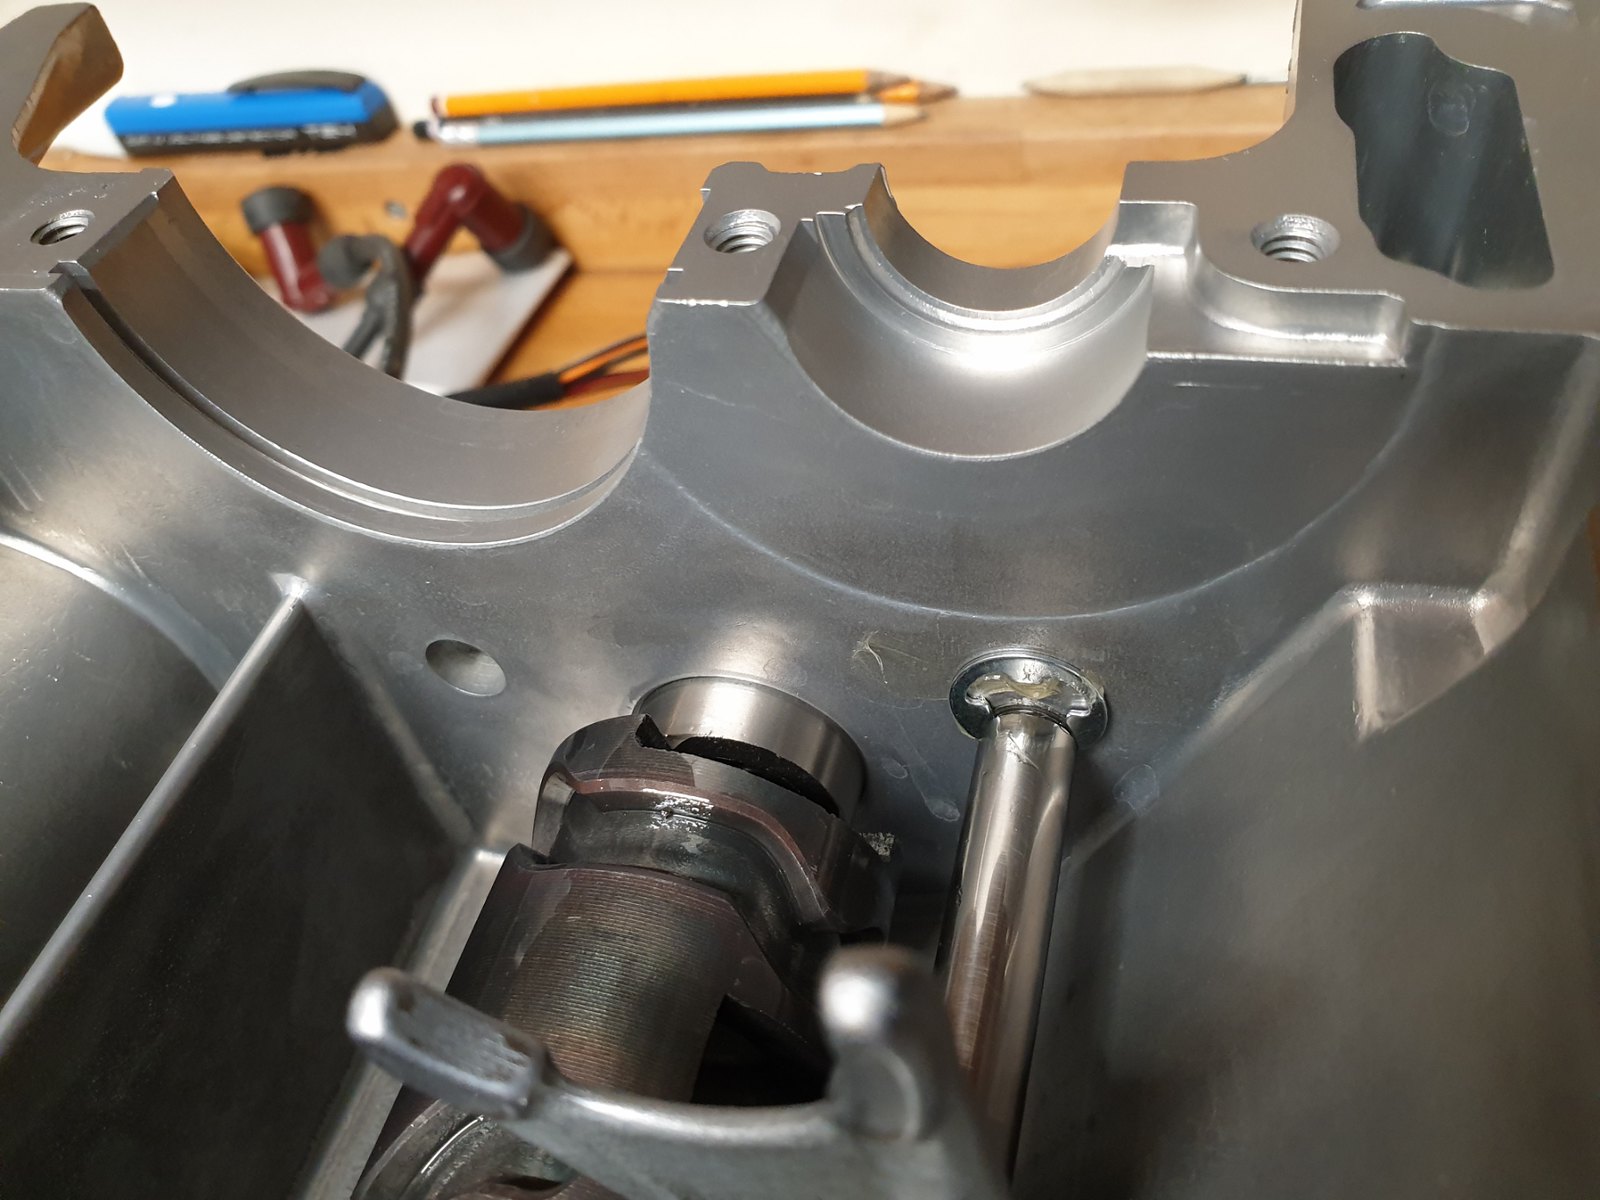 20220625_170910 20220625_170910 by dusty miller, on Flickr You can now fit the drum retaining plate. This stops the rod from from moving out to the right, hence you need to fit the riod and fork before fitting this plate;  20220625_171512 20220625_171512 by dusty miller, on Flickr The rear selector fork shaft - the longer one - can slide in now, and same as before, fit the forks as it passes through the case. Note the different shaped forks;  20220625_172500 20220625_172500 by dusty miller, on Flickr  20220625_173513 20220625_173513 by dusty miller, on Flickr  20220625_173526 20220625_173526 by dusty miller, on Flickr Fit the cirlip into the rod groove as you did with the front rod, and that's the drum and selector forks done  Dusty  |
|
|
|
Post by donkeychomp on Jun 25, 2022 21:47:33 GMT 1
It looks so easy Dusty. Then again, so did the Rubik's cube...
Alex
|
|
|
|
Post by dusty350 on Jun 25, 2022 21:51:59 GMT 1
It is easy mate. Are you around tomorrow morning ? I can pop over and look at your engine if it suits   |
|
|
|
Post by arrow on Jun 26, 2022 0:12:34 GMT 1
Dusty mate, your work is always flawless, but could I suggest you try using white spirit instead of petrol for cleaning parts? It works just as well, it's much safer, and has a lot less noxious odour.
I always add just a tad of oil to it, to prevent any rusting when it dries off.
Only downside would be it might not dry off quite as quick as petrol.
Both around the same price these days too.
|
|