|
|
Post by dusty350 on Jan 2, 2018 23:15:39 GMT 1
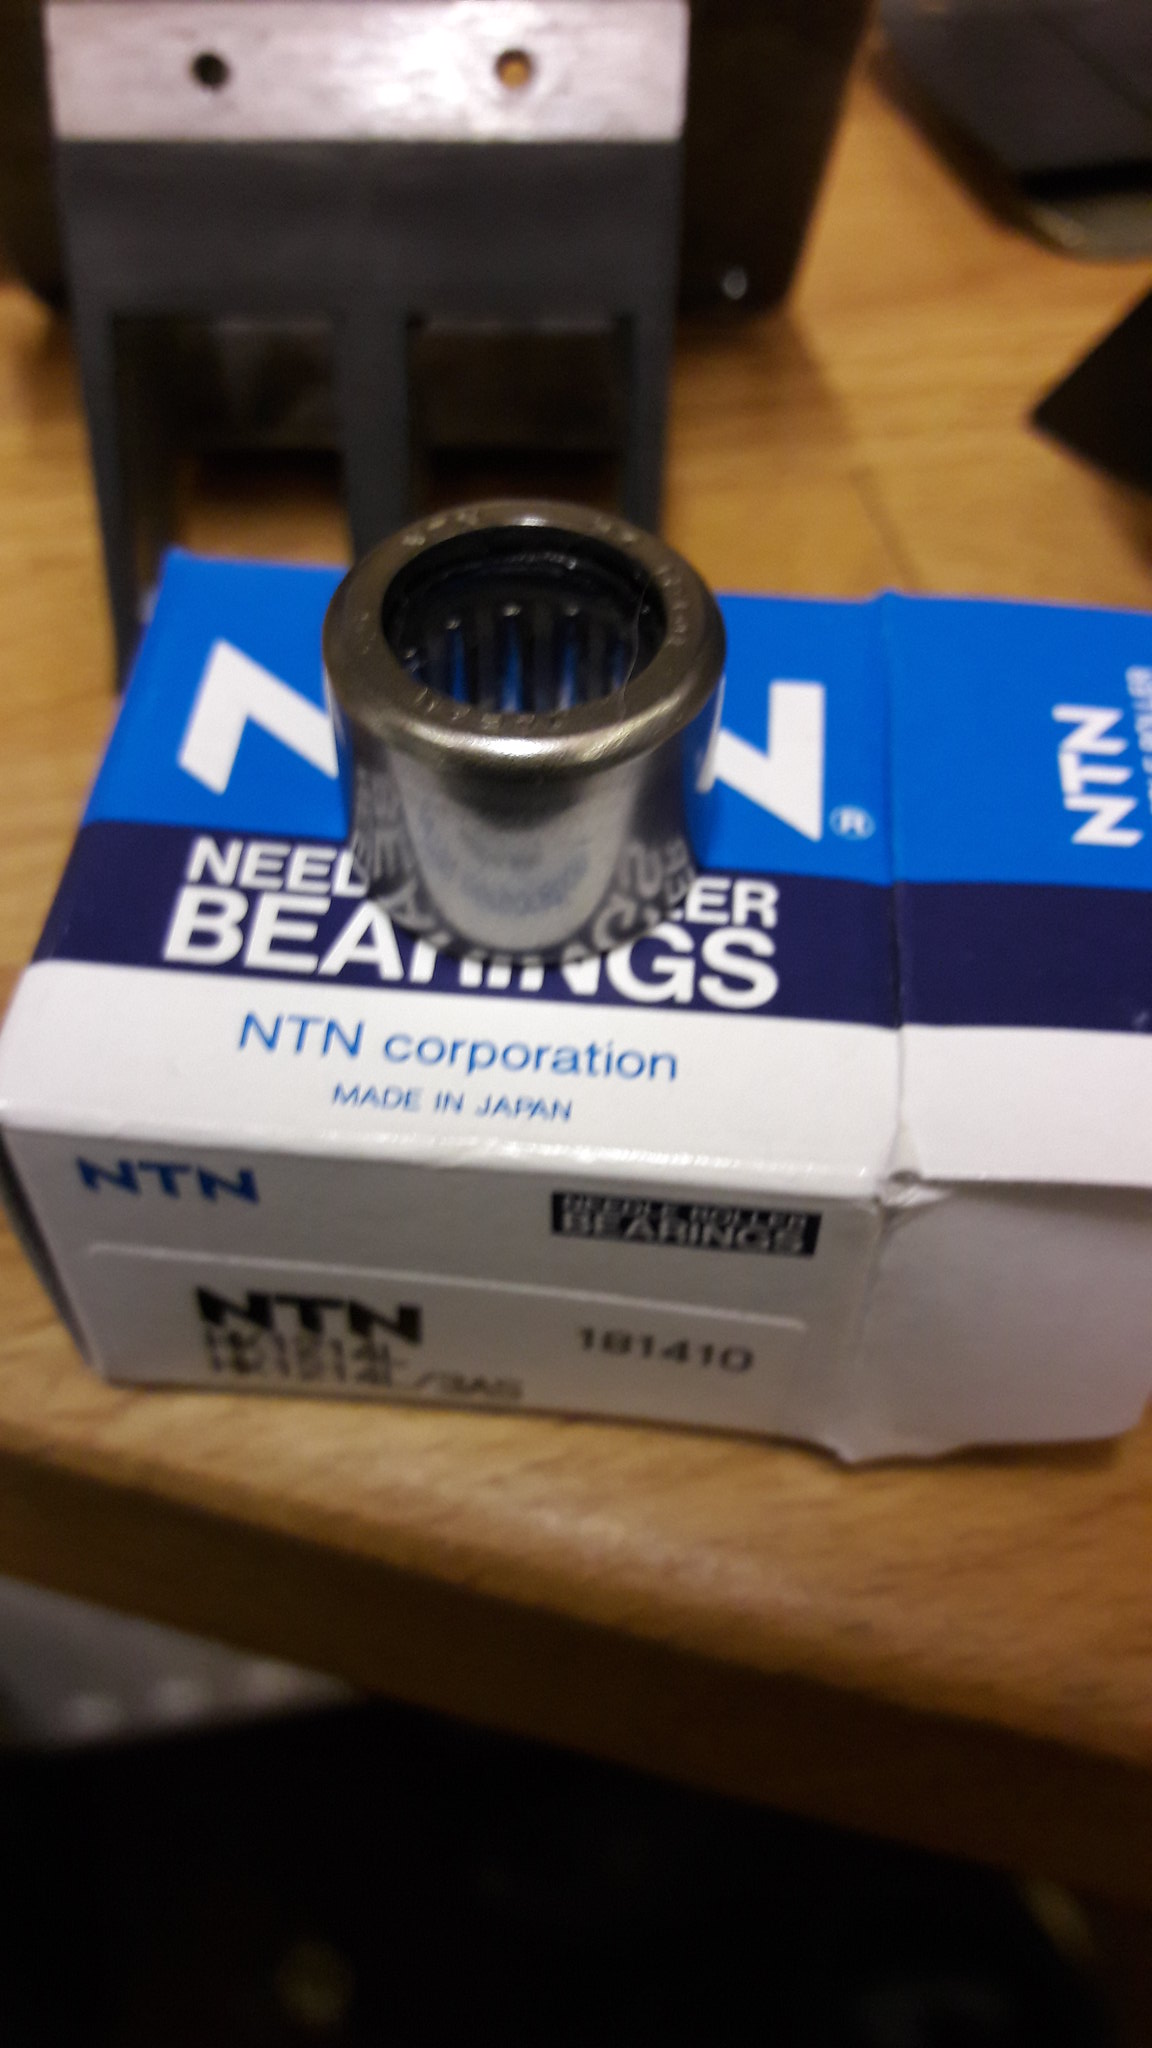
Found it ! Simply Bearings - HK1214RS Drawn cup type needle roller bearing with 2 open ends 12x18x14mm - £5.55 + £1.50 post  20170301_183612 20170301_183612 by David Miller, on Flickr I would carefully measure the case hole once you've pressed the bush out just in case there is a difference to the size I've quoted. It makes for a good mod though  Hth Dusty  |
|
|
|
Post by bezzer on Jan 2, 2018 23:50:00 GMT 1
Hi Bezzer I will have to see if I've got a receipt anywhere. Cant remember the dims to be honest. I pressed the old bush out of the case and measured the hole, both for internal diameter and depth, and then measured the diameter of the gear change shaft, all with a digital Vernier. I then went onto the Simply Bearings website and found a bearing with the correct dims. Was only about 5 or 6 quid I think. I had to file the hole in the case a bit to press the bearing home as it needs to be a tight fit. The bearing I bought sits under flush so I can use a small rubber seal on the outer face of the case to keep crud out. Dusty  Thanks for the info Dusty, smallest o/d I’ve found is 16mm, so I’m thinking this would work, my other option is to machine a plain oilite/bronze bush, which should give it decent support. Sounds like you did the right thing removing small amounts at a time to give the bearing a nice snug fit 👌🏻 😊 Thanks again mate. |
|
|
|
Post by donkeychomp on Jan 2, 2018 23:51:10 GMT 1
That must have taken ages to restore all the pics Dusty! Glad you did though, a very interesting read and it makes the Haynes manual look like, well, the Haynes manual.
Cheers, Alex.
|
|
|
|
Post by bezzer on Jan 2, 2018 23:51:54 GMT 1
Cheers Dusty, your message came through as I was typing my earlier response!, I’ll look that up in the morning.
Thanks again pal. Bezzer
|
|
|
|
Post by hudtm60 on Jan 3, 2018 5:18:00 GMT 1
Spent the afternoon going through this more carefully - such a valuable real life reference. I'll be re-connecting and re-reading and subconsciously re-thanking you on a daily basis throughout my own attempt of a rebuild.
Grateful for your time spent re-posting all them pics.
|
|
|
|
Post by dusty350 on Jan 3, 2018 8:42:44 GMT 1
Hi You are all welcome  I've recently restored a lot of the pictures on various threads thanks to Norbos tip on altering the code  Unfortunately, I restored this thread before I knew that info !!  Took me longer to rebuild the thread than it would to rebuild an engine !!  I'm glad it's a useful thread. I learnt stuff as I went thanks to the input of other members and hopefully you get an easy to follow guide. I've got a couple more pics to add and a couple more part numbers which I will do soon  Good luck with your builds  Dusty  |
|
|
|
Post by dusty350 on Jan 5, 2018 22:37:38 GMT 1
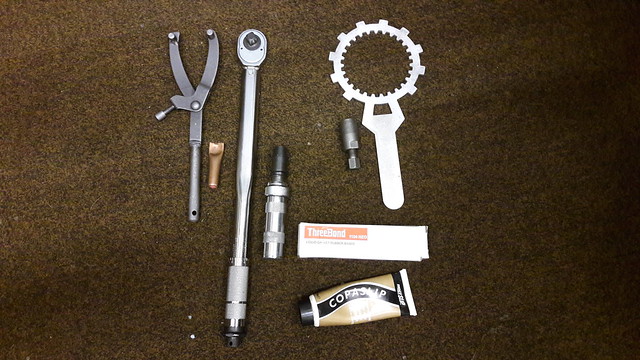
Thought I would include a pic of some of he tools used in the strip down and rebuild. The clutch holder and the rotor puller are essential items really. The rotor holding tool allied with the copper pipe enables safe loosening/tightening of the nuts at either end of the crank. The impact driver helps with those stubborn fixings and the torque wrench saves damaged fasteners, allowing correct torqueing of nuts and bolts. The Threebond is for the case halves on reassembly, and the copper slip for the fasteners. I also use threadlock of varying strengths on certain fasteners, and low melting point grease.  20180105_151940 20180105_151940 by David Miller, on Flickr A dial gauge is essential for checking timing on reassembly. I haven't invested in one yet but Yamark kindly came over and checked the timing with his gauge. The other tool I now think essential is a pressure testing kit - well worth the investment to be able to check a rebuilt motor before firing it up  Dusty  |
|
dbgr
Drag-strip hero
 
Posts: 204
|
Post by dbgr on Jan 5, 2018 22:56:45 GMT 1
hi Dusty great thread invaluable to the enthusiast, can you give pointers on where to purchase these tools
|
|
|
|
Post by dusty350 on Jan 5, 2018 23:20:53 GMT 1
Hi Norbo sells the clutch holding tool and the rotor puller. Any good tool shop/ motor factors will sell a torque wrench and an impact driver. I bought the rotor holding tool off ebay as well as the Threebond. The copper pipe was an offcut, flattened at one end with a hammer ! Dusty  |
|
|
|
Post by dusty350 on Jan 5, 2018 23:38:43 GMT 1
|
|
dbgr
Drag-strip hero
 
Posts: 204
|
Post by dbgr on Jan 6, 2018 15:50:04 GMT 1
Hi,Dusty it may be difficult to source the copper pipe
|
|
|
|
Post by dusty350 on Jan 6, 2018 18:54:29 GMT 1
Have a look under your sink. Bet there is loads under there 😉
Dusty😁
|
|
|
|
Post by andy71330 on Jan 7, 2018 0:08:04 GMT 1
just read this excellent post, should be studying for uni exams, but cant focus on anything bar bikes, hahaha, thanks for taking the time to restore the thread, andy
|
|
|
|
Post by jon on Jan 7, 2018 9:18:29 GMT 1
Hi,Dusty it may be difficult to source the copper pipe I assume you mean in the required length? All DIY shops sell it otherwise. Failing that just buy an end feed coupling. Jon |
|
|
|
Post by 4l04ever on Jan 7, 2018 11:04:23 GMT 1
Hi,Dusty it may be difficult to source the copper pipe I assume you mean in the required length? All DIY shops sell it otherwise. Failing that just buy an end feed coupling. Jon or just use a 2p coin.... |
|
|
|
Post by dusty350 on Jan 7, 2018 11:05:37 GMT 1
Or rag 😉
|
|
|
|
Post by jon on Jan 7, 2018 11:58:43 GMT 1
I assume you mean in the required length? All DIY shops sell it otherwise. Failing that just buy an end feed coupling. Jon or just use a 2p coin.... Only if it’s pre 1992. They must be getting fewer and fewer. Jon |
|
dbgr
Drag-strip hero
 
Posts: 204
|
Post by dbgr on Jan 7, 2018 17:44:27 GMT 1
What about an old 1d or 1/2d piece? whats the copper content in those? I have a shillings worth about me. I still remember "old money"
|
|
|
|
Post by bezzer on Jan 7, 2018 18:21:25 GMT 1
What about an old 1d or 1/2d piece? whats the copper content in those? I have a shillings worth about me. I still remember "old money" For what it’s worth, pre decimal pennies were cast from bronze - a much harder alloy than copper alone, not sure if this would damage the gears?. |
|
|
|
Post by bezzer on Jan 7, 2018 18:25:22 GMT 1
At the rate LC’s are climbing it’d be best to use a sovereign, golds pretty soft and why take the risk! Lol 😂
|
|
dbgr
Drag-strip hero
 
Posts: 204
|
Post by dbgr on Jan 7, 2018 20:51:22 GMT 1
Will a dubloon suffice..
|
|
|
|
Post by bezzer on Jan 8, 2018 12:42:48 GMT 1
Aye, or a groat.........................! |
|
|
|
Post by hudtm60 on Jan 8, 2018 23:37:03 GMT 1
Getting ready to prepare for my own reassembly and much enjoyed the pic of essential tools...a quick few novice/idiot questions please:
1-What grease were you using during reassembly for example on the selector drum
2-I'm committed to and love Redline 2 Stroke oil....but what's your favorite gearbox oil?
3-Would you use Copaslip AND Loctite Blue (the removable one) at the same time?
|
|
|
|
Post by dusty350 on Jan 9, 2018 8:53:04 GMT 1
Hi Grease - I used a Castrol low melting point grease just so the parts had some lube whilst it all sat on the bench. You could use gearoil - Silkolene light gear oil in my case - but grease stays in place on parts like the selector drum where it passes through the case. A thin smear will be enough. I use the standard grease in places that will eventually get washed with gear oil - I keep copperslip to areas that stay "dry" of oil so there is no contamination. Where I use threadlock I don't tend to use grease. Hth Dusty  |
|
|
|
Post by hudtm60 on Jan 9, 2018 19:07:10 GMT 1
Thank you- helpful and much appreciated...
|
|
|
|
Post by dusty350 on Jan 10, 2018 20:16:02 GMT 1
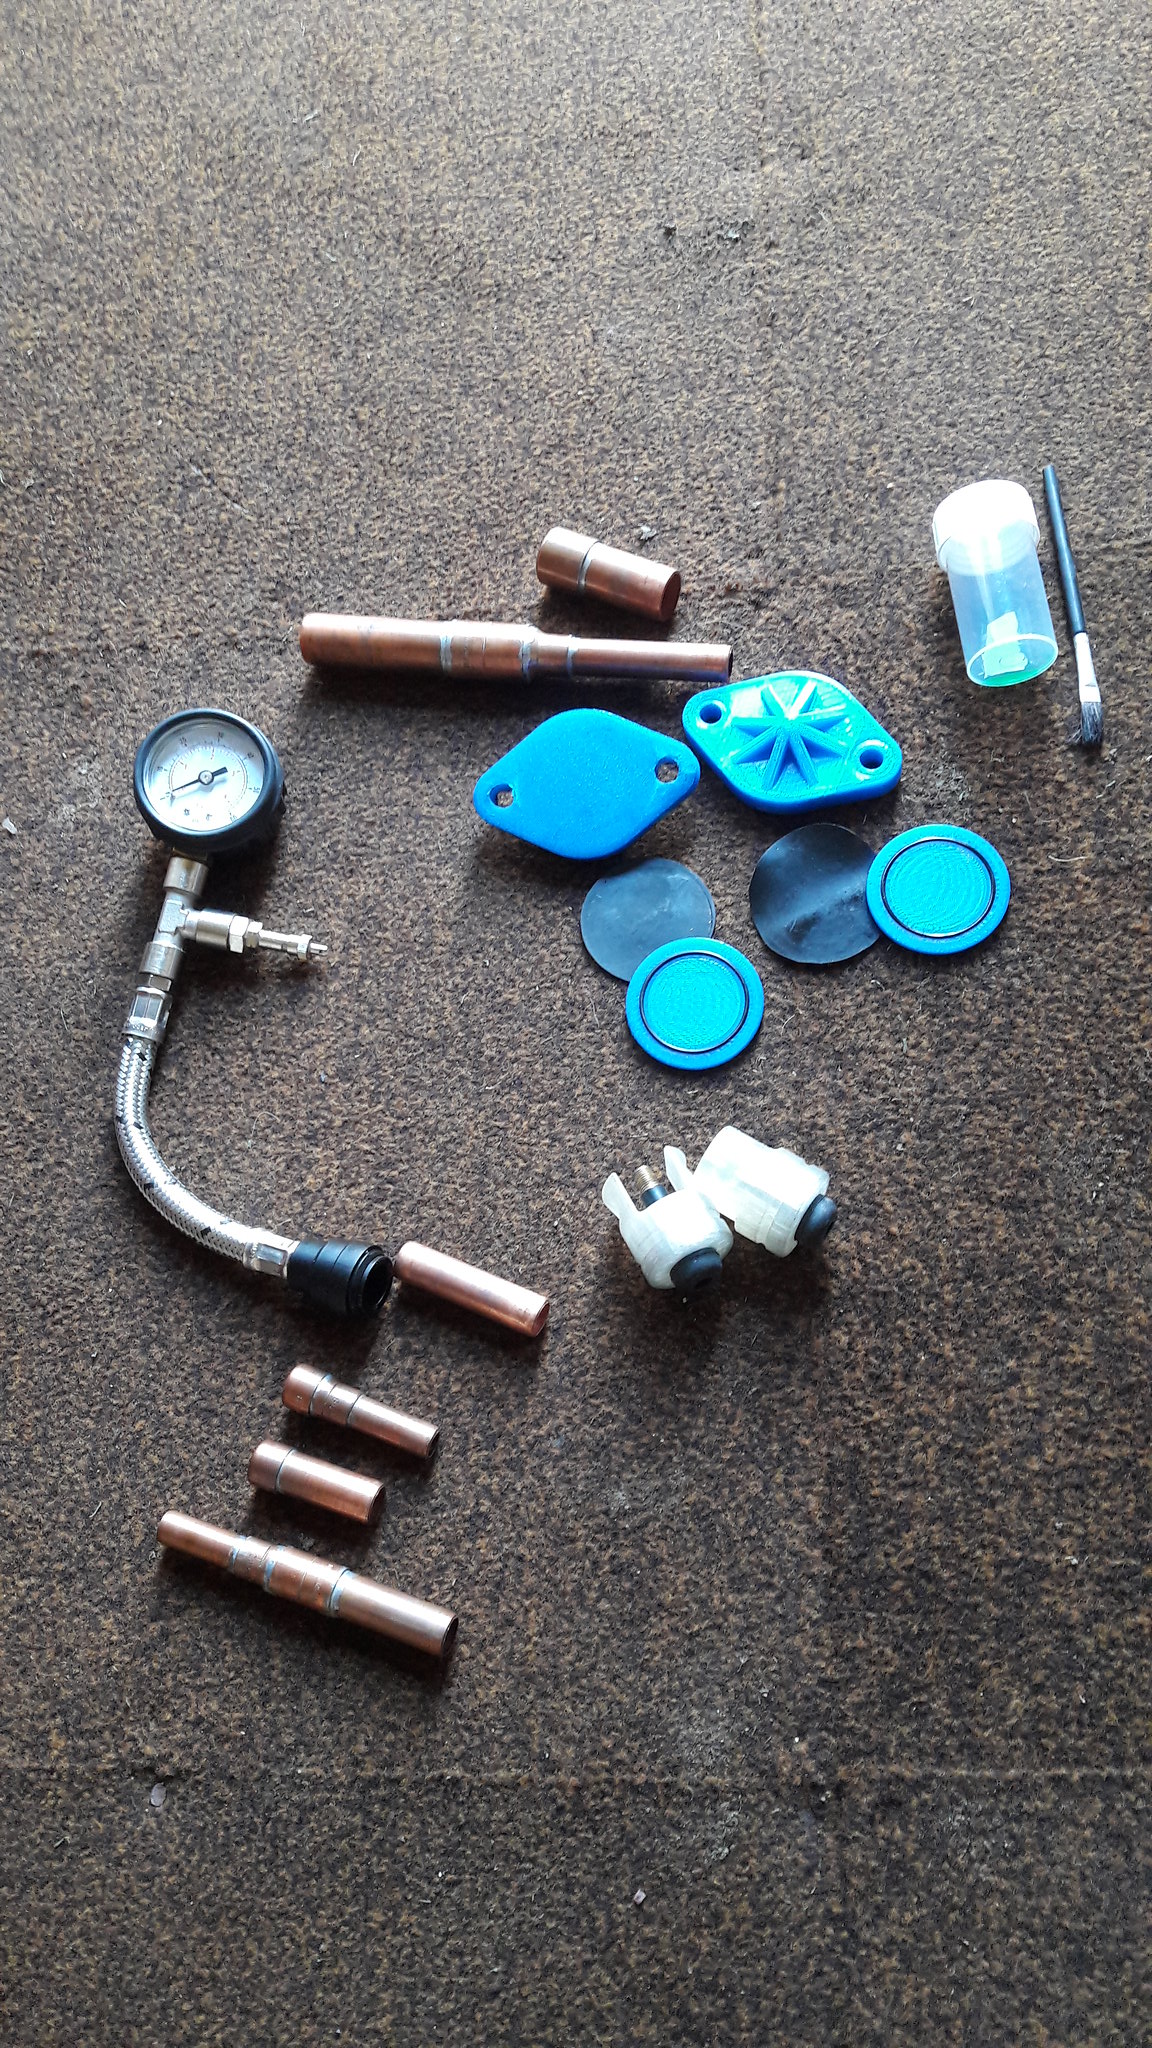
Managed to find a pic of the pressure testing kit;  20171110_085955 20171110_085955 by David Miller, on Flickr Yamark kindly made the kit up for me, and I already had the bungs. With this set up I can pressure test the top end and crank area plus the cooling system thanks to Marks pipework. I think a pressure test kit is now an essential part of any tool kit. Dusty  |
|
|
|
Post by hudtm60 on Jan 11, 2018 16:42:45 GMT 1
Yes!! I want one of those...I might be able to cobble together most of that from the local hardware store and auto shop- but what about those bungs. Any semblance of a shopping list would be greatly appreciated.
|
|
|
|
Post by dusty350 on Jan 11, 2018 17:09:56 GMT 1
Hi I bought the bungs off a forum member who had made a load of them. The blue parts and 2 rubber discs seal the exhaust ports and the 2 white plugs are for the inlet rubbers. These white bungs have a valve so you can introduce air through them. The kit Mark made for me uses a valve on the gauge to pressurise the system though. The gauge and all the copper fittings are plumbers merchant parts. The assortment of copper pipe allows for testing/plugging Lc and Pv inlet rubbers and also the cooling circuit. Only thing you need that's not in the pic is a bicycle pump !! I'm sure I've seen bung kits on ebay. Cant remember the name of the forum member who made the bung kits but may be worth an ask or wanted ad  Dusty  |
|
|
|
Post by dusty350 on Jan 11, 2018 17:17:53 GMT 1
|
|
|
|
Post by hudtm60 on Jan 12, 2018 4:24:48 GMT 1
Dusty...how did you get that mirror-like finish on the edge of the head?
Chris
|
|