|
|
Post by midlifecrisisrd on Nov 17, 2011 14:07:43 GMT 1
Engine all painted now, had to helicoil one exhaust thread, also fitted SS studs and refitted head studs 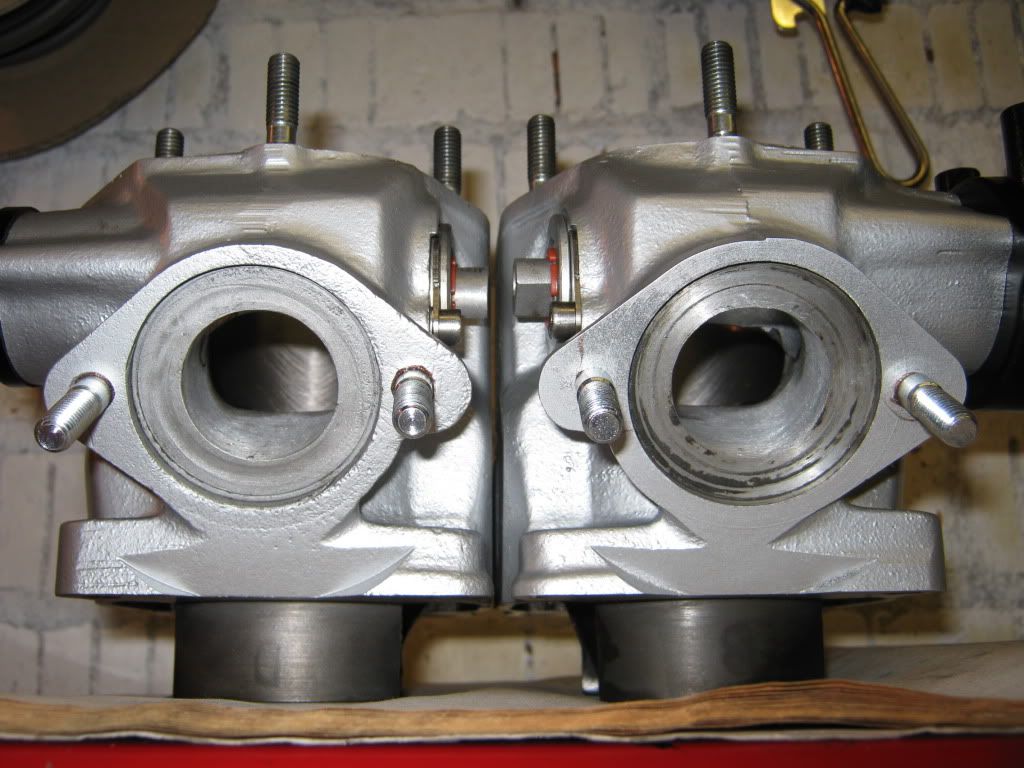 Powervalve caps fitted from old motor with tuning fork logos laser cut 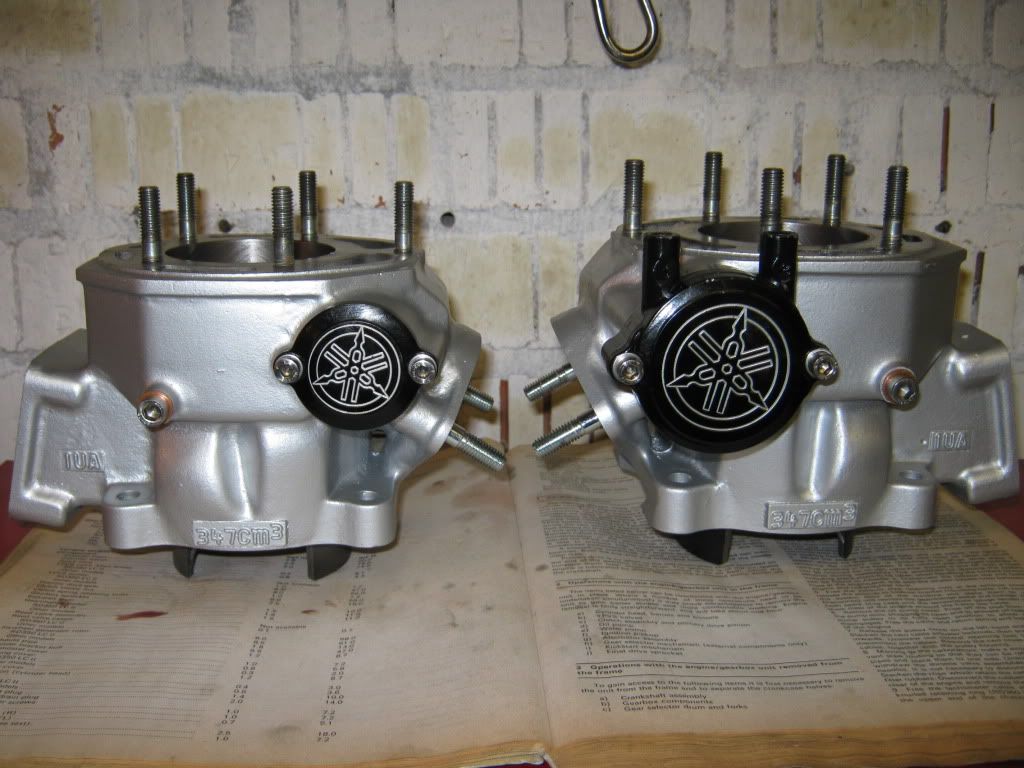 Top end fitted, open wide ;D 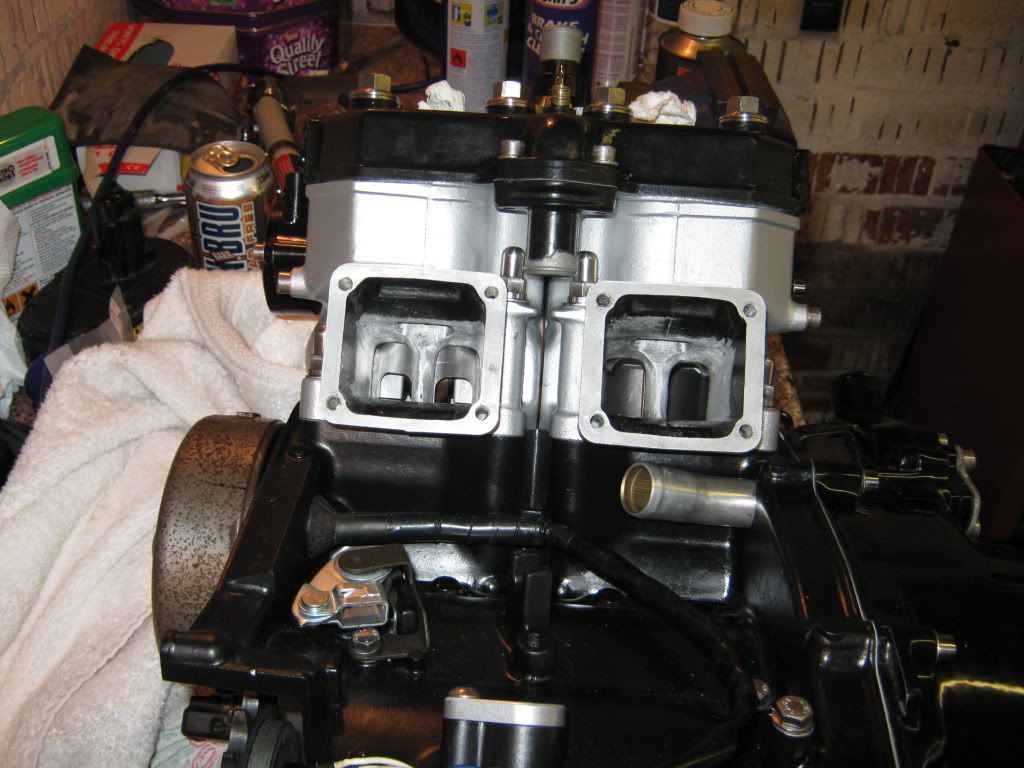 Had a bit of a panic when last thing to fit was the temp sender, wouldn't bloody go in so was worried the thread was damaged and would have to come to bits to repair. Head was a Y3 and the sender I had was the early one with the blade connector. Norbo to the rescue with a very quickly dispatched F2 sender which fitted straight in so all done and ready to fit in. Very please with the long dome head SS nuts to hide the barrel studs. 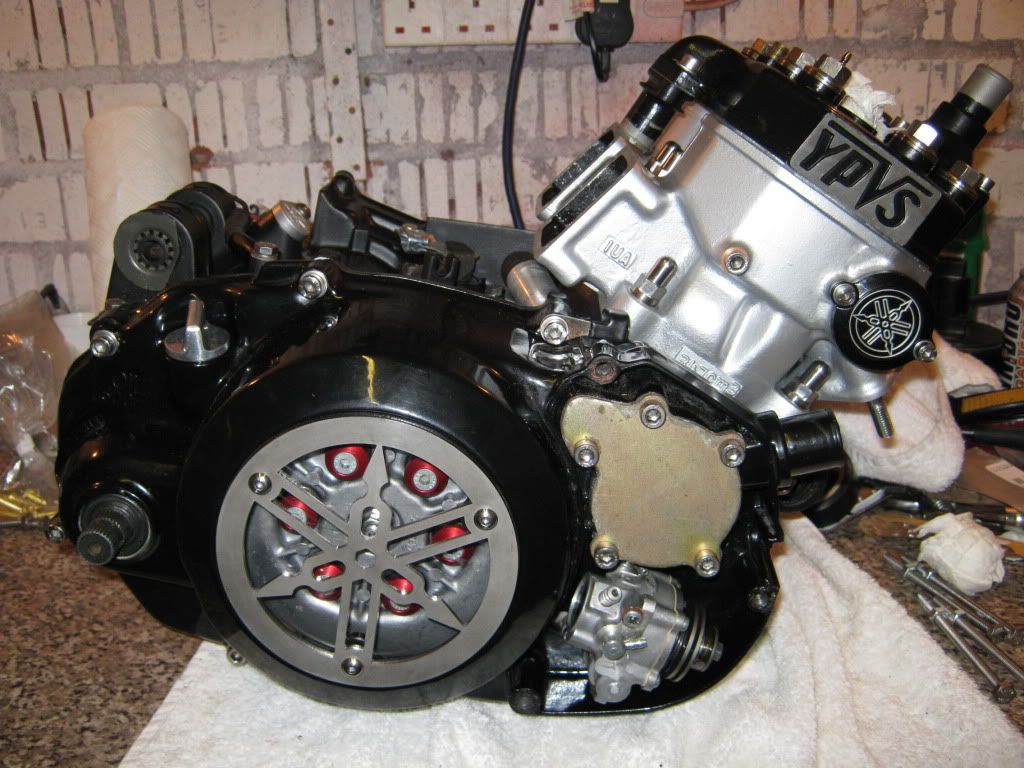 TZR 6 petal fibre reed blocks bonded to 10mm spacers, just waiting for the resin to go off so I can finish the shaping and drill the bolt holes.  Went back to the Scottoiler site to try and get something to solve the vacuum take off for the fuel tap issue and ended up with this spigot fitted nicely to the carb rubber 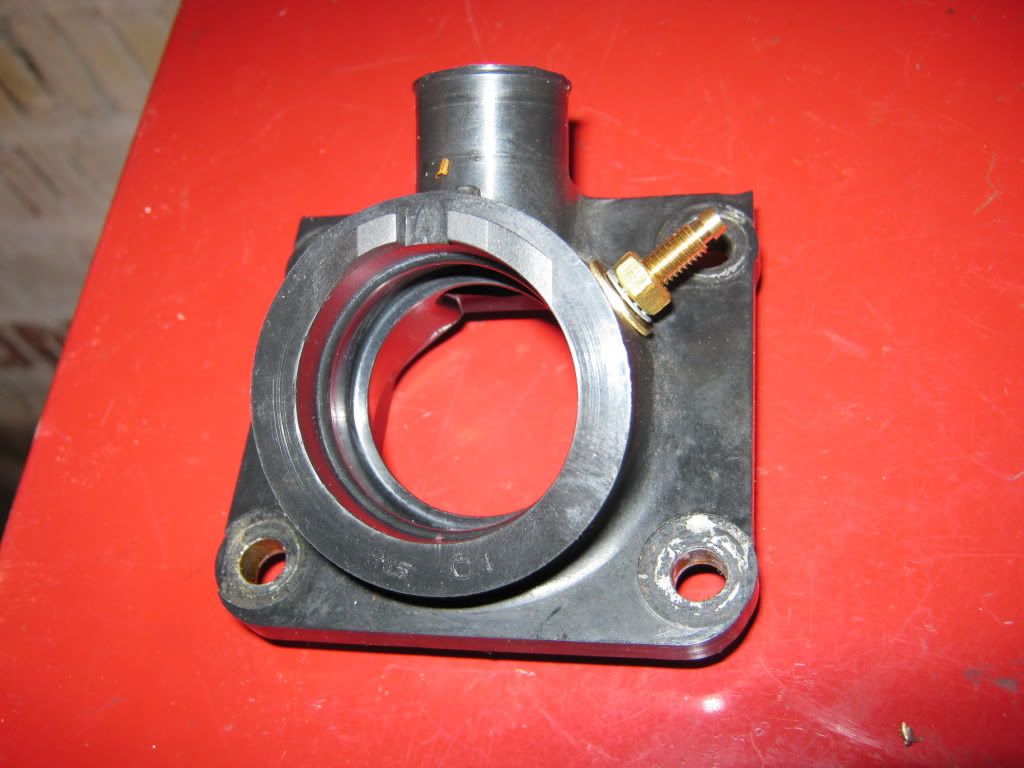 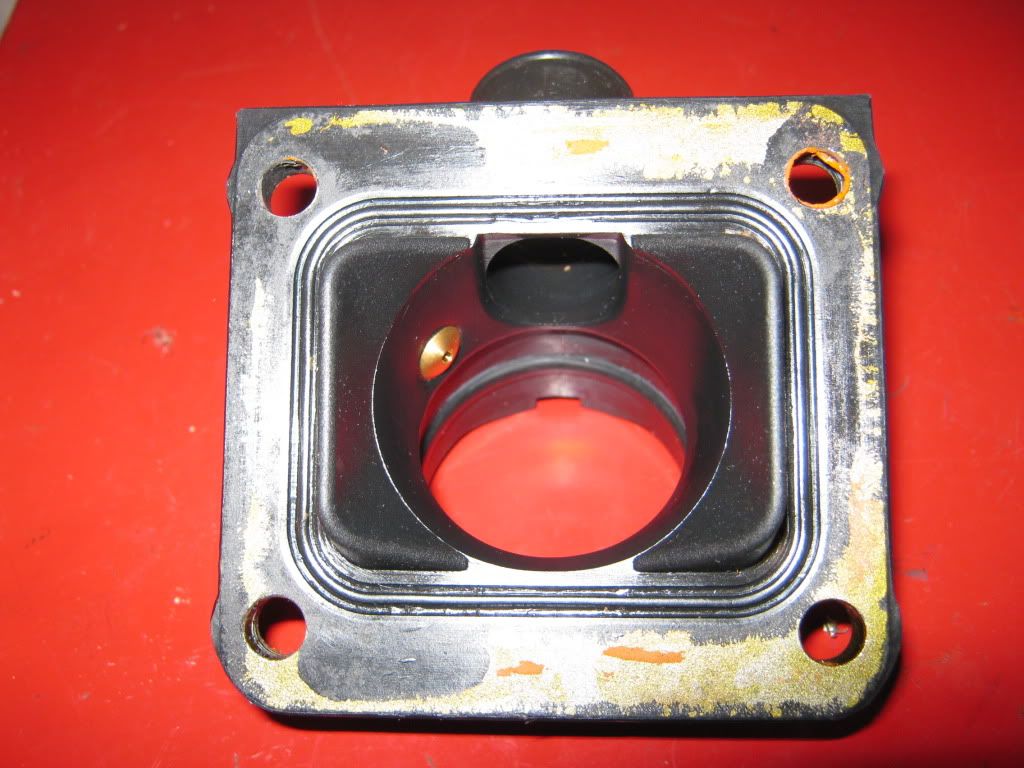 Steve |
|
|
|
Post by JonW on Nov 17, 2011 23:21:00 GMT 1
Nice work Steve (and Mick too!)
|
|
|
|
Post by strat on Nov 19, 2011 22:46:44 GMT 1
Steve, when you get bored of this engine can I have it.....? Tar, Strat. ps. looking good  |
|
|
|
Post by midlifecrisisrd on Nov 21, 2011 13:11:36 GMT 1
Motor in and kenny's pipes fitted with Nk cans 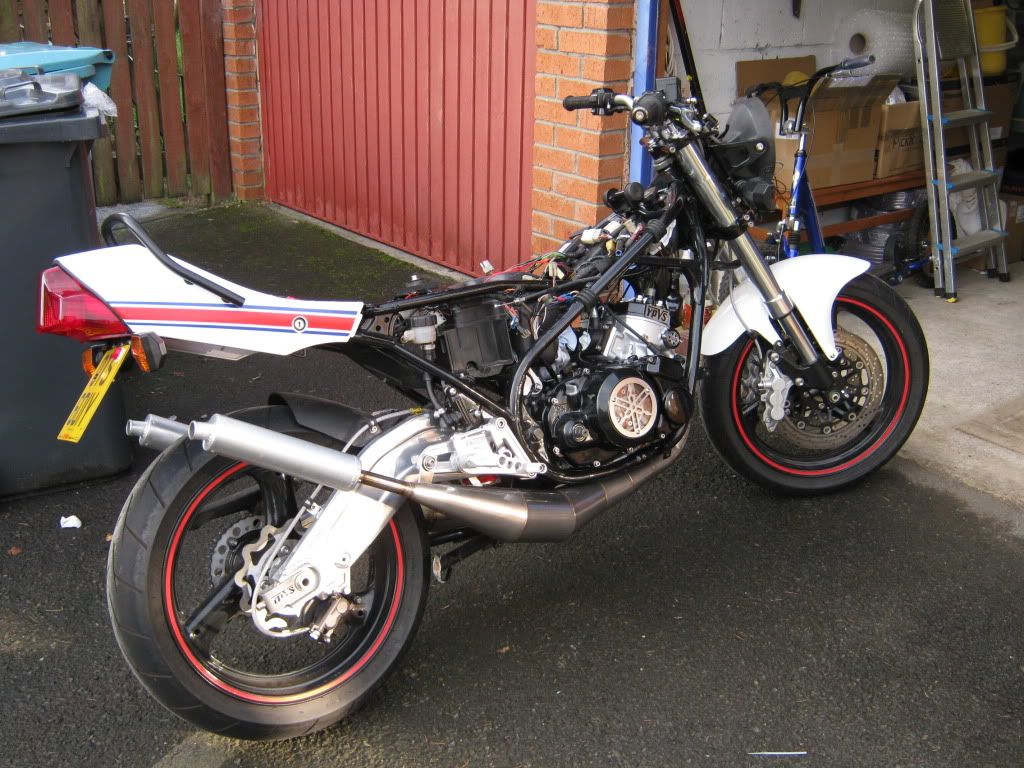 Made some new clocks for it with a NOS Fz 135mph speedo and used 2 x LED's to get round the Lc2 loom having 2 indicator warning lights finished with decals from simon5  Now just got to sort out the electrics, already rewired the modded F2 pv controller to fit the lc2 loom, just need to wire the zeel cdi up and fit the carbs. Steve |
|
|
|
Post by midlifecrisisrd on Nov 21, 2011 16:50:26 GMT 1
I bet yer getting excited now ;D Not half. Amazing how you think it's miles away from finishing then after a few hours work you realise you are nearly there. Just been to halfords for some oil and coolant so I can get the rad plumbed up next time I get the chance. Can't wait to hear it, kept the alloy cans rather than carbon so it would have a real good crackle  Nearly time to get out the new paintwork, got 3 versions to choose from. 1) newly painted panels in white with Lc2 red/blue to match the newly painted tank I just put on before ripping the motor out. Managed to wreck the decals on the other set as they were not lacquered and my boots took the colour off. The tail was worse, went to the bother of finding a crack free one rather than repairing one but turned out to be so brittle it cracked every time I looked at it. 2)newly painted tank and panels in white Lc2 but with black instead of Blue 3) set of newly painted panels to go with above tank with red/black again but in speed block Also got an RZ single seat but not painted yet as not sure what final paintwork will be, not even sure I'll use it as I like my modded gilly one. Also looking out for another tank as I fancy it done N1 style but with RZ-R instead of RD. Might actually punt some bodywork at that point lol Steve |
|
|
|
Post by midlifecrisisrd on Nov 22, 2011 13:17:54 GMT 1
Steve, when you get bored of this engine can I have it.....? Tar, Strat. ps. looking good Cheers, might hold you to that when it goes bang, call it half cost price ;D Steve |
|
|
|
Post by midlifecrisisrd on Nov 24, 2011 21:52:05 GMT 1
Not much else done, this working thing is getting in the way. Oil and coolant in. Cut the plugs off the stator wiring, CDI and that crap little one on the loom for the power from the stator and replaced with new multi connectors, good old 6.3mm spades in them so should take the load ok. Had to take the pipes off again as I thought I could fit the tie bars after but couldn't get them to line up properly. Took the opertunity to silicone the header joints which would have needed done anyway. Stupidly bought another set of N clocks off ebay on a spur of the moment then thought what the hell will I do with them? I'll put them beside the F2 loom I bought a week ago for connectors before deciding to replace them with non standard.  Suppose I better look at the carbs now. Steve |
|
|
|
Post by midlifecrisisrd on Dec 17, 2011 22:22:57 GMT 1
Been a while, had fitted carbs and oil lines but got held up with some silly little bits needing sorted but all done now including bodywork. Went for the speed block for now, I'll see how I get used to it. Put a litre of fuel/premix in and after 3 kicks burst into life so happy man. Just a couple of niggles, never changed the float bowl gaskets and the left one is weeping so will need changed. Also got some other carb issues. Thought when I assembled them I had the idle screws set where it would struggle to idle but was ticking over at 3k so switched off and screwed them out more, now got 2k but if you blip it it wants to sit at 3 - 4k but you can get it down to 2 again so not sure if cables letting them shut properly or there is a leak somewhere, will need to investigate another time. Never the less 1st heat cycle done ( well as much heat as you can get in it when it's -2 degrees. Crappy dark picture anyway, will get some decent ones in the light. 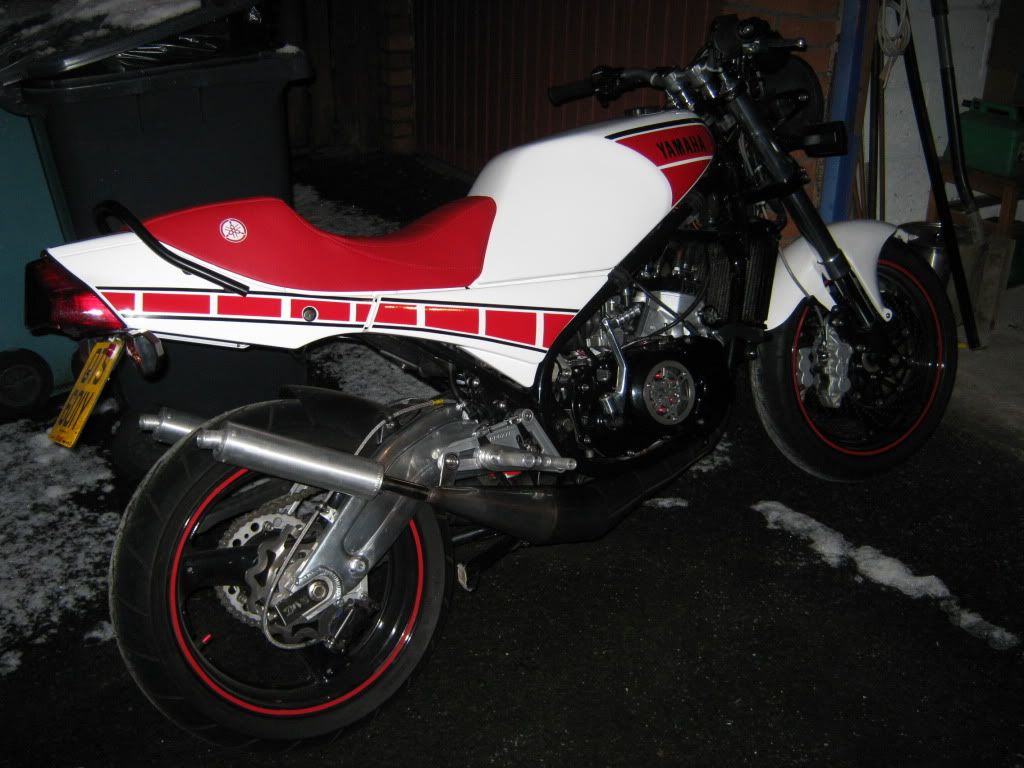  Don't think i'll be taking it up and down the street somehow. Steve |
|
|
|
Post by midlifecrisisrd on Dec 17, 2011 23:05:13 GMT 1
If it's -2, then you had better stop licking Kenny's pipes as yer tongue will stick to them ;D Don't worry, I was only licking them when they were warm from running  Steve |
|
|
|
Post by midlifecrisisrd on Dec 20, 2011 15:04:16 GMT 1
Sussed out the revving problem, seems like the cable is a bit on the short side so not letting the carbs shut, will need to take a little off the adjusters, also routing is pulling on the carbs which doesn't help. Also leaking fuel out the left carb overflow when on the side stand so will check it when fitting the new gasket. 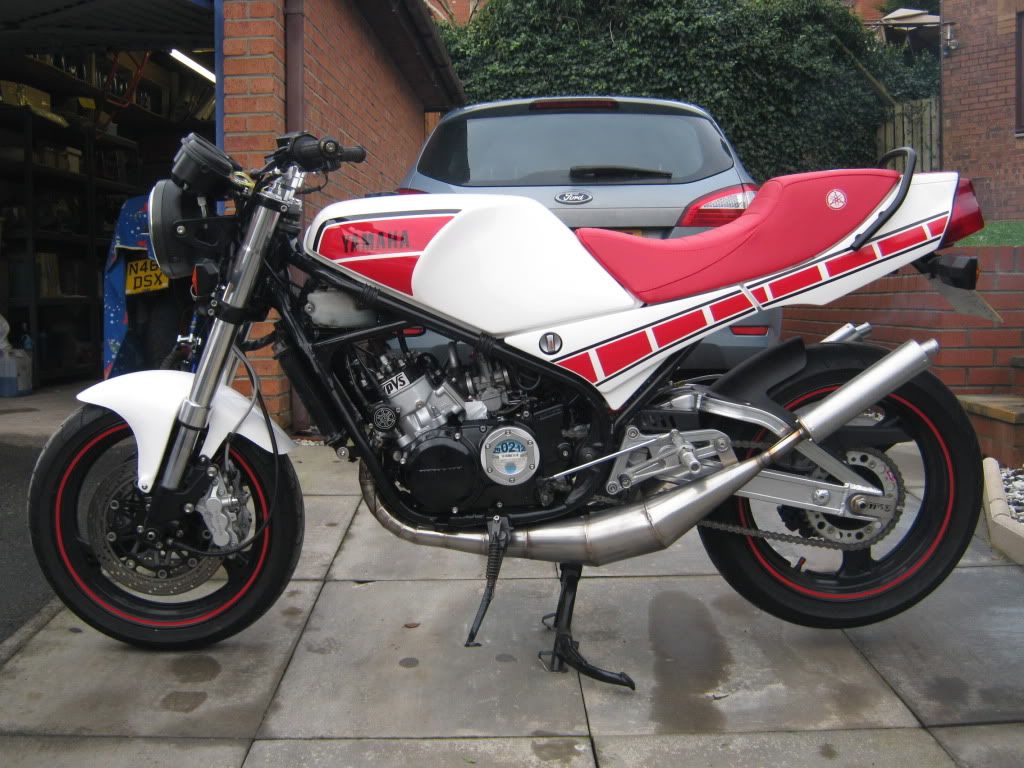 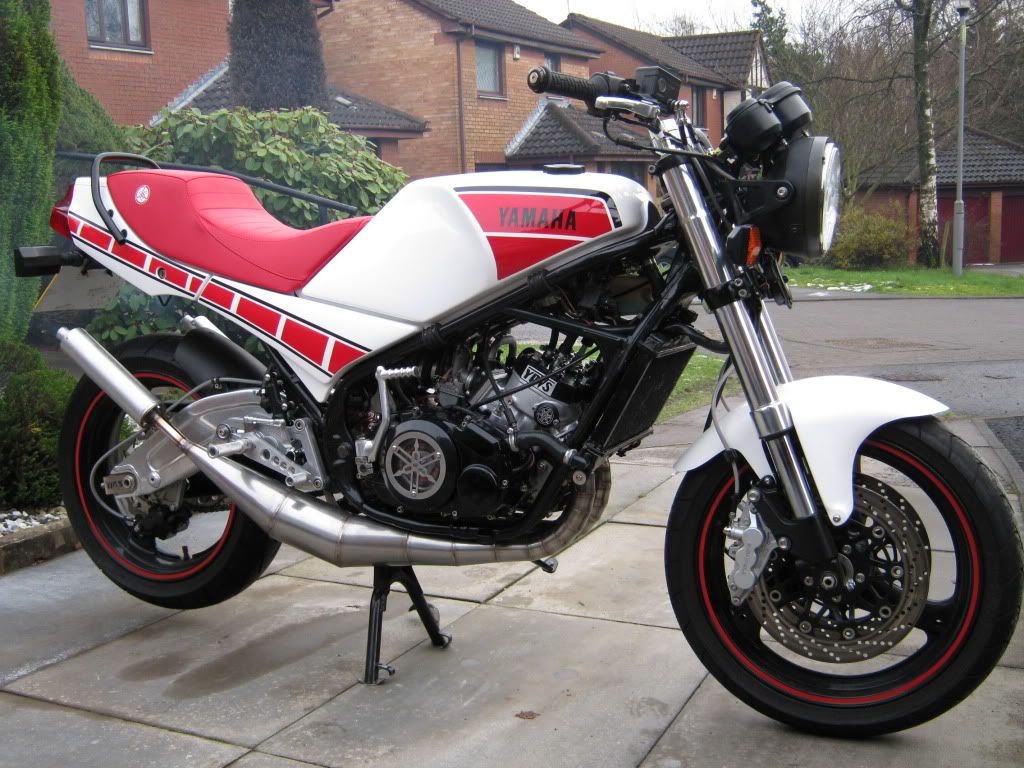 Took it up and down the street and seems fine, just need to sort out a rad guard and the frame infills and maybe try the none speed block tail and side panel to see how it looks. Steve |
|
|
|
Post by Norbo on Dec 20, 2011 15:33:06 GMT 1
who did the lazering on the YPVS end caps mate it look real nice./
|
|
|
|
Post by midlifecrisisrd on Dec 20, 2011 17:04:00 GMT 1
who did the lazering on the YPVS end caps mate it look real nice./ Robbed them off another motor that had them when I bought it so no idea, they do look really good though. Steve |
|
|
|
Post by nikfubar on Dec 20, 2011 17:23:07 GMT 1
Love it well smart Not keen on the colour of the seat though  |
|
|
|
Post by midlifecrisisrd on Dec 20, 2011 17:39:47 GMT 1
Love it well smart Not keen on the colour of the seat though Might have been better in black Never mind I have the RZ single cowl for it with the black seat for the future. |
|
lcolin
Thrash Merchant

Posts: 497
|
Post by lcolin on Dec 20, 2011 20:31:09 GMT 1
Did you have the seat made (as in not just re-covered), if so who by and did it cost alot?
|
|
|
|
Post by midlifecrisisrd on Dec 20, 2011 20:57:20 GMT 1
Did you have the seat made (as in not just re-covered), if so who by and did it cost alot? Seat is a guilly one that had the rear hump cut down and then re covered all in red as they originally have white sections. Was done by roger dennis for about £85. Steve |
|
lcolin
Thrash Merchant
Posts: 497
|
Post by lcolin on Dec 20, 2011 21:25:00 GMT 1
Cheers Steve.
Bike looking great - but engine looking extra good!
|
|
|
|
Post by kennyroberts on Dec 20, 2011 22:43:35 GMT 1
SWEEEET!
|
|
|
|
Post by watchhislegs on Dec 20, 2011 23:43:37 GMT 1
Absolutely mint. Great work fella.
|
|
|
|
Post by twostroker on Dec 21, 2011 0:00:24 GMT 1
looking realy nice  |
|
|
|
Post by lcrider on Dec 23, 2011 16:07:35 GMT 1
I like the red seat stands out and ads color to the bike
|
|
|
|
Post by midlifecrisisrd on Dec 29, 2011 15:29:48 GMT 1
Got out to the garage today, new carb gaskets fitted and some crud cleaned out the needle valve so fuel leak fixed.
Re routed throttle cable and took off adjuster lock nut and ground them down to half size to allow the slides to shut properly.
All running fine now,did a couple of short crap quality phone vids of it running and loaded them in photobucket but can't get them to work
Fitted the frame infills so just the rad cover and and the new carbon muddy and hugger to fit.
Steve
|
|
|
|
Post by lcowner on Dec 29, 2011 15:39:34 GMT 1
Got out to the garage today, new carb gaskets fitted and some crud cleaned out the needle valve so fuel leak fixed. Re routed throttle cable and took off adjuster lock nut and ground them down to half size to allow the slides to shut properly. All running fine now,did a couple of short crap quality phone vids of it running and loaded them in photobucket but can't get them to work Fitted the frame infills so just the rad cover and and the new carbon muddy and hugger to fit. Steve steve wat exactly did u dowith fixing the leaky carbs one of mine is doing the same so annoying? |
|
|
|
Post by midlifecrisisrd on Dec 29, 2011 15:50:20 GMT 1
Got out to the garage today, new carb gaskets fitted and some crud cleaned out the needle valve so fuel leak fixed. Re routed throttle cable and took off adjuster lock nut and ground them down to half size to allow the slides to shut properly. All running fine now,did a couple of short crap quality phone vids of it running and loaded them in photobucket but can't get them to work Fitted the frame infills so just the rad cover and and the new carbon muddy and hugger to fit. Steve steve wat exactly did u dowith fixing the leaky carbs one of mine is doing the same so annoying? They are pwk's but all carbs similar, first problem was the float gasket leaking, didn't notice there was a split in the gasket so fitted a new one which solved that. It was also leaking fuel out the overflow so I cleaned some dirt out the needle valve and re set the float height to 19mm. Noticed the floats were twisted so although I set at 19mm on one side the other side of the float was different so twisted back straight. If yours is over flowing it might be the needle valve passing in which case it will need replaced. You will need to take the bowl off and connect it to a fuel line and check the valve stops fuel flowing. Steve |
|
|
|
Post by midlifecrisisrd on Dec 29, 2011 18:55:18 GMT 1
does this work Attachments:
|
|
|
|
Post by midlifecrisisrd on Dec 29, 2011 18:58:58 GMT 1
And this Attachments:
|
|
|
|
Post by Fingermaus on Dec 29, 2011 19:44:31 GMT 1
It works fine Steve
Sound nice and zingy, I love this bike.
Now stop spending money on the bike and go buy a HD video camera ;D
|
|
|
|
Post by midlifecrisisrd on Dec 29, 2011 19:59:06 GMT 1
It works fine Steve Sound nice and zingy, I love this bike. Now stop spending money on the bike and go buy a HD video camera ;D Money spending is done, well maybe just a set of wavey discs left to buy, oh and get the tank I just bought painted in RZ R colours along with the RZ single seat Oh F*ck I'm doing it again although I will sell the white red/blue set, honest Have got a camera that does vid but thought I'd work out how to do it first, sounds better in the flesh, can't hear the crackle in the vid. Steve |
|
|
|
Post by midlifecrisisrd on Mar 7, 2012 12:20:39 GMT 1
Not updated for a while so here goes. Eventually got the rad guard to fit ( had to mount top 10mm further forward and has to be "stretched" a bit to fit over the rad but now on. Pity the belly pan doesn't fit now, not because of the pipes but as the rad cover sits different the pan doesn't meet it properly hence the N2 rad cover. Also thought I'd make it stop as well as it should go so Galfer discs and HH pads fitted. Always had clearance issues with the rear master as the inlet hose rubbed on the banana arm so now fitted an FZR 1000 inlet fitting ( sits straight up and down ) and a GP style res tube to get rid of the original res as airbox moved 5mm further back for the carbs and spacer and also slotted the airbox so it can be slid backwards to ease carb removal.  Finally blacked out the bottom of the side panels after many requests  And got round to putting the decals on the solo seat cowl for when I feel like a change 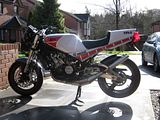 Now ready for an MOT and some miles to run in. Steve |
|
|
|
Post by midlifecrisisrd on Mar 7, 2012 13:10:15 GMT 1
Looking good Have you polished kennys pipes ? Not polished as such but gave them a quick rub with a fine compound by hand to brighten them a little. Not sure about going further as I may ditch the other polished parts due to not the driest garage and bitch to keep the alloy sparkling. Waiting for a set of original silver RGV forks to arrive and may coat the swing arm. Steve |
|