|
|
Post by dusty350 on Nov 26, 2022 21:20:17 GMT 1
Sorted some parts today for the first lot of gloss black powdercoat. I ordered some taper bearings for the headstock, and fitted the lower shell today so I didn't have to be turning the frame upside down to fit it after the coating was done. I also tidied up some welds, and sanded back some weld spatter so it looks better when done;  20221126_165117 20221126_165117 by dusty miller, on Flickr I also drilled out the rivetts on the European mudguard extender - looks much better without it !  20221126_153026 20221126_153026 by dusty miller, on Flickr Picked up my vapoured footrest plates from Jamie on Thursday;  20221126_120931 20221126_120931 by dusty miller, on Flickr They will get a light polish when I get a chance. Hope to get the frame to Jamie this week, and with any luck, get it back before Xmas. Dusty  |
|
|
|
Post by donkeychomp on Nov 26, 2022 22:30:17 GMT 1
Good news! He's back at work now so hopefully he'll do it before xmas. I need to go there too as I forgot to get my engine mounting brackets powder coated!
Alex
|
|
|
|
Post by JonW on Nov 26, 2022 23:11:32 GMT 1
Does the EU extender use the same rivet spacing as the normal reflector bracket?
|
|
|
|
Post by dusty350 on Nov 26, 2022 23:19:13 GMT 1
Cheers Alex, hopefully get back there this week. Hi Jon, yea, the extender uses 4 rivetts - 2 where the Uk reflector bracket bolts on, and one each side. I will find a couple of small black plugs to cover the 2 outer holes, and fit a Uk reflector to the middle 2 Dusty |
|
|
|
Post by dusty350 on Dec 4, 2022 23:08:03 GMT 1
21 parts are now at Jamie's for gloss powdercoat. Metmachex Lc swingarm for a Ypvs wheel may be finished Xmas week. I polished the front face of the vapour blasted footrest plates;  20221203_213530 20221203_213530 by dusty miller, on Flickr Pillion pegs stripped, scrubbed and given some tlc. Started cleaning up all the plastics; 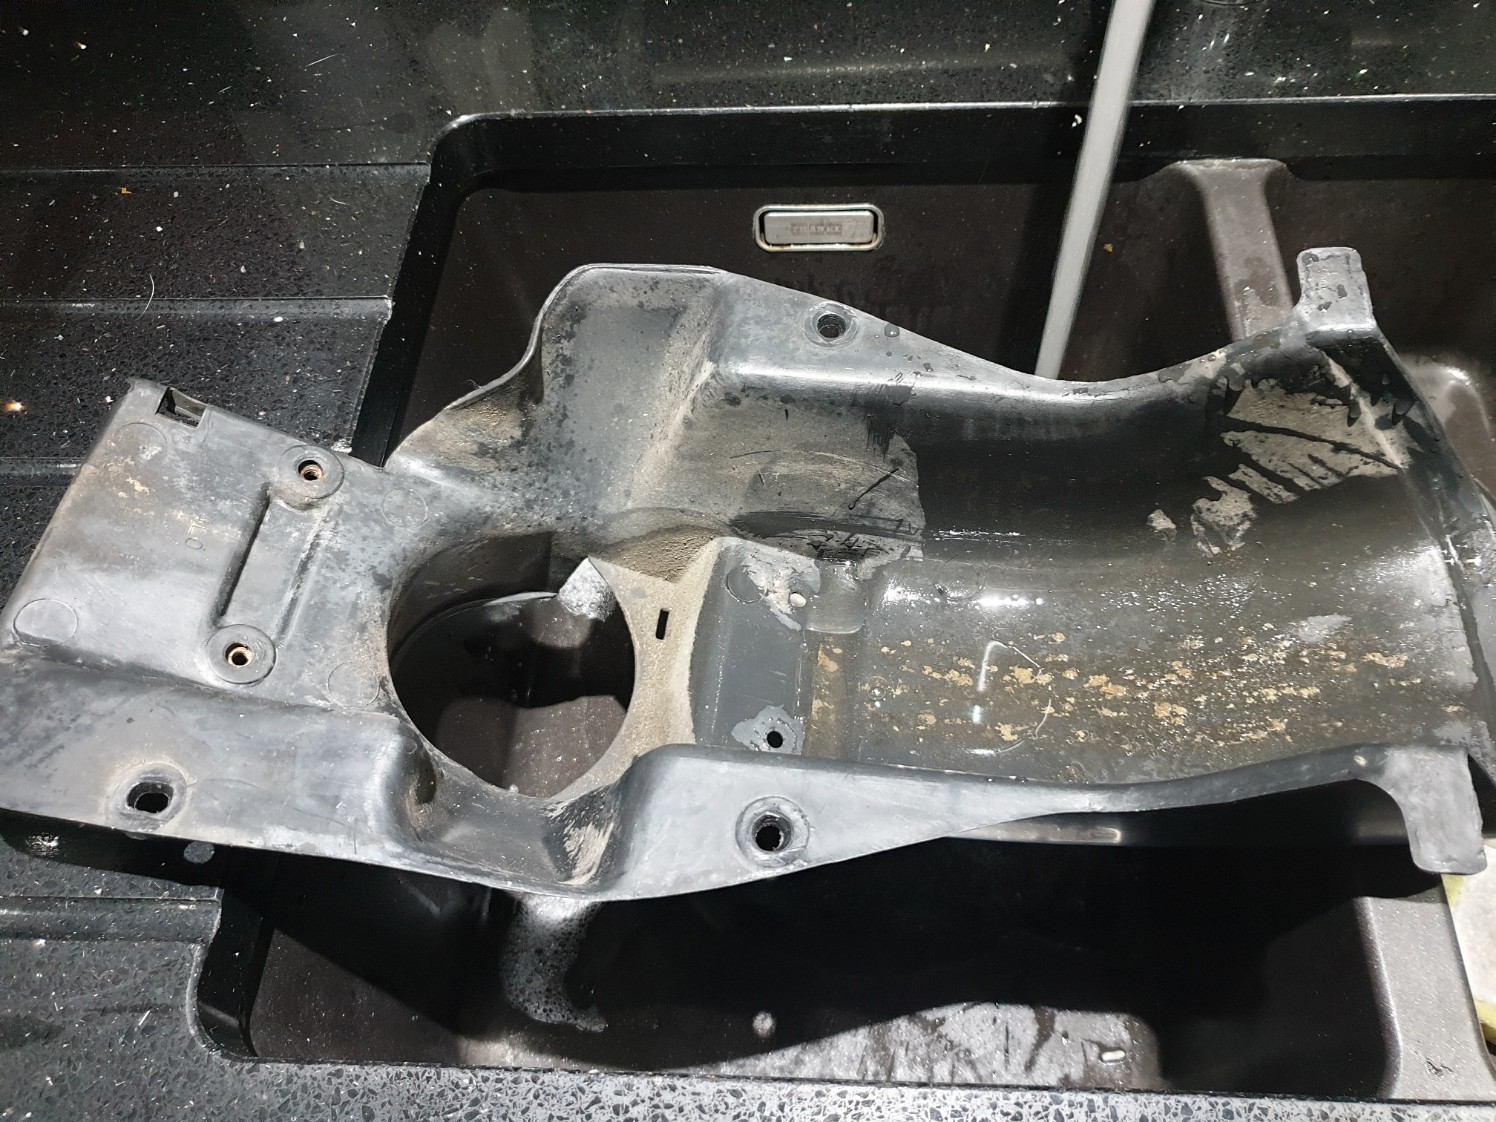 20221127_201558 20221127_201558 by dusty miller, on Flickr Have got the option of 2 Cdi units. The standard Yam from the 250 Swiss bike, or the HPI unit from the Fzrd (for a 350Lc engine) Don't know much about the HPI unit - made in Belgium, it's an anologue unit that is a straight swap with the standard Lc part. Whichever I don't use will go on the "Plan B" Lc;  20221204_164127 20221204_164127 by dusty miller, on Flickr Stocked up on stainless fasteners at Kempton yesterday, plus some polishing soap and a couple of new lathe cutting tools. Hopefully, by the time the Frame and other parts come back, there will be plenty of bits to bolt straight on  Dusty |
|
|
|
Post by donkeychomp on Dec 4, 2022 23:17:14 GMT 1
Ah dammit. I forgot about Kempton. Footrest mounts look superb mate, and it's great to have electrical components to choose from!
Alex
|
|
|
|
Post by dusty350 on Dec 17, 2022 12:47:59 GMT 1
Hoping to do a bit over the Xmas break with this build. Got a call from Jamie this week to say the smaller parts for the build were done, so I went and picked them up. The frame was still awaiting blasting, but due to the extreme weather, that will wait till this week when it warms up a bit !! In the meantime, I've been giving the new stainless bolts a light polish, and cleaning up some originals too. I fitted the lower taper bearing on the Ypvs yoke - I normally place the yoke in the freezer for a couple of hours, but as it was minus 5 here this morning, I left it outside for a couple of hours and left the bearing on a hot radiator !! Went on relatively easily !!  20221217_102634 20221217_102634 by dusty miller, on Flickr  20221217_102655 20221217_102655 by dusty miller, on Flickr  20221217_102736 20221217_102736 by dusty miller, on Flickr I love this part of a build - cleaning up all the rubbers for the clock dampers, exhaust dampers etc, and getting all the parts you wouldn't normally see back to a decent finish. Not a fan of the green passivate, so anything green gets a powdercoat in black, and all fasteners get shown the polishing mops Once the frame is back, I will get going !! Dusty |
|
|
|
Post by donkeychomp on Dec 17, 2022 22:25:52 GMT 1
Looking good Dusty, I do like some shiny bits on an LC!
Alex
|
|
|
|
Post by dusty350 on Dec 23, 2022 20:04:47 GMT 1
Got the call from Jamie yesterday - frame is ready to collect, so popped over there today;  20221223_180407 20221223_180407 by dusty miller, on Flickr Really pleased with this. He is such a perfectionist ! Always does such a great job. He masked off the frame number, as before, coated the frame and then clear coated the number to protect the bare metal. I left my 31k wheels with him, and he is going to paint strip the original black coating off and then vapour blast them for me. I am planning on polishing the rims and spoke edges and then maybe getting a paint match for the KR yellow put into rattle cans. Will be a lot of effort to get right but I will give it a go. I can start bolting parts back on now Dusty |
|
|
|
Post by donkeychomp on Dec 23, 2022 22:28:04 GMT 1
I really need to give him a call after crimbo. Can't understand what's taking so long with the tank. Maybe the entire thing dissolved and he's a bit embarrassed...
Frame looks like mine lol.
Alex
|
|
|
|
Post by dusty350 on Dec 24, 2022 23:17:06 GMT 1
Bolted a few bits on today. Fitted the taper bearings, and then the yokes and bars. Subframe went on with some lightly polished stainless cap head bolts. Tank rubbers front and rear got a scrub up before fitting. Forks are fitted temporarily. I want to change the oil, and maybe fit new springs first. And also tidy up the tops where they have had grips applied in a past life, but it was easier to fit them to get the bike more upright for fitting various parts;  20221224_213359 20221224_213359 by dusty miller, on Flickr Dusty |
|
|
|
Post by dusty350 on Dec 28, 2022 20:53:37 GMT 1
Took the forks out again to give them a proper clean up today. These are Lc2 forks that I swapped with Rob at the Stafford show, as I wanted to use Pv wheels on this build. He gave me the choice on a couple of pairs, and these were really good to start with. The only marks were on the fork tops, where a previous owner(s) had used grips to undo them, and chewed them up. I removed them with a spanner. I was expecting to order new springs and refresh the oil, but I was pleasantly surprised to find progressive springs already fitted, and oil that wasn't too dirty Spring lengths are spot on, so they've gone back in with fresh Silkolene fork oil. I polished up the lowers, and took some time on the forks tops, dressing out all the gouges and rough edges, and finishing up with a polish;  20221228_184147 20221228_184147 by dusty miller, on Flickr  20221228_184343 20221228_184343 by dusty miller, on Flickr  20221228_184335 20221228_184335 by dusty miller, on Flickr The ali on these tops is quite soft, hence they chew up easily if the correct sized spanner isn't used, but it also makes it easier to clean them up when they do get mullered. Ready to go back in now Dusty |
|
|
|
Post by donkeychomp on Dec 28, 2022 22:44:45 GMT 1
Eh? They look brand new to me. Some seriously good work there mate!
Alex
|
|
|
|
Post by JonW on Dec 28, 2022 23:38:41 GMT 1
+1
Very impressive results Dusty!
|
|
|
|
Post by shaunthe2nd on Dec 29, 2022 10:59:10 GMT 1
Great progress as always Dusty.
Hope you managed to put the tools down long enough to enjoy some turkey.
|
|
fabiostar
Thrash Merchant
 the older i get the faster i was.
Posts: 397
|
Post by fabiostar on Dec 29, 2022 13:21:23 GMT 1
How the hell do you get a finish like that on the footrests etc? all i end up with is a a black autosol finger !!!!!!
|
|
|
|
Post by dusty350 on Dec 29, 2022 13:41:54 GMT 1
I use an old bench grinder. On one side I have removed the grinding stone and fitted an arbor, and use 6" polishing mops. Much quicker and easier than solvol, plus I don't think you could polish the gouges out by hand. The right mops and soap combo can work miracles on damaged ali. Horrible, dirty job though, but the results are well worth it. Those fork tops were pretty rough to start with, with some heavy scarring.
Dusty🙂
|
|
|
|
Post by dusty350 on Dec 30, 2022 21:55:19 GMT 1
Few more refurbed parts added over the last couple of days;  20221230_203636 20221230_203636 by dusty miller, on Flickr I had bought some rattle can black before Xmas with the intention of respraying the seat locks and Cdi unit, but after a clean up, I have decided to leave them alone as they are in really good condition. I'm pretty fussy regards finish, but they really are that good I would be wasting my time painting them. Next job is to give the loom a good clean, then fit that before the airbox goes in. Dusty |
|
|
|
Post by donkeychomp on Dec 30, 2022 22:36:22 GMT 1
Loom...squirt Elbow Grease all over it. Wait a minute. Put into an old pillow case and bung it in the washing machine. Loom = like new!
Alex
|
|
|
|
Post by dusty350 on Dec 30, 2022 22:59:48 GMT 1
I'm not risking a 40 year old loom in the washing machine ! I've heard of the pillowcase method, but some rag and WD40 will bring it up well I think. I hate electrikery at the best of times, and I would hate the loom to come out of the washing machine and not work for some reason. Shouldn't take too long, hopefully |
|
|
|
Post by donkeychomp on Dec 30, 2022 23:39:19 GMT 1
Fairy Nuff! I did mine though and it came up sparkly. Even the original label looks better.
Alex
|
|
|
|
Post by dusty350 on Jan 3, 2023 19:36:59 GMT 1
Well, in a first for me, I'm rebuilding an Lc with original indicators !!   20230102_214539 20230102_214539 by dusty miller, on Flickr I've cleaned up all the plastics and all the indicator wiring and tail light. There are a few minor marks on the tail light lens, but not bad enough for a new one. I did order some new grab rail washers from Norbo today though as the originals were beyond redemption. Side panel rubbers are new, as is the reflector and the bracket for the rear muddie, as the original reflector was built into the Swiss model mudguard extension piece. I dropped my Pv wheels off to Jamie when I collected my frame on the Friday before Xmas. Got a call today to say they are ready. I asked Jamie to vapour blast them and get the old paint off, which he did first in his stripping vat, then vapoured afterwards;  20230103_095020 20230103_095020 by dusty miller, on Flickr My original plan was to polish the rims and spoke edges, and then paint the rest with a matched KR yellow, but I'm not sure now. I may polish said areas but maybe just go with black - still undecided. I also though I would change the headlight brackets, but in the interests of both cost saving, and using good existing parts from the original bike, I plan on reusing the Lc ears on the Lc2 forks. A few more parts for Jamie for powdercoating then;  20230103_113929 20230103_113929 by dusty miller, on Flickr Dusty |
|
|
|
Post by donkeychomp on Jan 3, 2023 22:31:12 GMT 1
Original winkers is unusual but regardless she'll still be a looker for sure Alex |
|
|
|
Post by dusty350 on Jan 8, 2023 10:07:57 GMT 1
Had a few hours on the bike yesterday. Loom cleaned up nicely. If I'm honest, it wasn't that dirty to start with, so a wipe over with a rag and some WD40 on the tape, and a toothbrush( the wife's of course !!  ) and some Wd on the connectors did the trick. It's a novelty for me to have a loom that's original and intact - normally have all sorts cut off or missing. Fitted the loom, then fitted the refurbed airbox, with one of Alan Kelly's excellent foam filter supports;  20230107_142302 20230107_142302 by dusty miller, on Flickr  20230107_142943 20230107_142943 by dusty miller, on Flickr New filter and filter box seals from Norbo;  20230107_141828 20230107_141828 by dusty miller, on Flickr  20230107_144022 20230107_144022 by dusty miller, on Flickr I had taken pics of the loom as it came off the bike on stripdown and that made it easy to refit. The battery box got a good clean, along with the reg/rectifier, and bolted back into place;  20230107_201548 20230107_201548 by dusty miller, on Flickr New grab rail washers from Norbo meant I could fit the tail cowl, and powdercoated grab rail. I went for black as it contrasts well against the KR yellow;  20230107_150807 20230107_150807 by dusty miller, on Flickr 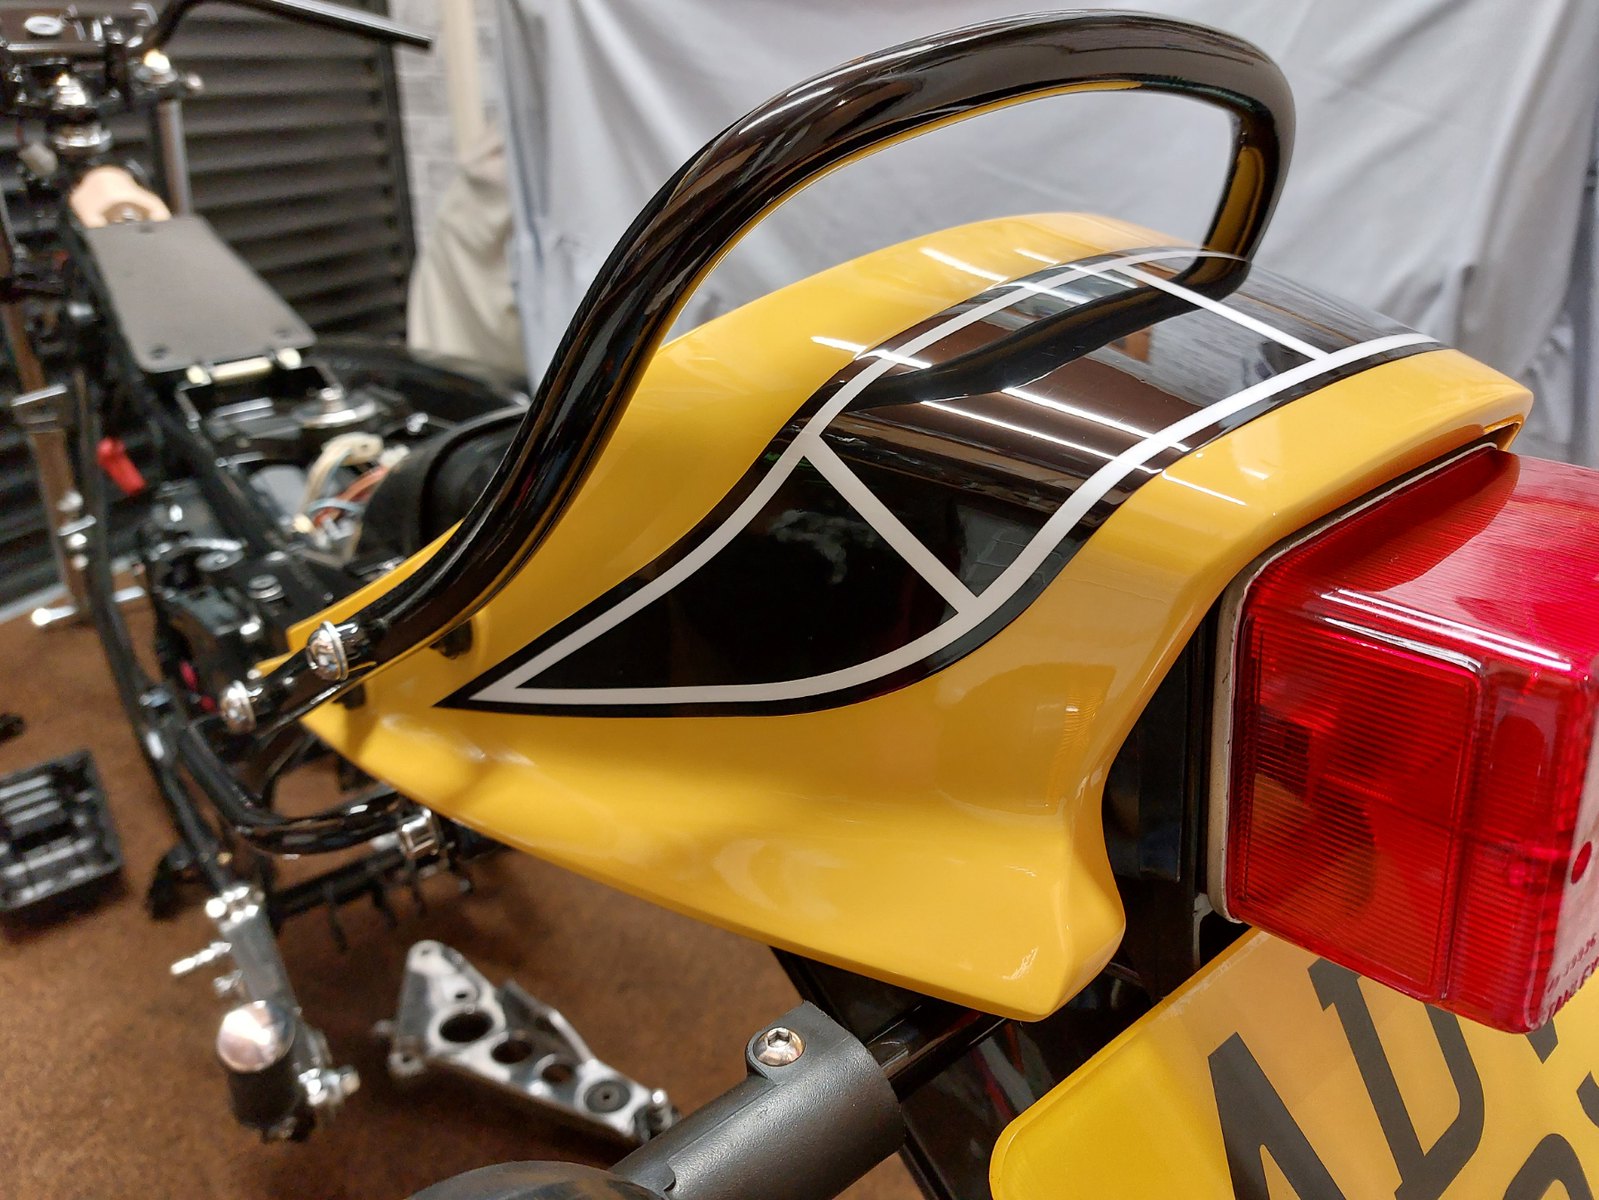 20230107_201541 20230107_201541 by dusty miller, on Flickr The original CDI cleaned u lovely, so I've fitted that, and will use the aftermarket one I have on the Plan B bike;  20230107_102414 20230107_102414 by dusty miller, on Flickr Next parts to fit will be switchgear, but I will wait for the headlight ears to come back from Jamie as I need to take the top yoke off to fit them. Swingarm is still a few weeks away so I am leaving the shock off till that's arrived. I did start stripping the rear caliper that was on the Fzrd, as it will go on this bike to suit the Ypvs brake, and closer inspection shows it a bit worst for wear. The 2 mounting lugs have been "shaved" to fit an Fzr caliper carrier, plus a bleed nipple has sheared;  20230107_124311 20230107_124311 by dusty miller, on Flickr The master cylinder seems fine, and we get a clean up, but the caliper will need a bit more input  The bleed nipple looks like a pain ! Dusty |
|
|
|
Post by sidney81 on Jan 8, 2023 11:50:42 GMT 1
Dusty I have one of those rear calipers ,needs a going through but I believe it's good ,you can have for the post? Let me know 🙂👍
|
|
|
|
Post by dusty350 on Jan 8, 2023 19:06:47 GMT 1
Wow, yes please Chris Had another look at it today and the lugs have been shaved badly - got a nice !! chamfer on one of them  I will pm you Dusty |
|
|
|
Post by dusty350 on Jan 12, 2023 22:57:18 GMT 1
Picked some more powder coating up from Jamie this week;  20230111_182132 20230111_182132 by dusty miller, on Flickr And sorted some other random parts;  20230111_193548 20230111_193548 by dusty miller, on Flickr The levers were anodised, and were a real pain to get back to bare ali then polish. Had to use a Dremel with abrasive pads, and then polish back. The flasher relay cancelling box was a spare I had. The Swiss bike never had one fitted (Uk fitment), but the wiring was in the loom for it so I cleaned it up and fitted it. The rear master cylinder was painted black and originally on the Fzrd. Paint stripped, internals removed and overhauled, and the body polished. I had a different fluid pipe union that was a better angle for a Honda style fluid pipe, so fitted that too. I will get a longer tube I think. Right hand switch gear is new Yamaha and off the Fzrd again so I've used that. I've got new Lc grips from Norbo along with twin horns as this had a single horn (250);  20230112_210607 20230112_210607 by dusty miller, on Flickr Front master will be a Gsxr style unit. Jamie is Cerakoting that at the mo Dusty |
|
|
|
Post by donkeychomp on Jan 14, 2023 23:54:07 GMT 1
a) is that rear MC off an R6 b) when do I get to look at this Alex |
|
|
|
Post by dusty350 on Jan 15, 2023 9:49:26 GMT 1
Hi mate The rear master is Ypvs . The R6 version is identical in size and shape, and apart from having "Brembo" in raised lettering rather than the 3 grooves og the Pv item, would bolt on and work in the same way. I had an R6 Brembo master on the orange hybrid;  20170915_171206 20170915_171206 by dusty miller, on Flickr May be around Wednesday afternoon. Depends on weather and work commitments Dusty |
|
|
|
Post by donkeychomp on Jan 15, 2023 22:32:27 GMT 1
Okey doke. Yes the weather's going to be a tad nippy...and maybe snow. Think I'll start looking for an R6 one to match all the other Brembo parts!
Alex
|
|


 ) and some Wd on the connectors did the trick. It's a novelty for me to have a loom that's original and intact - normally have all sorts cut off or missing. Fitted the loom, then fitted the refurbed airbox, with one of Alan Kelly's excellent foam filter supports;
 The bleed nipple looks like a pain !

