|
|
Post by shaunthe2nd on Feb 20, 2014 22:44:42 GMT 1
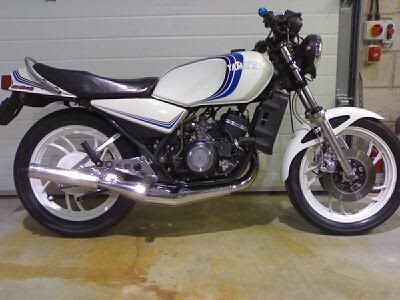
Well lets start with a photo, so here is my project the day I picked it up....  Now I have your attention, let me do the introduction..... As a lot on here I had my dream 350LC when I was 19 years old back in 1982 and spent 3 of the best years of my life on that bike. Well in the subsequent years, i have had many bikes, and more recently been spoilt with Firebaldes, R1's and the like and my recent bike of choice is an FZ1, however, I never forgot my first love and always lusted after her. Why I waited so long I don't know, but at the end of last summer I came across a 350LC locally that had my name on it, and was seduced into buying it. It was pretty well re-built, and all I did was mainly cosmetic (changed paintwork to my childhood white-blue, replaced seat, pipes, and a few other bits and pieces) and sat in in my lounge for the winter as I didn't want to abandon it to the cold garage. I've only done 10 miles on it so far! I'm rambling I know, but this then led me to joining this site and I then became enthralled by the stories of the rebuilds in this section, and this motivated me into giving it a go myself, with the aim of procreating a little 250 sister for my lonely 350. Instead of buying though I've decided to have a go at rebuilding/refurbishing one myself. I've never attempted this before, hence the virgin reference. I've been at it now for 3 months or so, and only just got the courage to start a blog on it, simply because I didn't believe it was in me and I'd end up with a box of bits of scrap and no end product. However, with all the advice and support I've had already off this site I'm convinced I will get there and hence would like to record my journey, as many others have. So this is just the beginning, I will post progress on here and welcome any advice you can offer. So here's a few more pictures....       The bike is a Swedish import which I bought from Kev Redbimoto, and he was extremely helpful from the outset. The bike started first kick and ticked over nicely. 21,000 km (approx 13,500 miles) and seemed a good starting point. Virtually all parts there, albeit some battle scars that need some repair and surgery and lots of love, but seemed like a good start to me. My aim is to give it a full make-over, and wherever possible use the original parts to maintain authenticity, although as its my first I don't plan to get too anal and i certainly don't want to throw big bucks at it. Well watch this space..... |
|
rdbuzz
Weekend rider

Posts: 90
|
Post by rdbuzz on Feb 20, 2014 23:36:56 GMT 1
Eh? LC for sale locally? Missed that and I look all the time. good base project bike that.  |
|
|
|
Post by marsbar350 on Feb 20, 2014 23:46:02 GMT 1
Eh? LC for sale locally? Missed that and I look all the time. good base project bike that. best get in touch with kev on here rebimota hes always got a few gems stashed away  prices are keen and he is a good guy to boot  |
|
|
|
Post by shaunthe2nd on Feb 21, 2014 11:03:08 GMT 1
Eh? LC for sale locally? Missed that and I look all the time. good base project bike that. The Red 250 LC above came from Kev Redbimota near Sheffield. I put out an appeal on here for a 250 project and Kev came up good. The 350LC I have though came from your neck of the woods though, I picked it up near Dunswell. Here it is when i got it...  and this is it now in my lounge at home...  So the project is to try bring the 250 up to similar standard, so i can have a set in my lounge! |
|
|
|
Post by shaunthe2nd on Feb 21, 2014 11:07:54 GMT 1
Day 1... The classic 'bike in the back of the van' shot. This is how I collected it.  |
|
|
|
Post by shaunthe2nd on Feb 22, 2014 19:34:21 GMT 1
Well after much procrastination the strip down begins...  Lets see how big a job this is going to be....    Needs a bit of tlc, but its all there. This is how I left it after the first day of strip down...  I'm wondering what have I done, will it ever come together as a bike again? I hardly slept that night, was excited at actually making a start, but fearful I may have bitten of more than I can chew. |
|
|
|
Post by shaunthe2nd on Feb 23, 2014 10:49:08 GMT 1
|
|
|
|
Post by marsbar350 on Feb 23, 2014 10:54:18 GMT 1
if ya look at tony rsvr1000 rebuild following how he has started the strip and clean wont go far wrong |
|
|
|
Post by shaunthe2nd on Feb 23, 2014 15:45:31 GMT 1
if ya look at tony rsvr1000 rebuild following how he has started the strip and clean wont go far wrong Thanks for that tip, I'm keeping an eye on Tony's blog, amongst others, I'm a keen learner and welcome all tips and other people experience. This is a great forum for that. |
|
|
|
Post by shaunthe2nd on Feb 23, 2014 15:54:50 GMT 1
Well, back to the story so far.... My first day of stripping the bike down, I learnt 2 lessons. The first was how much oil and crap you get on your hands. As an office boy, mine have always been clean and soft. That's how I came across latex gloves (well not the 1st time, but thats another story lol). Great things for keeping your hands clean, and warm during the rebuild, and feel quite nice too! Hence the latex glove reference in the blog title! The second lesson, was that I'm not as young as I once was, and leaning and kneeling over a bike in the cold isn't good for your back. I was in agony that night! So the answer was to buy a bike lift, but at £300 that was well out of my budget, so I decided to build one, and this is the result...  I bought the above off thiefbay for less than £20. tarted it up a bit.....  and fitted an old worktop....  and voila....  I have my bike lift for less than £50. This means that i can continue without the back pain, and if the projects goes t*ts up, i haven't spent a fortune. |
|
|
|
Post by shane250 on Feb 23, 2014 15:58:25 GMT 1
make a pile of all your bits then start seperating them.
Scrap bits
needs work
just needs cleaning
make a list as you go through it.
Then clean everything that your going to use in a tub of cleaner.i use petrol.
Then you need to seperate
paint/powder coating stuff and give them a good check for missing brackets,dodgy threads etc.Miss anything and you will pay heavily later......
Clean your plastics (airbox etc in petrol and clean back up with Autoglym rubber and vinyl care.Spray loads on a leave over night.repeat as required.
Andy2bikes for your paintwork.
And of course kev for bits.
Good luck with it it doesnt look too bad..........
|
|
|
|
Post by shane250 on Feb 23, 2014 15:59:33 GMT 1
Take plenty of pictures,almost at every bolt
|
|
|
|
Post by farmboy on Feb 23, 2014 18:14:19 GMT 1
Hi, I wish my rebuild could have started like yours, at least most of the parts were together as a bike. I had all my bits but had been in boxes for over 20 years .
I like the bike lift , yes i will not kneel on a hard floor anymore if I can help it.
I am sure it will uncover a few questions from the last owners when you finish the strip down..
Grest thread I ll be watching for hints .
Cheers Alex.
|
|
|
|
Post by shaunthe2nd on Feb 24, 2014 13:57:32 GMT 1
Thanks for the comments, all taken on board. Well up to now all my work had been 'destructive' in that i started with a running, albeit grubby, bike, but at least it was whole, now its time to be 'constructive' so I picked a nice clean job to start with - converting the clocks from km to mph. This was my starting point... Took the km clock out, and stripped it down...  Did you notice the latex gloves?? opened it up with small screwdriver along the seam..  I then replaced the mechanism with a mph one i took out of an xs250/400 one i bought off ebay for £30...  It took a bit of messing about to get it to fit, but eventually i got there and set the odometer to read 13,500 miles or so to closely match the original bike mileage in km's. The one in my hand in picture below is what I ended up with, the other one is the one on my 350LC for comparison purposes....  A good nights work and got myself a mph clock fro a fraction of what they are selling at on ebay at the moment. I'm sure there will be other set backs though. |
|
|
|
Post by alibongo on Feb 24, 2014 22:43:08 GMT 1
Kudos on the home made bike bench dude, that's using your noggin.
As for the rebuild, don't worry. LC's go together quite easily, you realise there is not much to them once you have them in bits.
|
|
|
|
Post by shaunthe2nd on Feb 26, 2014 16:10:58 GMT 1
Kudos on the home made bike bench dude, that's using your noggin. As for the rebuild, don't worry. LC's go together quite easily, you realise there is not much to them once you have them in bits. I hope it goes together as easy as it came apart! I just have to not loose any parts and try to remember where they cam from. This forum should help on both counts I hope! |
|
|
|
Post by shaunthe2nd on Feb 26, 2014 16:19:02 GMT 1
So my next big money investment was an ultrasonic cleaner from Aldi for £20 and another £10 for cleaning fluids. this has allowed me to spend some pleasant evening in my kitchen watching eastenders and supping tea whilst cleaning up various LC bits and pieces.   The ultrasonic cleaner is only big enough for jewellery and the like, but i came across the 'milk carton' tip that can increase the capacity of the cleaner by sitting a cut down milk carton full of cleaner fluid into the some water sat in the cleaner unit as follows: 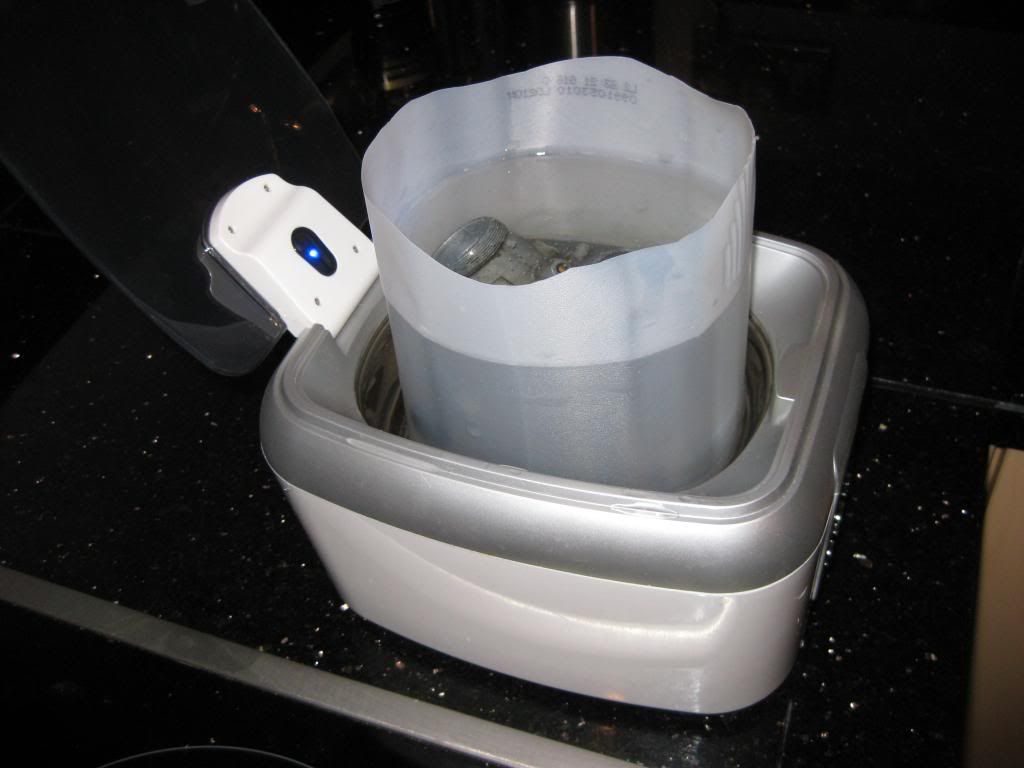 This allowed me to put one carburettor in at a time, and the results were pretty good. Before... 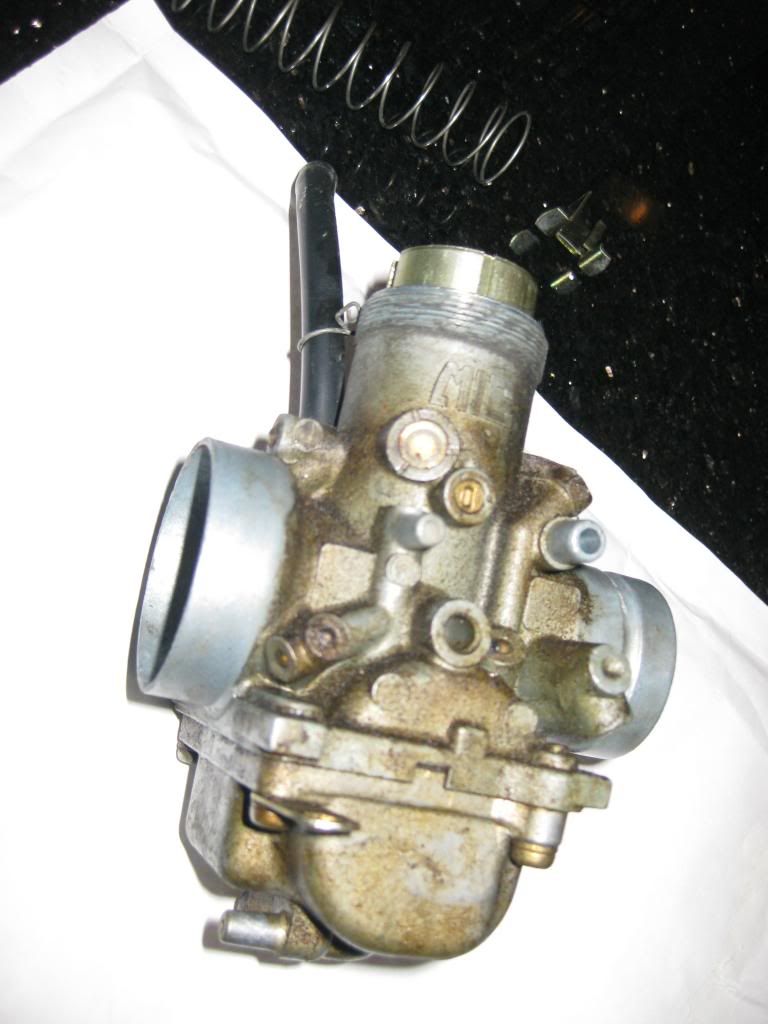 During... 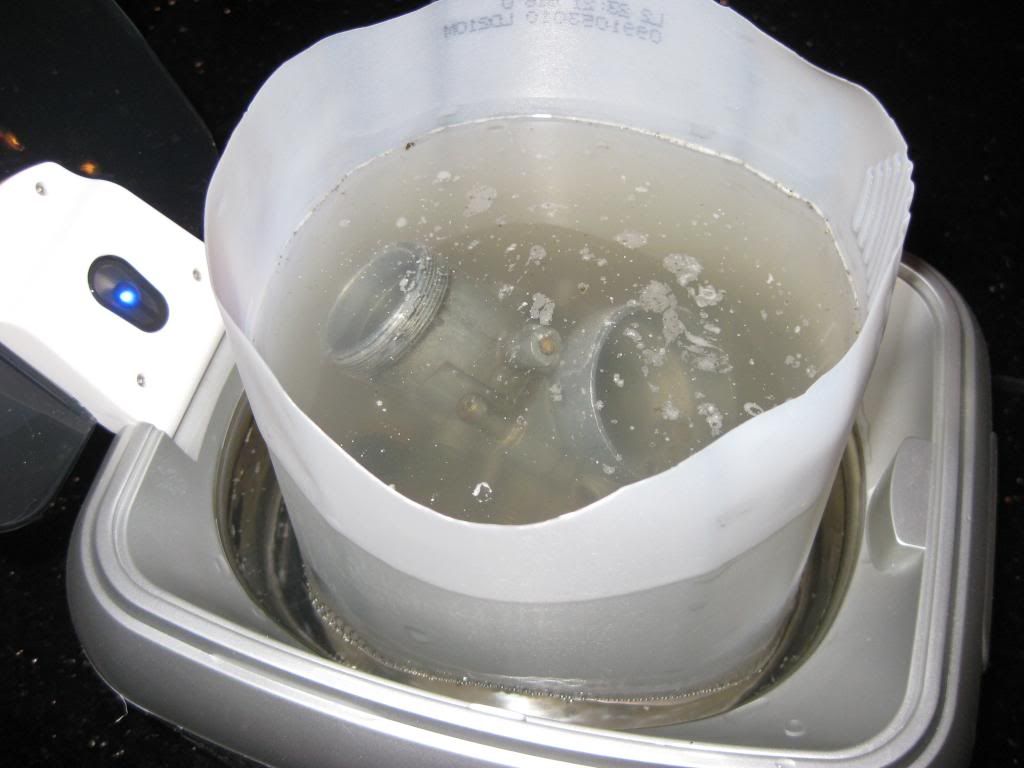 and after.... 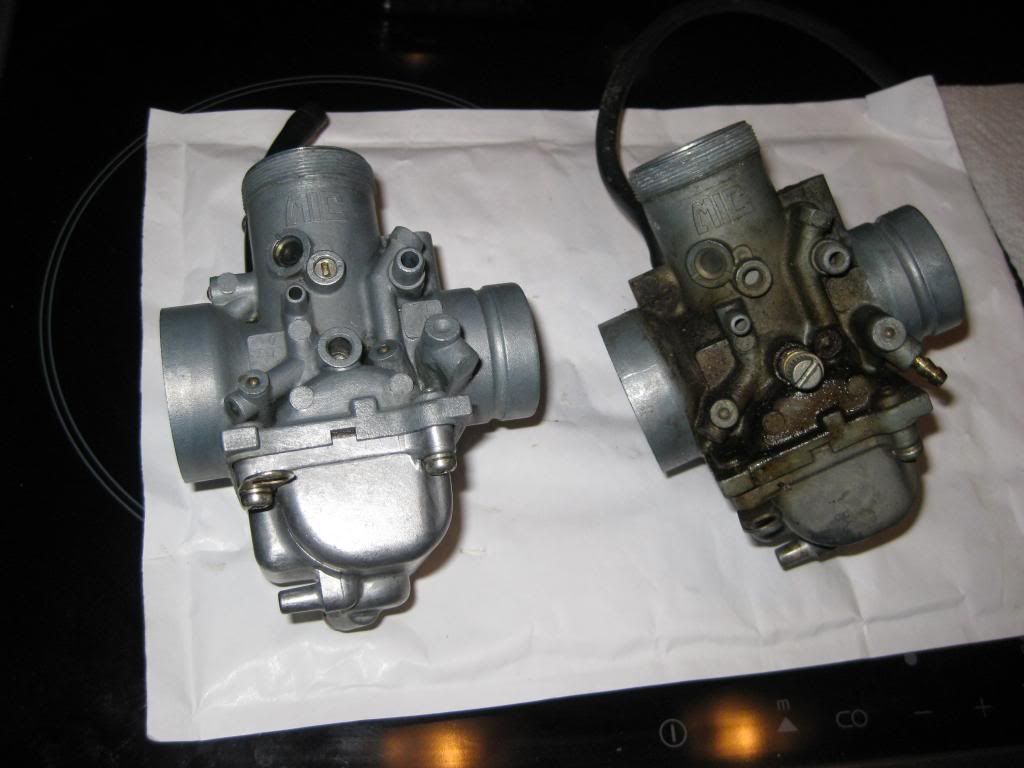 pretty good hey! This is how they both looked when I finished. 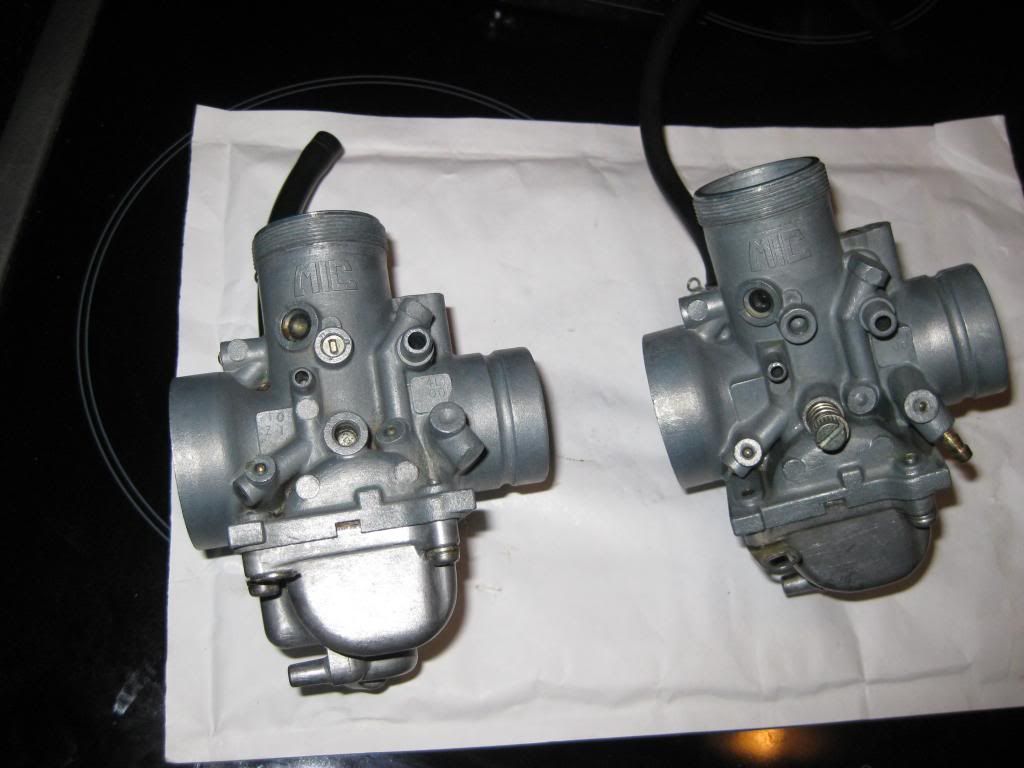 |
|
|
|
Post by shaunthe2nd on Feb 26, 2014 16:50:48 GMT 1
I even spent time cleaning up bl**dy washers!  The gloves felt nice though! |
|
|
|
Post by zedixe13 on Feb 26, 2014 16:59:30 GMT 1
Oh , I think i need an ultra sonic cleaner , I spent too much time scrubing on my last carb set .
|
|
|
|
Post by farmboy on Feb 26, 2014 20:13:09 GMT 1
Did you strip down you carbs when you cleaned thenm , or just how they are in the pics?
I would at the very least pull the float bowls off , better still the strip the jets out , nothing to hard just do one carb at a time so not to mix the bits up. Be sure to pull the needle jet /mixer tubes out also . Someone had a pic on the forum just this week with a mixer tube full of crap.
I also found it best to clean the brass parts at a different time to the small screws and stuff.
I have my claner since xmas and done loads of different parts in it. I use white vingar and rain water for some alu and steel parts . I also used neat Jizer degreaser for the brass bits , that worked real good.
Keep up the good work.
|
|
|
|
Post by shaunthe2nd on Feb 27, 2014 0:11:35 GMT 1
Did you strip down you carbs when you cleaned thenm , or just how they are in the pics? I would at the very least pull the float bowls off , better still the strip the jets out , nothing to hard just do one carb at a time so not to mix the bits up. Be sure to pull the needle jet /mixer tubes out also . Someone had a pic on the forum just this week with a mixer tube full of crap. I also found it best to clean the brass parts at a different time to the small screws and stuff. I have my claner since xmas and done loads of different parts in it. I use white vingar and rain water for some alu and steel parts . I also used neat Jizer degreaser for the brass bits , that worked real good. Keep up the good work. Other than disconnecting the tops of the carbs i didn't strip them down, i just cleaned them as per the pics. I have never stripped a carb down before so was nervous to do so at the time, but starting to get a bit more confidence and the encouragement is good. It can't be too hard can it? What's the worst that can happen.....! I might give it a go, there just seems so many other things to do! Its only time and money and i'm sure it will be worthwhile in the long run. Watch this space..... |
|
|
|
Post by farmboy on Feb 27, 2014 8:12:05 GMT 1
As you have the cleaner now you may as well make use of it . There is nothing to worry about stripping the carbs. As said if you do one at a time so not to mix parts from one to the other, although you should!!! have both carbs with matching jets , needles, on the same clip etc . The float bowls are different left and right . Read through the manual and take your time , don't try and force any screws esp. the pilot jet . These are the main parts the little screws are not in the picture.  I am not a computer type guy and only post on 2 forums , an old tractor forum and this forum. There is a great bunch of honest helpful folk on here , so Iam sure you will not get stuck on the cards. I would clean them out piece of mind when you get it back running.Be interesting to have a look in the bottom of the bowls. |
|
|
|
Post by shaunthe2nd on Feb 27, 2014 12:12:39 GMT 1
Alex,
Thanks for that picture. Not sure if that has motivated me or not to do it, there are lots of small bits there to go AWOL lol.
Seriously, I think I will give it a go. One carb at a time as you say, and probably open then up inside a clear plastic bag to catch the escapees!
I will post a picture as proof!
|
|
|
|
Post by shaunthe2nd on Feb 27, 2014 12:34:53 GMT 1
The lock set wasn't too healthy, and wasn't all matched to one key, so off they all came..   I dropped them off with Simon wells and he did his magic on them. I now have a nice matching set that all works off one key...  Thanks Simon. Only small hiccup i had was that I mislaid the non-locking seat latch, so bought another only for the first one to turn up. grrr! So got a spare if anyone wants it for £10 + postage. PM me. |
|
|
|
Post by shaunthe2nd on Feb 28, 2014 11:37:44 GMT 1
My attempt at creating the yamaha green passivate finish with a rattle can! First the rad screws...  and then the clock bracket...  Not perfect, and not for the purists, but came out better than I expected. |
|
|
|
Post by shaunthe2nd on Feb 28, 2014 12:08:40 GMT 1
Had a bit of a set back trying to get the swinging arm off the bike. The chain is the endless type without a split link, and I didn't realise the chain is actually threaded through the swing arm so you have to split if to remove the arm. Splitting it ended up a bit of a task. It always helps if you have the right tools which this virgin doesn't! Eventually lent a splitter and fought it off, damaging the splitter tool at same time, so no money saved there! Lol. Anyways i eventually got a few bits together to take for powder coating.....   and a few days later, here was my reward....   Was happy with that. I them clumsily damaged the swing arm bush when trying to get it back into the swing arm. Grrrr. A trip to Dave's (muttsnuts) and he soon sorted me out. Turns out the swing arm shaft was buggered too, but luckily he had one of those too. Top bloke. |
|
|
|
Post by shaunthe2nd on Mar 2, 2014 22:28:33 GMT 1
Farmboy motivated me to clean the inside of the carbs and not just the outside, and i'm glad I took his advice. This was new territory for me, and his pic showing a million parts didn't help but it needs to be done, so this is what I found....    Not too sure how good those pics are, but carbs covered on inside with lots of white crystal type of debris. So back to the ultrasonic cleaner and the magic tooth brushes...  and some good results....  My biggest fear was remembering where all the bits went, there are a lot of them, but it was quite straight forward to be honest. All was going well, I did the first carb (the non choke one) and cleaned it and put it back together, felt proud of myself. The 2nd one would be a doddle then..... stripped and cleaned, and almost back together... until..... bugga bugga bugga.... I got rough handed (I was rushing to meet the lads in pub!).... so rushed putting in the last float pin and fckd the carb housing bracket...  The screw driver points to the damage. I'm sure its not repairable. I'm gutted after the time taken to clean up the inside and the outside of the carb. i'm assuming I need a new carb housing. Anyone have a spare kicking about for sale? I have all the shiney bits to go inside, just need a replacement carb housing. HELP! Not a good ending to my weekend. |
|
|
|
Post by copper99 on Mar 3, 2014 21:14:48 GMT 1
Great build thread mate....look forward to seeing how she comes together.
|
|
|
|
Post by shaunthe2nd on Mar 3, 2014 21:48:28 GMT 1
Thank you. I think I'm back on track with the carbs, Soccersmyth off here sorted some replacement housings for me and should be in the mail.
Hopefully will have them sorted at weekend and will post an update.
Fingers crossed.
|
|
|
|
Post by shaunthe2nd on Mar 3, 2014 22:20:42 GMT 1
I will report back on the carbs. So I decided to strip down and clean up and repaint the shock. So this was what I started with..... So I removed it, and as I don't have a spring compressor, I took it down to Muttsnuts to borrow his. He's a fine fella and even took the spring apart and tested the shock for me whilst his missus offered me a cuppa. Result on 2 scores, a great cuppa and the shocker is all as it should be.  So the spring goes off for powder sand blasting and powder coating, and I set about in the workshop (ok so some people call it a kitchen) with scotchbrite and plenty of elbow grease. A week or so later, all the bits come back together (me, spring, damper, and mutts!) and voila all that magic results in this piece of engineering art....  I'm so pleased with it I'm tempted to mount in 'billy the fish' style and put it on my wall! |
|