|
|
Post by chrisg on Jan 23, 2021 12:41:01 GMT 1
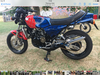
The sun will come out, eventually and it may be slightly different, but fingers crossed we will get there.
|
|
|
|
Post by Mr Kipling on Jan 23, 2021 20:05:26 GMT 1
Looking fantastic there Dusty.....
|
|
|
|
Post by dusty350 on Jan 23, 2021 20:08:46 GMT 1
Hey Mr K, long time mate  , hope you are good and the missus is ok  Soon as we can Alex, no problem Dusty |
|
|
|
Post by dusty350 on Feb 28, 2021 22:28:40 GMT 1
Felt like doing a bit on the bike today. First job was to reduce the length of the brake lever pedal as the kickstart would have hit it otherwise. Cut it back on the lathe, which made a neat job of it;  20210228_122745 20210228_122745 by dusty miller, on Flickr Kickstart just misses it now Next job was fitting the new Yam throttle cable to the Pwk's. I knew it wouldn't fit straight on - I had the same issue with the Pwk's on the Cafe bike, but had an idea of how to sort it without too much hassle. I needed to reduce the length of the outer cable on the 2, splitter to carb cables, to enable the inner cables to reach further down into the carbs and connect to the slides. First, I dremmelled off the ferrules;  20210228_140123 20210228_140123 by dusty miller, on Flickr This enabled the cable to fit into the brass adjusters on the top of the carbs - the ferrules are too big to fit the Pwk adjusters otherwise. With the cables fully seated in the adjusters, I connected up the cable to the slide on one carb to see how much of the outer cover needed cutting back. Quite a lot as it happens - roughly like quarter throttle ! 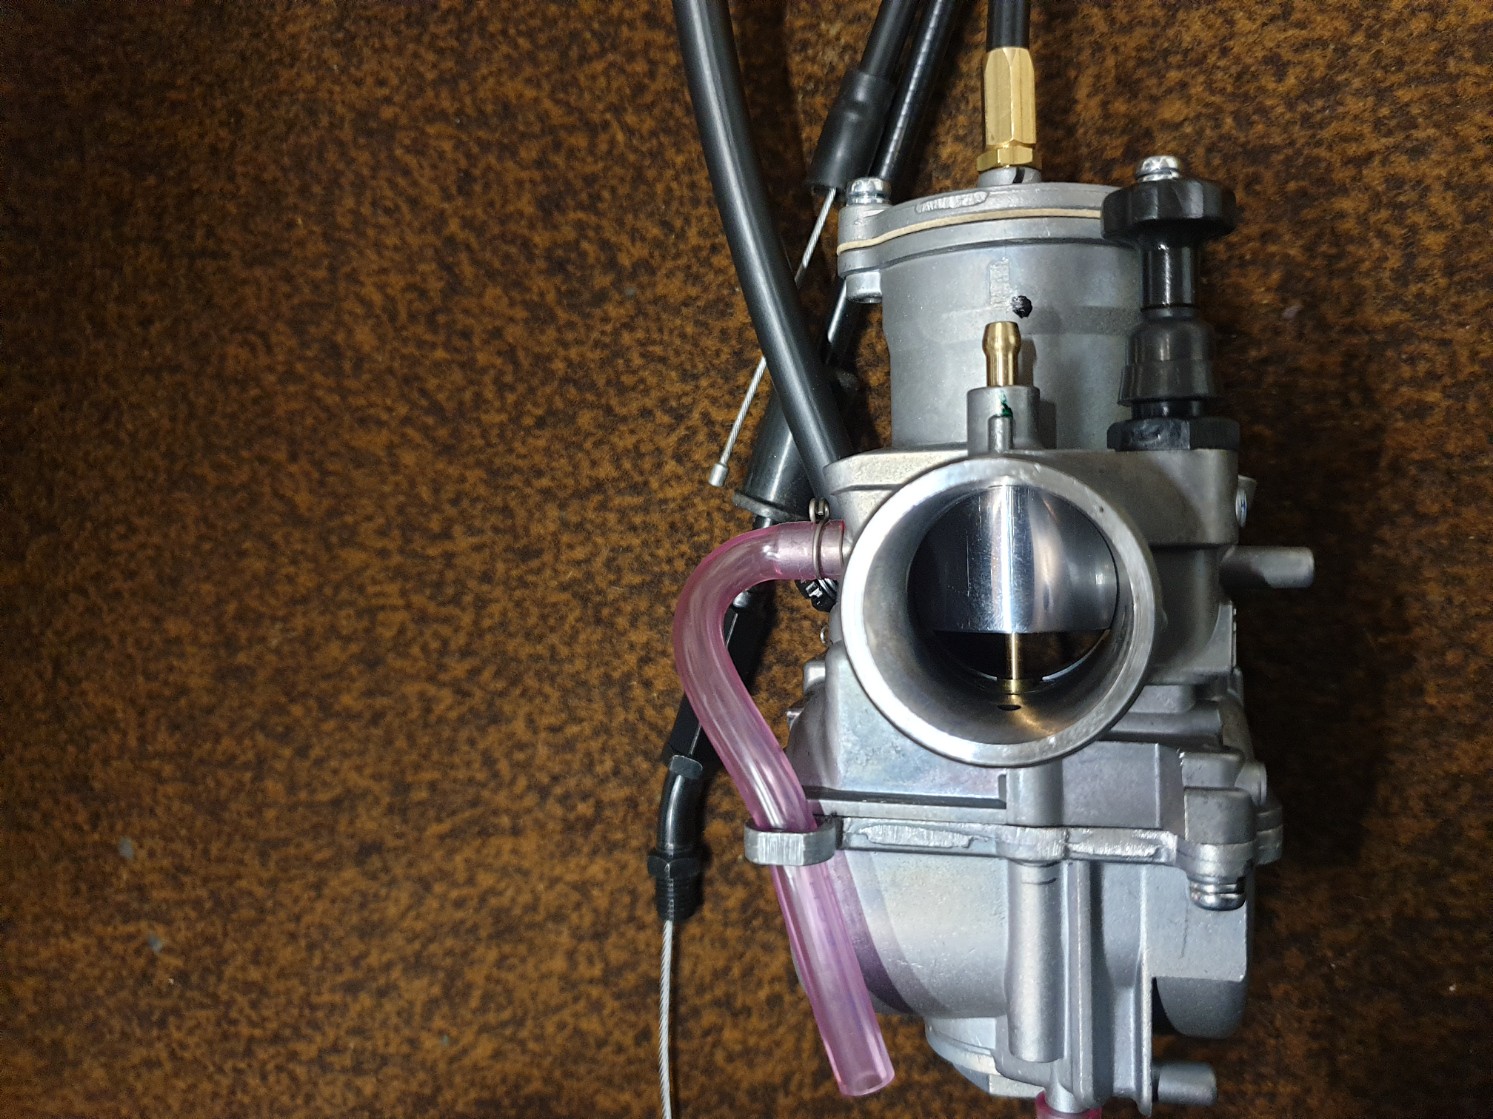 20210228_144233 20210228_144233 by dusty miller, on Flickr After measuring how far off closed the slide was, I used that measurement to cut back the outer cable, so shortening it but leaving the inner cable the original length. Did one and checked it, then did the other side. Adjusted the cables whilst the carbs were off for sync, then fitted them and connected the throttle end, then double checked the sync again, and all is good Loom next Dusty |
|
|
|
Post by donkeychomp on Mar 1, 2021 22:33:22 GMT 1
Nice one Dusty.
Alex
|
|
|
|
Post by gazzatt2 on Mar 20, 2021 23:01:55 GMT 1
Cheers fellas The R6 gear change arm arrived today. I want a "kinked" arm as it needs to sit further away from the casing as the rearset plates are spaced away from the frame. I did use a straight version, but with an ali spacer, which wasn't bad but not ideal, as I wanted to remove any chance of "slop" out of the gear change. If you need a kinked arm for an Lc/Pv/Ac build, I can confirm the R6 is a good fit;  20210119_200512 20210119_200512 by dusty miller, on Flickr I rubbed the silver paint off it and used some solvol to give it a better finish;  20210119_203324 20210119_203324 by dusty miller, on Flickr Gear change action is really slick now, so another job ticked off the list. The last main job now is paint. I need to get a couple of single outlet petrol taps off Norbo so I can double check the tank, and then it can all go off for painting. Few other bits to buy, but really not far off now Dusty what year R6 is the gear change arm from ? tia Gazza |
|
|
|
Post by dusty350 on Mar 21, 2021 9:21:47 GMT 1
Hi It was listed as an R6, 03-05 5sl model. The other one I bought was listed as R6, 2002 model. Dusty |
|
|
|
Post by philmill on Mar 22, 2021 19:32:26 GMT 1
Hi It was listed as an R6, 03-05 5sl model. The other one I bought was listed as R6, 2002 model. Dusty Dusty, the straight one would work ok with std setup do you think? Phil |
|
|
|
Post by dusty350 on Mar 22, 2021 20:51:11 GMT 1
Hi Phil, Yes, the standard one would work fine with a narrower swingarm, but the rearsets are spaced away from the frame to clear the wider swingarm, and I felt the angle of the gearchange rod was too extreme to keep the standard lever, hence the "cranked" version. I wanted to keep the rod as straight as possible for more precise gearchanges, and less wear on parts. Dusty |
|
|
|
Post by philmill on Mar 23, 2021 5:14:30 GMT 1
Thanks Dusty, I get one of those to use on mine.
Phil
|
|
|
|
Post by dusty350 on Mar 29, 2021 21:04:33 GMT 1
Started fitting the loom at the weekend. I bought a new, pattern loom off ebay ages ago;  20210327_102009 20210327_102009 by dusty miller, on Flickr Spent a fair bit of time getting it laid out on the frame so it was nice and neat. I ran it up the left side of the headstock - right side would be standard, and this was to keep it neater, due to the throttle cable splitter box and the Banshee coils fitment. Just got to make the connections in the headlight and it's done. I ordered an AGM battery off ebay which should turn up tomorrow, and then I can test the electrics. Add some sealant to the pipe flanges and she'll be ready to start up for the first time. I also spoke to Mark Cordwell regards the paint. He is going to do a standard 400e white scheme with red speedblocks for me, with a red Rgv front mudguard to match the red of the decals. I did consider something non standard, but I did want the bike to be very much "Rd400" at first glance. You see so few on the road I felt a standard paint scheme would identify it best, plus I always loved the "white heat" scheme the best. Getting near the end now Dusty |
|
|
|
Post by dusty350 on Apr 3, 2021 20:33:47 GMT 1
One step forward, 2 back ! With the loom fitted, I looked at connecting everything up, but, the pattern switchgear doesn't have the correct plugs fitted to match the loom  Couple of wires dont match the wiring diagram colours either  Not gonna be the simple plug in job I was hoping for - the joys of pattern parts and nla connector blocks I suppose;  20210403_161014 20210403_161014 by dusty miller, on Flickr I made a connection up for the front brake light switch and fitted that and have repaired a couple of wires from the idiot light consul. Also bought an AGM battery;  20210403_161034 20210403_161034 by dusty miller, on Flickr Bought this one after reading some bad press on the Motobatt's. This was £28 delivered with a 3 year guarantee, so worth a go. Got some parts from Norbo this week too. 2 x hi flow petrol taps with a single outlet rather than the twin outlet;  20210403_160933 20210403_160933 by dusty miller, on Flickr So one to feed each carb, Also got some clear oil lines from pump to inlet manifolds;  20210403_160949 20210403_160949 by dusty miller, on Flickr I know not everyone rates the clear pipe, but I've never had a problem with the pipe Norbo supplies, and I will keep an eye on it. I had the option of running it to the manifolds or the carbs as there are spigots fitted on both, but chose to go to the manifolds as jetting changes will mean I wont need to disturb the oil feeds. I fitted some old taps and checked the tank for leaks by filling with fuel. I hadn't checked the tank since having the welding done for the second tap and the cross over tubes welded shut. Thankfully, no leaks, so the tank is now empty and ready for Mark Cordwell. Brakes lines will be the next parts to buy. Dusty |
|
|
|
Post by donkeychomp on Apr 3, 2021 21:37:41 GMT 1
Do you need an original loom for comparison Dusty? I have one if you need it.
Alex
|
|
|
|
Post by dusty350 on Apr 4, 2021 7:37:43 GMT 1
Thanks for the offer Alex, but I will need to change the switchgear mainly, probably with modern connectors. The loom is not such an issue, it's more the switchgear with bullet connectors and no plugs. Hope you are well mate Dusty |
|
|
|
Post by gazzatt2 on Apr 4, 2021 13:45:31 GMT 1
you will meed to work out what the wires on the pattern switch do with a meter
had to do that on a RD50 pattern switch I thought the correct coloured wires would connect to the matching wires in the loom
but to it was not wired like that
|
|
|
|
Post by dusty350 on Apr 4, 2021 20:18:24 GMT 1
I've already looked inside the switchgear to see what goes where Gazza, but I still think there will be some head scratching to do |
|
|
|
Post by oldbritguy on Apr 4, 2021 21:40:00 GMT 1
Hahaha
You always did say that wiring was your favourite part Dusty 😜
I am sure you will fathom it out no problem. Keep plenty of spare fuses handy just in case 😉
John
|
|
|
|
Post by howard on Apr 4, 2021 21:49:50 GMT 1
I'm sure all the pattern switch gear is made for the C and D models , not the E and F's although I've never bought any , if I'm right then the kill switch would be wrong .
|
|
|
|
Post by dusty350 on Apr 5, 2021 12:53:04 GMT 1
Yea, I hate the electrickery part or rebuilds John !! Thought buying all new parts would make life easy - obviously not Everything away from the headlight connects up as it should, but it's only the ignition switch connection that plugs straight in at the front end. I think you may be right Howard. Had a look at some earlier switchgear on ebay, and it was original bullet connections on that too, indicating the switchgear may match a C/D loom more readily. I've got a Kojaycat colour wiring diagram on it's way as they are very easy to follow, so wont attempt anything till that arrives. Dusty |
|
|
|
Post by dusty350 on Apr 20, 2021 21:00:18 GMT 1
Paintwork is off to Mark Cordwell tomorrow;  20210420_190533 20210420_190533 by dusty miller, on Flickr I know he is mega busy at the mo, but at least it will be there for when he is ready. Had a bit of time with the wiring lately. I bought a colour Kojaycat wiring diagram which is a big help, plus I have ordered a 4 pin male plug from them to help connect to the loom. Other plugs are nla, so I ordered some more bullet connectors from Amazon - obsolete plugs will get cut off and bullets fitted;  20210420_190551 20210420_190551 by dusty miller, on Flickr  20210420_190714 20210420_190714 by dusty miller, on Flickr Working my way through it. I've got working horn, idiot lights, front stop light, and I've wired in the temp gauge to a switched live, so the gauge comes on with the ignition. Lots of wires will be redundant as there will be no indicators, and the pattern switchgear has no pass light switch. I'm testing everything before I start cutting block connectors off, but will leave all indicator wiring intact in case they are fitted at a later date. Dusty |
|
|
|
Post by oldbritguy on Apr 20, 2021 22:15:06 GMT 1
Well, I see that for someone who does not particularly enjoy electrical problem solving, you have dived straight into the dark art here.
Lovely tidy job so far and that wiring diagram looks superb. Nice n simple.
Mr C will do an outstanding job on the bodywork so looking forward to seeing it finished however I agree that he is run off his feet and it may be a while.
Top stuff as always Dusty.
John 🙂
|
|
|
|
Post by JonW on Apr 21, 2021 5:01:54 GMT 1
I have the exact same connector kit as you Dusty, Ive already had to buy more connectors... twice lol. I use it quite a lot. The crimper isnt perfect but its much better than what i had before. |
|
|
|
Post by dusty350 on Apr 22, 2021 7:32:29 GMT 1
Cheers John and Jon The main wiring kit with a crimping tool was about 30 quid a year or two back. The smaller kit is to top up the connections. I have used those awful blue/red/yellow connectors from Halfords in the past, and I can safely say I will never use them again !! Decent connectors are a no brainer, and give a finish just like the factory crimped connections. I didn't really want to cut any existing plugs off the loom from the idiot light cluster, but I didn't have any choice as I cant source the correct "other side" as they aren't available, so good quality bullets are my next best bet. I'm slowly working my way through it though, and haven't blown any fuses, yet !! I remade the battery leads as they were very long, and I have also had to re route the main loom up the right side of the frame as it gave it an extra inch of length in the headlight bowl - just doing that took an hour last night as I then had to re route other wires, as I want it to be as neat and tidy as possible, even though it's not seen beneath the tank. Need to sort the lights out next as a lot of wiring in the headlight is for instrument/ headlight operation. I was pretty pleased to get the neutral, oil and temp gauge working as they should !!  20210422_071356 20210422_071356 by dusty miller, on Flickr The paintwork is now with Mark up in Derby. 5- 6 week turnaround which is fine. He has plenty of paint sets waiting to be done, so I appreciate him taking it on. I've gone for a bright white, as opposed to the standard Rd white, which can look a bit "creamy" compared to a bright white. As my wheels are bright white, the bodywork would have looked odd if it was different. Decals will be standard Rd400 red speedblocks though, and will be lacquered over. Edging a bit nearer to the end !! Dusty |
|
|
|
Post by mouse on Apr 22, 2021 7:49:18 GMT 1
Great progress, another skill added to the long list!
Exciting news on the paint, you now have a deadline to finish the wiring!!
Mouse
|
|
|
|
Post by midlifecrisisrd on Apr 22, 2021 8:35:08 GMT 1
Great to see you are conquering white man's voodoo 😀
Before you know it you will be rewiring stuff that spent need it 😂
Getting there nicely 👍
Strve
|
|
|
|
Post by sidney81 on Apr 22, 2021 10:30:11 GMT 1
Dusty dose the temperature gauge get the power direct from the battery ?? , Looking brilliant 🙂
|
|
|
|
Post by dusty350 on Apr 22, 2021 10:58:03 GMT 1
Don't think I will be setting up "Dusty's rewires" any time soon, but hopefully I will get everything working. I did look at taking it to a bike repairer local to me, but at £55 per hour I decided to sort it myself !
Hi Chris. The gauge takes a switched live feed from a brown wire. Nearest I found to where the gauge loom sits is from the rear brake light feed. Then the earth wire from the gauge loom goes to an earth point on the frame. So the gauge only goes live when you switch the ignition on. Easy to splice into the brown wire for the rear brake, and it leaves the main loom untouched.
Dusty
|
|
|
|
Post by steve h on Apr 22, 2021 20:45:49 GMT 1
Its nice to see someone doing the electrics correctly, and using the correct terminals and crimping tool.
Some folks spend thousands on rebuilds and specials... then treat the electrical system to utter contempt....
Seen insulated terminals "crimped" with cheap tools no better than pliers...
Nice one Dusty!
|
|
|
|
Post by dusty350 on Apr 22, 2021 21:48:57 GMT 1
Cheers Steve My inability to fully grasp electrickery means the last thing I want to do is chase electrical gremlins, and using those awful cheap and nasty Halfords type fixings means I could introduce problems into the system. Using the proper "W" crimping tool and decent connectors will hopefully reduce any possible problems. Another essential workshop tool, no matter what bike you have. Dusty |
|
|
|
Post by dusty350 on Apr 25, 2021 14:41:29 GMT 1
Managed to finish the wiring today, by getting the headlight working properly thanks to Steve and Nigel's help yesterday Bonus was I got it all in the headlight bowl and the lens fitted and everything still worked !!  So, with no excuse to drag my feet any longer, a quick trip to get some fuel in a can, mix some oil in and....  20210425_141208_19570381898694 20210425_141208_19570381898694 by dusty miller, on Flickr Third kick, fired up sweet as a nut. The first time this collection of parts has ever run as a complete bike Been a long road since starting with just the frame that Alex gave me back in 2019. Some tweaks will be required for fuelling I'm sure, but the engine sounds great and the Allspeeds sound awesome Need brake lines and get the calipers bled and that will be about it. Dusty |
|


 , hope you are good and the missus is ok


 Couple of wires dont match the wiring diagram colours either
  Not gonna be the simple plug in job I was hoping for - the joys of pattern parts and nla connector blocks I suppose;