|
|
Post by nelly on May 7, 2020 21:31:11 GMT 1
Fantastic work it gives me a headache just trying to figure out how you manage solutions to problems.Loving watching Mr Millyard build engines as well, thanks for inspiring me to do stuff myself.Keep up the great work mate.
|
|
|
|
RD700LC
May 10, 2020 19:14:18 GMT 1
Post by yamark on May 10, 2020 19:14:18 GMT 1
Oil pump, again 
Now I have the pump drive, oil line routes, cable route and cover sorted- I've still got to test pump output with inline check valves in place. Once again this Forum shows the class of it's members. Stusco, sent me a message about some valves that he had, and offered them for free. So I Paypal'd a drink over to him and they turned up quickly in the post. (Thanks Stu)
On 500RG's RS500 build, I saw inline check valves made by Suzuki, which fit the bill for what I need. If bought in the UK, they work out close to £100 for 4! Stu's valves are the same, but with a 6mm outlet diameter. Here's a picture of them
 SDC11828 SDC11828
|
|
|
|
Post by yamark on May 10, 2020 19:38:12 GMT 1
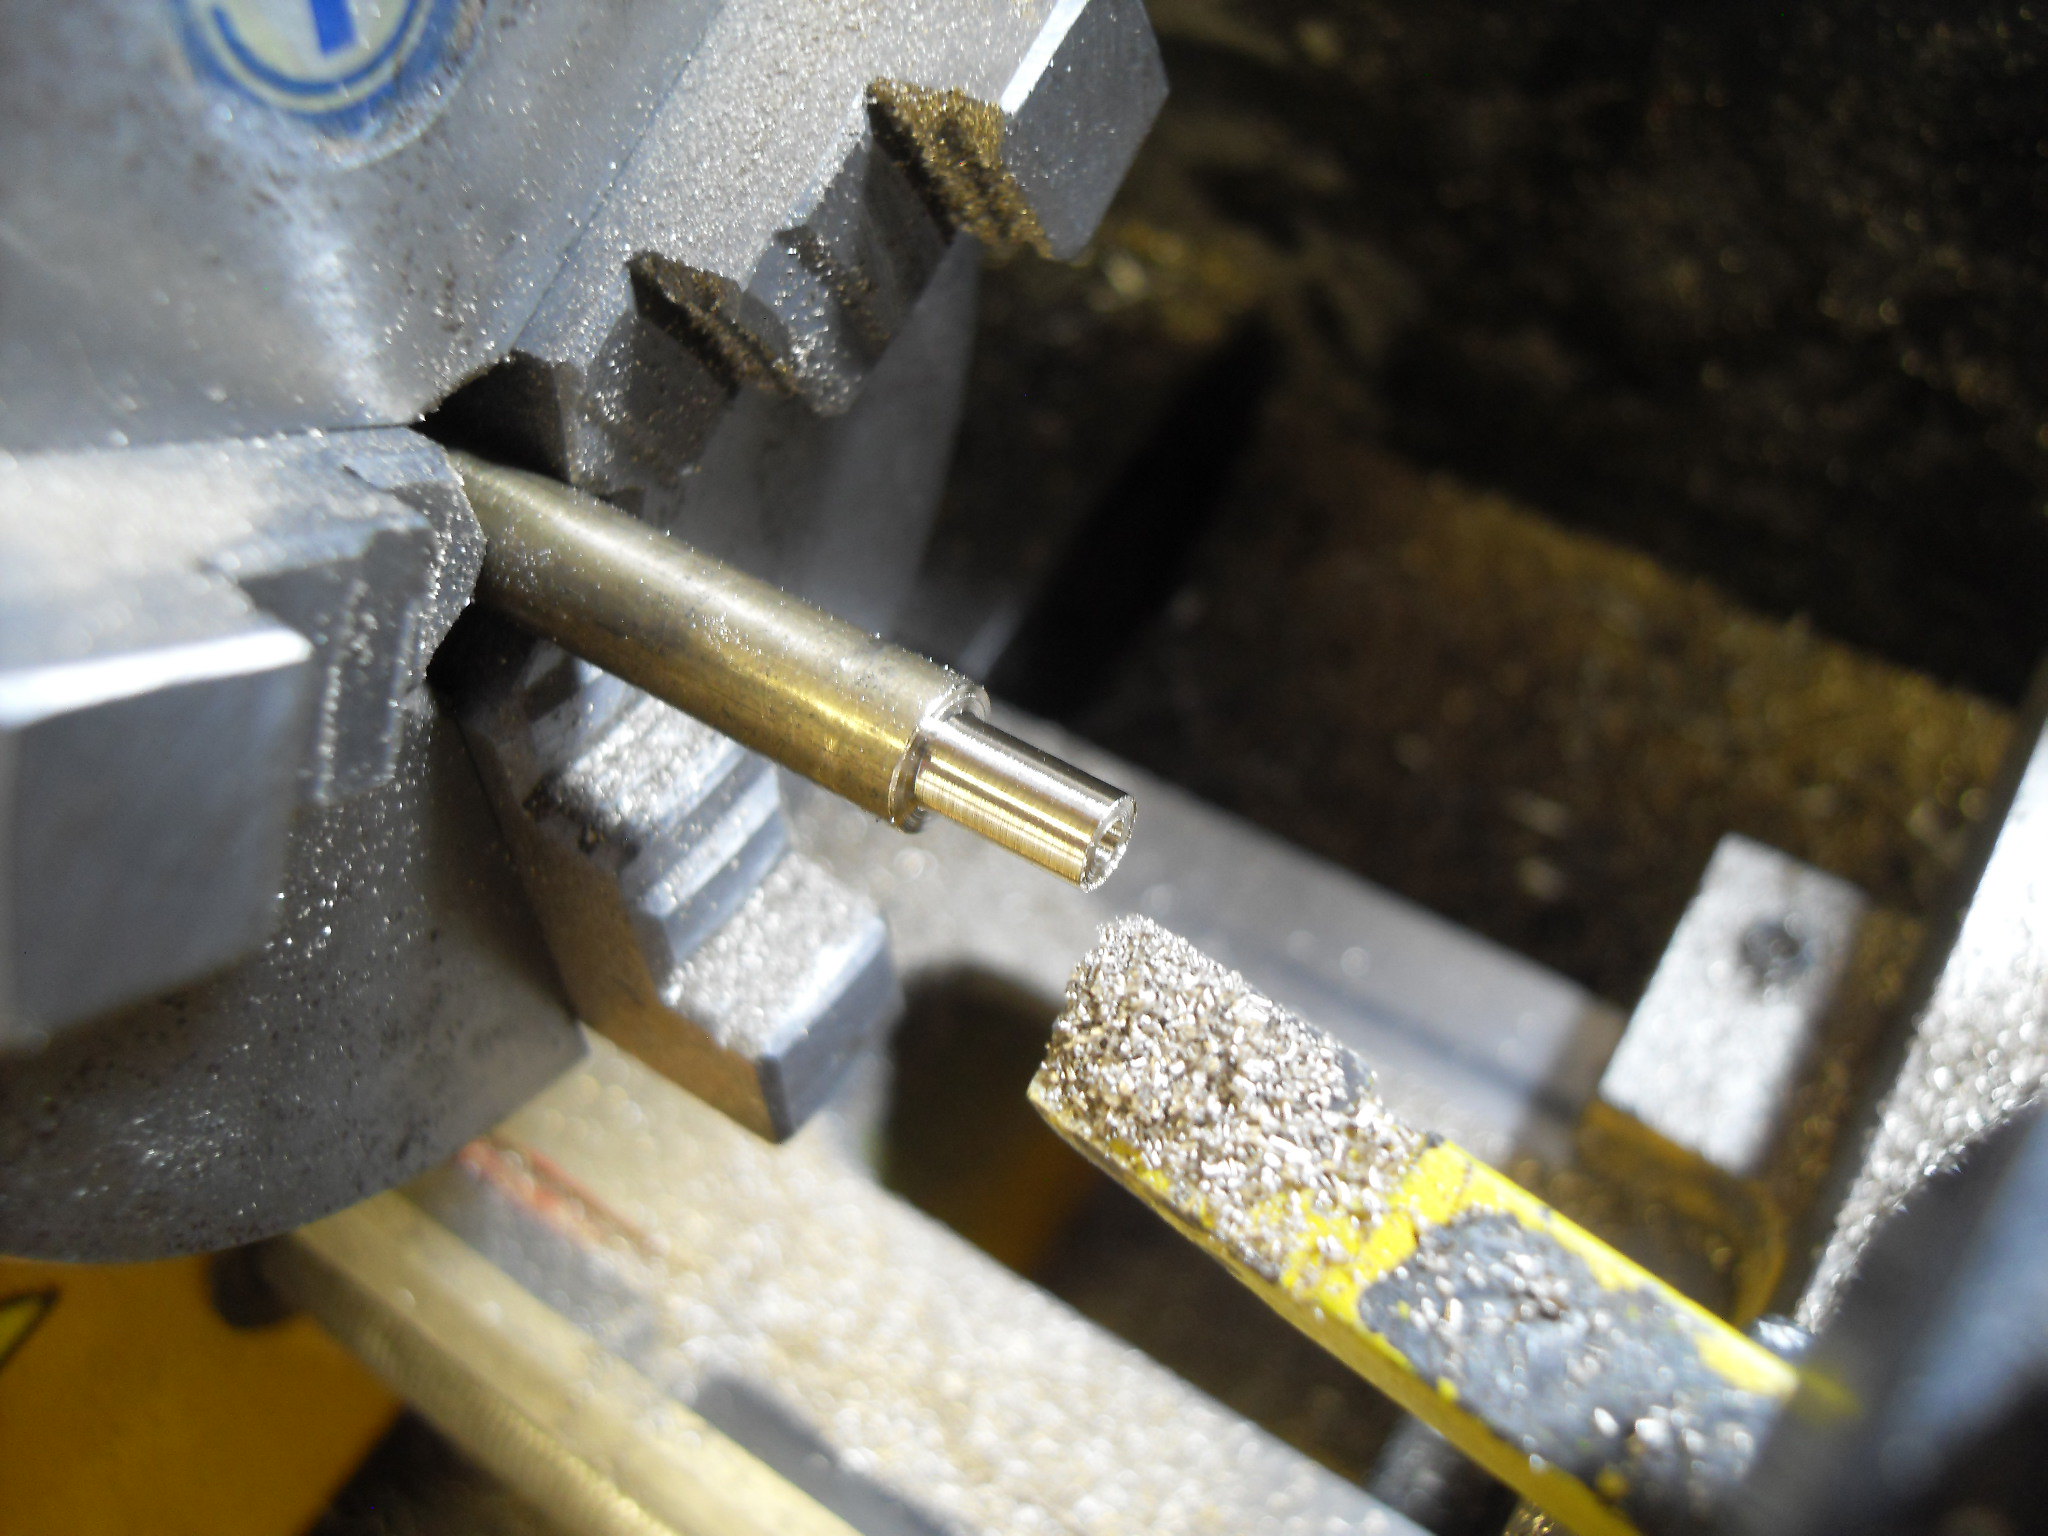
So, some adapters need to be made for the outlet side. The pump outlet pipe size is about 3mm (sorry I can't remember the exact measurement), but it's the same as the inlet side of the check valves. The 31K carb oil line stubs are nearer 4mm, so I've got to reduce from 6mm to 4mm.
So, I machined some 7mm brass rod and centred it on the lathe.
 SDC11804 SDC11804
I then used a 2mm drill
 SDC11805 SDC11805
And started to machine the outlet side to match the diameter of the carb stub
 SDC11806 SDC11806
 SDC11808 SDC11808
 SDC11809 SDC11809
 SDC11810 SDC11810
Then I start machining the side that has to connect to the 6mm outlet of the check valve
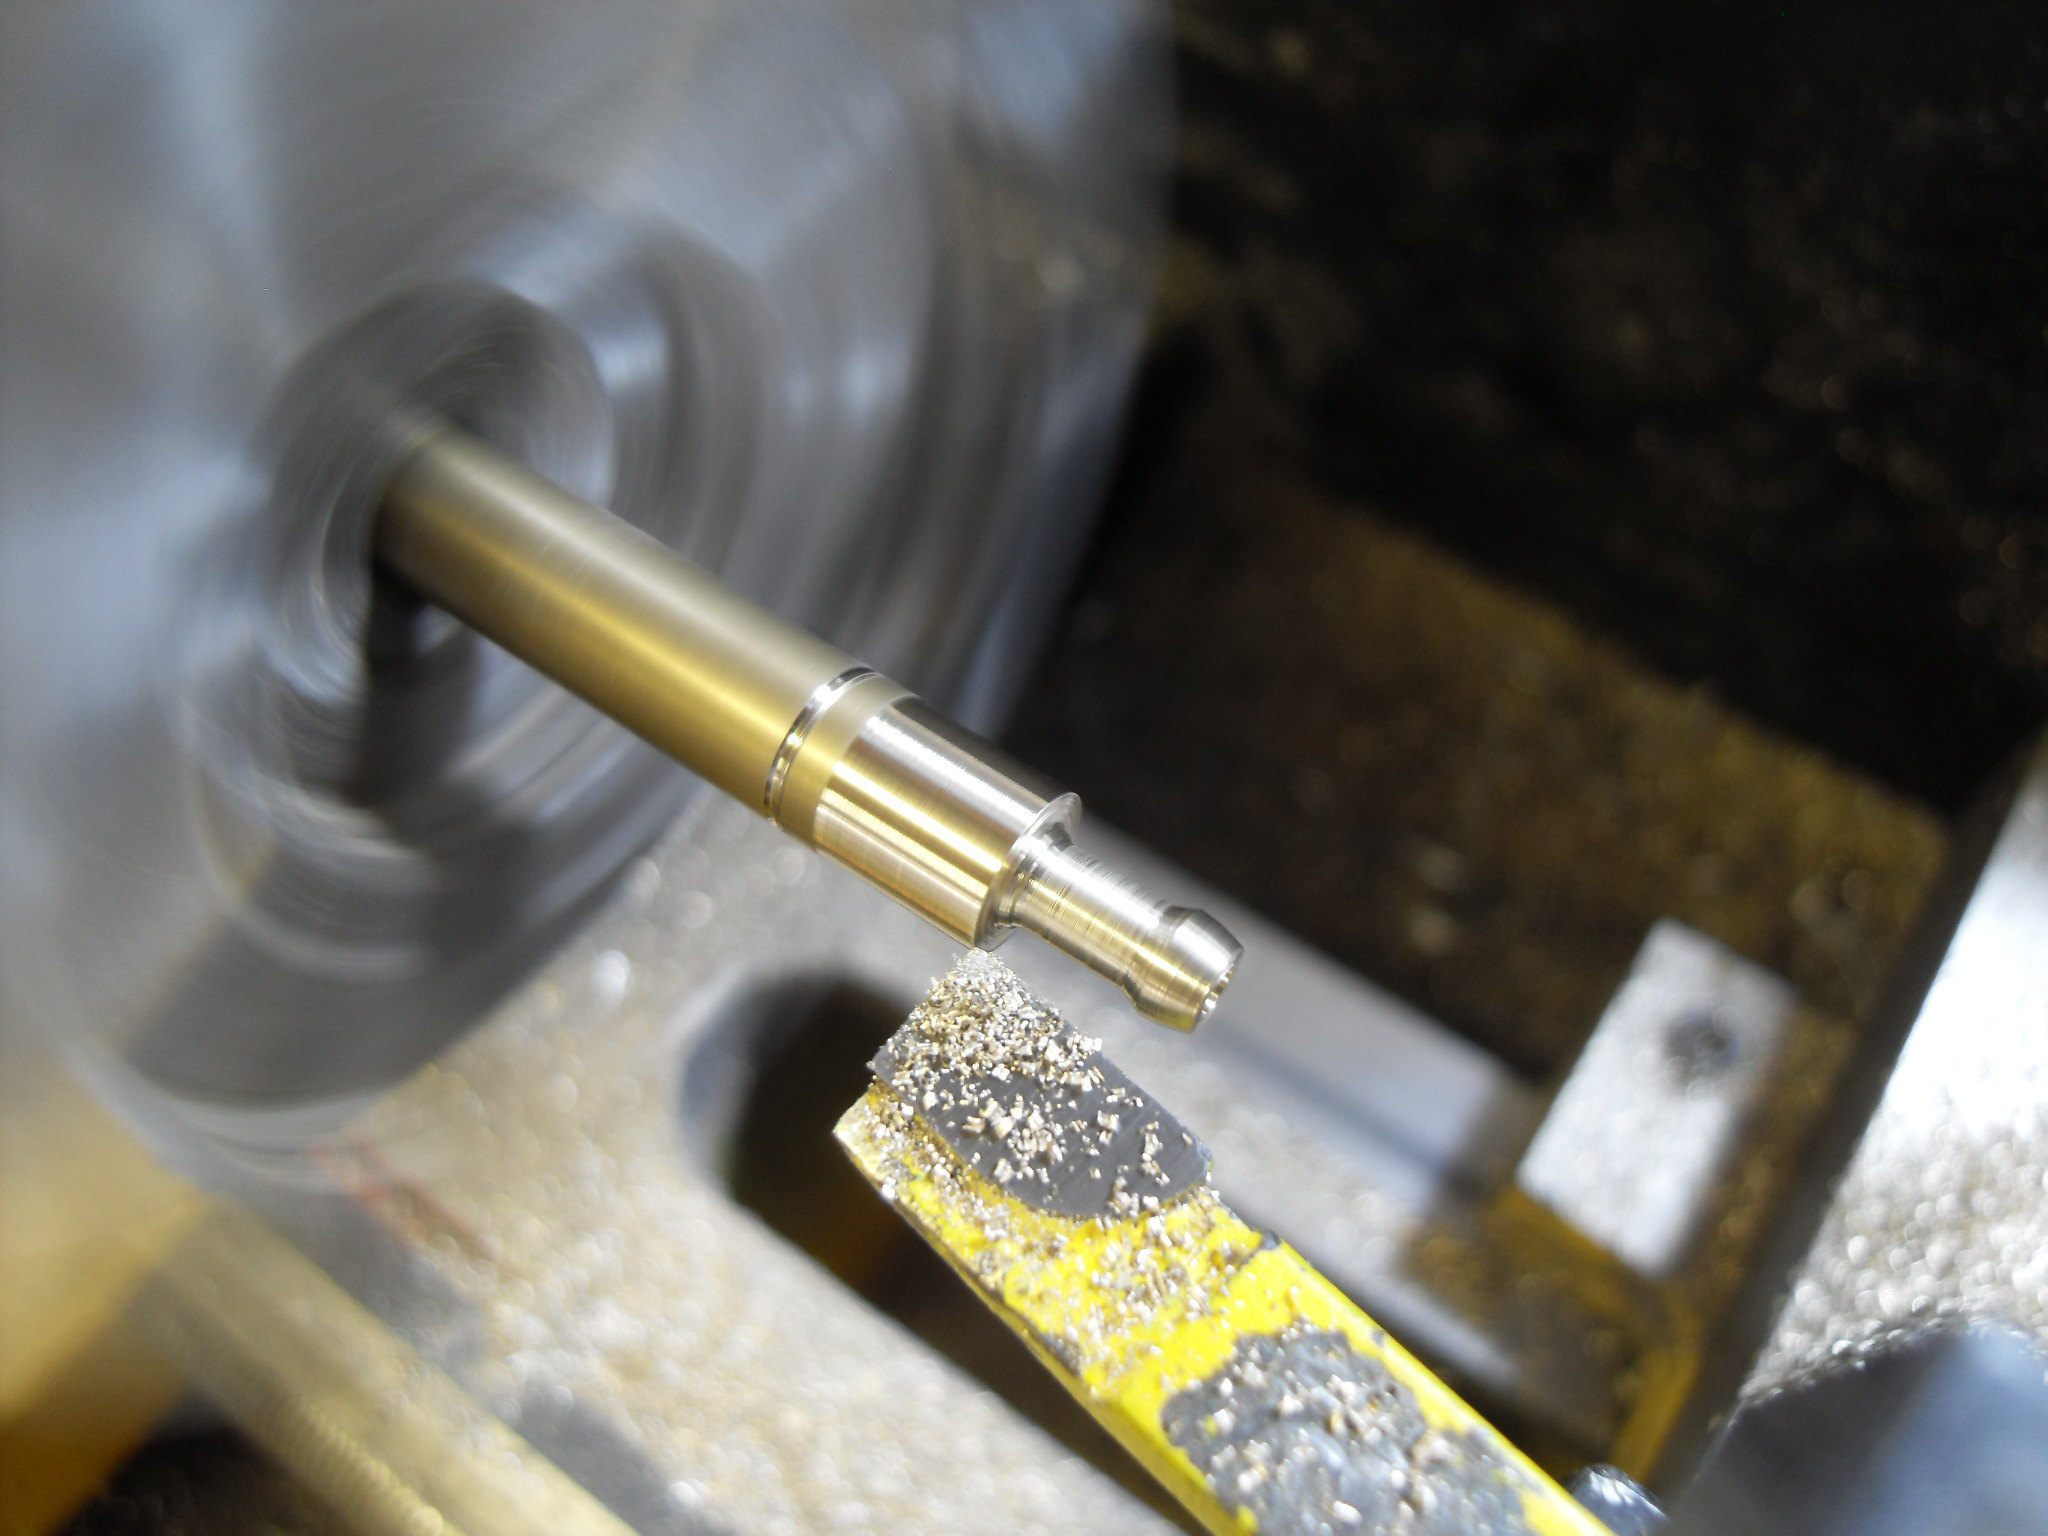 SDC11811 SDC11811
More next week,
Cheers, Mark 
|
|
|
|
Post by rattler on May 10, 2020 22:32:43 GMT 1
Wow - an amazing build. I've jsut skipped throught the 14 pages and that took a long time, you must have the patience of a saint. Awesome work and great skills.
|
|
|
|
Post by nelly on May 11, 2020 12:49:44 GMT 1
You've got more patience than me,I would of given up a long time ago and gone premix!😂🤣😂👍🏻
|
|
|
|
Post by dusty350 on May 11, 2020 19:14:13 GMT 1
Fantastic lathe work, again, Mate  Looks "factory" Dusty |
|
|
|
Post by yamark on May 17, 2020 19:38:56 GMT 1
Cheers, Rattler, Nelly and Dusty.
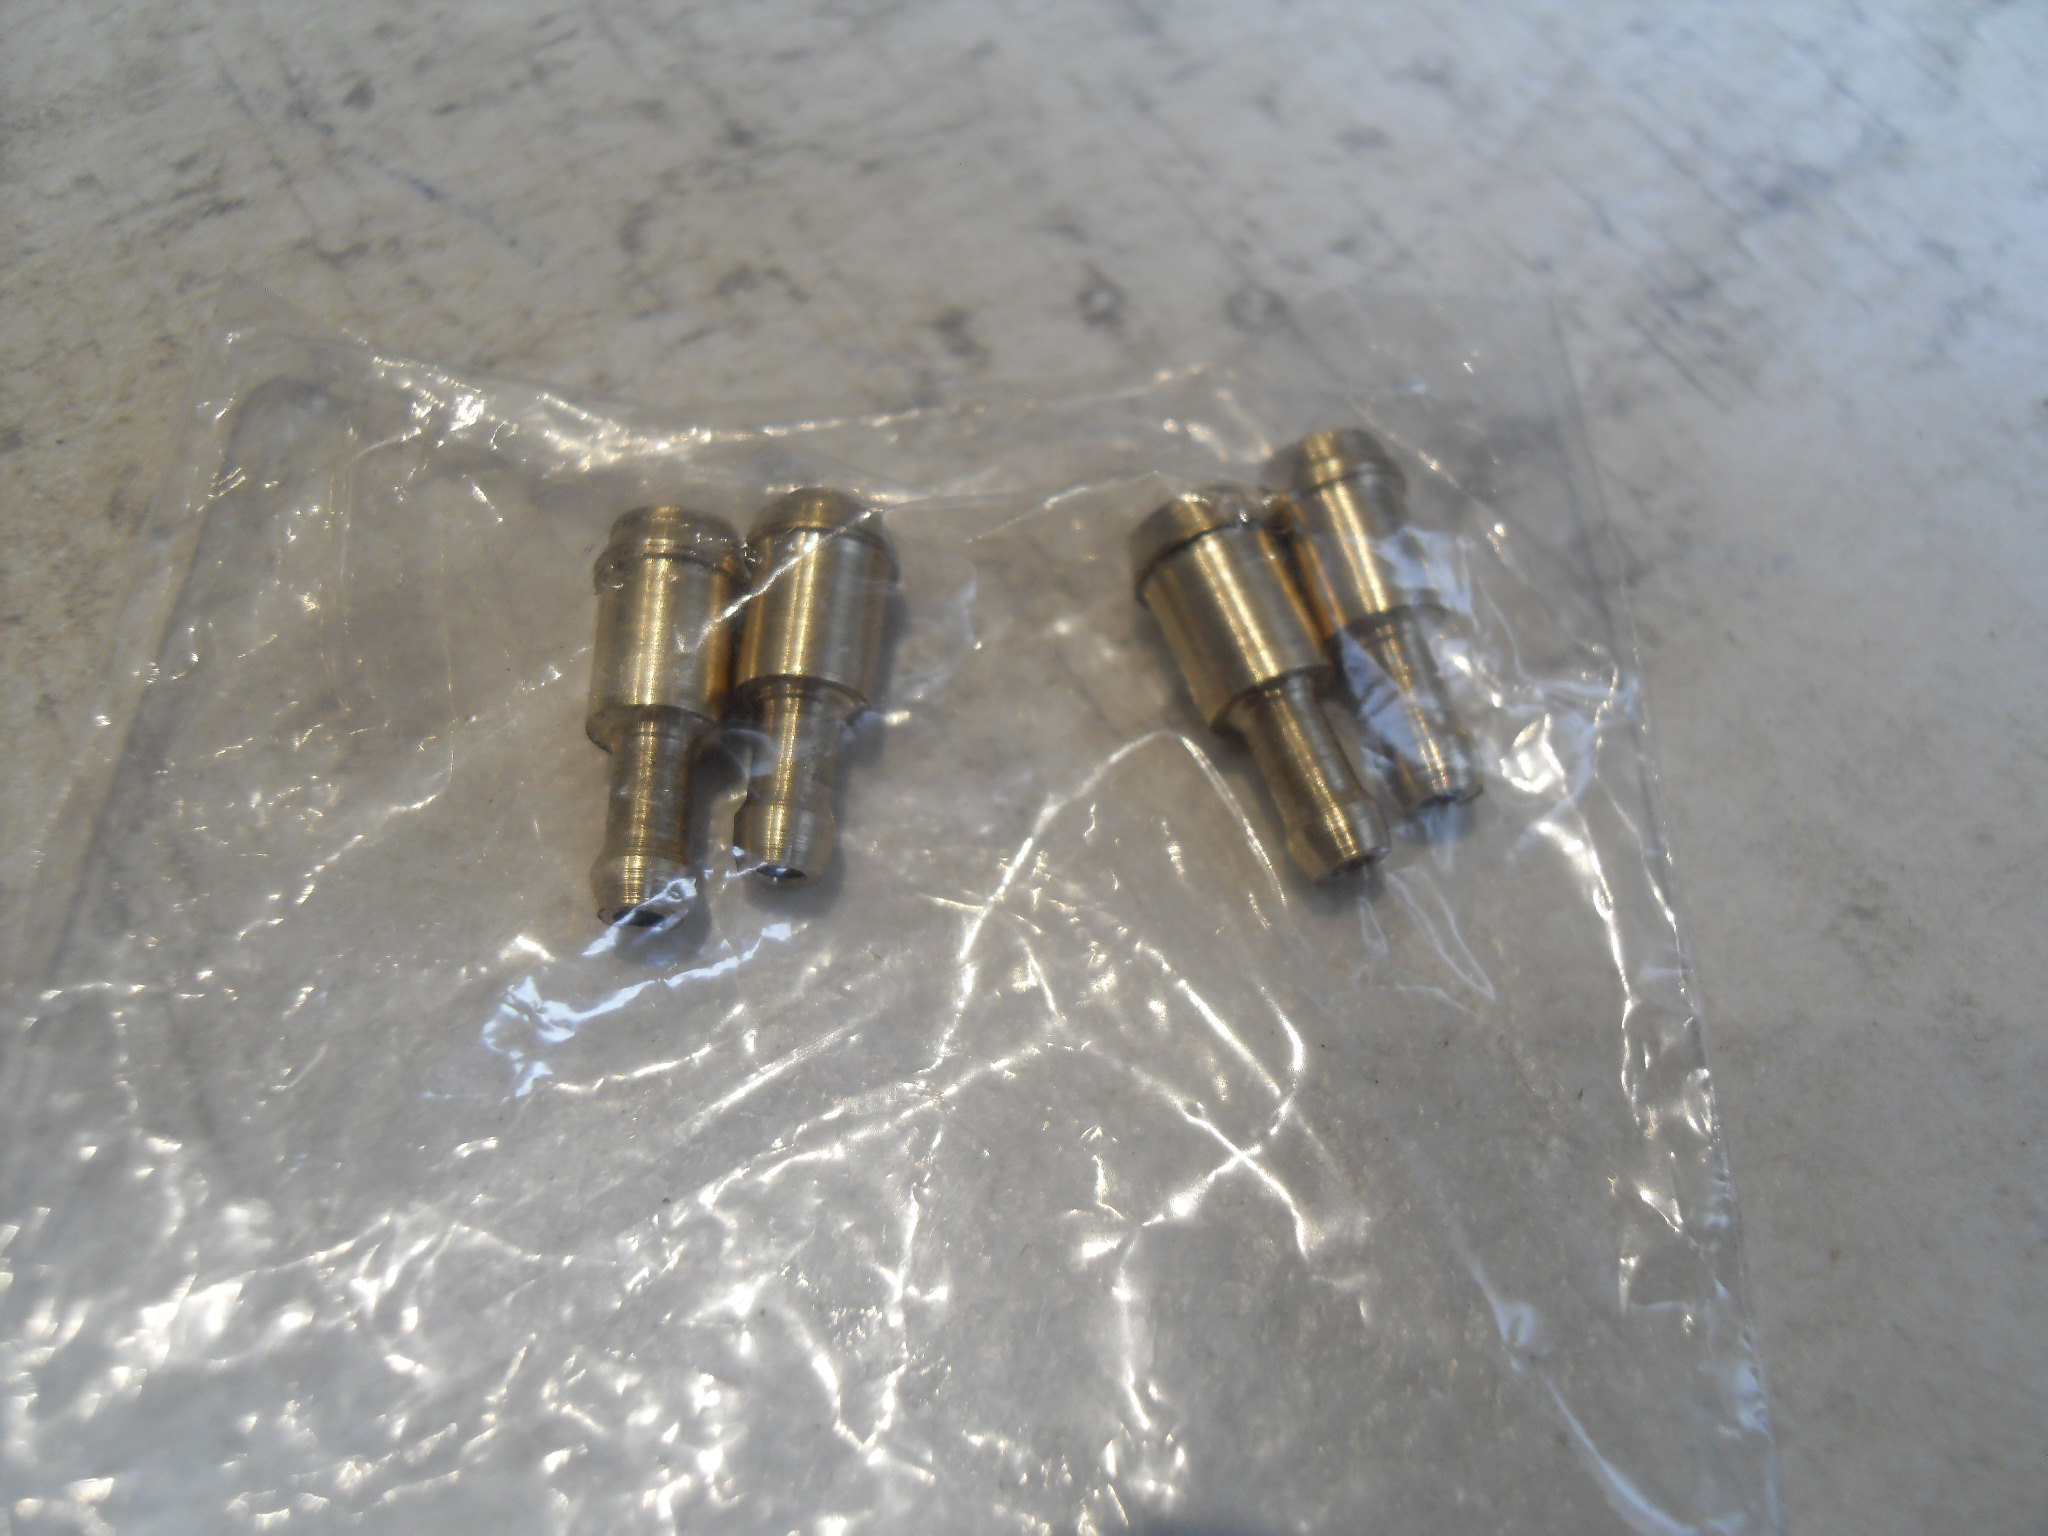
Staying with the last part of the oil pump and machining the reducers so the check valves that Stusco supplied will fit
The 6mm ID of the reducer formed
 SDC11812 SDC11812
Finished reducer
 SDC11813 SDC11813
Then repeated
 SDC11829 SDC11829
The finished product, (without clips installed) the check valves will sit under the carbs.
 SDC11814 SDC11814
I will check the output of the pump again (in the week) with 3 types of check valve, but I'm fairly sure all of them will be OK. So, that should be the 2 stroke oil system sorted .
I can now move on to mods to the generator cover, so the second pick up fits A bit more fabrication then 
Cheers, Mark
|
|
|
|
Post by Shytalk on May 17, 2020 20:03:14 GMT 1
That’s some fine work Mark.
|
|
|
|
Post by Yogi on May 17, 2020 22:47:28 GMT 1
Turning into a right little lathe expert ,nice job 👍
|
|
|
|
Post by 500RG on May 18, 2020 9:22:25 GMT 1
Cheers, Rattler, Nelly and Dusty.
Staying with the last part of the oil pump and machining the reducers so the check valves that Stusco supplied will fit
The 6mm ID of the reducer formed
SDC11812
Finished reducer
SDC11813
Then repeated
SDC11829
The finished product, (without clips installed) the check valves will sit under the carbs.
SDC11814
I will check the output of the pump again (in the week) with 3 types of check valve, but I'm fairly sure all of them will be OK. So, that should be the 2 stroke oil system sorted .
I can now move on to mods to the generator cover, so the second pick up fits A bit more fabrication then
Cheers, Mark
Great work Mark, your attention to detail is simply amazing 😉 |
|
|
|
Post by urbantangleweed on May 18, 2020 23:45:43 GMT 1
Fabulous work there 👍🏻
|
|
|
|
Post by yamark on May 24, 2020 20:00:10 GMT 1
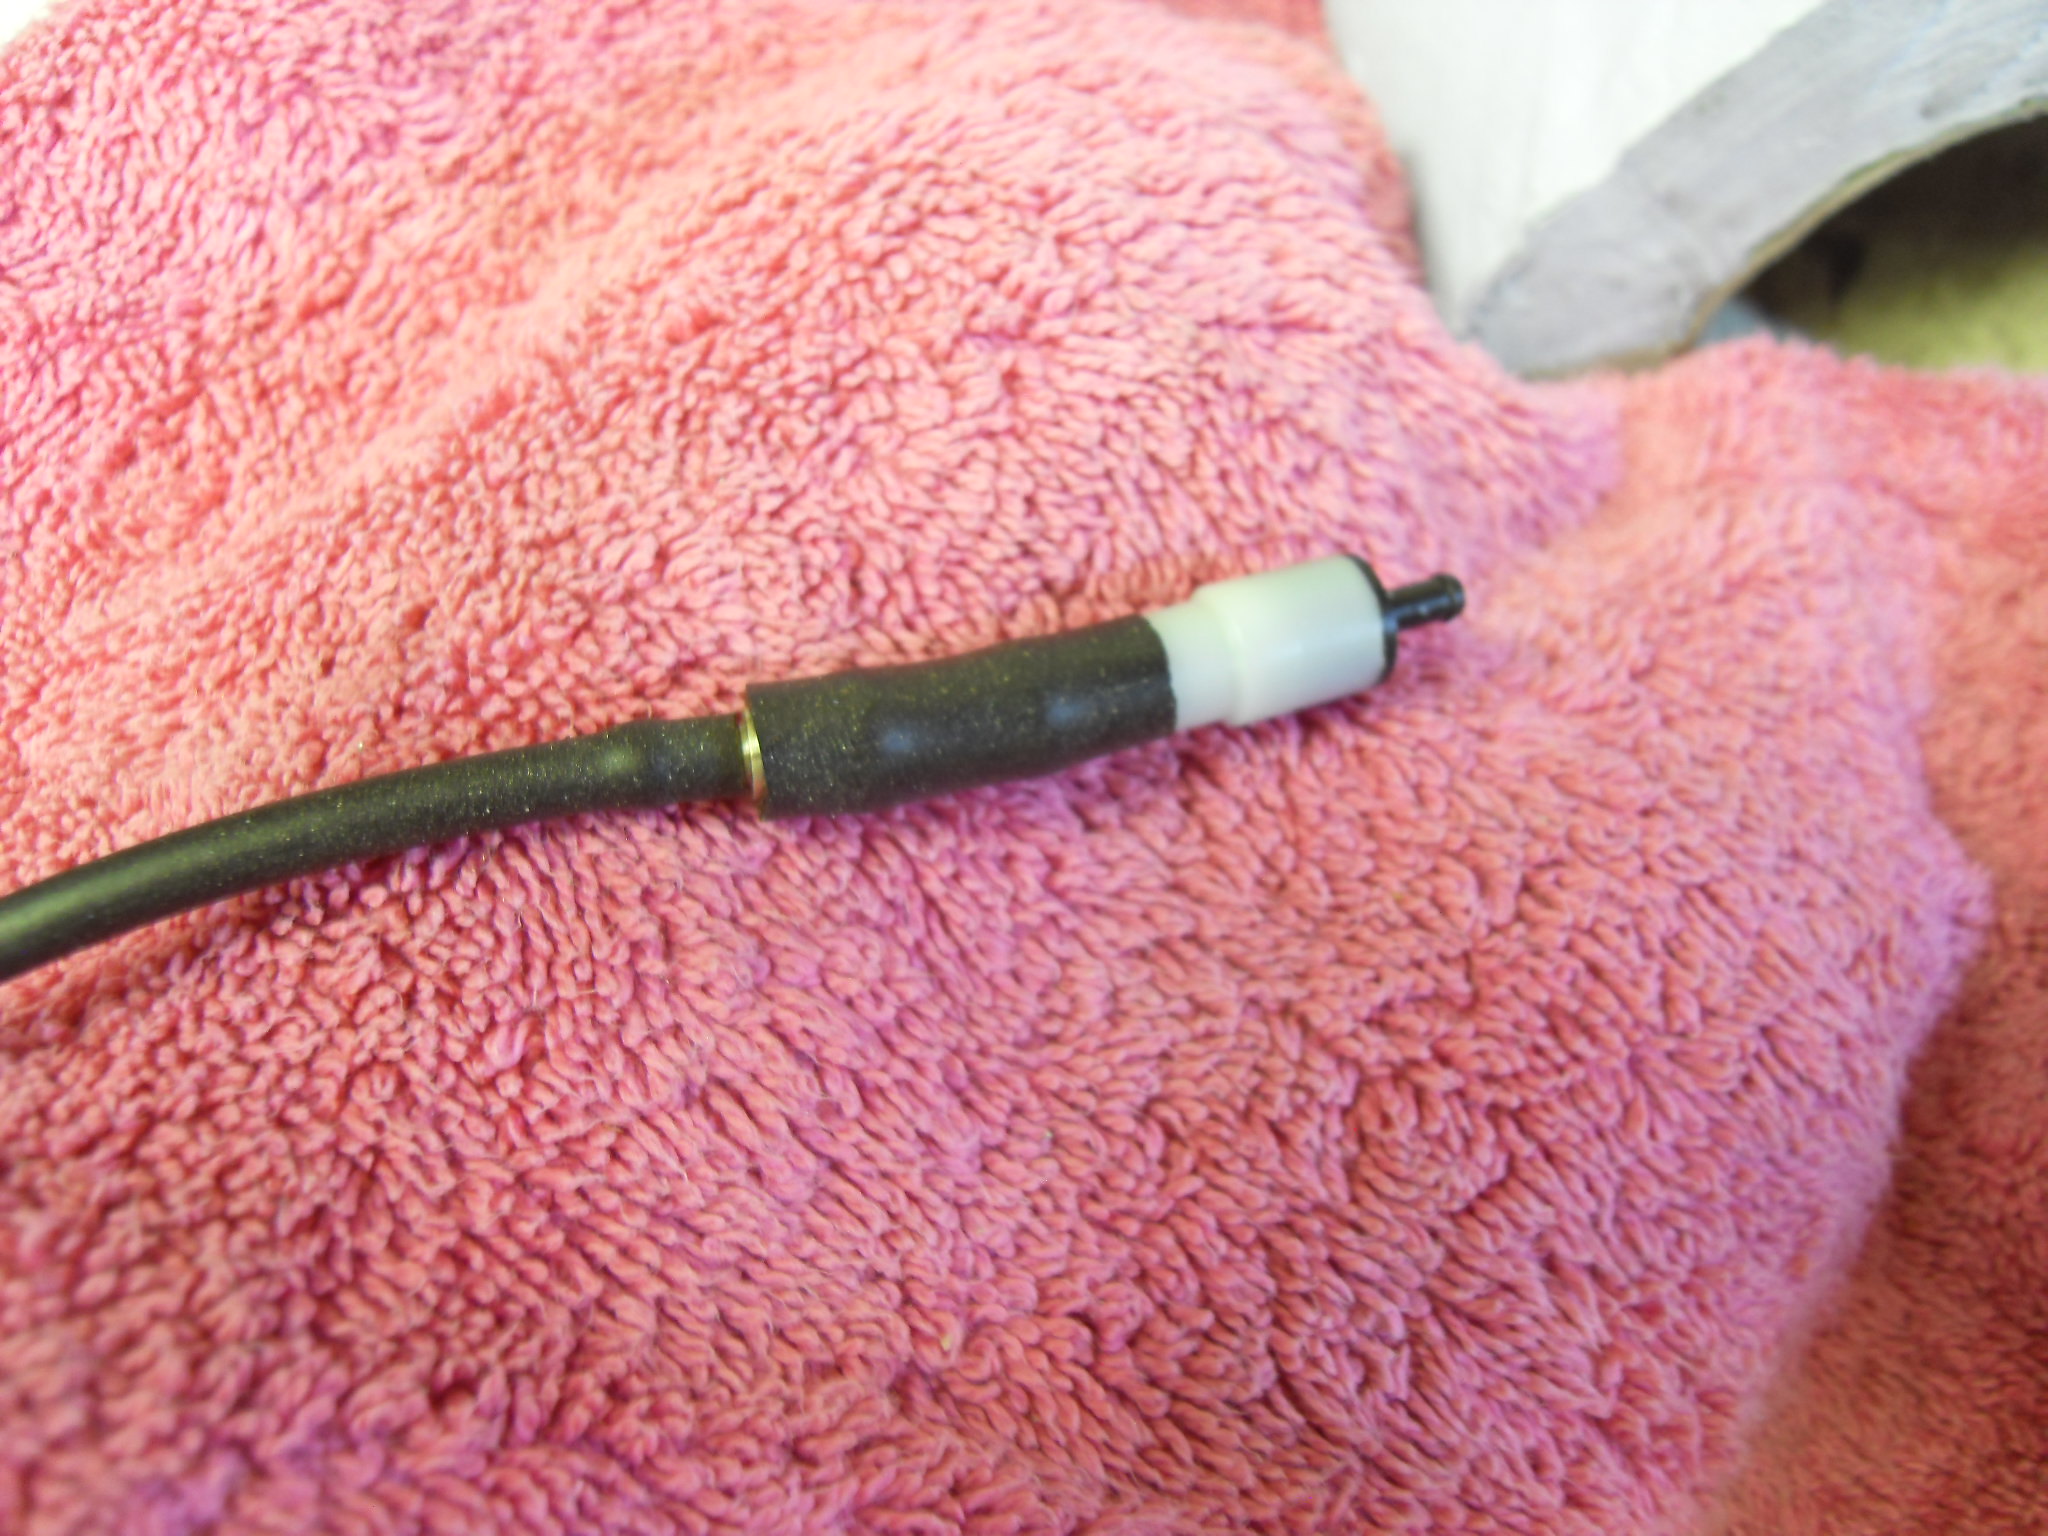
Oil Pump - last part
Carrying on from last week, I needed to test the output of the pump with the 3 chosen check valves. So the 3 valves on test are 1) plastic diaphragm valve 2) Suzuki in line valve (supplied by Stusco) 3) Pneumatic/oil valve
 SDC11846 SDC11846
I ran the pump for a little bit longer than the original test and compared the volumes. The original test was 2min 15 secs, I now ran the pump for 3 mins.
3 Mins, fully open LC pump - 2.6 ml (LC check valve in pump) RG pump 1) plastic valve - 2.8 ml 2) Suzuki valve - 2.6 ml 3) Pneumatic/oil valve - 2.5 ml
 SDC11847 SDC11847
Photo, showing the 3 valves
 SDC11848 SDC11848
So the check valves do restrict the oil flow. That brings the RG500 pump in line with the LC pump using the Suzuki in line check valve.
I'm now switching to the ignition. As I have 2 pick up coils, I have to modify the generator cover.
So I cut the raised section from my scrap cover
 SDC11831 SDC11831
And detached
 SDC11832 SDC11832
This section has to be modified and grafted on to the 700's generator cover.
Cheers, Mark
|
|
|
|
Post by rattler on May 24, 2020 20:04:48 GMT 1
Oil Pump - last part
Carrying on from last week, I needed to test the output of the pump with the 3 chosen check valves. So the 3 valves on test are 1) plastic diaphragm valve 2) Suzuki in line valve (supplied by Stusco) 3) Pneumatic/oil valve
SDC11846
This looks like some crazy science project !! ; ) = great work
|
|
|
|
Post by dusty350 on May 24, 2020 20:36:11 GMT 1
Great detective work mate I wonder how many other "multi cylinder" builds are running with a pump instead of premix ? Yours may be the only one Keep up the great work Dusty |
|
Deleted
Deleted Member
Posts: 0
|
Post by Deleted on May 26, 2020 10:33:54 GMT 1
You never cease to amaze me.
|
|
|
|
Post by yamark on May 31, 2020 19:49:44 GMT 1
Great detective work mate I wonder how many other "multi cylinder" builds are running with a pump instead of premix ? Yours may be the only one Keep up the great work Dusty Hi mate, as far as I'm aware it's never been done. Allen Millyard used a late H2 oil pump (4 outlets) and a Kawasaki bottom end for his 4 cylinder 500LC. I'm assuming all of his 5 cylinder machines run on premix
|
|
|
|
Post by veg on May 31, 2020 19:58:09 GMT 1
Where’s the we aren’t worthy emoji? 🥺?
Bloody amazing work as always mark 👍
|
|
|
|
Post by yamark on May 31, 2020 20:30:14 GMT 1
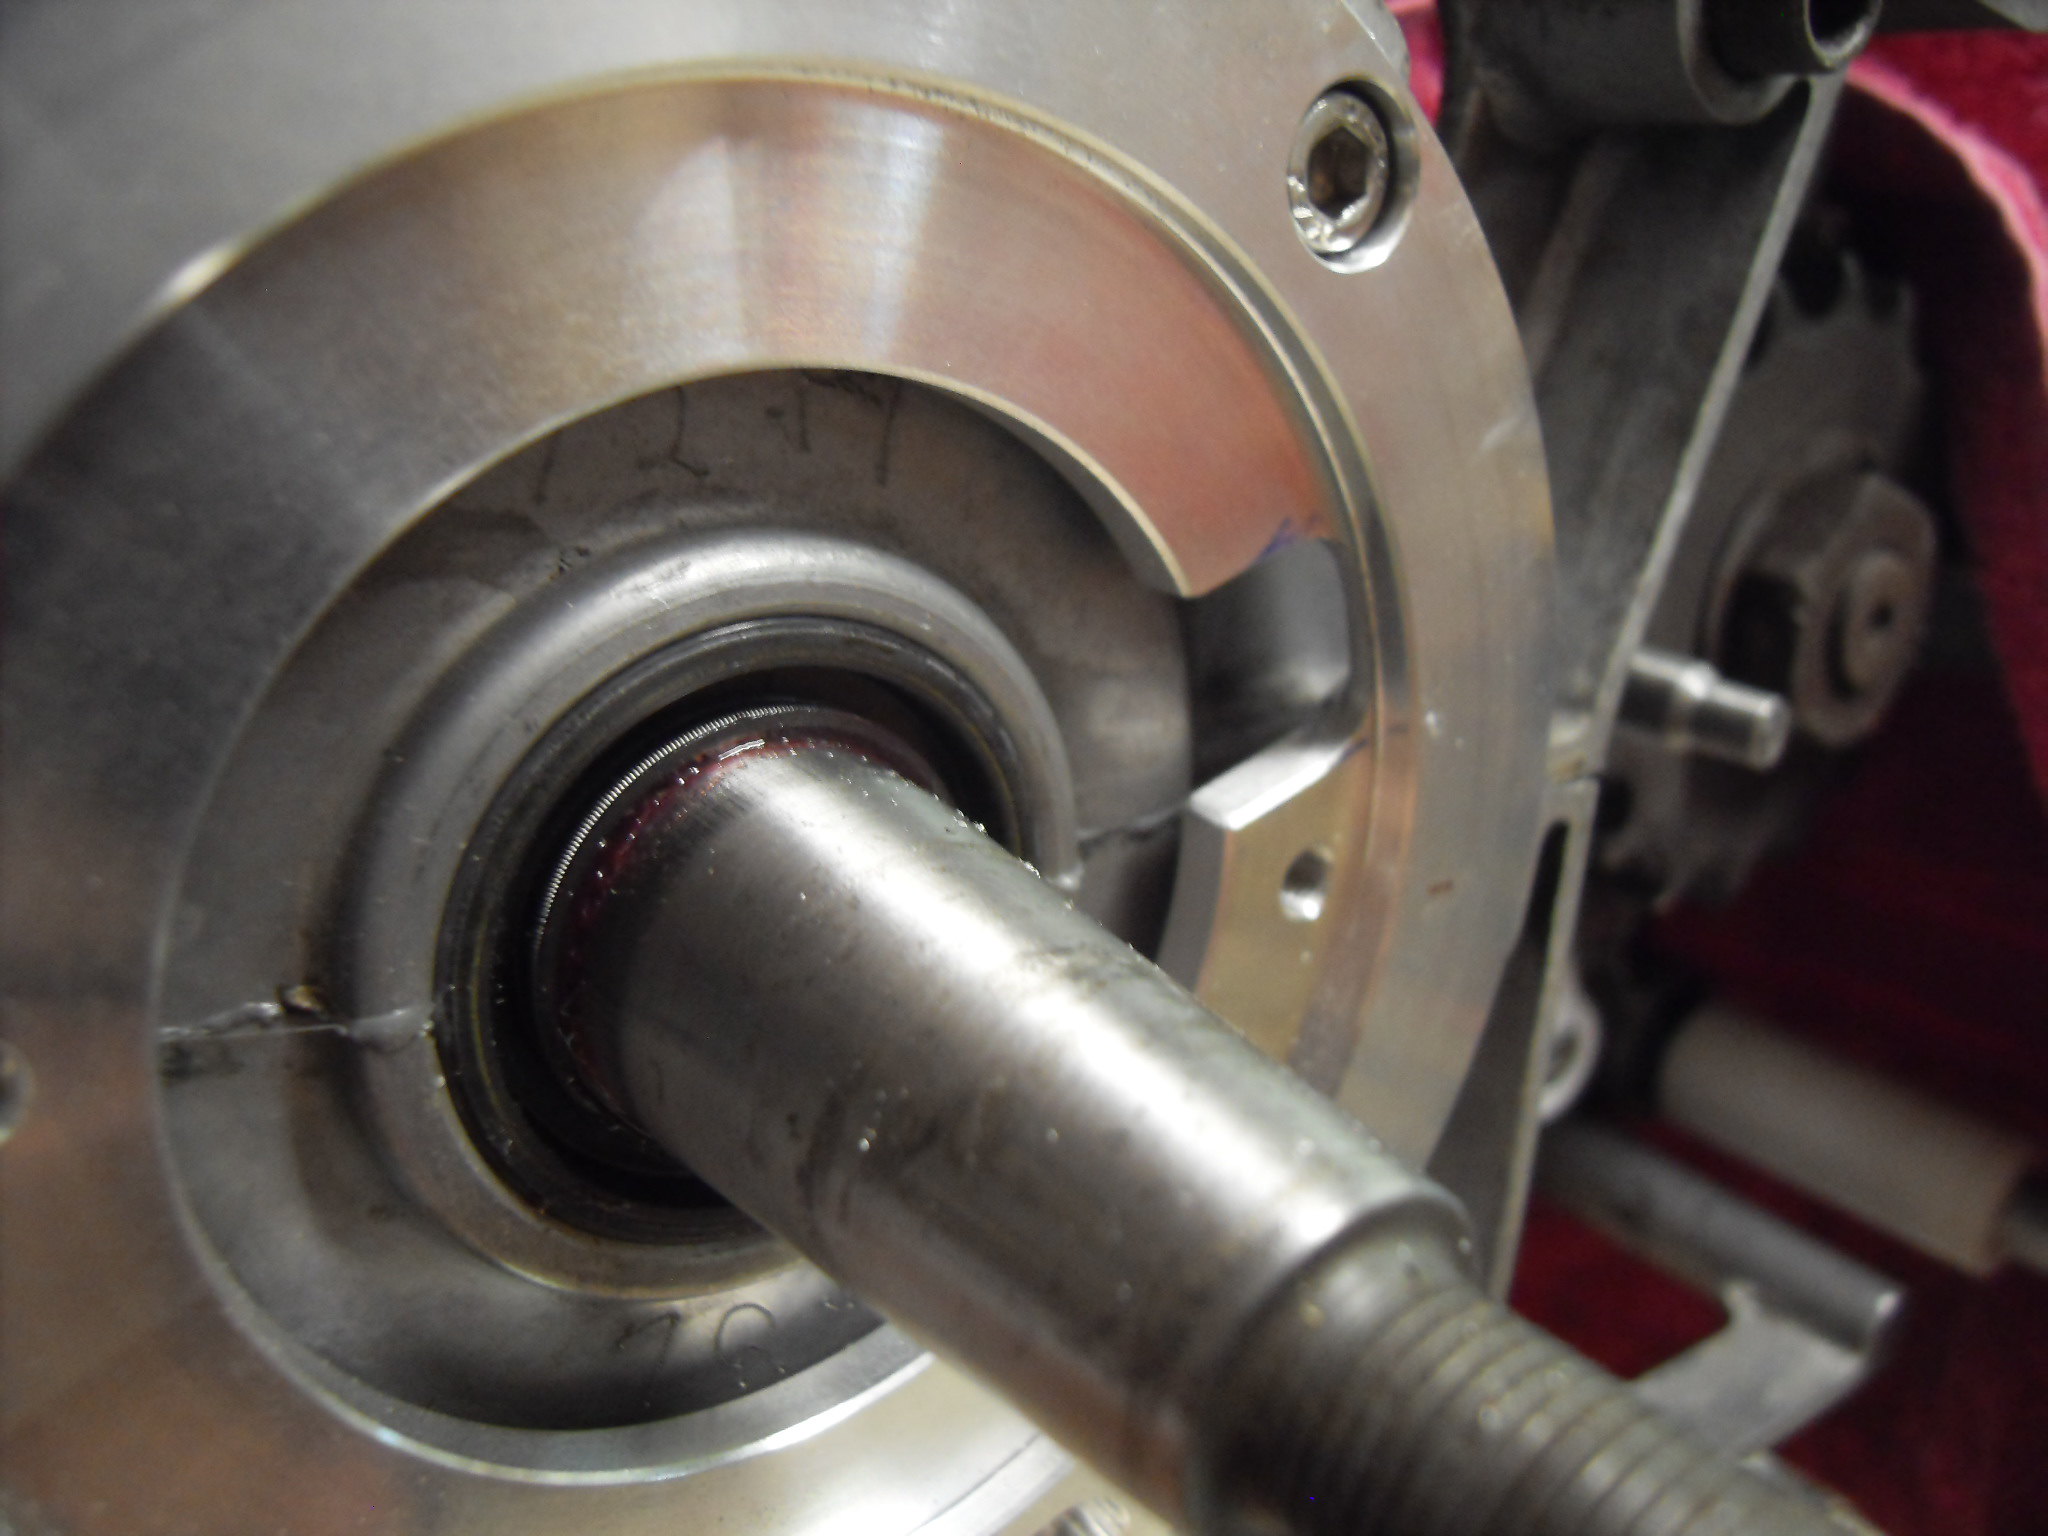
Ignition
I'm running out of things to do, as I wait for the bike to come back "from lockdown". I have a spare engine that I can check the generator and modified ignition fits.
So I mount the modded generator to check the second pick up clearance
 SDC11833 SDC11833
I then cut my scrap genny cover to clear the second pick up
 SDC11840 SDC11840
Next, I cut and shape a new raised section to be welded to my generator cover (the generator cover I'll be using is with Mick Abbey). This is the most standard looking I could make it after much head scratching.
 SDC11841 SDC11841
So now the next hurdle is the cables from the generator exit at about 4 o'clock as it's a YPVS power dynamo, so I have to modify the base plate as there is no room for the cables to sit behind the plate- the crankcase join leaves a tiny gap.
 SDC11842 SDC11842
The new exit route is then formed
 SDC11843 SDC11843
And bolted in place. You can now see the raised section where the case halves join that closes off the cable route.
 SDC11844 SDC11844
And assembled to check it all fits. The pick up connections and cable routes are straight forward.
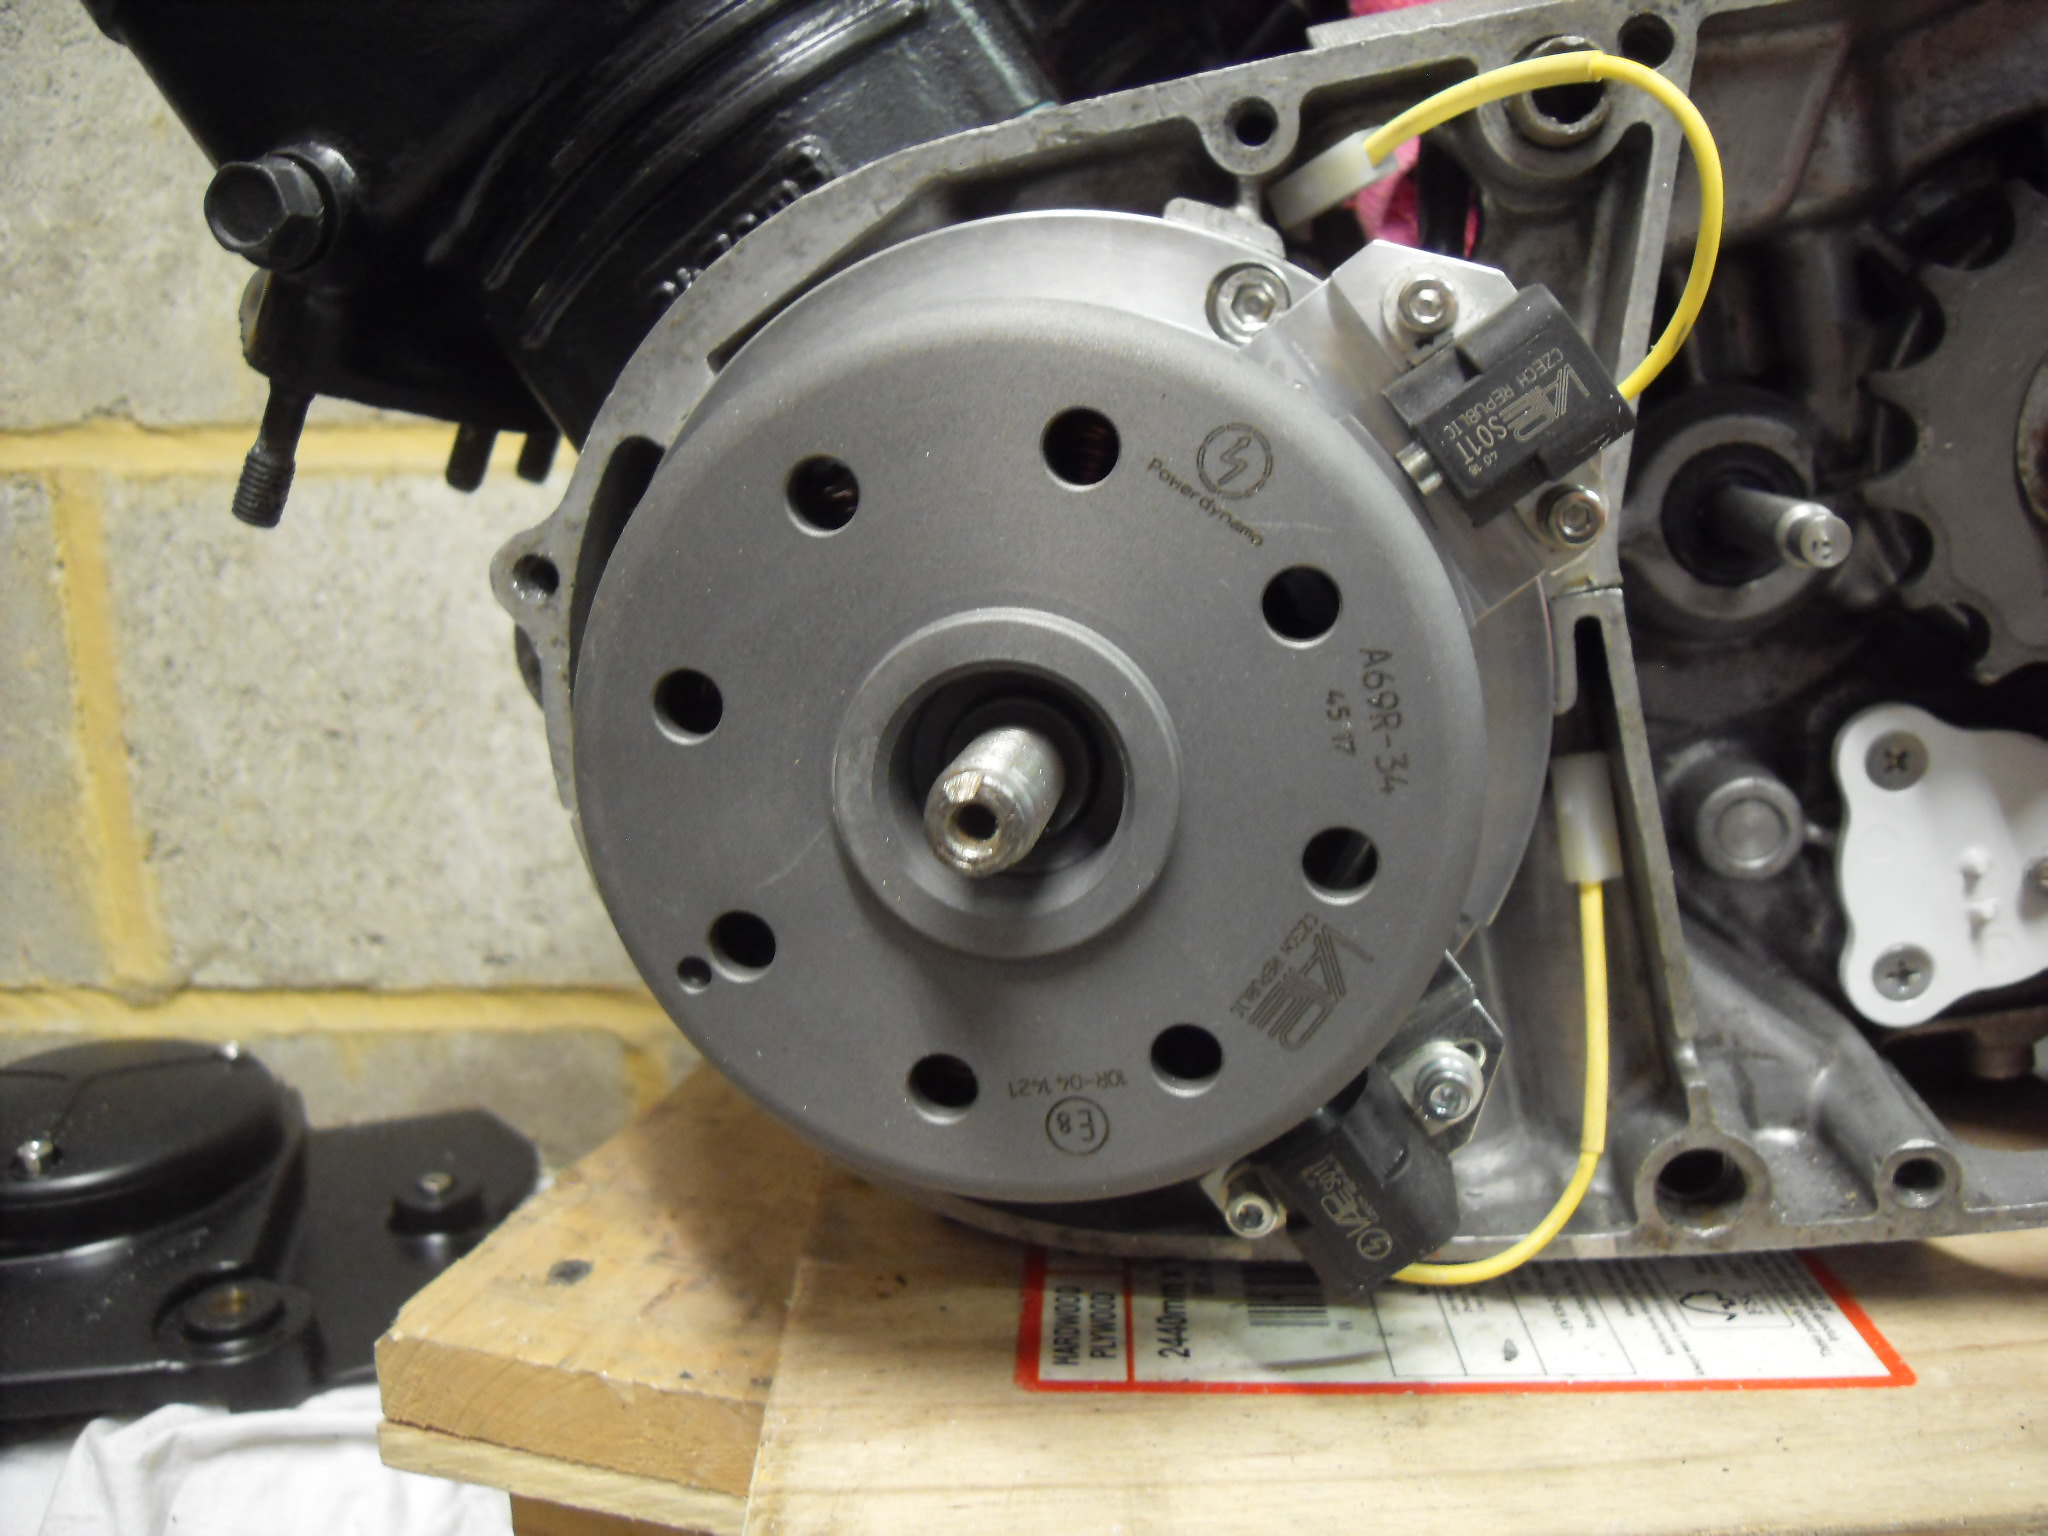 SDC11845 SDC11845
So that's the ignition and generator sorted
Clutch, pushrod, gearbox shaft, crankshaft and coolant outlets to go and the engine mods will be finished.
Cheers, Mark
|
|
|
|
Post by dusty350 on May 31, 2020 20:42:18 GMT 1
Flying through it now Mark That cover will look "factory" once you've finished it, and really trick too Dusty |
|
|
|
Post by oldbritguy on May 31, 2020 21:17:34 GMT 1
Really great stuff here Mark. Thoroughly enjoying the problem solving and the top fabrication to make it work.
You have also become a dab hand on that lathe now too. Top skills 👍
John😉
|
|
|
|
Post by spacejunkie on May 31, 2020 21:21:43 GMT 1
Gonna love to see this all done it’s gonna go like a mad possessed b*****d 😂
If my hybrid is as half as good as your creations I will be happy
|
|
|
|
Post by yamark on Jun 7, 2020 21:02:24 GMT 1
Cheers Dusty, Oldbritguy and spacejunkie.
Front Brakes
I'm using an early R6 front end, with RWU forks. A while back, I bought some blue spot calipers, but quickly realised there will be no blue on the bike. They also need new seals, bleed valves, pads etc
So, I degrease first, and connect the caliper to an old master cylinder. I then pump out the pistons to check they move. I also limit their movement so the pistons don't fully come out. Then, I push the outboard pistons back into their bores. Next, I remove the inboard pistons
 SDC11849 SDC11849
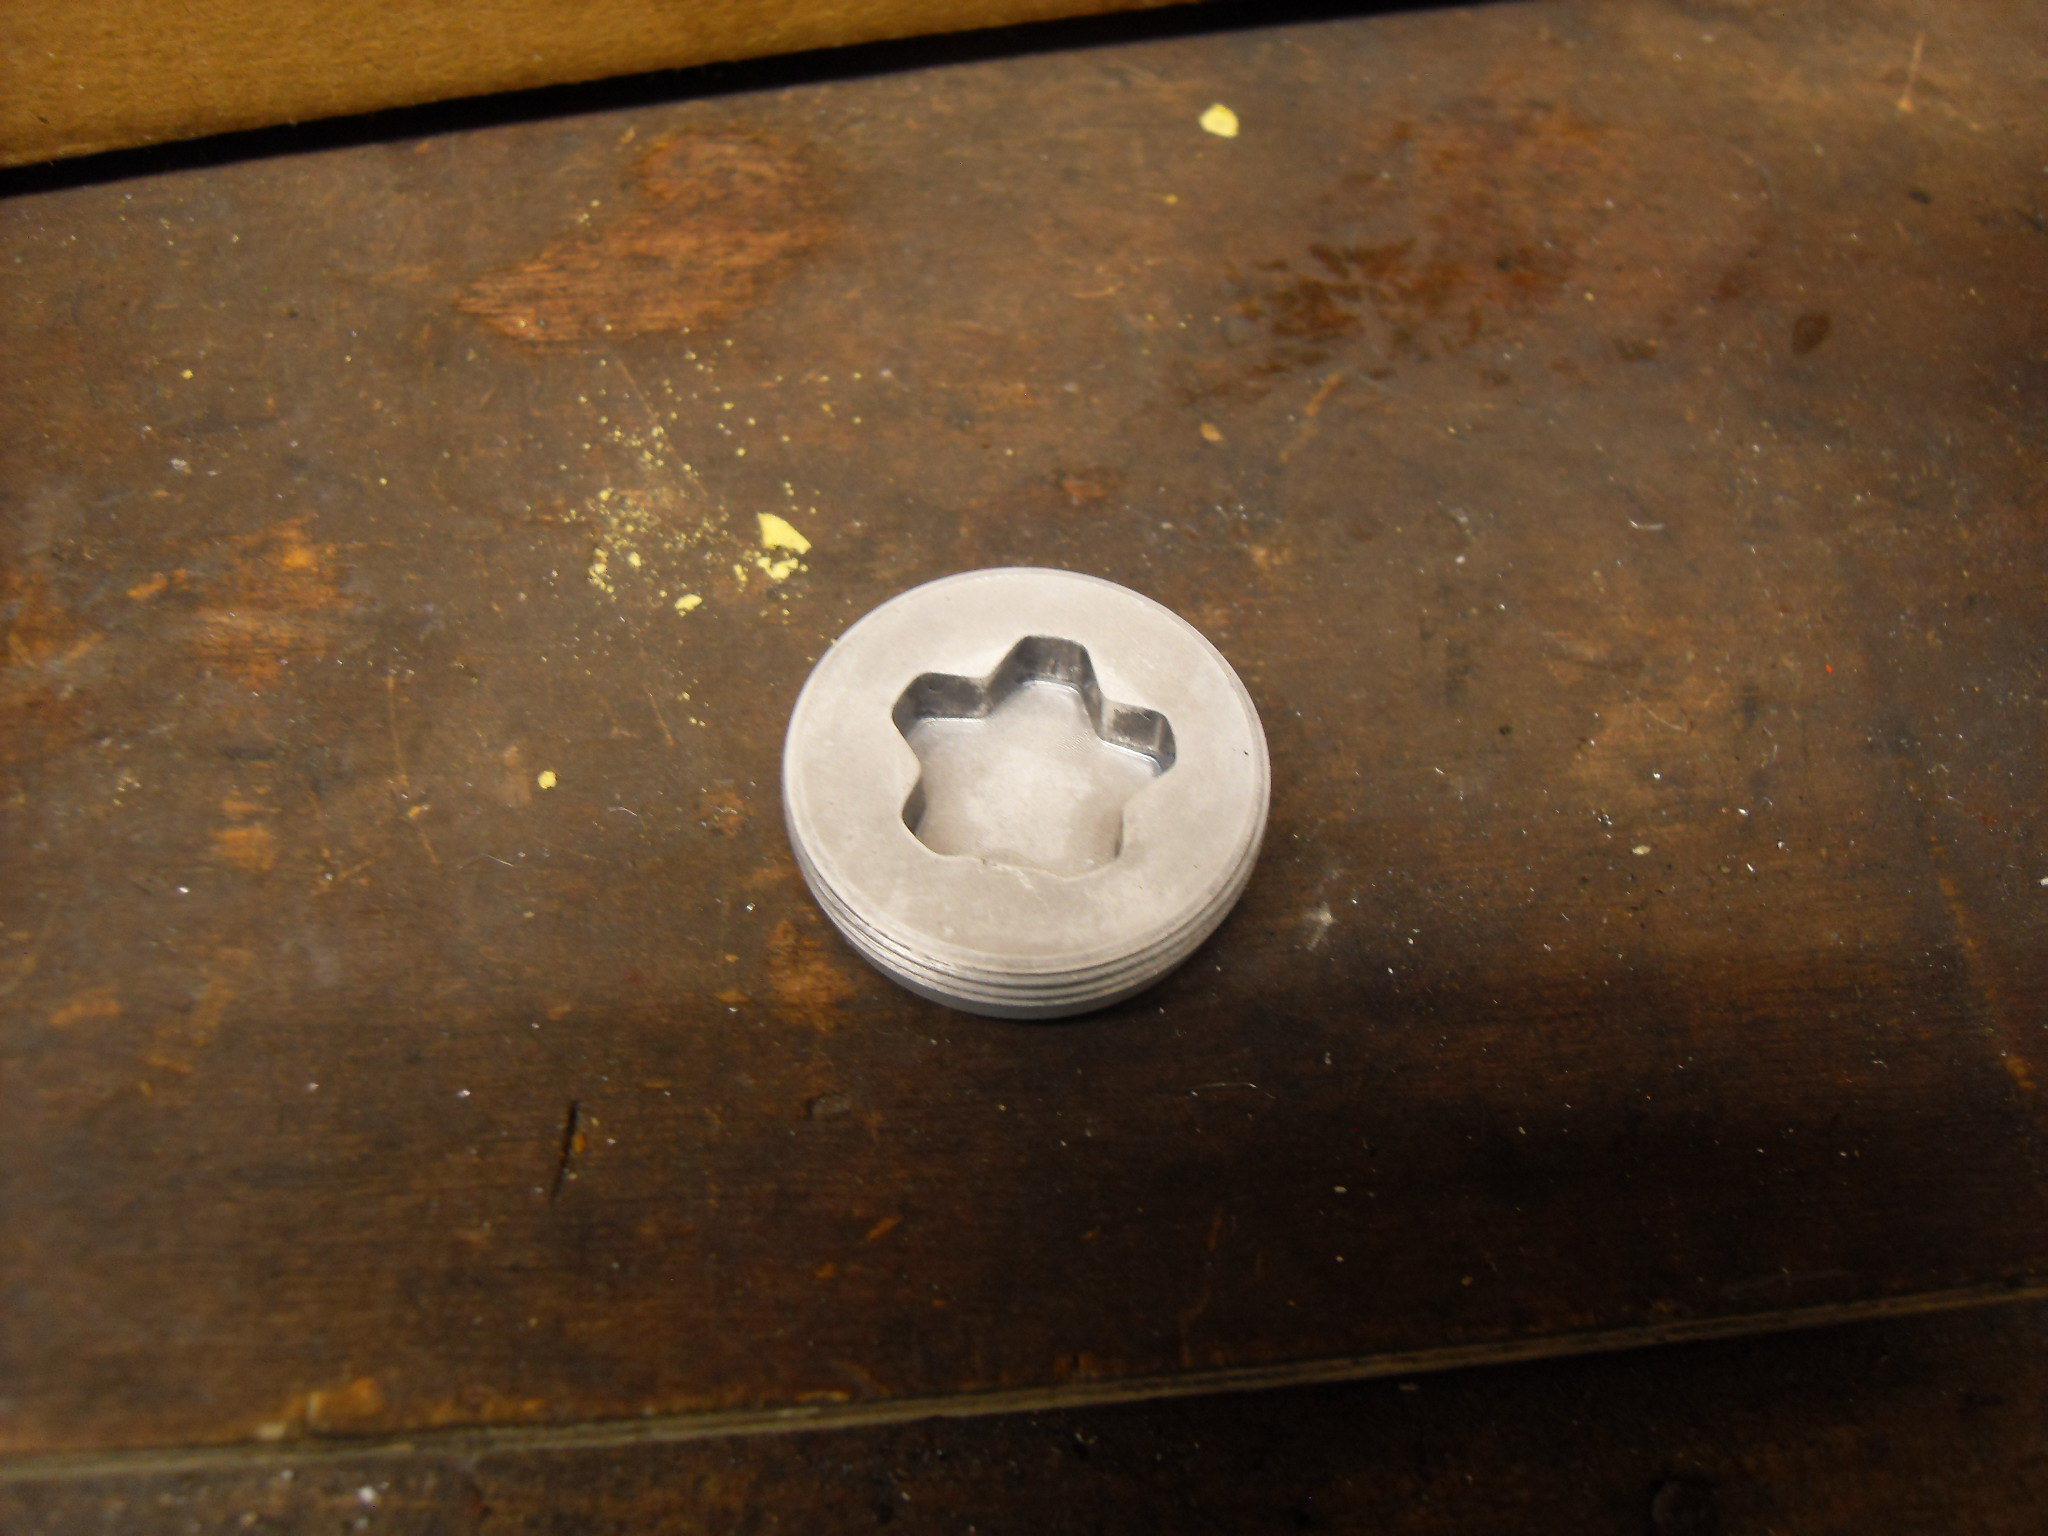
I then remove the 2 star discs using the special tool and protect the ali disc with a latex glove
 SDC11850 SDC11850
You can then push the last 2 pistons out
 SDC11851 SDC11851
That's all the components out.
 SDC11852 SDC11852
The plan is to remove the anodising, and polish the star discs, then paint and new seals etc
Cheers, Mark
|
|
|
|
Post by Yogi on Jun 7, 2020 21:12:53 GMT 1
Coming along Great guns now mate 👌
I’ve got a few sets of blue spots that will need the same treatment so at least I’ve got
this to follow 👍 if I get in bother
|
|
|
|
Post by cb250g5 on Jun 7, 2020 21:18:01 GMT 1
Not sure it really matters, but I've always removed & replaced the pistons on the blue spots through the blue spot holes, after removing them.
|
|
|
|
Post by nokturnal on Jun 7, 2020 23:07:29 GMT 1
Fz07 is the same caliper with silver plugs. I’m using 2017 calipers on my bike.
|
|
|
|
Post by oldbritguy on Jun 7, 2020 23:33:25 GMT 1
Nice one with the brakes Mark I have always liked the blue spots but have been put off by the blue anodized bits. I now know there are different coloured variants of these but will be watching eagerly how these ones turn out when you are finished John |
|
|
|
Post by cb250g5 on Jun 8, 2020 9:38:04 GMT 1
Blue, silver & gold.
I have 1 of each across bikes.
Blue is standard steel pistons.
Silver is supposed to be stainless pistons, mine wasn't, but is now.
Gold are aluminium pistons. Big thick meaty things they are as well. All use same seals, so I suspect the caliper bodies didn't change, just the piston material and anodised colour of plugs.
|
|
|
|
Post by Tobyjugs on Jun 9, 2020 18:07:02 GMT 1
Blue, silver & gold. I have 1 of each across bikes. Blue is standard steel pistons. Silver is supposed to be stainless pistons, mine wasn't, but is now. Gold are aluminium pistons. Big thick meaty things they are as well. All use same seals, so I suspect the caliper bodies didn't change, just the piston material and anodised colour of plugs. Handy to know |
|
|
|
Post by Denzil on Jun 10, 2020 7:46:53 GMT 1
Fabulous work and engineering skills, so enjoying this build.
|
|
|
|
Post by yamark on Jun 14, 2020 19:38:18 GMT 1
Cheers lads, and thanks for the info cb250g5. I paid £50 for the pair of blue spots, the FZ and MT silver calipers are around double that, but I almost wish I'd gone down that route. I always inspect pistons and renew seals with brakes, I never take chances with steering, tyres and brakes!
Disc ready for cleaning, the seal has been removed
 SDC11854 SDC11854
After a bit of research, Oven pride (oven cleaner) is the product to use to remove the anodising. £3 on offer in Tesco *Wear gloves* it causes burns. So I pour the liquid into a cup and immerse a disc. It sort of creates a white and blue foam on contact. I left the disc in for 10 minutes.
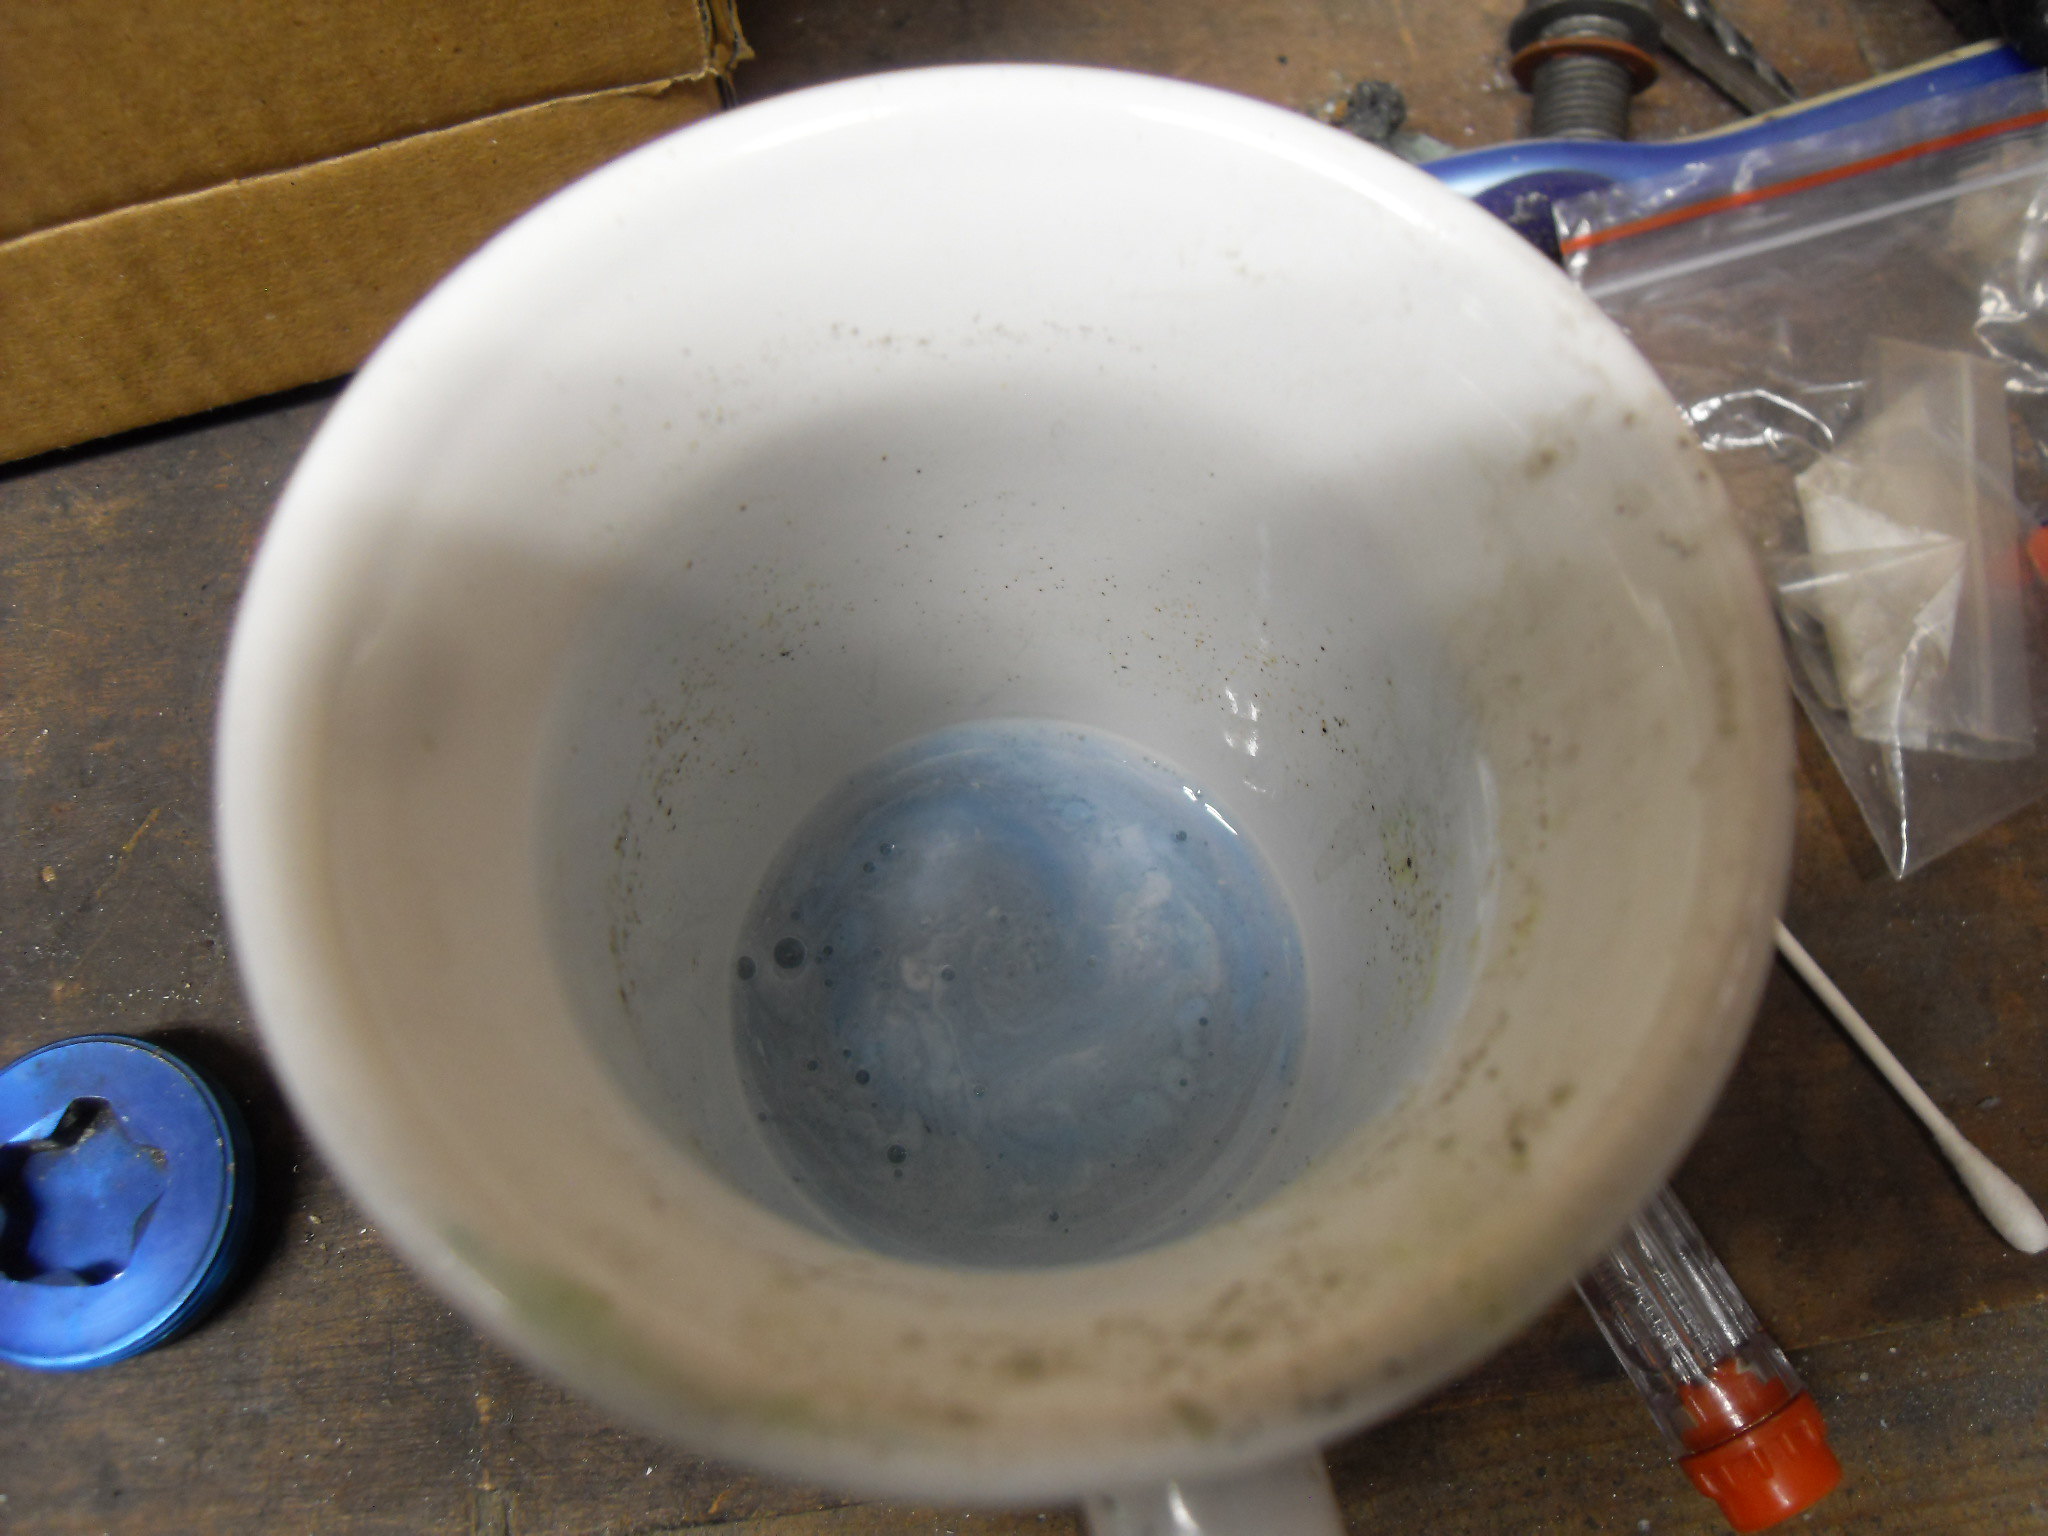 SDC11855 SDC11855
This is how the disc comes out after a bit of scrubbing with an old tooth brush
 SDC11856 SDC11856
Now while the colour is removed easily, there is still the remaining anodising left. This is new to me, but the best way to describe it is if you put the disc back in the oven cleaner it keeps softening this layer. You can then keep scraping until it's removed. It took me a few goes, and I practiced on the inside of the disc first, but patience is the key.
Now this image shows the different stages, left- colour removed, centre- anodising removed, right- polished.
 SDC11857 SDC11857
It takes a while to get into all the corners, but I wanted the discs polished.
Cheers, Mark
|
|


