|
|
Post by dusty350 on Jun 14, 2020 21:46:18 GMT 1
Well worth the effort mate. Few years back I bought some stainless discs off ebay that stuck over the top of tatty blue spots. They looked ok, but I would much prefer the look you have achieved with yours  Good job Dusty  |
|
Deleted
Deleted Member
Posts: 0
|
Post by Deleted on Jun 15, 2020 0:46:23 GMT 1
Just a suggestion Mark
Oven cleaner and aluminium aren’t good mates, the strong alkali dissolves the metal and leaves it in-passivated
Another way is to use phosphoric acid in 15 parts water to 1 part phosphoric mix, heat this solution up to just under boiling
Put you parts in this mix for about 2-3 minutes checking to see if the coating has gone, if it’s particularly stubborn leave it in there for a minute at a time
Rinse thoroughly and do your polishing
Or you could try immersing them in a glass of coke, probably easier to get hold of, this works to shine old copper pennies (will also dissolve a cube of meat overnight), Coke contains weak phosphoric acid
It will be trial and error with the coke as to how long to leave it in there for though, certainly much safer than spraying oven cleaner around
Love your work
|
|
gidsrz350
L plate rider.
 Two-stroke crazy fan
Posts: 21 
|
Post by gidsrz350 on Jun 15, 2020 18:45:49 GMT 1
Keep us informed with the build, very interesting project!!
|
|
|
|
RD700LC
Jun 21, 2020 18:18:51 GMT 1
Post by yamark on Jun 21, 2020 18:18:51 GMT 1
Just a suggestion Mark Oven cleaner and aluminium aren’t good mates, the strong alkali dissolves the metal and leaves it in-passivated Another way is to use phosphoric acid in 15 parts water to 1 part phosphoric mix, heat this solution up to just under boiling Put you parts in this mix for about 2-3 minutes checking to see if the coating has gone, if it’s particularly stubborn leave it in there for a minute at a time Rinse thoroughly and do your polishing Or you could try immersing them in a glass of coke, probably easier to get hold of, this works to shine old copper pennies (will also dissolve a cube of meat overnight), Coke contains weak phosphoric acid It will be trial and error with the coke as to how long to leave it in there for though, certainly much safer than spraying oven cleaner around Love your work Always learning, I wish I'd chosen chemistry for "O" level  . . With the oven cleaner, it felt very controlled, but quite difficult to scrape all the layers off down to bare aluminium. I thoroughly rinsed the discs and then put them in a solution of bicarbonate of soda to neutralise them. Then polished. I'll try phosphoric acid next time
|
|
|
|
Post by yamark on Jun 21, 2020 18:36:04 GMT 1
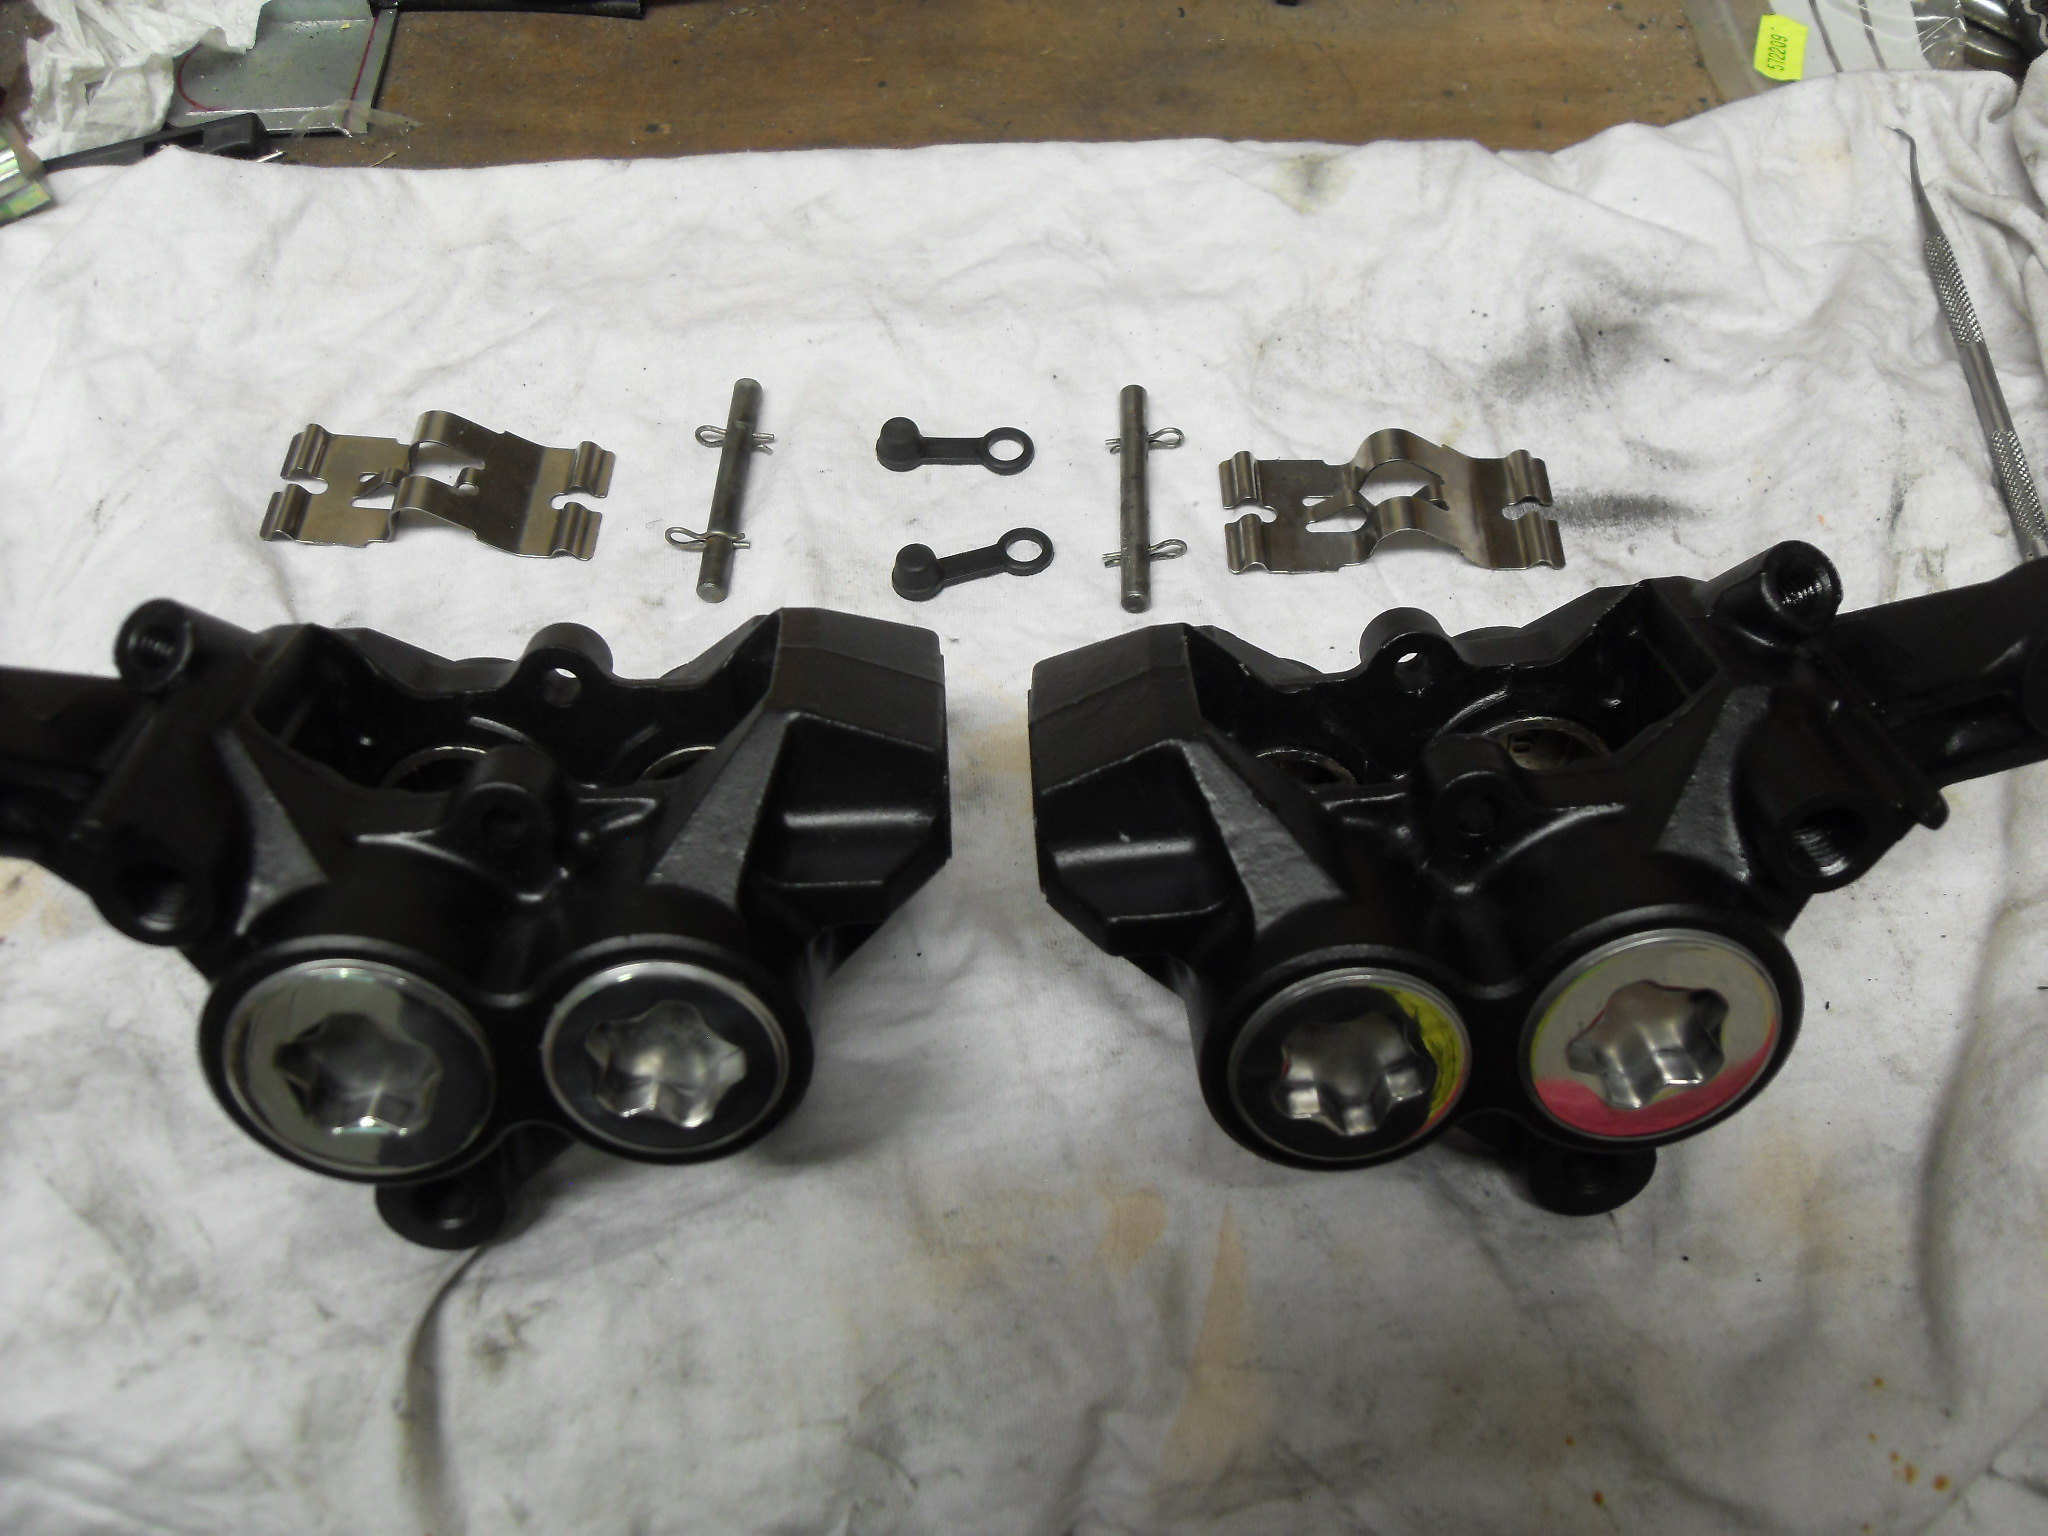
Front brakes
I degrease and paint the calipers in heatproof satin black. After polishing the discs and putting a protective layer of wax on them, I lay out all the components.
 SDC11858 SDC11858
I then get the old seals and dust seals out using a dental tool
 SDC11859 SDC11859
You just pierce the seal and pull it out
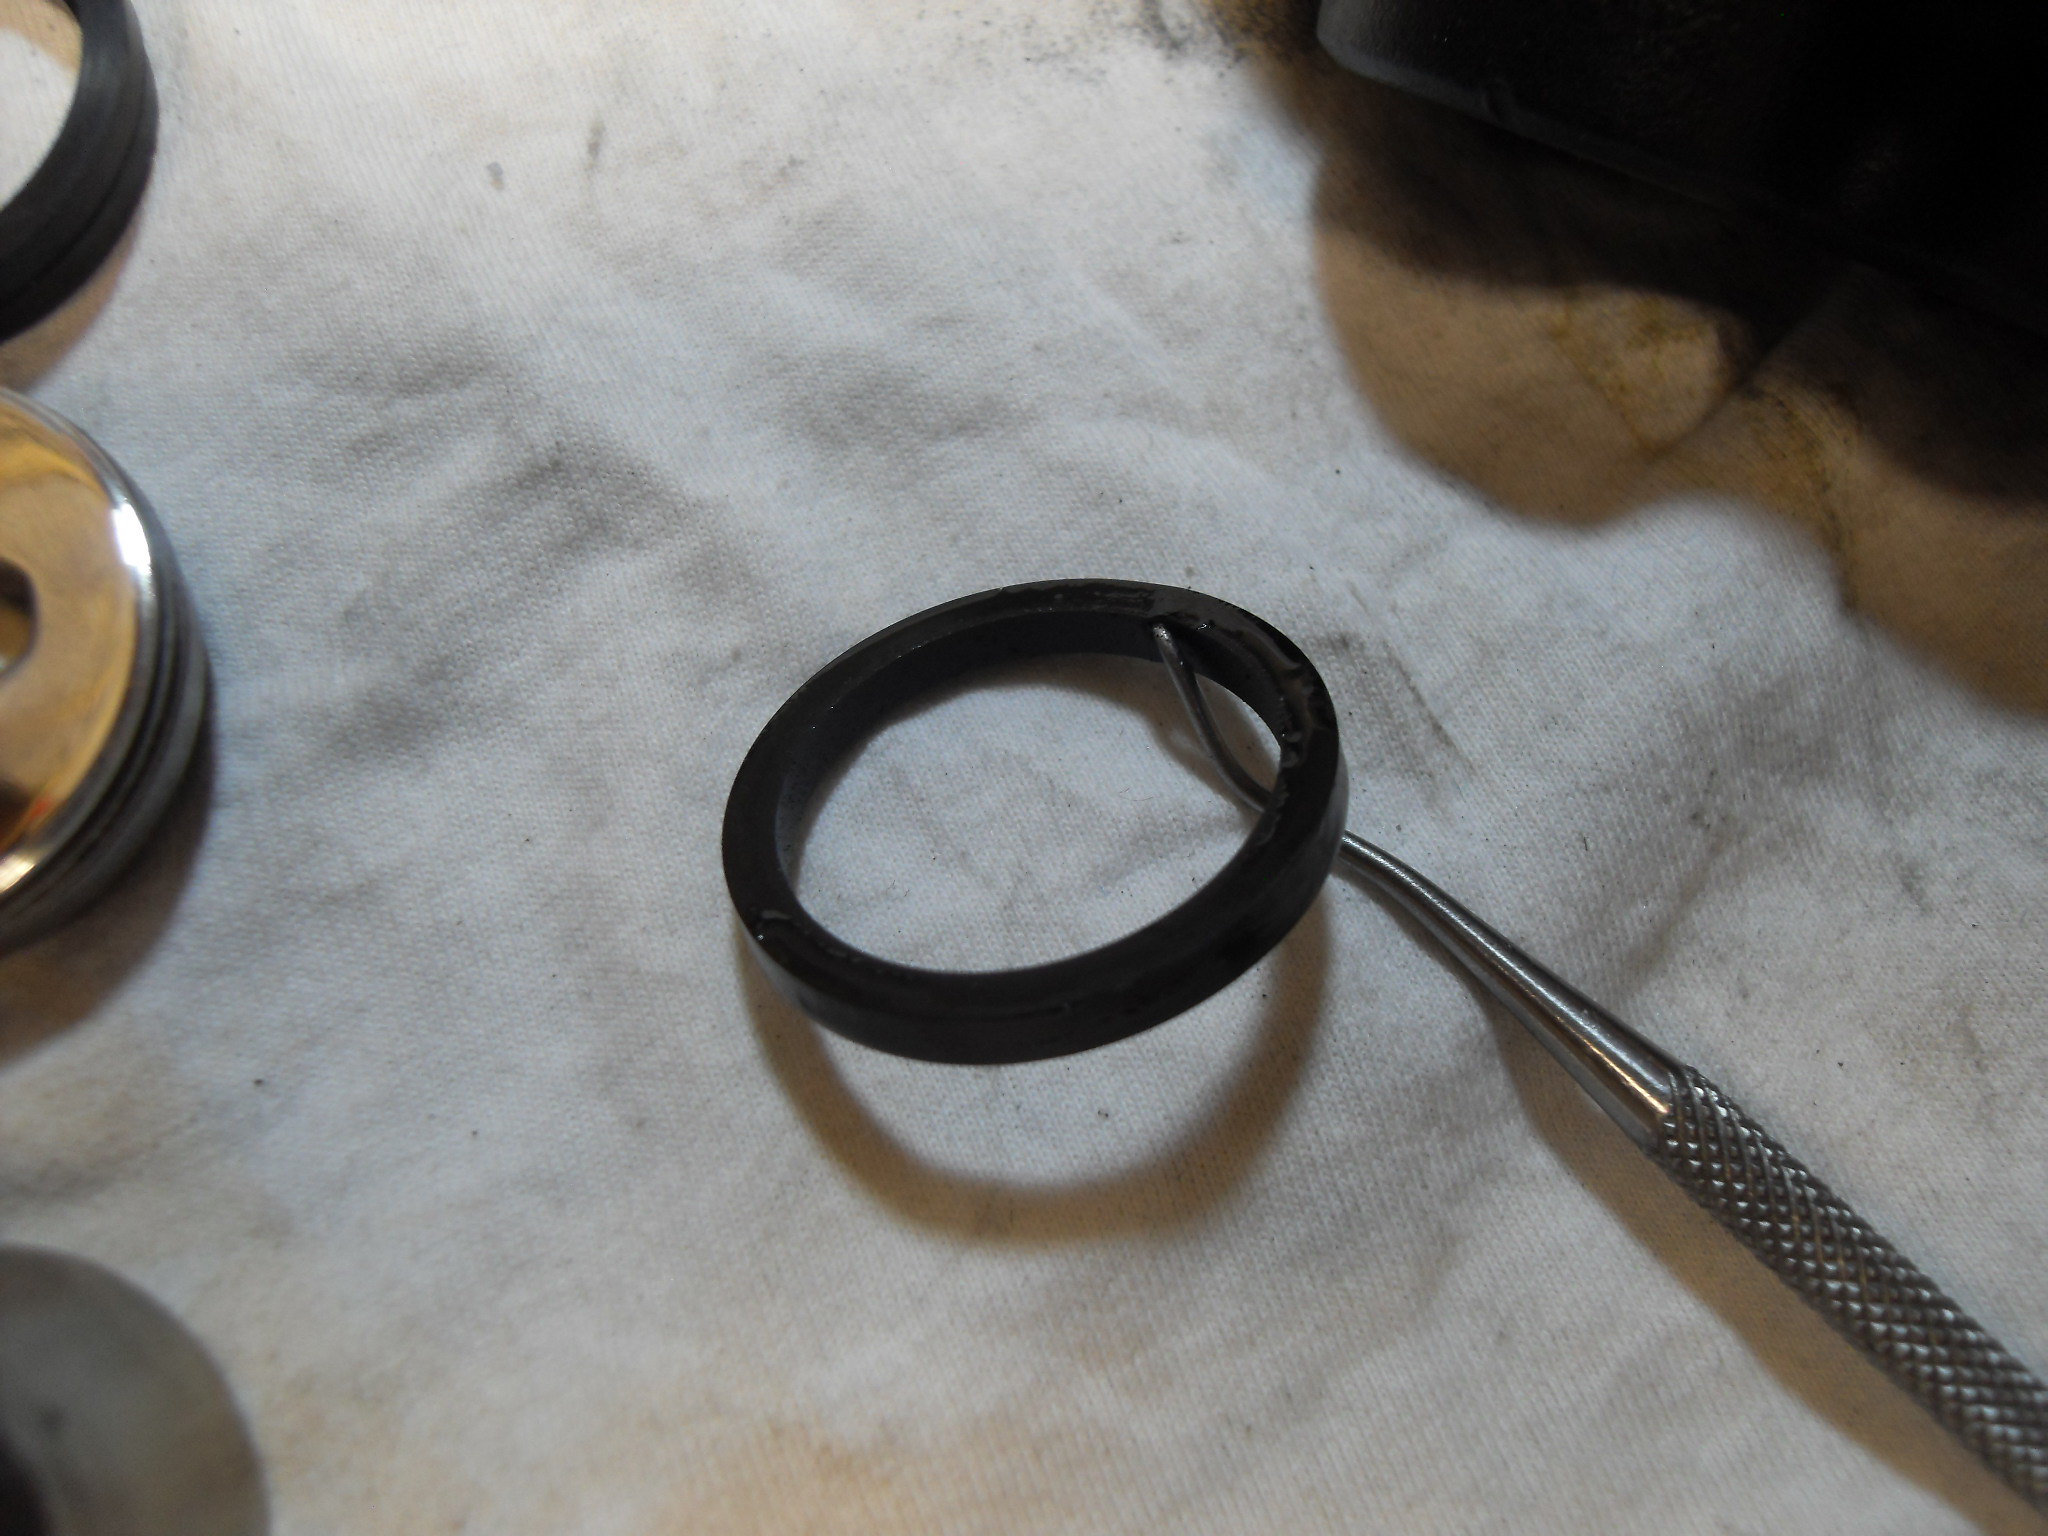 SDC11860 SDC11860
Pistons and seals in, the star discs need tightening
 SDC11861 SDC11861
I've decided the pad pins are too stained to reuse, so I'll get a pair of new ones. The finished pair of calipers
 SDC11862 SDC11862
New pads, pins, R clips, bleed valves, dust covers and banjo bolts will be fitted.
Cheers, Mark
|
|
|
|
Post by cb250g5 on Jun 21, 2020 18:49:56 GMT 1
Mark. As a lathe owner, surely you mean you'll make new pins out of stainless? Not buy new ones?
|
|
|
|
Post by dusty350 on Jun 21, 2020 18:58:35 GMT 1
They look great Mark - like new Dusty |
|
rickymac
Drag-strip hero
 Hi all new to this forum and owner of a barn find 250lc
Posts: 224
|
Post by rickymac on Jun 22, 2020 12:38:57 GMT 1
Amazing build thread 👌
|
|
|
|
Post by yamark on Jun 29, 2020 11:53:10 GMT 1
Carbs
I'm fitting 31K carbs from the later Powervalve model. 4 of them! Luckily, I bought them a while back, so I don't have to shake my sofa out . Now I know this has been covered before, but it's balls out time.
I first clean the carbs, inside and out, then drill out the brass balls on the air correction circuit.
 SDC11873 SDC11873
I use a 2.5mm drill after using a centre punch
 SDC11875 SDC11875
After running a 3mm tap into the hole, I thread a bolt in, and heat the ball up with a heat gun. I apply gentle sideways pressure to the bolt until the ball rotates and then pull the ball out
 SDC11876 SDC11876
Ball and emulsion tube removed, I make sure the air correction jet is clear.
 SDC11888 SDC11888
I then replace the brass ball with a new one, after putting a little threadlock on the ball.
 SDC11889 SDC11889
The carbs will be put through the ultrasonic cleaner again, and anything worn will be replaced.
Cheers, Mark
|
|
|
|
Post by flames on Jun 29, 2020 12:15:33 GMT 1
Fantastic. I have been searching on here for a post on how to do this but hadn't been able to find one. Thank you for posting.
Build is amazing btw.🤗
|
|
|
|
Post by Denzil on Jun 30, 2020 8:02:38 GMT 1
Carbs
I'm fitting 31K carbs from the later Powervalve model. 4 of them! Luckily, I bought them a while back, so I don't have to shake my sofa out . Now I know this has been covered before, but it's balls out time.
I first clean the carbs, inside and out, then drill out the brass balls on the air correction circuit.
SDC11873
I use a 2.5mm drill after using a centre punch
SDC11875
After running a 3mm tap into the hole, I thread a bolt in, and heat the ball up with a heat gun. I apply gentle sideways pressure to the bolt until the ball rotates and then pull the ball out
SDC11876
Ball and emulsion tube removed, I make sure the air correction jet is clear.
SDC11888
I then replace the brass ball with a new one, after putting a little threadlock on the ball.
SDC11889
The carbs will be put through the ultrasonic cleaner again, and anything worn will be replaced.
Cheers, Mark
Stupid questions probably..... what is the purpose of the brass balls, what do they do, why did you drill them out just to put a new one in. |
|
|
|
Post by Denzil on Jun 30, 2020 8:03:42 GMT 1
Stupid questions probably..... what is the purpose of the brass balls, what do they do, why did you drill them out just to put a new one in.
|
|
|
|
Post by dusty350 on Jun 30, 2020 8:16:17 GMT 1
The factory machining process cant drill round corners, so the ball blocks the entrance needed for the drilling process. If the carb gets blocked with crud, removing the ball enables you to clear the blockage, but you need to reinstate the ball, or a grub screw to seal it up again or risk upsetting the fuelling. Dusty |
|
|
|
Post by yamark on Jul 1, 2020 13:44:12 GMT 1
Stupid questions probably..... what is the purpose of the brass balls, what do they do, why did you drill them out just to put a new one in. Hi Denzil, as Dusty explains, there is the air jet behind the brass ball. If this jet has any build up of crap, it affects the low speed carburation. The air jet enters the emulsion tube at the jet needle, the jet needle usually has a build up of crap from old petrol and this can block the air jet. Also vapour blasting can find the fine medium behind the brass ball and you engine will never run cleanly. I always remove the jet needle, remove the brass ball, pour thinners in the jet and blow compressed air through. The brass balls are 4.5mm in diameter.
Cheers, Mark
|
|
|
|
Post by Denzil on Jul 2, 2020 8:00:30 GMT 1
Stupid questions probably..... what is the purpose of the brass balls, what do they do, why did you drill them out just to put a new one in. Hi Denzil, as Dusty explains, there is the air jet behind the brass ball. If this jet has any build up of crap, it affects the low speed carburation. The air jet enters the emulsion tube at the jet needle, the jet needle usually has a build up of crap from old petrol and this can block the air jet. Also vapour blasting can find the fine medium behind the brass ball and you engine will never run cleanly. I always remove the jet needle, remove the brass ball, pour thinners in the jet and blow compressed air through. The brass balls are 4.5mm in diameter.
Cheers, Mark
Top men Mark & Dusty. Thank you. Now I know what they are there for and what their purpose is. Thanks. |
|
|
|
Post by yamark on Jul 5, 2020 20:26:02 GMT 1
Airbox
The airbox is always going to be a compromise. The standard bike had a slightly undersized airbox. The monoshock gets in the way, so you cant increase the size upwards. Also the oil tank and battery box limit how wide the box can be made. You can increase rearwards but only a little. The frame tubes are in the way of the area that feed the inlet rubbers, the tank internal shape limits the upper section. So volume, shape and filter will be maxed out. After hours of research and talking to many people that understand the problem, modifications are planned to make the air flow smoothly through the airbox.
So paper templates are made to fit the wood patterns. Then the templates are marked on ali sheet and cut out. The ali is wrapped round the wood templates
 SDC11823 SDC11823
 SDC11822 SDC11822
After much folding, beating and swearing, the curved section of the airbox is ready for welding
 SDC11866 SDC11866
Cheers, Mark
|
|
|
|
Post by dusty350 on Jul 5, 2020 21:35:12 GMT 1
Having seen this for real, I can honestly say your short description doesn't do the amount of work in this airbox justice ! Just the wooden former must have taken ages to make, and that's before you start making it in metal. Unbelievable patience, and attention to detail on a part that is largely hidden. I know I use the word "awesome" a lot, but it is, well, just bloody AWESOME !! Dusty |
|
|
|
Post by donkeychomp on Jul 5, 2020 21:36:01 GMT 1
Just shaking my head in wonderment. It's not just the skills involved it's also the thought process. Brilliant stuff Mark.
Alex
|
|
|
|
Post by cbm on Jul 6, 2020 3:38:47 GMT 1
Nobody likes a show off  |
|
Deleted
Deleted Member
Posts: 0
|
Post by Deleted on Jul 6, 2020 17:58:49 GMT 1
Far out Mark, you could easily get into the sheet metal fabrication game after seeing those pictures
YPVS fuel tanks lol
I can see that air box has a lot of hours put into it, brilliant and as Dusty says AWESOME
You never cease to amaze us
|
|
|
|
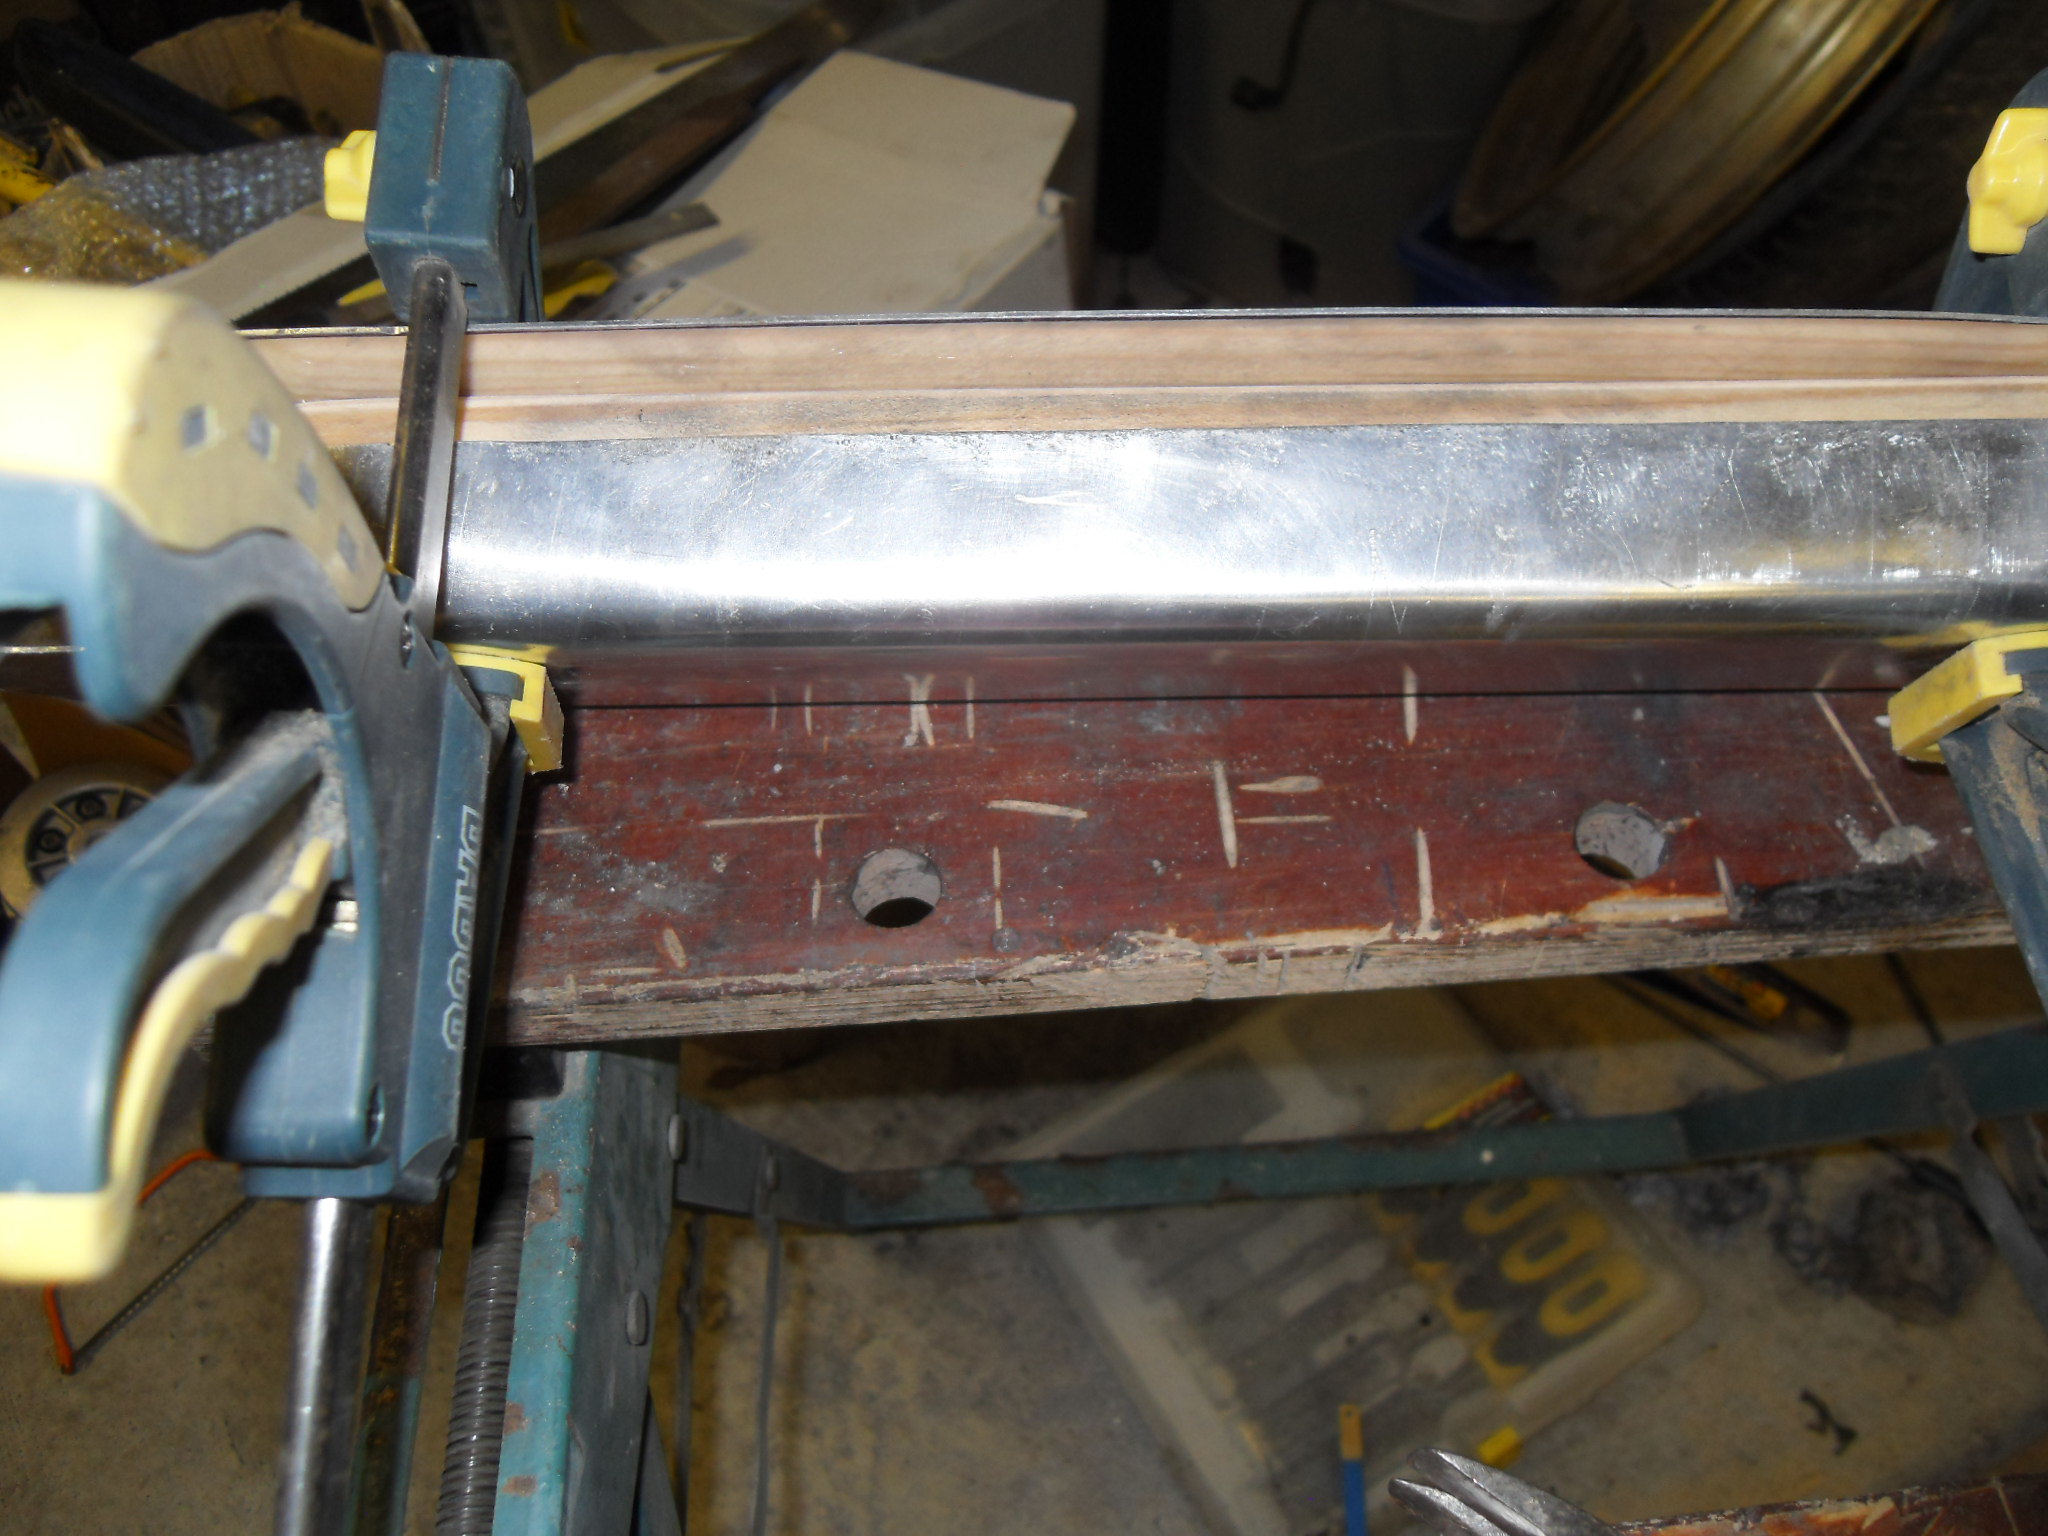
Post by yamark on Jul 12, 2020 21:31:13 GMT 1
Thanks Dusty, Alex, Cbm, and hblair. Airbox part 2 The wood pattern is then copied for the main section of the airbox. I draw the shape out on a sheet of ali and cut out with a jigsaw with a fine metal blade  SDC11863 SDC11863 I then bend the sides up by securing in a vice, with a strip of metal clamped along either side of the crease line. A piece of wood is then used to hammer the metal to a 90 degree fold 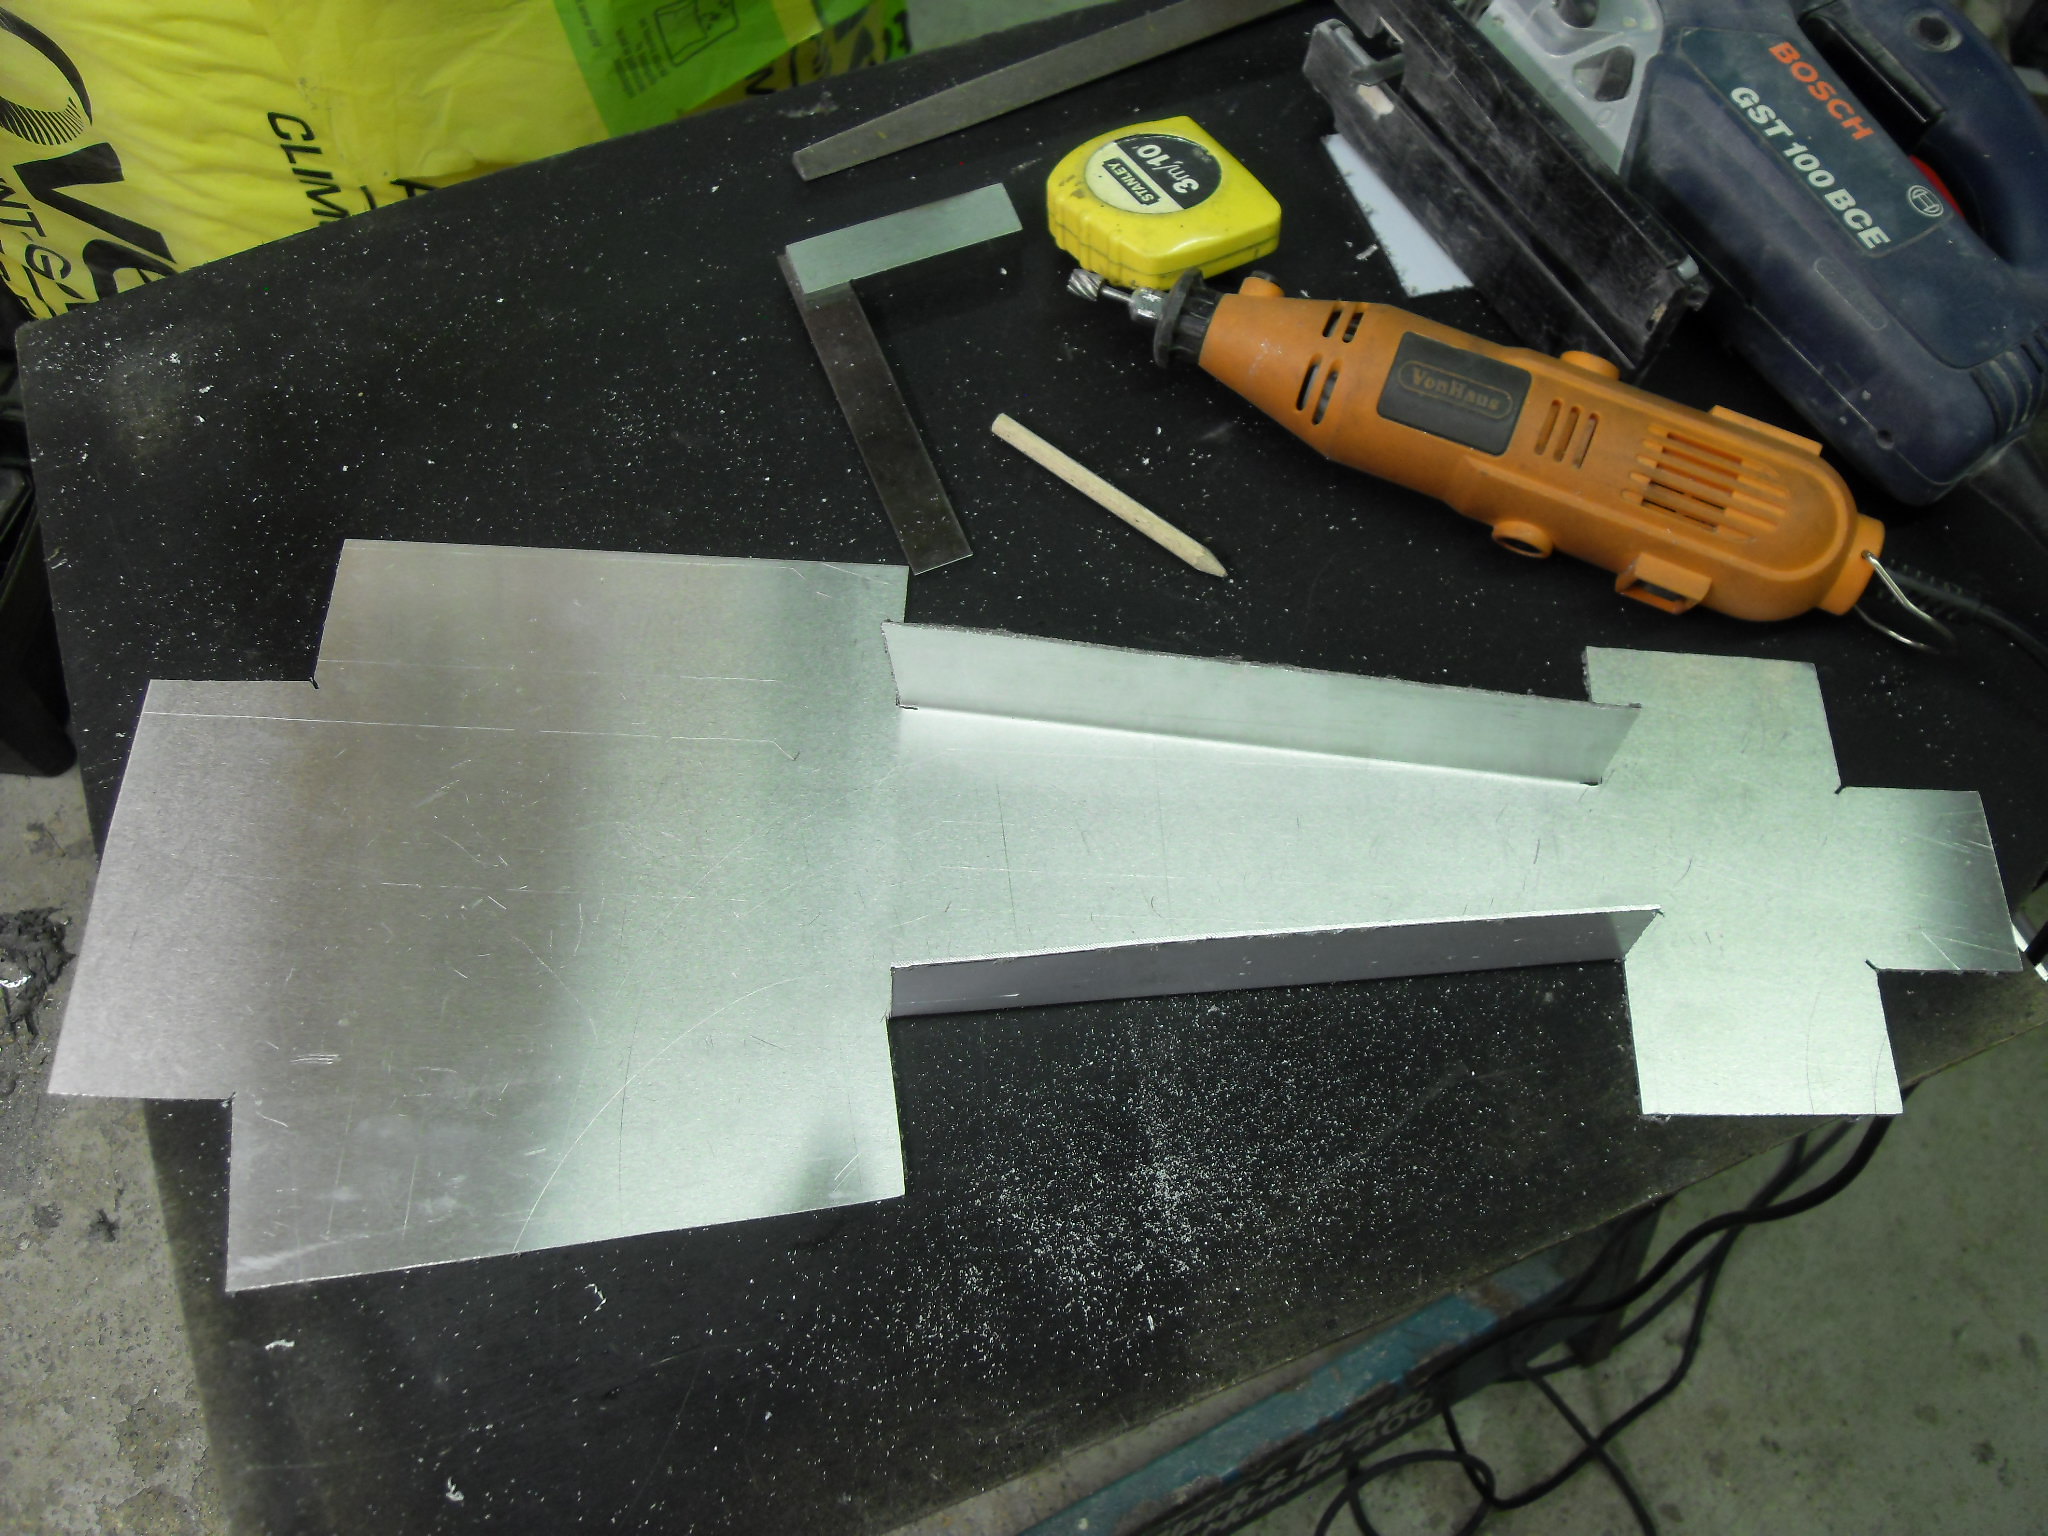 SDC11864 SDC11864 The remaining sections are then folded  SDC11865 SDC11865 Then the ends and the infills are done  SDC11867 SDC11867 Lastly, I make the lid to the very odd shaped airbox  SDC11868 SDC11868 So just the joining part, rear mounts, 2 air filter mounts and front bracket to make! Cheers, Mark |
|
|
|
Post by donkeychomp on Jul 12, 2020 21:38:46 GMT 1
Is it just me or does that look like a coffin for a parrot? Seriously Mark, nice job there mate!
Alex
|
|
|
|
Post by cbm on Jul 13, 2020 5:56:47 GMT 1
Is it just me or does that look like a coffin for a parrot? Seriously Mark, nice job there mate! Alex It doesn't need a coffin, it's not dead it's just restin' Great work as usual mate 👍 |
|
|
|
Post by dusty350 on Jul 13, 2020 7:43:27 GMT 1
Great work Mark |
|
|
|
Post by yamark on Jul 14, 2020 7:31:27 GMT 1
Is it just me or does that look like a coffin for a parrot? Seriously Mark, nice job there mate! Alex Beautiful plumage .
Thanks chaps, the airbox is quite a bit longer than stock!
Mark
|
|
|
|
RD700LC
Jul 19, 2020 21:25:05 GMT 1
Post by yamark on Jul 19, 2020 21:25:05 GMT 1
Airbox Part 3
I now have to make the 2 inlets for the air filter. I cut 2 strips of ali
 SDC11869 SDC11869
I then bend the strips around a socket to form the correct diameter
 SDC11870 SDC11870
 SDC11871 SDC11871
Ready for welding
 SDC11872 SDC11872
Moving back to the curved section of the airbox, I have to cut out the area where the curved and main sections will be joined
 SDC11877 SDC11877
I then cut along the lower section to form the triangular shaped side section
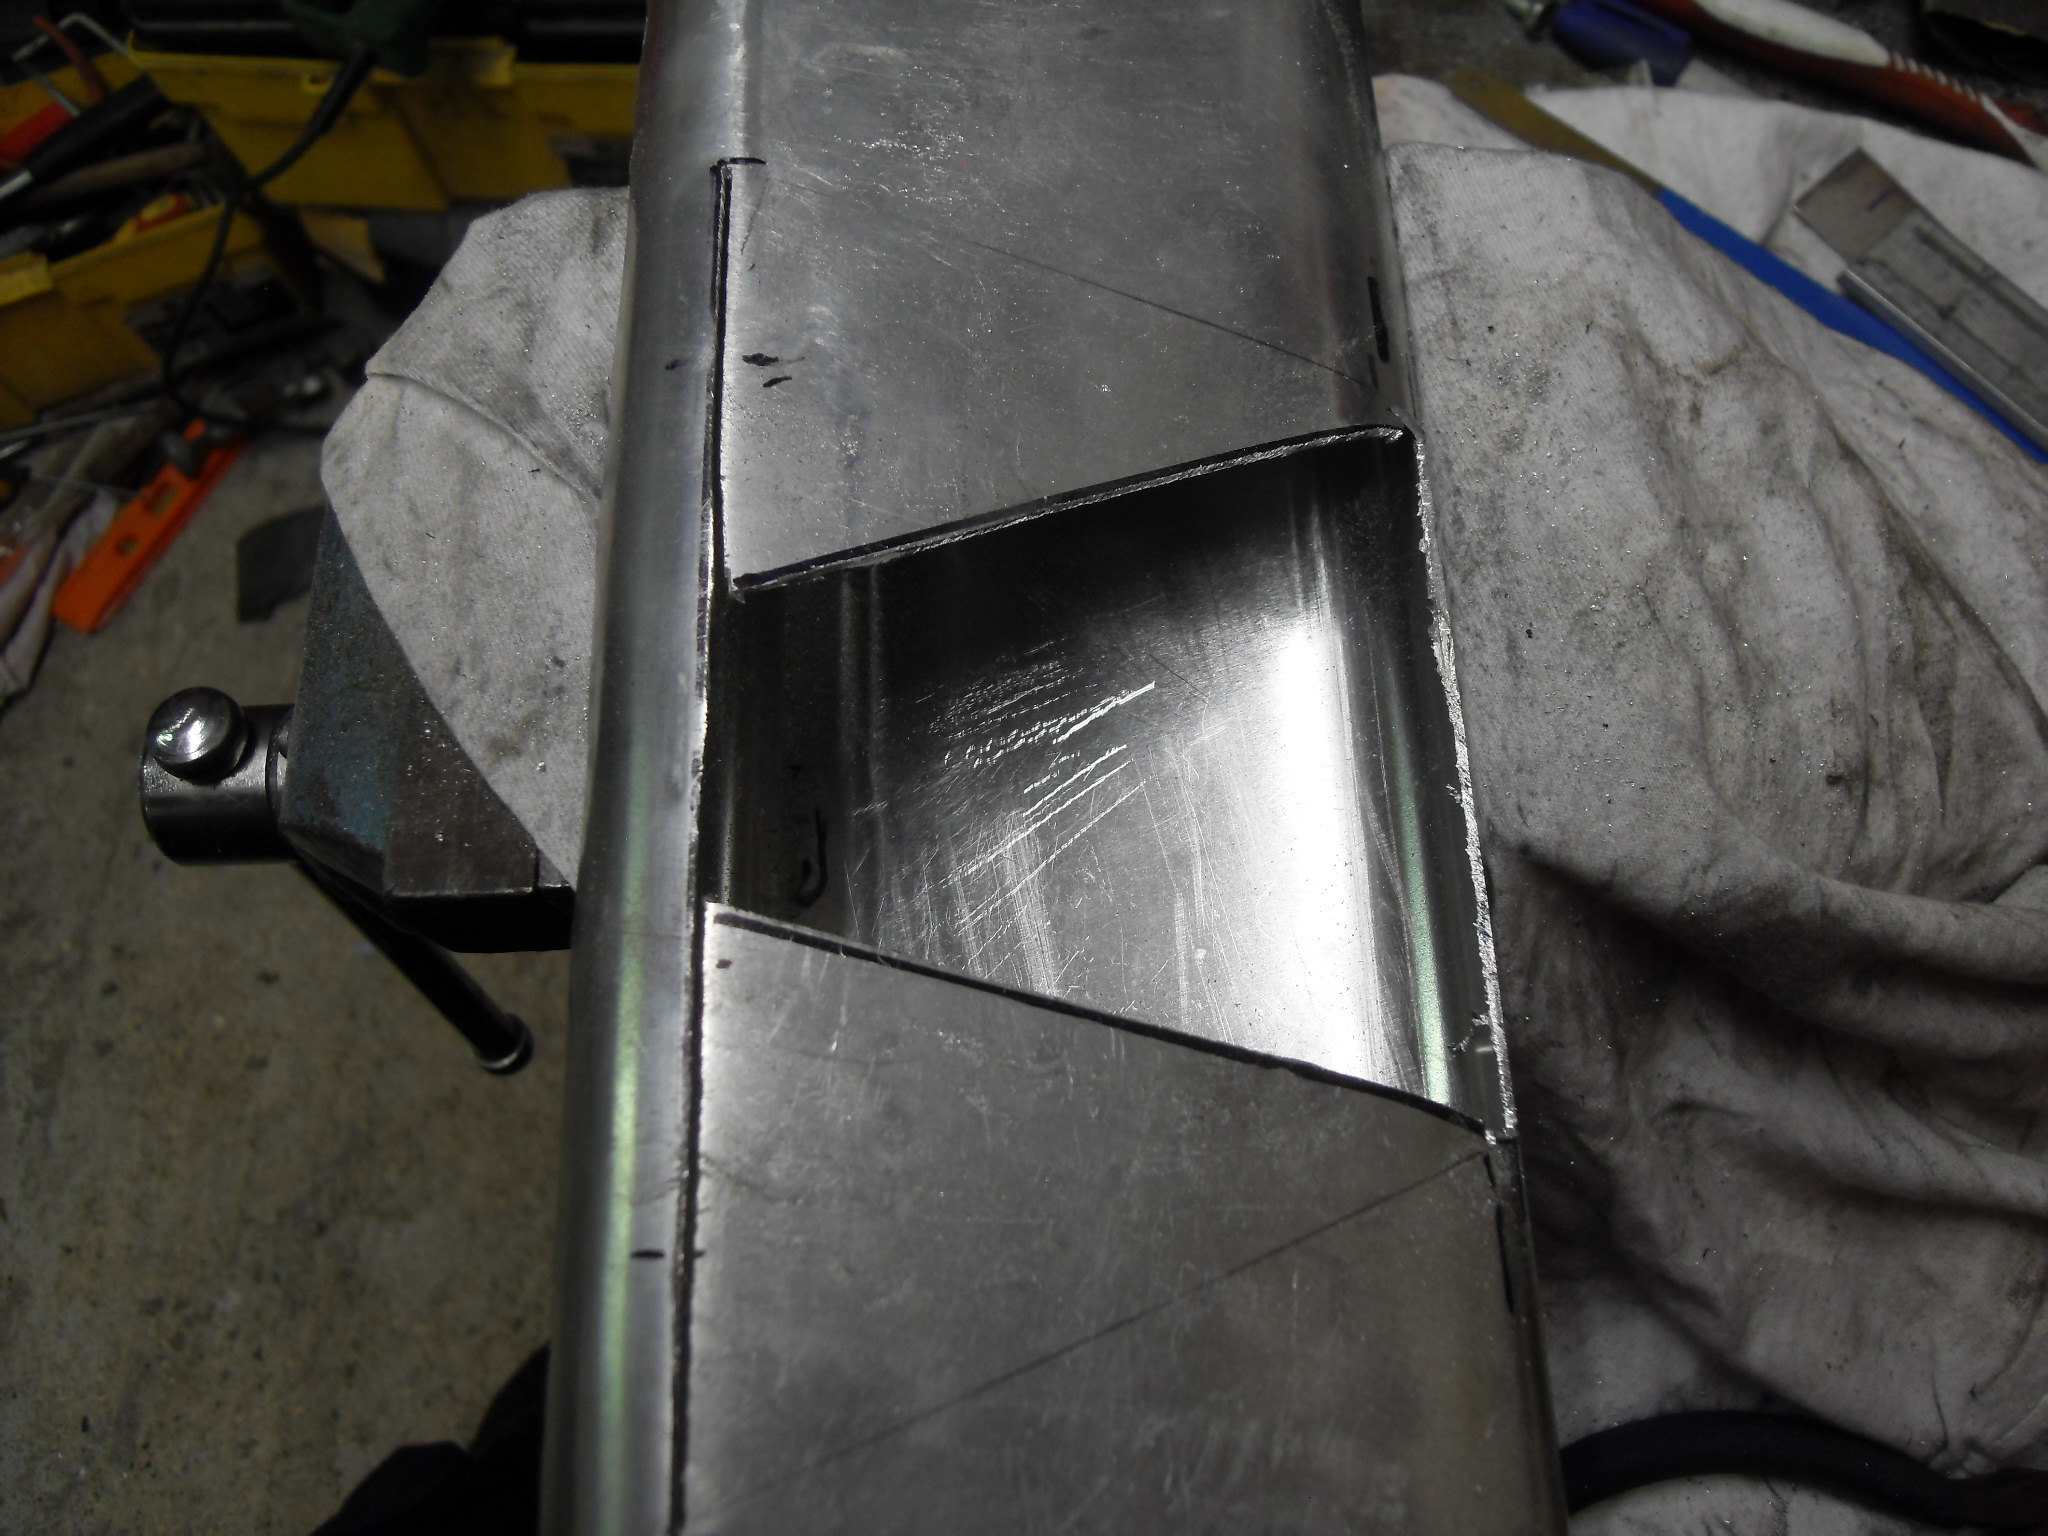 SDC11878 SDC11878
I then score along the fold line with a diamond disc, and fold the triangle side sections upwards to connect with the main airbox
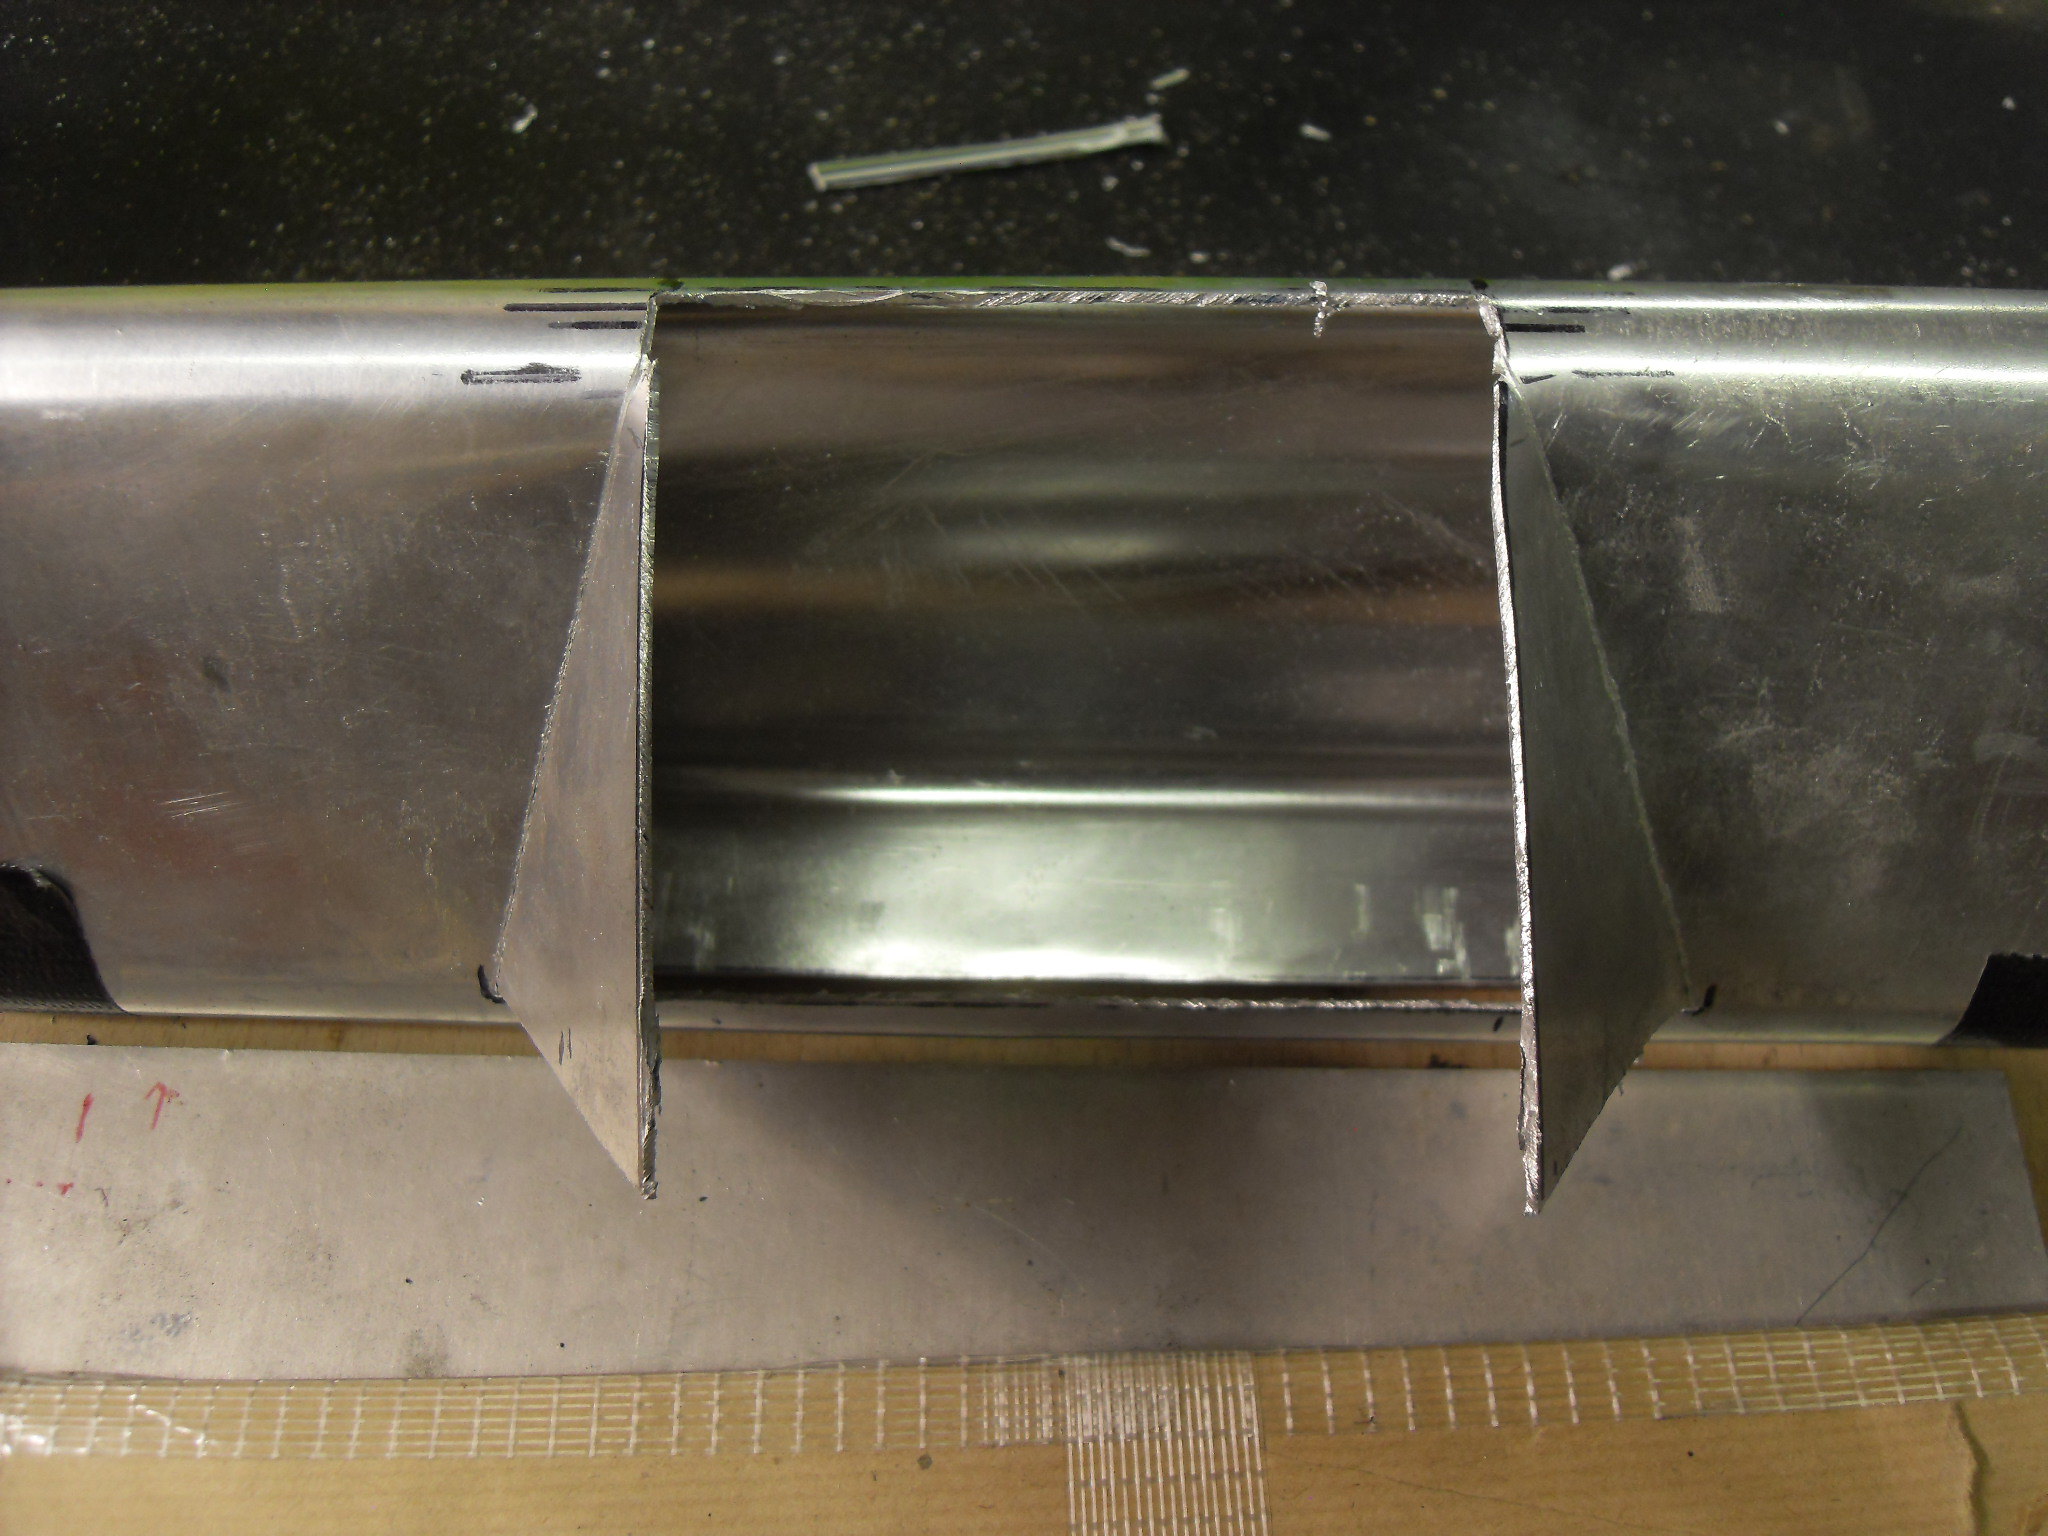 SDC11879 SDC11879
More next week,
Cheers, Mark
|
|
2taol
Thrash Merchant
Posts: 378
|
Post by 2taol on Jul 20, 2020 7:28:58 GMT 1
Great work and great viewing.
As an engineering guy once said to me when discussing various solutions to problems
"anything is possible"
|
|
|
|
Post by yamark on Jul 26, 2020 19:53:42 GMT 1
Airbox Part 4
Last week, I started to fold the sides of the curved section of the airbox.
 SDC11880 SDC11880
Next, I make the rear infill, it's not a symmetrical shape!
 SDC11881 SDC11881
And fitted
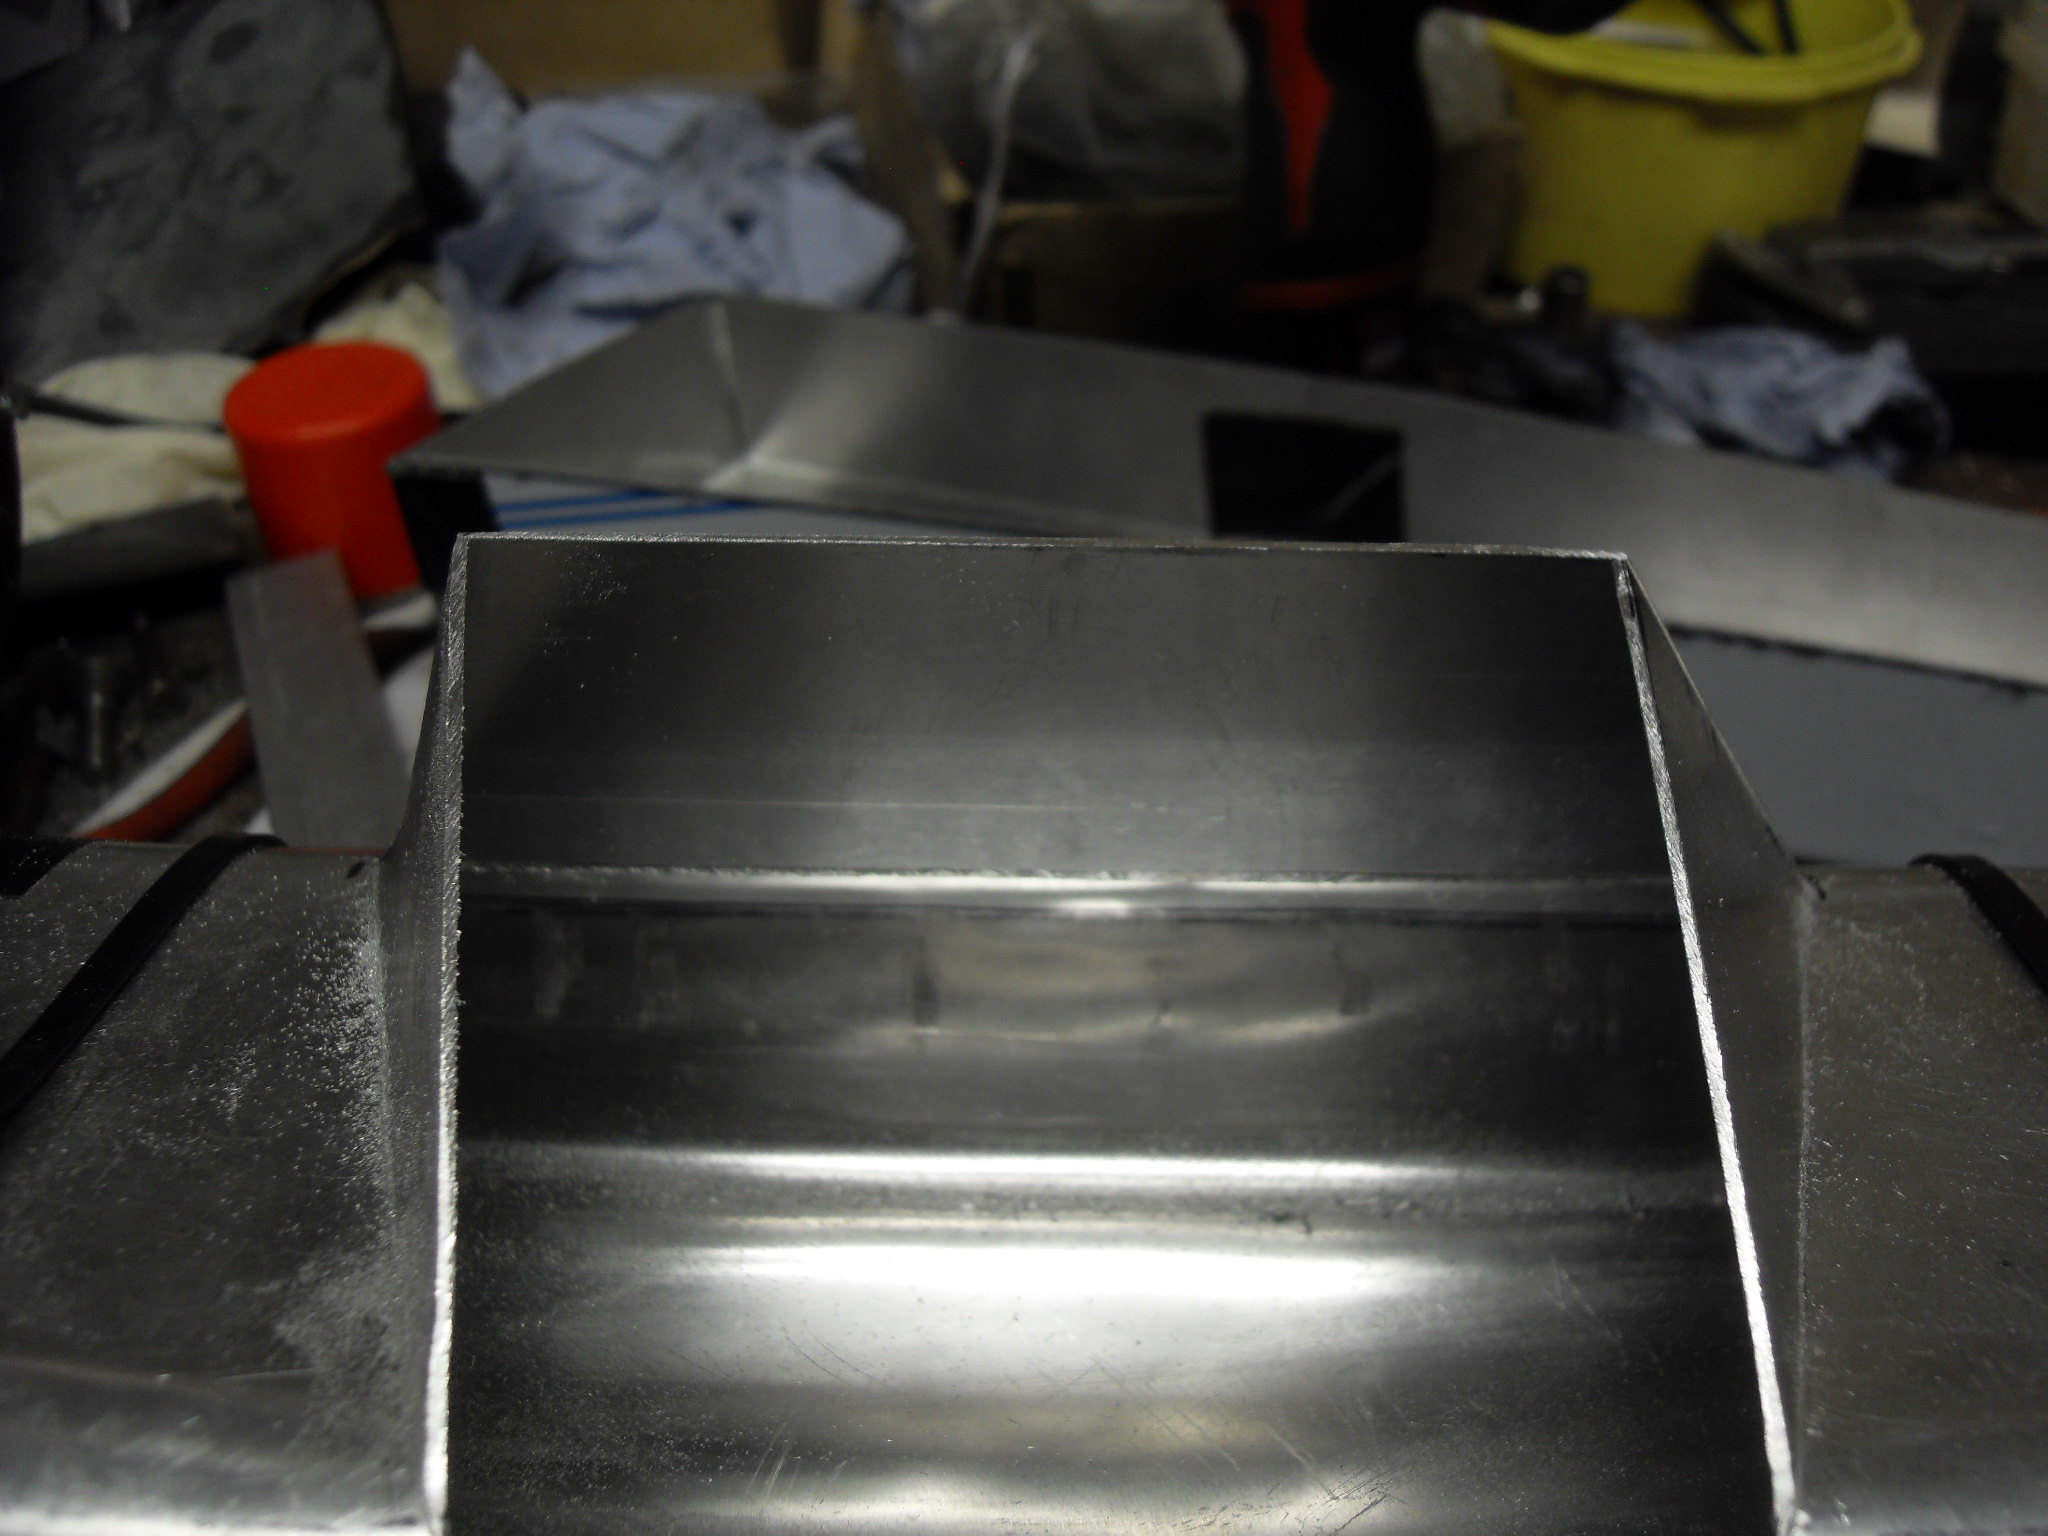 SDC11882 SDC11882
Moving back to the main section, I mark out the area where the 2 sections will be joined, and drill holes. I plan to fold 2 flaps to keep the sections "locked together", to make it easier to weld
 SDC11883 SDC11883
I then cut out the opening
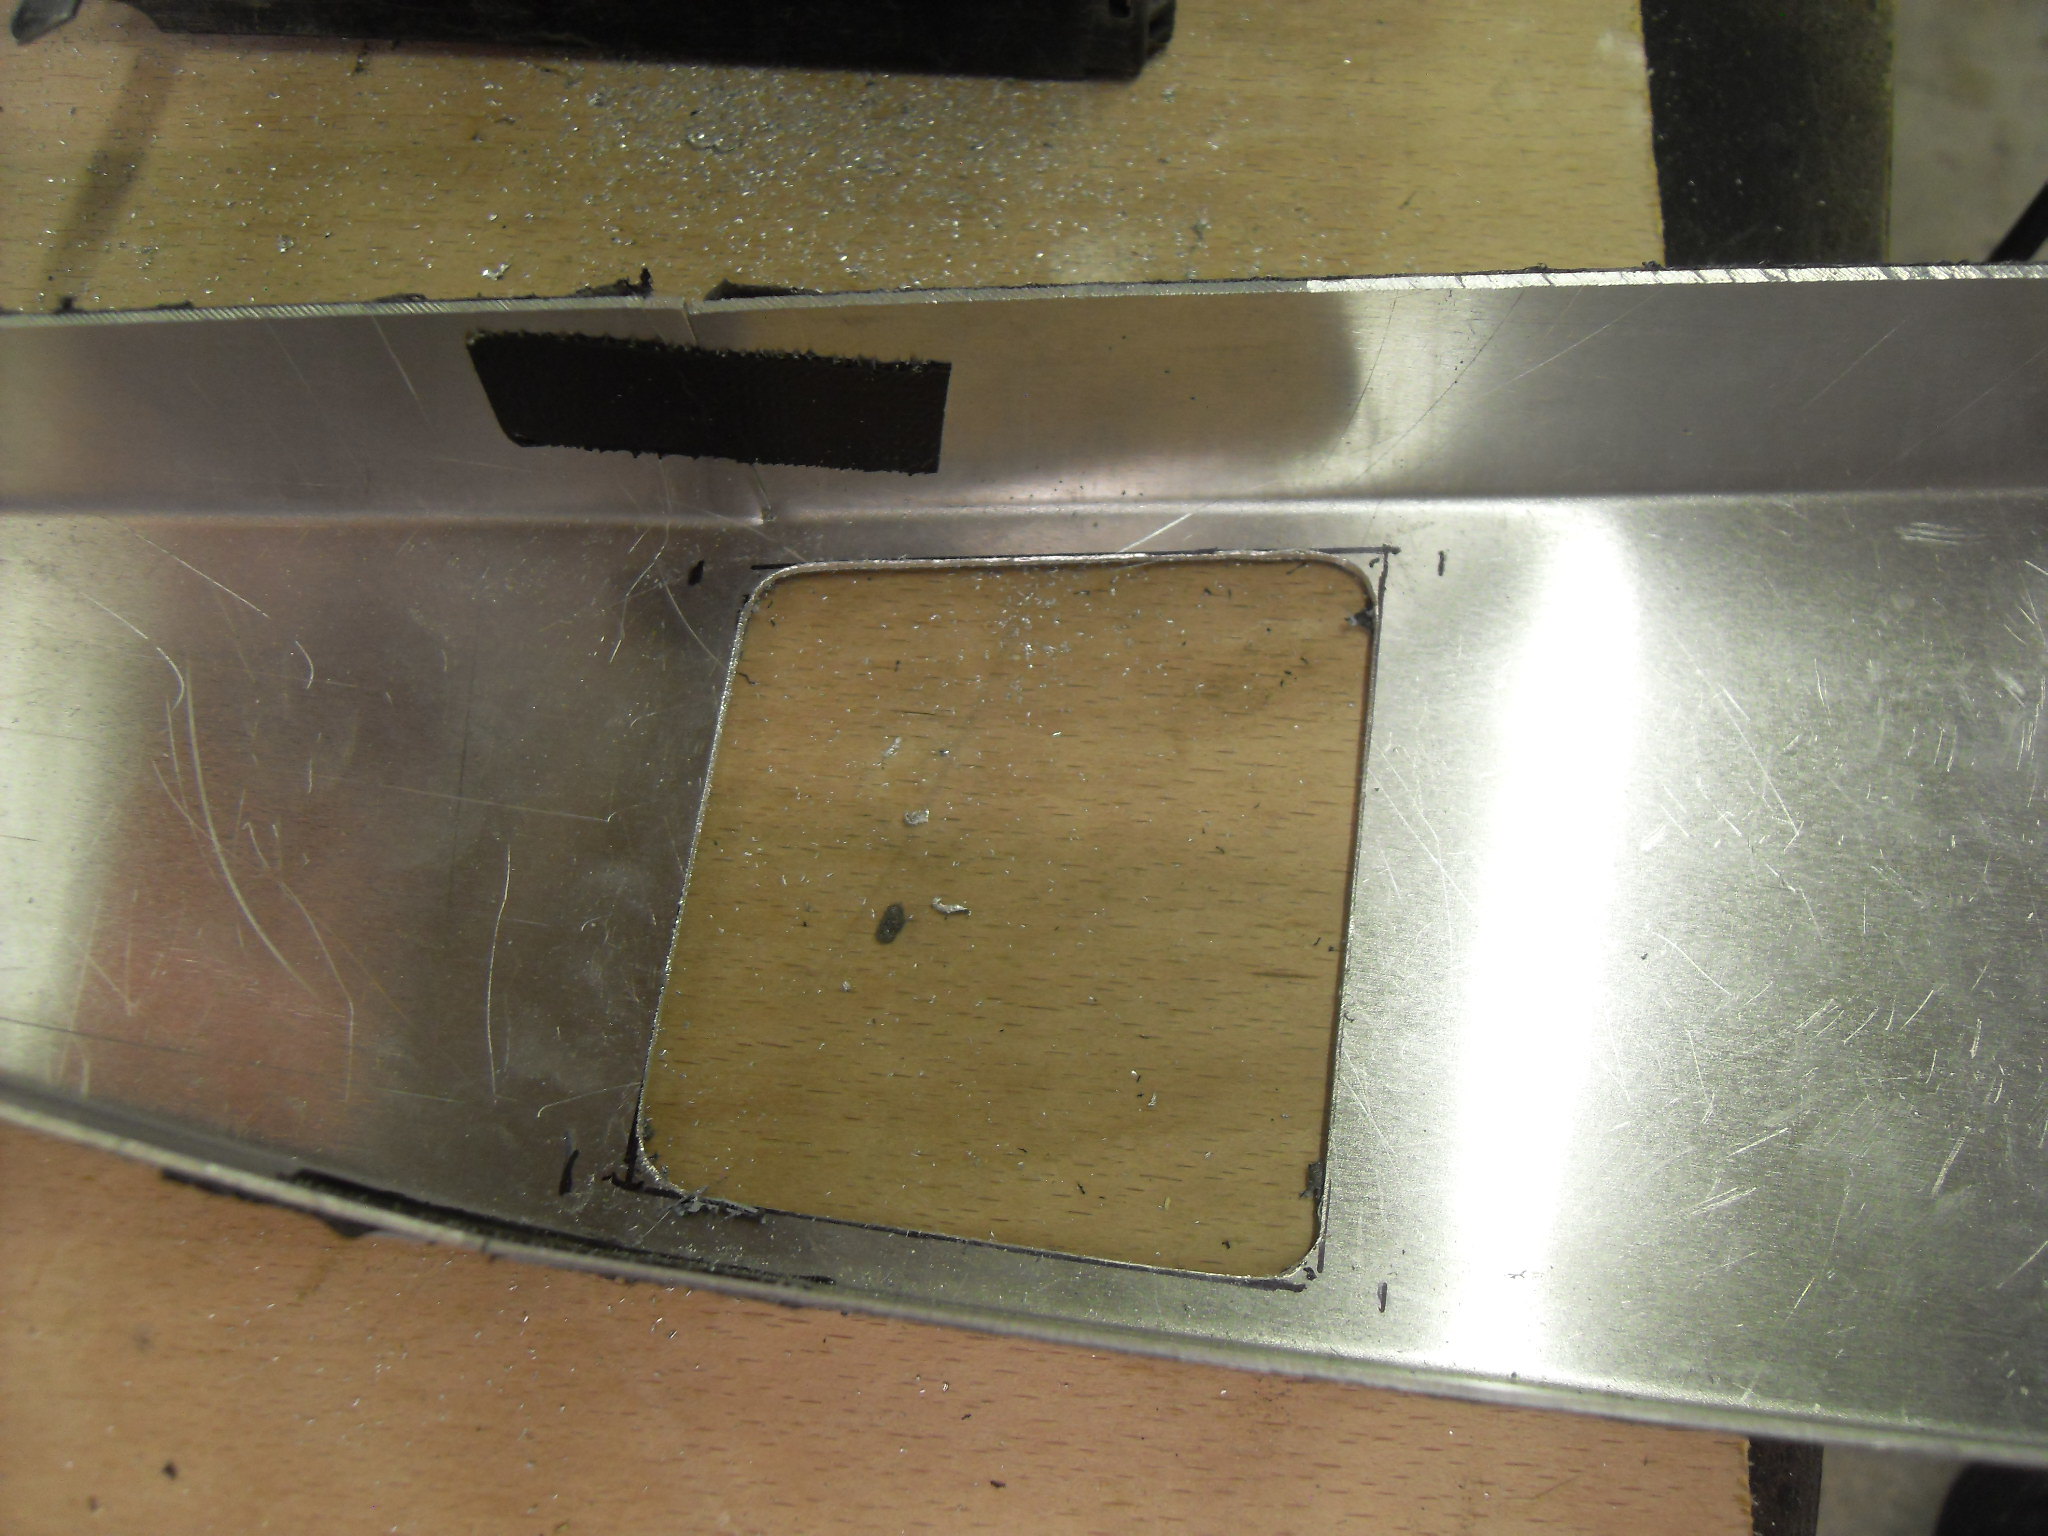 SDC11884 SDC11884
Then the flaps are folded (ewer matron)
 SDC11885 SDC11885
And finally, the 2 air filter inlets are placed in position
 SDC11886 SDC11886
Just the rear and front mounts to make, and it can be welded together.
The Airbox, I think, is the second hardest part of the build. Not much more work, before I finish all the fabrication.
Cheers, Mark
|
|
|
|
Post by sidney81 on Jul 26, 2020 21:48:05 GMT 1
Great work mark love your updates 👍
|
|
|
|
Post by yamark on Aug 2, 2020 19:50:07 GMT 1
Airbox Part 5
I need to make the rear underside mounts, a front mount, and a connecting bracket to fix to my extended coil bracket(more about the coils later)
First, I make 2 ali discs
 SDC11890 SDC11890
Then on the lathe, drill a centre hole
 SDC11891 SDC11891
Then thread them both (M6)
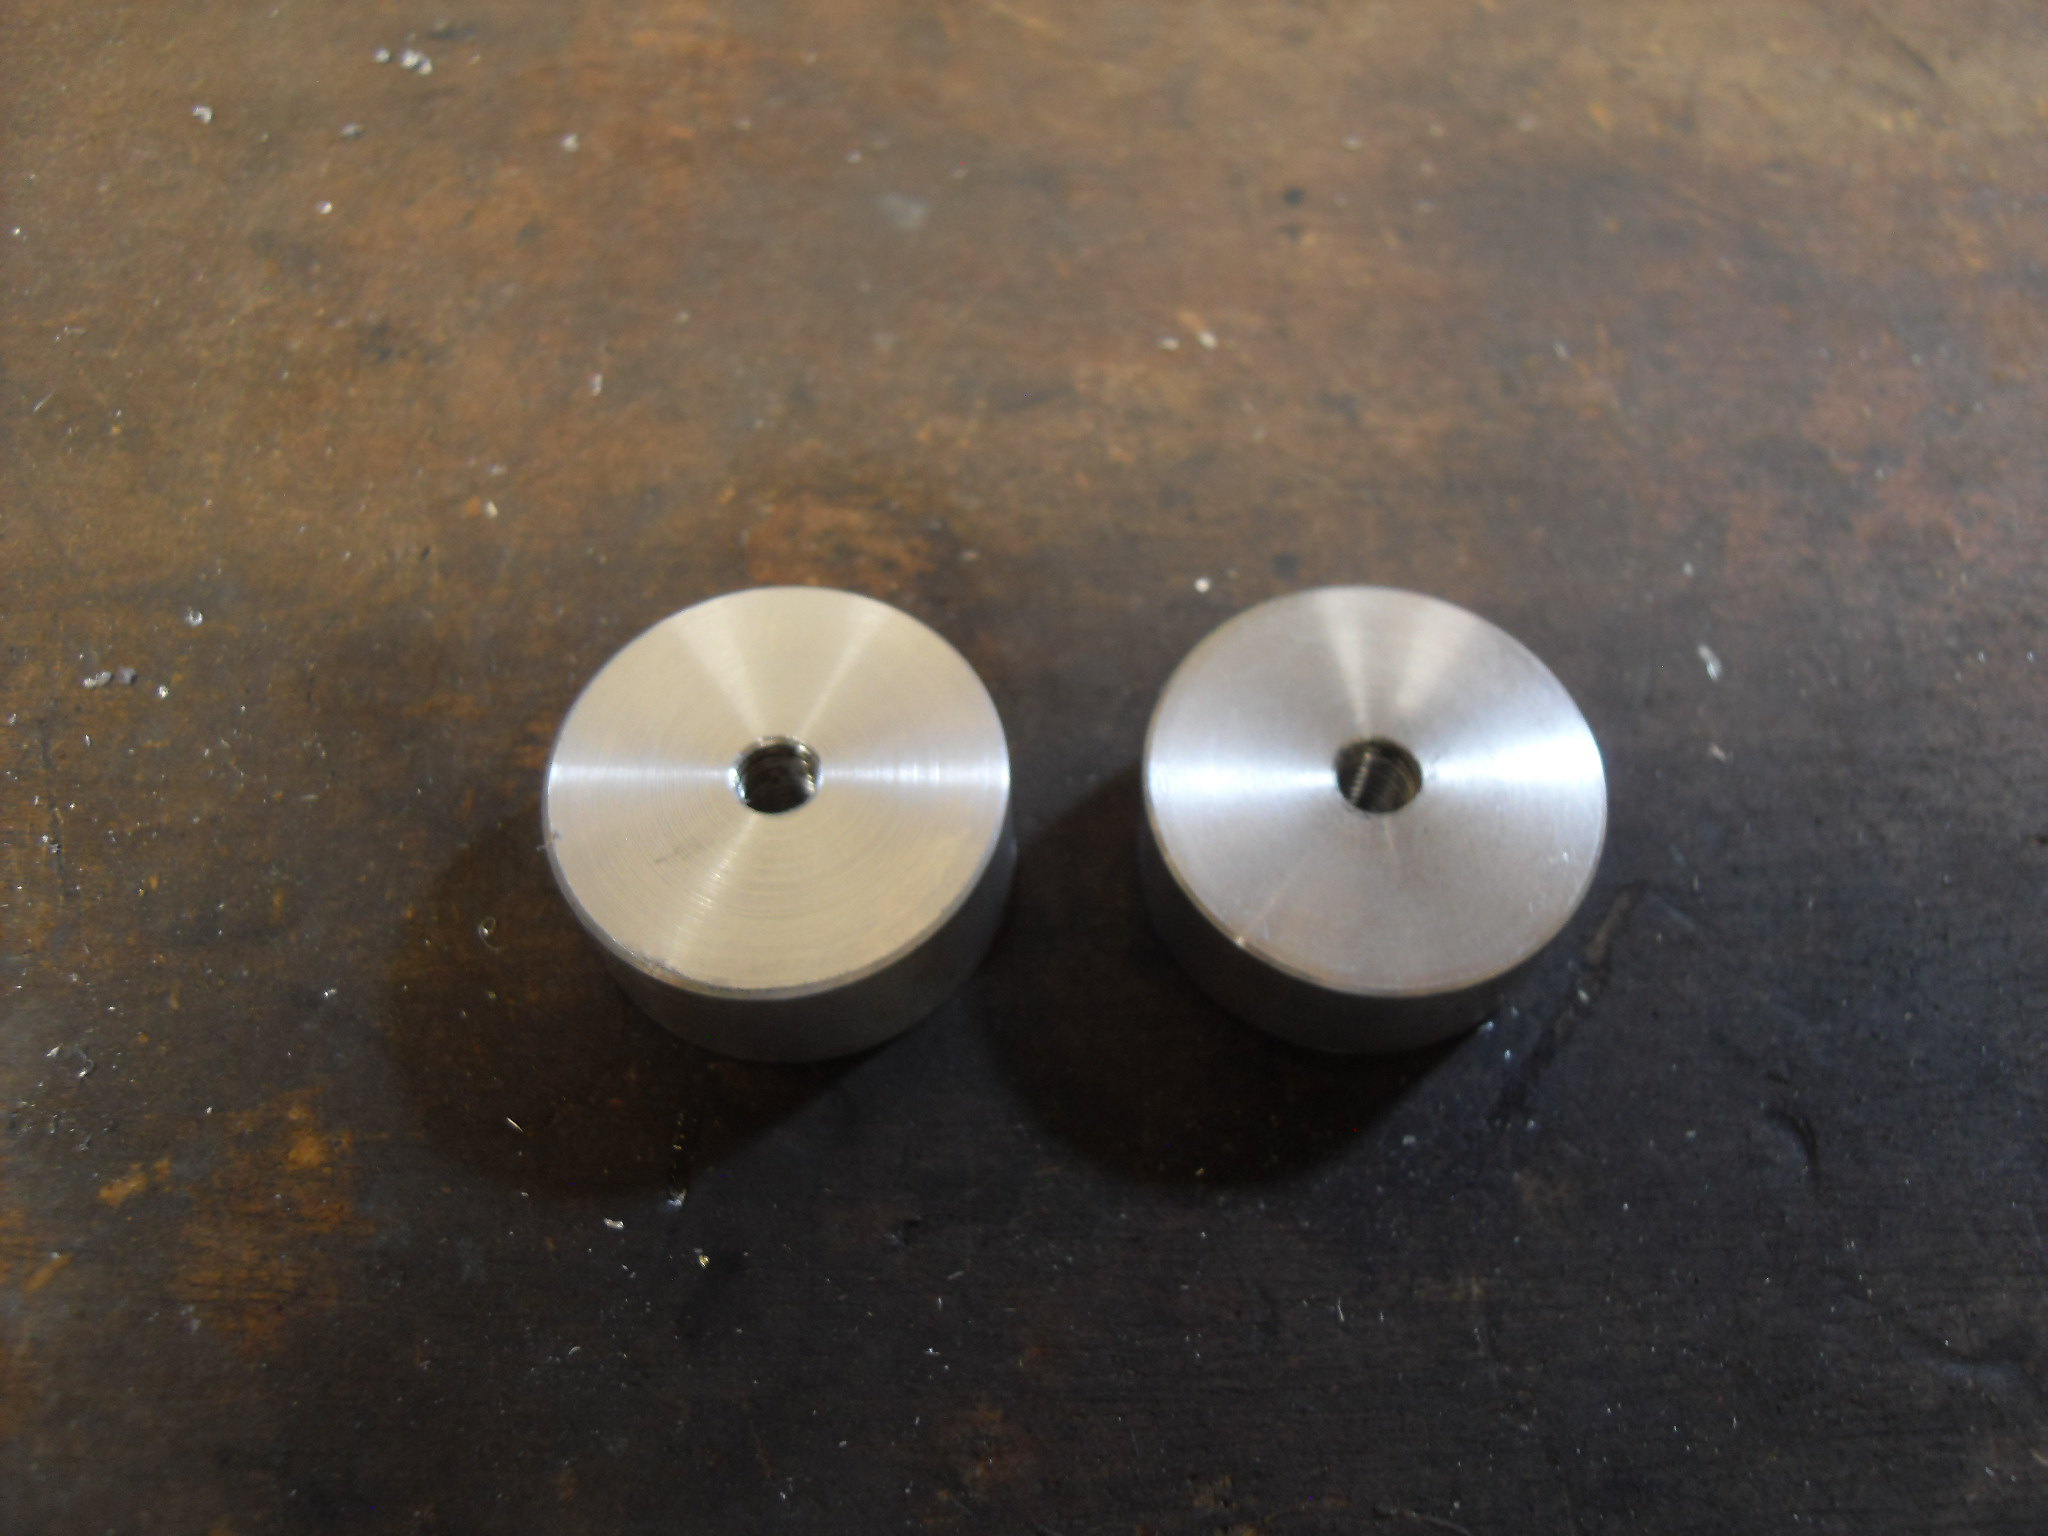 SDC11892 SDC11892
For the front mount, I cut a block of ali to size, centre punch and drill 2 holes
 SDC11908 SDC11908
Again thread both holes M6
 SDC11909 SDC11909
This next bracket won't make much sense, it will connect the front of the airbox to my coil bracket. The coil bracket is quite long as it will have 4 coils mounted to it.
I template first, then cut a bracket out of steel
 SDC11919 SDC11919
After a bit of shaping the bracket, the strengthening braces are then bent ready for welding
 SDC11920 SDC11920
I have a large pile of parts, ready for welding, just a couple of parts to make
Cheers, Mark
|
|


 Good job


 .
.


