|
|
Post by dusty350 on Feb 26, 2017 10:39:27 GMT 1
Hi Jon Just habit with me I suppose, that I always do the primary drive nut last. I get it fairly tight but don't torque it until everything else is done. Old habits die hard I guess ! And Wallcraft, are you saying I need to tear my letter to the Copyrite people up ? My plans for global domination of the gear locking tool market look to be in tatters  I will have to go and invent something else now  Dusty  |
|
|
|
Post by dusty350 on Feb 26, 2017 12:08:54 GMT 1
So now I have a decent new clutch hub and new plates, I can finish the clutch. Hub slides on and a new tab washer fits next; 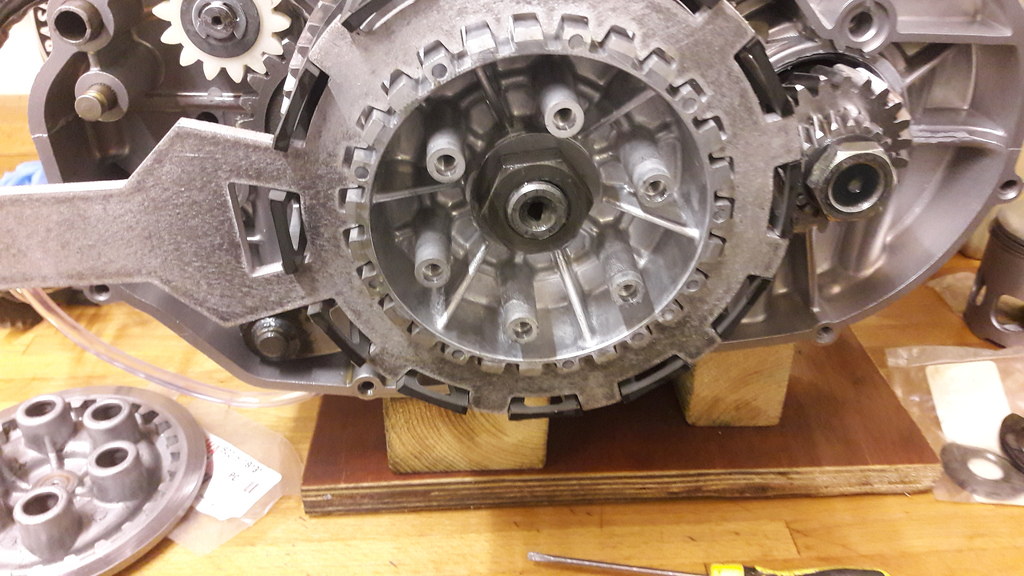 20170223_131416_zps0pqmafra 20170223_131416_zps0pqmafra by David Miller, on Flickr 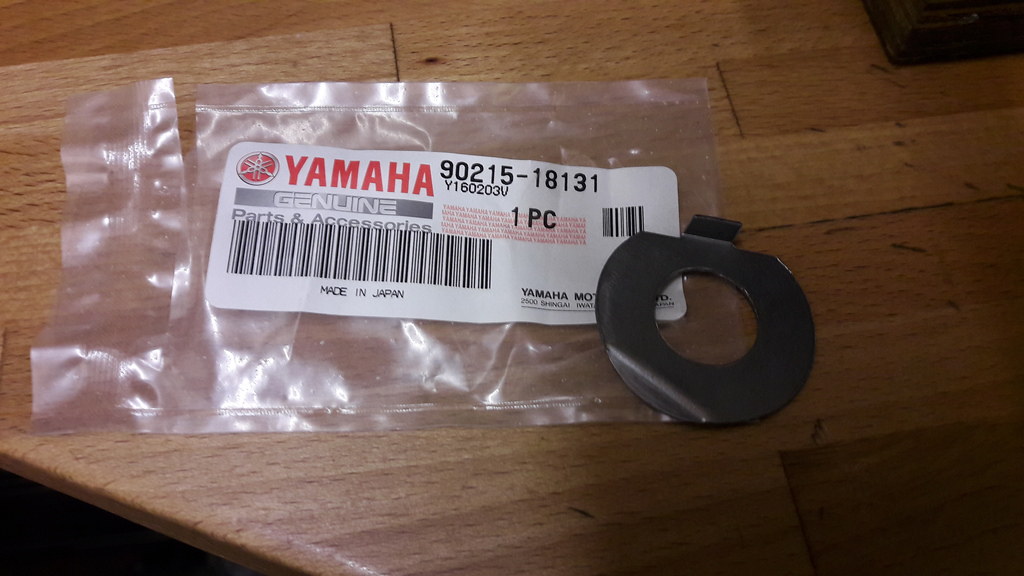 20170223_124541_zpsa71tfuis 20170223_124541_zpsa71tfuis by David Miller, on Flickr Then the locknut is tightened and the tab bent over. locking the hub with a clutch holding tool. I put some fresh gear oil in a plastic container and soaked all the plates, cushion rubbers and springs ready for assembly. Cushion rubber goes on first; 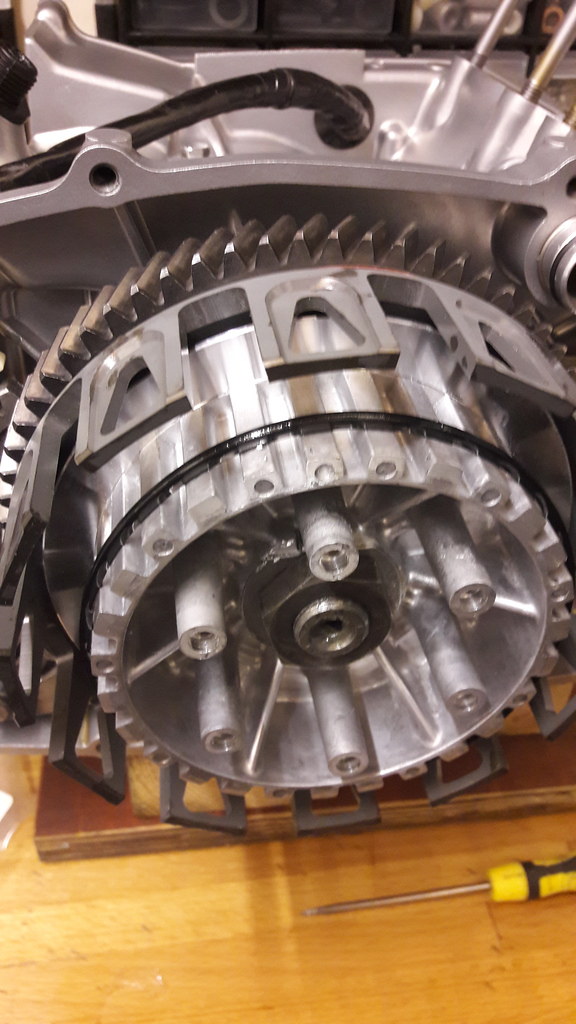 20170223_132255_zps6e3jkebq 20170223_132255_zps6e3jkebq by David Miller, on Flickr Then a friction plate; 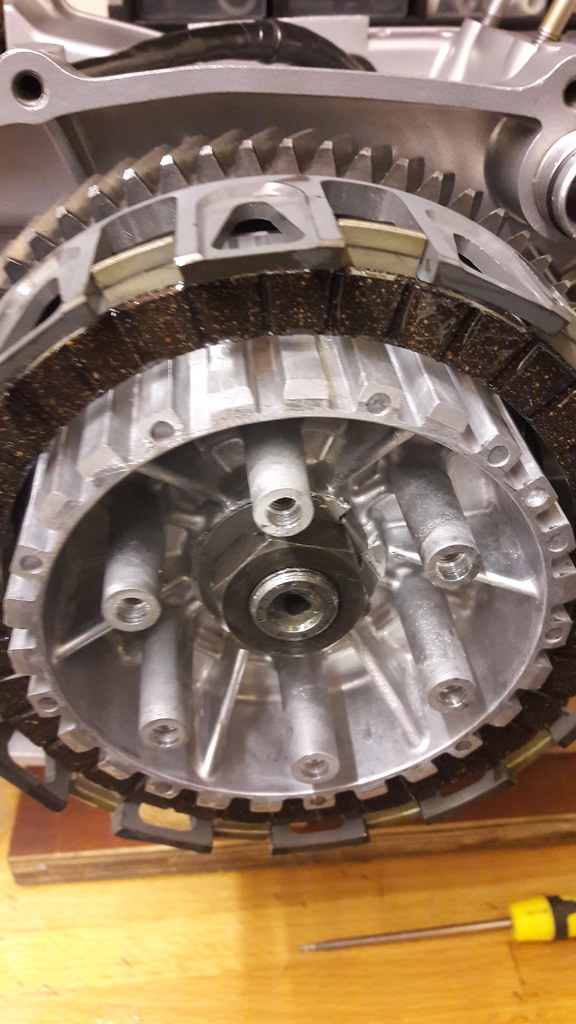 20170223_132519_zps8dbkalh9 20170223_132519_zps8dbkalh9 by David Miller, on Flickr Then a steel plate;  20170223_132638_zpsxhx8hkd8 20170223_132638_zpsxhx8hkd8 by David Miller, on Flickr Notice the steel plate has a shaped part to it. I started with this first plate with the shaped part at 12 0 clock position. As you fit the next damper, then friction then steel, the second steel will be at the 2 o clock position, then the third steel will be at 4 o clock, the fourth at 6 o clock, then 8 o clock and the last at 10 o clock. Centrifugal force throws them outwards reducing noise and vibes so they need to be evenly spaced around the basket. So the pattern is rubber, friction, steel, rubber, friction, steel, finshing with a friction plate. Next you can add the ball bearing; 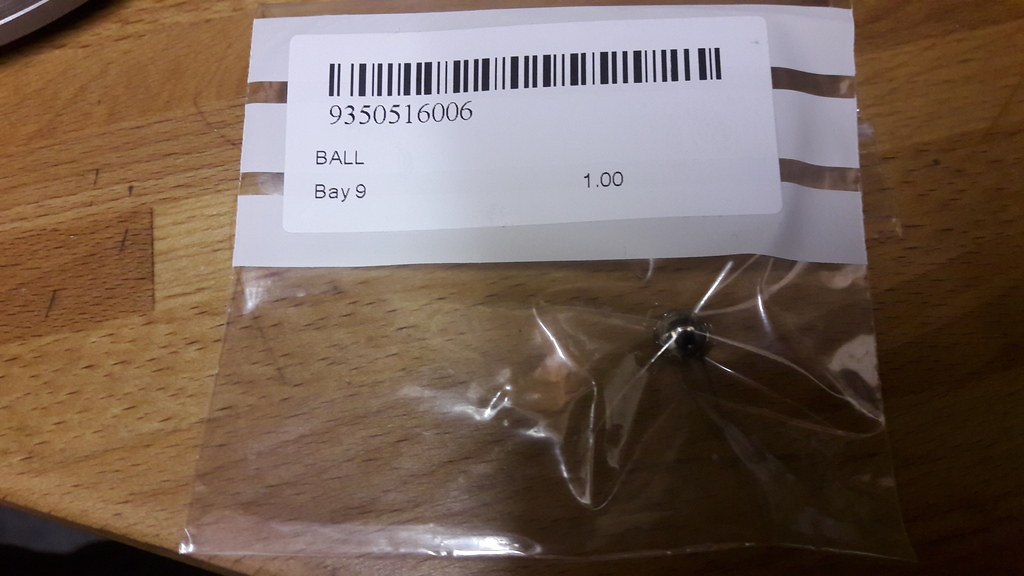 20170223_135544_zpszyeheel4 20170223_135544_zpszyeheel4 by David Miller, on Flickr Then the pushrod mushroom; 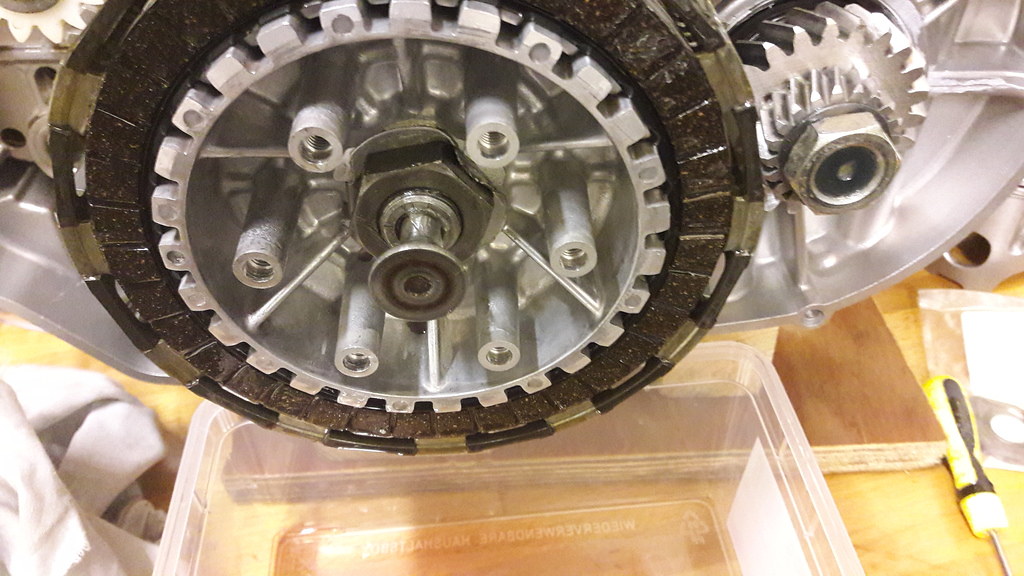 20170223_135746_zpshvthpc5m 20170223_135746_zpshvthpc5m by David Miller, on Flickr And lastly the pressure plate can be fitted with the new springs. I tighten them in a 1, 3, 5, 2, 4, 6 order. I then lubricate and fit the pushrod through the seal on the sprocket side of the engine; 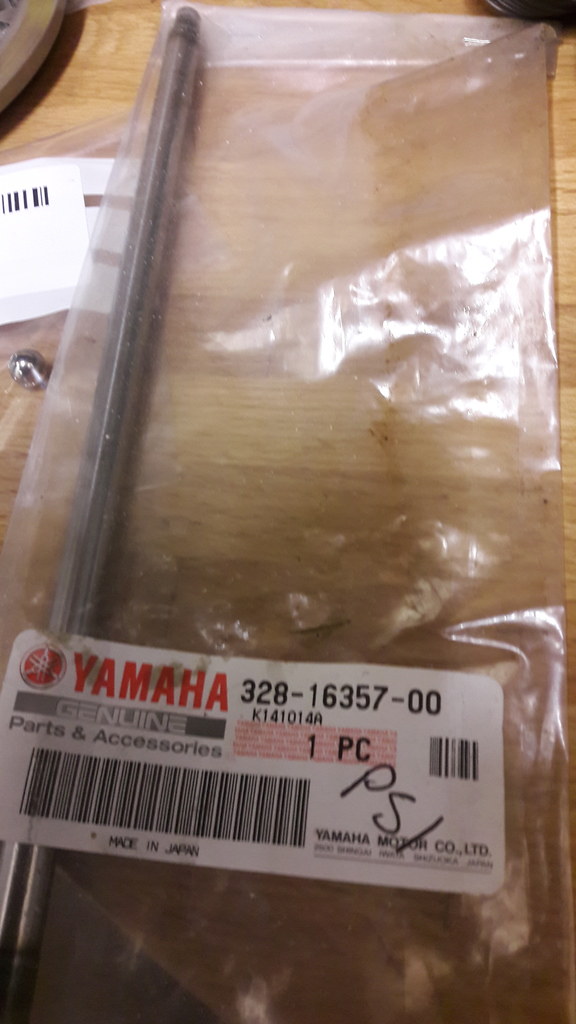 20170223_135601_zps1plzjgu6 20170223_135601_zps1plzjgu6 by David Miller, on Flickr And that's the clutch done. Dusty  |
|
|
|
Post by muzz350 on Feb 26, 2017 13:37:52 GMT 1
i'm about to embark on building a engine from all the spares i have accumulated for my next build and whereas i have built motors before they have all been relatively soon after a strip down , your detailed build will be so helpful to me and i dare say many others so thanks.
Muzz
|
|
|
|
Post by Yogi on Feb 26, 2017 17:35:54 GMT 1
Hi Dusty Can you get a move on so I can send my 385 over for you to work your magic on  Top work mate Matt |
|
|
|
Post by arrow on Feb 26, 2017 17:48:47 GMT 1
Great work dusty.
|
|
|
|
Post by dusty350 on Feb 26, 2017 18:08:14 GMT 1
Cheers guys  You'll be getting the oil pump in due course Gary  Clutch casing was dropped off for powdercoating last week so hopefully will pick that up this week. Dusty  |
|
|
|
Post by yamark on Feb 26, 2017 21:01:47 GMT 1
Great work Dusty, this thread will be used by many people in the future. It's coming together quickly now  |
|
|
|
Post by dusty350 on Feb 26, 2017 21:04:48 GMT 1
Hi mate Yea it's moving at a good pace now. Couple more bits to buy, couple of jobs to farm out - this week hopefully, and it will be virtually done  Dusty  |
|
|
|
Post by wallcraft on Feb 27, 2017 8:42:09 GMT 1
Dusty, used the copper pipe trick myself, and it works spot on, felt chuffed when I discovered that one! Simply things please ......... Referring totally to my simple self there Dusty. Excellent informative thread, always look forward to updates. Mark. |
|
|
|
Post by dusty350 on Feb 27, 2017 9:41:38 GMT 1
Hi I will happily admit I am pleased with simple solutions, for I am a simpleton, simple guy !! And I did tighten the primary drive nut last night using the copper pipe and it worked perfectly. The teeth drew the flattened end in a bit and then locked solid. Once the nut was tight I eased the gear back and it dropped out, with some deformation to the pipe. Hammered it flat again and it's good to go for a future build. Plus I've saved 2p !!  Dusty  |
|
|
|
Post by mouse on Feb 27, 2017 10:23:52 GMT 1
Hi I will happily admit I am pleased with simple solutions, for I am a simpleton, simple guy !! And I did tighten the primary drive nut last night using the copper pipe and it worked perfectly. The teeth drew the flattened end in a bit and then locked solid. Once the nut was tight I eased the gear back and it dropped out, with some deformation to the pipe. Hammered it flat again and it's good to go for a future build. Plus I've saved 2p !!  Dusty  Top money saving tip Dusty, look out Martin Lewis! Brilliant thread, almost gives me confidence to have a go myself! Mouse |
|
|
|
Post by dusty350 on Feb 27, 2017 10:59:54 GMT 1
You should have a go Andrew. Hopefully this shows how simple and well laid out these engines are. Plus I have done a similar thread on a pv, and apart from the pv's themselves it is virtually the same engine rebuild -wise, bottom end especially. Even the different clutch actuation on the valve doesn't present any difficulties for the home builder. Dusty  |
|
|
|
Post by lrcarl on Feb 27, 2017 11:02:07 GMT 1
Hi I will happily admit I am pleased with simple solutions, for I am a simpleton, simple guy !! And I did tighten the primary drive nut last night using the copper pipe and it worked perfectly. The teeth drew the flattened end in a bit and then locked solid. Once the nut was tight I eased the gear back and it dropped out, with some deformation to the pipe. Hammered it flat again and it's good to go for a future build. Plus I've saved 2p !!  Dusty  Top money saving tip Dusty, look out Martin Lewis! Brilliant thread, almost gives me confidence to have a go myself! Mouse No excuse for anyone not to build there own engine now Like dot to dot with this thread Carl |
|
|
|
Post by dusty350 on Feb 27, 2017 11:57:56 GMT 1
|
|
|
|
Post by dusty350 on Feb 27, 2017 21:30:09 GMT 1
Apart bolting all the parts back onto the engine, I have been doing some resto work too. The reed blocks were looking a bit manky, so I stripped the stops and carbon reeds off and cleaned up the ally - first with petrol, and then the polishing wheel; 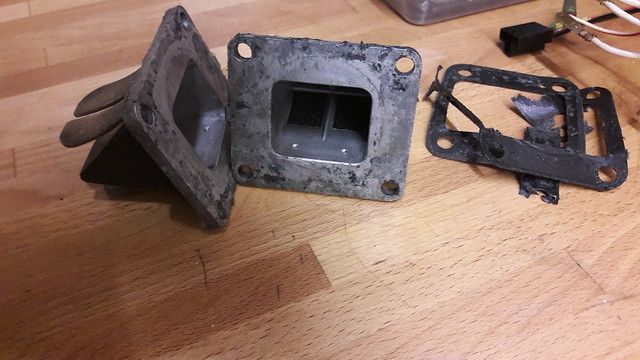 20170224_082518_zpsiiqvareg 20170224_082518_zpsiiqvareg by David Miller, on Flickr 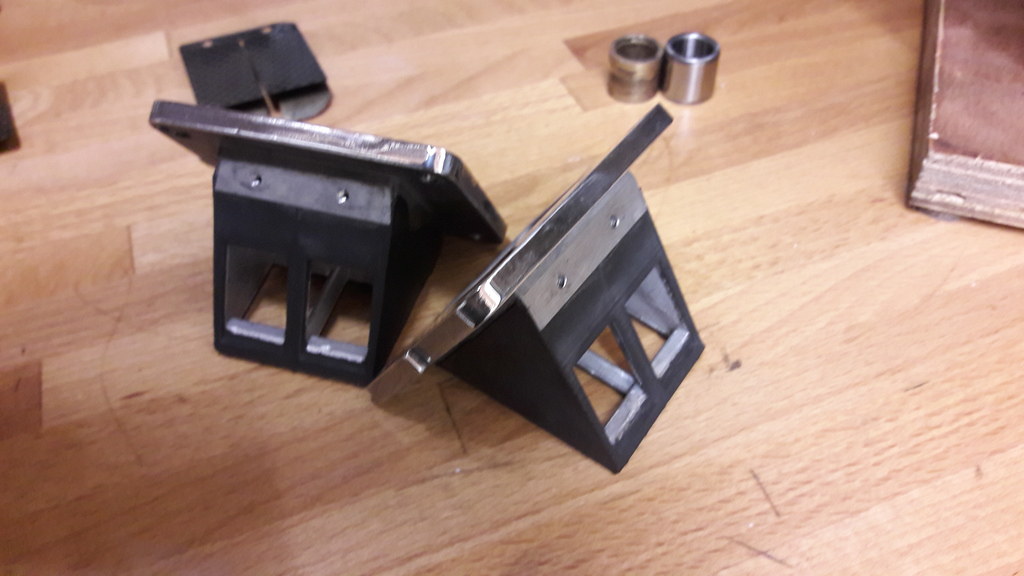 20170227_101753_zpsx651gofp 20170227_101753_zpsx651gofp by David Miller, on Flickr The head was stripped back and then masked up; 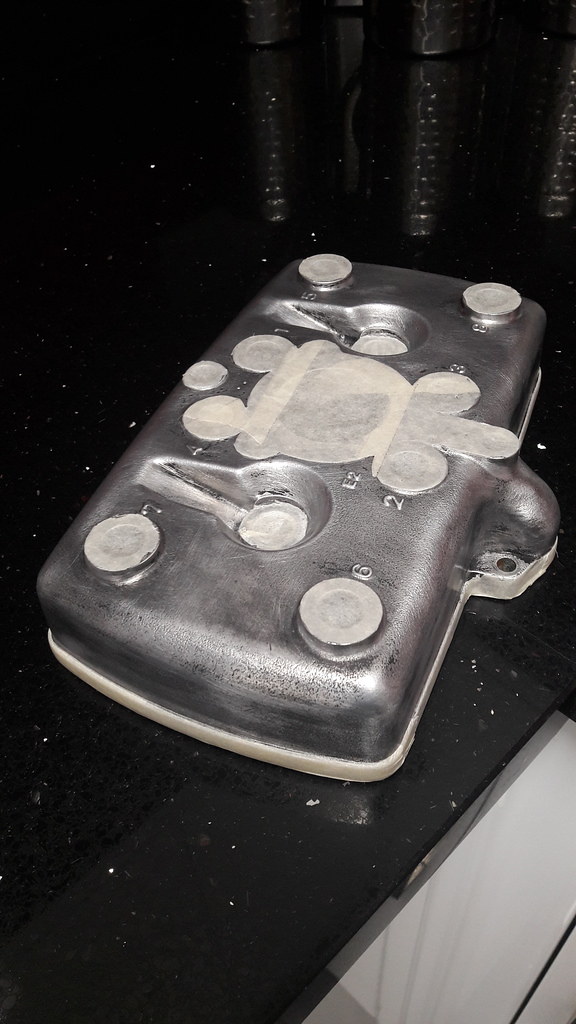 20170223_121906_zpsadw8pfwc 20170223_121906_zpsadw8pfwc by David Miller, on Flickr It was treated to a few coats of gloss engine enamel. I will save that pic till a bit later ! One issue I am working on is the left side engine case. For some unknown reason it is missing the spacer for the gear shaft. It is not a part listed by Yamaha so cant be easily replaced. I would like to use this cover as I quite like the hole design some previous owner has drilled in it !! Gotta save weight where you can  Anyway, this is the problem;  20170227_101812_zpsc5g6hdq7 20170227_101812_zpsc5g6hdq7 by David Miller, on Flickr So I have been on the "Simply Bearings" website and found a roller bearing that I hope may fit. That should land tomorrow so I will see how that fits. Once that issue is resolved the case can go to the powdercoaters, who currently have the clutch casing in for gloss black. Hopefully get that back this week. Dusty  |
|
|
|
Post by semperrd on Feb 27, 2017 21:50:30 GMT 1
This is a really informative thread, it will help me a lot when I'm rebuilding my engine.
|
|
|
|
Post by dusty350 on Mar 1, 2017 20:12:01 GMT 1
Hi I think I've solved the spacer issue in the left generator case. I ordered a needle roller bearing off the Simply Bearings website and it turned up today; 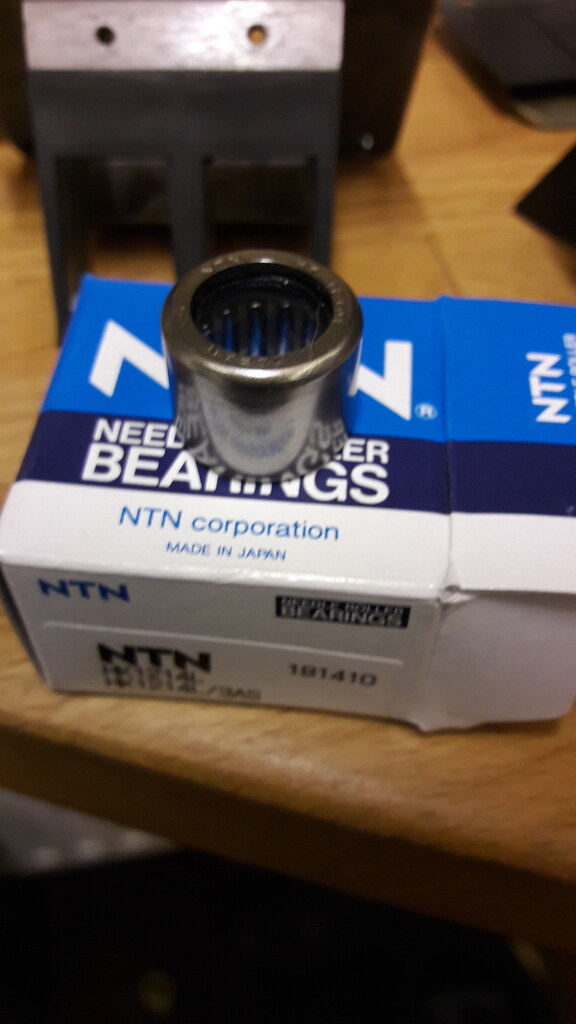 20170301_183612_zpsvzk3r1us 20170301_183612_zpsvzk3r1us by David Miller, on Flickr 12mm internal diameter, 18mm external and 14mm deep. I should be able to squeeze an oil seal in too. It's gonna be a snug fit in the case - I will need to freeze it before pressing it in which is a good thing. Once I knew it was going to be right I took the case over to Windsor for powdercoating - the clutch case is already there. Will be next week now before they are done. Dusty  |
|
|
|
Post by ibby4585 on Mar 2, 2017 8:59:48 GMT 1
Great thread. I am removing my engine this week and hopefully this has given me a bit of confidence to have a go myself.
Kris
|
|
|
|
Post by dusty350 on Mar 2, 2017 9:24:20 GMT 1
Go for it Kris  The hardest part of a strip down is stubborn fixings - parts that may never have been removed before. I am going to get a pic of all the tools I've use at the end of the build, but as long as you have a flywheel puller, clutch holding tool and a good socket set and spanners, plus an impact driver, you are good to go really. Take lots of digital pics as you go so you can refer back if needed, and a Haynes manual is a must really - lists all the torque settings and I always read it before I start. Bag everything up in freezer bags to keep it together and you wont mix parts up that way. Plus when you have time you can pick up a bag and clean/inspect/refurb parts as you go. And enjoy the process, it's a great engine to rebuild. Dusty  |
|
|
|
Post by ibby4585 on Mar 2, 2017 10:31:30 GMT 1
Cheers Dusty.
Ive done a few top end builds but never ventured any further.
Im hoping that all the fixing will be easy as its only recently been apart apparently.
Hopefully there are no nightmares waiting for me inside.
Kris
|
|
|
|
Post by ibby4585 on Mar 2, 2017 10:40:44 GMT 1
I notice that pjme list the crank with an option of TZ style bearings did you go for that and what is the advantage?
Cheers
Kris
|
|
|
|
Post by dusty350 on Mar 2, 2017 12:45:51 GMT 1
Hi
I did ask about the tz upgrade when i ordered the crank but they said it was good for racing and not necessary on a road bike. I didnt bother with it. I wont be thrashing it on a daily basis - they cost too much to rebuild !!
Its only £20 though so its not gonna break the bank.
Dusty
|
|
|
|
Post by dusty350 on Mar 3, 2017 13:28:53 GMT 1
Hi Got some work done on the barrels today. I had stripped one of paint some time back - easy enough job with only a few stubborn/difficult areas to clean it off. I had planned on painting them but I know if I get petrol on them and it comes off it's really gonna bug me, so I decided to go with a vapour blasted finish. Cases were done ages ago over at Cox's at Reading. I've been going to them since the early 90's and have always been really happy with their work, so I popped over with the barrels this morning, went and got some breakfast, and 2 hours later they were done  Before; 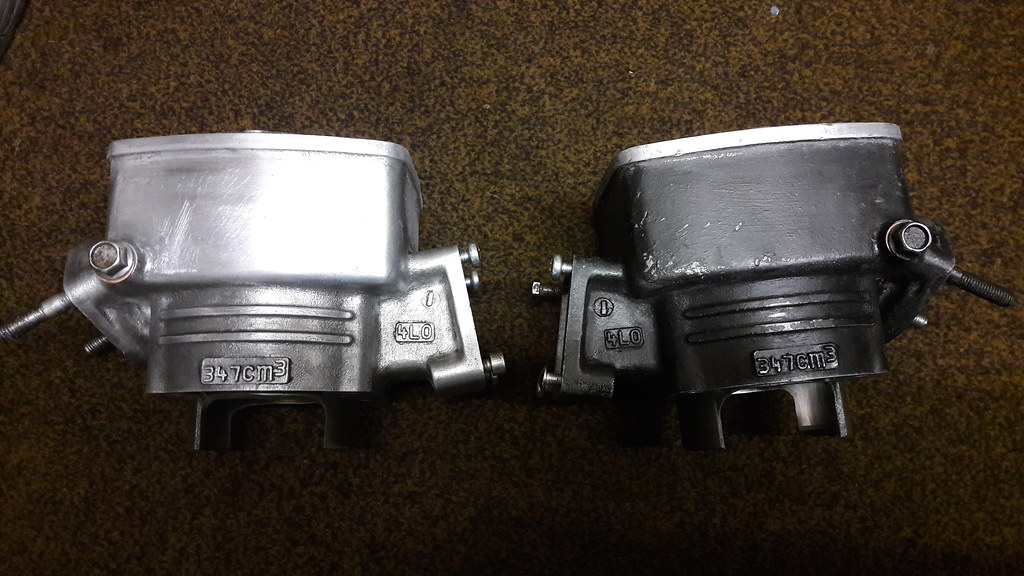 20170303_070809_zpsmssp4mkx 20170303_070809_zpsmssp4mkx by David Miller, on Flickr And after; 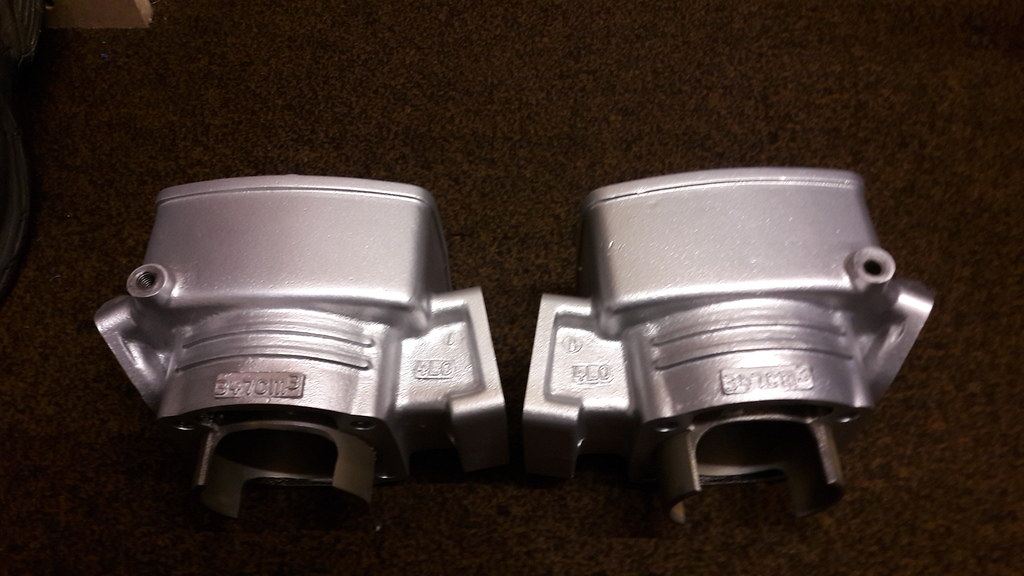 20170303_115044_zpsnfmoqhq6 20170303_115044_zpsnfmoqhq6 by David Miller, on Flickr They are actually a bit shinier than the pics show, which is what I wanted. They can adjust the "blingometer" when vapour blasting so the cases are more of a satin finish compared to the barrels. £40 for the pair which I think is good value. Going to give the barrels another good rinsing and then they are good to go. The engine finish, with gloss side cases, vapoured crankcases and barrels and black head will match the Ypvs engine in the blue hybrid; 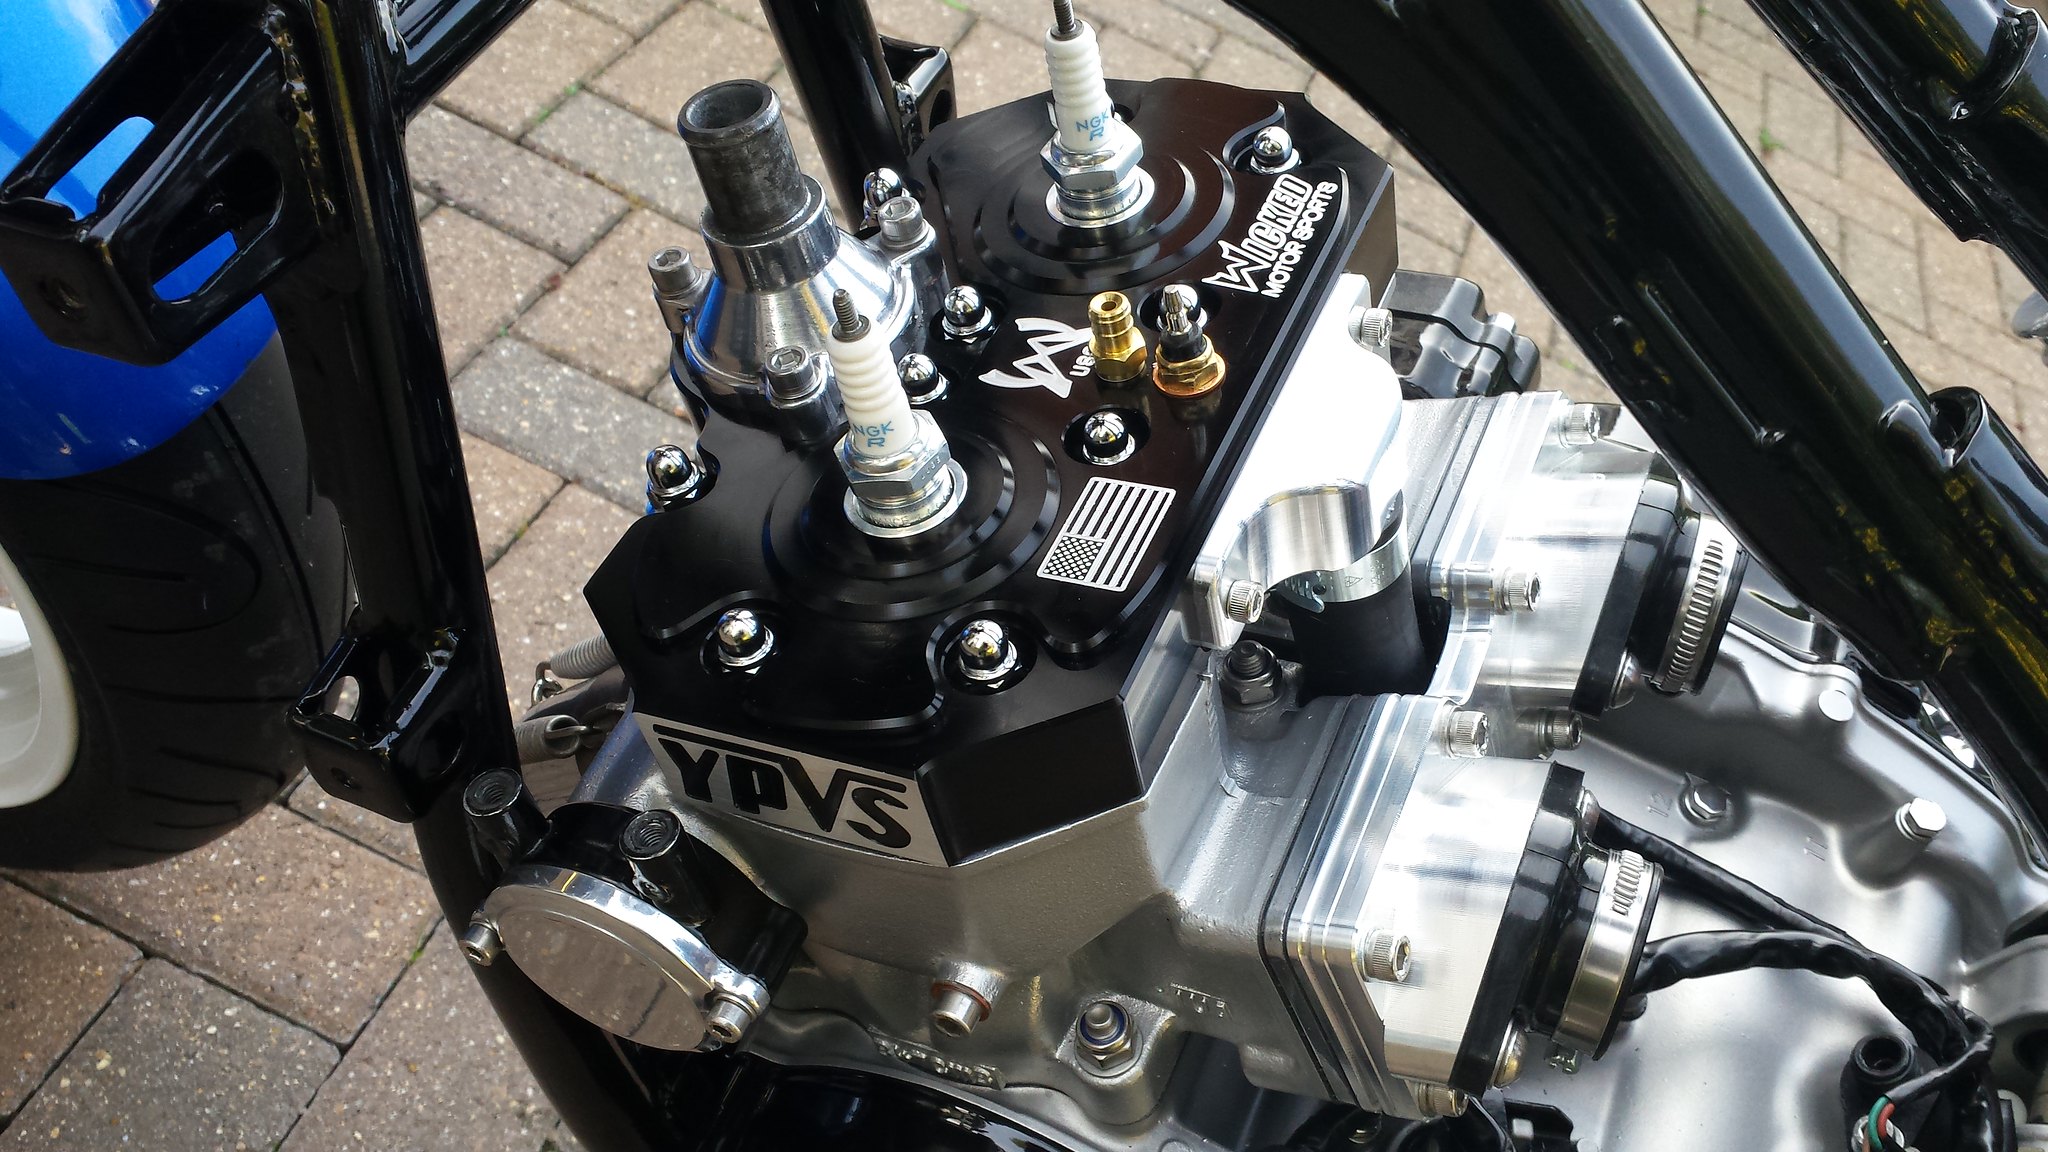 20151004_140800 20151004_140800 by David Miller, on Flickr Dusty  |
|
|
|
Post by mouse on Mar 3, 2017 13:56:49 GMT 1
Looks fantastic Dusty, i should have something similar very soon!
Mouse
|
|
|
|
Post by richclare on Mar 3, 2017 21:03:23 GMT 1
There is something delicious about raw aluminium alloy..... yum yum!
|
|
|
|
Post by dusty350 on Mar 3, 2017 22:07:08 GMT 1
They look like they have been sprayed with silver paint ! The good thing about vapour blasting, apart from the finish and it's non aggressive attitude towards delicate areas, is that it seals the "pores" of the ally so keeping it clean is a lot easier. Dusty  |
|
|
|
Post by dusty350 on Mar 3, 2017 22:39:19 GMT 1
Whilst I am waiting for the side cases to be powdercoated, I can build the top end now the barrels are done. New circlips were supplied by PJME as I threw the old ones when I removed the pistons when stripping it all down. Never reuse old circlips !! I fit the "inner circlip to the pistons before offering the piston to the conrod - so right circlip on the left piston and vice versa. It means you only have to fit 1 circlip per piston on the engine- just makes life easier as they can be fiddly. Plenty of fresh oil to lube all parts and then you can slide the gudgeon pin in and fit the second circlip. It's a good idea to put some clean rag in the crankcase mouth before you do this just in case the circlip disappears down under the crank ! Photobucket is playing up again so cant post any pics at the mo. It's the most temperamental bl**dy website I've ever used  Dusty |
|
|
|
Post by dusty350 on Mar 3, 2017 22:47:50 GMT 1
|
|
|
|
Post by dusty350 on Mar 4, 2017 19:49:42 GMT 1
Thanks mate  My lad spared me a few minutes this morning so I could get the barrels on; 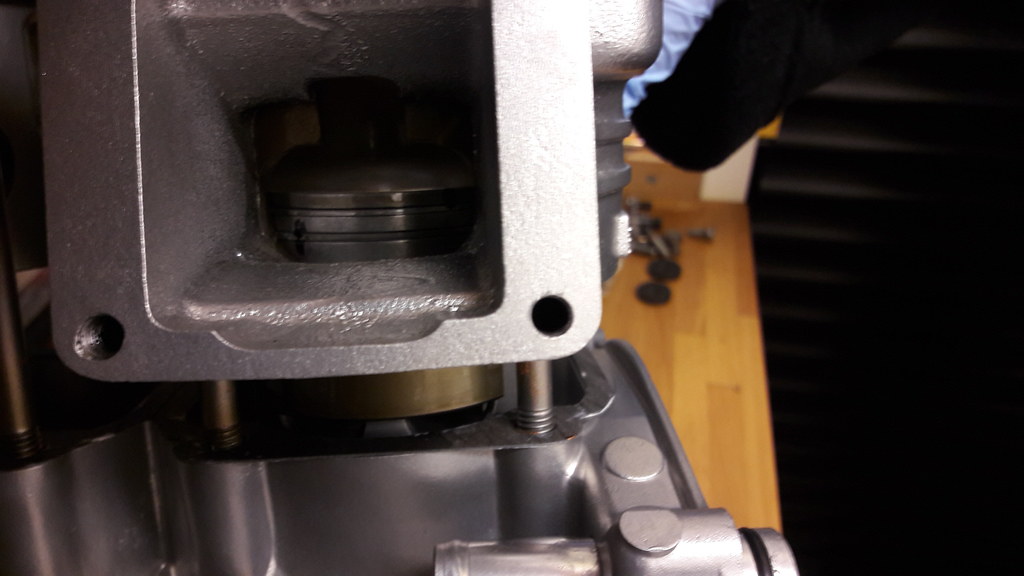 20170304_093030_zpseisarzfm 20170304_093030_zpseisarzfm by David Miller, on Flickr The other thing I do is mark where the ring pegs are in the pistons - makes it easier to see when the light isn't great in the garage; 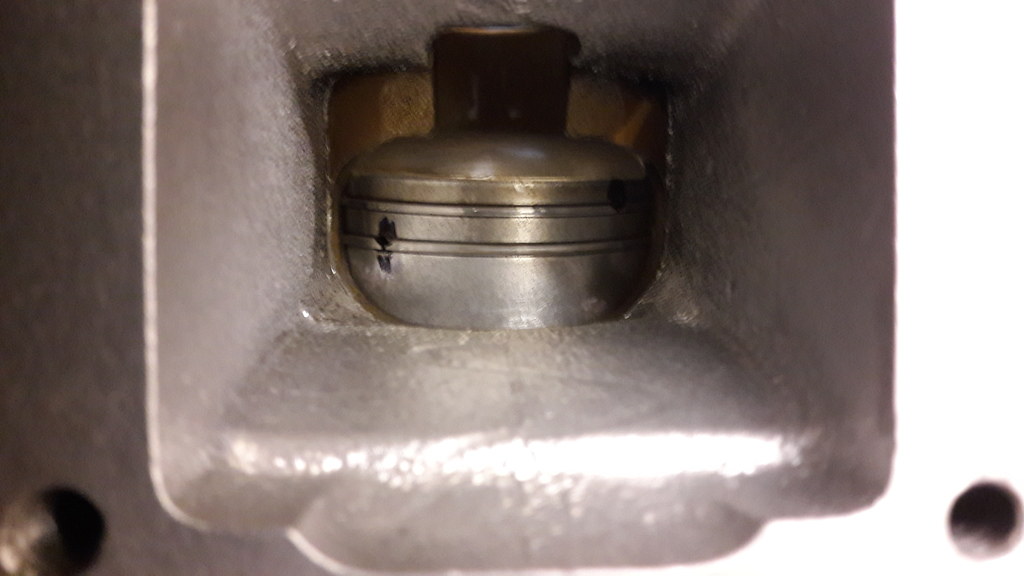 20170304_093054_zpslw6ivt4q 20170304_093054_zpslw6ivt4q by David Miller, on Flickr So Sam gently lowered the barrel over the studs with me compressing the top ring first. Once that ones in we wiggle the barrel down and bit and compress the bottom ring. Little bit fiddly but so much easier with 2 of you. For my own piece of mind I can check the rings are seated by looking through the inlet - the barrel is approx. an inch or so from being seated. Second barrel is slightly more difficult as the first gets in the way a bit but the process is the same, and is easier if you don't have sausage fingers like me !! So now both barrels are on, time for the head gasket; 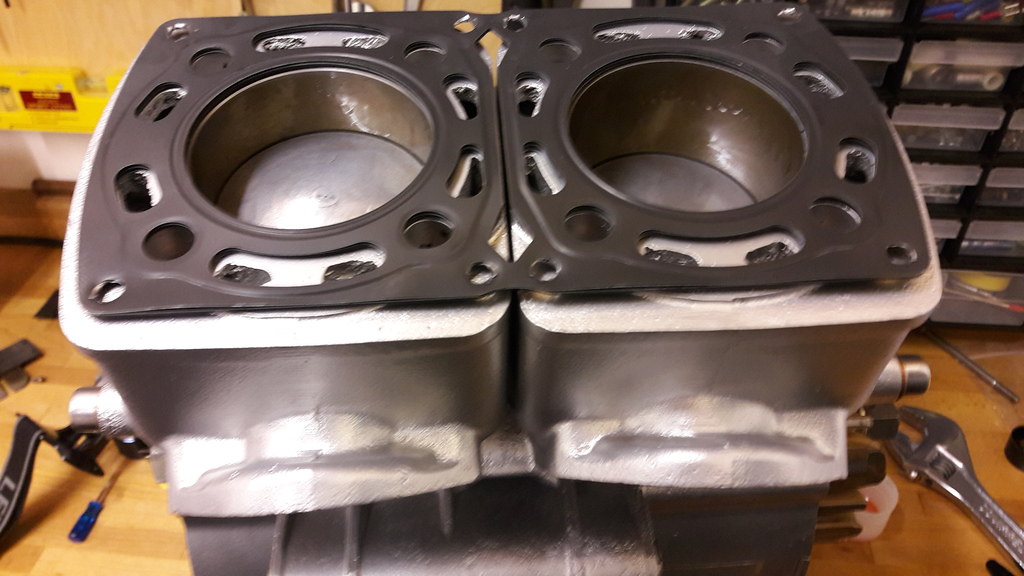 20170304_094049_zpsdwdhbhhb 20170304_094049_zpsdwdhbhhb by David Miller, on Flickr 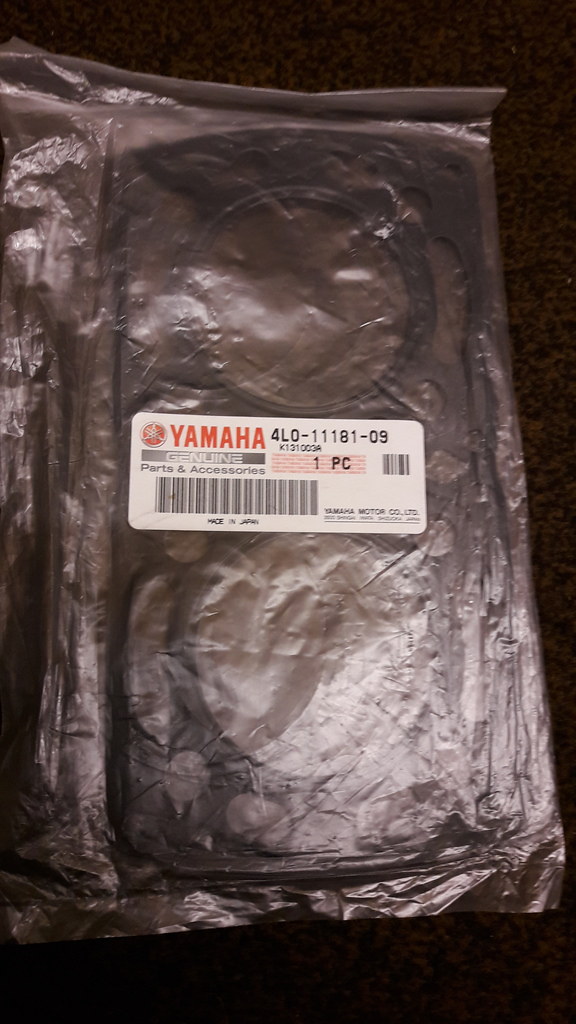 20170304_093700_zps6ihtaajx 20170304_093700_zps6ihtaajx by David Miller, on Flickr I place some wood under the front of my engine stand to jack up the front - makes it easier to sit the head gasket on the barrels so it doesn't keep sliding off. I use the 4 outer bolts first just to locate the holes in the barrels; 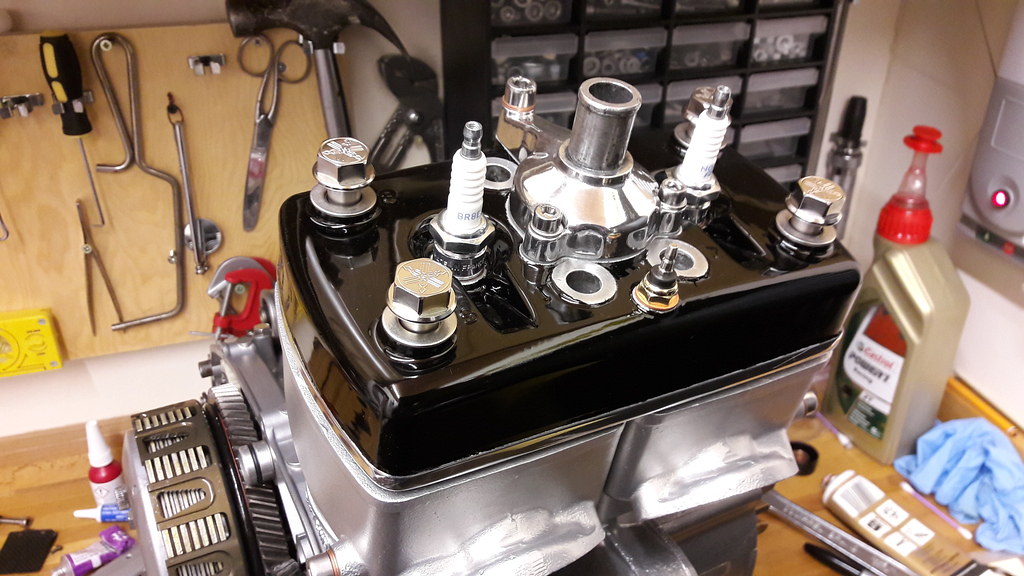 20170304_094304_zpsu7jutbgv 20170304_094304_zpsu7jutbgv by David Miller, on Flickr Then add the 4 inner bolts and start to tighten them in the sequence marked on the head. The head was sprayed with gloss engine enamel from Halfords. I polished the top housing and temp sender, and bought the blingy head bolts from Norbo; 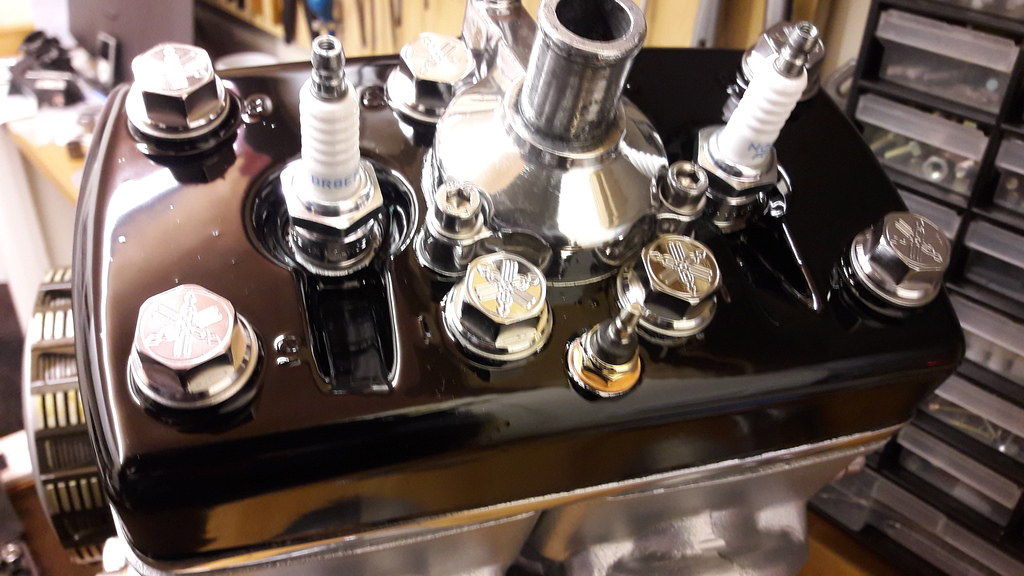 20170304_100557_zpst8zkr3sj 20170304_100557_zpst8zkr3sj by David Miller, on Flickr There is a new Yam gasket under the thermostat housing;  20170227_192548_zpsvdsm65l0 20170227_192548_zpsvdsm65l0 by David Miller, on Flickr I have managed to misplace the rear hose union that bolts to the head but I had a Ypvs item which is the same part number, so polished it, added a new gasket and fitted it, and also fitted new drain bolts with copper washers; 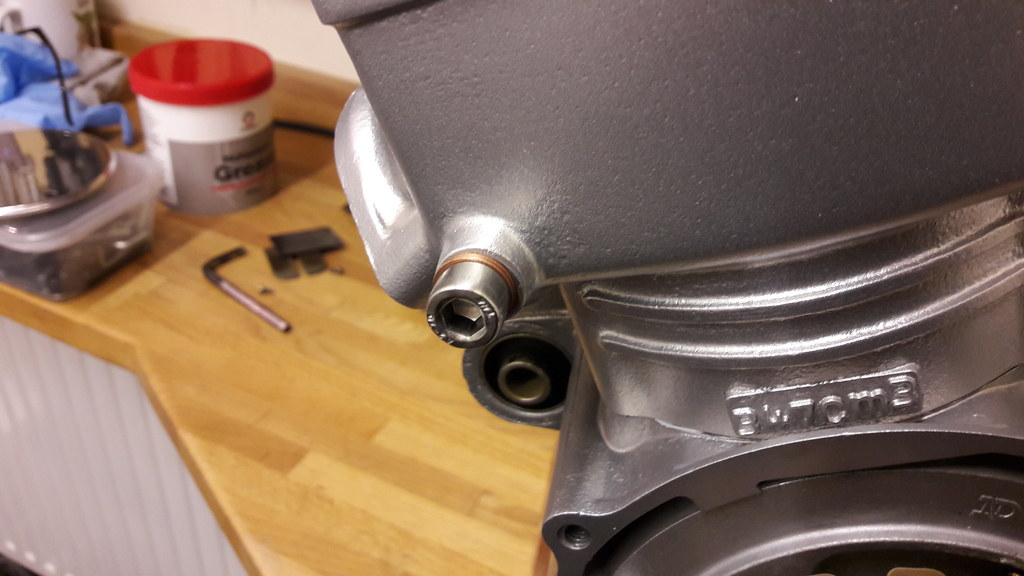 20170304_100905_zpsglidfyzx 20170304_100905_zpsglidfyzx by David Miller, on Flickr Dusty  |
|
|
|
Post by rostrumorhospital on Mar 4, 2017 20:13:58 GMT 1
very smart looking - no doubt it will run as good as it looks,
great work
|
|