|
|
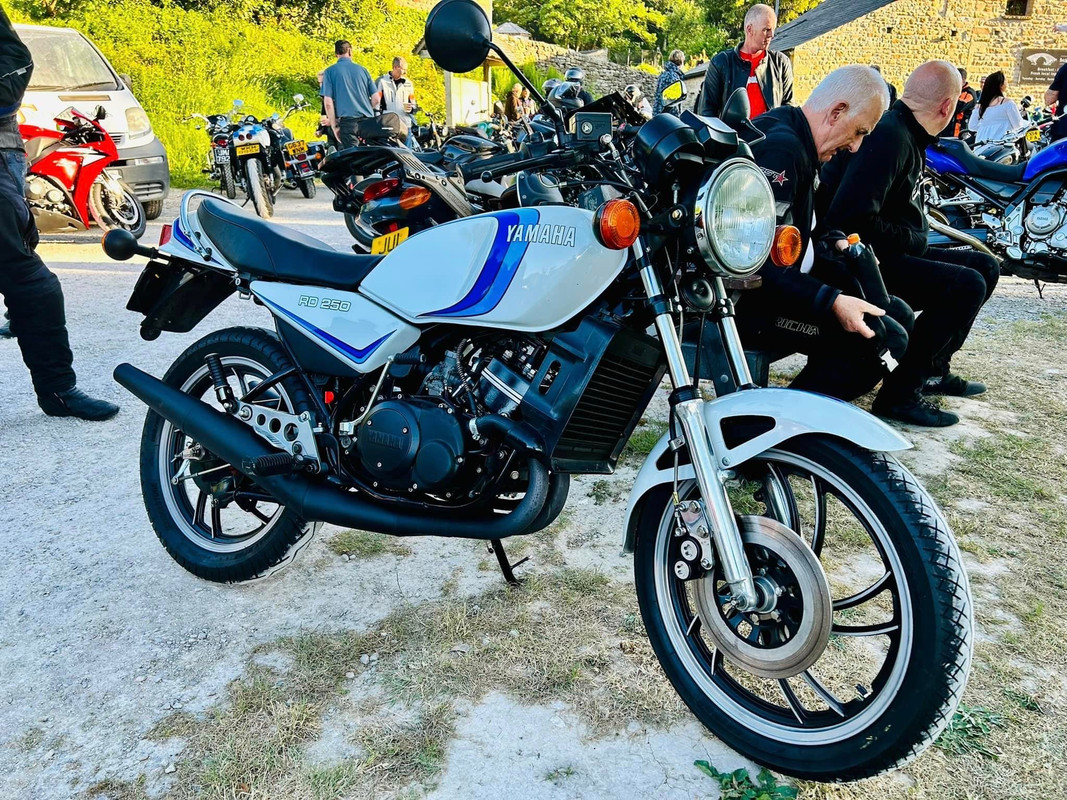
Post by JonW on Aug 25, 2022 14:17:49 GMT 1
Yes there is defo couple a bits there that are not LC Steve but its a good haul and reminds me i need one of those back of tank lumps of rubber for one of my LCs. Damn it never ends...
|
|
|
|
Post by steve63 on Aug 28, 2022 12:57:49 GMT 1
Yes there is defo couple a bits there that are not LC Steve but its a good haul and reminds me i need one of those back of tank lumps of rubber for one of my LCs. Damn it never ends... I keep finding stuff and adding it to the pile. I have 6 hoses which I presumed were two sets. Then I noticed there was only one 90° hose. That's the one that goes between the reeds to the head. There must be some more kicking around I think. |
|
|
|
Post by steve63 on Aug 28, 2022 13:02:45 GMT 1
The youngest lad stripped the old water system out of his house as it had a combi boiler fitted. He was getting rid of this and I couldn't resist it. You know when you want something but don't know what for? I sealed up a couple of the holes and made it into a de-rusting tub. Put a rusty shock spring in with water and citric acid crystals and it's doing its thing. Been in overnight and it's starting to go yellow.    |
|
|
|
Post by steve63 on Aug 29, 2022 21:52:07 GMT 1
I dragged the clocks out on Sunday. They had been taken off the bike in 1987 when I fitted the F1 valve engine and clocks and stuck in a box since. Unless these were on the rolling chassis I bought sometime in the 90's. Anyway It looks like they have been upside down at some point and oil has made its way onto the face of the rev counter. The speedo glass had dirt on the inside and after a quick look I can see the inner case is broken. I'll have a think about what to do and how far I want to go with them. I have new outer cases to fit but I don't think I can bring myself to just transfer them to the new cases without sorting them out first. Do I have a go myself or hand them to one of the experts?   |
|
|
|
Post by steve63 on Sept 5, 2022 23:03:27 GMT 1
The threat of a job is looming so today I thought I'd have a go at getting the wheels done. I'm not going to the expense of having them diamond cut. They are what they are. I've already bead blasted a few of them so I had a think about what order to do the tasks in and came up with this: 1) Polish the rims and spoke edges. 2) Fit new bearings and seals. 3) Fit tyres and tubes. 4) Clean/mask and paint. My thinking was that there was a risk of damaging the paint during tyre fitting and having the tyres on would not cause any problems with masking and painting. There would also be a risk of damaging the paint if I tried to polish the rims and spoke edges after painting. The only issue with doing it my way is the buffing compound goes all over and the wheel needs to be spotless before I can paint it. I'd already removed the bearings on this one. So set about polishing the rims and spoke edges.  Fitting new bearing on one side, remember to fit the spacer then fit the other, both with my special bearing fitting coach bolt and laser cut washer that just happened to be the right size.   Note none Yamaha oil seals used. I bought all the bearings and seals from Simply Bearings. The bearings are either NTN or Koyo and the seals look like good quality ones with the triple lips. The seals only task is to keep the weather out and the grease in so I'm not paying Yamaha prices.  It took me a while to find the speedo drive washer thing and the other ring that goes on top. I found two sets, one of which had the common problem of being bent and worn out. Sometimes the speedo drive doesn't get lined up with the tabs properly and tightening the wheel squashes the tabs then wears them out. I took the measurements from a good one to do a drawing then had a go at repairing it. I got it straightened out but both tabs are about 2mm short. I'll put a bit of weld on them next time the TIG set is out.  Yamaha still have these and they are quite reasonable but you know me by now 🤔 Something else I've been thinking about is making some kind of tyre changing rig. That square made of four bits of wood under the wheel is my present rig but I have plenty of RHS and would quite like to make something more robust to make my tyre changing a bit easier than the massive struggle it normally is. A kind of poor man's Sealey tyre changer. |
|
|
|
Post by shaunthe2nd on Sept 6, 2022 8:48:40 GMT 1
Refurbishing the wheels is definitely a labour of love.
I did a set a couple of months ago so feel for you.
That set had an old set of tyres fitted, so I left them on whilst I did the bearings, polishing and painting in that order.
I then had the new tyres fitted by a garage I use, and they didn't damage the paint nor rims. £30 well spent.
A few years ago I bought a full home tyre fitting kit, but still found it a massive fight to get tyres on and off, so sold the kit and pay someone to do it.
That and fitting LC decals are services I happily pay for. I know my limits!
If you need a hand with the clocks Steve give me a shout.
|
|
|
|
Post by steve63 on Sept 6, 2022 17:41:41 GMT 1
Refurbishing the wheels is definitely a labour of love. I did a set a couple of months ago so feel for you. That set had an old set of tyres fitted, so I left them on whilst I did the bearings, polishing and painting in that order. I then had the new tyres fitted by a garage I use, and they didn't damage the paint nor rims. £30 well spent. A few years ago I bought a full home tyre fitting kit, but still found it a massive fight to get tyres on and off, so sold the kit and pay someone to do it. That and fitting LC decals are services I happily pay for. I know my limits! If you need a hand with the clocks Steve give me a shout. Cheers Shaun. I may well do that with the clocks. For the time being they are in one lump and I have enough bits scattered around so I think I'll leave them for a bit. Not sure about the labour of love bit. More like just hard labour. I'm with you on the tyres thing. A mate of mine was pretty good at it and would only need biscuits and tea in exchange for doing a tyre but them days are gone. I once fitted an RD200 tyre and found out the direction of rotation was wrong after I put it back on the bike  I'm in the process of building a tyre changing thing like the Sealey one. I've only got a drawing done and sourced some metal. My new theory is that if the wheel was secure and not pressing on the tyre I could actually do it without losing the skin off my knuckles and a litre of sweat. Time will tell although your story doesn't give me much encouragement  . I would like to say I have it sussed, it's a doddle as I have three sets to do not including the little 125! The guy back way has a load of tyre changing kit and does his own. He's had Fireblades and GSXR's and takes it in his stride. He did actually say I could borrow it but I have the metal, the time and the tools so I'm going to give it a wirl! |
|
|
|
Post by steve63 on Sept 8, 2022 13:25:02 GMT 1
|
|
|
|
Post by steve63 on Sept 9, 2022 14:24:20 GMT 1
About there now.  |
|
|
|
Post by evochris on Sept 9, 2022 16:21:22 GMT 1
Steve, have a go at the tie wrap solution for putting tyres on, loads of YouTube vids on how to do it, I have done it many times and makes the job so much easier, hardly need much effort. I did it with my hybrid Suzuki wheels then left the tie wraps on so I could finish painting the wheels, I didn’t have the luxury of a polished edge to mask. It might work for you. Nice work by the way 👍
|
|
|
|
Post by steve63 on Sept 10, 2022 8:08:24 GMT 1
Steve, have a go at the tie wrap solution for putting tyres on, loads of YouTube vids on how to do it, I have done it many times and makes the job so much easier, hardly need much effort. I did it with my hybrid Suzuki wheels then left the tie wraps on so I could finish painting the wheels, I didn’t have the luxury of a polished edge to mask. It might work for you. Nice work by the way 👍 I did try the tie wrap method once on my RGV rear. When I needed new tyres for the VFR I took the wheels to have them fitted though. I fitted the front tyre ok. I was hoping I wouldn't have to secure the stand but even though most of it is 5mm wall tube so it's very heavy it still moves about. I'll just drill a couple of holes in the garage floor and fit anchors in.  |
|
|
|
Post by lcmarky on Sept 10, 2022 16:03:35 GMT 1
Steve, have a go at the tie wrap solution for putting tyres on, loads of YouTube vids on how to do it, I have done it many times and makes the job so much easier, hardly need much effort. I did it with my hybrid Suzuki wheels then left the tie wraps on so I could finish painting the wheels, I didn’t have the luxury of a polished edge to mask. It might work for you. Nice work by the way 👍 I did try the tie wrap method once on my RGV rear. When I needed new tyres for the VFR I took the wheels to have them fitted though. I fitted the front tyre ok. I was hoping I wouldn't have to secure the stand but even though most of it is 5mm wall tube so it's very heavy it still moves about. I'll just drill a couple of holes in the garage floor and fit anchors in. Good work mate - nice one! |
|
|
|
Post by steve63 on Oct 3, 2022 12:16:31 GMT 1
I'm not a tyre fitting expert by a long, long way but it took me about 15 minutes to fit the back one using my new set up. No skinned knuckles, very little swearing and no wrestling bent double on the grass.   I can find the new bearings and sling them in now. Must not get distracted by the SR125 forks that need stripping 😀 |
|
|
|
Post by steve63 on Oct 4, 2022 10:18:18 GMT 1
The bearing thing didn't go as planned  I warmed the hub with my paint stripper and tried fitting the side with the two metal seals first. Thought I would take a short cut and use a decent fitting socket to knock it in but It slipped and dented the seal. I could feel the resistance so I took it out. Fortunately I have another bearing for the other wheel and tried again with another one taking a lot more more care. Anyway, same result, bu@@er! £11.98 worth of Koyo bearings scrapped. Ordered two new bearings and I'll use my jig to pull them in that I was too lazy to look for and use. Ah well punishment for rushing a job.  |
|
|
|
Post by shaunthe2nd on Oct 4, 2022 23:39:32 GMT 1
Well impressed with the tyre fitting, well done. I gave up on that.
Shame about the bearing fitting, maybe I'm better at that!
|
|
|
|
Post by steve63 on Oct 5, 2022 12:01:55 GMT 1
Well impressed with the tyre fitting, well done. I gave up on that. Shame about the bearing fitting, maybe I'm better at that! It still wasn't a doddle but beats being bent double and chasing is across the lawn! I still need to decide where and fasten it down. Still going to be removable though. It's that last bit that I'm sure is harder than it should be. Paying to have them fitted is Ok but it's in their time and inconvenient and expensive if you have a few to do. I keep checking it to see if it's still holding air. Trapping the tube with the levers is the Achilles heal of the job. A couple of days later and it's flat! I'm thinking tubeless would be easier. I'll find out when I do my F2 wheels. The guy next door does all his and he's had a Blade and GSXR1000. I've a feeling bigger tyres might be easier. The back was easier than the front but then again the rims are the same size but front tyre is narrower so that makes sense. The socket I used didn't have much of a flat on the bottom face, more of a chamfer so it was bound to slip off really. One thing I miss about work is being able to get things like washers made, any inside, outside and thickness I want for things like this. I do have a few random ones in the garage but not enough. You can come and fit my bearings but I'm not fitting your tyres! Still dislike the job, just not as much  You're welcome to use the rig though  |
|
|
|
Post by steve63 on Oct 17, 2022 15:54:03 GMT 1
What a mind numbing few hours that was! Wheels now ready for paint. I just need to gather everything that's ready for satin black and wait for conditions in the outdoor paintshop to be right for painting, not easy in October but I'm not giving up hope.  |
|
|
|
Post by shaunthe2nd on Oct 17, 2022 16:00:10 GMT 1
One of my least favourite jobs too.
Once you get paint on them and peel off the masking tape, that is very satisfying though.
|
|
|
|
Post by billbott on Oct 17, 2022 22:02:50 GMT 1
I remember doing my wheels with great joy
After spending hours masking them all up, priming and painting them, the b@stard paint reacted (probably with some polish from doing the rims) so I had to do it all again.
I am building up courage to start my 250 wheels as I type..
|
|
|
|
Post by steve63 on Oct 18, 2022 8:19:45 GMT 1
One of my least favourite jobs too. Once you get paint on them and peel off the masking tape, that is very satisfying though. The thought of peeling off the masking tape and the sheer joy it brings is what's keeping me going . I've kind of developed what I think is the most efficient way to do the separate tasks like the tyre fitting, the rim/spoke cleaning/polishing etc. so logically I should crack on with another pair while I'm in the groove but I don't think I can bring myself to do it. |
|
|
|
Post by steve63 on Oct 18, 2022 8:32:03 GMT 1
I remember doing my wheels with great joy After spending hours masking them all up, priming and painting them, the b@stard paint reacted (probably with some polish from doing the rims) so I had to do it all again. I am building up courage to start my 250 wheels as I type.. If that happend to me I'd probably sling them back in the garage for another year! I tried to come up with the most logical order to do them that would minimise the risk of damage. I decided that polishing the rims then fitting the tyres before masking and painting would minimise the chances of damaging the paint. Once the paint is on they're finished and can be stashed out of the way. The last thing I did before masking off was give them a scrub all over with cellulose thinner using a toothbrush and a clean rag. There were traces of polish coming off. Hopefully I won't have the same issue as you. The Mrs. has made a couple of remarks (complaints  ) about finding bike bits, mainly these wheels around the house. She said one was under the bed when she came to put her suitcase away. Then she said there were some in the utility room. I put her straight with the fact that the ones in the utility room are the same ones and they are only in there warming up so the masking tape sticks and for painting. Women eh? I need to come up with somewhere better to hide the finished wheels  . |
|
|
|
Post by steve63 on Oct 18, 2022 10:44:22 GMT 1
Wheel painting stand (work in progress).  Nice working height, I can get to both sides and I can spin the wheel. I just need a bit of heat in the sun 🌞  |
|
|
|
Post by steve63 on Oct 20, 2022 10:04:49 GMT 1
The weather Gods smiled on me with a single, still, warm, sunny day so i managed to get both wheels primed and top coated. Looking at them carefully the next day I spotted a few areas where I could just make out the primer through the black so they will need a bit more paint. There's so many sides and corners it's so hard to get every last mm. It doesn't look like today will be the day for painting though. It's grim out there   I've only gone and got myself a job, starting on Monday. Progress will have to slow down a bit and before anyone says anything, yes, I know it was pretty slow anyway |
|
|
|
Post by tonyd123 on Oct 20, 2022 11:16:10 GMT 1
Steve, have a go at the tie wrap solution for putting tyres on, loads of YouTube vids on how to do it...... Just Googled that, looks like hard work to me! The key is make sure the tyres are warm, I always put them on a radiator for 20 minutes, it makes life so much easier |
|
|
|
Post by steve63 on Oct 20, 2022 12:54:50 GMT 1
Steve, have a go at the tie wrap solution for putting tyres on, loads of YouTube vids on how to do it...... Just Googled that, looks like hard work to me! The key is make sure the tyres are warm, I always put them on a radiator for 20 minutes, it makes life so much easier No good in our house, the radiators are all cold |
|
|
|
Post by andy748 on Oct 20, 2022 19:23:54 GMT 1
Nice work Steve, and great (Ahem) news on the job front, well done mate. Andy.
|
|
|
|
Post by steve63 on Oct 21, 2022 9:05:42 GMT 1
Nice work Steve, and great (Ahem) news on the job front, well done mate. Andy. Thanks Andy. I'm suffering here. All I want to do is peel that masking tape off and it's done nothing but pi$$ it down since I painted them so I can't do my touch up bit. Seriously considering clearing out the tomatoes and moving operations to the greenhouse. I'm 50/50 about the work thing. Same money as before but one hour less and almost flexible hours, so result . One of the jobs I was involved in and thought (hoped) I'd never see again is still knocking around. I've a feeling I may be the sacrificial lamb on this one . Still, nothing to lose, I can leave easily and they can blow me out easily so any cash I get out of it is a bonus. If there's one thing I've learned from all this it's make the most of what you have because you never know when it will come to an end. I used to walk past the scrap bin and think, oh a nice piece of sheet/bar/tube/angle/mesh, I might take that home for my stash, no need I can always pick some up another time. I'll make sure my 'stores' are well stocked now. Same with getting items laser profiled. I would put it off thinking there was no rush. Anyway this new company has a laser of their own so result! |
|
|
|
Post by steve63 on Oct 21, 2022 9:37:57 GMT 1
I bought this kit yesterday. The idea is to make my own wheel balancing stand. I could have bought some bearings and made most of the rest but I would have had to employ the services of a turner to make the cones so I thought this was a reasonable start for £24.00 delivered.  |
|
|
|
Post by Robbieben on Oct 21, 2022 10:51:26 GMT 1
I bought this kit yesterday. The idea is to make my own wheel balancing stand. I could have bought some bearings and made most of the rest but I would have had to employ the services of a turner to make the cones so I thought this was a reasonable start for £24.00 delivered. I have a similar set up but home made and use a front paddock stand for the rollers to sit in |
|
|
|
Post by steve63 on Oct 21, 2022 17:13:06 GMT 1
The wheel balancing kit arrived today which is pretty good going. I gambled that the shaft would fit an LC front wheel, the bearings are 12mm dia inside. Some of these say 15mm and over spindle size. The shaft is actually 12mm or even 12.1mm so it wont fit inside the front wheel bearings by a cats c**k. It's soooo close though. The actual wheel spindle is a couple of tenths under 12mm. A bit of thought needed. Anyway the weather gods smiled on me again for about an hour so I dragged the wheels out and a couple of other bits and put the last bit of paint on and peeled off the masking tape, ta da These are as near to standard as my budget/patience/skills will allow. I thought they looked a bit too shiny at first but I think they're pretty close now.   I've bought another disc off Ebay in the hope that it's a closer match in thickness to one I have. i have a matching pair then a much lighter skimmed one that's probably come off a 250 wheel I had. Once that arrives I'll give it a blast (the other four are done) then it's back to the tedious task of masking off again, deep joy . It's gonna be a drag having to do stuff on a weekend and evenings again but at least I won't have to freeze in a cold house/garage all winter |
|


 . I would like to say I have it sussed, it's a doddle as I have three sets to do not including the little 125!


 You're welcome to use the rig though

 ) about finding bike bits, mainly these wheels around the house. She said one was under the bed when she came to put her suitcase away. Then she said there were some in the utility room. I put her straight with the fact that the ones in the utility room are the same ones and they are only in there warming up so the masking tape sticks and for painting. Women eh?
 .
. 

