|
|
Post by d6lc on Jan 27, 2015 3:18:09 GMT 1
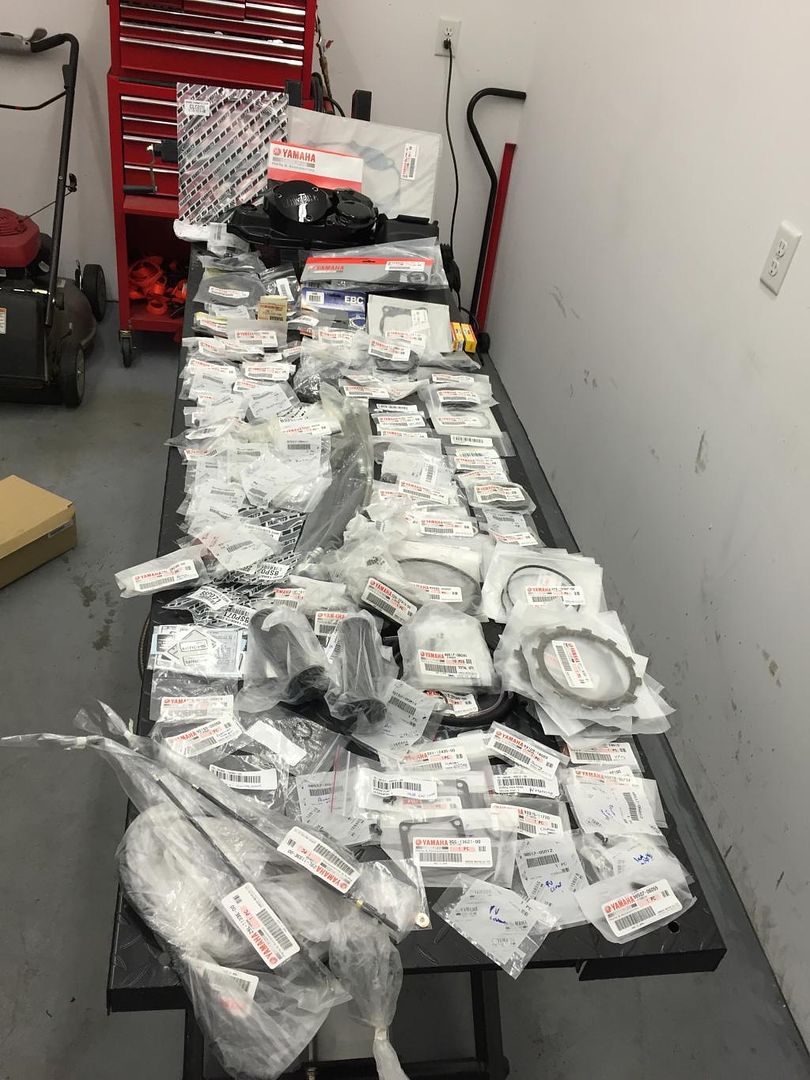
The photo the wife can NEVER see, garage time is private time!!
 |
|
|
|
Post by d6lc on Jan 27, 2015 3:21:20 GMT 1
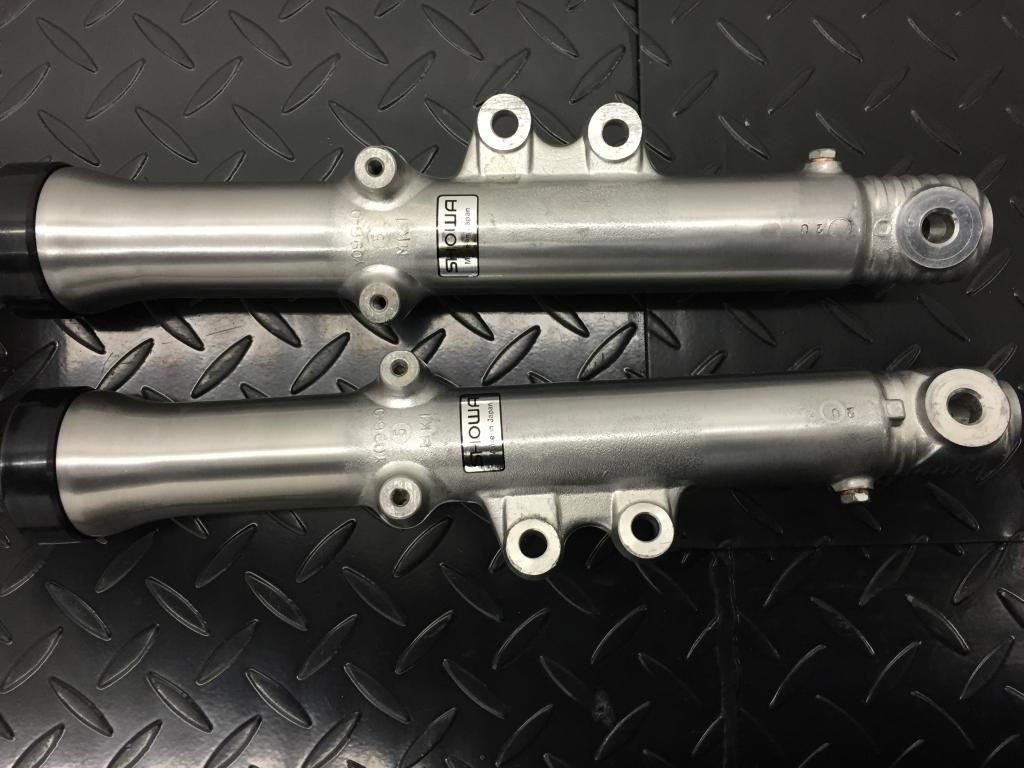
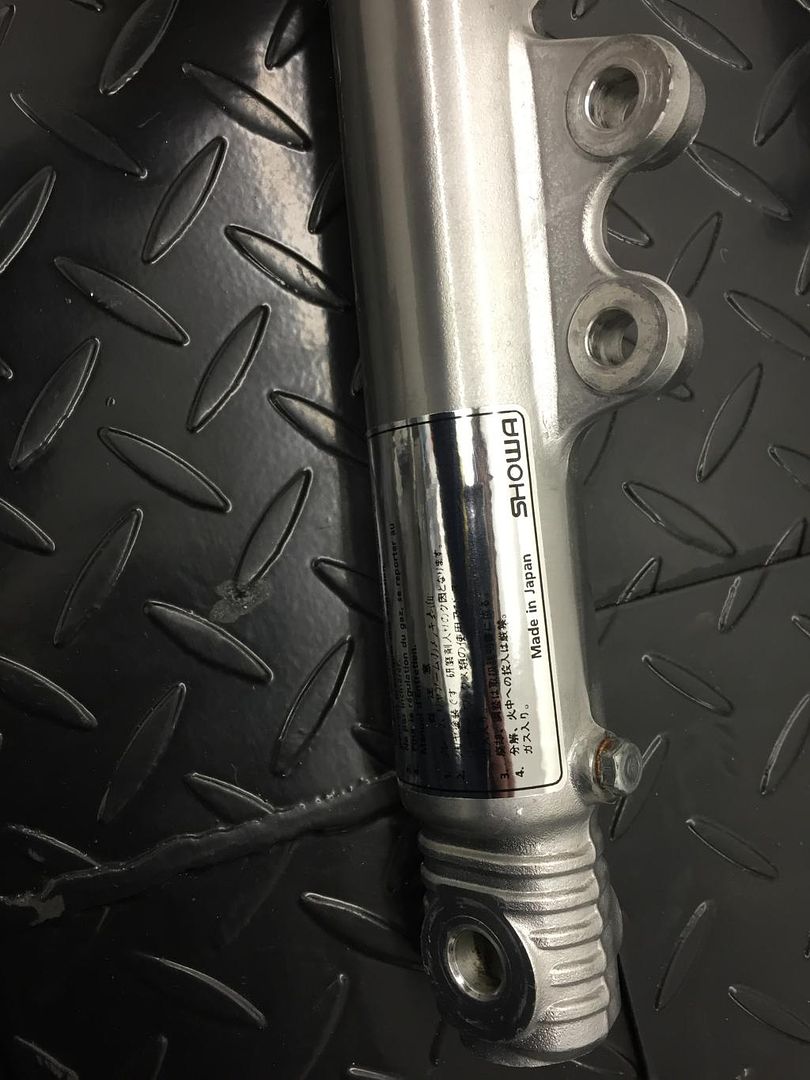
Forks finished, replacement Showa decals on
  |
|
|
|
Post by spudmab on Jan 29, 2015 9:33:51 GMT 1
Not much of an update for the rebuild, been cleaning all the sundry parts that need painting and getting ready for the rebuild. Stripped all the brakes, they all need painting, one piston on the front caliper was in for good!, took WD40 and a blow torch to get it out, as you can see plenty of corrosion in there!. 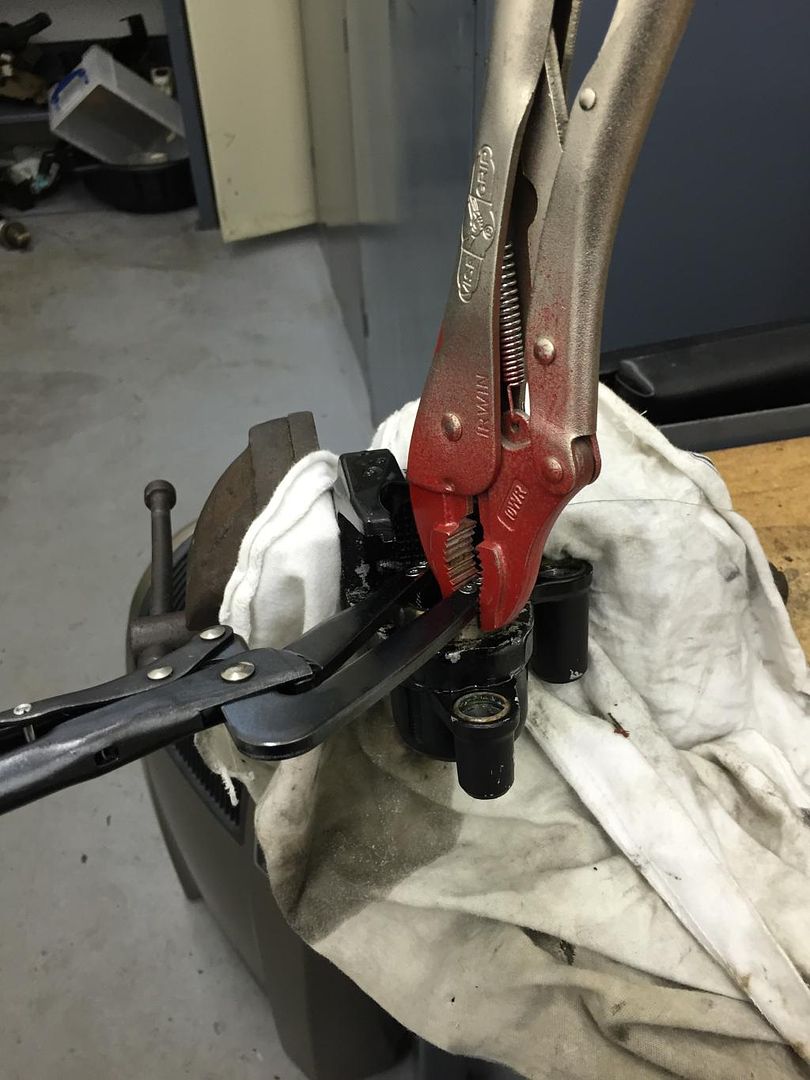 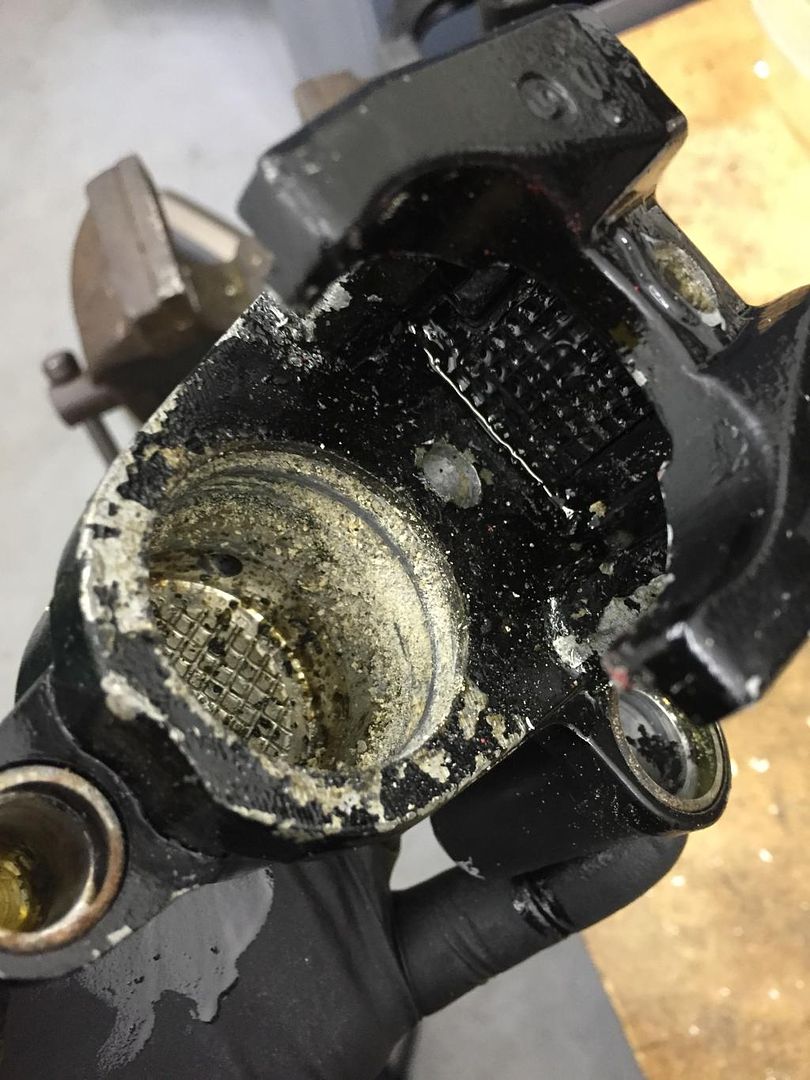 Some parts came up like new after a quick ultrasonic bath. 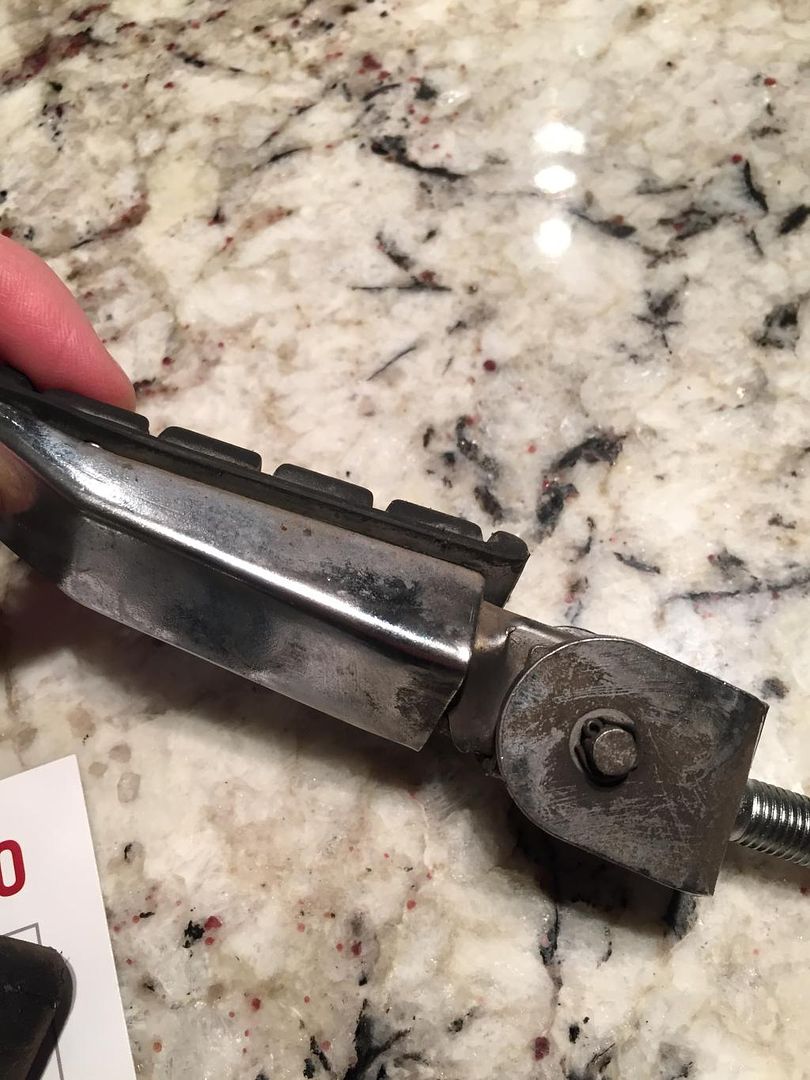 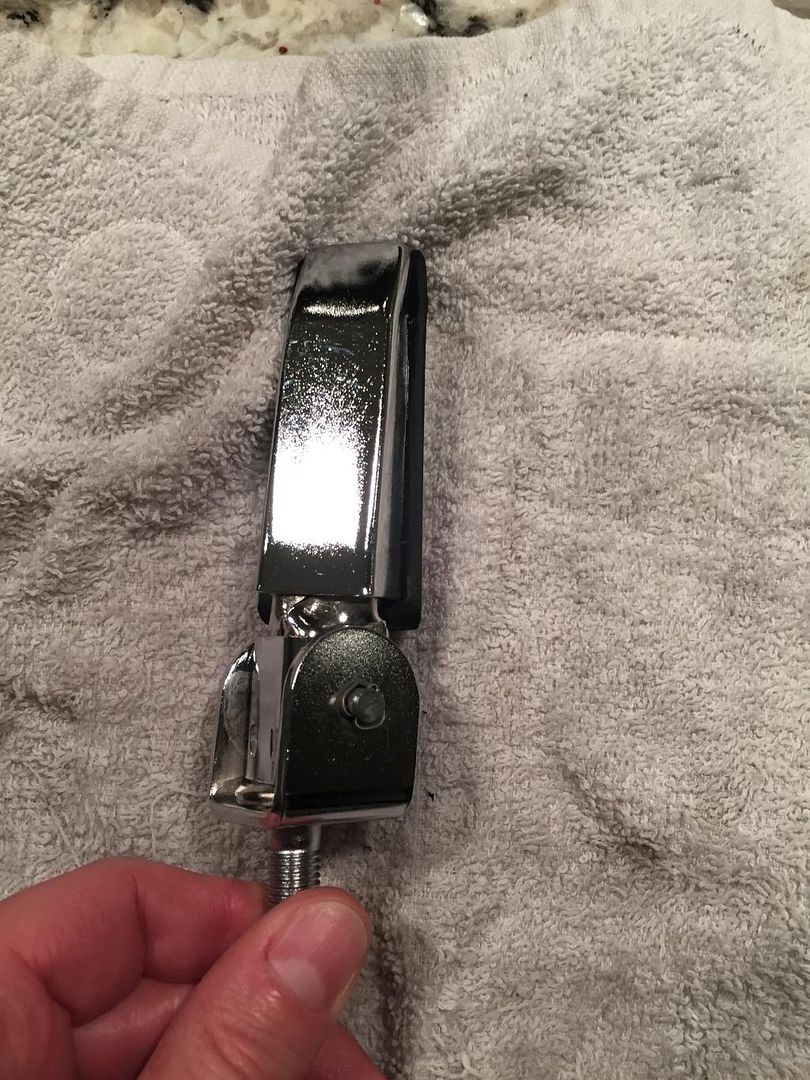 Finally found a use for the dishwasher in the basement, all the plastic parts are oil and grease free now. 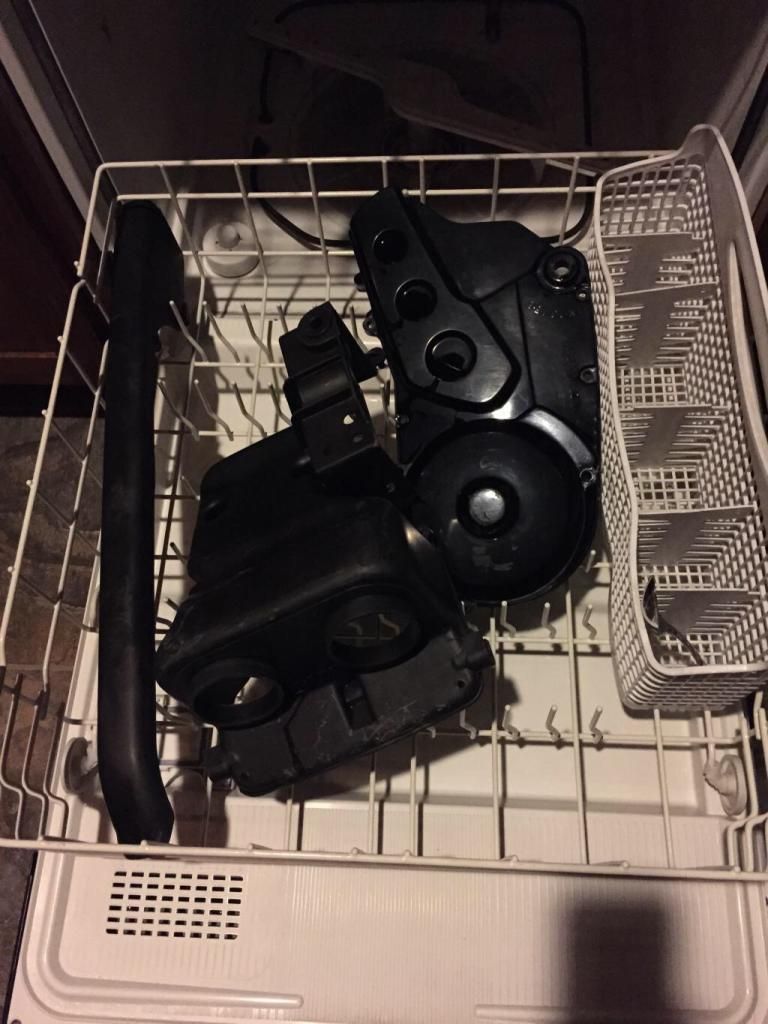 Just wondering what you use in your ultra sonic cleaner, I have tried white vinaigrette but it doesn't bring stuff up as nice as your have |
|
|
|
Post by spudmab on Jan 29, 2015 9:36:37 GMT 1
The photo the wife can NEVER see, garage time is private time!!
Wow, I have a file of receipts that I have hidden in the workshop, what they Don't know won't hurt, lol |
|
|
|
Post by d6lc on Jan 29, 2015 15:02:12 GMT 1
Your supposed to put Vinaigrette on your salad mate not in your ultrasonic cleaner, I presume you mean white vinegar, water & washing liquid.
For the really crappy parts I used 50/50 Simple Green & water, not sure if you can get it in the UK, it’s a biodegradable degreaser, works a treat and doesn’t discolor aluminium or strip plating like Vinegar solutions can.
|
|
|
|
Post by neil007 on Jan 29, 2015 17:46:06 GMT 1
Your attention to detail is brilliant. Keep the posts coming and keep up the good work  ? |
|
|
|
Post by spudmab on Jan 29, 2015 23:01:15 GMT 1
Lol I just noticed that my auto correct changed it, I meant white vinegar
|
|
|
|
Post by d6lc on Feb 1, 2015 14:34:15 GMT 1
So my daughter wanted to trawl through some old photo’s and to my surprise she found a couple of pics of my first YPVS. As mentioned in an earlier post I was an 83, purchased in 88 as in the first pic as a basket case for 600 quid from a guy in Atherstone!, I remeber it as i think runners used to go for around 1,500-2,000 and i just couldnt afford one. Painted and rebuilt it. 27 years on I’m doing the exact same thing, but less dayglo red this time, and a bit less bodging to get it running on a budget! 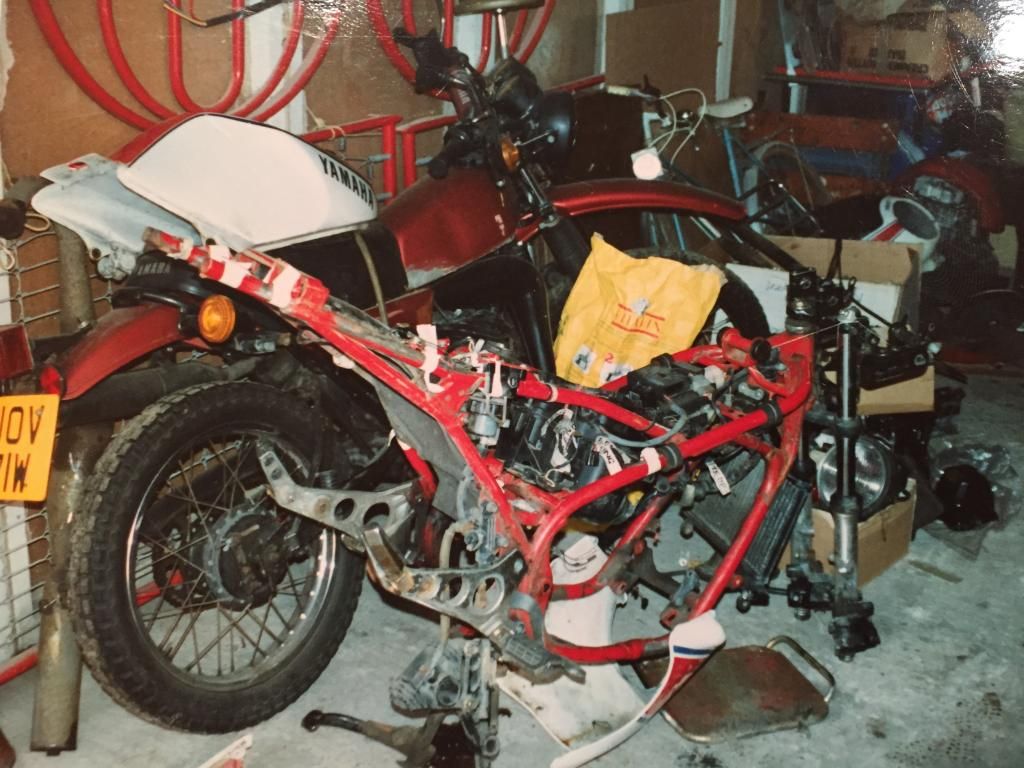 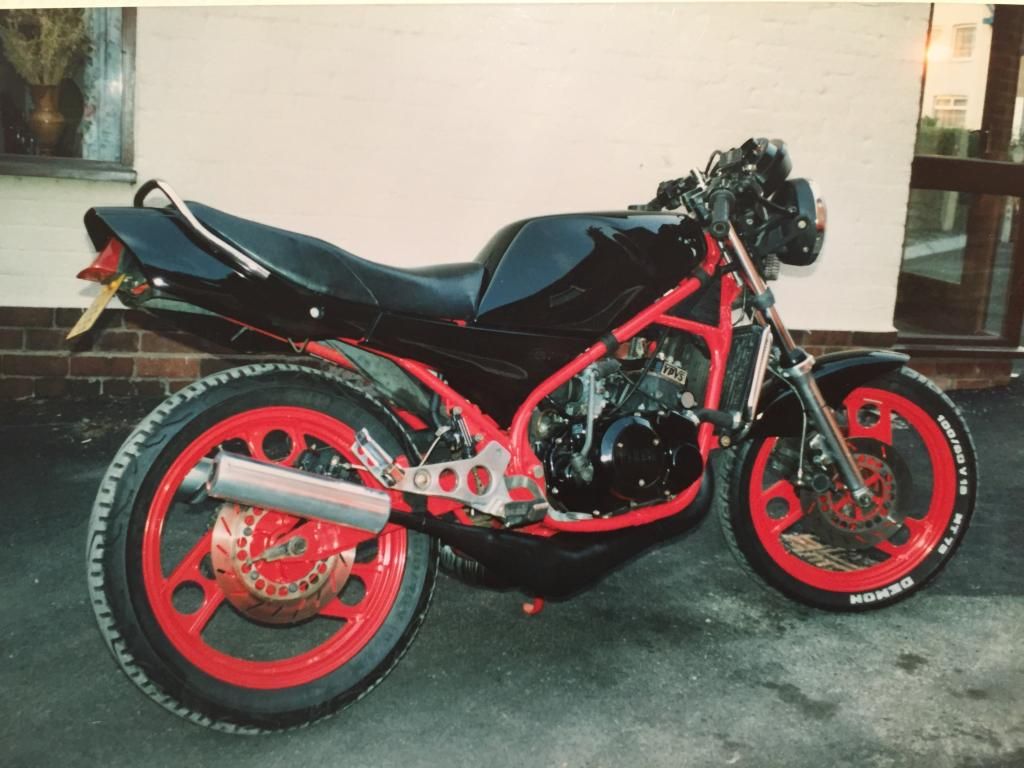 |
|
|
|
Post by d6lc on Feb 1, 2015 14:48:48 GMT 1
So got the frame, swing arm & stands back from the powder coaters, they look great, really pleased with them. Pressed the steering head cups in and fitted the warning decals. Just waiting for the plating so I can start to put it all together.  A tip for anyone doing this, dont try and hammer the swingarm roller bearings in with a socket, you will just deform them. Put them in the freezer, then gently tap them in to start them, get a threded rod & nut, tighten it up and press them in, just always make sure they are going in square. 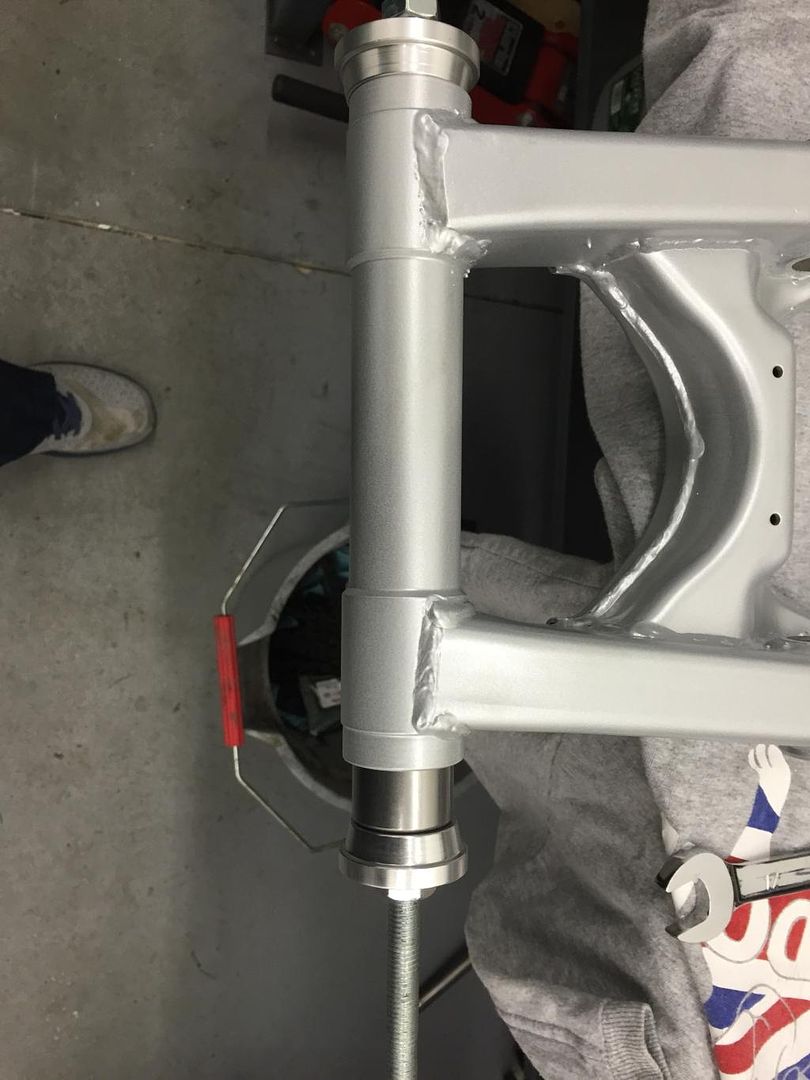 |
|
|
|
Post by gazsellars on Feb 1, 2015 15:16:58 GMT 1
This is going to be a real beauty when it's finished. Enjoyed the thread so far can't wait to see the finished article.
|
|
|
|
Post by d6lc on Feb 1, 2015 23:08:26 GMT 1
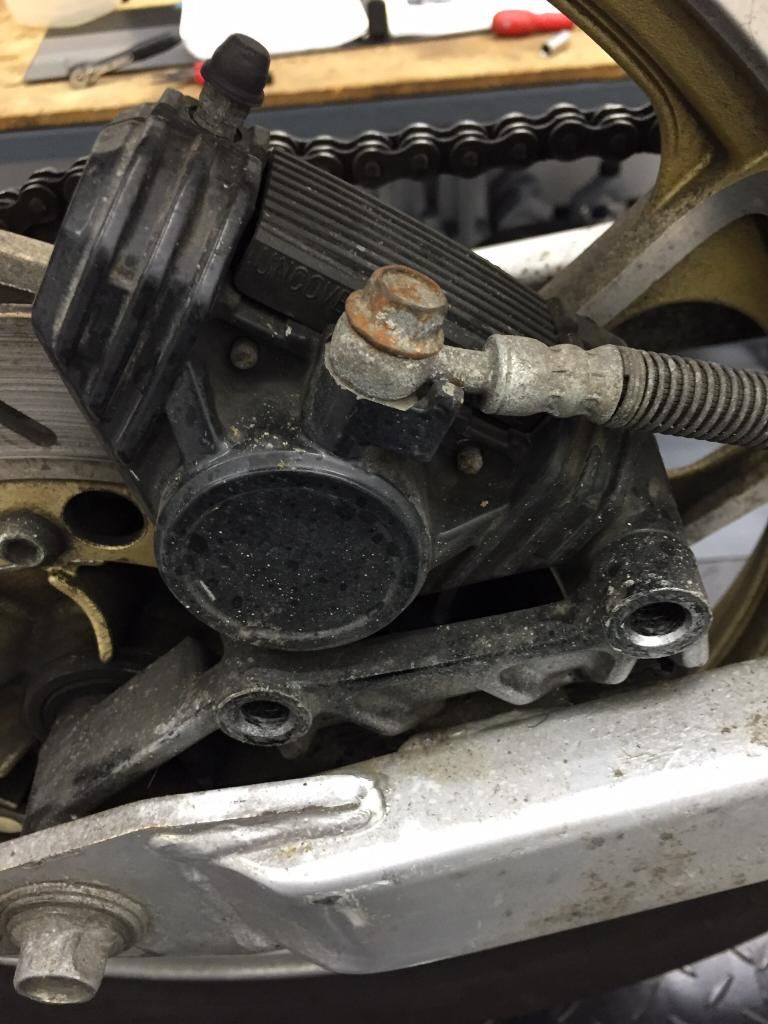
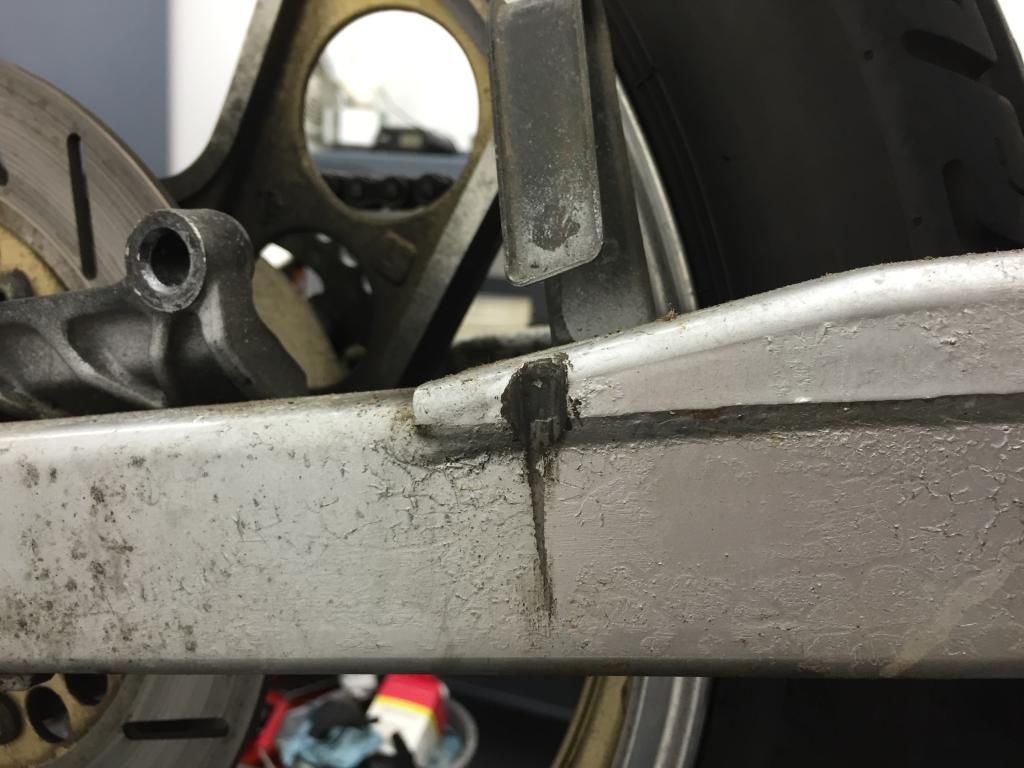
So attacked the last of the cleanup prior to build and by far the worst, the wheels!!, 30 years of crap, corrosion and crime, the before photo’s are after I degreased and washed them, that’s how grubby they were. So I spent 3 hrs with a dremel and various, wire wheels, polish wheels, sand paper, scothbrite and wire wool, but nothing seemed to remove the corrosion and leave a reasonable finish. So I ended up with a process that seemed to work pretty well – sanded the machined parts of the wheel with 150 grit until you remove all of the corrosion, then rub the area down with wire wool and WD40, this seems to give a nice satin finish almost the same as original. The rest of the painted area came up ok after scrubbing with WD40 and a nail brush. I had an old electric toothbrush that was a godsend to clean the corners of the wheel where you couldn’t get the brush in. probably 8 hrs worth of labor to get the wheels cleaned up, my fingers are numb now but they look good. Here is a selection of before and afters: 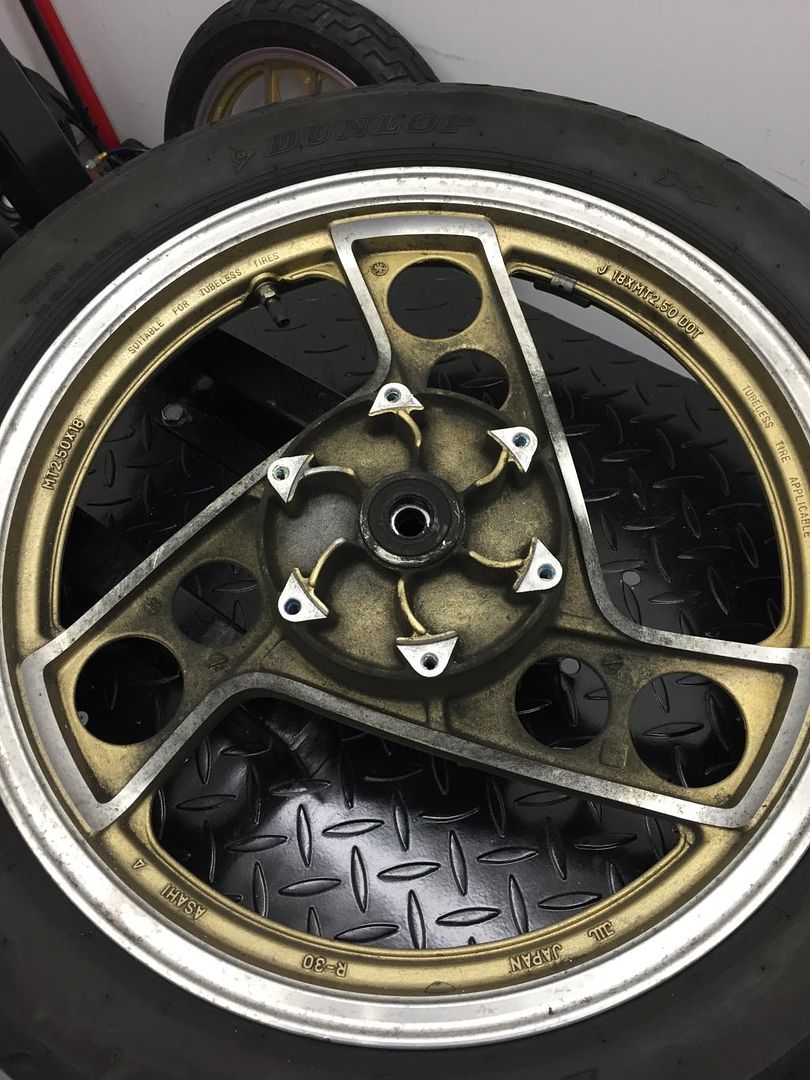 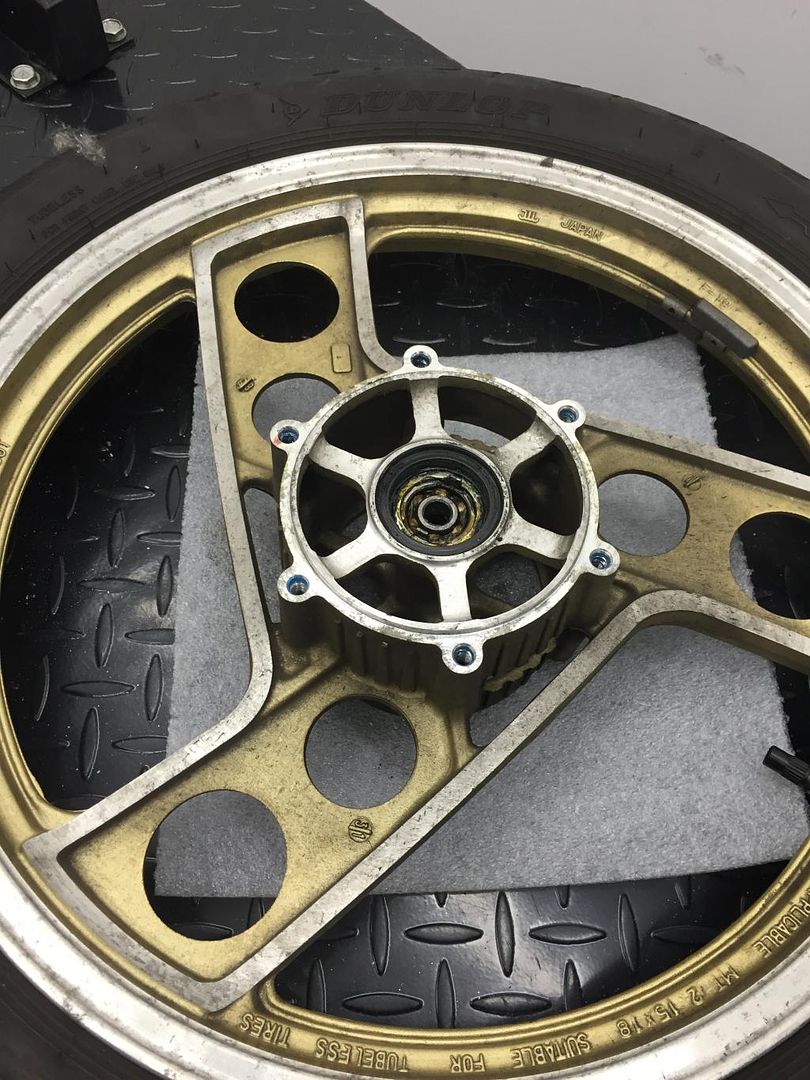 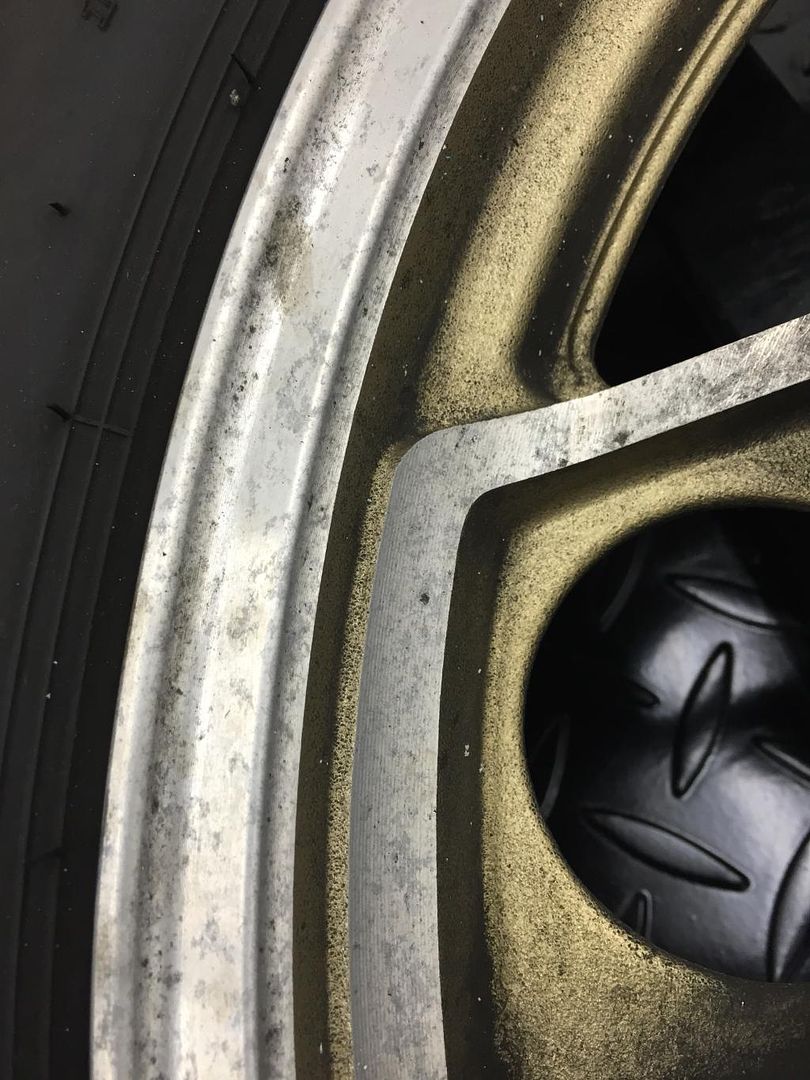 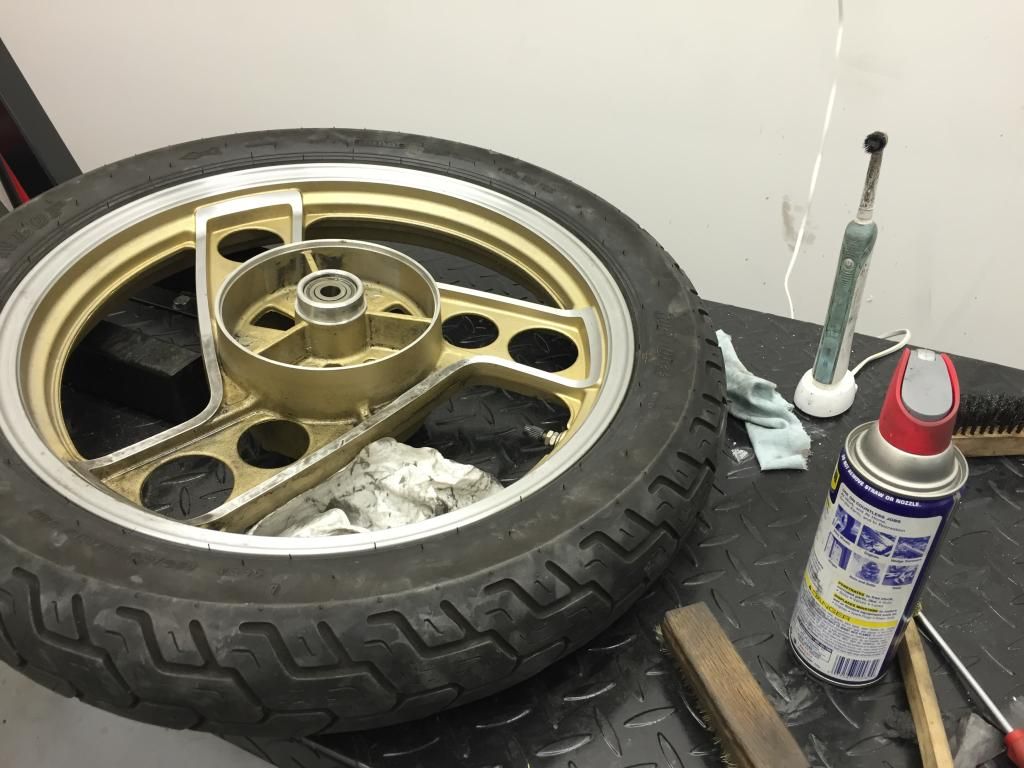 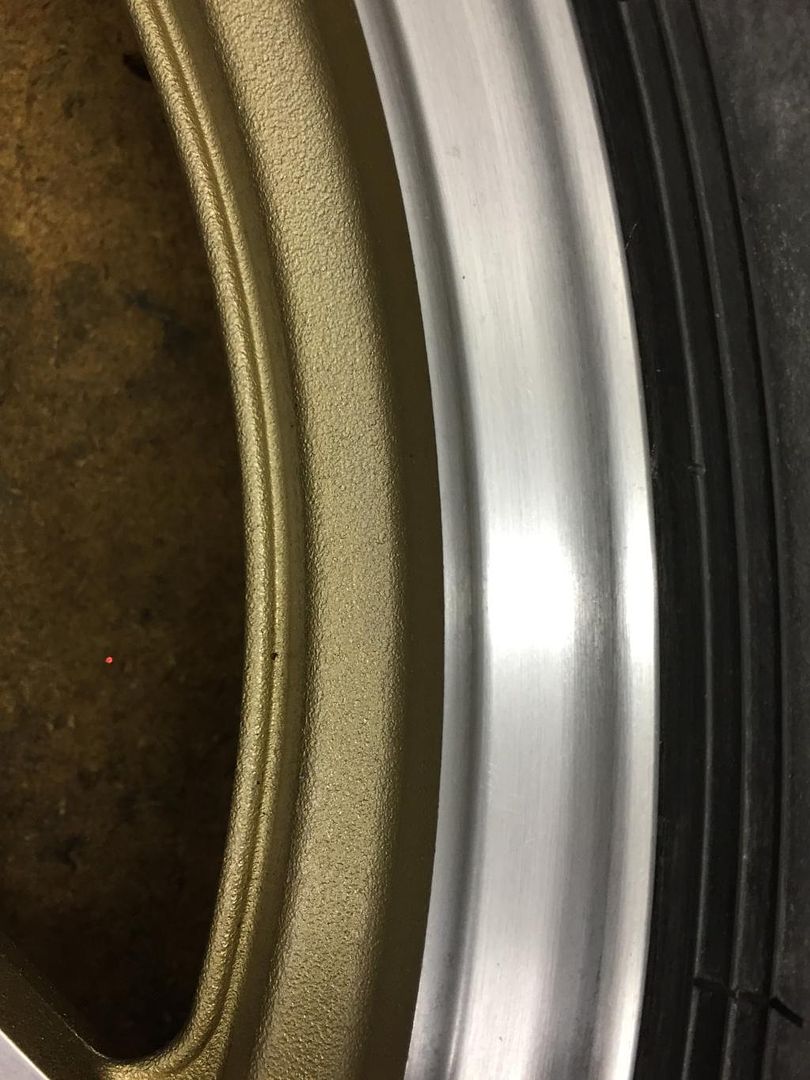 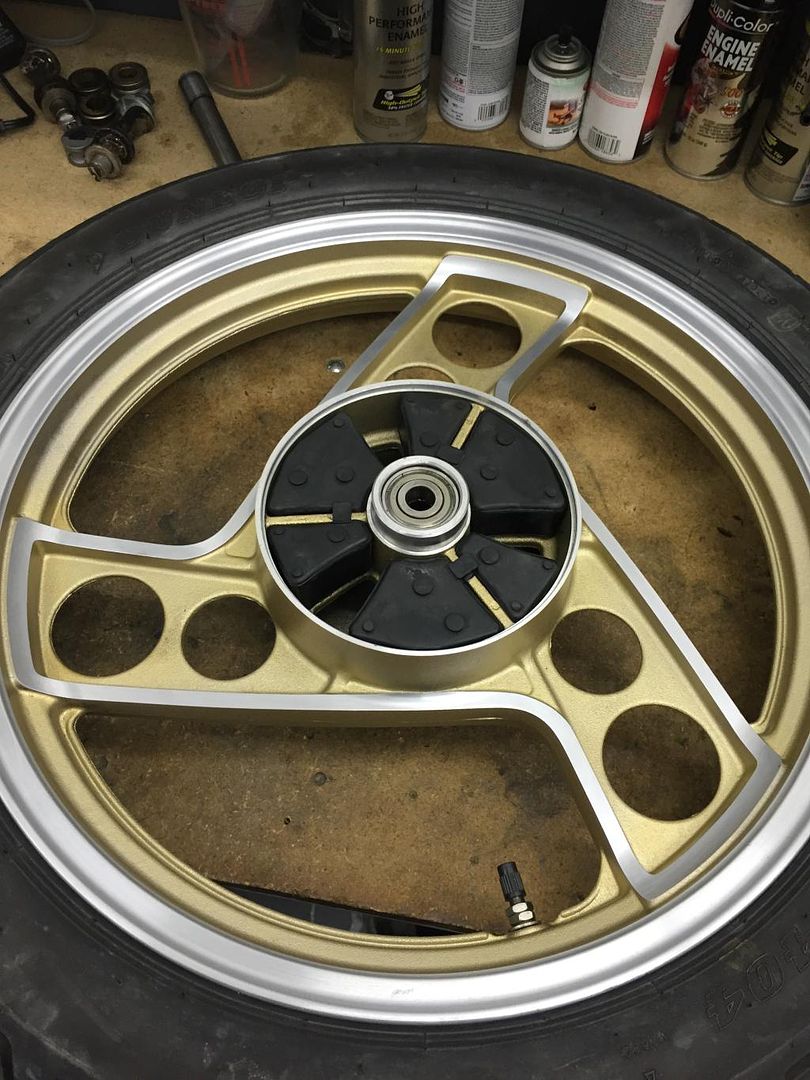 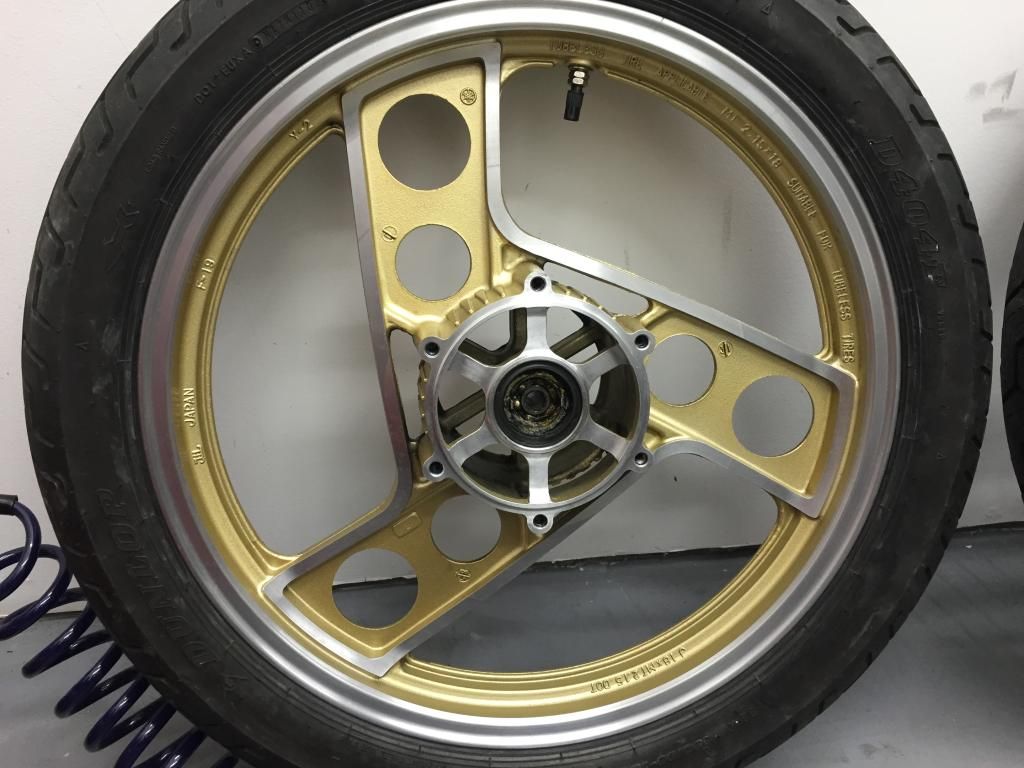 |
|
|
|
Post by neil007 on Feb 5, 2015 20:17:01 GMT 1
Well worth the 8hrs. Look better than new. Well worth the time and effort. Keep the posts coming their brilliant
|
|
|
|
Post by d6lc on Feb 9, 2015 13:24:14 GMT 1
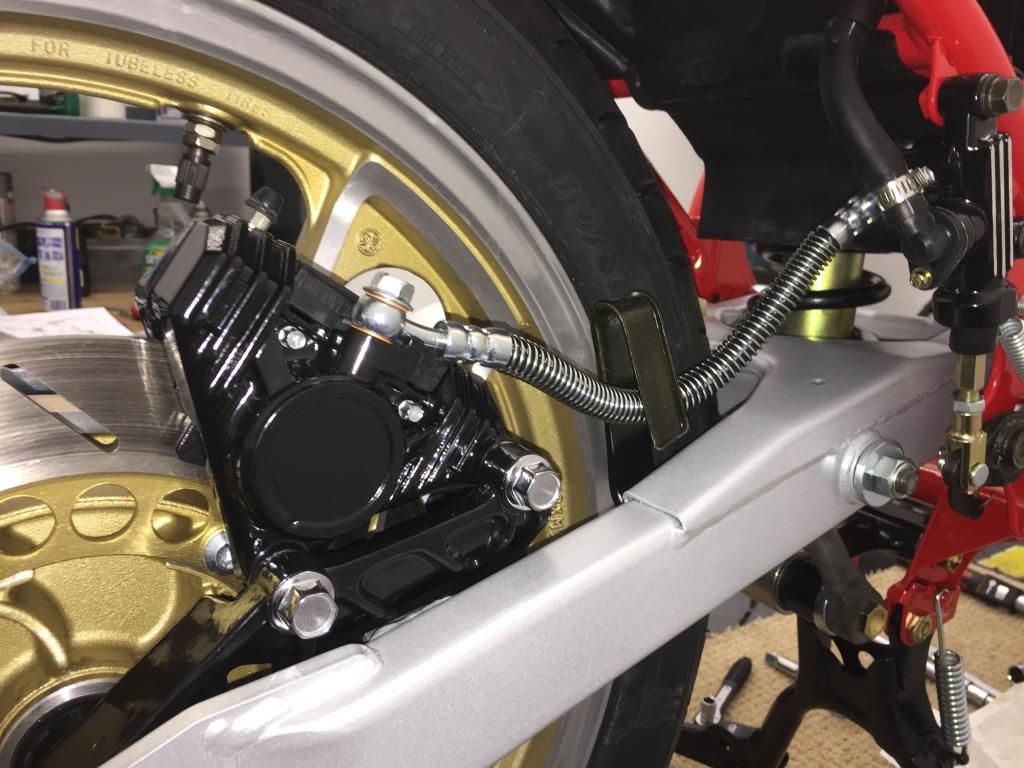
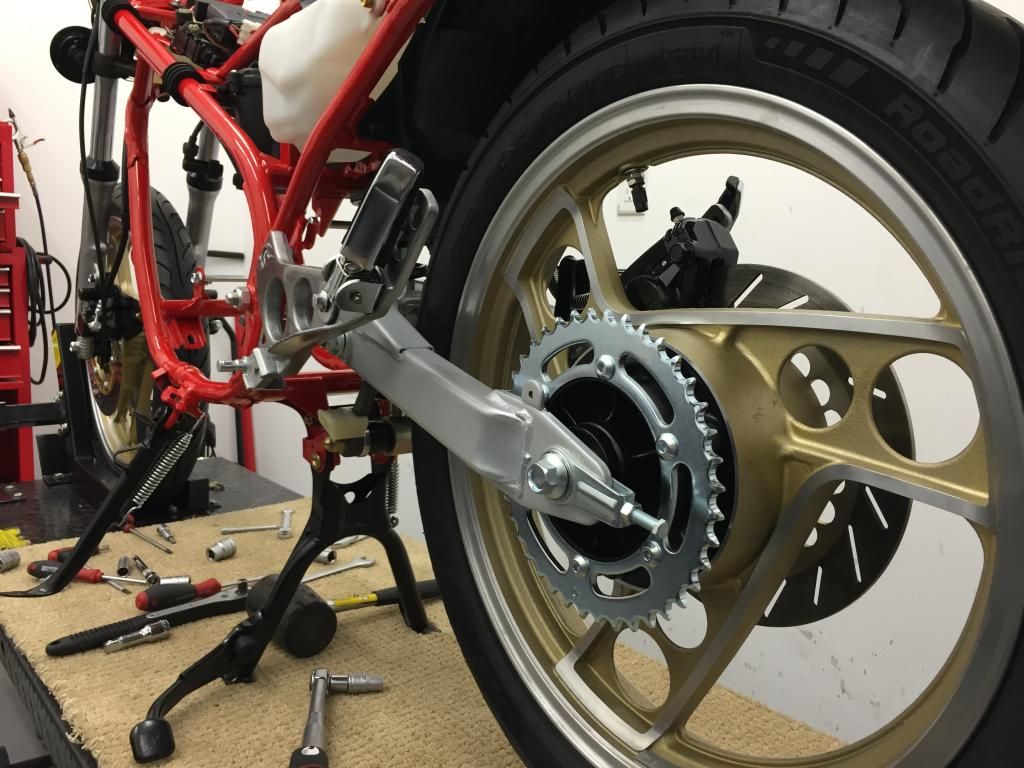
Cheers Neil, these things are labors of love thats for sure. So finally I got the plating back!, plater did an phenomenal job in the bright zinc, yellow zinc and chrome. Started to put the chassis together, still waiting on the swingarm nylon bushes & top yoke cap so only got so far. Here are some pics, fingers crossed the parts arrive this week so I can get the chassis finished. 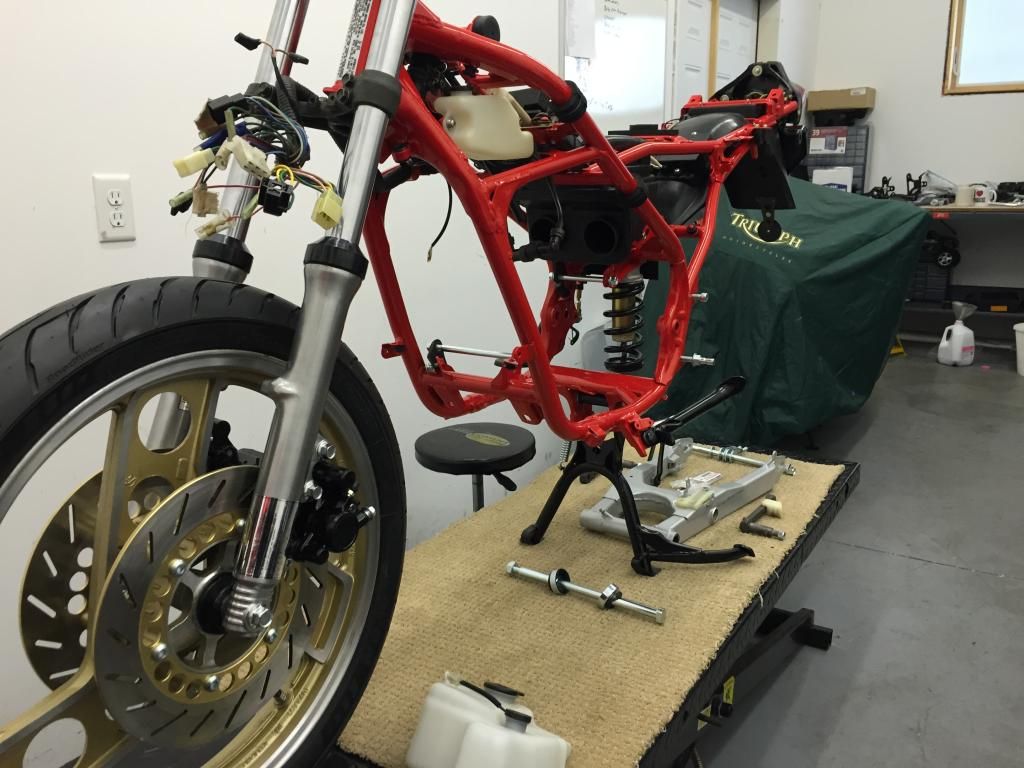 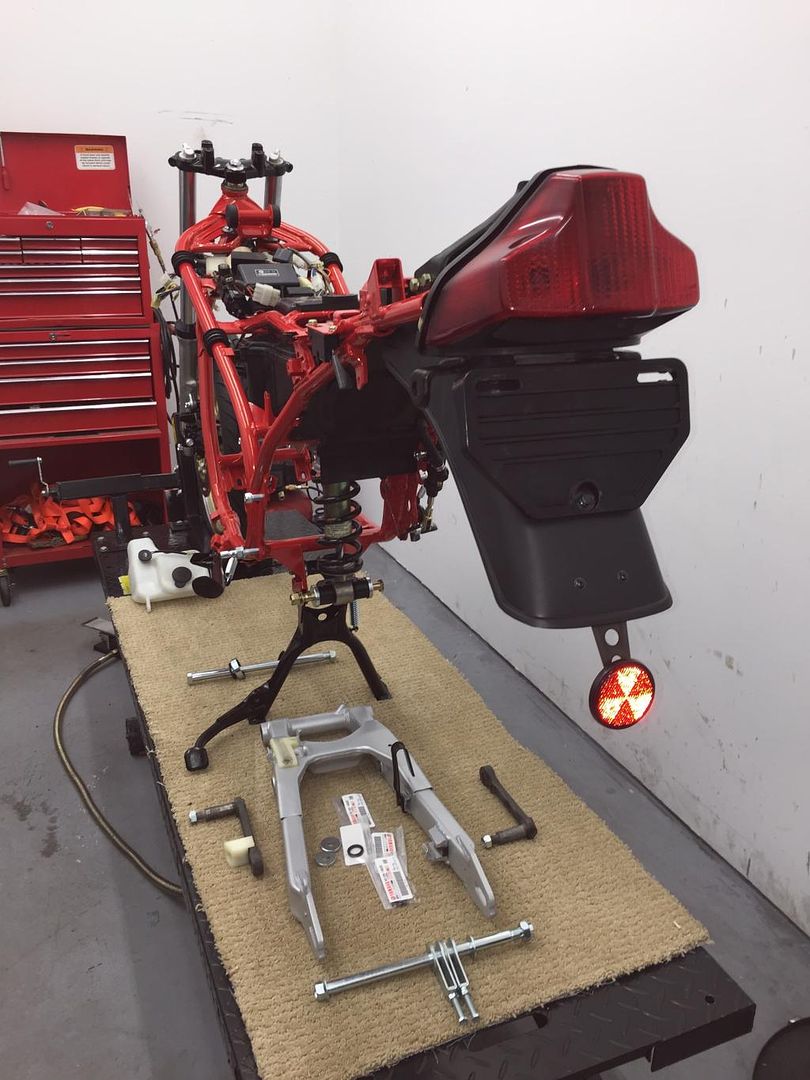 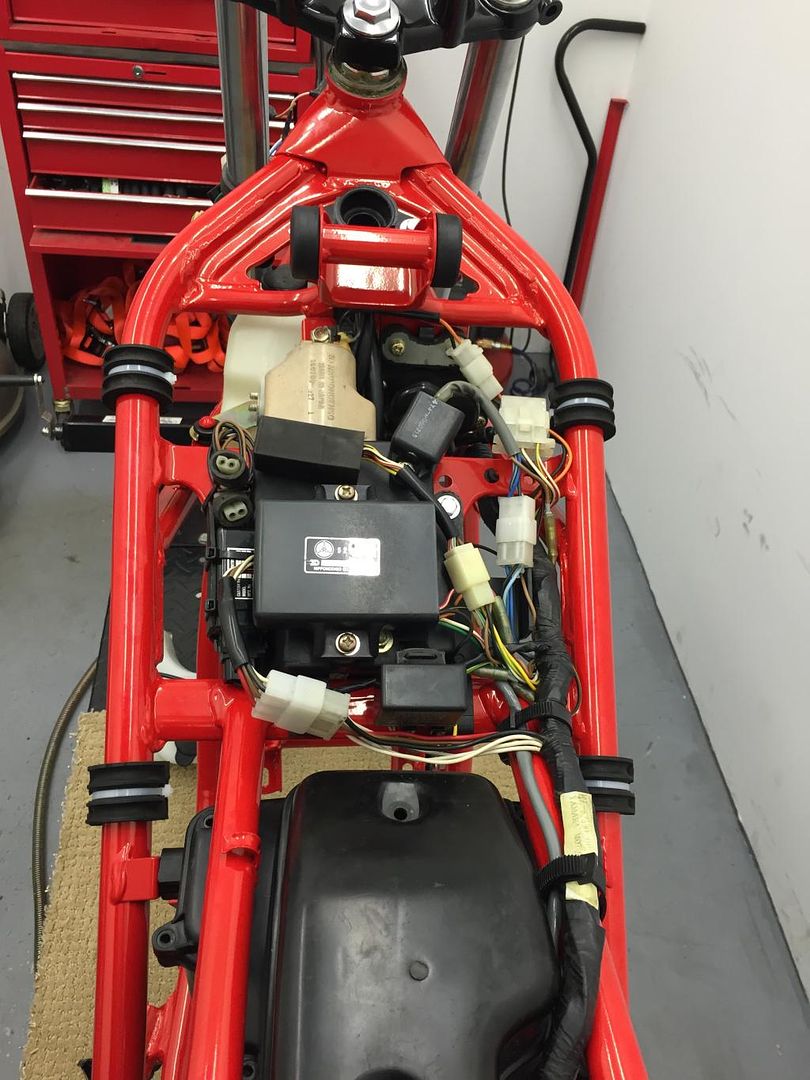 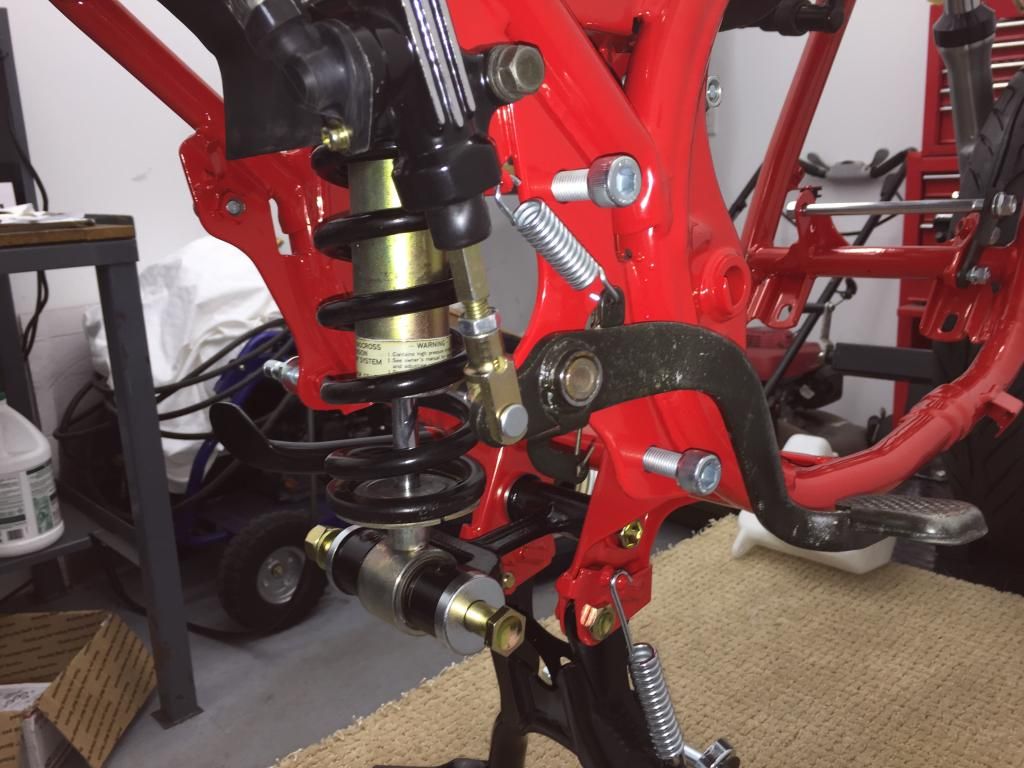 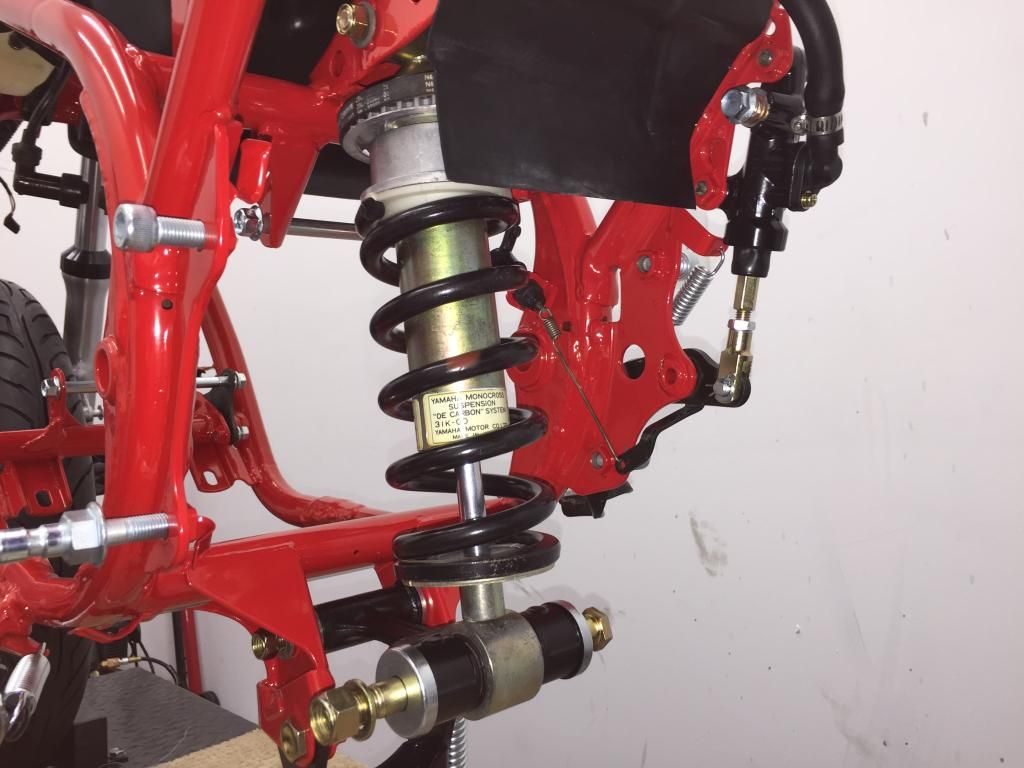 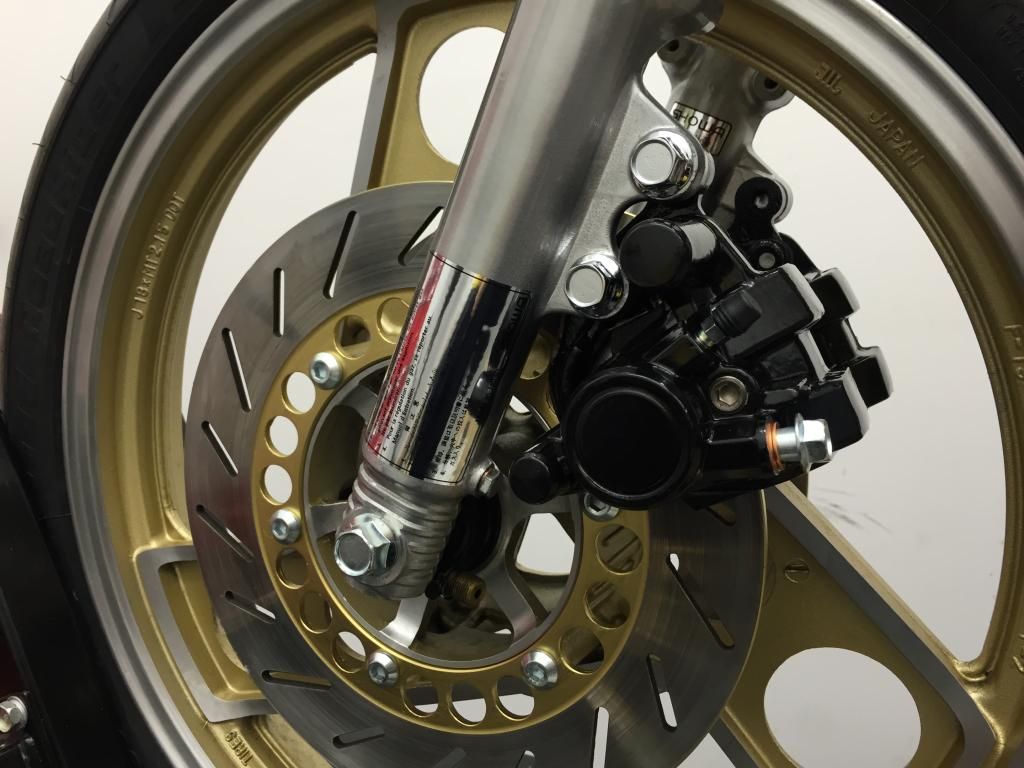 |
|
|
|
Post by d6lc on Feb 16, 2015 0:29:13 GMT 1
|
|
|
|
Post by kostas on Feb 16, 2015 20:27:20 GMT 1
|
|
|
|
Post by kostas on Feb 16, 2015 20:38:16 GMT 1
|
|
|
|
Post by 2R9 on Feb 16, 2015 21:24:29 GMT 1
Absolutely cracking restoration, Keep up the good work.  |
|
|
|
Post by compo on Feb 17, 2015 13:33:41 GMT 1
Nice work, thanks for sharing
|
|
t0m4
L plate rider.

Posts: 39 
|
Post by t0m4 on Feb 19, 2015 19:11:44 GMT 1
Great work mate its going to look better then new
|
|
|
|
Post by 2R9 on Feb 19, 2015 20:10:34 GMT 1
|
|
|
|
Post by d6lc on Feb 19, 2015 22:05:39 GMT 1
Very very nice restoration in progress, Looking forward to you selling it to me on completion.    Have to admit it but I actually enjoy the process of the rebuild more than riding the bikes most of the time, sacrilege I know! Once it’s finished I was planning to share the full costs of the bike, all the parts, paint, plate, tires, JL pipes etc. If I clear my costs and $1,000 then I’ll happily sell the bike and start another. |
|
|
|
Post by shaunthe2nd on Feb 19, 2015 23:44:19 GMT 1
Thanks for the comments chaps. So I have been thinking what to do next, clearly as a 30 year old bike it has some marks on the frame and the wheels/hanger alloy has some corrosion, nothing that couldn’t be polished out through, also chassis items like brake calipers are chipped. Very few bolts though are corroded which surprised me as the bike has lived in Minnesota all its life, I guess our winters are so cold and harsh, it has never really been ridden in the rain or salt. One thing that is poor is the bodywork, with cracked side panels, and badly scratched tank, so that will all need re-painting/replacing. So my choices are: 1. Give the bike a thorough clean, polish, touch up the paint on the frame where it needs repairing, but don’t powdercoat it (as its under a side panel you can’t see it anyway). Replace/replate the odd fastener that is really bad. And get it as original (Apart from the bodywork & stands need painting) as possible with age related patina and mechanically perfect. 2. Same as above, but don’t repaint, just polish it up and pick up used parts to replace the cracked as they become available (I know this is nearly impossible) 3. Do a full restoration, powdercoat the frame, repaint anything marked or scratched and make it as good as I can. To be honest I am leaning towards 1, as I don’t think it is really worth the expense of 3, and I’m not doing it to have a perfect show bike. I also like the originality of a bike looking as it did when it rolled out of the factory, I think a few age marks add character. The flip side is that I am a bit of a perfectionist and like it to look good (I am sure there is some sort of classic motorcycle related bi polar condition) What do you guys think, many of you have been through this process, so I’m interested in your opinions. Would you prefer an original bike with a few marks or a perfect bike?. Any views appreciated Option 3 gets my shout! Just read it all and seems you agree. Great thread and build, well done. |
|
Paul H
Drag-strip hero

Posts: 244
|
Post by Paul H on Feb 20, 2015 0:22:31 GMT 1
Nice work , well done
|
|
|
|
Post by copper99 on Feb 20, 2015 16:53:55 GMT 1
Speedy work mate...the bike is already unrecognisable from the start point!
|
|
|
|
Post by d6lc on Feb 23, 2015 1:57:47 GMT 1
Cheers for the positive comments gents, just got the barrels back fron the rebore, they need to be cleaned up not and painted, bit too cold for painting right now. I didnt get much time in the workshop this weekend. Managed to get about 4 hrs work in, and it pretty much took me all of that time to get the PV's cleaned up, used a razor blade to scratch off the carbon followed by scotchbrite to finsih them off. Here is a shot of one done. 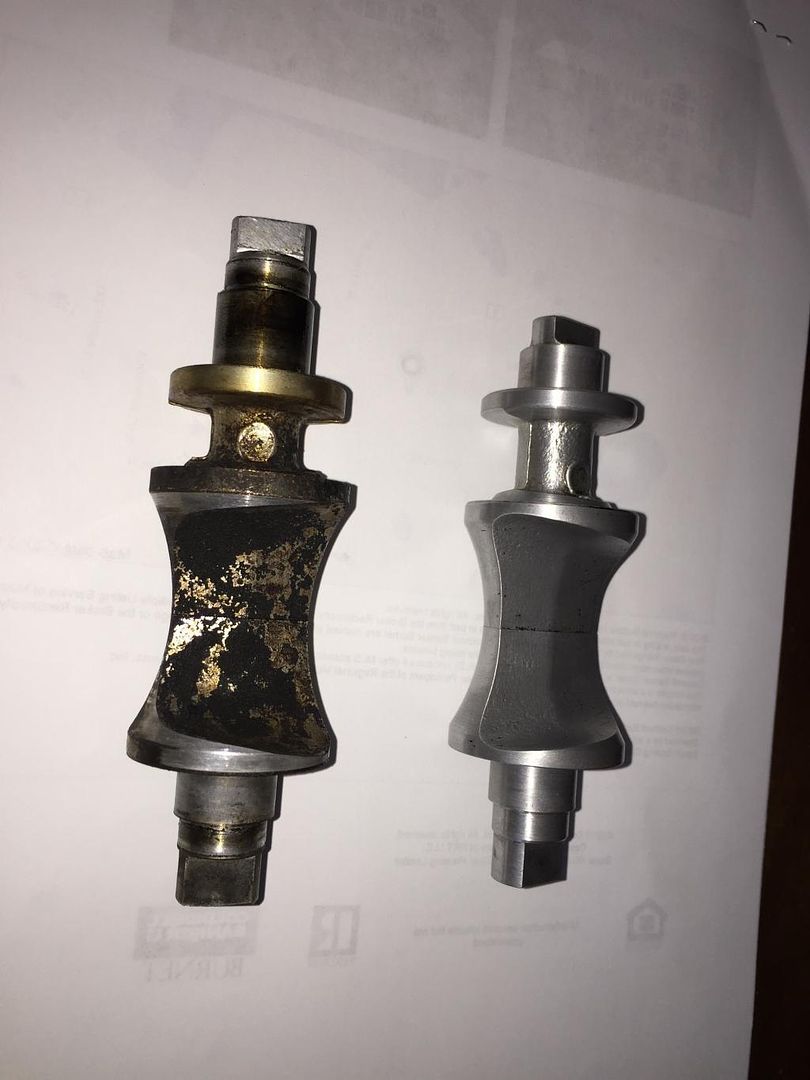 |
|
|
|
Post by d6lc on Mar 6, 2015 3:10:45 GMT 1
Repaired and repainted bodywork back, good impetus to get it finished 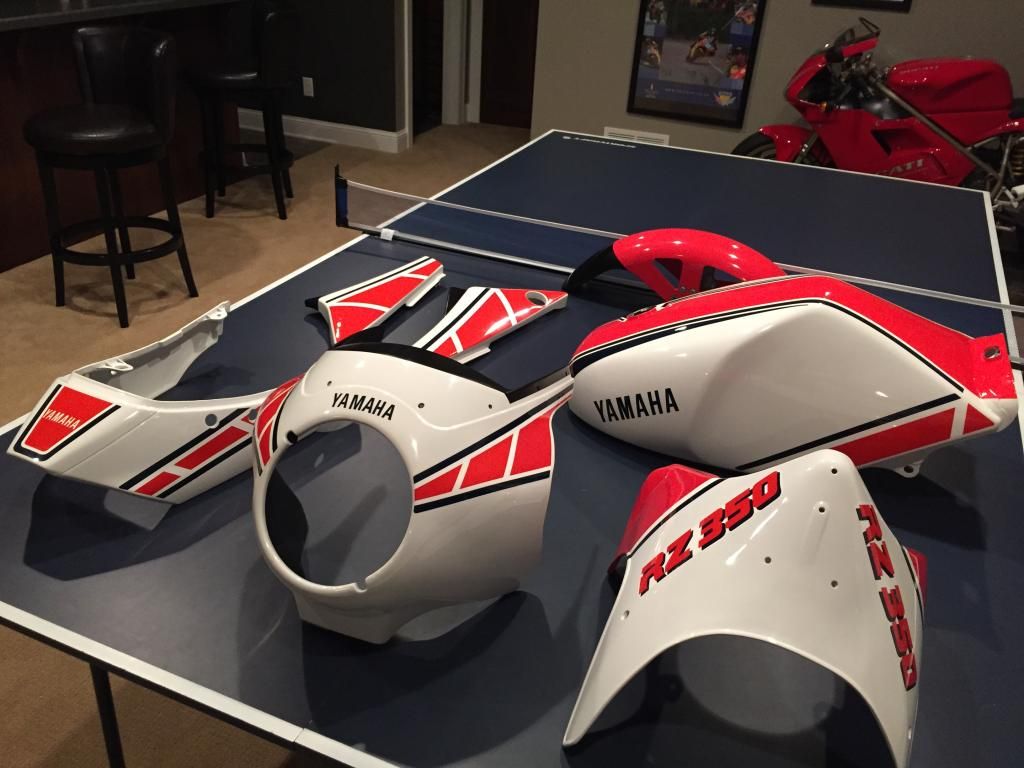 |
|
|
|
Post by d6lc on Mar 7, 2015 3:30:31 GMT 1
Engines back together and back in 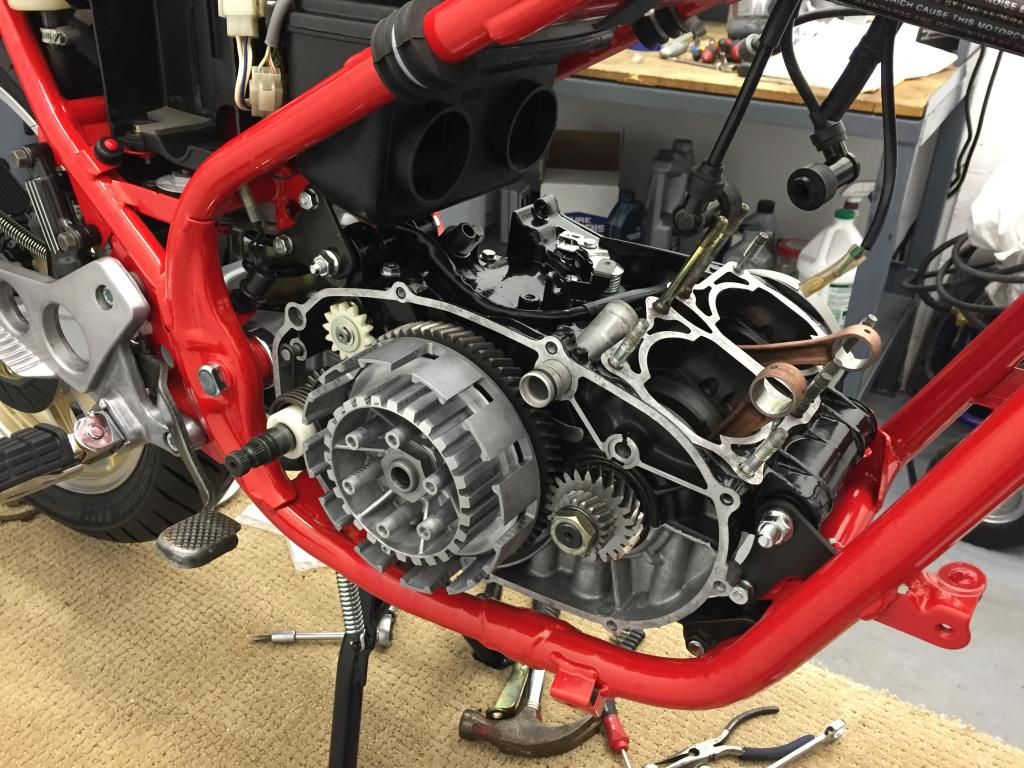 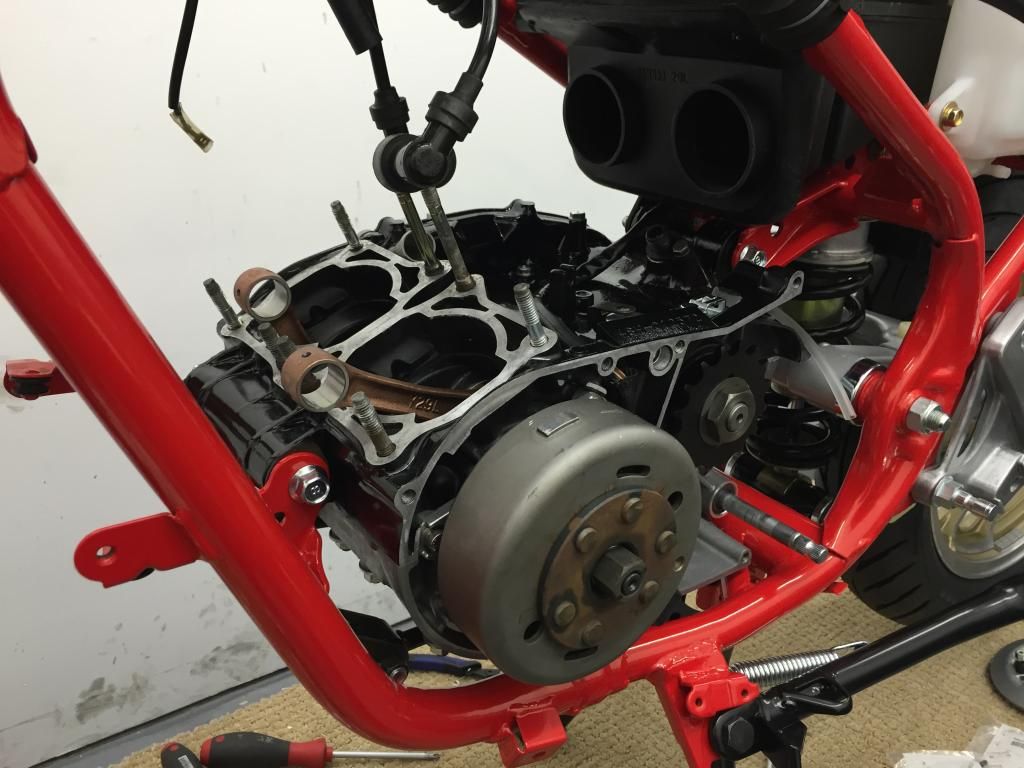 Barrels on and new pistons in next 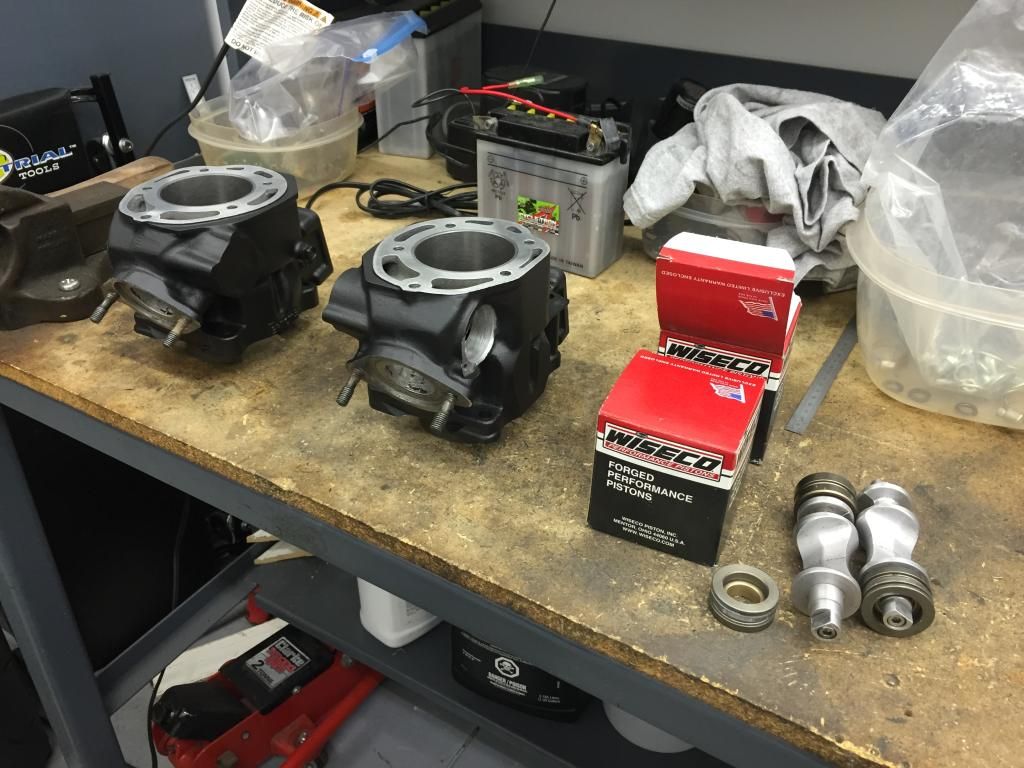 Also have a split rubber and wiring on the sidestand cut out switch, they are no longer available, so found the same switch on Ebay, for an XV950 I think, wiring length wasn’t the same, so need to get some shrink wrap and solder the old wiring to the new switch. 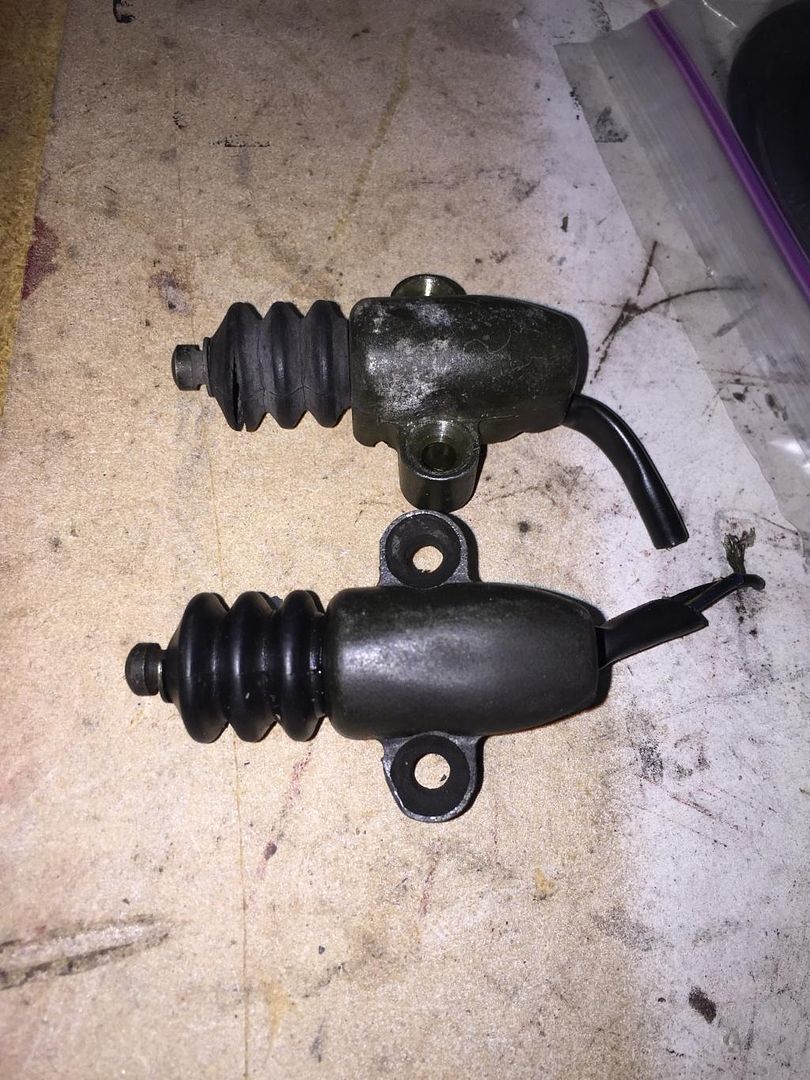 Last but not least I’m looking for help from anyone that may had a front frame/engine stabiliser bolt, they are listed by Yamaha but unfortunately its been superseded by a crappy black bolt. I’m only missing 1 and you can see the original in bright zinc next to it, anyone got one?, really want to keep this bike looking as it did out of the factory, here’s some pics of what I need if anyone can help…PLEEEAAASE 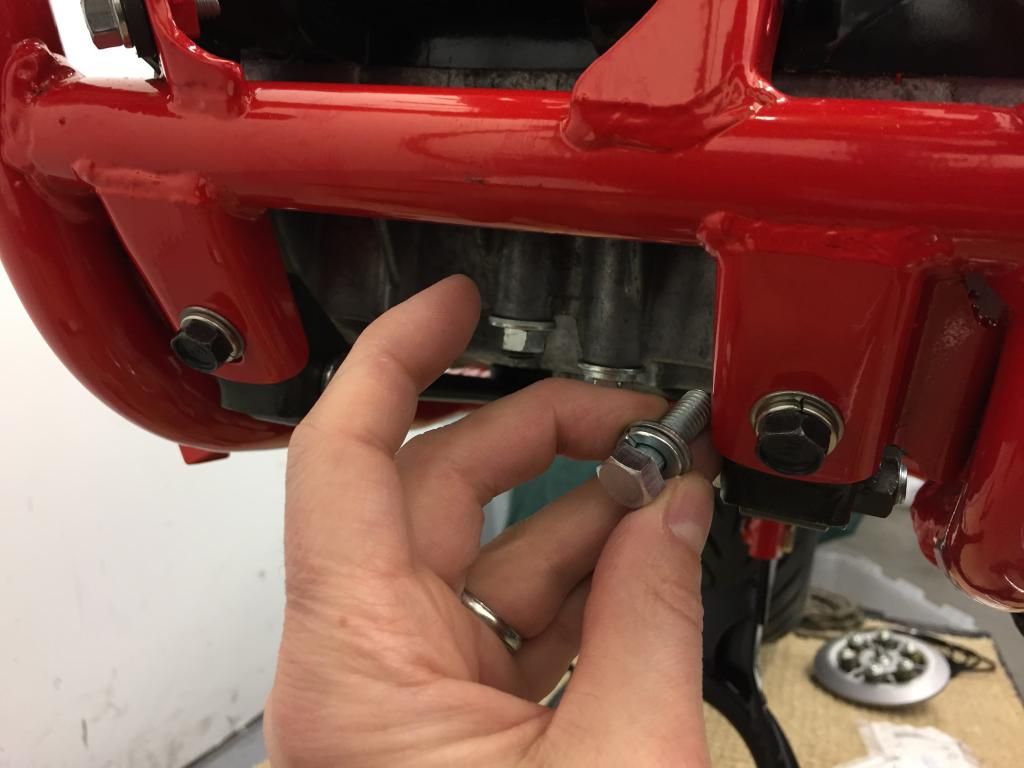  |
|
|
|
Post by Nick84DK on Mar 9, 2015 14:31:52 GMT 1
love the attention to detail, cant wait to see her finished.
|
|
|
|
Post by d6lc on Mar 11, 2015 19:20:14 GMT 1
Cheers Painster So I didn’t really get much chance to work on the bike last weekend, I c**ked up and only ordered 1 YPVS O-ring instead of 4!, so I’ll have to wait a week or so until I can finish the engine  I decided to have a go at sorting the turn signals, my originals we scuffed, to I purchased a set from HV Cycle, whilst they listed the parts with the actual Yamaha part #, they are copies that just don’t look good enough. Original part on the right 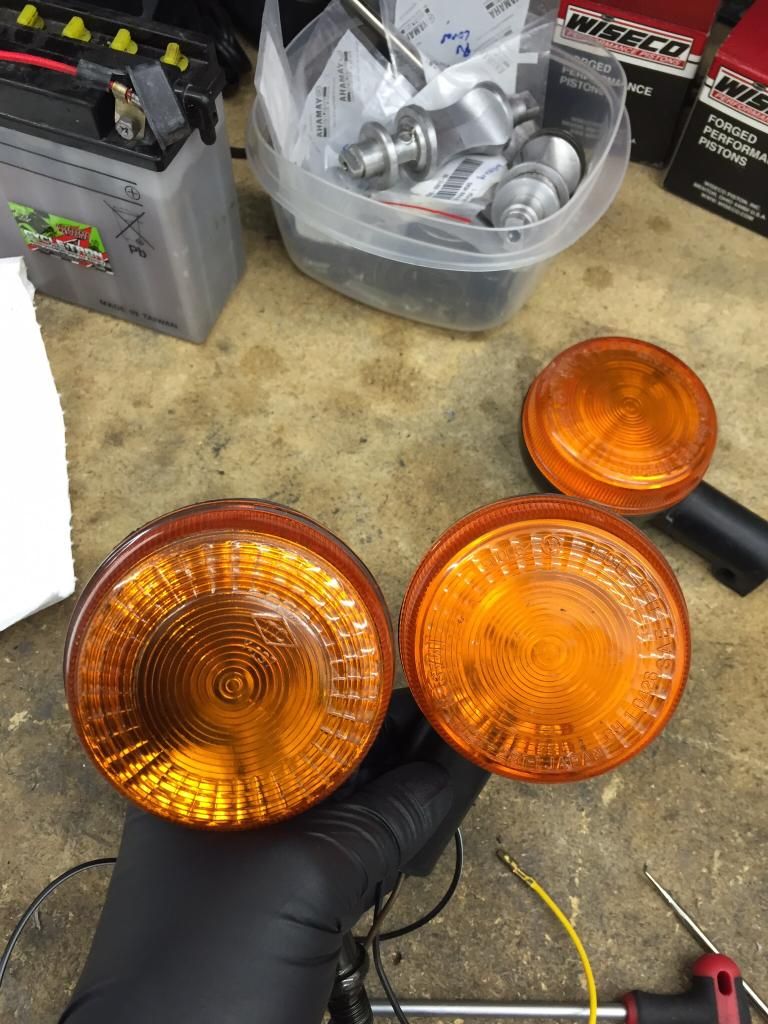 original body vs copy 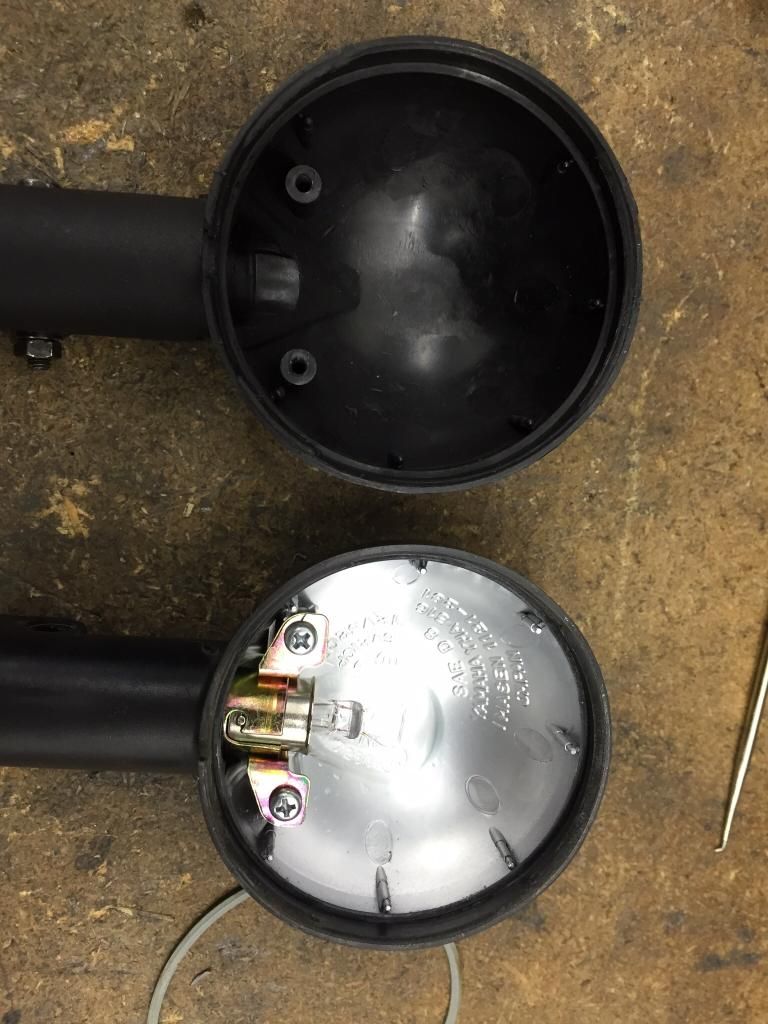 The good news however is that they are an exact copy of the Yamaha part, so I swapped over the internals, painted the inside silver like the originals and have ordered a set of Yamaha OE lenses, I’m pretty pleased with the final parts, from 2ft look exactly the same as the original now. 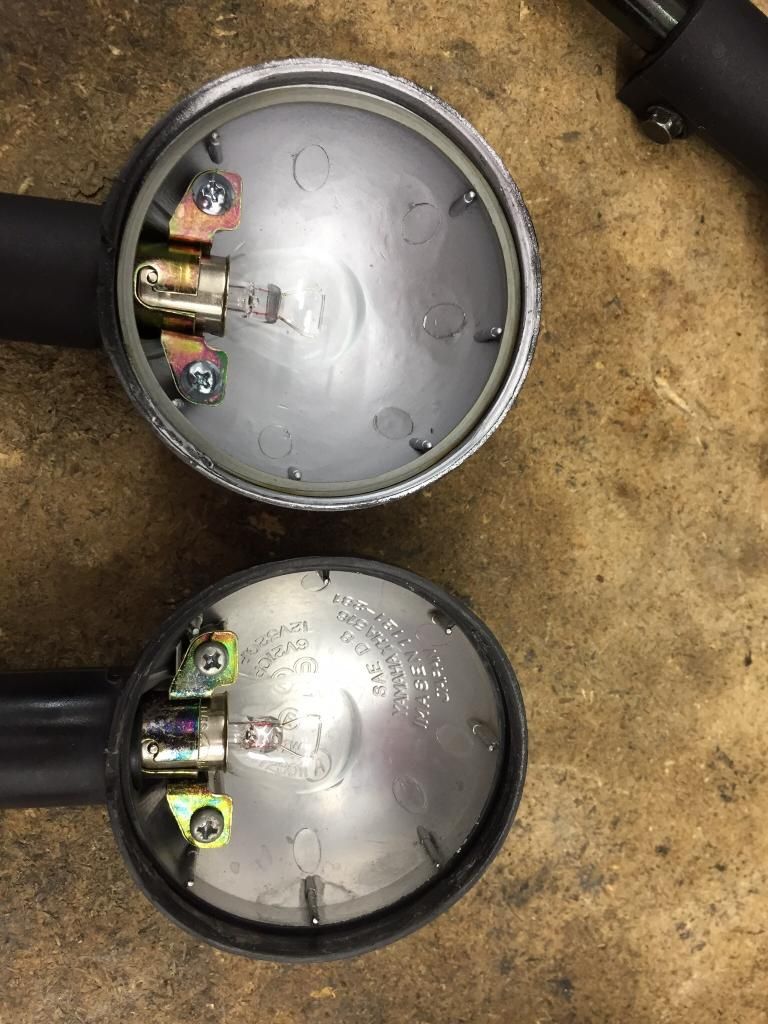 |
|
|
|
Post by billyboy on Mar 11, 2015 21:10:38 GMT 1
looking fantastic , i'd recommend you pack your open crankcase mouths with rags next time , many a clip or bolt dropped in could cause a major headache down the line .
|
|


 ?
?