|
|
Post by raven13 on Apr 22, 2012 15:59:32 GMT 1
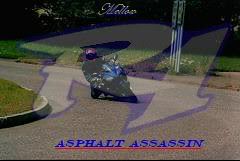
Ok so i didnt start from a bare frame or buy a bike and do a strip down. i bought a started project and went from there. im probly going about things in the wrong way but its whats working for me. the frame had already been stripped and powder coated with new swing arm fixings. may have to sand thru it to read the frame number properly. i do have a V5 but as the frame number cudnt be read properly its not on an age related plate. and i dont want to run a Q plate  |
|
|
|
Post by raven13 on Apr 22, 2012 16:10:04 GMT 1
sorted my picture problem :-)
|
|
|
|
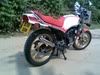
Post by raven13 on Apr 22, 2012 17:12:44 GMT 1
i once again cheated and got tank and plastics that had already been painted. the seller wudnt tell me who did the paintwork but its pretty good and far better than i could do without a lot of practice 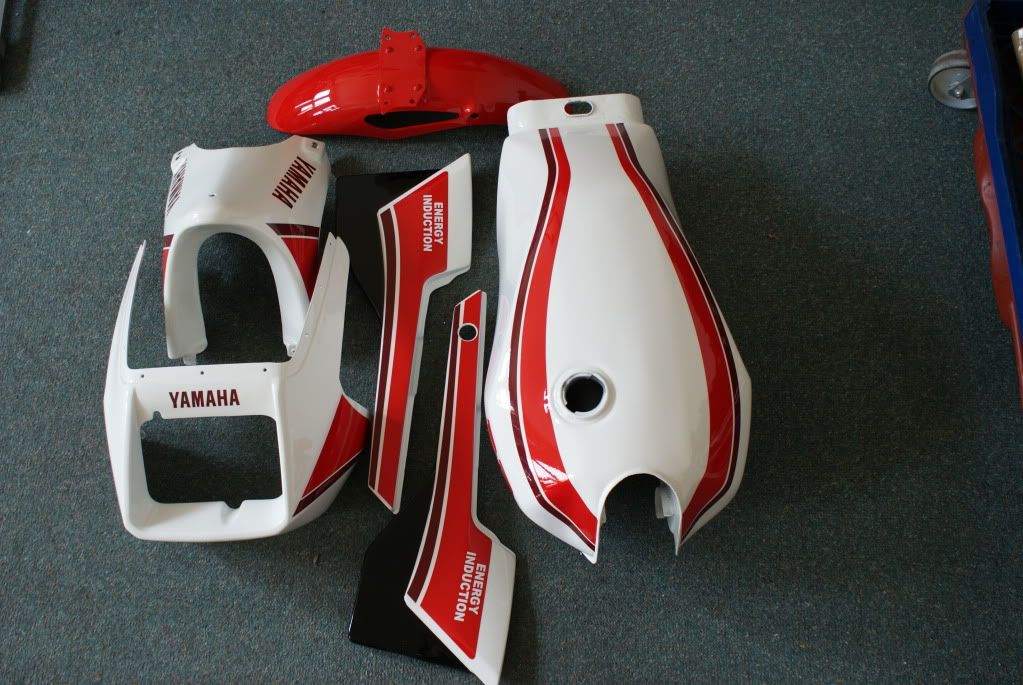 |
|
|
|
Post by raven13 on Apr 22, 2012 17:28:30 GMT 1
a raid on ebay and probly too much money later  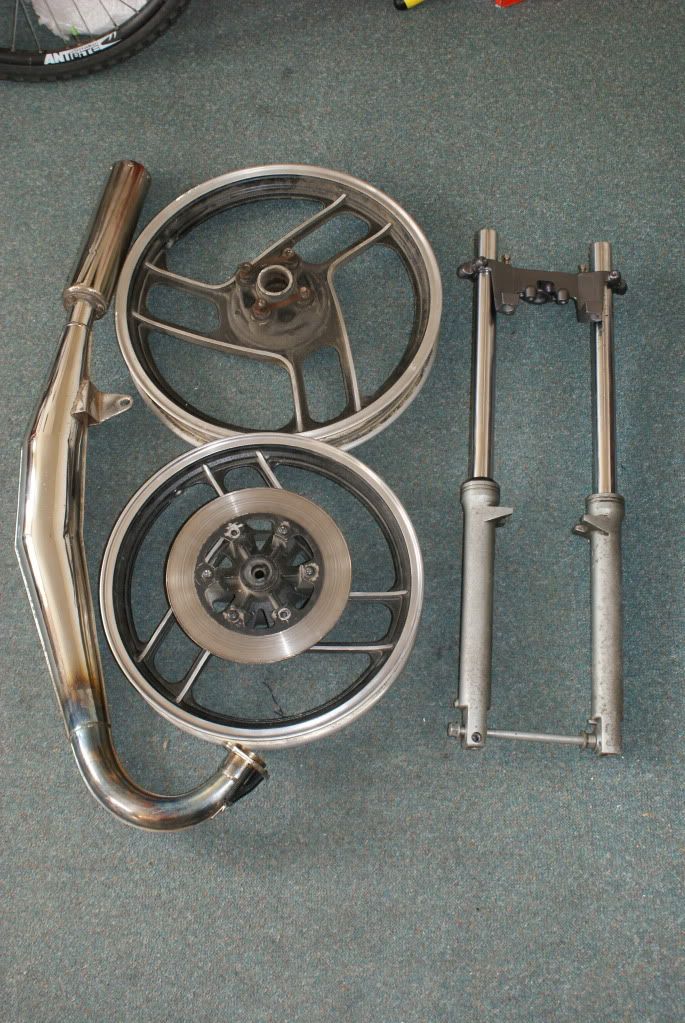 |
|
|
|
Post by raven13 on Apr 22, 2012 17:34:10 GMT 1
found this on ebay along with some front foks (the ones i had already got had that many pits in them, miners were moving in) and a rear mudguard extension with reflector once again probly paid to much but its complete in good condition and came with a spare pair of pistons and seals   |
|
|
|
Post by raven13 on Apr 22, 2012 17:54:18 GMT 1
I want to run twin headlights in the original fairing, without butchering it. after a search on ebay again i found a nice small set of twins, for some reason you got 2 in a pack for less than £30. wen they arrive they dont have provision for sidelights so out with the drill.   and after a few mins "voila" working sidelights.    Now for the fairing. a small sheet of whiterock and a dit of drilling  some double sided tape to attatch it and hey presto a twin headlight. i like the look ( your opinions are always welcome) |
|
|
|
Post by flames on Apr 22, 2012 17:56:00 GMT 1
great start dude.its gunna be a looker when its done,i can tell.
|
|
|
|
Post by raven13 on Apr 22, 2012 18:03:32 GMT 1
its the first in what i hope to be a collection of usable 125's
i want to add an air cooled rd and an ar125 to start with.
but convincing my flatmate to allow me to have more bike's in the lounge is proving harder than i thought. i cant for the life of me think why.
|
|
|
|
Post by raven13 on Apr 23, 2012 19:37:43 GMT 1
to go with the twins at the front i've got twins at the rear as well. once again thanks to ebay.  |
|
|
|
Post by jollyr6 on Apr 23, 2012 23:10:42 GMT 1
Looks great that mate n as for twin headlights there better looking than the ones you used to get is there owt else u need to finish it off???  |
|
|
|
Post by raven13 on Apr 23, 2012 23:19:21 GMT 1
need to figure out the electrics. im colour blind and am struggling. but will get there.
|
|
|
|
Post by raven13 on Apr 25, 2012 19:52:15 GMT 1
right im not loving the standard mk 2 indicators,
too long and too square.
im thinking short oval but dont want to go to led.
anyone have any favourites that i shud check out first??
|
|
|
|
Post by flames on Apr 25, 2012 20:50:07 GMT 1
mini indys mefinx.loads of em on bay.
cant understand yr flatmate,wiv a bike that looks this gd in the living room i wouldve thought he/she would want you to start lining them up.
|
|
|
|
Post by Fingermaus on Apr 25, 2012 21:31:46 GMT 1
Agreed, bikes make great house decorations, and you can then ride em unlike a potted plant. Loving this Raven, nice and different with the twin lights. Some indicators to consider Winkers with bulbsThey come in long, short, clear lense or amber. |
|
|
|
Post by mellow on Apr 26, 2012 16:53:06 GMT 1
nice work so far m8.is that a mk3 barrel with working powervalve  ;D |
|
|
|
Post by raven13 on Apr 26, 2012 19:12:12 GMT 1
unfortunatly not. and for the time being its gonna stay that way.
purchased a mk1 rd125lc today (picking it up on saturday hopfully) so funds are tight again.
but on the good side the mk1 is taxed and tested for 11 months so will be using it as my runabout till i get this one finished.
|
|
|
|
Post by raven13 on May 3, 2012 12:12:58 GMT 1
as im going to be eventually riding a white,red, black bike it thought id be really sad and buy a bit of matching clothing. found this on ebay and thought ahh thats my bike colours. got it for what i think was a bargain at £60.   |
|
|
|
Post by raven13 on May 3, 2012 12:20:47 GMT 1
decided on the indicators. got these  |
|
|
|
Post by aaron on May 3, 2012 12:27:35 GMT 1
starting to take shape! good job
|
|
|
|
Post by billy on May 4, 2012 9:11:28 GMT 1
Nice work and it's great to see some custom stuff for once! |
|
|
|
Post by raven13 on May 13, 2012 15:12:00 GMT 1
right ive had the rattle cans out and thrown some colour on my wheels. had to have a break from the electrics as i was getting a headache.   they're not perfect and i may strip them and do them again at some point but for now they are just fine. |
|
Deleted
Deleted Member
Posts: 0
|
Post by Deleted on May 17, 2012 8:08:54 GMT 1
lookin good, keep the pics coming
|
|
|
|
Post by raven13 on May 18, 2012 13:12:57 GMT 1
WOOHOO
finally sussed out the lights.
had to strip the switches down. found all sorts of buts of crap in there.
its a bit worn in there so may need to replace it in the future but for now another item ticked off the to do list.
|
|
|
|
Post by raven13 on May 18, 2012 22:03:11 GMT 1
and this is what the twin headlight look like now. ;D  |
|
|
|
Post by gerumgoin on May 18, 2012 22:15:30 GMT 1
Love it,nice work mate ;D :-
|
|
|
|
Post by twostroker on May 19, 2012 20:59:53 GMT 1
|
|
|
|
Post by raven13 on May 19, 2012 21:02:50 GMT 1
that is one ugly looking light, :-(
|
|
|
|
Post by raven13 on May 28, 2012 23:34:57 GMT 1
i've been attacking the loom tonight. had to open it up and remove about 6 inches of wire running each way from the indicator relay. must have had water ingress via the terminals.the wire just turned to dust.
all sorted now, just need to solder a couple of new terminals on.
thats the lights finished.
waiting for my new coil to arrive and will see if she has a spark.
|
|
|
|
Post by raven13 on May 29, 2012 17:54:53 GMT 1
front brake time.
i bought one from a good seller on the bay, knew it would need a refurb but as it came with a new set of seals and pistons was still more than happy.
until i relised that the pistons were seazed solid, not one for giving up that easily i sripped it as far as i could and wen about figuring how best to remove the offending pistons.
bare in mind i dont have a workshop. cant use power tools (apart from a drill) as im doing the rebuild in my flat. so after a bit of swearing i thought i would try the heat it and twist but all this did was make a nasty smell in the flat.
then i remembered summat i saw on a tv show.
as i heated each half body (over the gas ring on the cooker) i dropped an ice cube into the piston, this cooled the piston but not the body and with a quick twist with a pair of vice grips viola out it came. repeacted the proccess on the other half.
now all i have to do is find the "safe" place i put the pistons and seals.
|
|
|
|
Post by raven13 on May 29, 2012 19:04:25 GMT 1
im not happy with myself. found the new pistons and seals for the brake caliper only to find id put them at the bottom of a box with all sorts of heavy crap in it. the pistons are fine but ive crushed the seals. looks like its buy new one's time .
|
|


 ;D
;D