|
|
Post by 0h5h1t on Sept 25, 2015 14:16:16 GMT 1
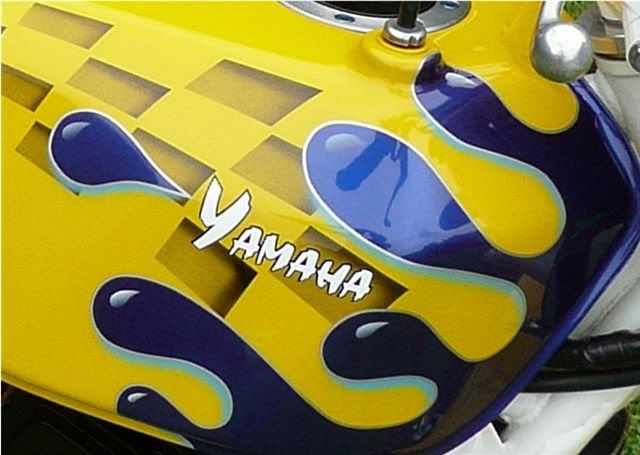
it seems an awful long time ago that I bought this from Dusty350 on here but have been busy with life's little trials and haven't always had the time to get on with it but I have made reasonable progress so thought I would start the thread. Here's the bike as I picked it up from Dusty. 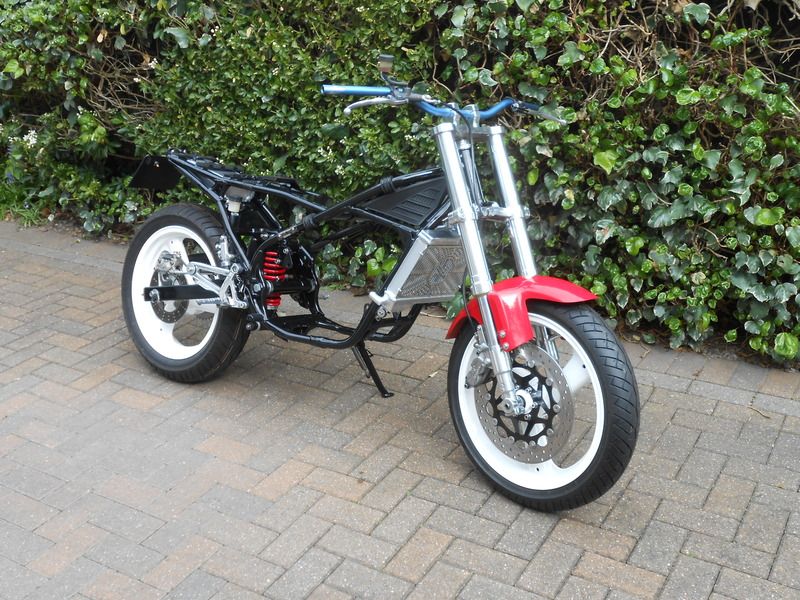 I sourced a poorly looking motor for a very fair price from redbimota, also from this forum. seriously I think you could buy anything on here :-) 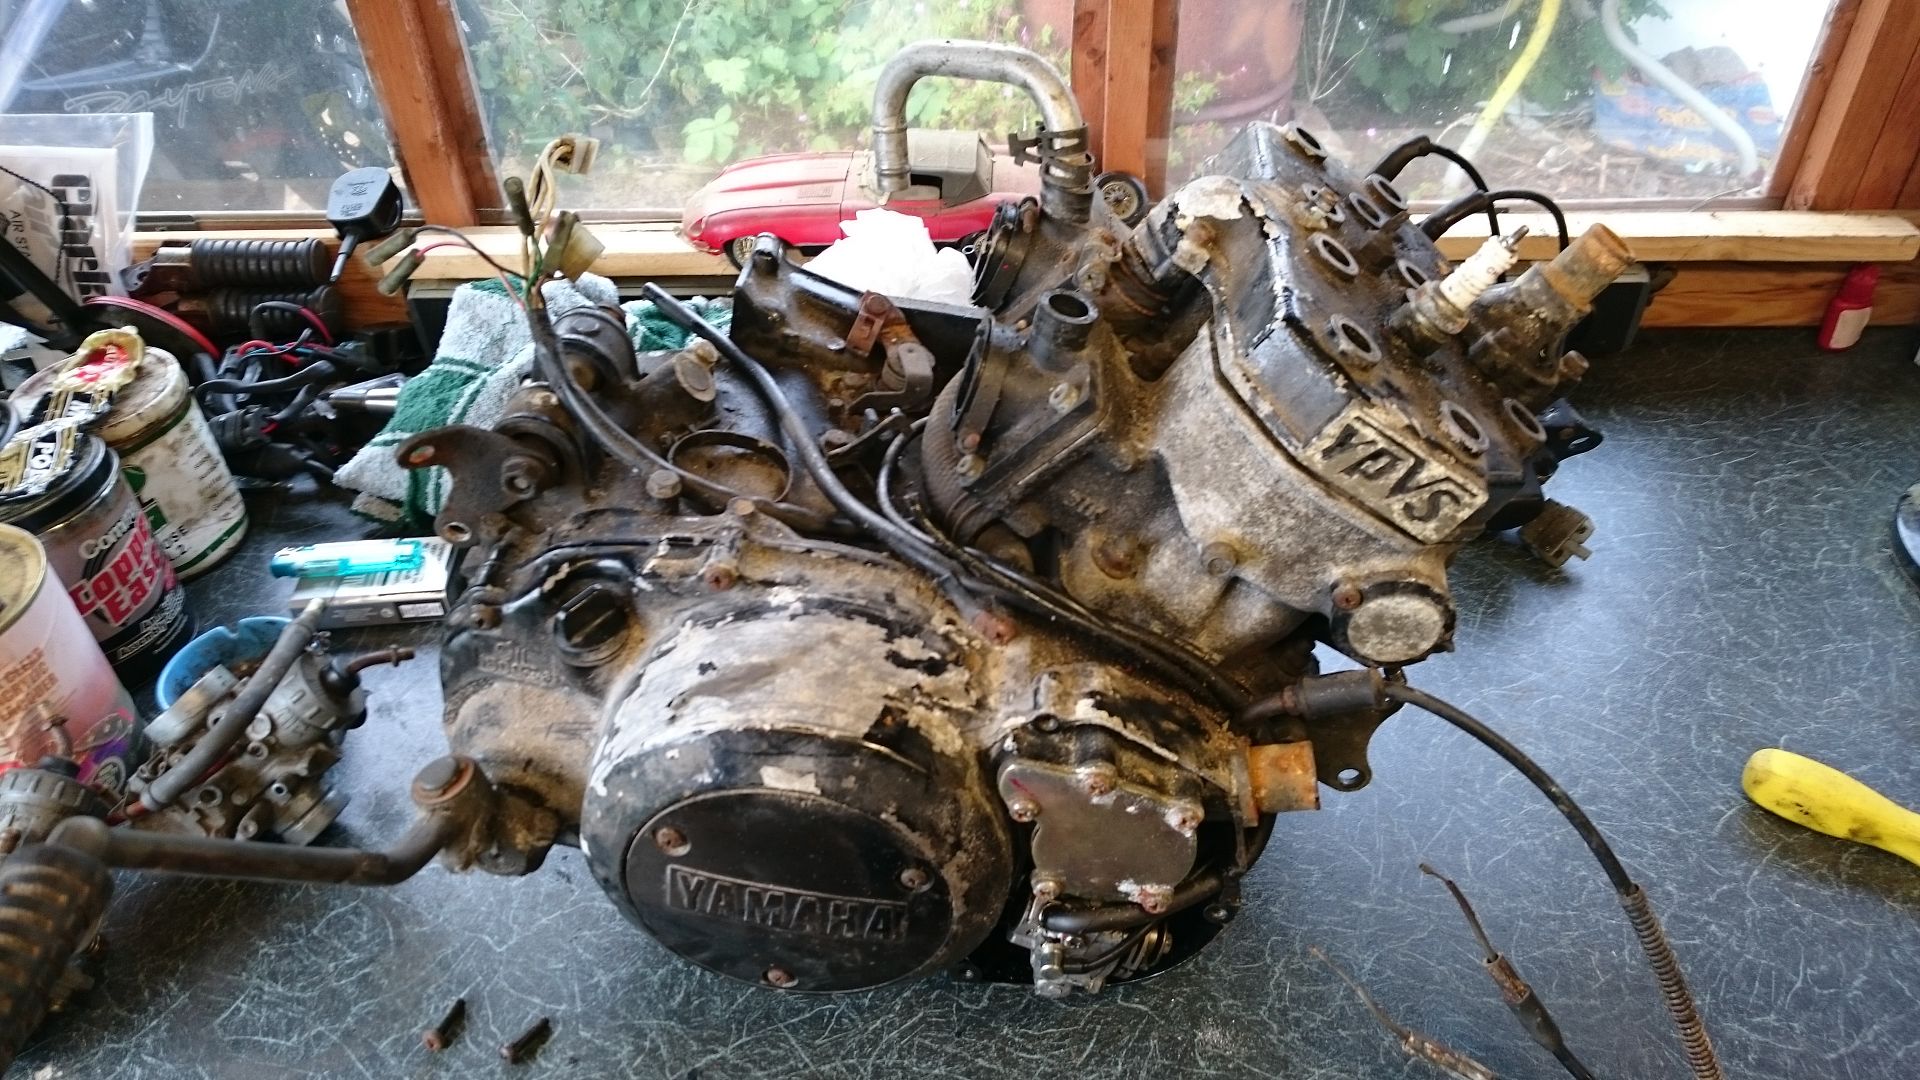 as there was virtually zero work to do on the frame and wheels I got stuck straight into the engine strip and rebuild. Bottom case, clutch cover, barrels and head were dropped off for vapour blasting at a local firm and came back nice and shiny. 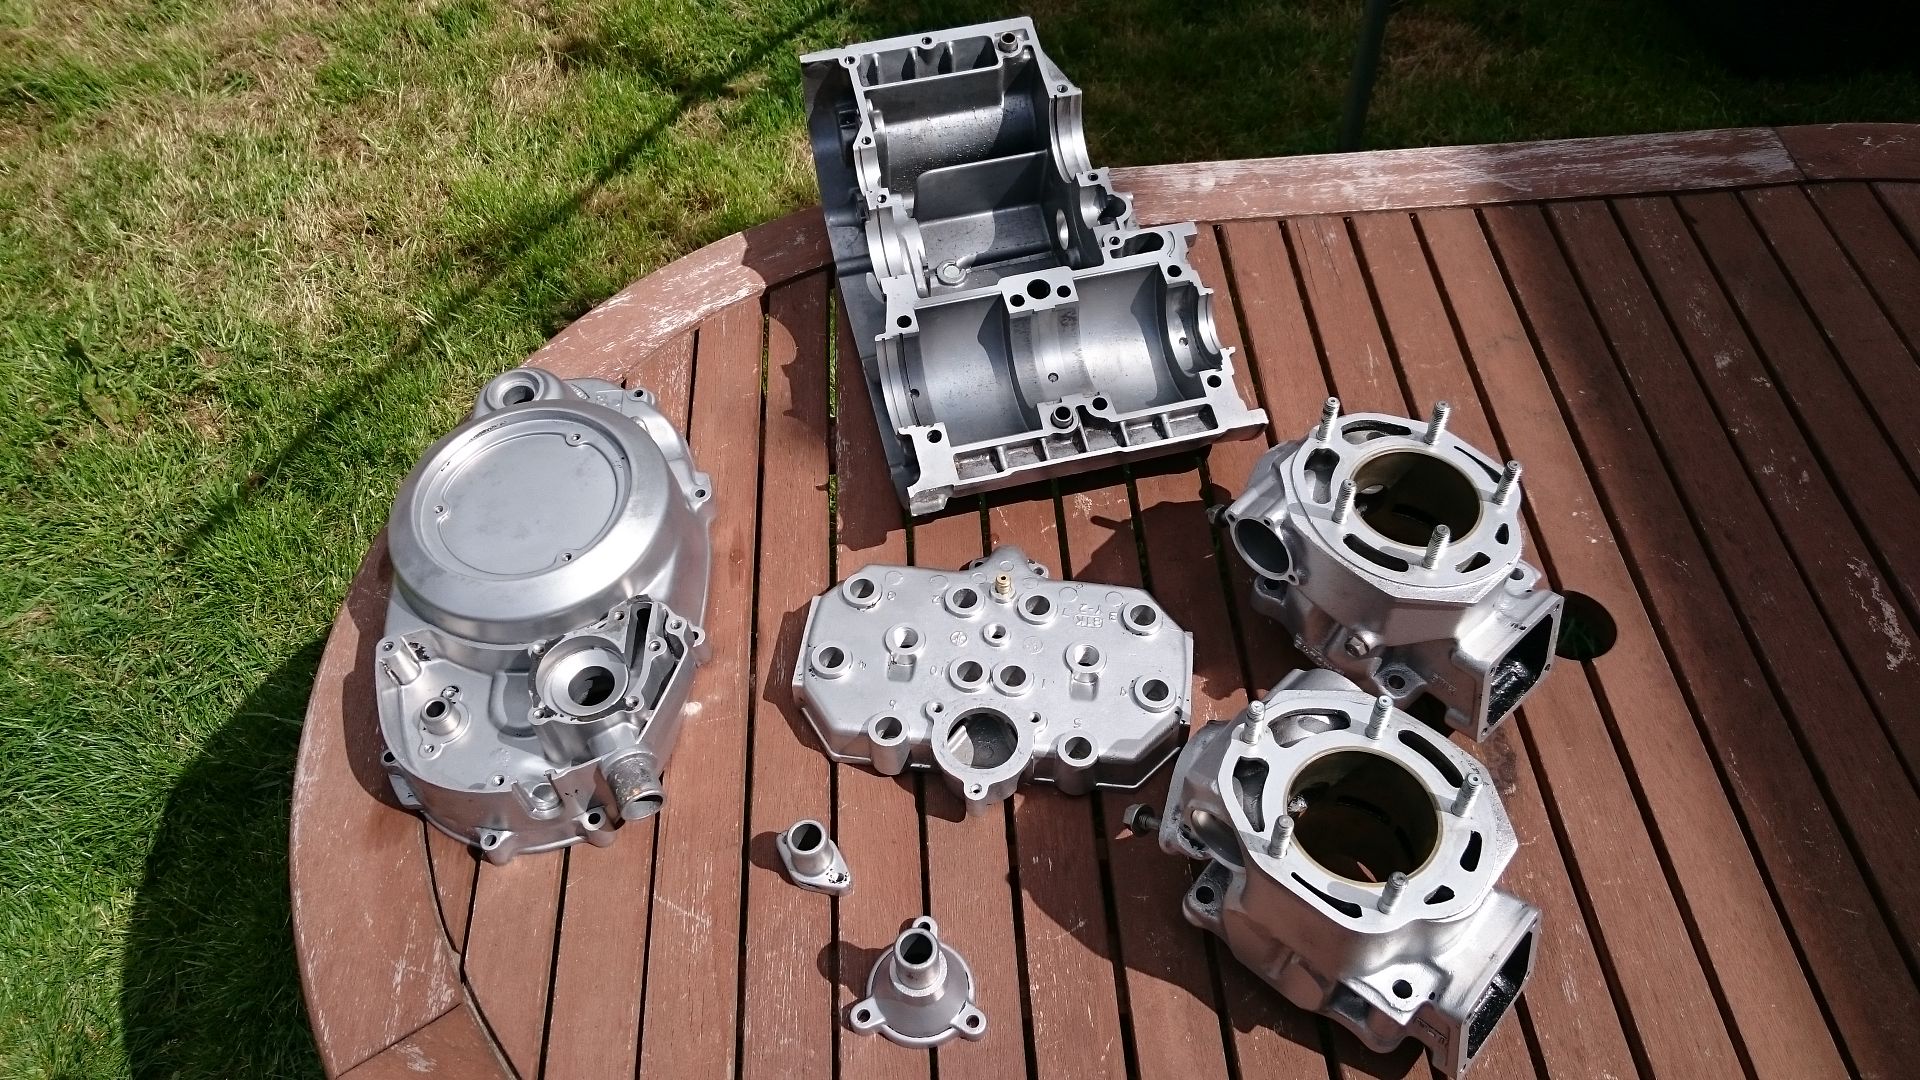 I also had a rebuilt crank from Redbimota which I immediately was thankful for as the mains on the one in the engine were a little tired to say the least. I replaced every seal and bearing during the rebuild and assembled with Athena gaskets for reliability of fitting, no point messing around with some of those cheaper gasket sets in my opinion. painting was done on warm sunny day in the garden letting paint harden overnight, i haven't baked them as with no plans to use the bike any time soon due to the rest of the build ahead the paint will have plenty of time to fully harden anyway. 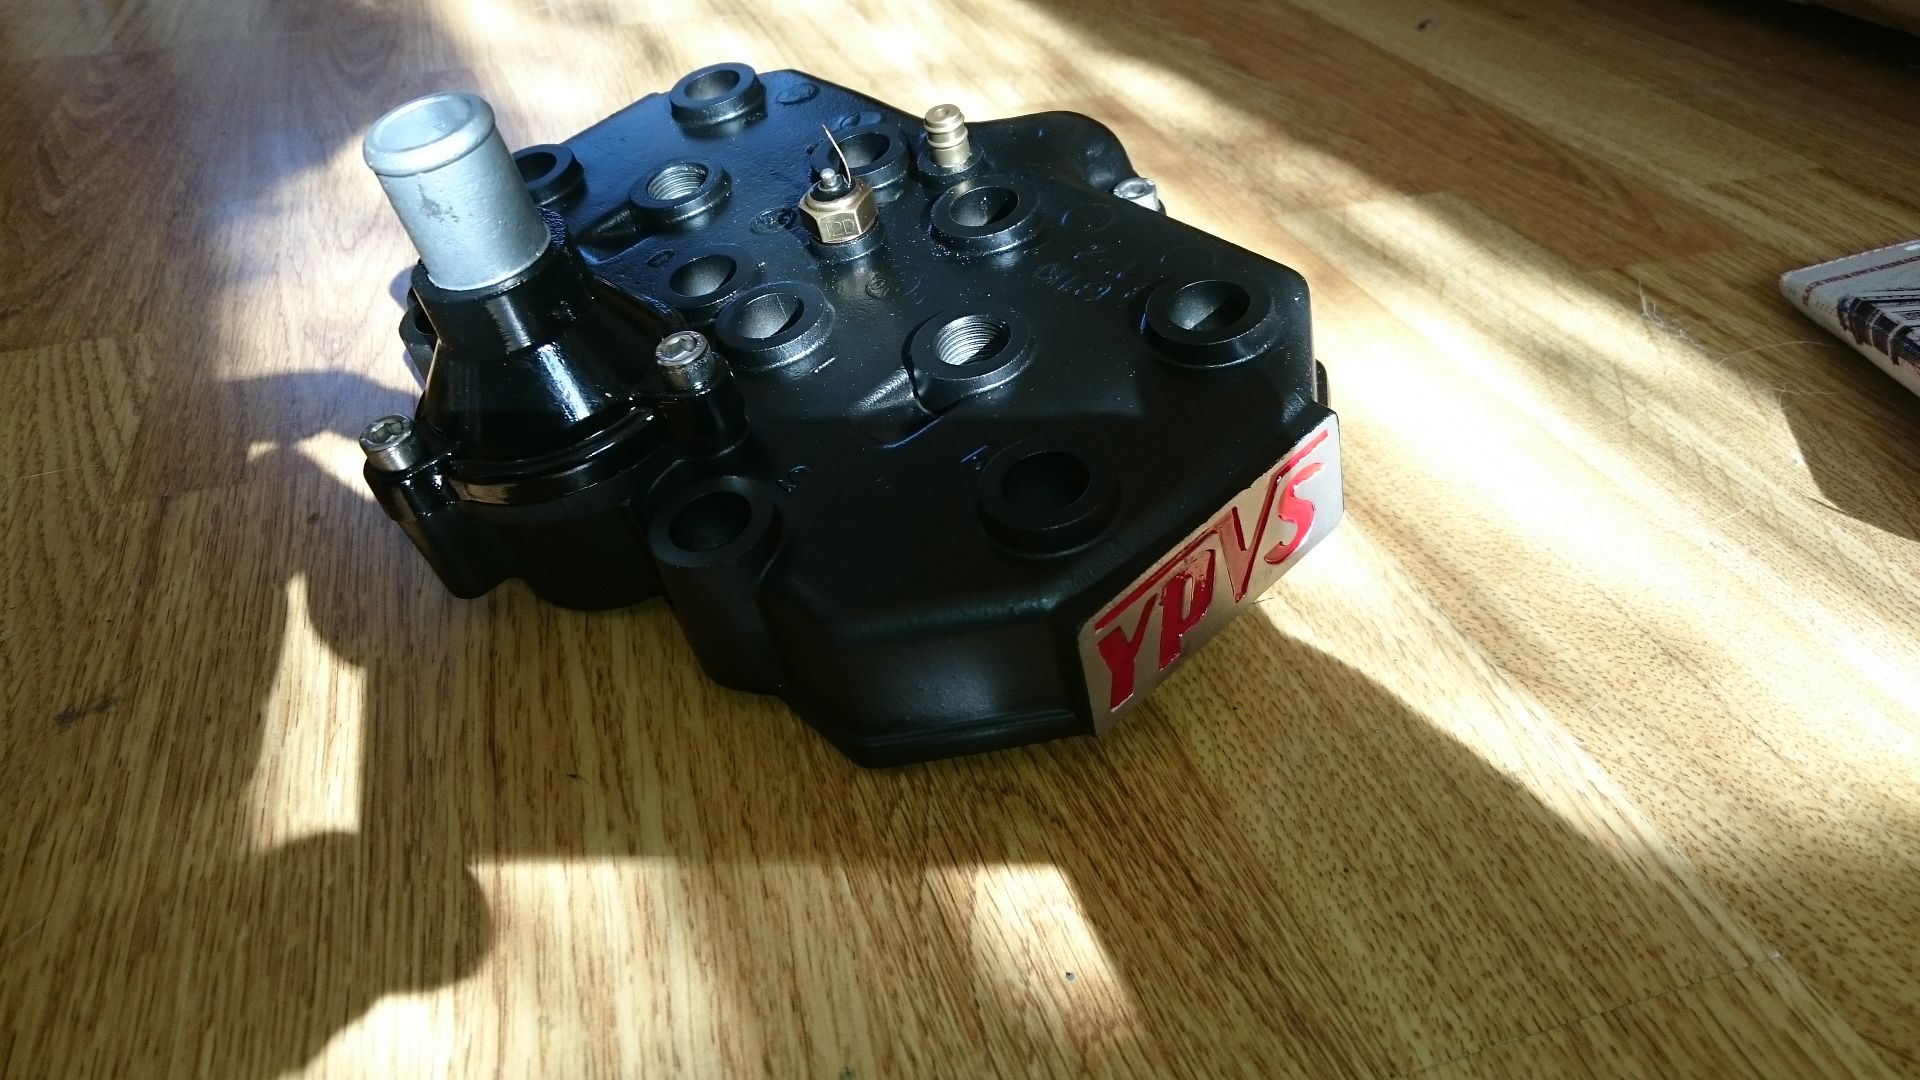 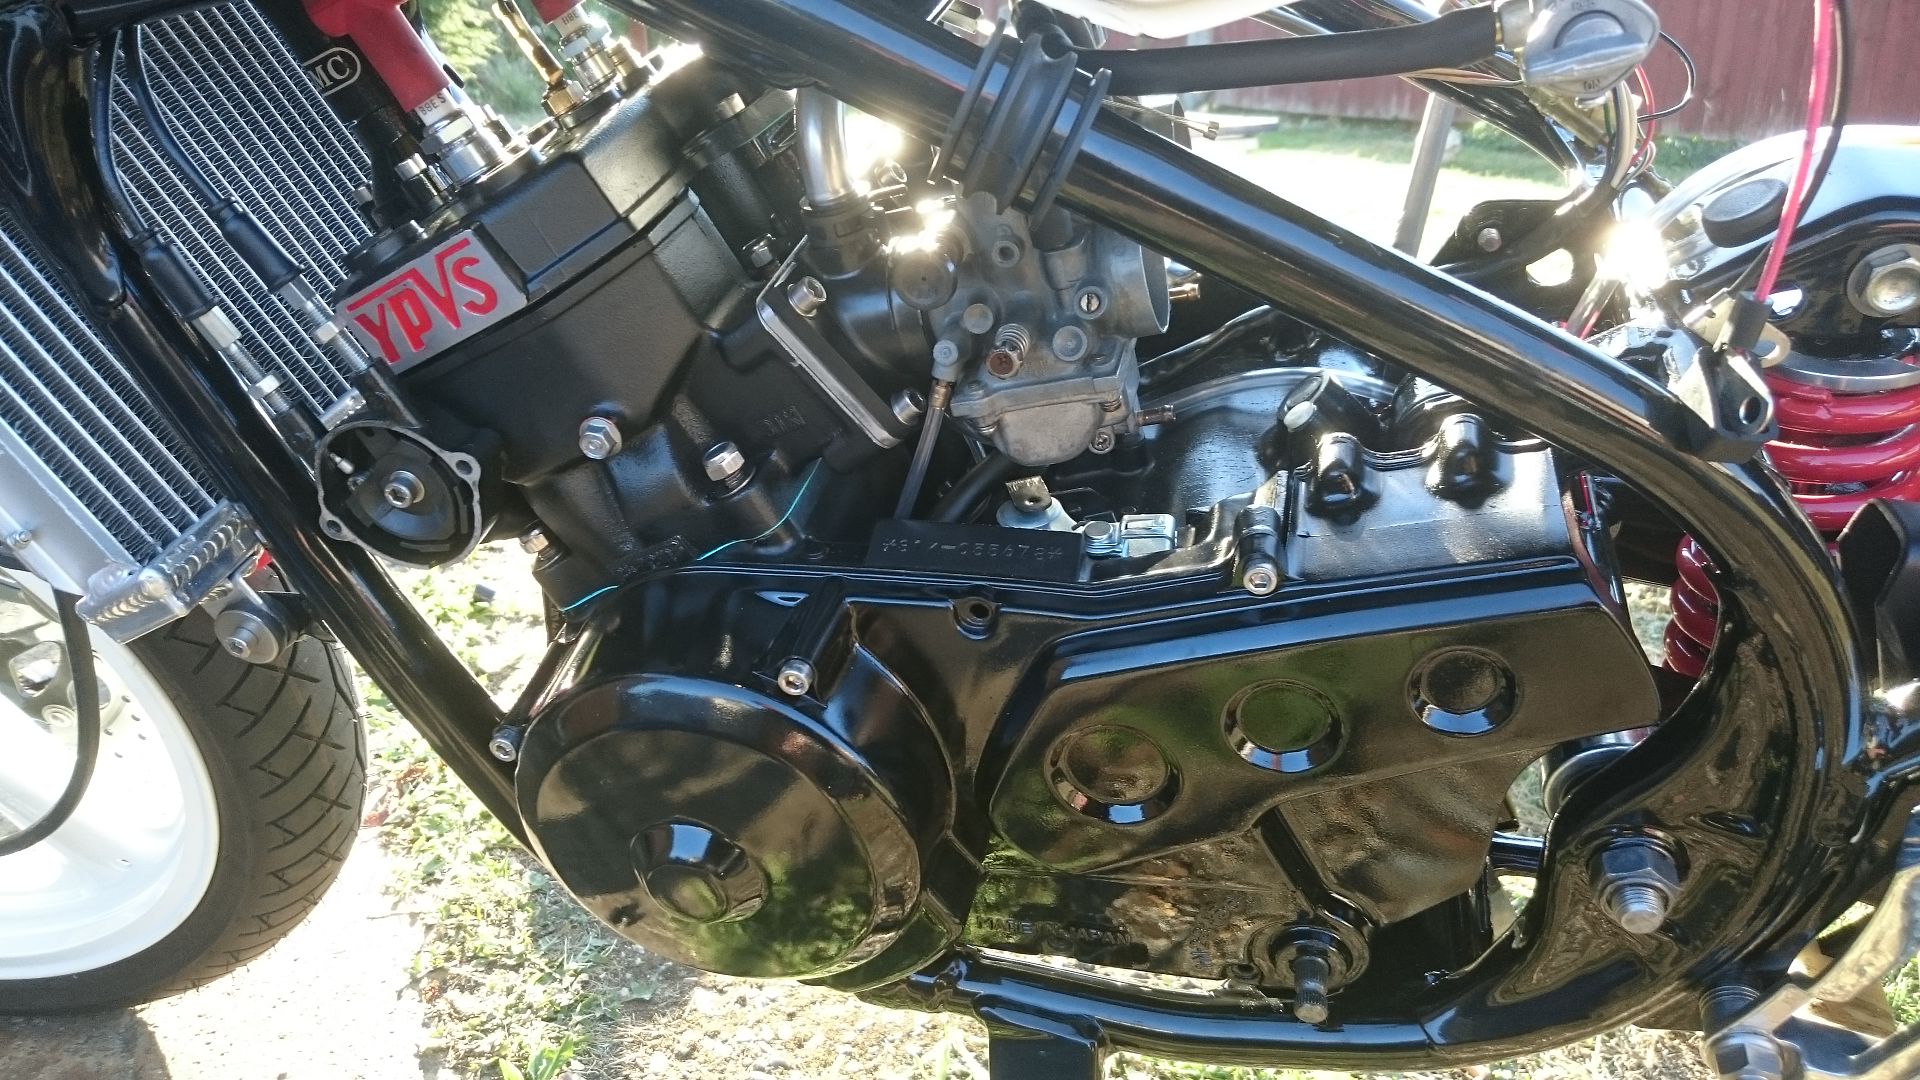 the carbs i had were pretty badly corroded around the mainjet seat and were letting fuel by so sourced a nice pair from the evilbay. 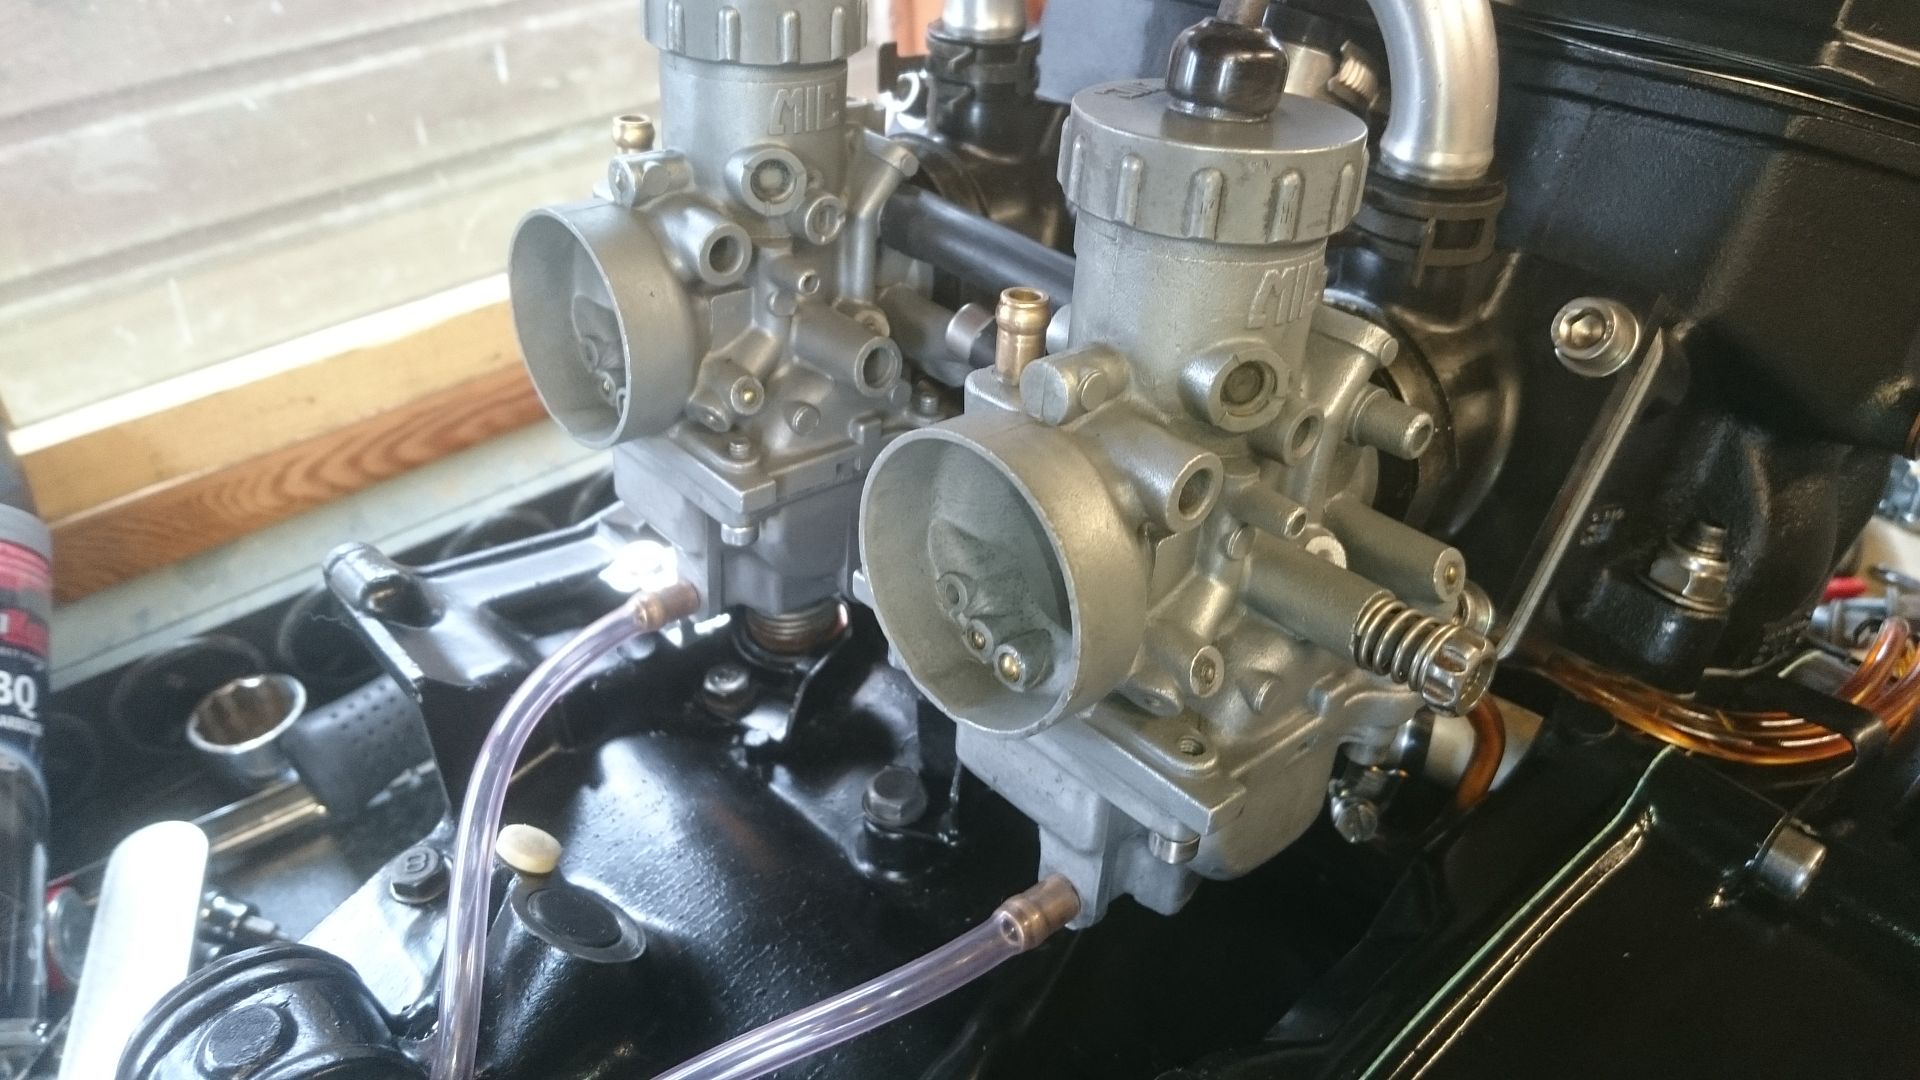 I also ordered one of these, I liked the one that Dusty had for sale too but didn't have the money available at the time. 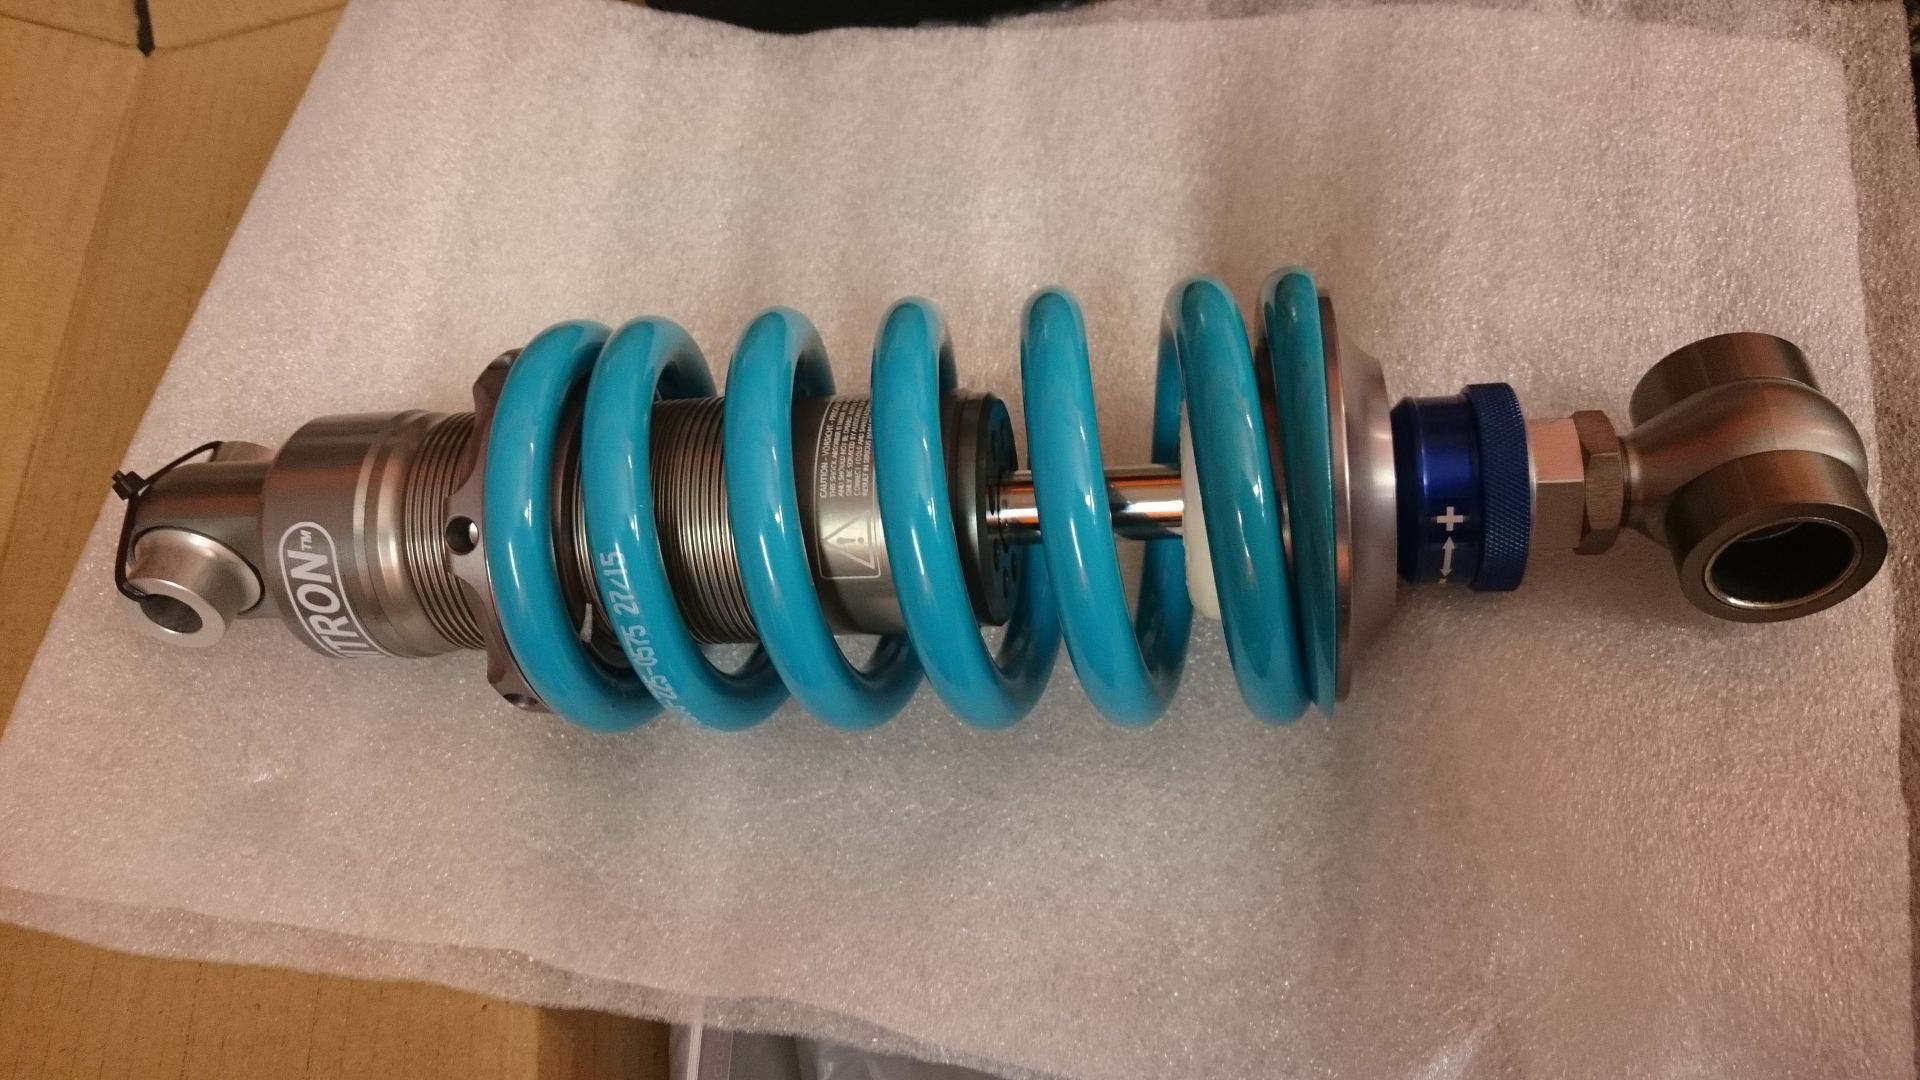 |
|
|
|
Post by dusty350 on Sept 25, 2015 21:33:28 GMT 1
Hi mate Looking good  You've made a nice job of that engine  I saw Dave at the Ace on Sunday, and he showed me some pics - looks lovely with the intended seat unit - I think it really suits it for shape and length. It's gonna be a nice special for sure Dusty |
|
|
|
Post by 0h5h1t on Sept 25, 2015 21:42:38 GMT 1
Thanks dusty mate, there's still some work to do on the seat unit but it shouldn't be long now.
|
|
|
|
Post by yamark on Sept 26, 2015 7:16:04 GMT 1
Very impressive work. Nice photo's You've managed to keep up Dusty's build standard! Following this with interest.
Mark
|
|
|
|
Post by 0h5h1t on Sept 26, 2015 18:42:14 GMT 1
Thanks Yamark, I had no choice there lol. The work previously done by Dusty demands I do it.
|
|
|
|
Post by 0h5h1t on Sept 28, 2015 12:34:10 GMT 1
The Frame had already been de-lugged so I couldn't mount the normal rear brake switch so got a small(ish) hydraulic switch which doesn't look too bad. 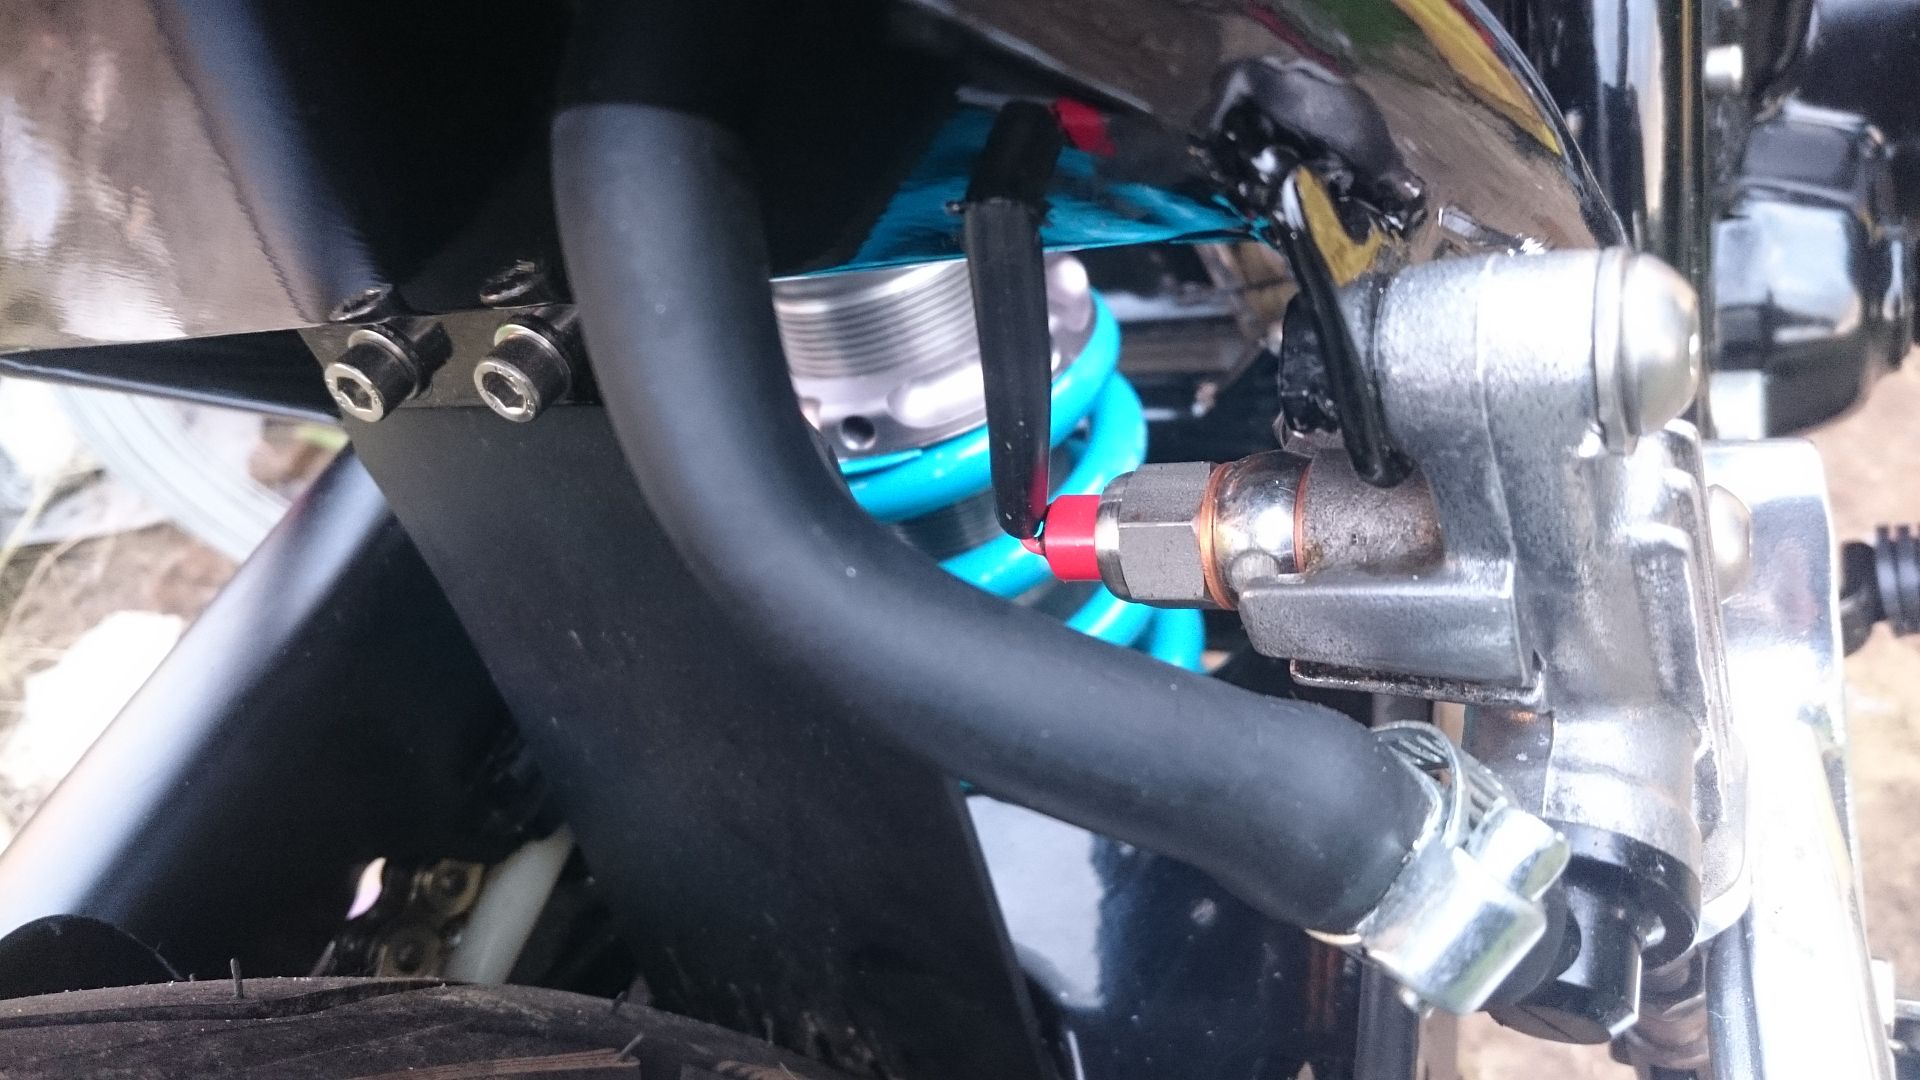 |
|
|
|
Post by 0h5h1t on Sept 28, 2015 12:55:09 GMT 1
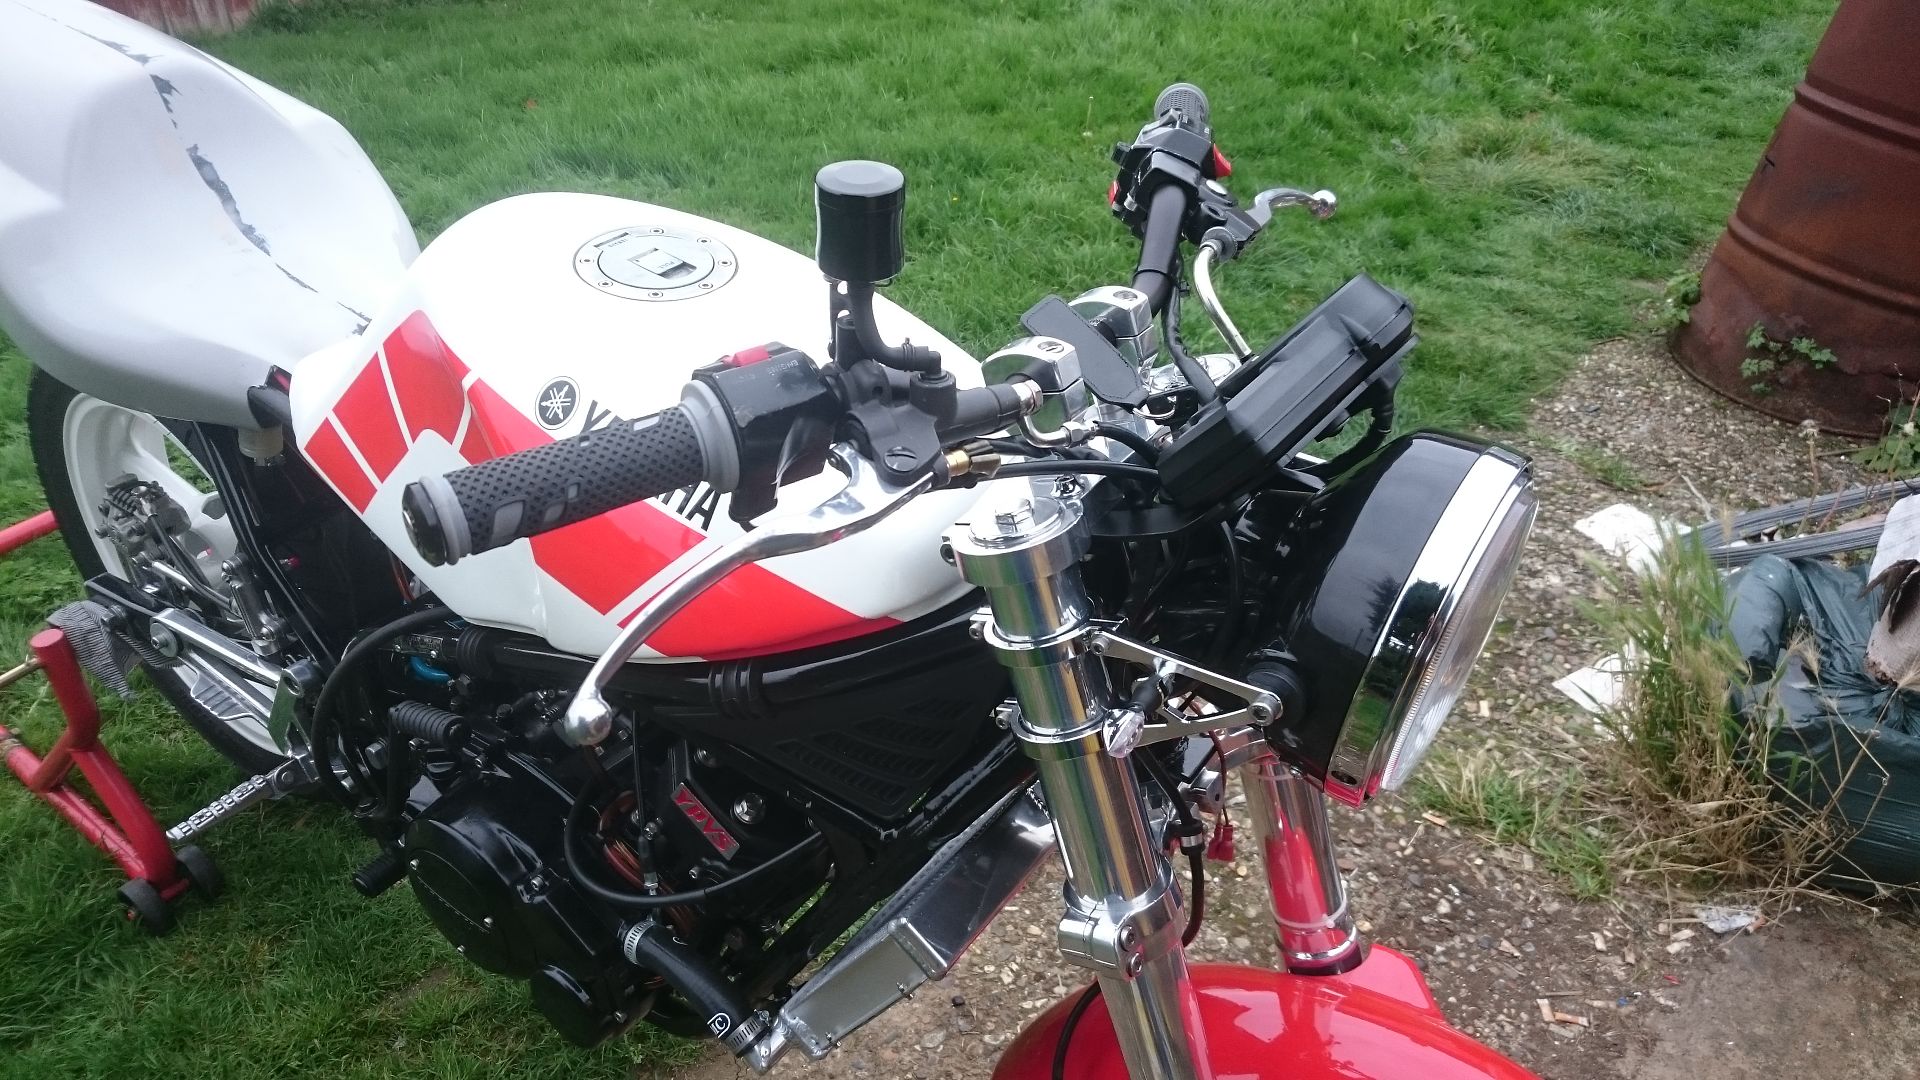
also mounted the Nitron shock which dropped straight in. 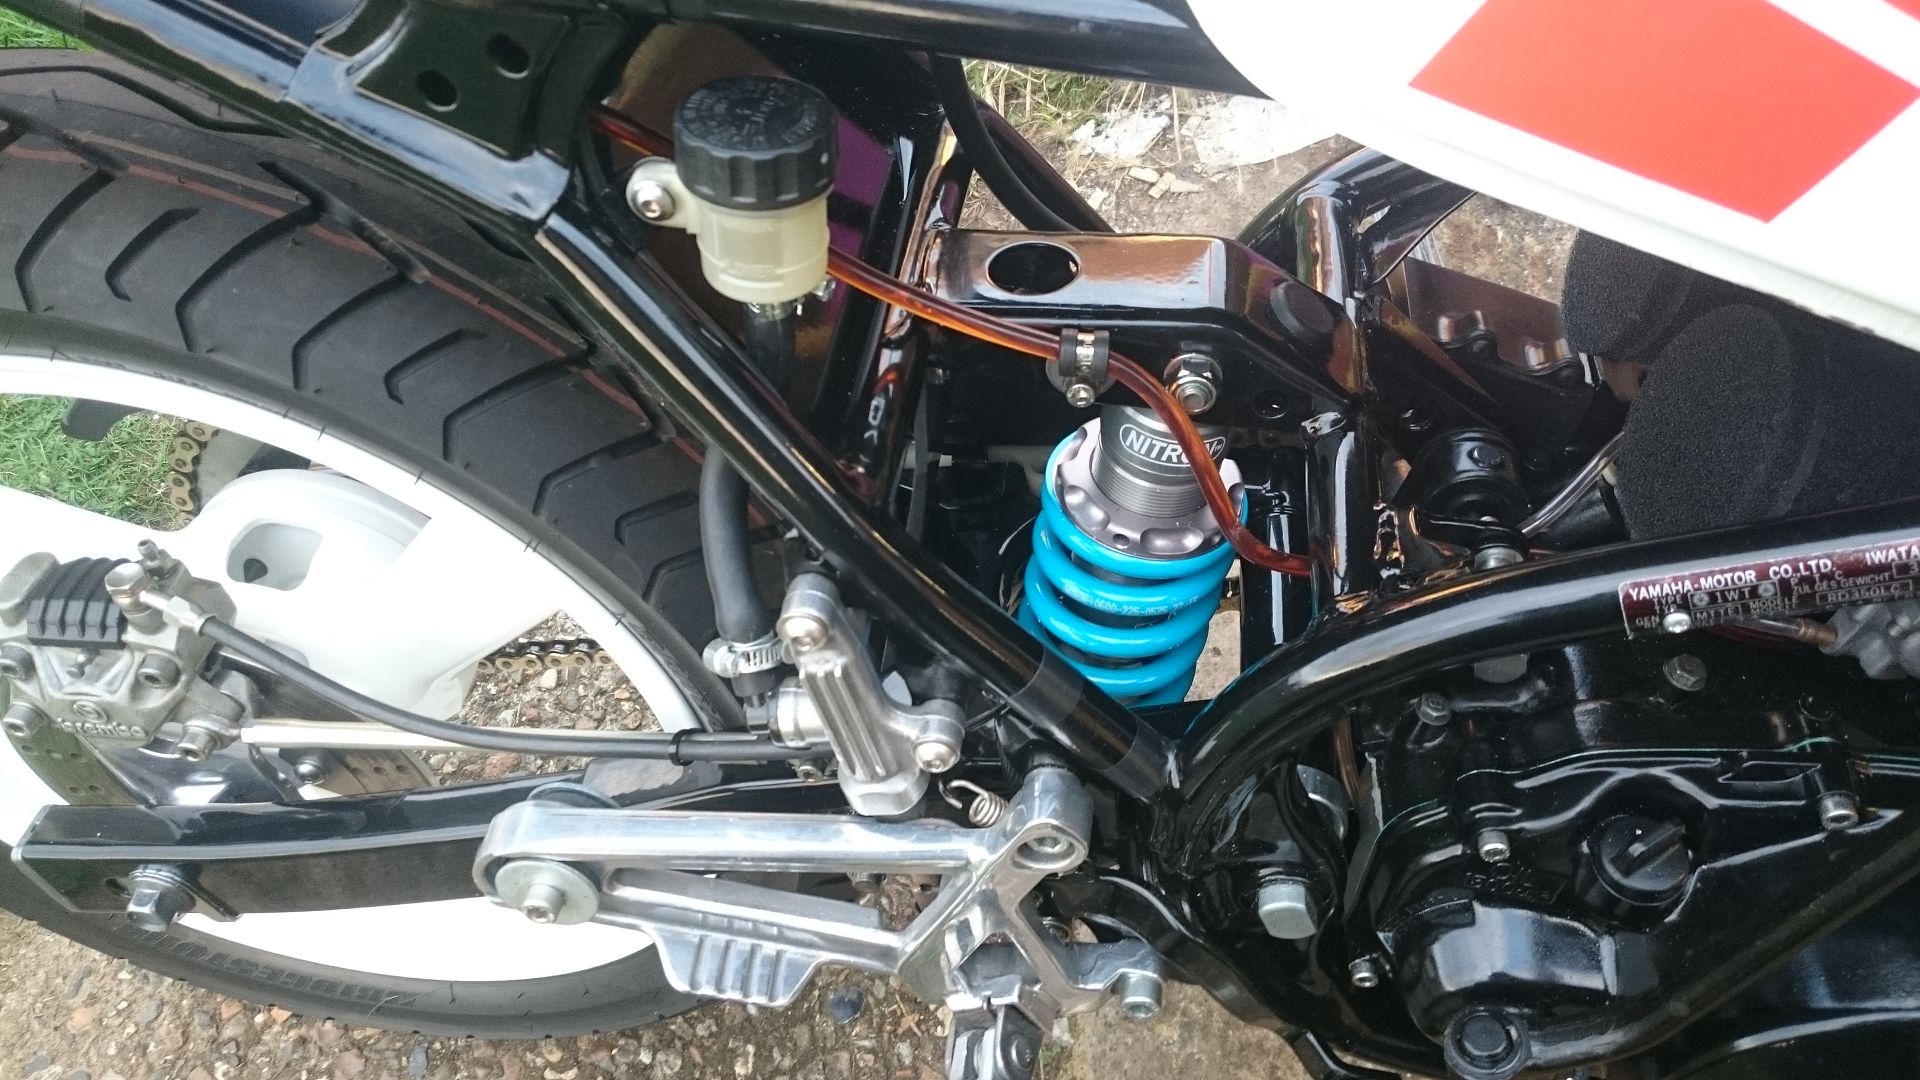 mounted the headlight using some polished brackets and installed some tiny Ultra bright LED indicators. I had mulled over what clocks to fit to keep the styling, LC clocks? ypvs clocks? round clocks from the Koso or Daytona range but couldn't find the right combination of size, functions and style so in the end plumped for the RX2+ GP style dash from Koso. nice dash but the fitting bracket was never going to look anything other than adequate so I made one up using 4mm Alloy sheet which also allowed me to make up an additional bracket for the ignition barrel to fit the custom top yoke. 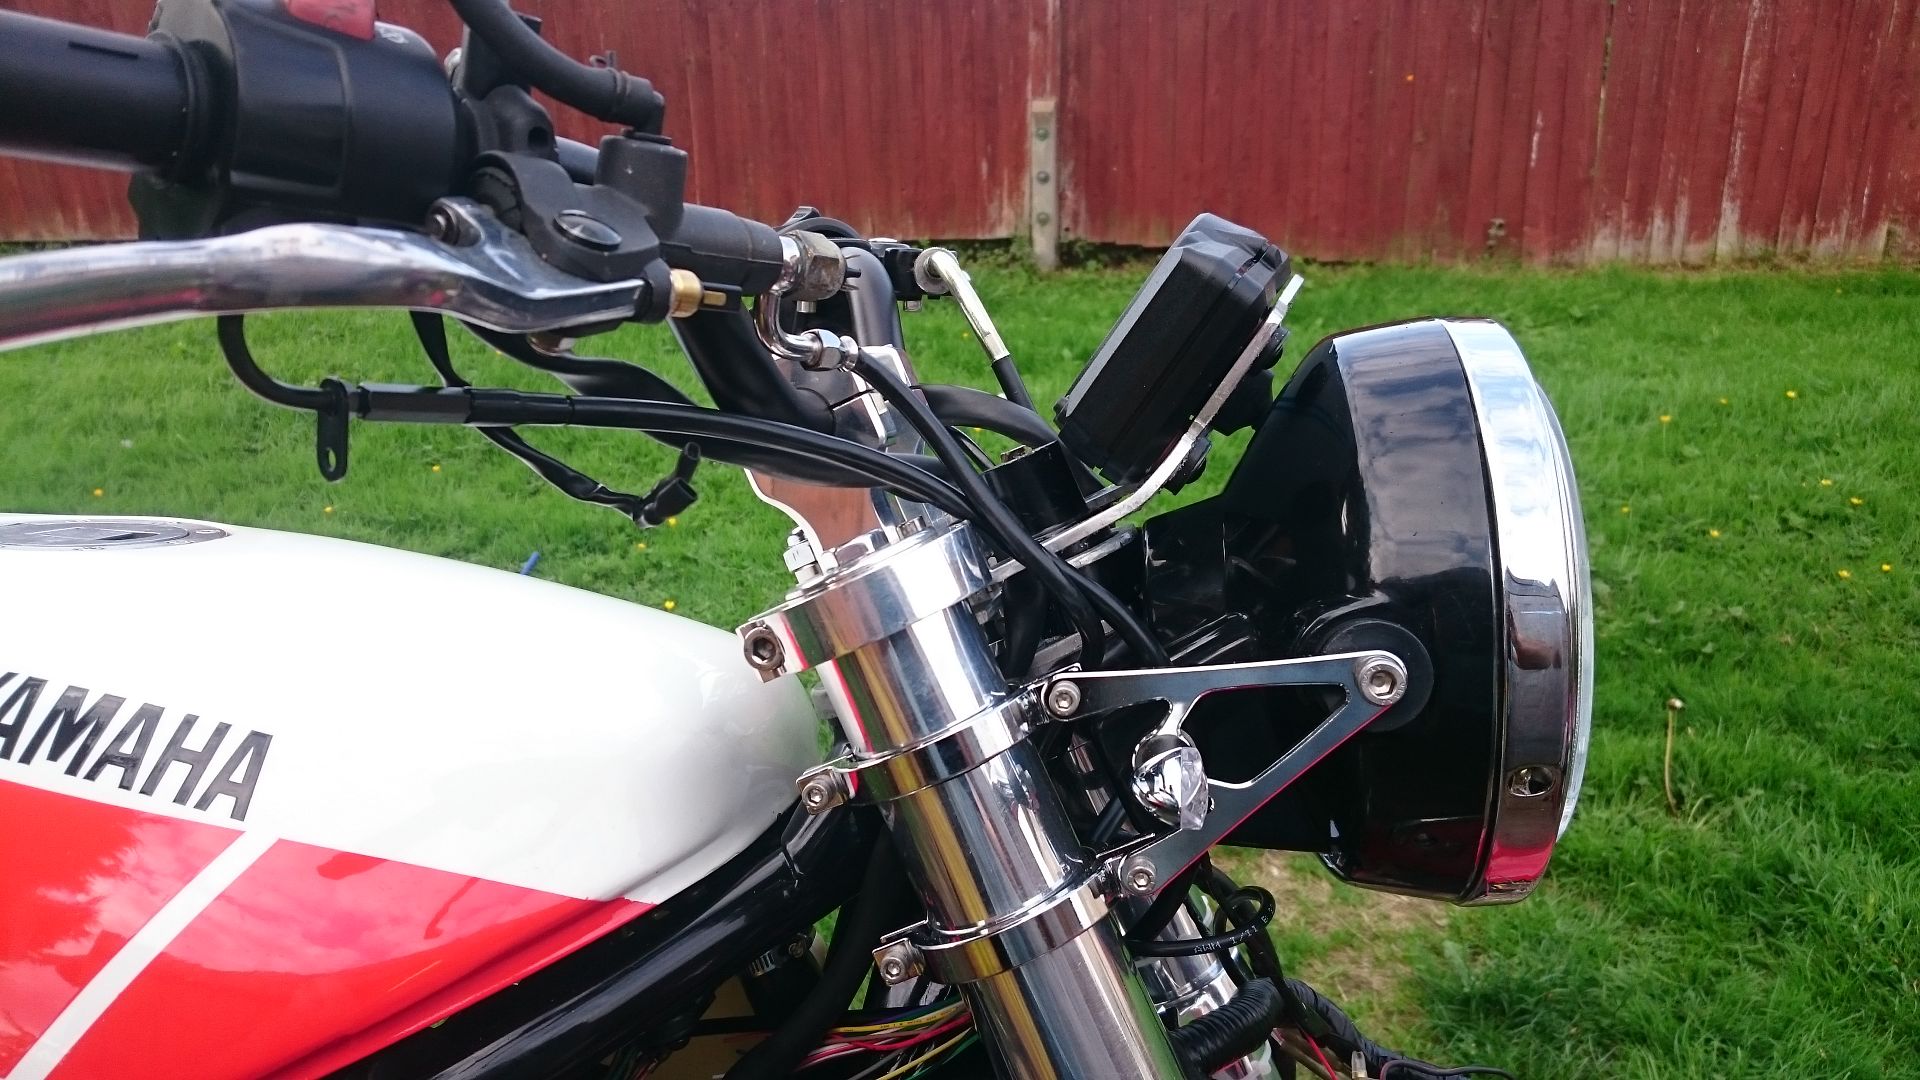 looks better now its painted though. 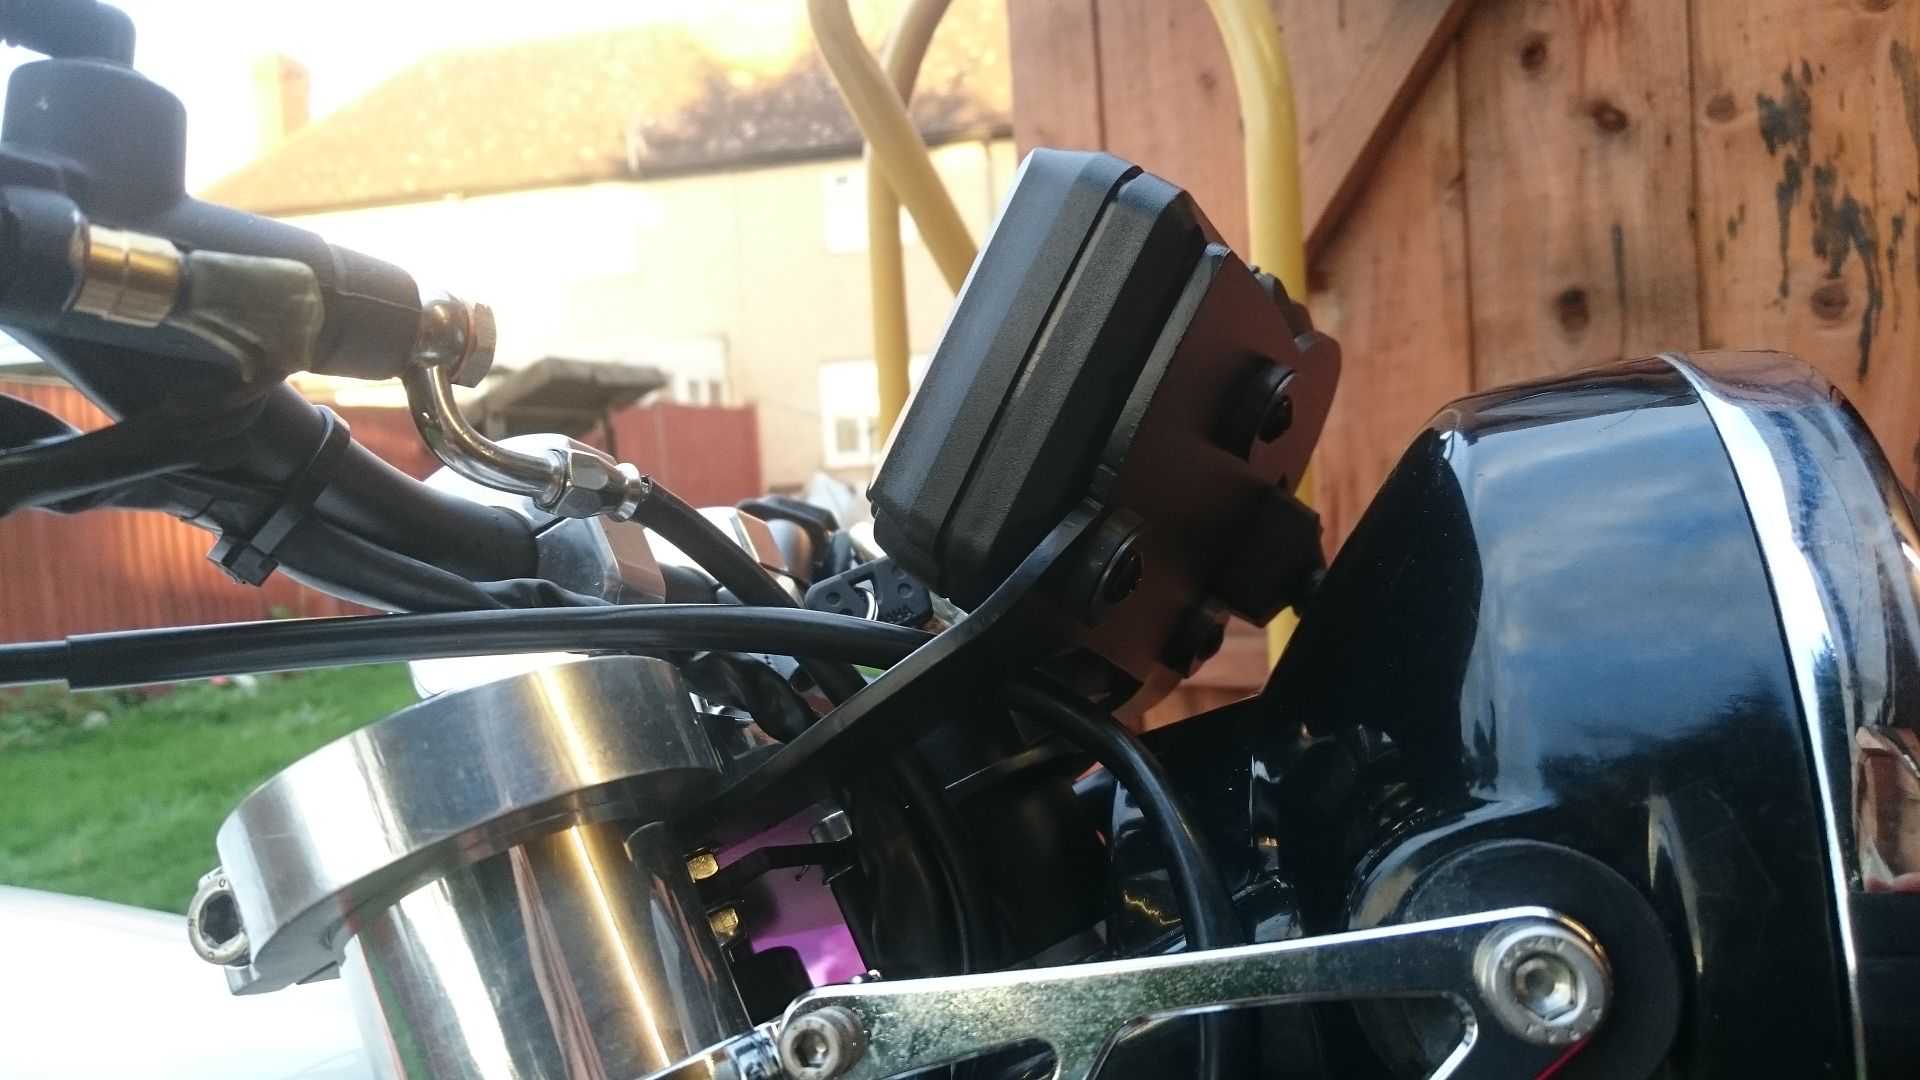 here's the Dash 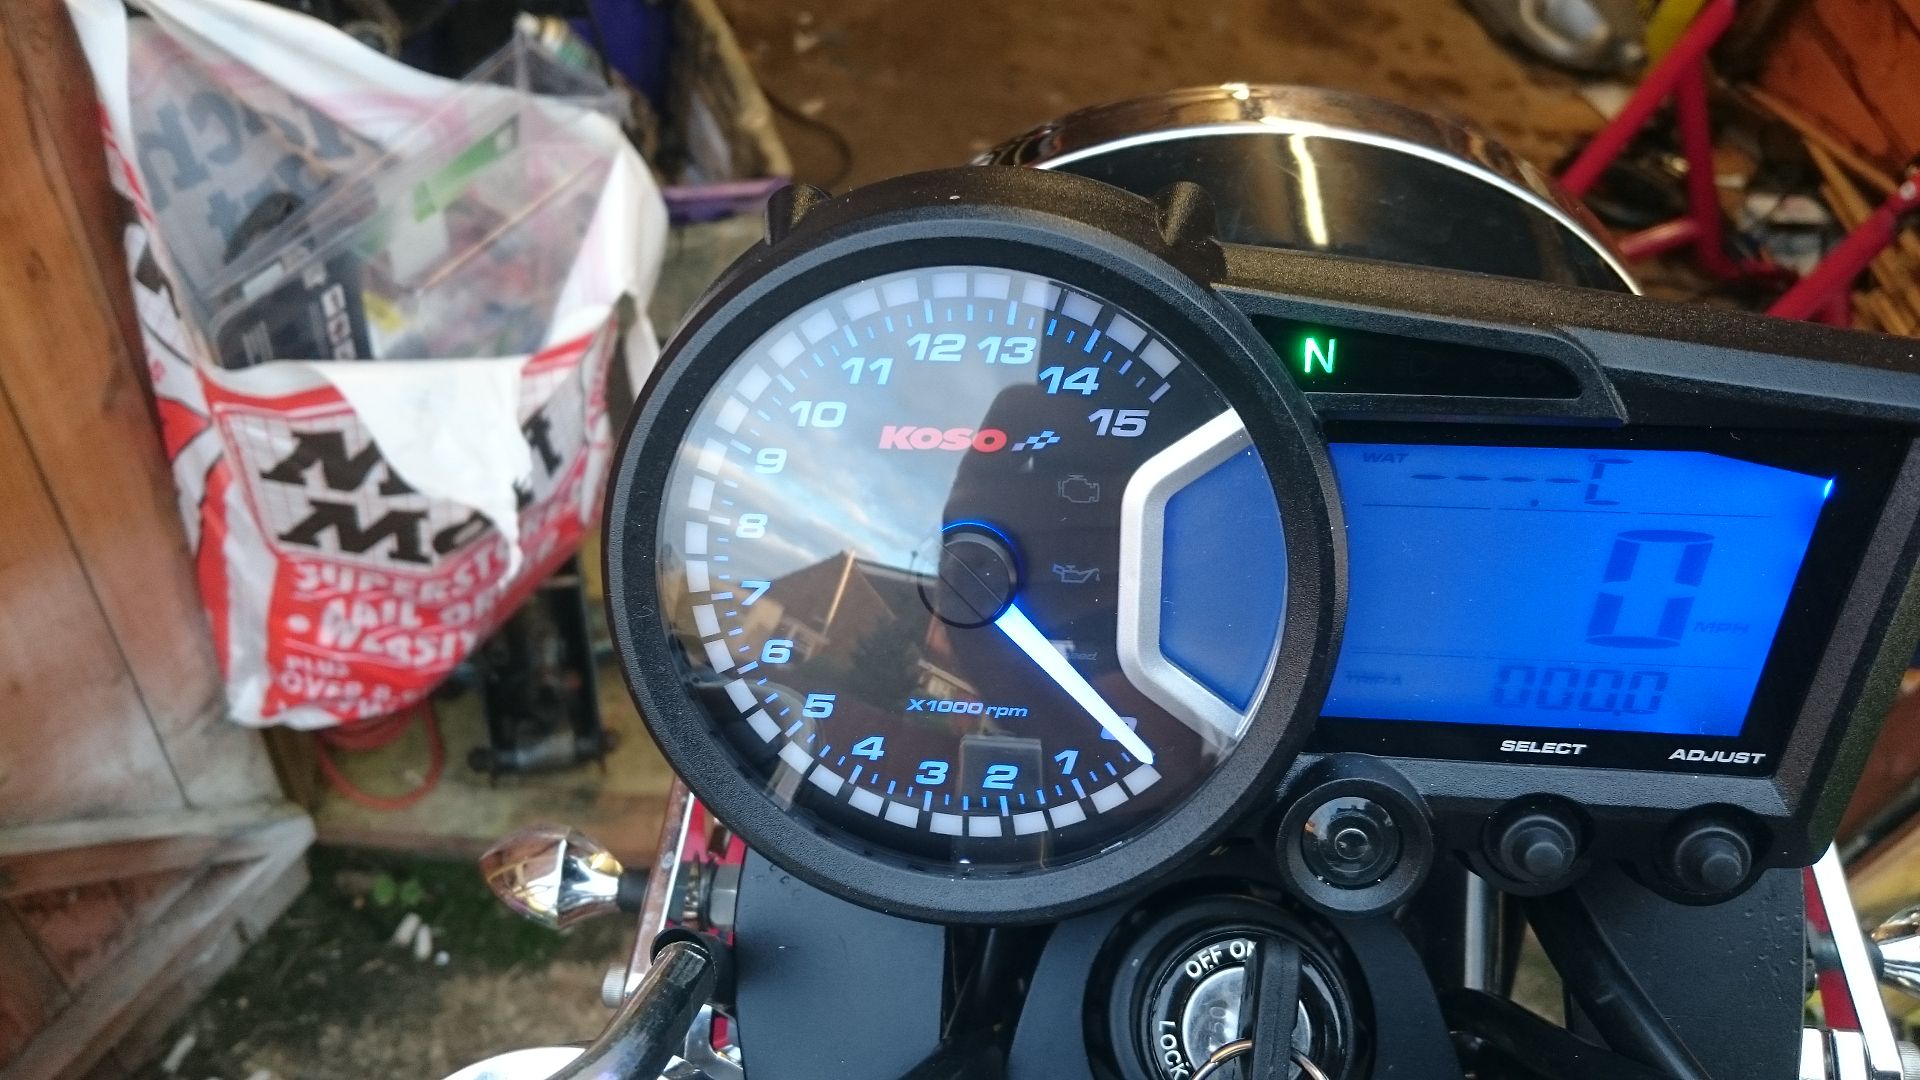 I sunk the ignition barrel as low as I could as I didn't want it too high and obstructing the clocks (or the key ring banging around, scratching them lol) 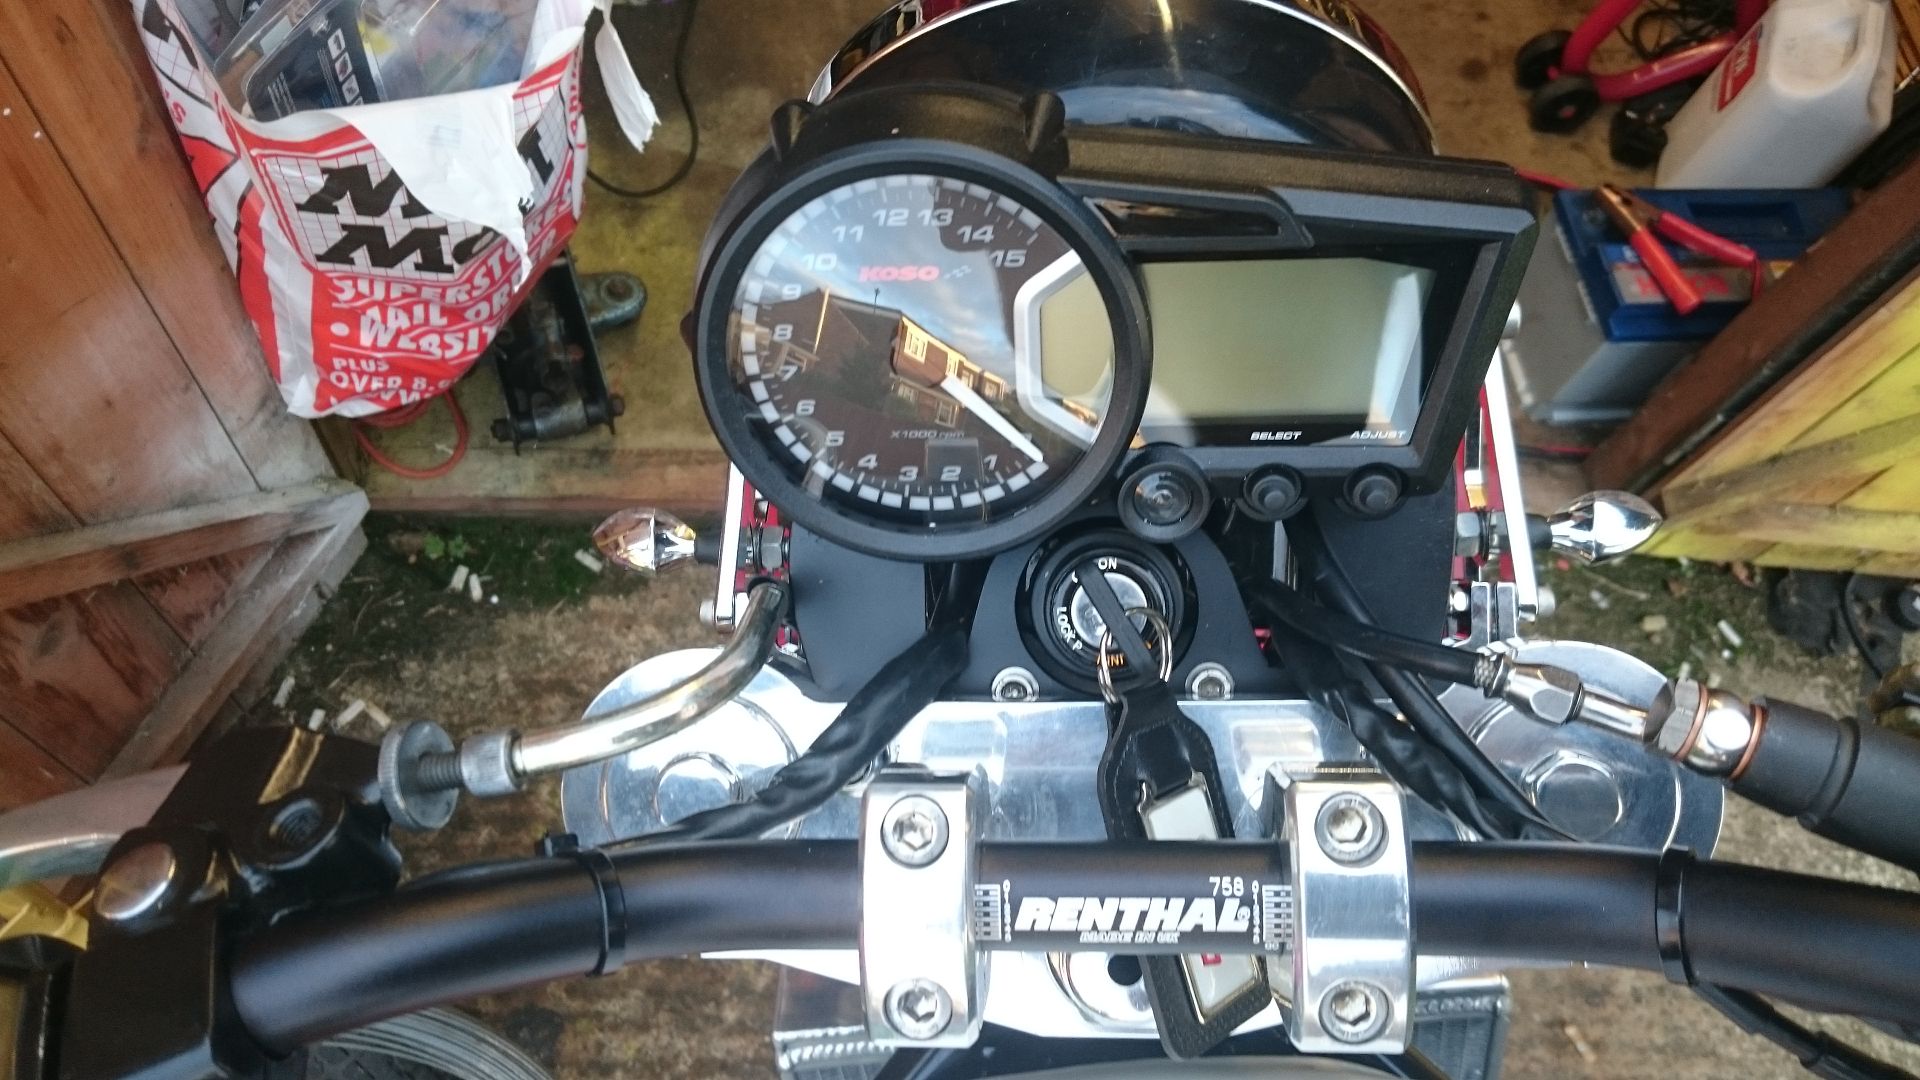 Last night i fitted the Temp sender adaptor and being as I didn't want any wiring on show I hid it onto the pipe that runs down between the carbs, it was getting late tho and I didnt get a picture. |
|
|
|
Post by 1966baz on Sept 29, 2015 19:57:12 GMT 1
Looking really promising. The engine is a huge transformation. Keep it up.
|
|
|
|
Post by boldor84 on Sept 29, 2015 22:02:05 GMT 1
sorry if ive missed it elsewhere but what swinging arm and rear wheel have you got fitted ?
|
|
|
|
Post by 0h5h1t on Sept 30, 2015 13:03:29 GMT 1
Hi Boldor84, the rear swingarm is standard F2 with unnecessary lugs etc removed and then powder coated and the rear wheel is TZR125 Belgarde which is fitted with a 140 section tyre. if you need more detail mate, I'm sure Dusty350 will update you further as he completed the frame work before I bought the rolling frame from him.
|
|
|
|
Post by dusty350 on Sept 30, 2015 17:35:12 GMT 1
Hi Yep, that's correct - F2 swingarm with the lug for the caliper carrier removed. The Belgarda wheel goes in with the belgarda caliper carrier and caliper, and on the chain side I used an Rd400 spacer and it all lined up easily. Also had a tab welded on the top of the arm for a caliper carrier torque arm to bolt to. The matching front end is an easy fit too The Koso looks great, really suits the bike. It's coming on leaps and bounds now. Any pics of the seat fitted yet ? Dusty |
|
|
|
Post by gazsellars on Sept 30, 2015 18:42:41 GMT 1
Nice build mate your work on that motor looks great! Keep up the good work.
|
|
|
|
Post by copper99 on Sept 30, 2015 18:47:30 GMT 1
Thats very nice mate. top work.
|
|
|
|
Post by myivora on Oct 3, 2015 18:52:30 GMT 1
very nice mate...love it.
|
|
|
|
Post by 0h5h1t on Oct 6, 2015 9:55:16 GMT 1
thanks all, I'll get some more pics as soon as I can.
|
|
|
|
Post by wolfboy1 on Oct 6, 2015 10:45:17 GMT 1
amazing , i love it !
was the koso difficult to wire up ?
|
|
|
|
Post by 0h5h1t on Oct 6, 2015 13:02:28 GMT 1
Hi Wolfboy1,
Thanks,
The Koso was very easy to wire up, very straight forward in fact. I got the cable adapter for the speedo at the same time. this simply screws into the yamaha speedo drive on the front wheel and has an electronic cable that runs up to the clocks. I'll get a picture posted soon as I can of the installed cabling and speedo drive so you can see for yourself. :-)
|
|
|
|
Post by wolfboy1 on Oct 6, 2015 23:38:58 GMT 1
|
|
|
|
Post by 0h5h1t on Oct 13, 2015 17:47:04 GMT 1
Sorry for the delay Wolfboy, heres a pic of the wiring. 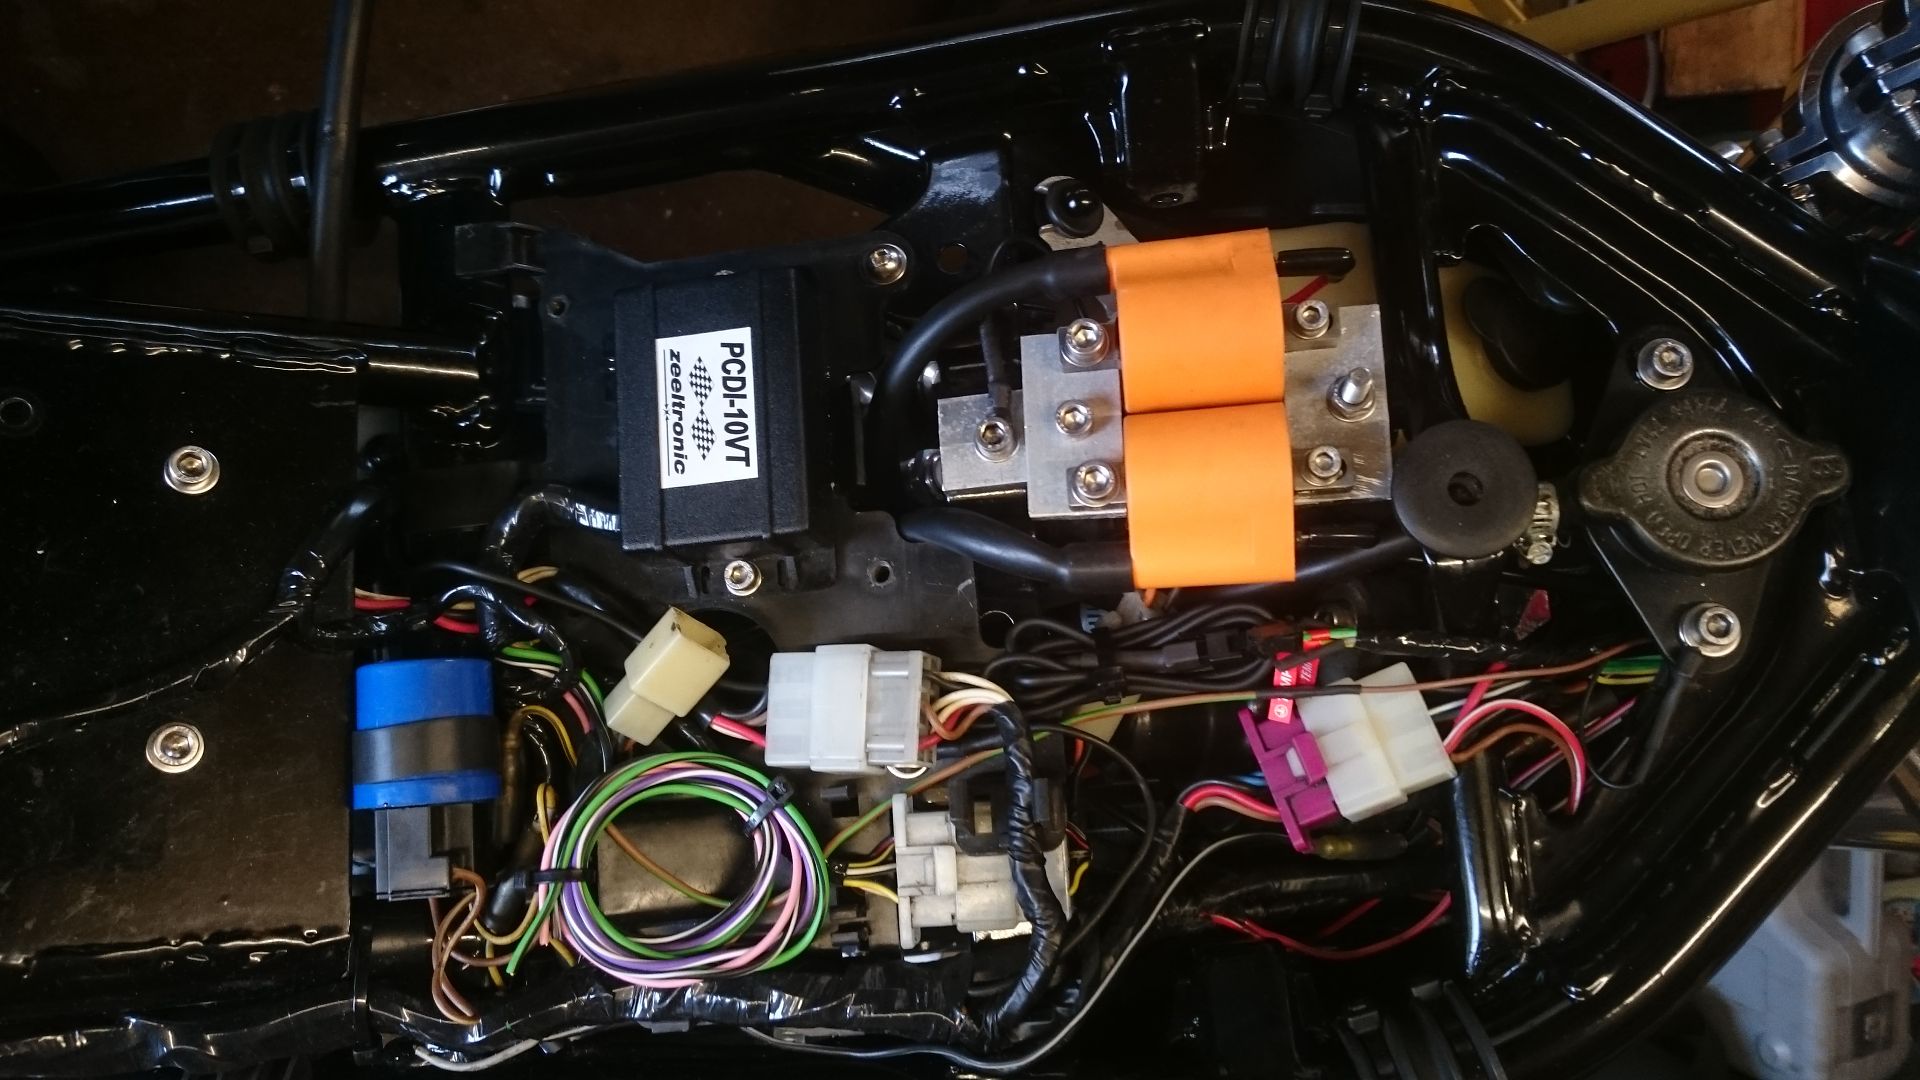 you can just see the the clock loom coming in by the coolant filler cap and the Ignition switch connector. unfortunately the rest is already hidden but you can see there are not a lot of connections here. ok,wanting to make some progress on the build now so today I have built a battery tray for the rear end. the battery is going to live under the seat so I also had to extend the battery loom to reach the new position. 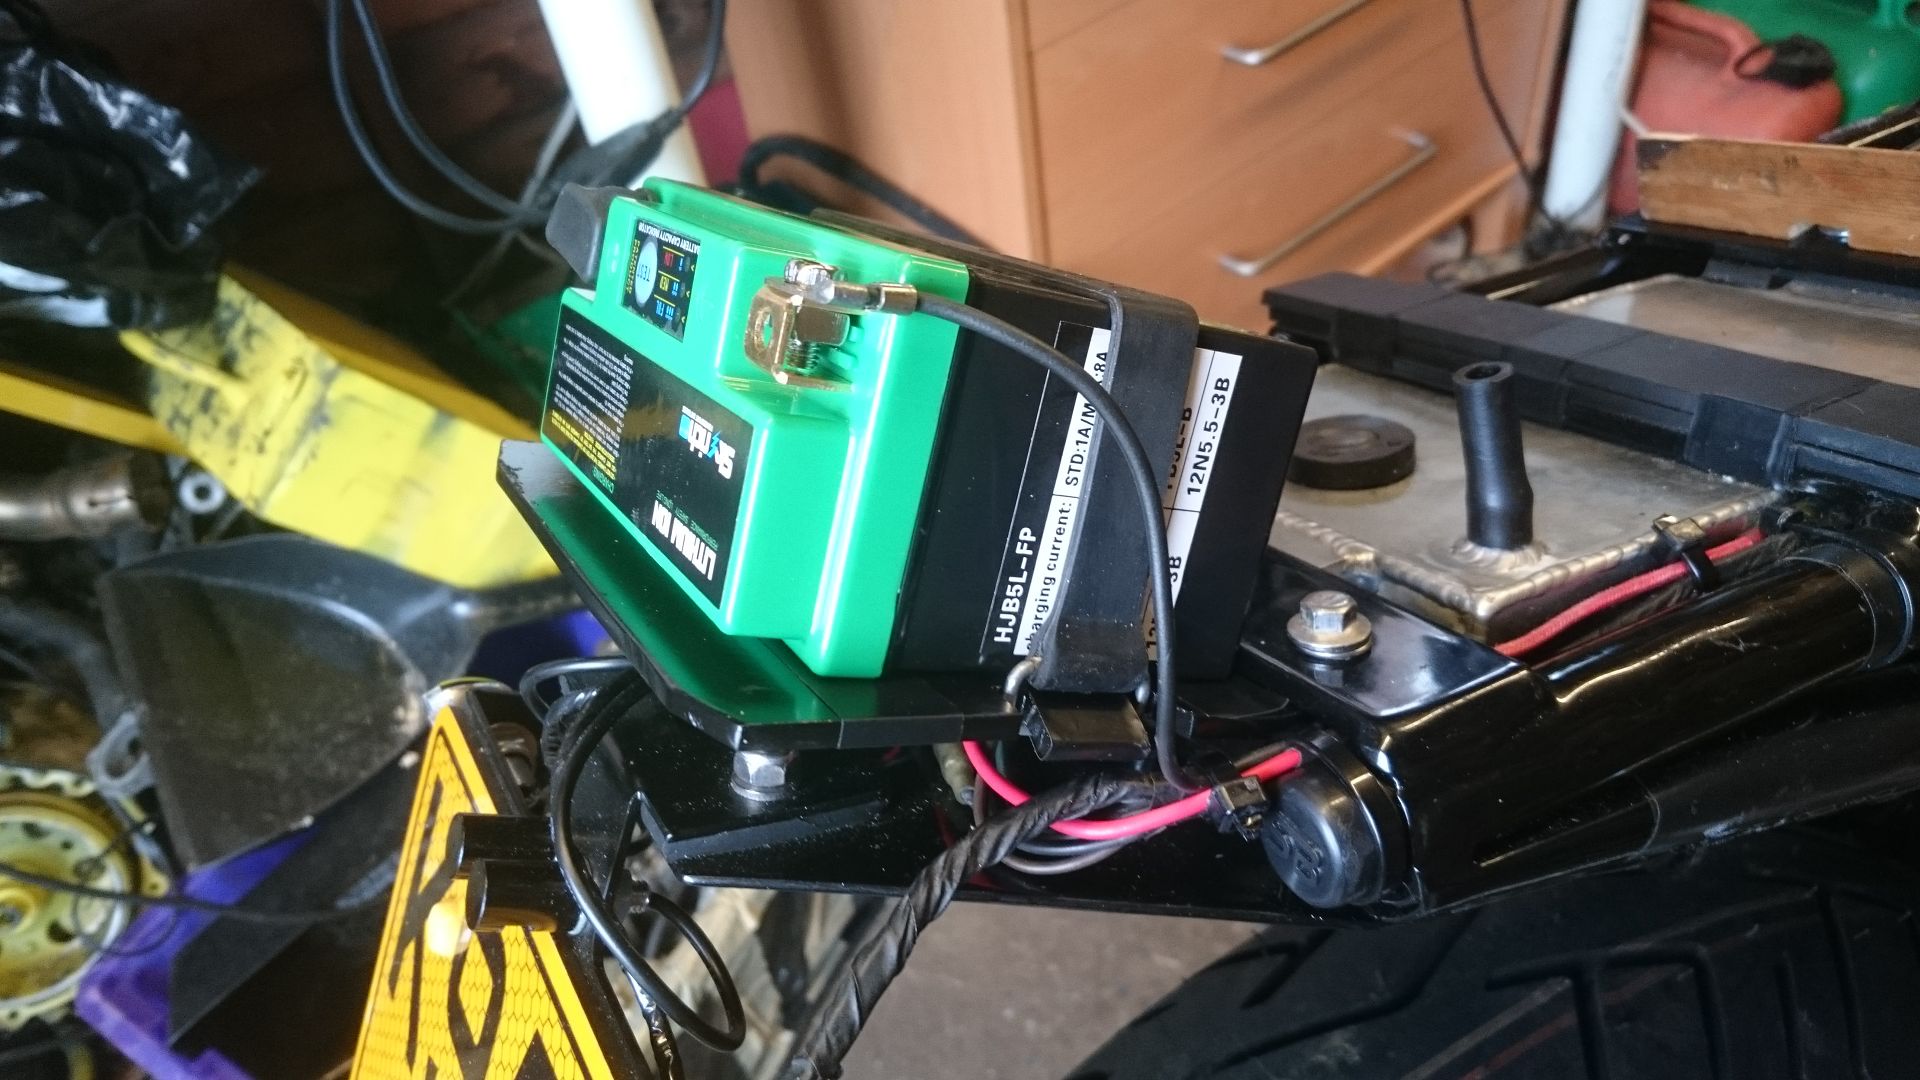 made some cutouts to allow a slight bend in the alloy to forma Tag for the battery strap 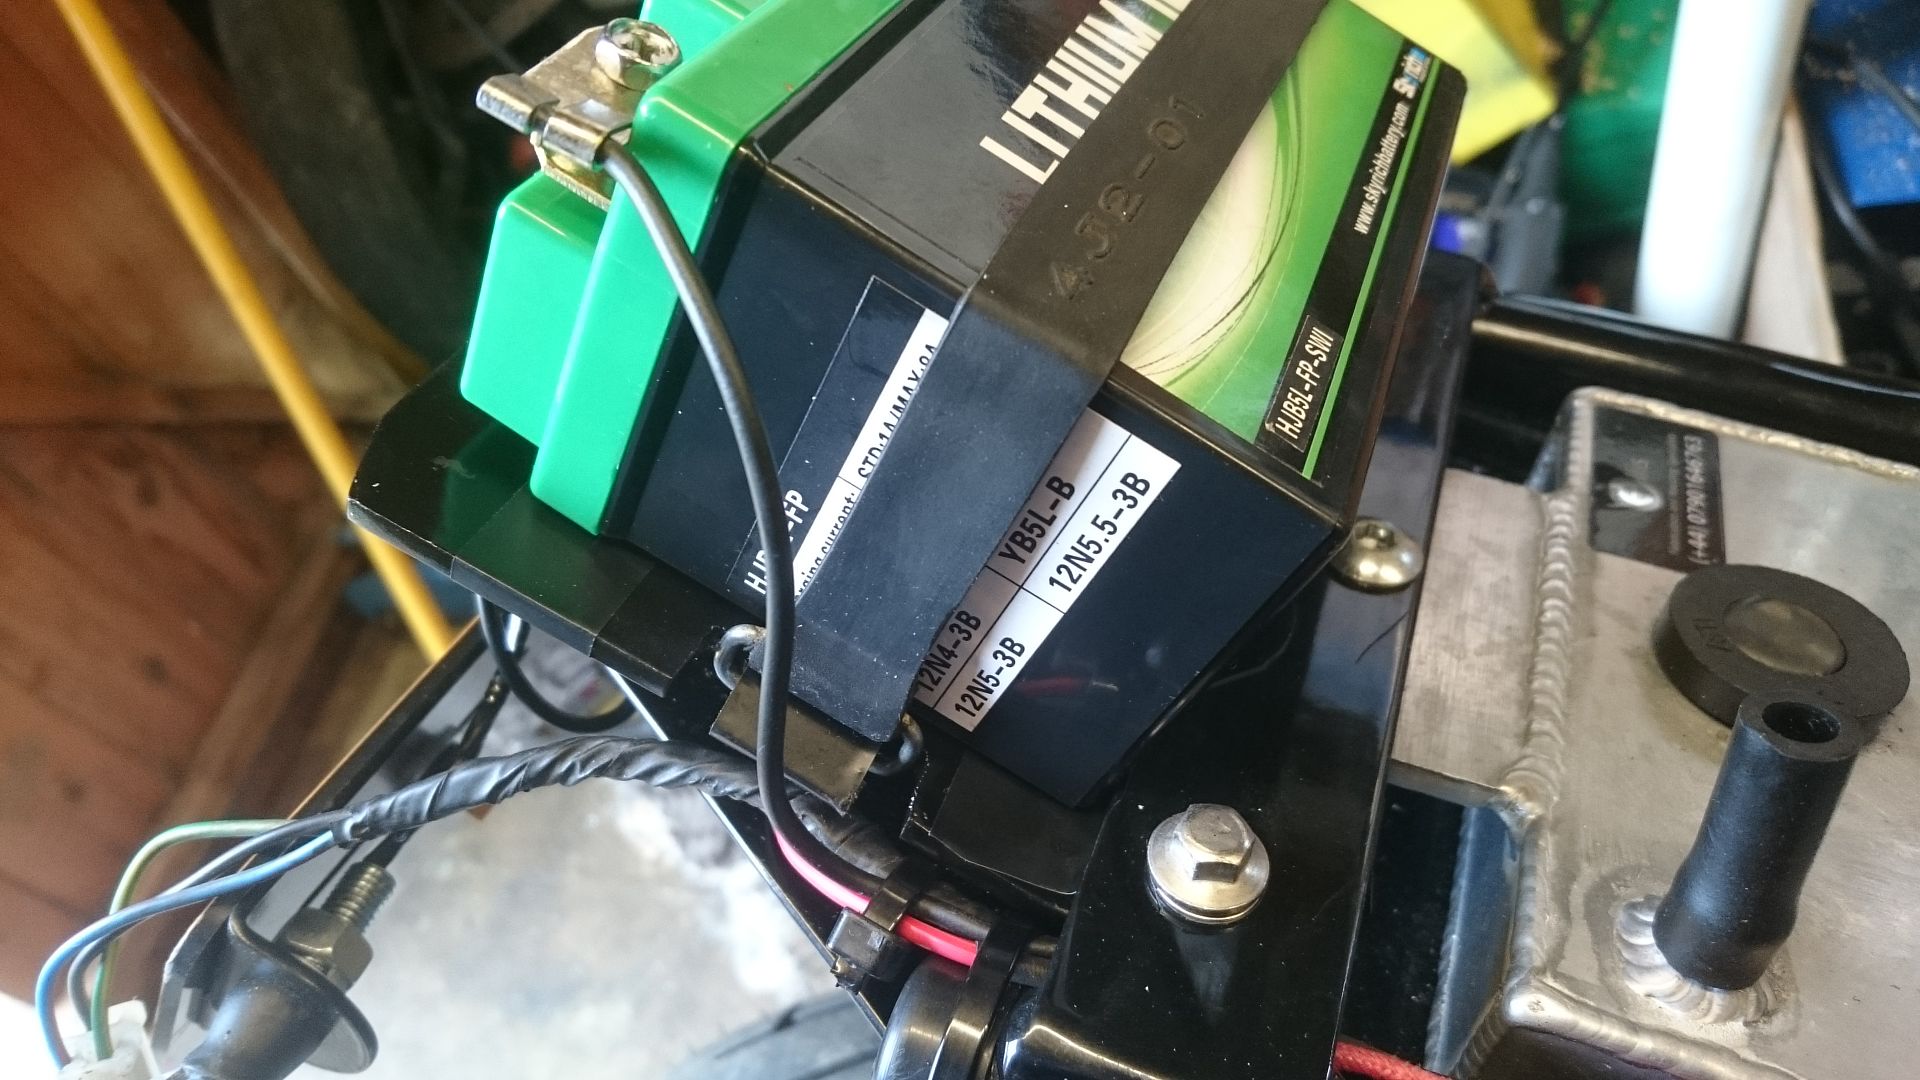 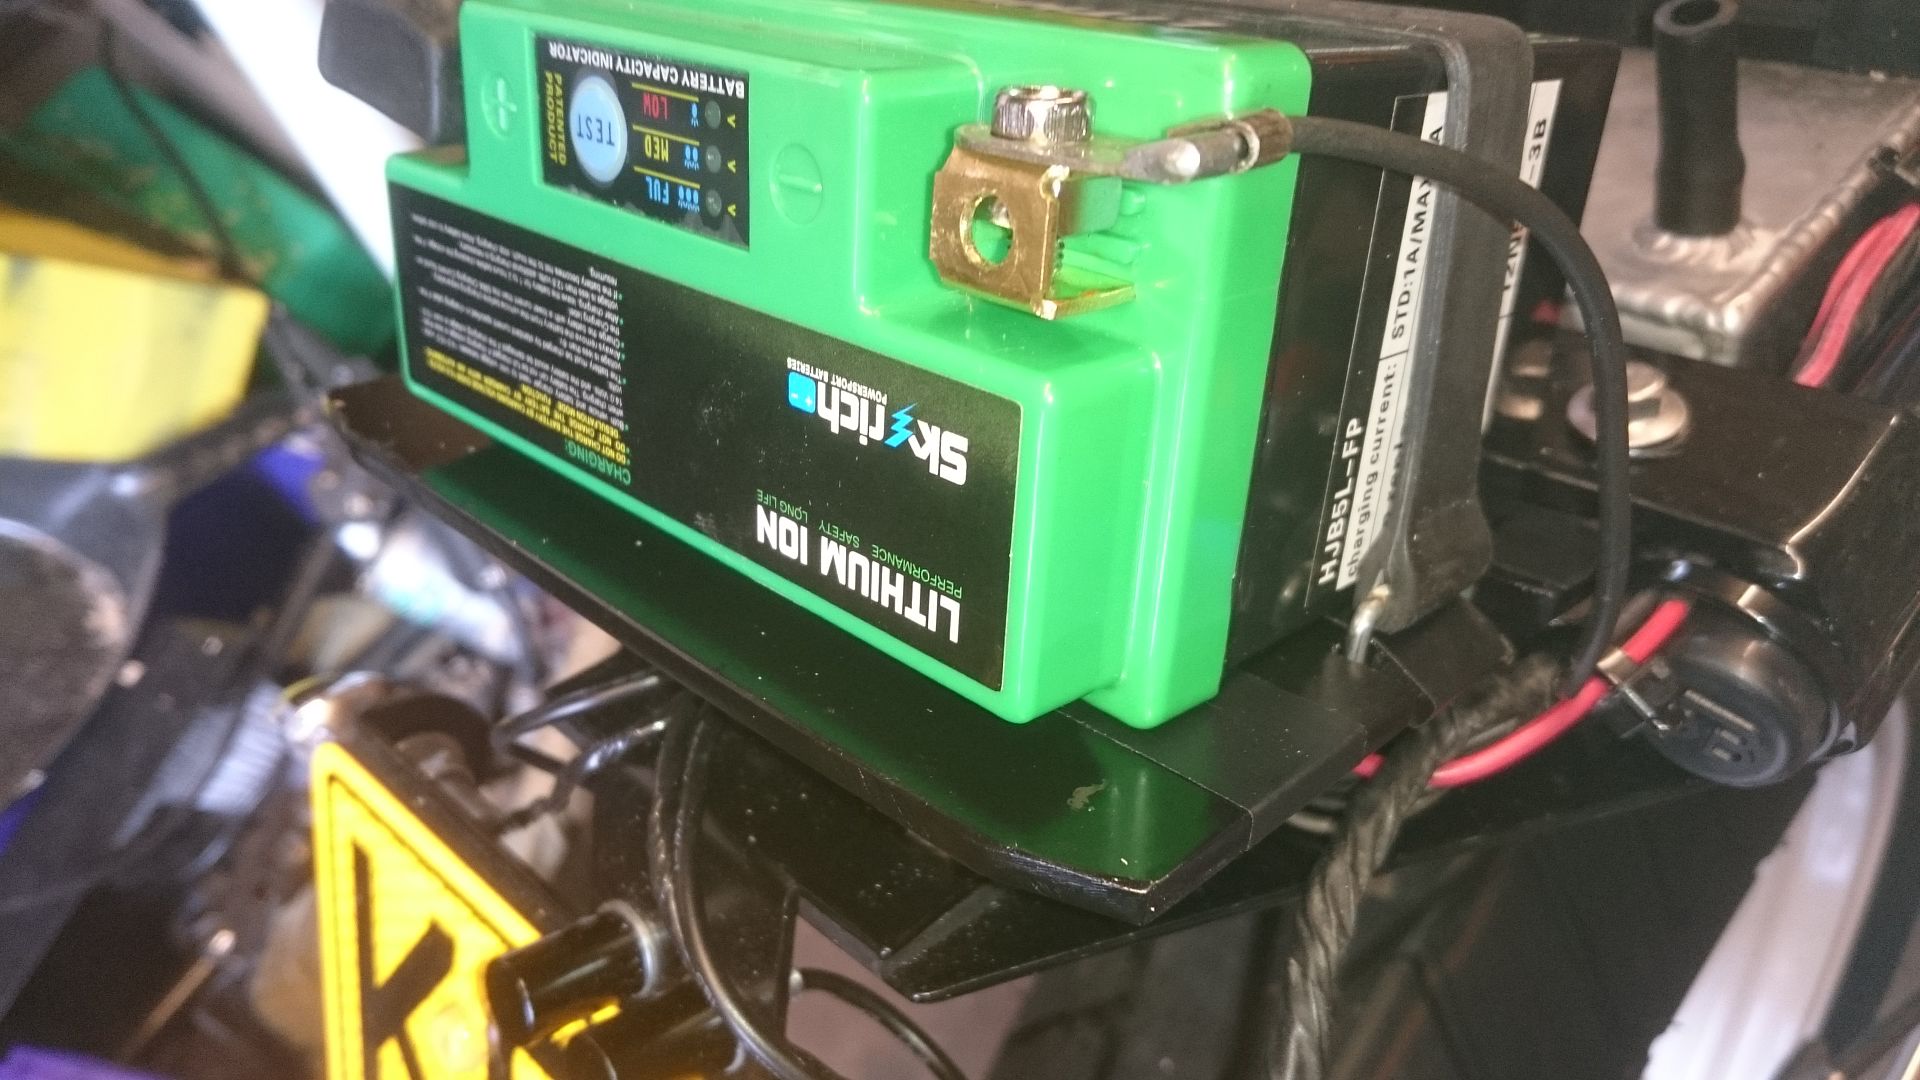 also got a pic of sorts of the Koso temp sender hidden away between the carbs. you can also see the engine loom hidden away in here to avoid too much visible cable on view. 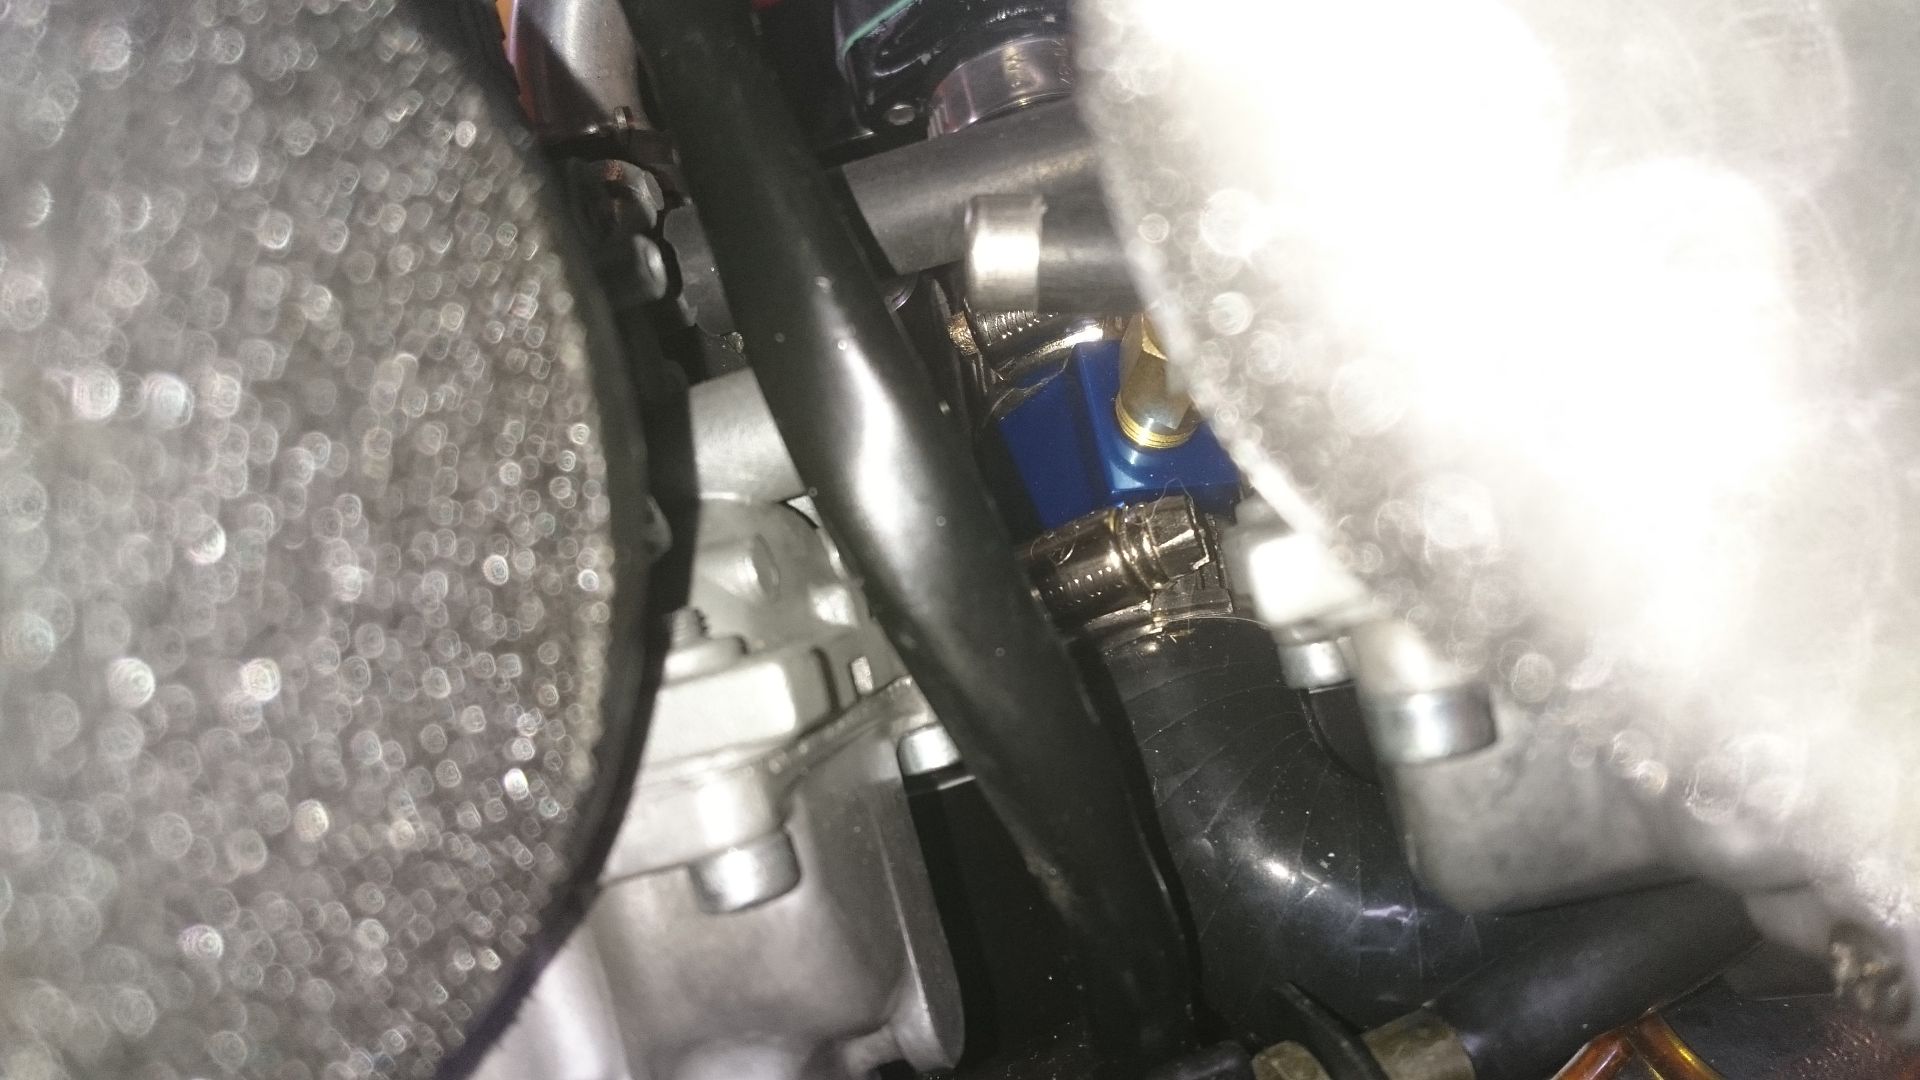 well this is where I'm thinking the seat is heading, admittedly a lot of work to be done yet but you get the idea. the seat is a 916 race seat which has been shortened at the front by roughly 4 inches and has been cut down the middle length ways, a few inches removed and then joined back together again. still have to finalise the front part of the seat where it meets the tank and then the seat pad will butt up nicely to finish off. I'm planning a fixing point at the front onto the rear tank mount, two a little further back near the back of the seat base and finally two underneath back where the indicators would be. The number plate will then move back also onto the seat base. 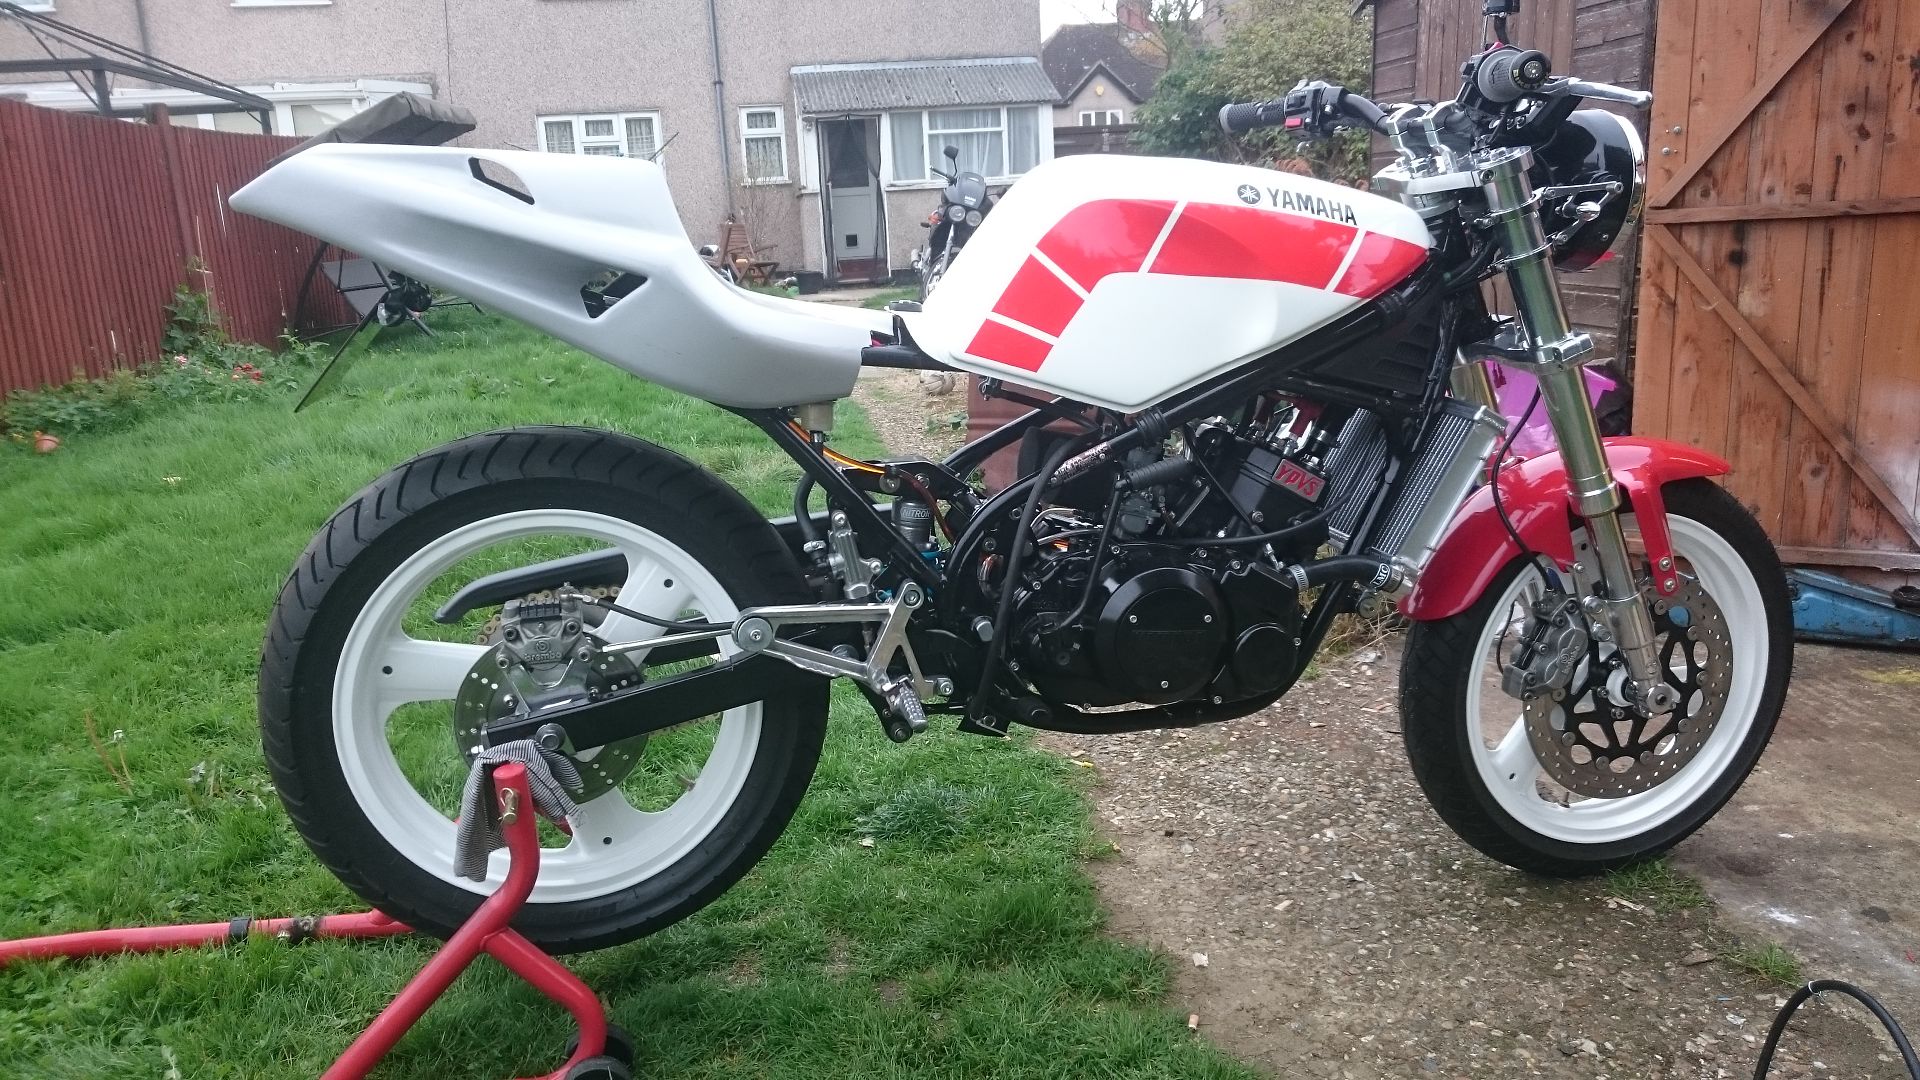  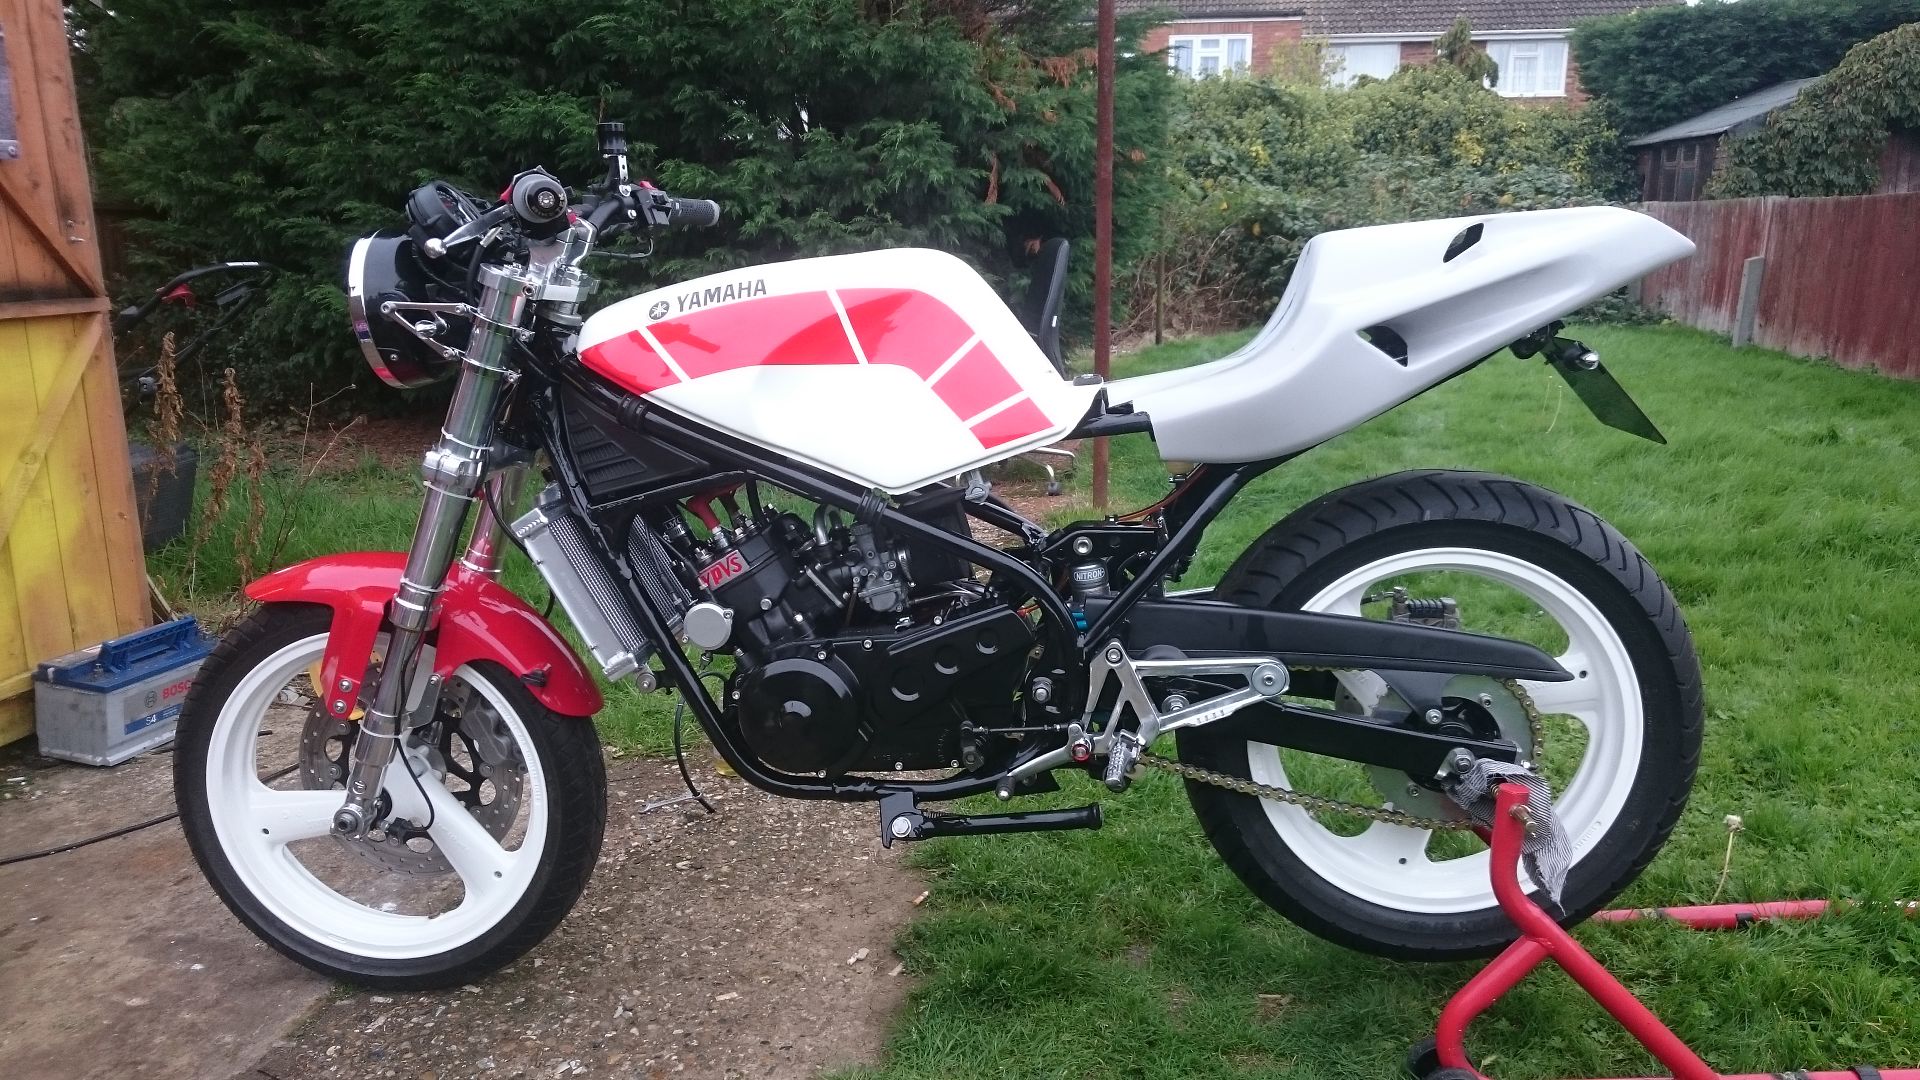
The pipes Ive selected are Kenny Race pipes,expecting them soon :-), already thinking of a Mick Abbey fast road tune but that's a little way off yet i think. Anyone know what Mick charges for his work? |
|
|
|
Post by dave1963 on Oct 13, 2015 19:51:03 GMT 1
Looking good mate like the lines
|
|
|
|
Post by dusty350 on Oct 14, 2015 6:45:47 GMT 1
Hi Karl, Bike is looking great mate I think the seat unit really suits the bike. That was always the issue for me - getting the right "look" for the bike, and I think you have achieved that. Those Lithiums are so light aren't they. Perfect for hiding under the seat. Looking forward to seeing the bike build moving onwards. Dusty |
|
|
|
Post by wolfboy1 on Oct 14, 2015 9:52:33 GMT 1
looking very nice ? , one thing have been planning is to get a custom made alloy oil tank over the winter , but will keep it where it normally sits as i want it on show |
|
|
|
Post by 0h5h1t on Oct 14, 2015 14:07:46 GMT 1
Hi Karl, Bike is looking great mate I think the seat unit really suits the bike. That was always the issue for me - getting the right "look" for the bike, and I think you have achieved that. Those Lithiums are so light aren't they. Perfect for hiding under the seat. Looking forward to seeing the bike build moving onwards. Dusty Thanks dusty, I was originally going with an r6 tail unit but saw the mould for the 916 unit when visiting the race fairing suppliers and thought "I've always liked that seat unit" and after discussing the fitment options decided to go with it. I agree the seat unit on this bike was always a make or break option but I am very pleased with my choices so far. :-) |
|
|
|
Post by 0h5h1t on Oct 18, 2015 13:34:11 GMT 1
with the seat unit being narrowed by a couple of inches a new problem came about, the standard 916 tail lights will now not fit so the hunt was on for a suitable replacement. luckily after a short search I came across these, small enough to fit onto the tail piece at 50X45mm each and will look right i reckon. I'll take the lights of the metal plate and mount directly to the tail piece, ala 916 stylee. 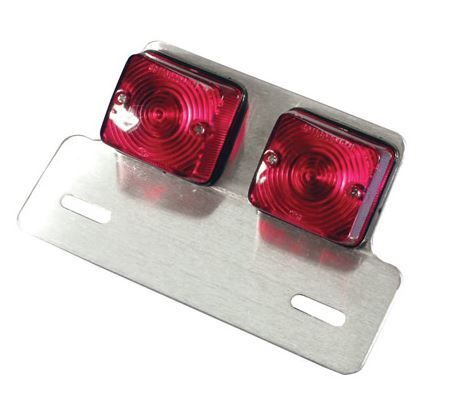 |
|
|
|
Post by dave1963 on Oct 18, 2015 19:05:15 GMT 1
They look good mate
|
|
|
|
Post by Splodge on Oct 18, 2015 19:13:57 GMT 1
Good little light unit its the same one I used on my RD400 Special A really nice build coming along there fella |
|
|
|
Post by 0h5h1t on Oct 18, 2015 19:33:15 GMT 1
Cheers guys, looking forward to getting a leg over the bike now.
|
|
|
|
Post by 0h5h1t on Dec 1, 2015 16:53:36 GMT 1
Another long period of not a lot happening but have made some progress, pipes are on and sound great. had to change my mind on the pipes but pleased so far with the outcome. 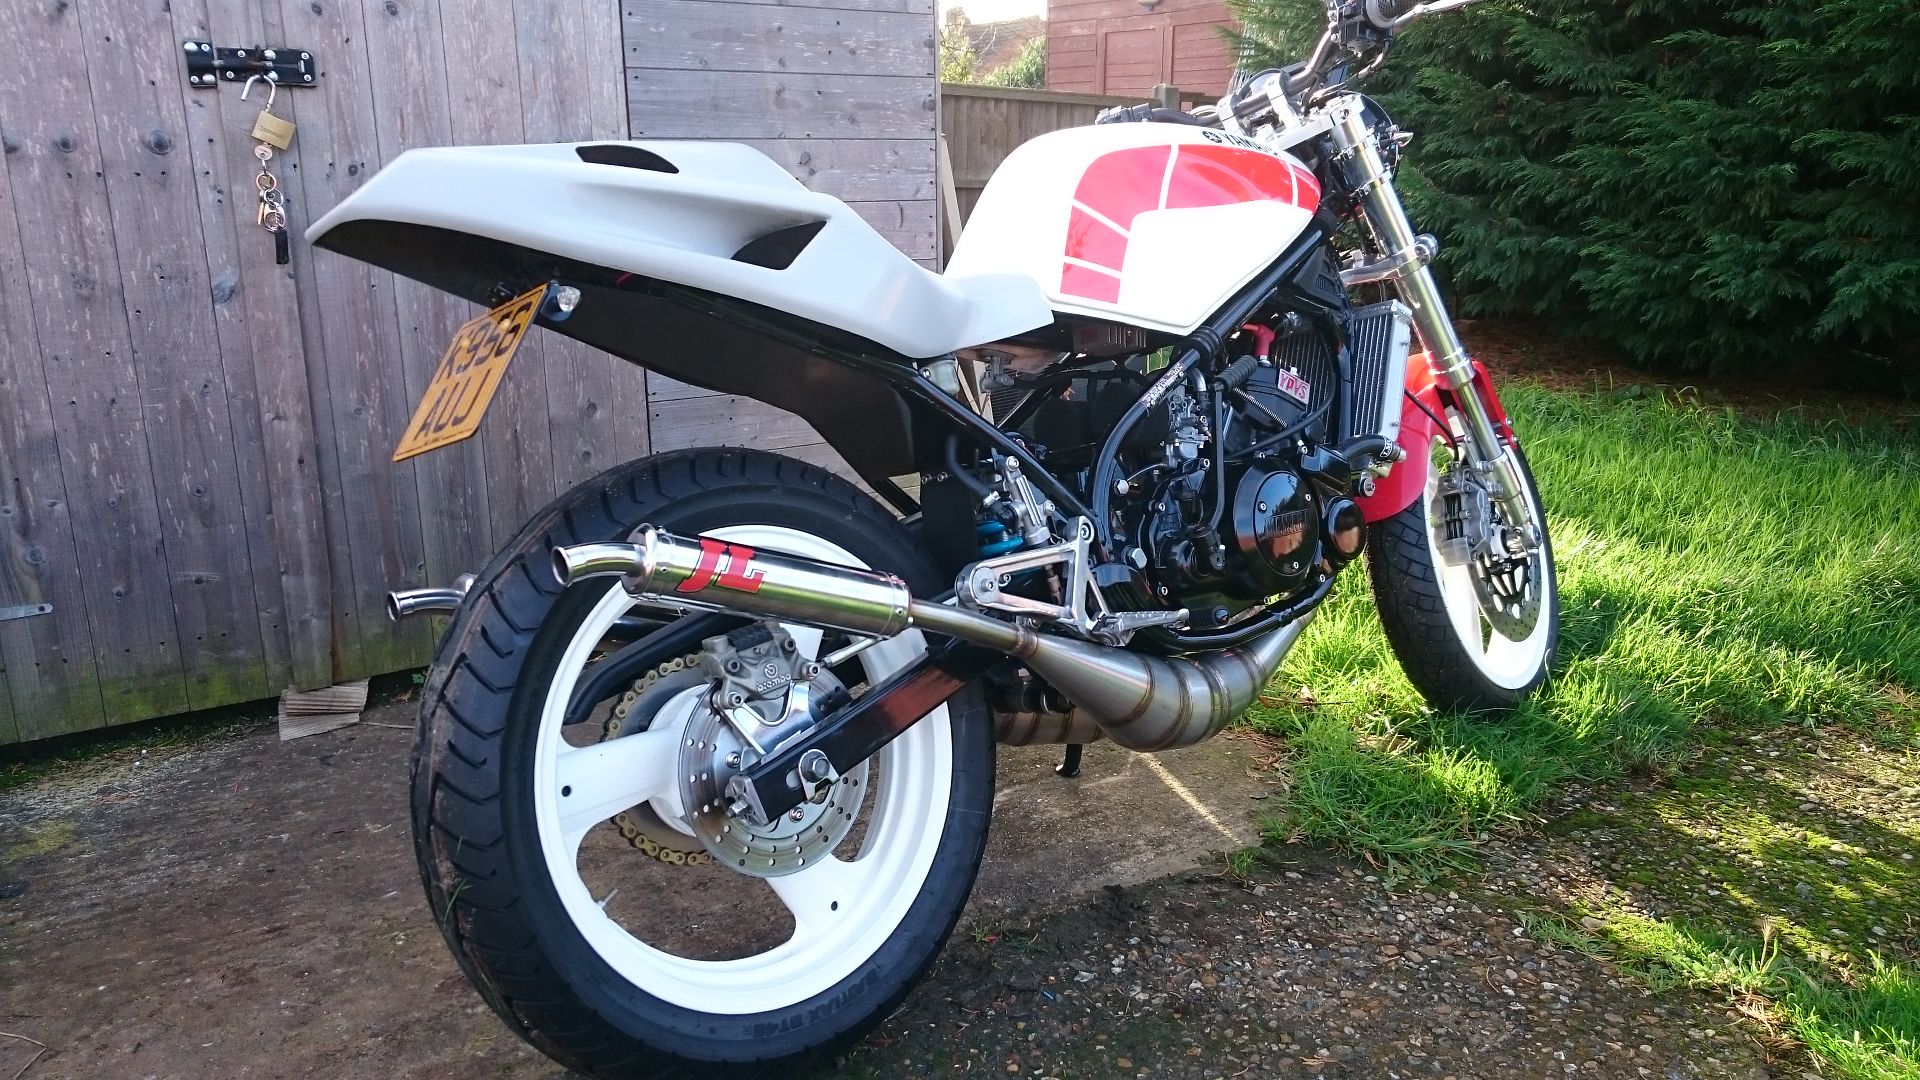 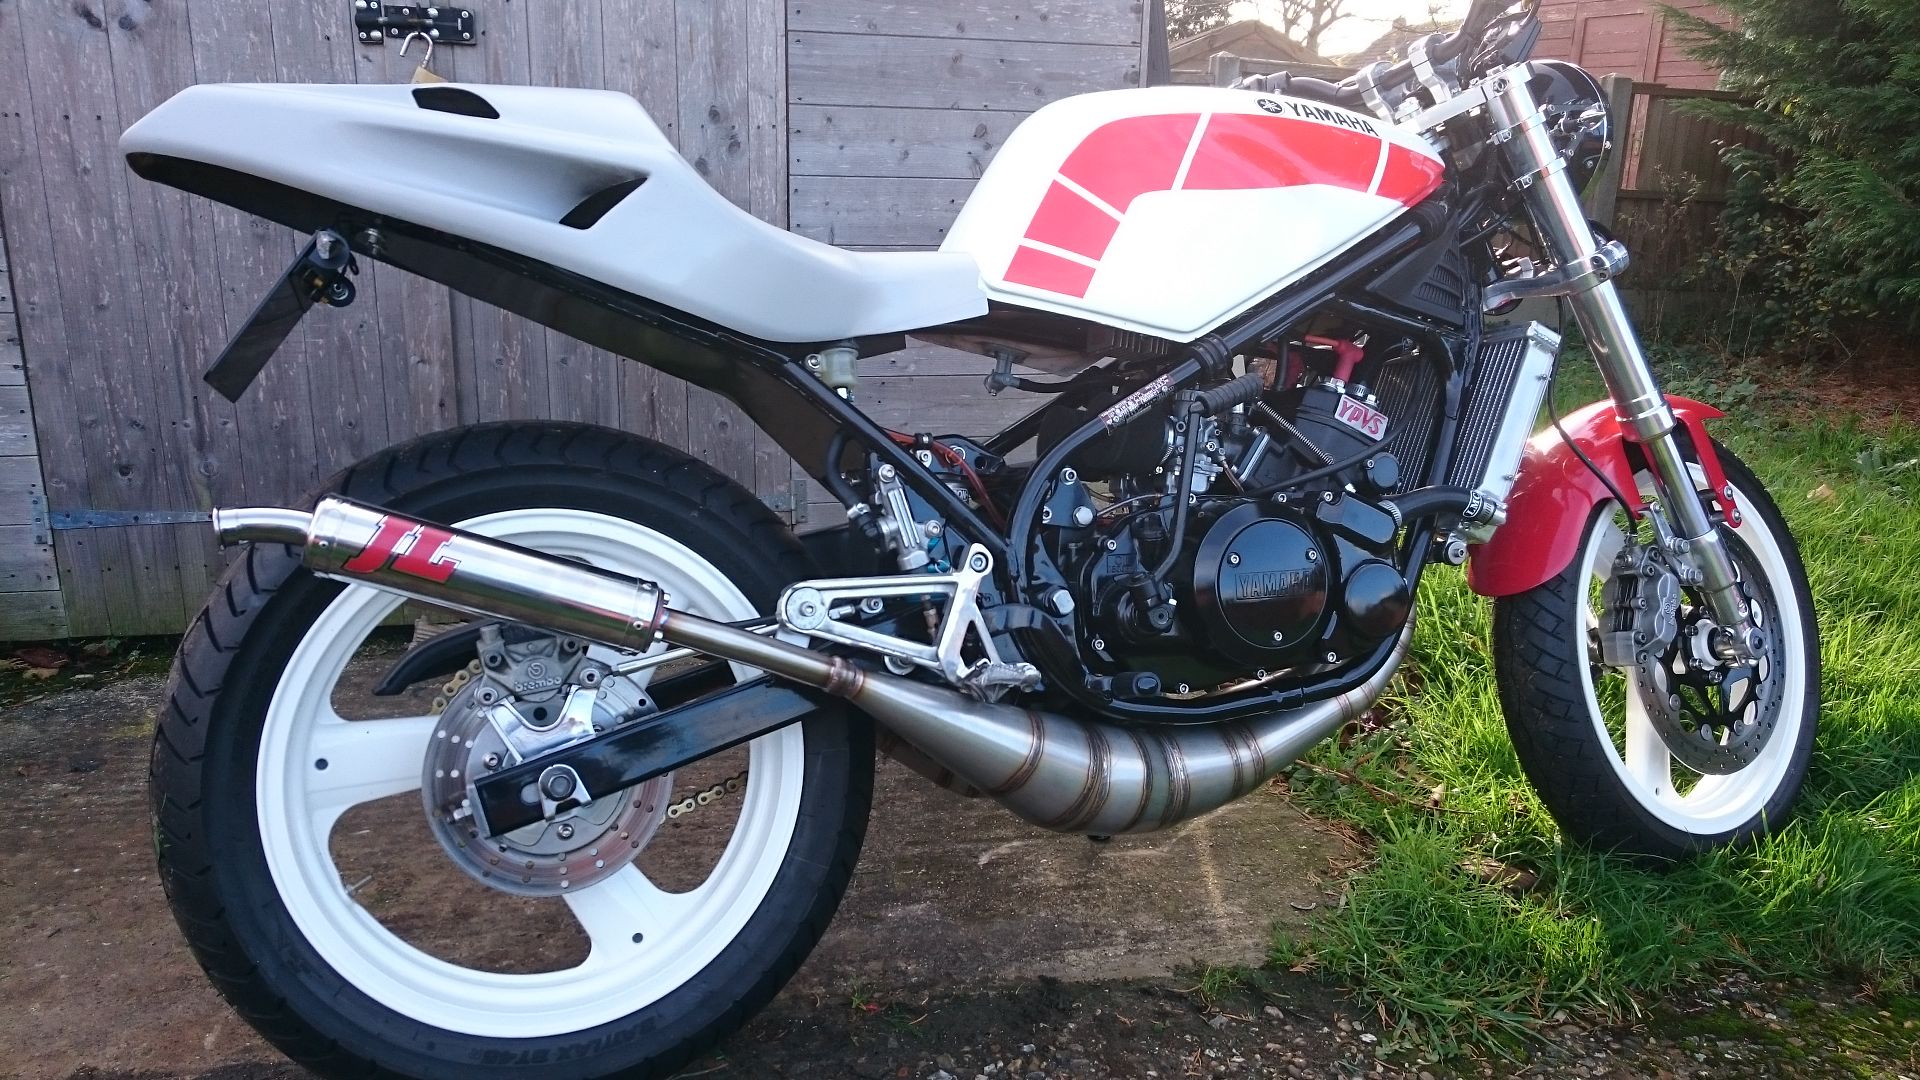 the seat is a lot nearer to completion, it just doesn't look it here lol. the front of the seat where it joins the back of the tank needs a little trimming, the lights need fitting although I have cut the apertures for them :-) then just the under tray to sort out and rear mounts and ready for mot. Edit: forgot to add that obviously the seat pad has to be sorted out and paintwork too. got a few ideas for that but cant make up my mind lol. |
|
|
|
Post by jessy03 on Dec 1, 2015 17:27:18 GMT 1
Looks really nice, had some Lomas pipes a few years back - you won't be disappointed.
You might want to move the temp sender it will be giving you the temperature straight from the rad not the head.
Jess
|
|
|
|
Post by 0h5h1t on Dec 1, 2015 17:39:56 GMT 1
Thanks Jessy, Hmm, yea thinking about the coolant flow direction it would read a little lower than the head temp but the RX2 clocks come with two temp sensors so I could use the other one to take the temp of the head itself using the sender that fits under the spark plug to monitor the differences to see how different they are.
|
|


 You've made a nice job of that engine