|
|
Post by rbridd on May 19, 2021 16:47:29 GMT 1
No... My names Ray. The bike is called Kevin 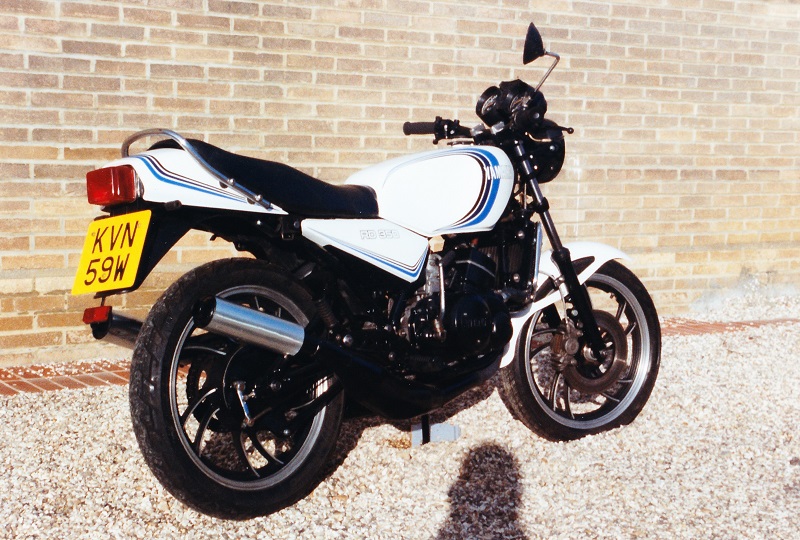 For obvious reasons. i once owned this bike in the lateish 1980s. Then I sold it to a friend who rode it into the ground, and rebuilt it to look like the photo above. Many years later it arrived back at my house looking like this... 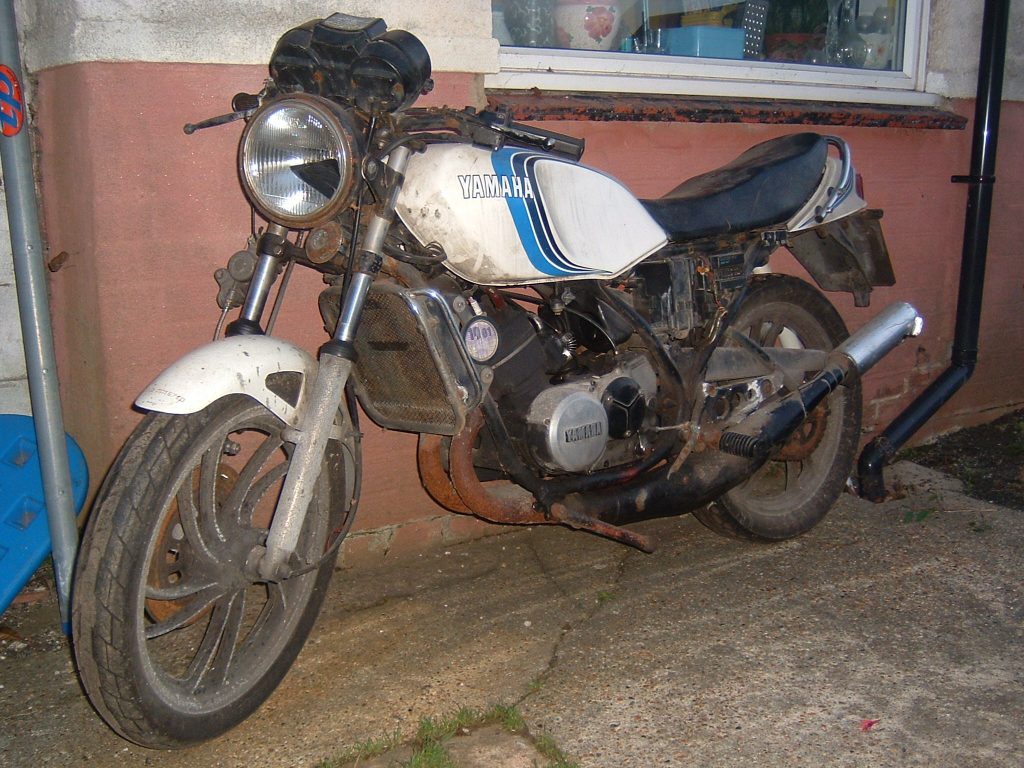 They said it couldn't be done again! They said the frame was too rusted. (They had a point) 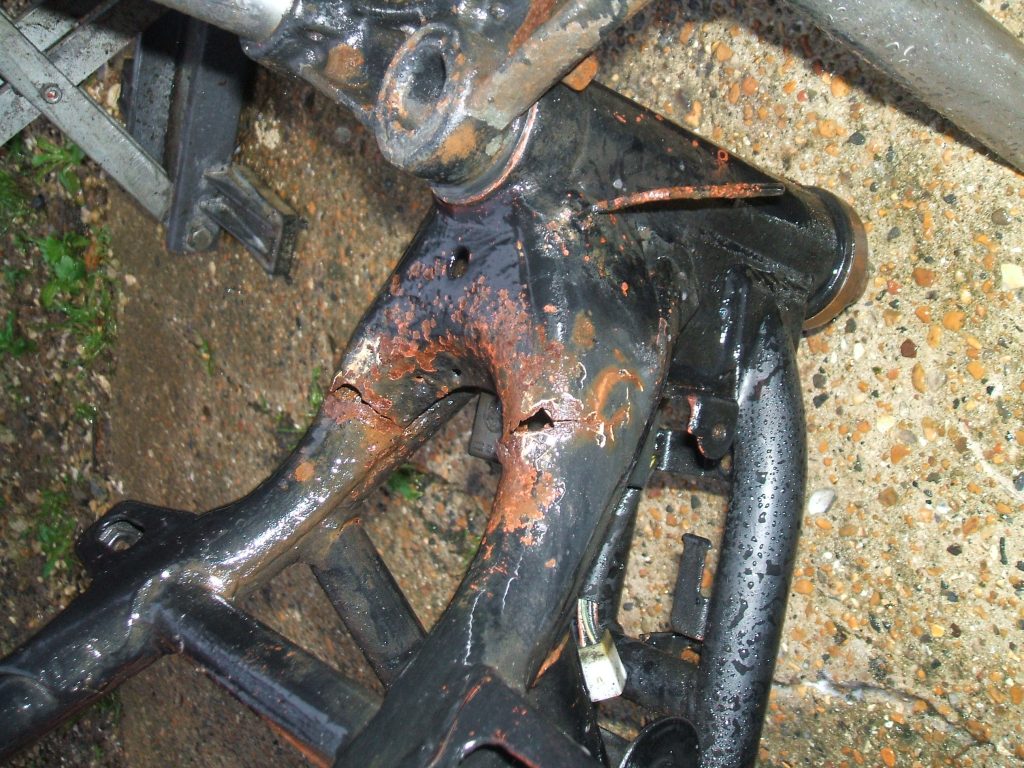 ...but undetered I commenced the rebuild... and it has gone slowly so far, but has recently picked up pace on my retirement. the full back story and progress is recorded on my blog. (I never had a blog before, so this seemed a good time to try one out. Rays BlogNow I have joined this amazing community of like minded souls, I'll also post some progress here. |
|
|
|
Kevin
May 19, 2021 16:54:13 GMT 1
Post by rbridd on May 19, 2021 16:54:13 GMT 1
Today, I fitted the rebuilt front brake caliper to the bike, along with some braided hose from Wezmoto, and bled the system. 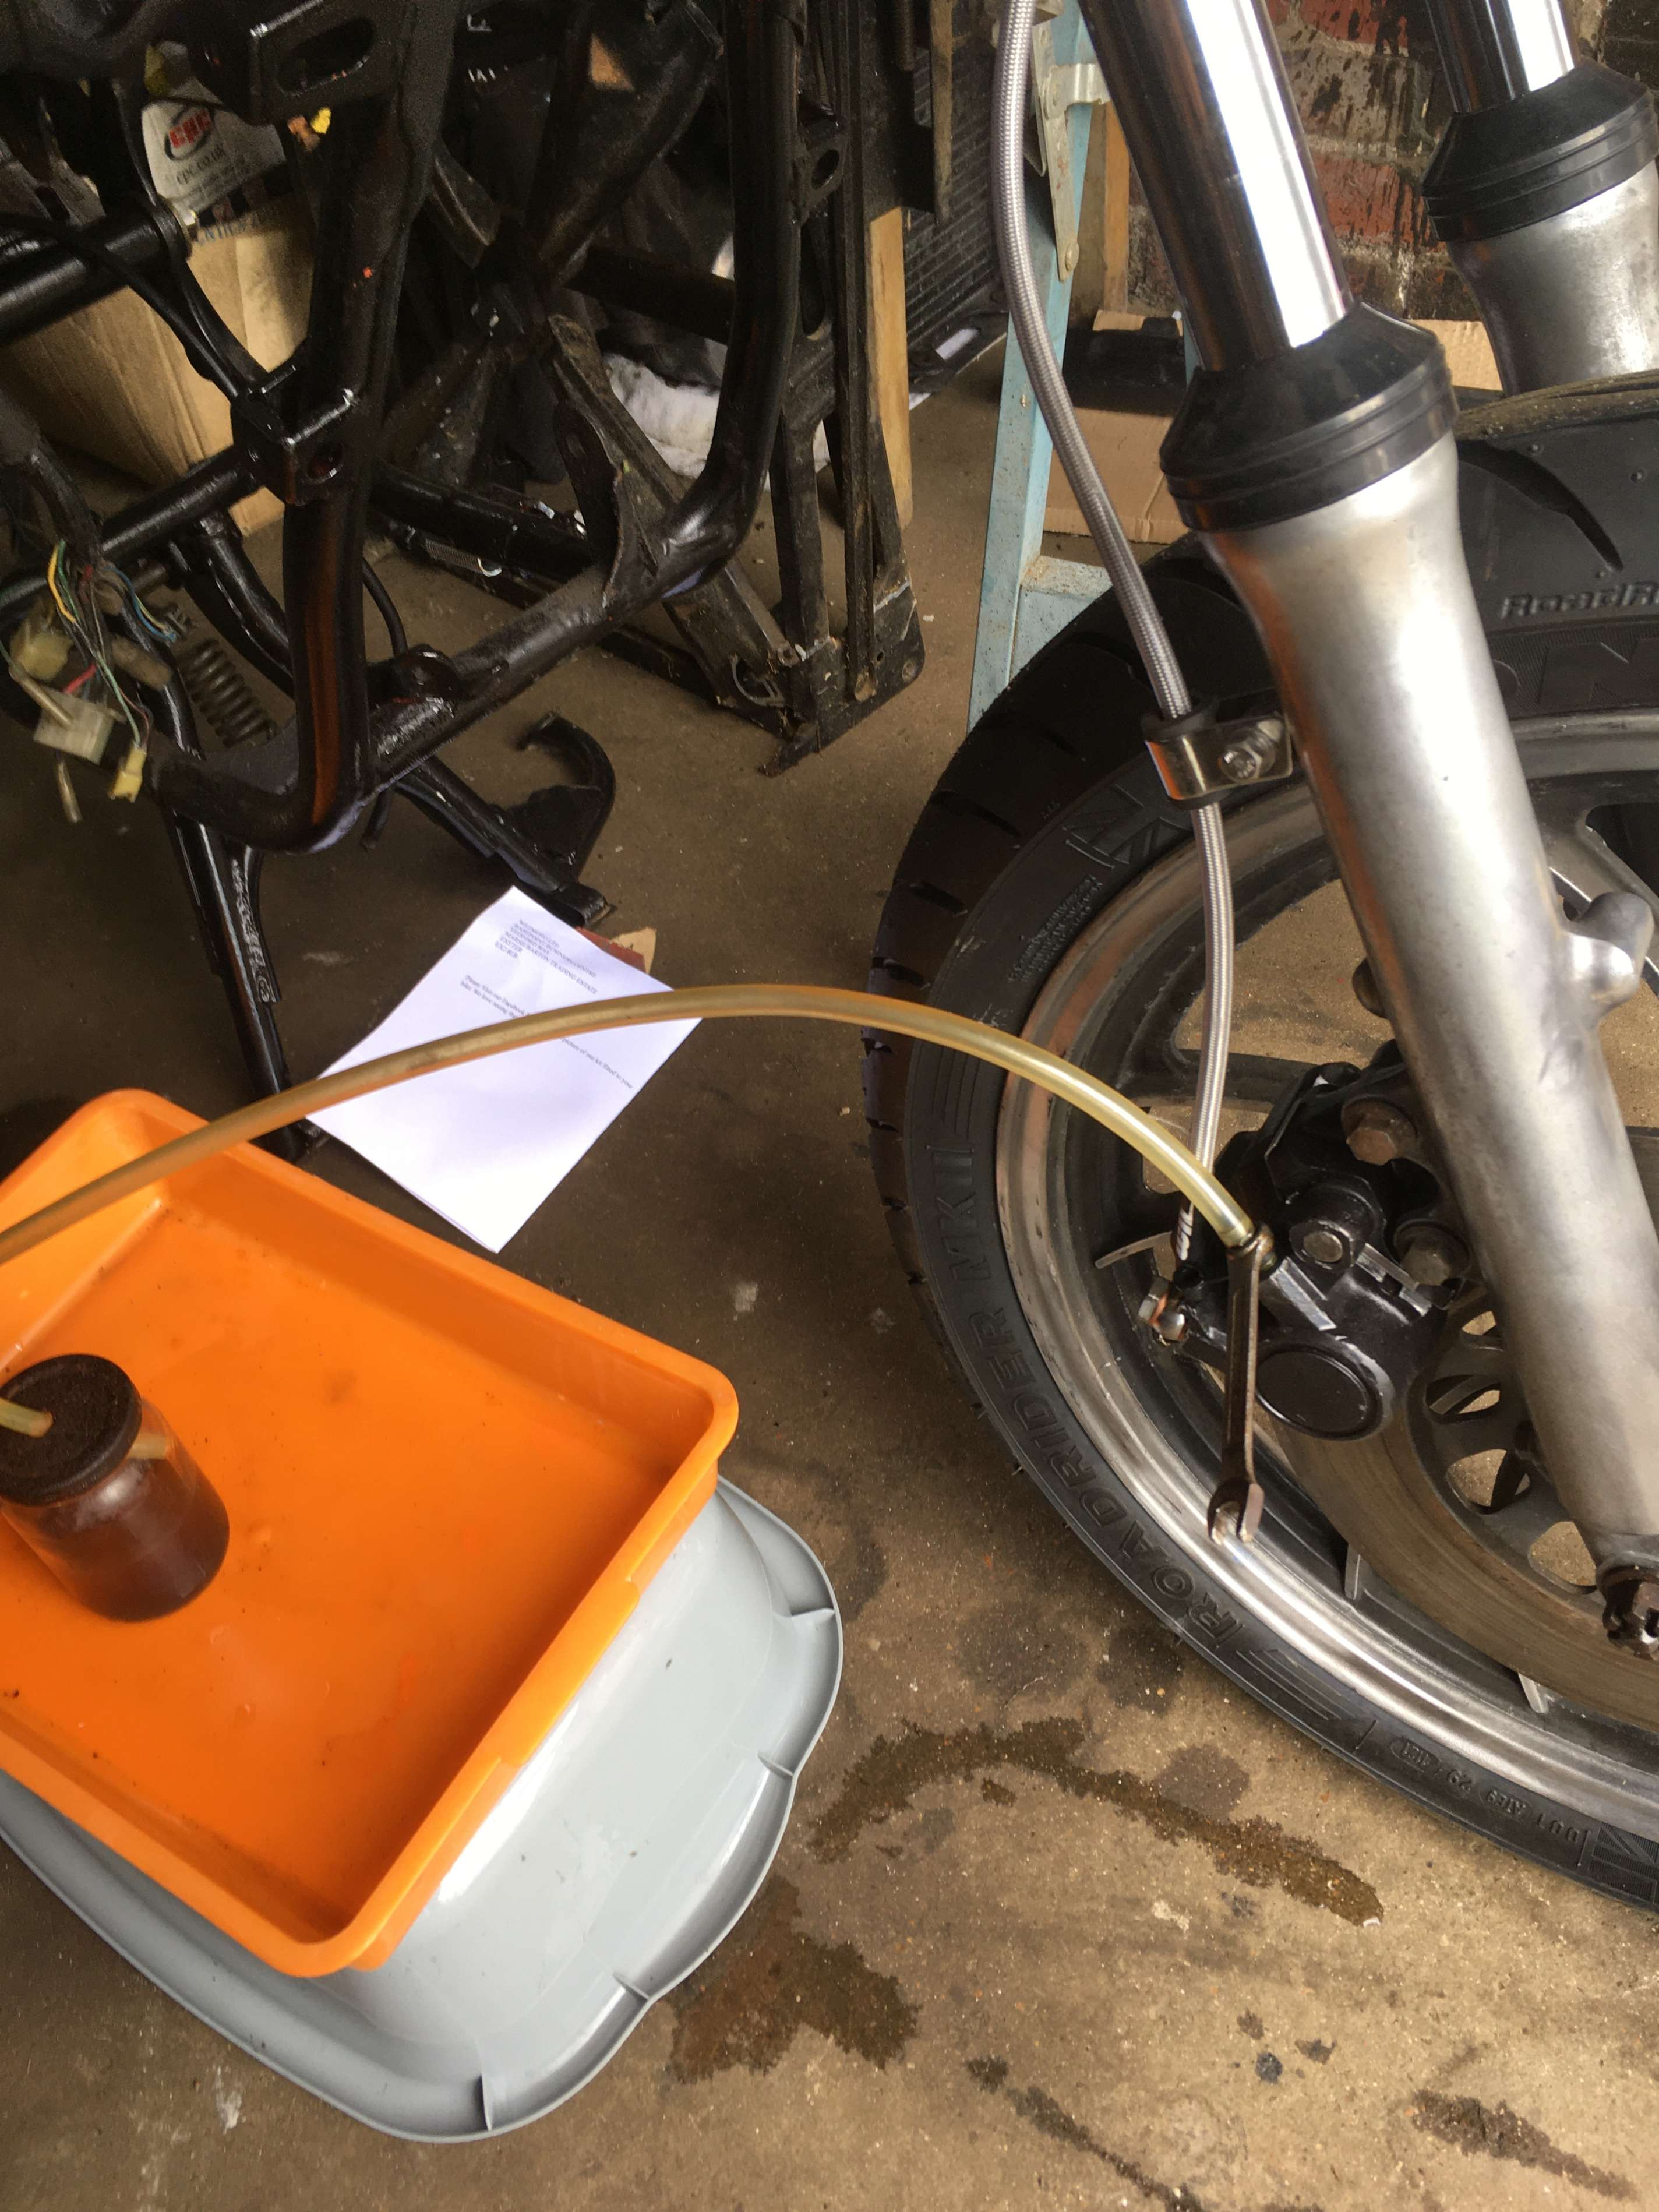 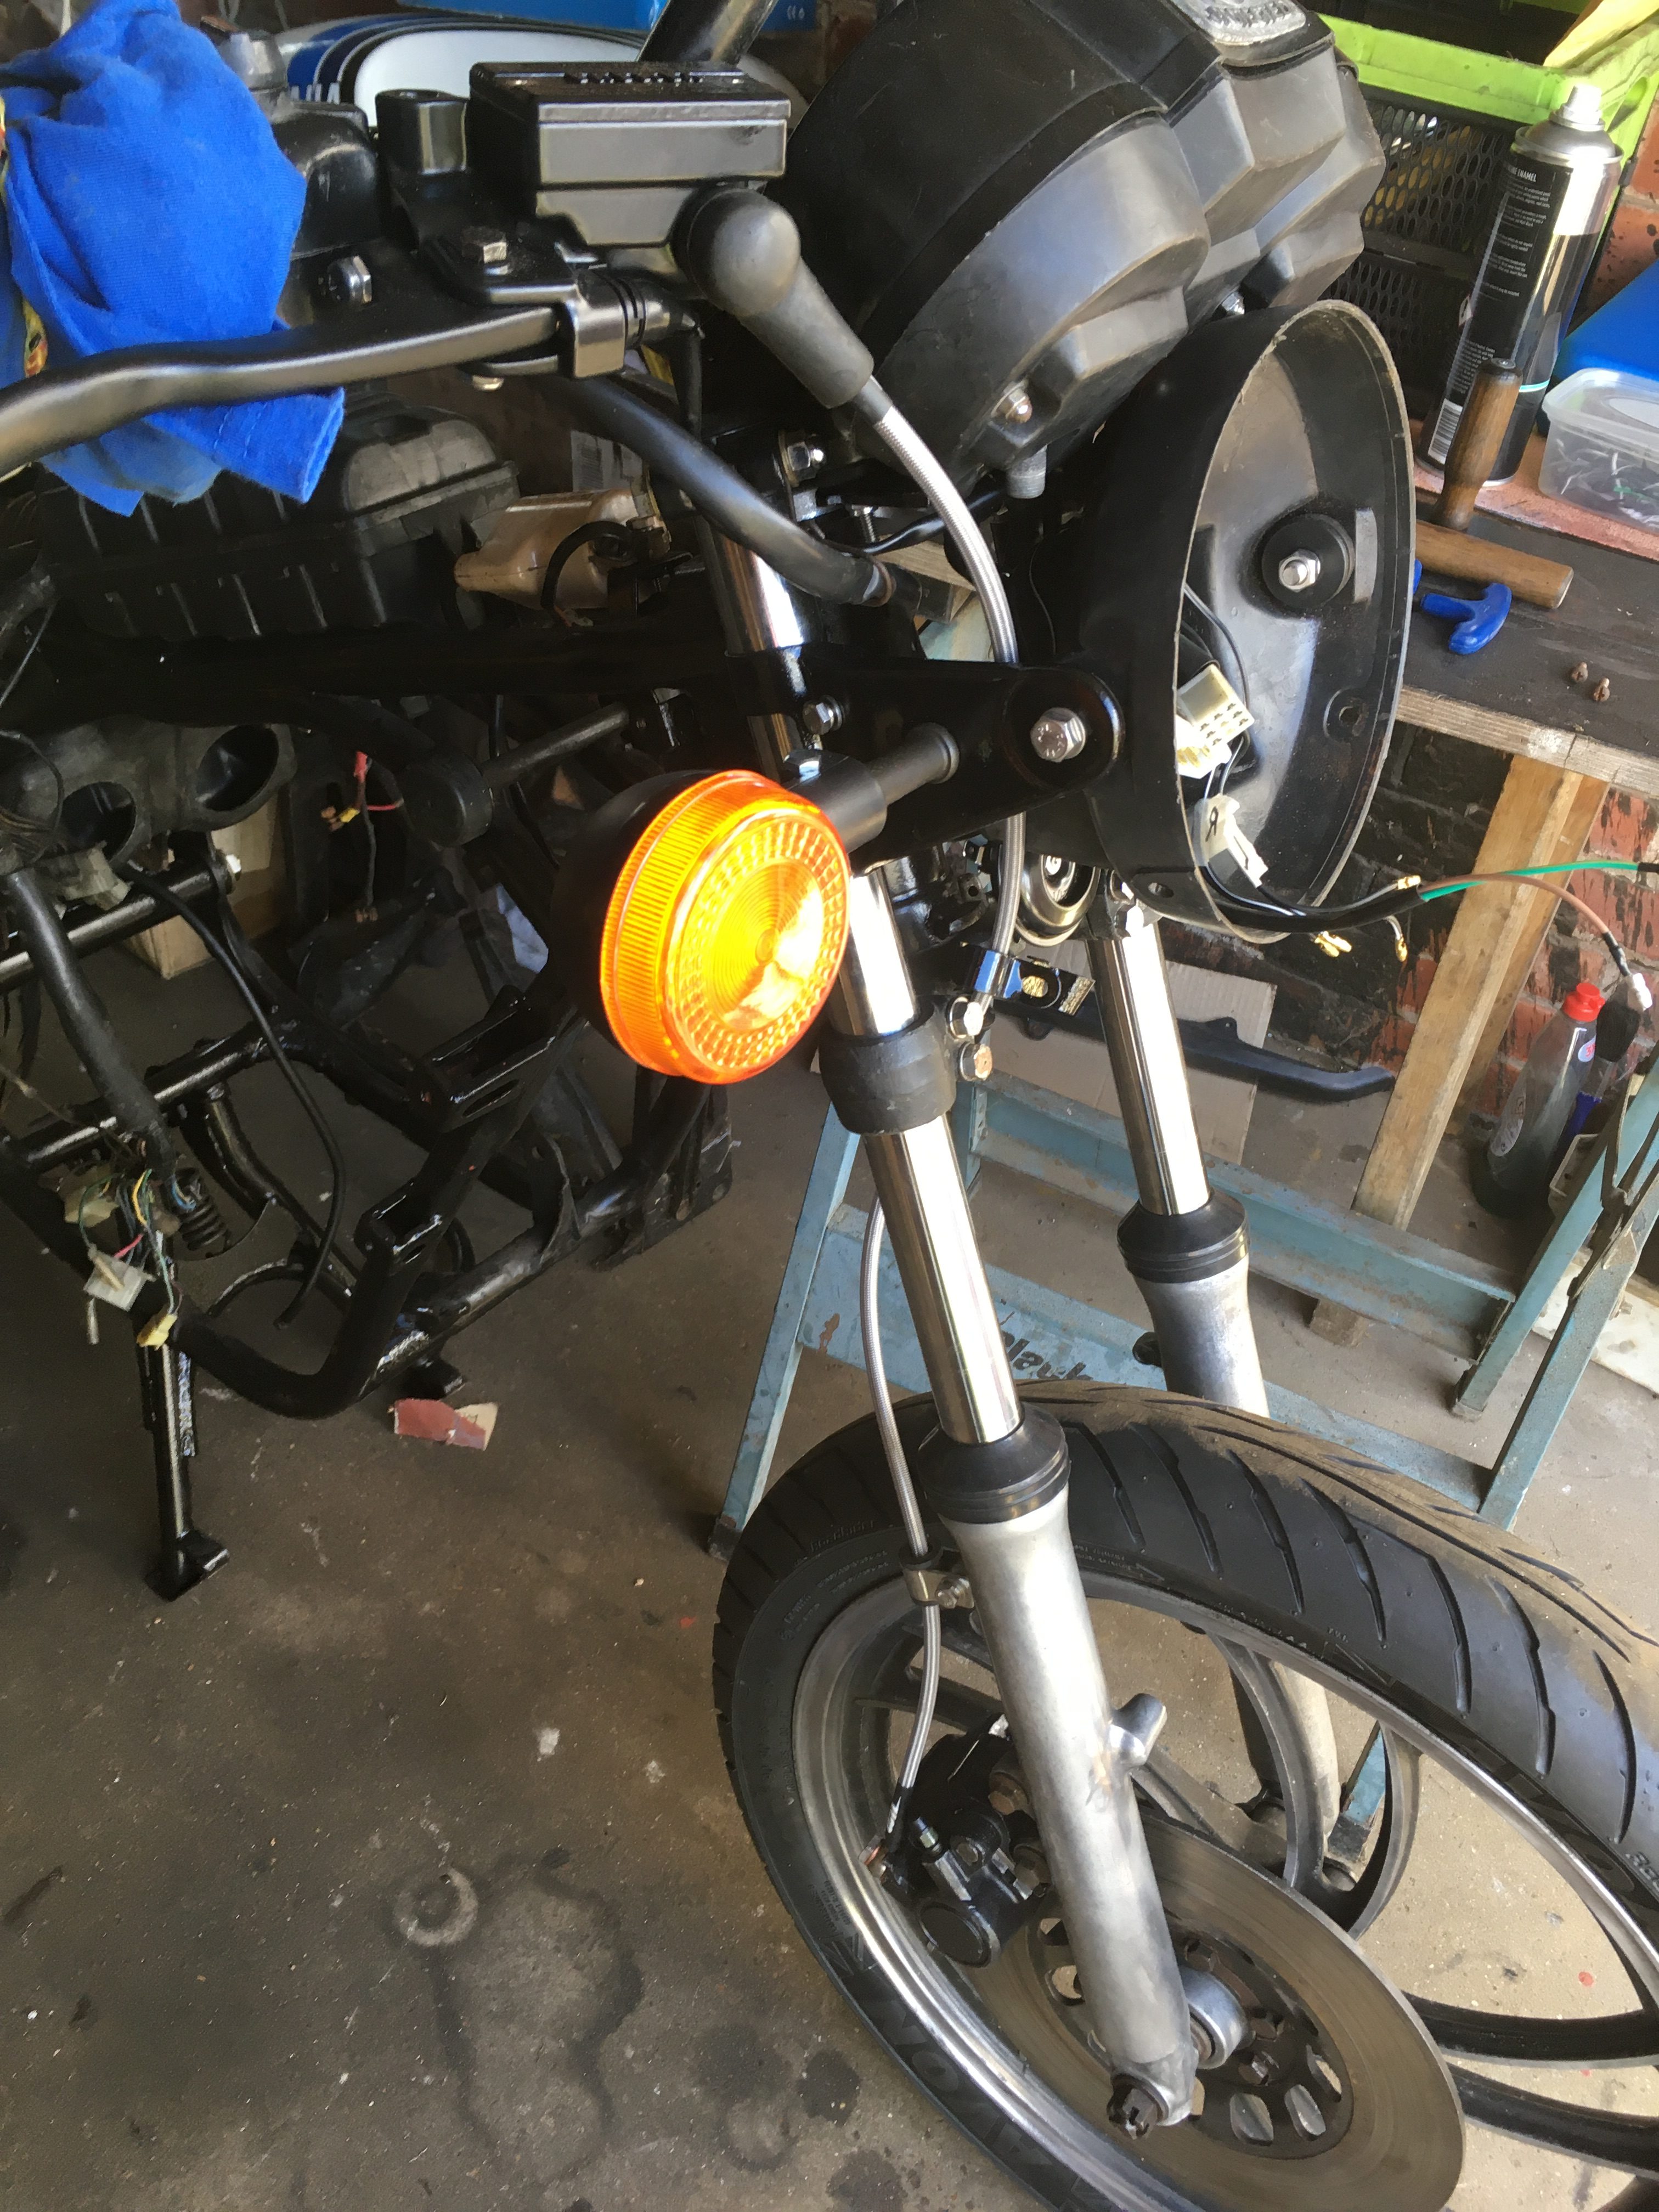 Details here... Details here... |
|
|
|
Kevin
May 19, 2021 17:09:44 GMT 1
Post by shaunthe2nd on May 19, 2021 17:09:44 GMT 1
Welcome Ray, welcome Kevin, looks like at least one of you had a hard life!
Was Kevin originally a 2-striper as 3 stripes didn't come out until 1982.
W plate was 80/81 I think.
|
|
|
|
Post by rbridd on May 19, 2021 17:17:09 GMT 1
I picked up Kevin from a front garden in Brighton around 1986. By that time it had already had a matt black and grime bodywork makeover, so what the original colour scheme was is anybodies guess.
When I rebuilt it for the first time, I used cheap Halfords rattle-can.
When the friend built it, the 3 stripe decals were used because they were available at the time.
This time Kevin will have 2 stripe era consistent paintwork.
I have not yet decided on Mars bar, or red on white.
(I don't want (another) blue on white as my day to day bike is an RD350LC in bounty colours.)
|
|
|
|
Kevin
May 19, 2021 21:18:47 GMT 1
via mobile
Post by oldbritguy on May 19, 2021 21:18:47 GMT 1
Hi Ray (and Kevin)
Welcome to the forum. Just went through your blog there and thoroughly enjoyed it so far.
Looking forward to Kevin’s reincarnation, popcorn on standby.
John
|
|
|
|
Kevin
May 20, 2021 1:10:22 GMT 1
Post by JonW on May 20, 2021 1:10:22 GMT 1
Wow, thats some rust! I bought a whole LC a few years ago here that had been left out in the rain for years and the top of the frame looked somewhat like that and im sad to say it got worse the lower you looked. check the downtubes and the cup under the headstock for rust. if they have gone its going to hard to fix or trust to ride fast. fingers crossed for you.
|
|
|
|
Post by rbridd on May 20, 2021 13:43:13 GMT 1
All the rust is gone. The entire bottom half of the headstock and downtubes were replaced by Maidstone motoline, (retaining the frame number). cost was, (slightly), less than the cost of a second hand frame, so worth it to retain the number, log book and registration. Solid as a rock now  |
|
|
|
Kevin
Jun 2, 2021 15:36:26 GMT 1
Post by rbridd on Jun 2, 2021 15:36:26 GMT 1
I finished the loom repair, crimping in new sections of wire and connectors where needed, and removing copious amounts of green fur from inside the plastic blocks. Before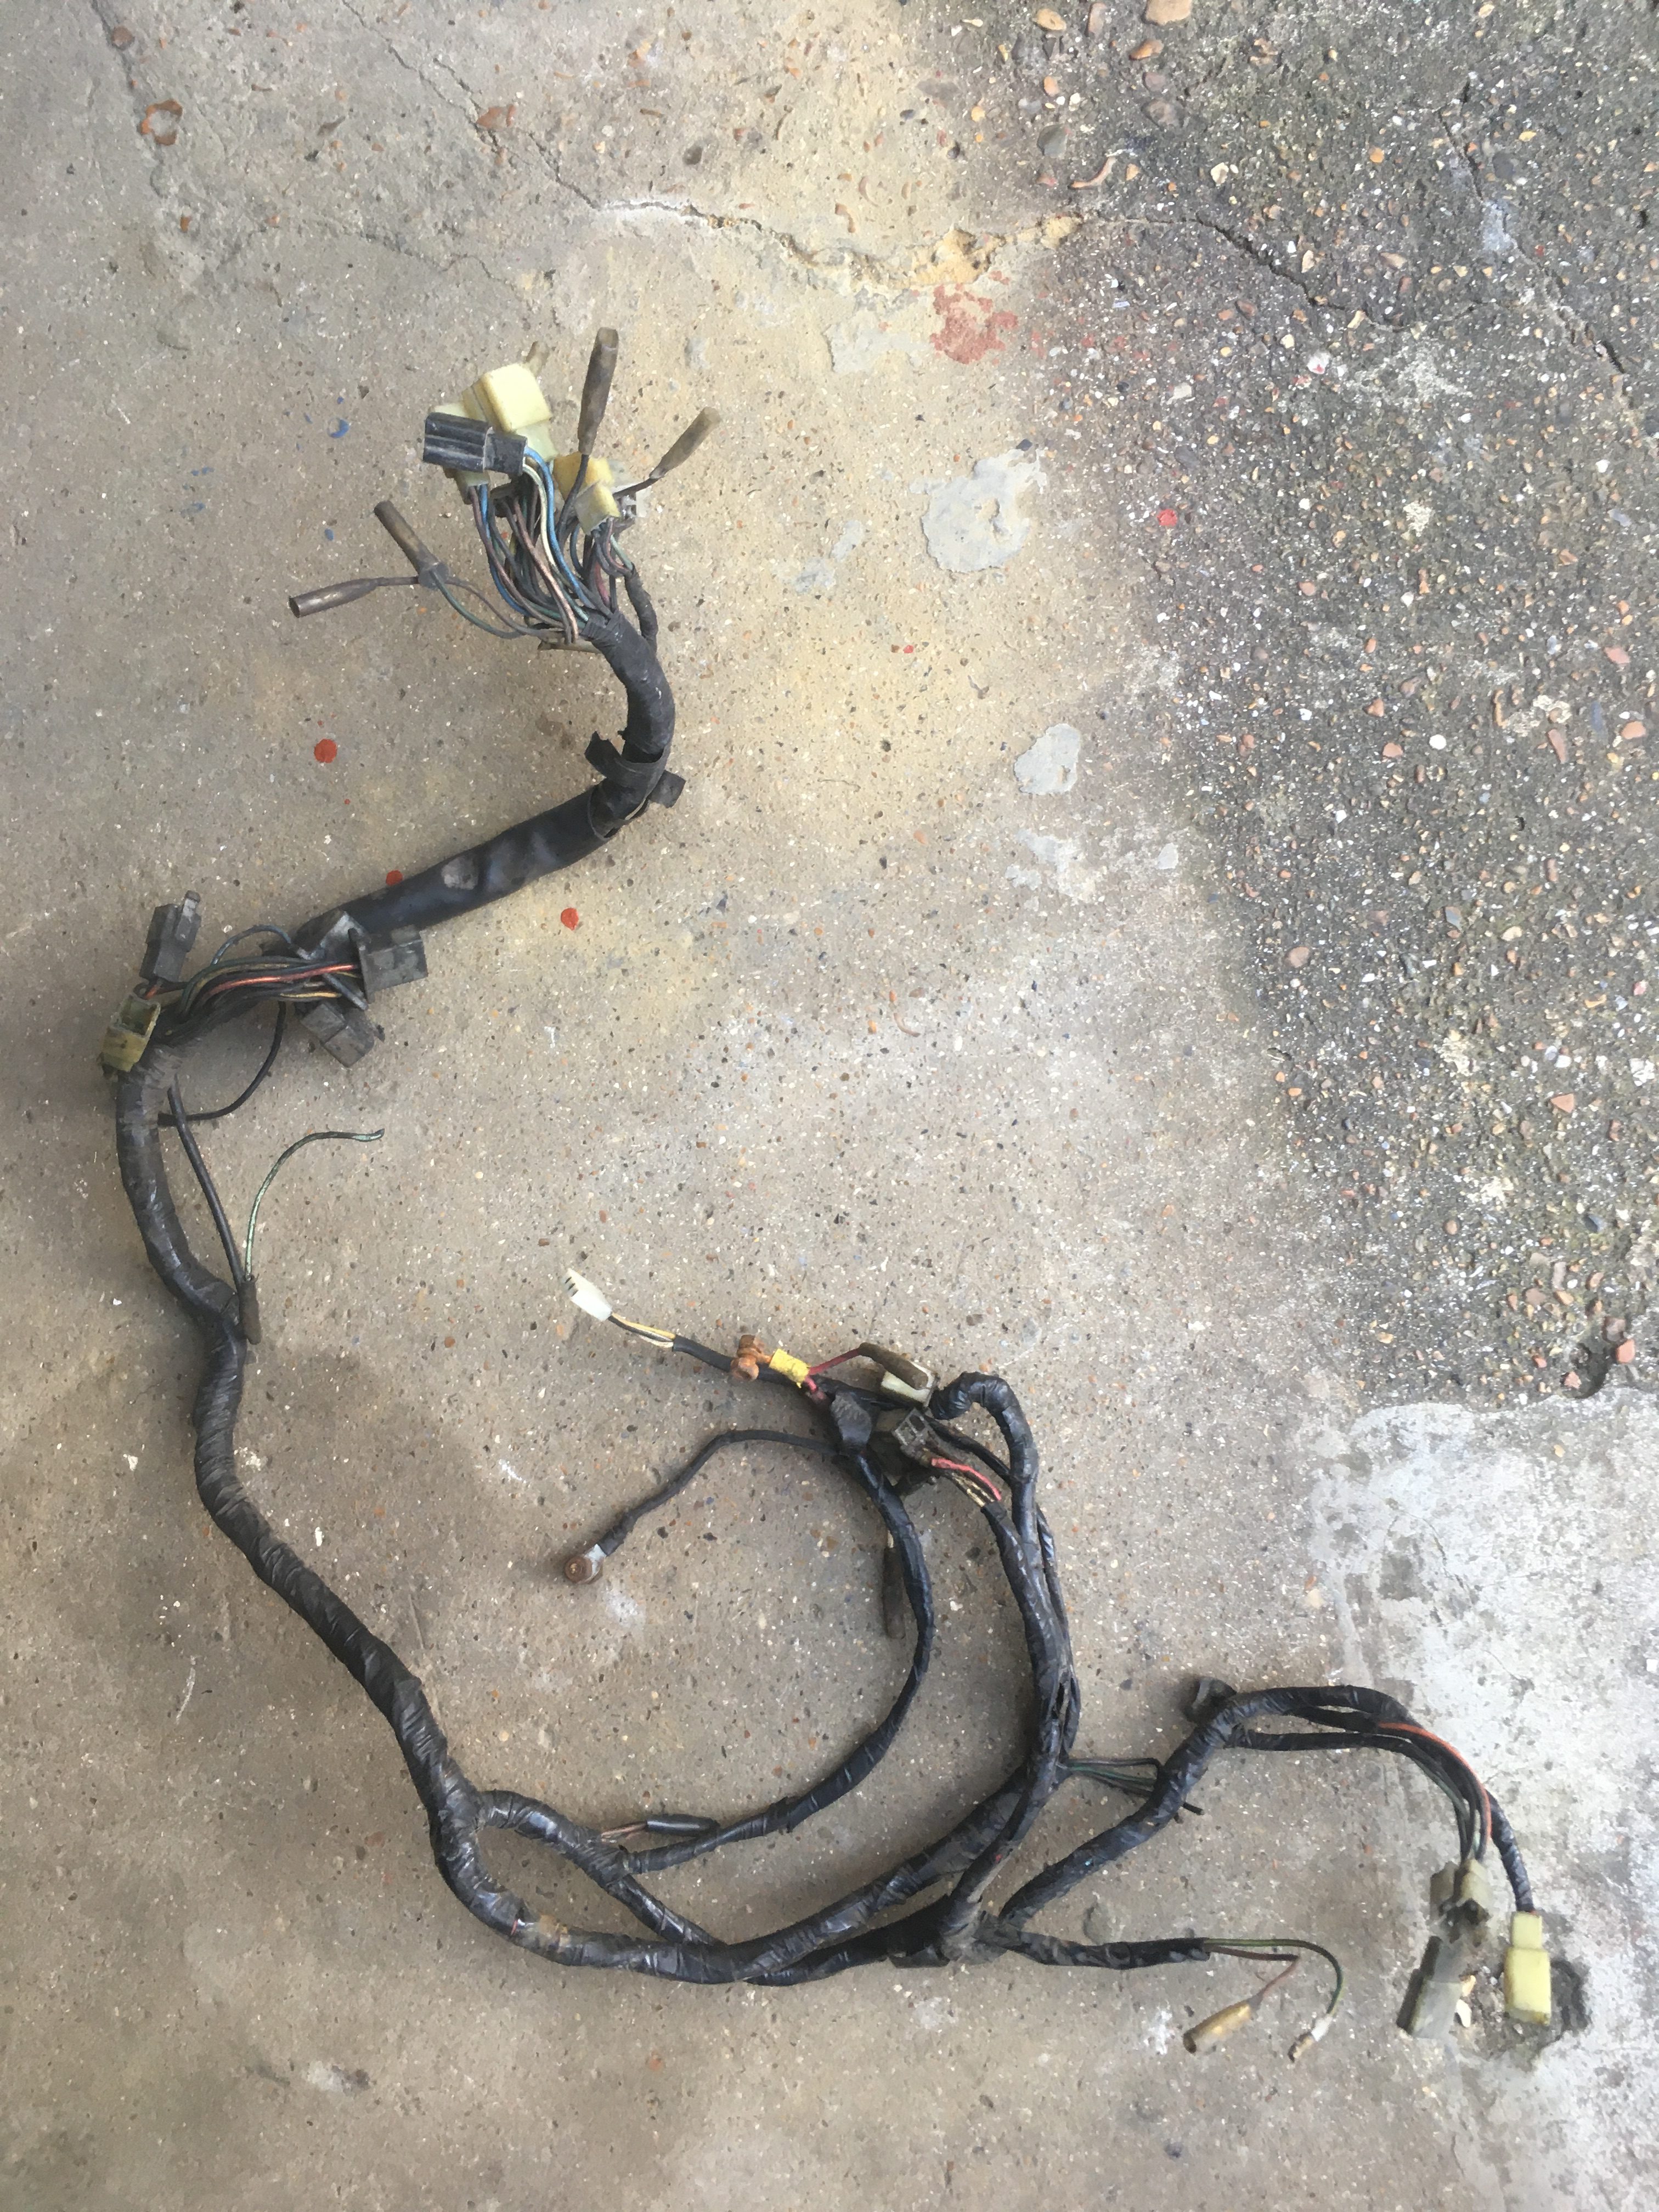 After After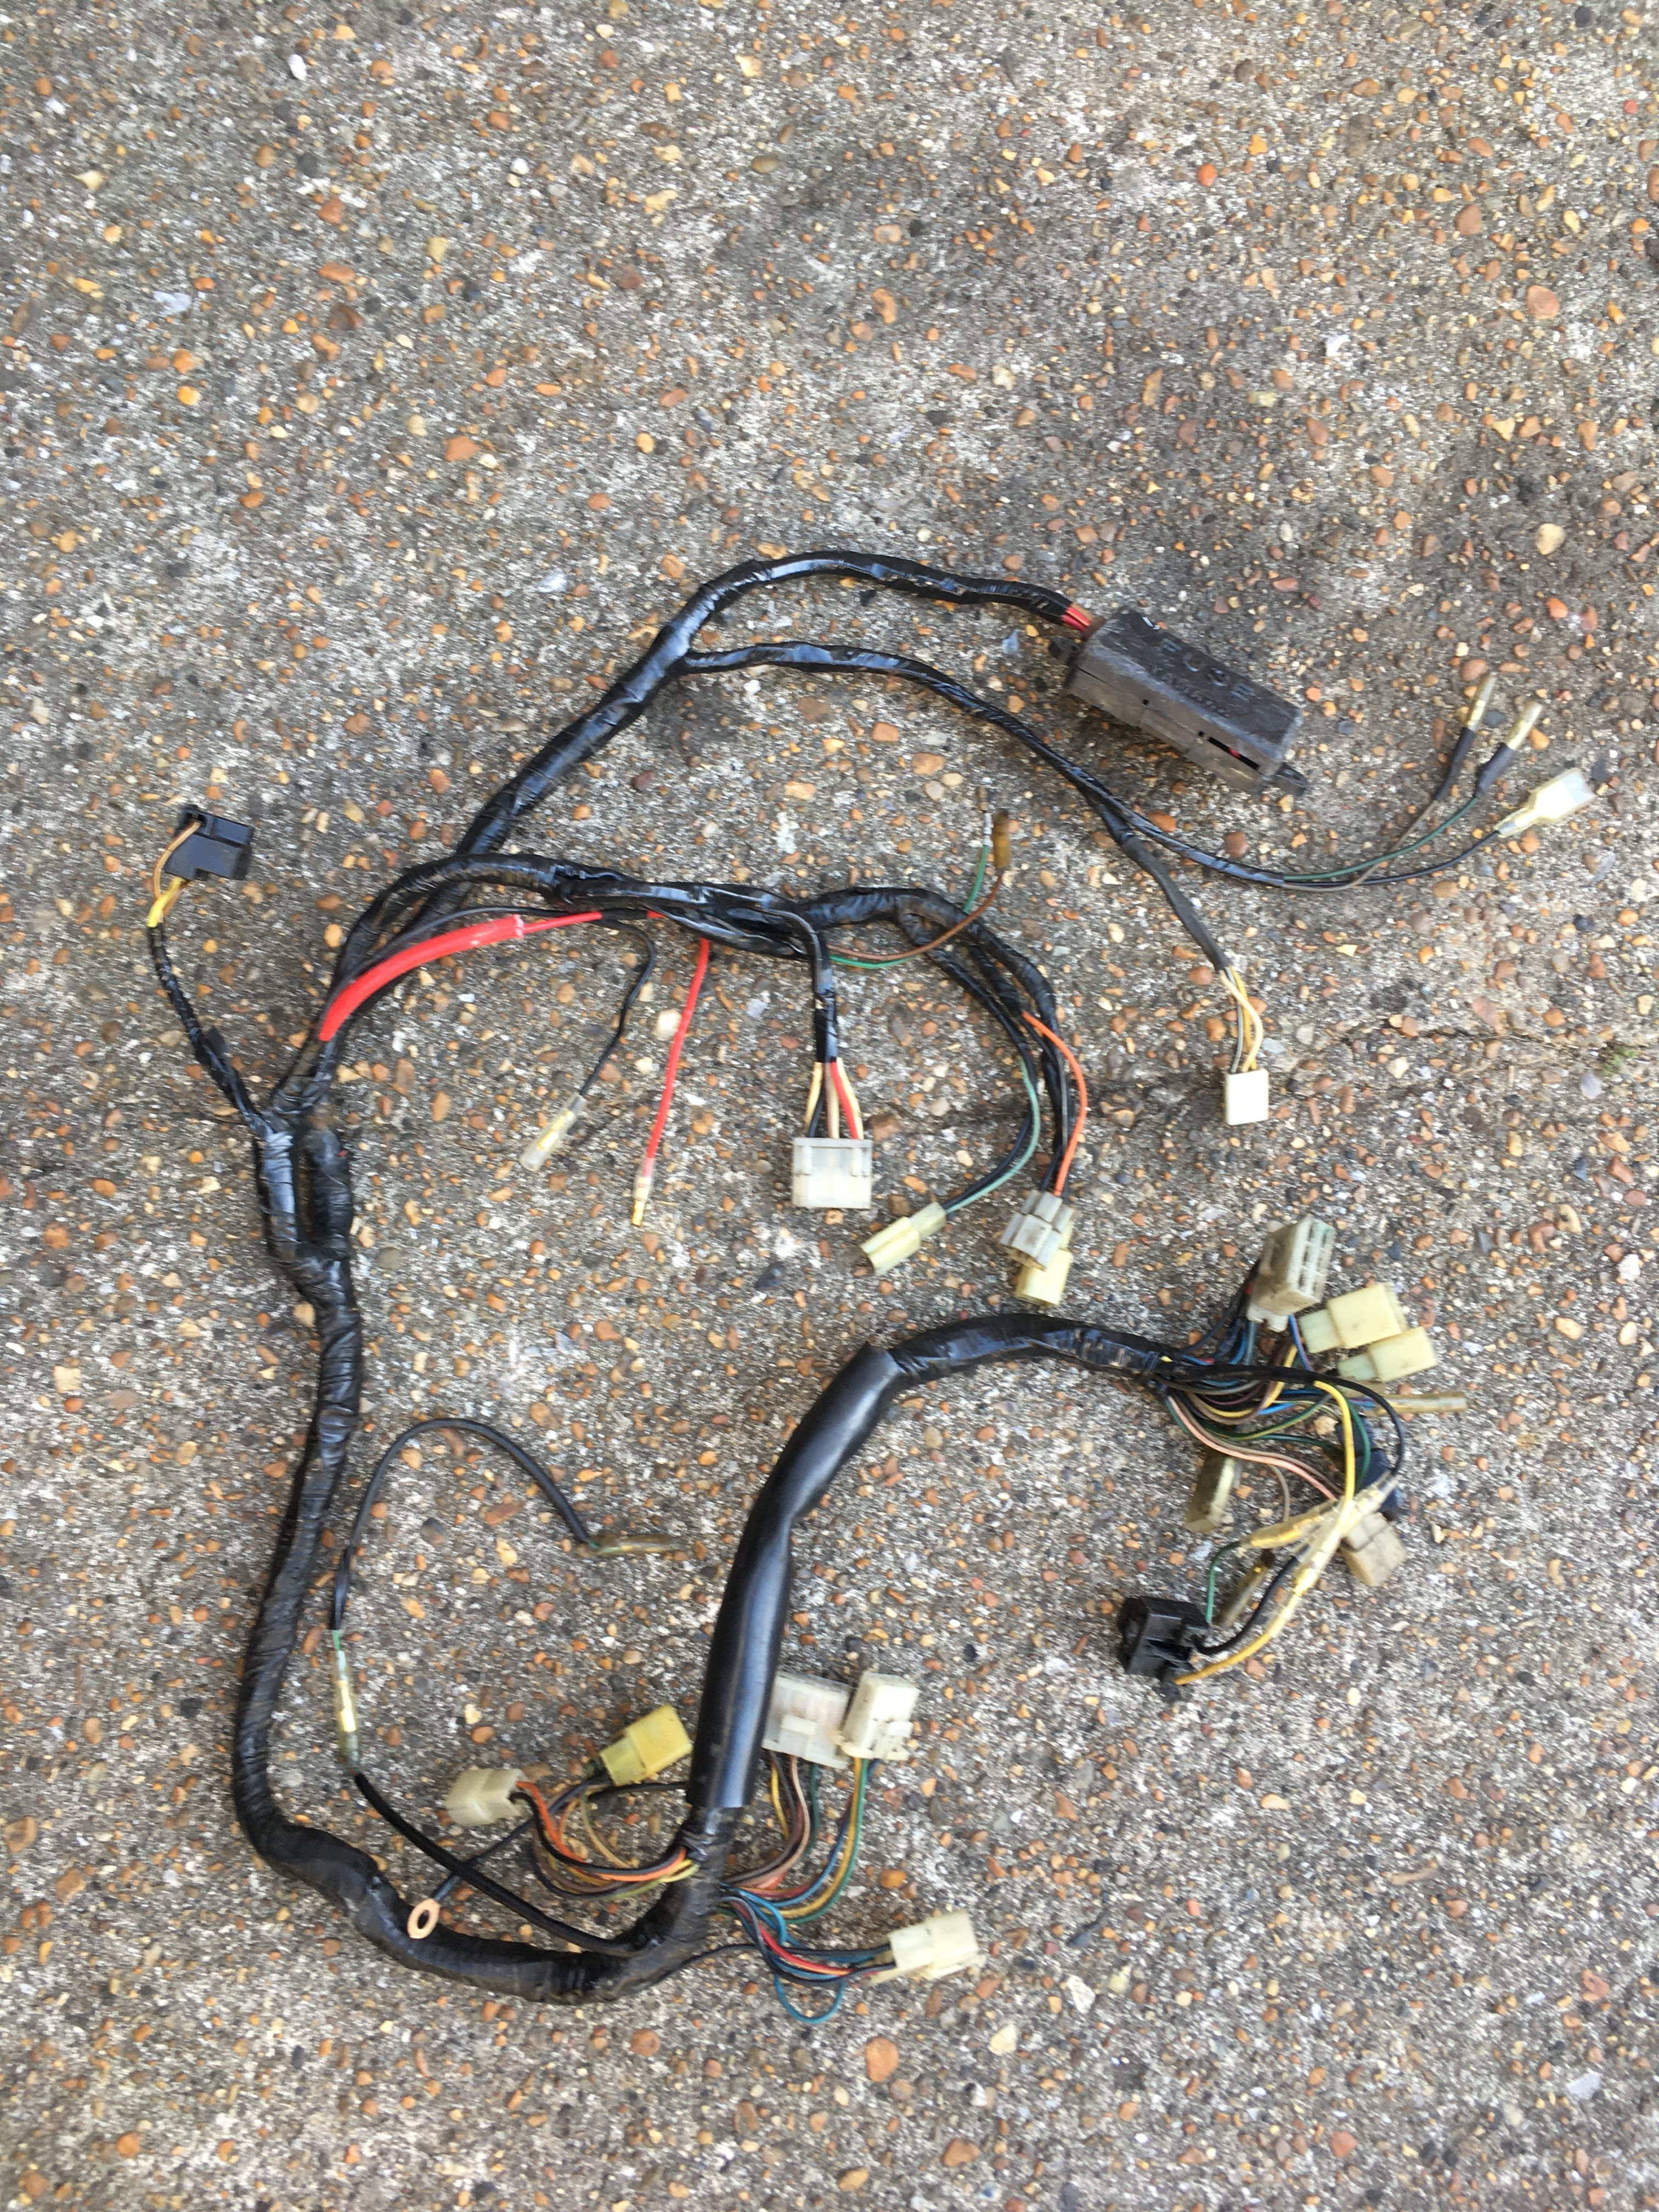 Write up. Write up.
...from the blog |
|
|
|
Kevin
Jun 2, 2021 16:05:28 GMT 1
Post by shaunthe2nd on Jun 2, 2021 16:05:28 GMT 1
The loom refurb is quite satisfying if you take your time, but you never know how good a job you have done until you fit it to the bike and test everything, which in my case could be anything up to a year later!
|
|
|
|
Kevin
Jun 2, 2021 19:05:48 GMT 1
Post by rbridd on Jun 2, 2021 19:05:48 GMT 1
Alas.
Initial testing shows that the Horn, Headlamp dip, and Headlamp full are the only items operating.
No indicators, no idiot lights and no tail lamp activity... brake or otherwise.
Continuity testing tomorrow.
|
|
|
|
Kevin
Jun 3, 2021 19:16:56 GMT 1
via mobile
stusco likes this
Post by oldbritguy on Jun 3, 2021 19:16:56 GMT 1
I’ve had similar issues with electrics not behaving as they should
Traced to the handlebar switches which had gummed up the contacts from sitting too long. Got a can of spray electrical contact cleaner from Halfrauds and a bit of wiggling got everything working fine.
Worth a try and not expensive either.
John
|
|
|
|
Kevin
Jun 11, 2021 11:34:11 GMT 1
Post by rbridd on Jun 11, 2021 11:34:11 GMT 1
Tank : Evaluation The tank which came with the donor bike is dented and scratched, but I know that when it was last rebuilt, the seams were carefully welded up, so It might be a good option for the initial build. I have added a little petrol to the tank and left it for a few hours to see if any leaks develop around the seams. 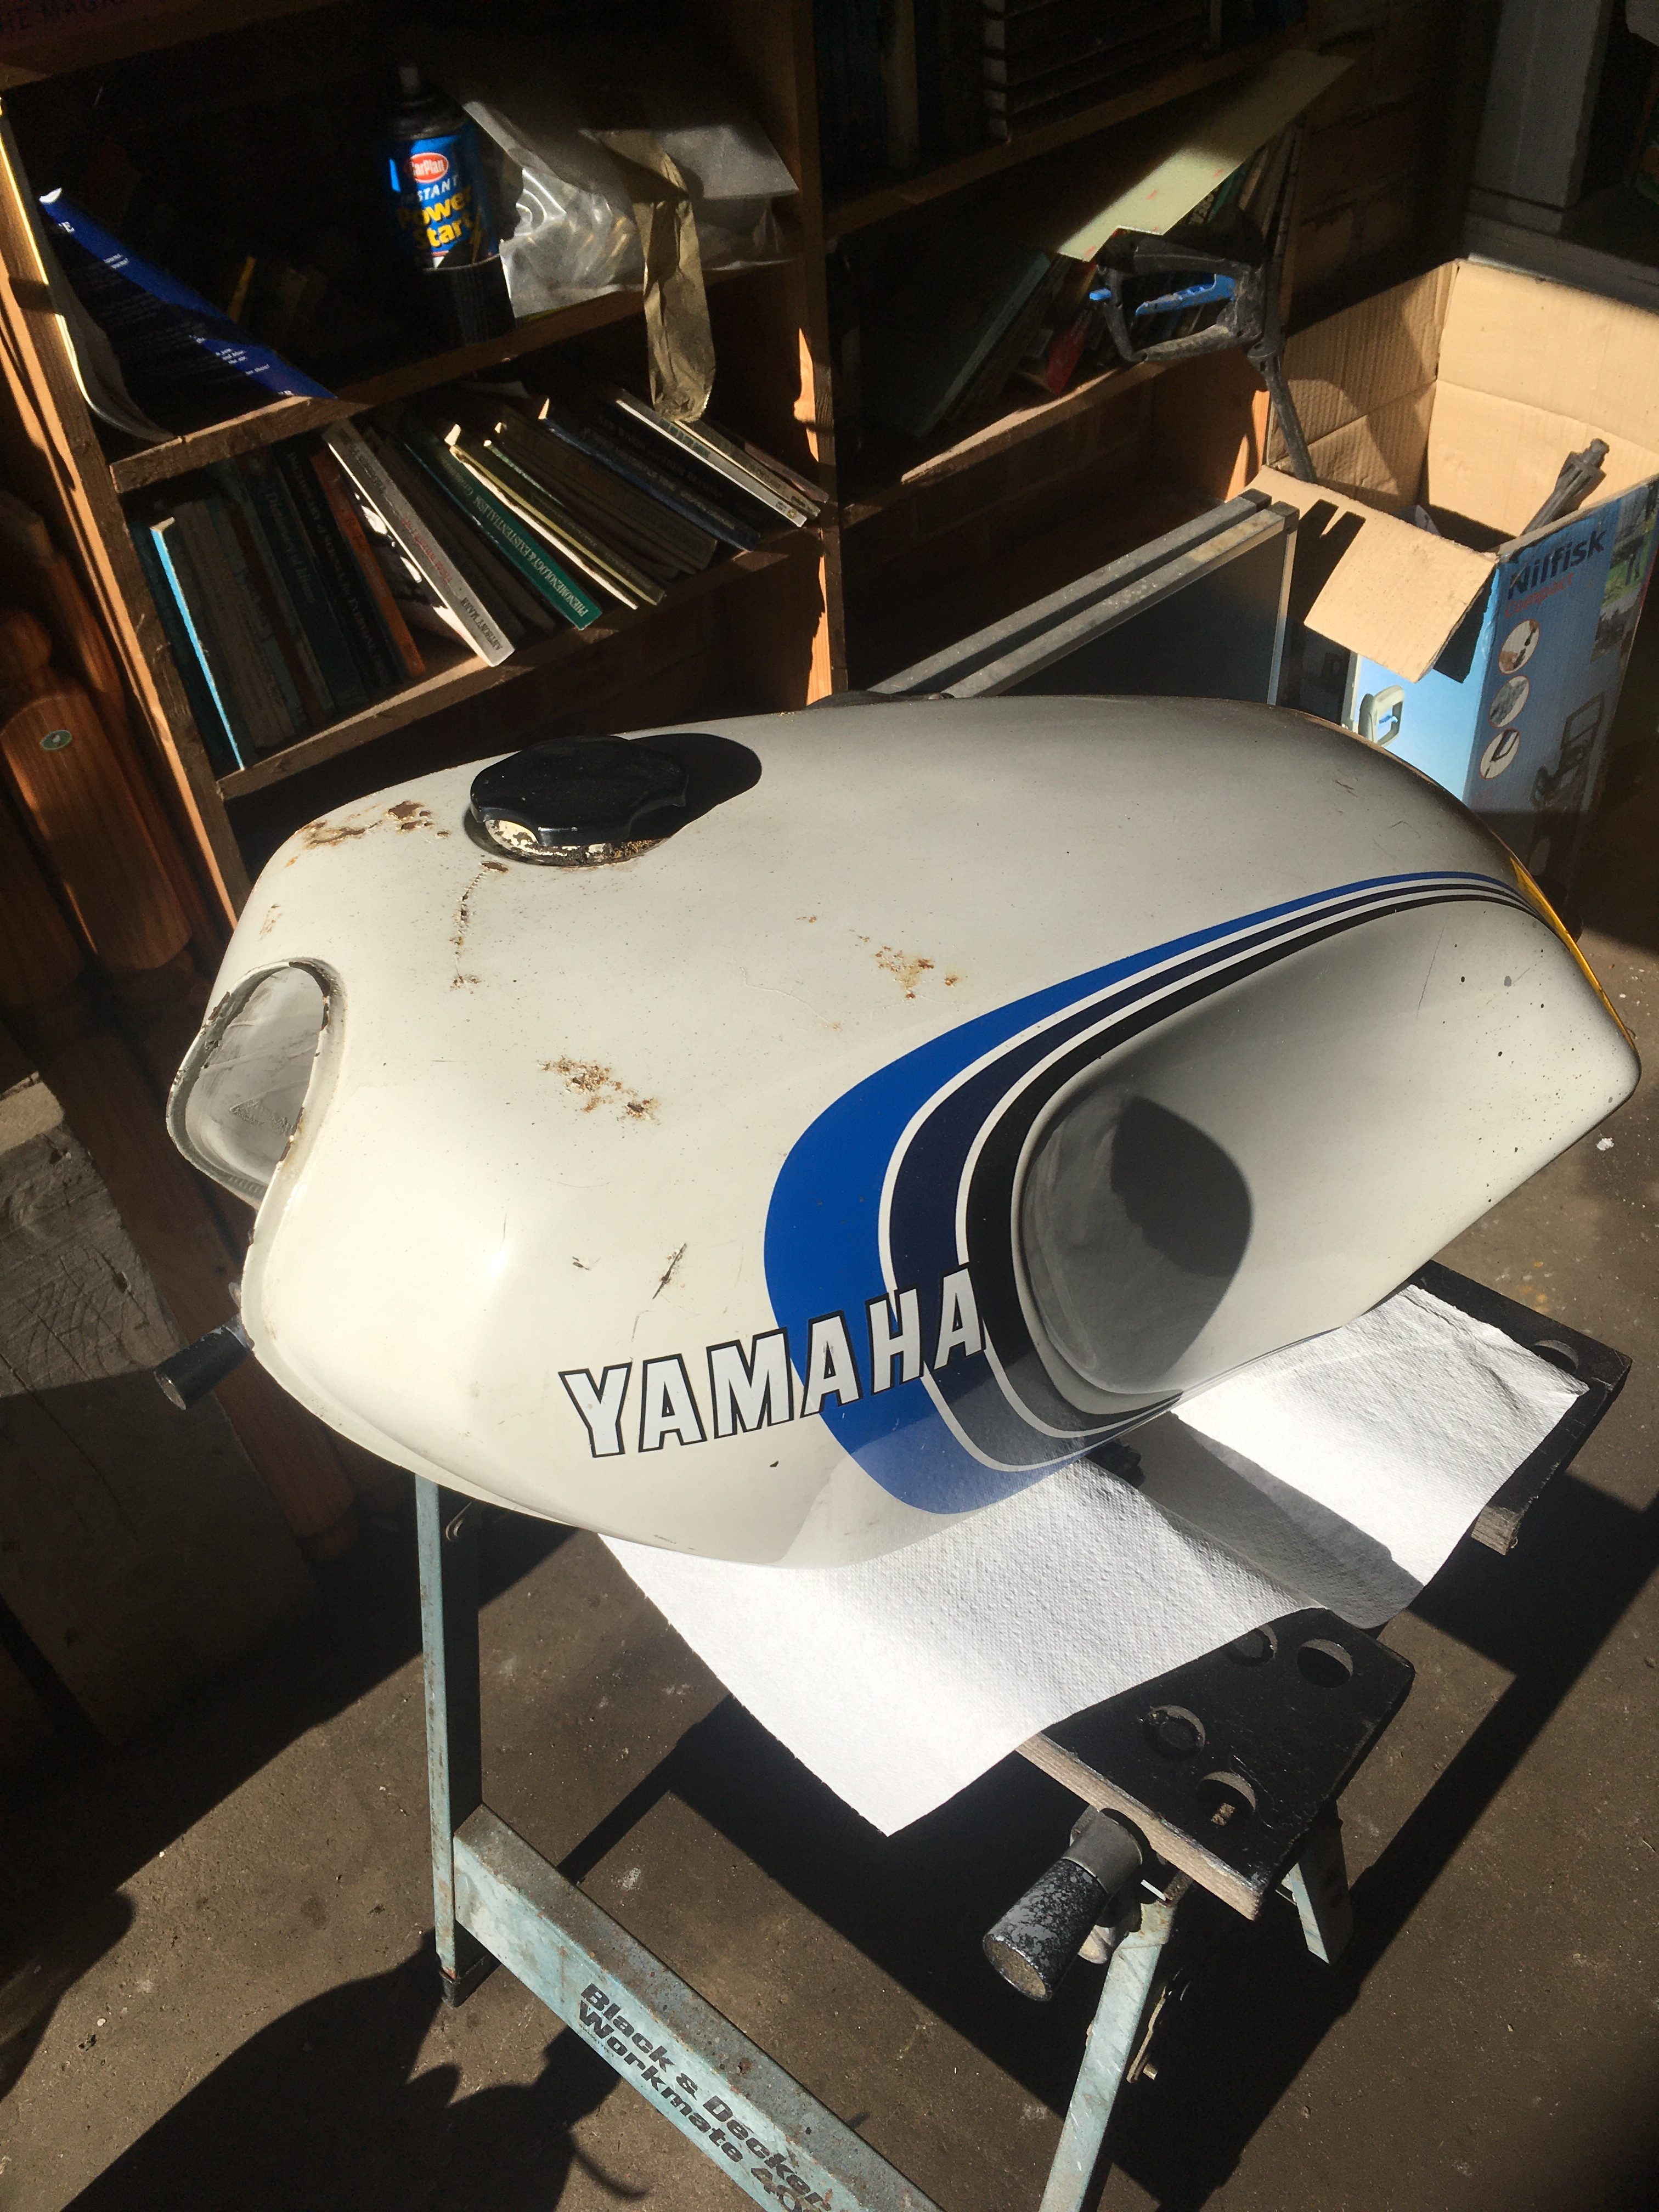 I have 2 other tanks which have been hanging on the garage wall, largely ignored and forgotten for over 20 years. 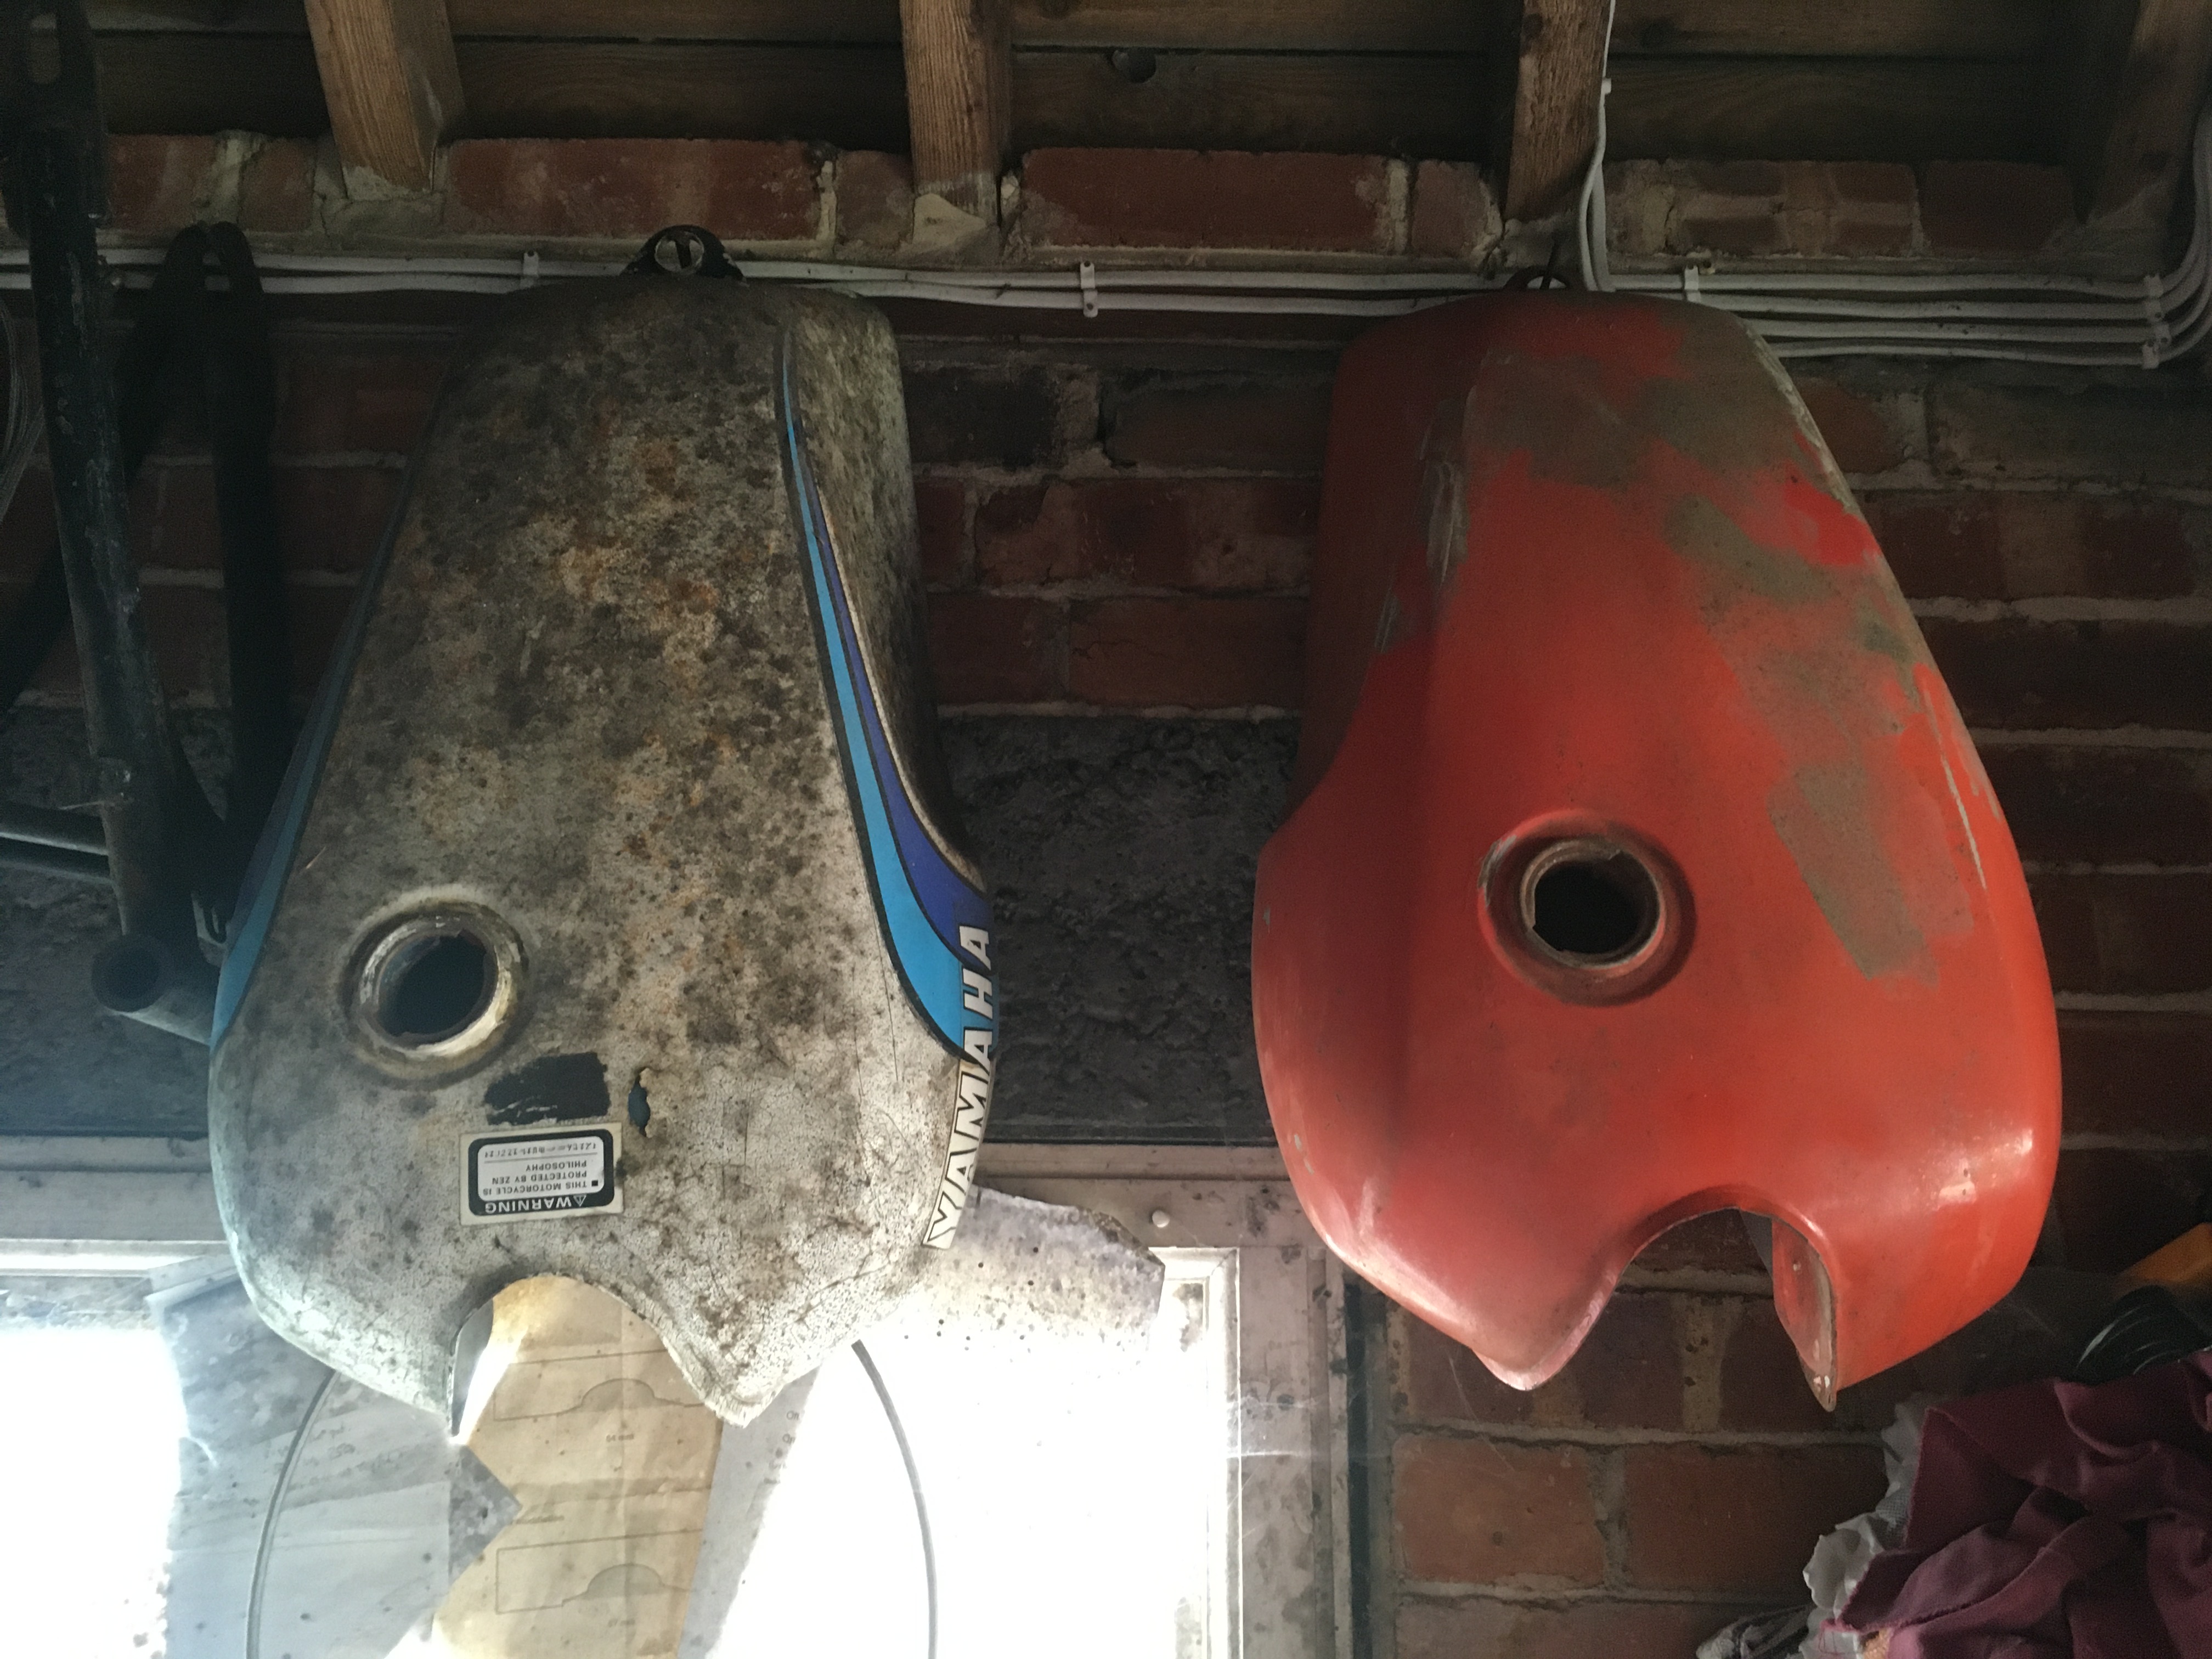 These may be worth considering also. I would need to fit a fuel tap, so it’s off to the shed to visit the parts box. 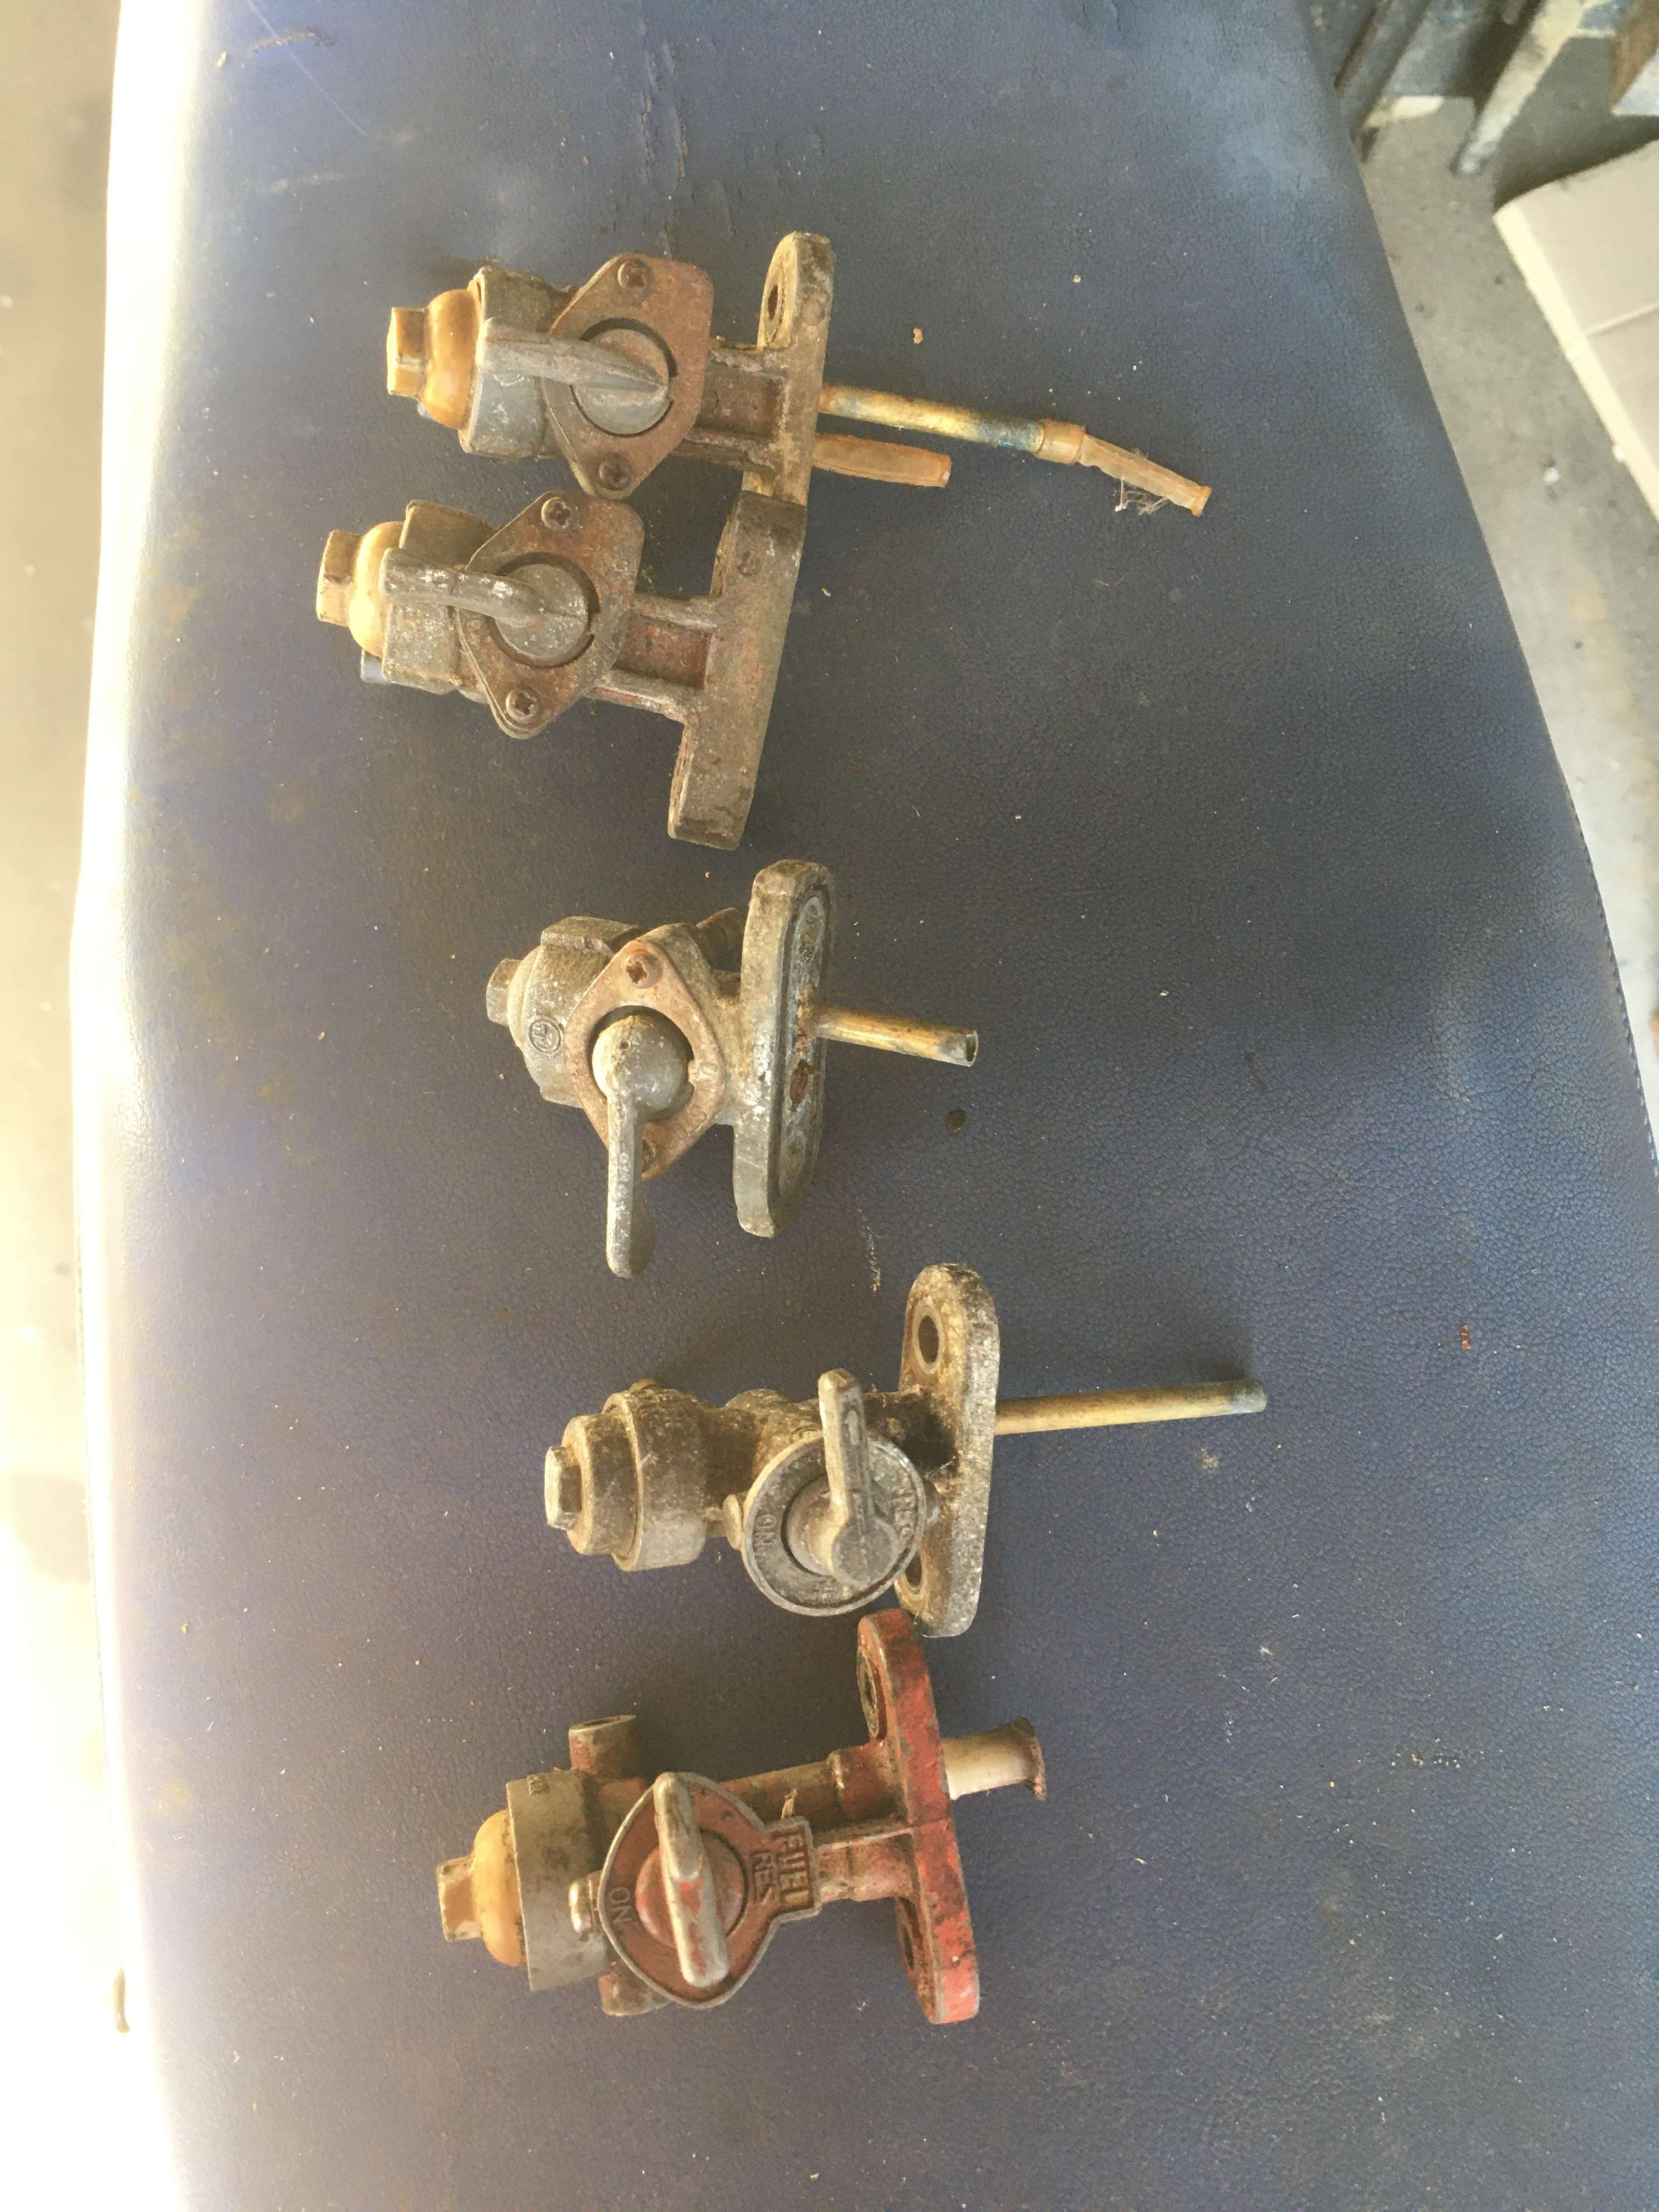 What a motley collection. There appears to be only one LC fuel tap here, and that is lacking not only its filter, but also the two brass spigots, leaving nowhere to attach the fuel pipes. The tank from the donor bike is relatively rust free inside, but it had been coated with some kind of tank sealer, which is now flaking off. My preference would be to remove it. Of the two tanks on the wall, The Blue/White one has a thick internal coating like an epoxy resin, which is cracking off and rattling around inside. The red one is fairly rust infested inside but has no coating.. This led me to a bit of internet searching on how to clean the insides of fuel tanks. Eventually i turned up this page , detailing a three step method using regular household cleaning supplies… 1) Caustic soda 2) Hydrochloric acid 3) Phosphoric acid I have ordered the chemicals, and will perform the method on each tank, recording the results here. |
|
|
|
Kevin
Jun 11, 2021 21:20:54 GMT 1
Post by donkeychomp on Jun 11, 2021 21:20:54 GMT 1
Number 3 is a good one. I use that a lot. But do it outside as the fumes are pretty nasty!
Alex
|
|
jam911
Thrash Merchant

Posts: 376
|
Kevin
Jun 12, 2021 8:18:32 GMT 1
Post by jam911 on Jun 12, 2021 8:18:32 GMT 1
Citric acid should also work
|
|
|
|
Post by JonW on Jun 14, 2021 2:18:37 GMT 1
I'd use DEOXC and buy a new tourmax tap... neither are a lot of money and make life easier. just my 2c.
|
|
|
|
Kevin
Jun 14, 2021 15:33:12 GMT 1
Post by rbridd on Jun 14, 2021 15:33:12 GMT 1
I'd use DEOXC and buy a new tourmax tap... neither are a lot of money and make life easier. just my 2c. I really liked the idea of doing it using household cleaning items, so that's what is on the agenda. The fuel tap was dug out to fit to keep the chemicals in the tank, (as the Classic bike hub article recommended). On careful consideration, and understanding what caustic soda can do to aluminium, I'm going to give the fuel tap a swerve and make up a blanking plate for the tap hole. 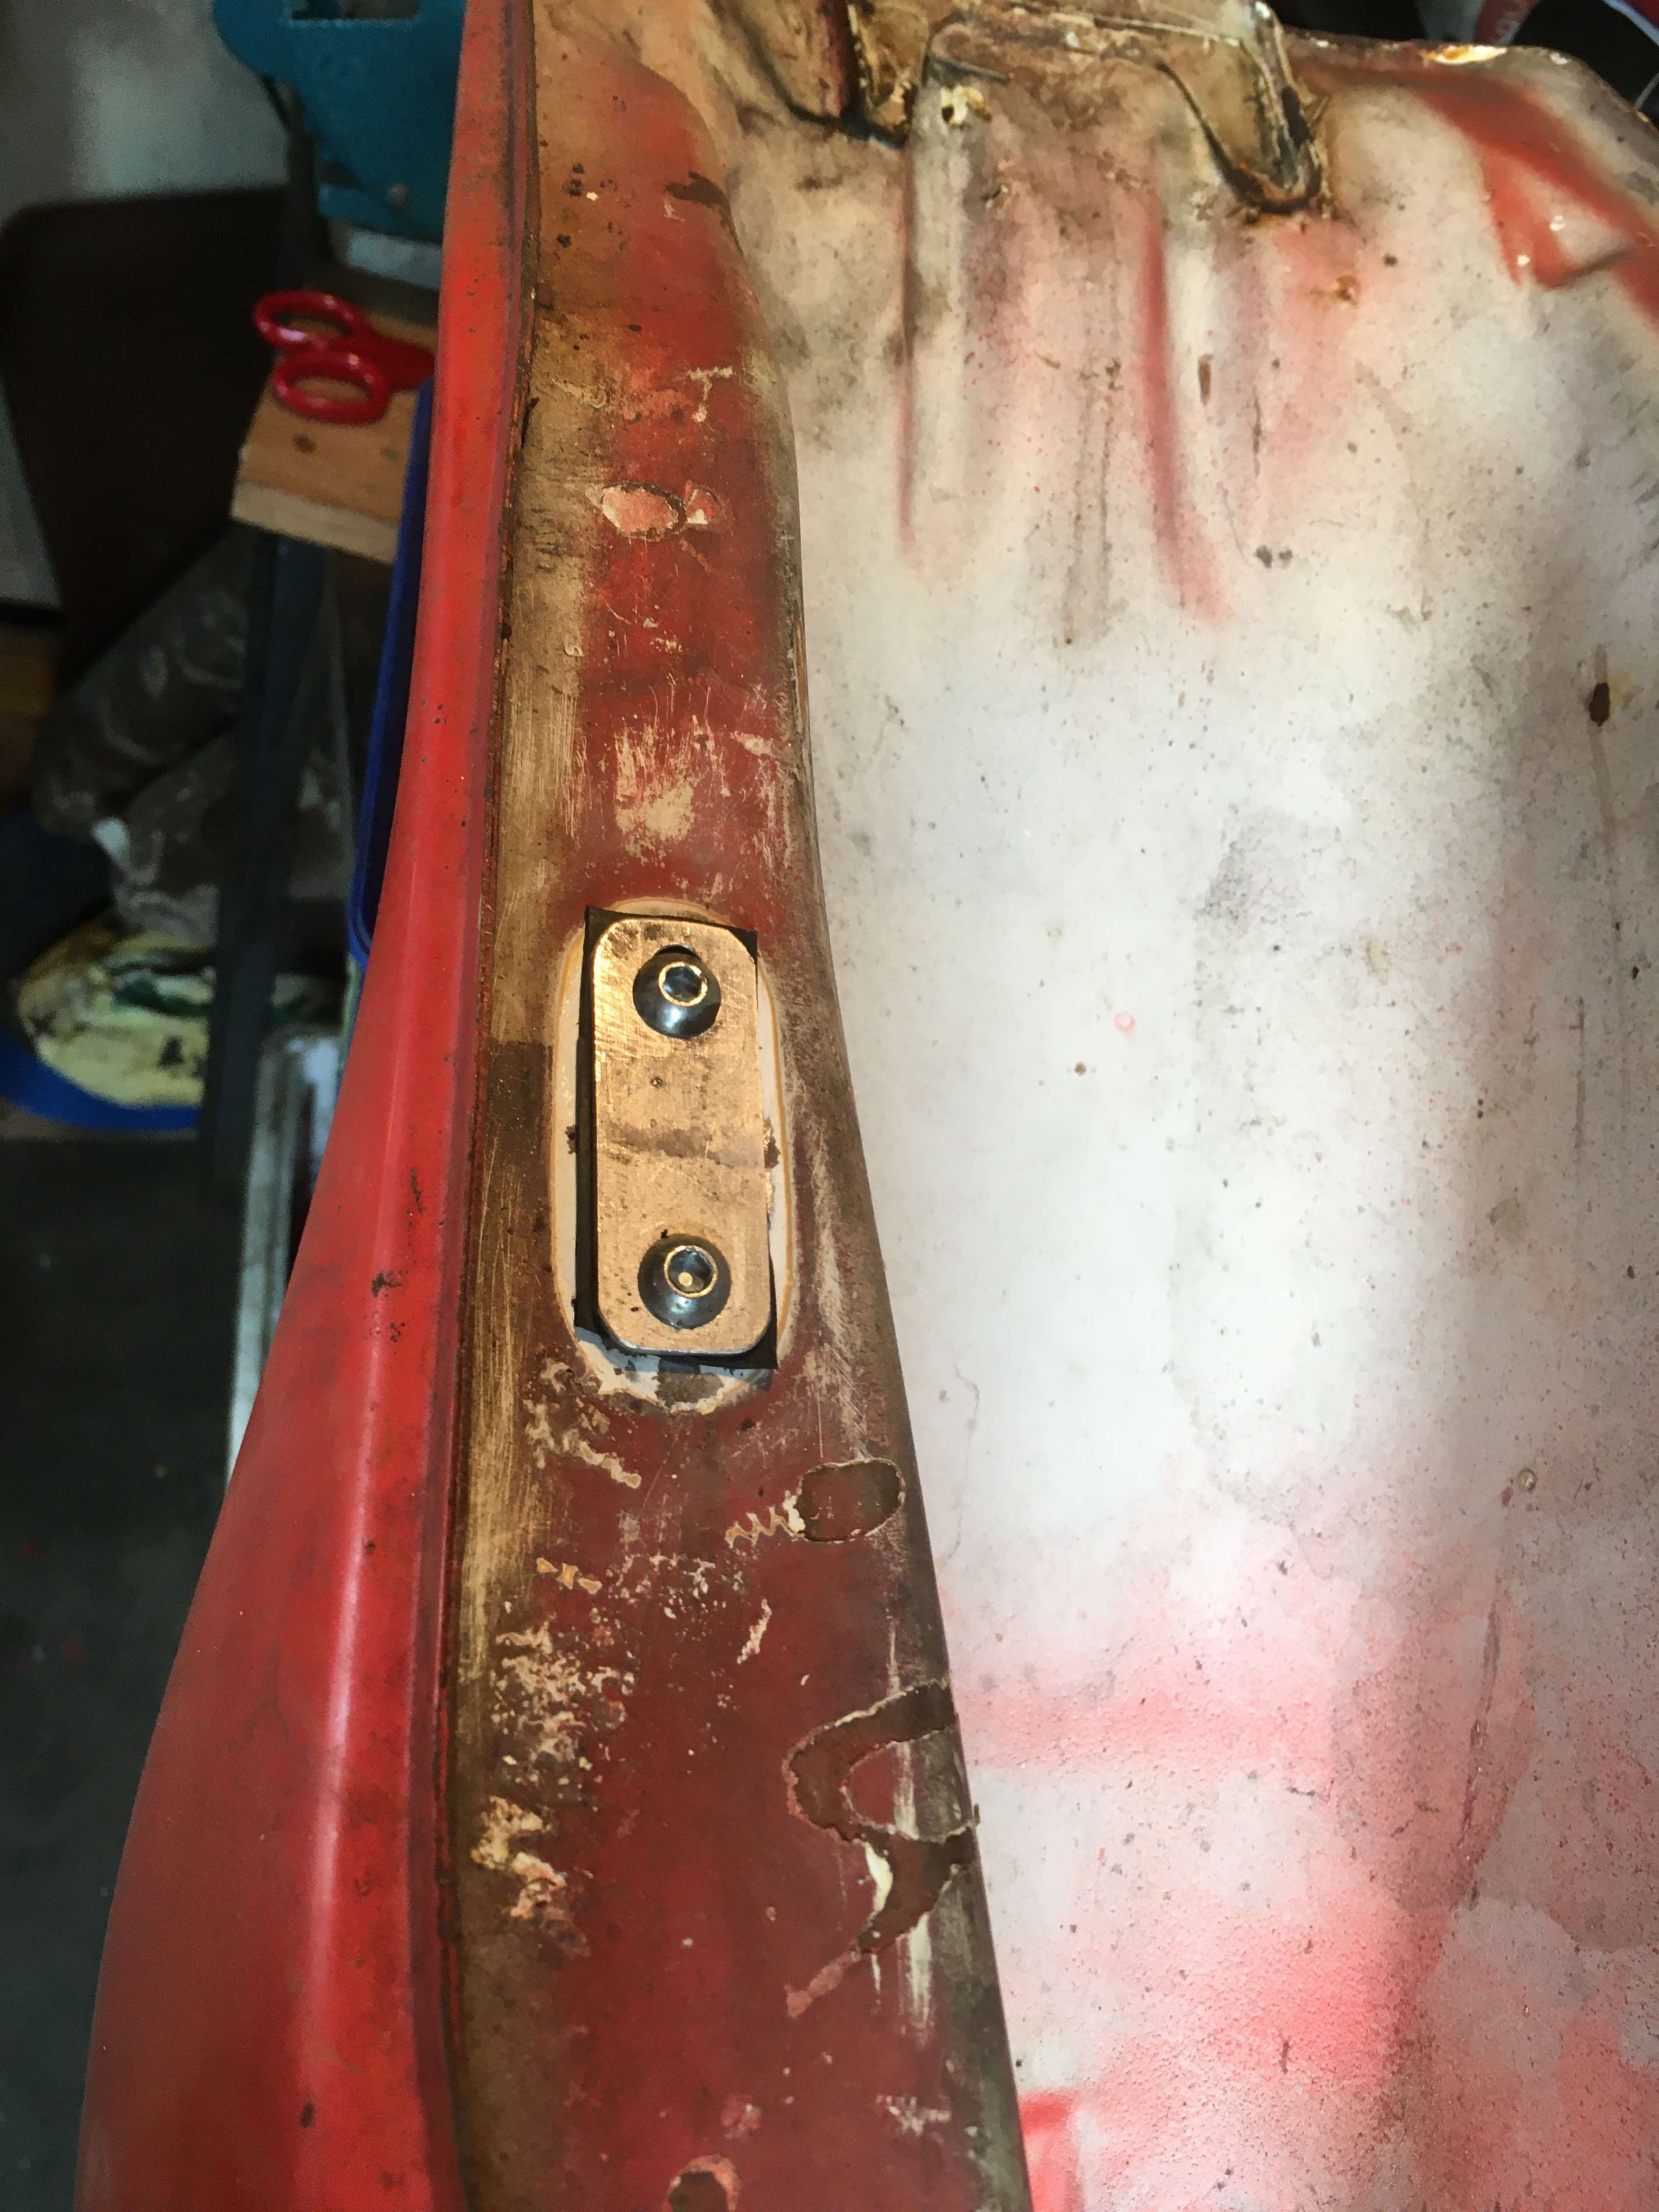 The tap turned out nice after i soaked it in brake fluid to get the paint off, and gave it a scrub with Wonder Wheels. I'd still like to find a way of putting spigots back in it so it's usable as a fuel tap. Perhaps i can rob 2 from the other fuel taps. |
|
|
|
Post by rbridd on Jul 8, 2021 19:36:41 GMT 1
So I completed the internal tank clean on another tank in possibly worse condition. I'm impressed with the results! 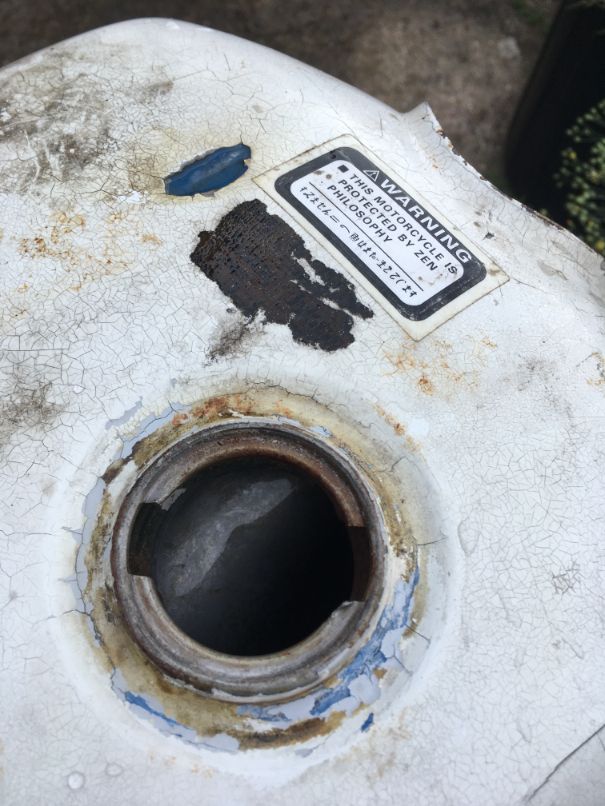 Whether the phosphoric acid is sufficent to stop flash rusting from the hydrochloric acid, I'll find out over the next few days. Cleaning up these tanks wasn't going to be a crucial part of the project for Kevin, but costs have mounted so greatly while progressing through the build, that i'm going to have to rein in the spending. A new tank and a professional paint job must necessarily be replaced on the to-do list with a tank reclamation, and a rattle can paint job. Consequently, this tank, and the two other dented and filled relics of the 80's, now become important so... sticker removal, a rub down back to metal, (and filler, because I'm sure it's full of pug), and then I'll make a decision on which tank will get the new paint. This one at least is not leaking at the seams after removal of the interior crud, lining, and rust. 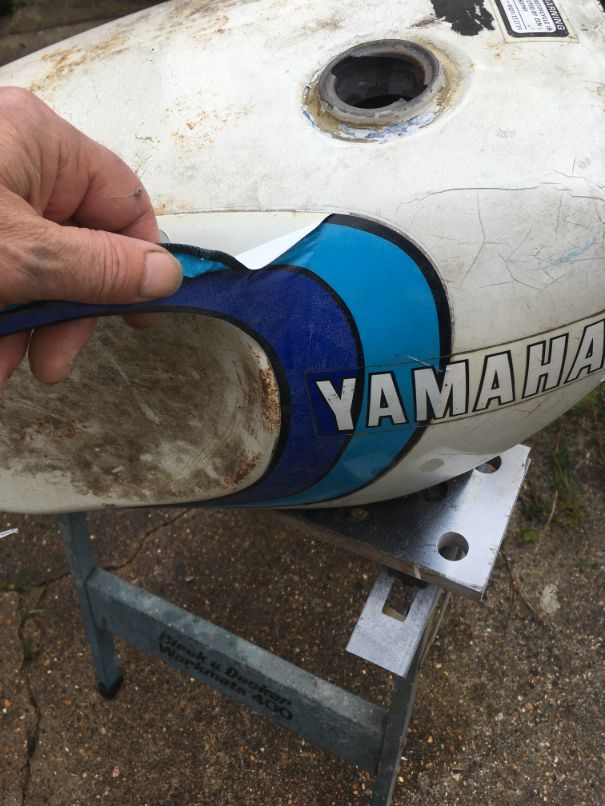 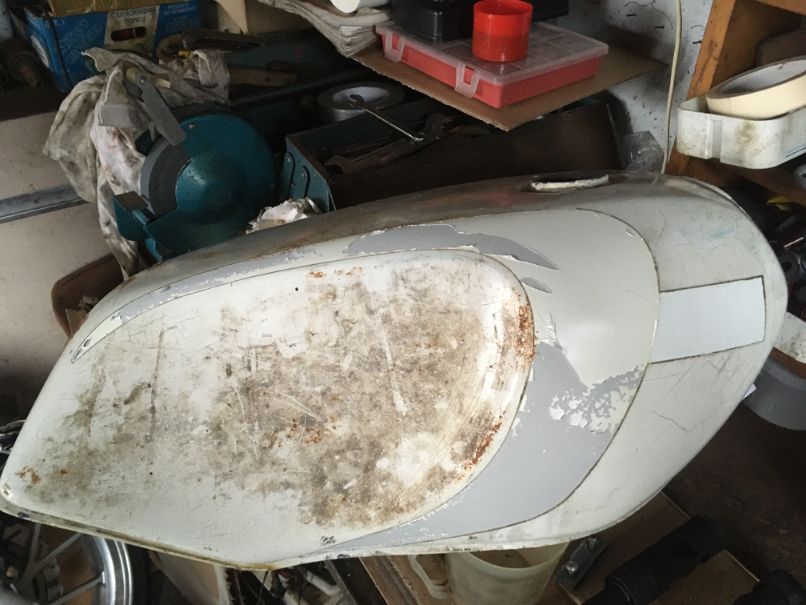 I've decided on black... The Mars Bar colour scheme. |
|
|
|
Post by rbridd on Sept 1, 2021 3:23:40 GMT 1
I've been a bit remiss on keeping this thread up to date, but it's all on the blog. (see sig). Long story short, it all came together over time, with the usual setbacks. Then I took it for an MOT which it passed with a couple of advisories, one cured with application of red grease to the fork leg to "flip" the oil seal lip, and for the other, I'll be seeking out someone with a lathe big enough to re-true a rear brake drum. So it's on to running in, but after 50 miles or so, I heard a bit of a rattle from the clutch, which DIDN'T go away when the lever was pulled. A clutch side stripdown ended up with this...  ...so it looks like the final bill just got bigger, (and it was past the original budget already... by some margin!) So is this simply the normal outcome of an engine component that has done circa 50,000 miles, or could this be caused by the slight lateral play I can, (now), feel in the mainshaft bearing? Answers on a postcard... (etc.) (to be on the safe side, I will be replacing the clutch side mainshaft bearing as a matter of course.) Woohoo! another engine stripdown and only 50 miles after the last one. I am truly blessed. |
|
|
|
Kevin
Sept 1, 2021 22:53:53 GMT 1
Post by shaunthe2nd on Sept 1, 2021 22:53:53 GMT 1
Bugga, but these bikes are full of set backs. I'm just about to start an engine strip after a rebuild due to what I think is a dodgy bearing. Good luck with yours, but definately a labour of love. Budgets, nor timescales are never met on these beauties.
|
|


