|
|
Post by dusty350 on Mar 28, 2020 22:46:49 GMT 1
I thought it would be interesting to see the work required of rebuilding a 2 stroke crank. I've had quite a few done over the years, and never really understood the process - how it's done, what is checked etc. I'm sure it's something we've all had to get done at some point in our 2 stroke ownership, and as I needed my current 400e crank rebuilding, I thought it the perfect opportunity to ask Paul at PJME Motorcycle Engineers if he would kindly take the time to take some pics from the start. Paul has done all my crank rebuilds and rebores over the years. I first took some 400 barrels and a crank up to him when visiting family in Birmingham, back in the 90's. I found him really helpful - he passed those particular barrels as fit for use, and the crank rebuild he carried out was perfect, so I have entrusted all my crank and barrel work to him ever since. He has been doing this for 30 years, and really knows his stuff. Currently, they are rebuilding 10 - 15 cranks a week, aside from other work, so I really appreciate him taking the time to document the process. The crank was an unknown quantity to start with. I bought the engine off ebay before Xmas. It had been a spare engine the seller kept under his bench for years after selling his bike, and finally cleared out, so I planned on a complete strip and rebuild. I finally got around to driving up to Wednesfield last month to drop the crank and barrels off to Paul, and left him to work his magic !! The first thing Paul did was set the crank up on a trueing jig. The reason was to check each end of the crank for run out. Mine wasn't healthy !  VID-20200323-WA0024 VID-20200323-WA0024 by dusty miller, on Flickr 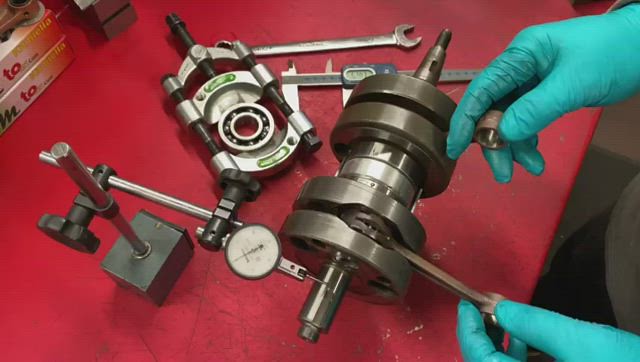 VID-20200323-WA0025 VID-20200323-WA0025 by dusty miller, on Flickr Paul reckoned on as much as 12 thou runout - the manual states 2.5 thou as acceptable I believe  The crank was miles "out of true", and Paul believes it may have been built this way previously. Paul always aims for zero run out once the crank is rebuilt, but that's not always possible due to wear and/or poor previous rebuilds. If the crank isn't pressed together correctly it can damage parts and make zero run out difficult to achieve, but he does spend considerable time trying to get it perfect. Dusty  |
|
|
|
Post by oldbritguy on Mar 29, 2020 0:38:31 GMT 1
Very interesting Dusty as these old cranks have undoubtedly taken a fair bit of punishment over the years. I have built up loads of bolt up British cranks over the years with big centre flywheels and sludge traps, and they were never true, even from day one. Always had to send them off to the local engineers for trueing and balancing afterwards. What a difference when done though. I have never built a pressed up crank as never had the tools or correct knowledge to do so, so it is great to know there are still some skilled engineers out there who make this look easy and help keep our old bikes running the way they should. John |
|
|
|
Post by dusty350 on Mar 29, 2020 19:41:43 GMT 1
I agree John, there is a lot involved in getting it right  So, a badly balanced crank is gonna feel rough when running, sap power, and put undue strain on the bearings. The 400 crank is a heavy old beast so you can imagine the extra strain a badly balanced crank would cause. The crankshaft would be constantly fighting against the bearings. The other thing that was obvious with my crank was the con rods. They weren't original Yamaha rods, and they had quite a narrow neck, just below the small end eye. Not necessarily a problem, but unlike any Rd rods I'd seen before, and Paul commented on them as soon as he saw them. Another issue that became apparent was the mismatched dimensions of the webs;  IMG-20200323-WA0021 IMG-20200323-WA0021 by dusty miller, on Flickr  IMG-20200323-WA0022 IMG-20200323-WA0022 by dusty miller, on Flickr These measurements are useful if trying to understand why a crank my be running badly, but in my case, it was getting a total strip and rebuild anyway. The crank is pressed apart - note the conrods ;  IMG-20200323-WA0014 IMG-20200323-WA0014 by dusty miller, on Flickr  IMG-20200323-WA0017 IMG-20200323-WA0017 by dusty miller, on Flickr As the crank came apart, it's component parts are easier to see. The big end bearings - these have the standard 14 rollers;  IMG-20200323-WA0018 IMG-20200323-WA0018 by dusty miller, on Flickr Mismatched thrust washers ?;  IMG-20200323-WA0008 IMG-20200323-WA0008 by dusty miller, on Flickr The centre Labrynth seal, bottom of the pic, compared to the new, better designed one that will be fitted;  IMG-20200323-WA0009 IMG-20200323-WA0009 by dusty miller, on Flickr Here you can see the splined section of the aircooleds crankshaft;  IMG-20200323-WA0012 IMG-20200323-WA0012 by dusty miller, on Flickr The crank, now completely stripped down, ready for cleaning and inspection;  IMG-20200323-WA0019 IMG-20200323-WA0019 by dusty miller, on Flickr Dusty |
|
|
|
Post by Yogi on Mar 29, 2020 19:52:00 GMT 1
Nice one Dusty 👍
Crank building and balancing as always seemed like wizardry to me
|
|
|
|
Post by dusty350 on Mar 29, 2020 20:04:12 GMT 1
Hi mate Yea, me too. Paul has done some brilliant pics - I'm trying to use as many as I can. This crank is proof as to why I never trust a second hand engine with an unknown history ! It also shows that not all people that build cranks do a good job ! Paul is sure the crank was built with the imbalance, and not something that has occurred through use. Same can be said for reboring, but that's a thread for another day !! Dusty |
|
|
|
Post by yamark on Mar 29, 2020 22:08:00 GMT 1
Brilliant thread mate, the pictures are fab. The aircooled cranks use 12 splines, so 180, 120, and 90 degree angles can be achieved for building LC, aircooled multi's. Looking forward to the next instalment |
|
|
|
Post by donkeychomp on Mar 29, 2020 22:41:31 GMT 1
I never realised just how many components go into a crank. Now I understand why it costs so much to get a rebuild! That and all the machinery/expertise involved.
Alex
|
|
|
|
Post by cbm on Mar 30, 2020 3:30:29 GMT 1
Great thread Dusty, FYI, if you need a speedy turn around give this firm a call 👍 |
|
|
|
Post by dusty350 on Mar 30, 2020 7:22:38 GMT 1
 Yea, seen that vid before - he could knock you up an Lc or Pv petrol tank in a few minutes too I expect !! Paul's workshop looks far more civilised ;  IMG-20200323-WA0004 IMG-20200323-WA0004 by dusty miller, on Flickr Dusty
|
|
|
|
Post by headcoats on Mar 30, 2020 8:50:41 GMT 1
Then Yamaha went backwards and built the LC cranks !
|
|
|
|
Post by marrcel on Mar 30, 2020 14:03:08 GMT 1
Very interesting topic David. 👍
I am curious how to correct wrong trueness and imbalance.
Another interesting decision is when do you pull the crank out? Is it the play of the big end bearings?
|
|
|
|
Post by beardy on Mar 30, 2020 15:15:15 GMT 1
Brilliant thread mate, the pictures are fab. The aircooled cranks use 12 splines, so 180, 120, and 90 degree angles can be achieved for building LC, aircooled multi's. Looking forward to the next instalment The beauty of the imperial system |
|
|
|
Post by dusty350 on Mar 30, 2020 19:24:27 GMT 1
Hi Marcel I think balancing/trueing the crank is where the expertise of the builder really comes into play. There are many videos on the net of guys whacking the hell out of their cranks in an attempt to get them running true The use on a copper mallet, allied with wedges, is how it's done. Paul described the trueing process to me, when I asked, but his method starts at the very beginning of the crank rebuild. Carefully putting each component back together means he is trueing as he goes, hopefully leaving the final true up to be a minimal job. But, he can spend as long as an hour getting a crank as true as it can possibly be, if that's how long is required. Like any job, it's about preparation, and making sure each stage is done correctly, so hopefully the final adjustments are minor ones. As for when to pull a crank out for rebuild ? Mine was always going to be rebuilt due to the long time it had sat unused. It's history wasn't known either, and the fella I bought it from had bought it as an unknown quantity years before. After splitting the cases and finding corrosion on some of the gearbox, my decision to do a full and comprehensive rebuild was justified. I always do a complete engine build on project bikes of unknown history, as I would hate a nasty surprise when it was all built back up ! Dusty |
|
|
|
Post by dusty350 on Mar 31, 2020 20:00:21 GMT 1
With the crank stripped down to it's component parts, the cleaning process starts. First, a hot wash;  IMG-20200323-WA0001 IMG-20200323-WA0001 by dusty miller, on Flickr  IMG-20200323-WA0002 IMG-20200323-WA0002 by dusty miller, on Flickr Once it's been through the parts washer, Paul then vapour blasts the webs. He does this as it's easier to inspect the parts for damage/cracks. Once happy that he can proceed with the rebuild, all the new parts are added. He built my crank with silver plated, Tz style big end bearings that have 18 rollers instead of the standard 14; 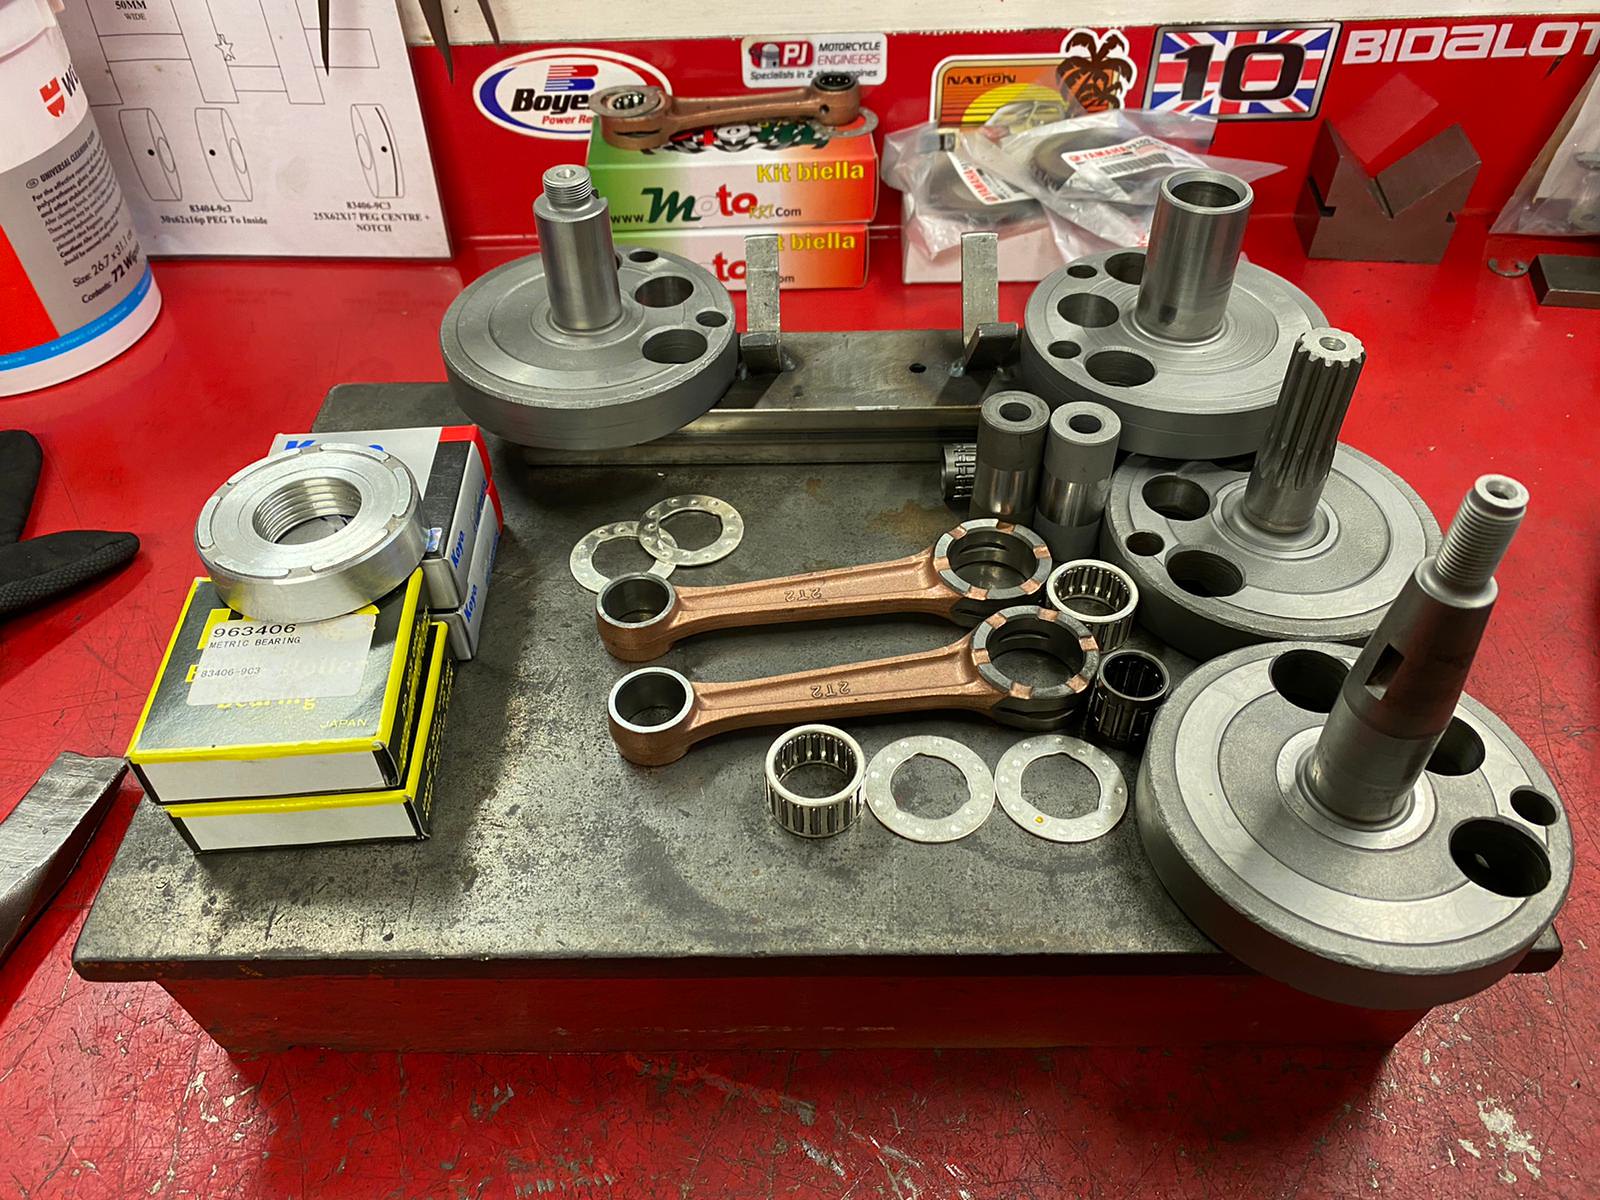 IMG-20200324-WA0006 IMG-20200324-WA0006 by dusty miller, on Flickr 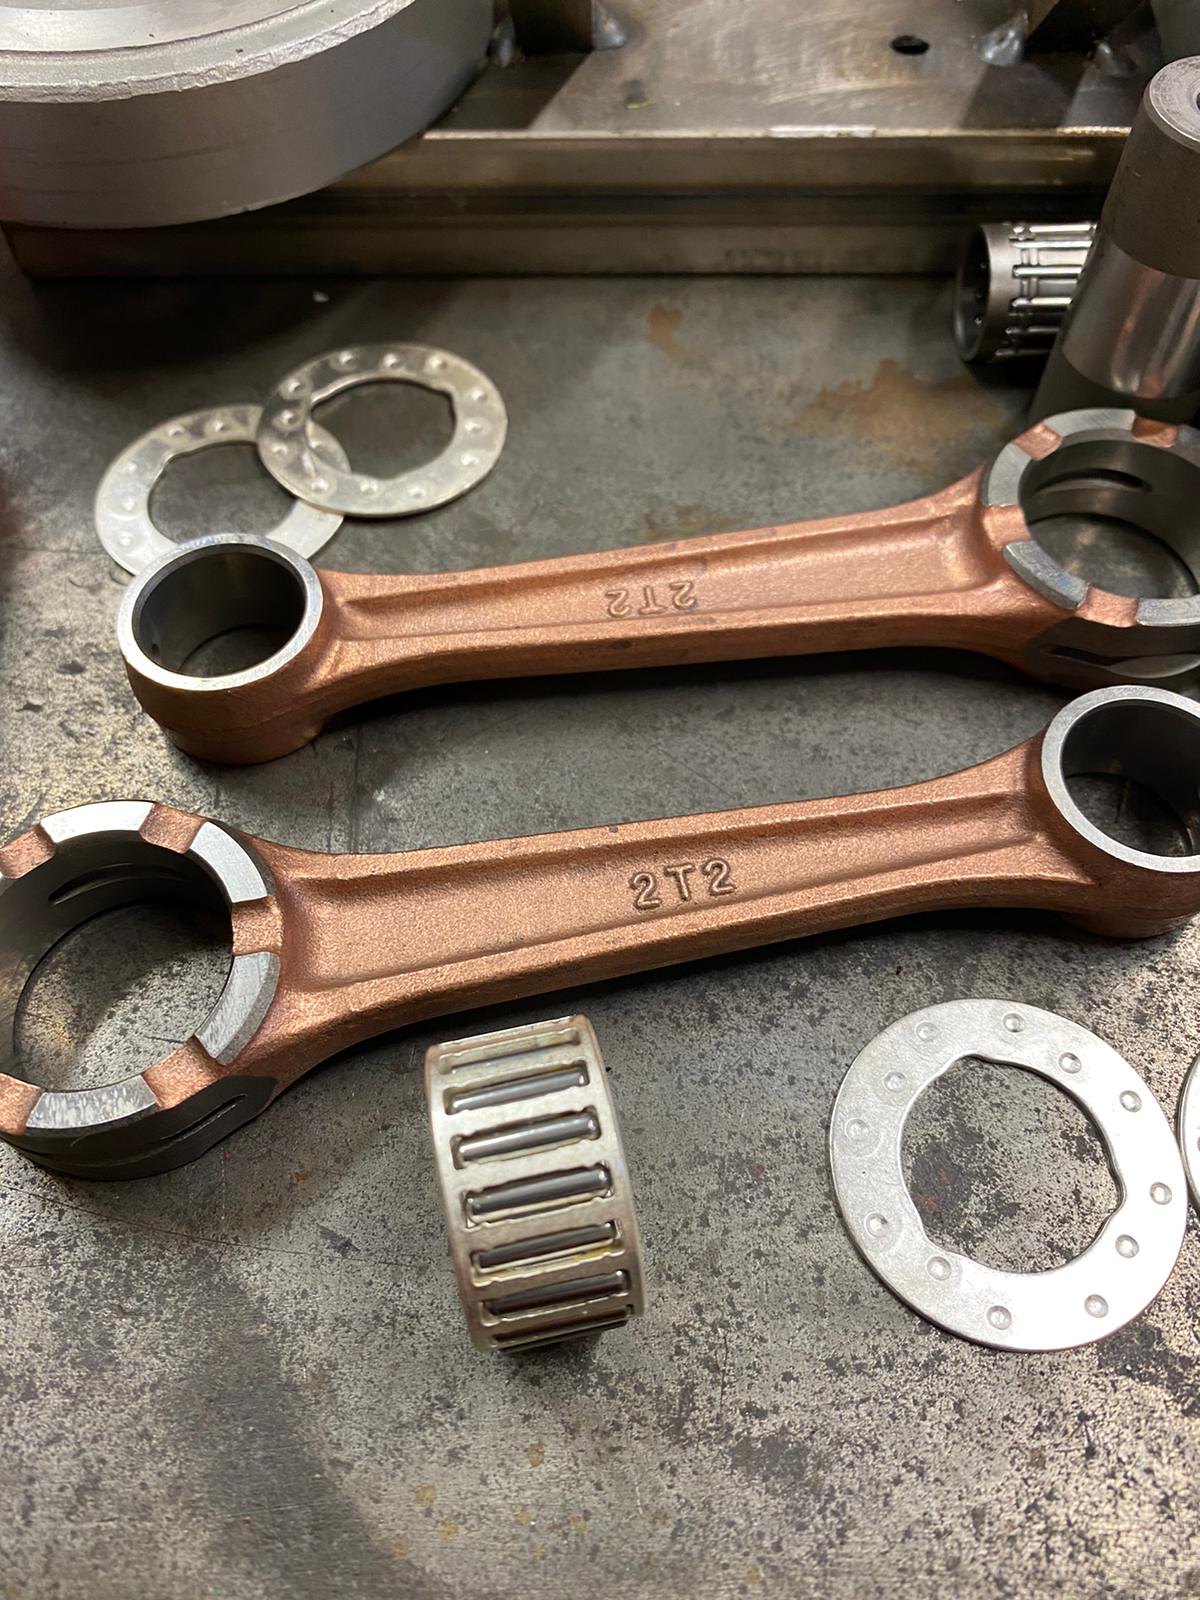 IMG-20200324-WA0010 IMG-20200324-WA0010 by dusty miller, on Flickr New conrods, crank pins, thrust washers, big and little ends, labrynth seal and 4 new Japanese bearings. Back on the press to start building it all back up;  IMG-20200324-WA0014 IMG-20200324-WA0014 by dusty miller, on Flickr  IMG-20200324-WA0013 IMG-20200324-WA0013 by dusty miller, on Flickr  IMG-20200324-WA0009 IMG-20200324-WA0009 by dusty miller, on Flickr 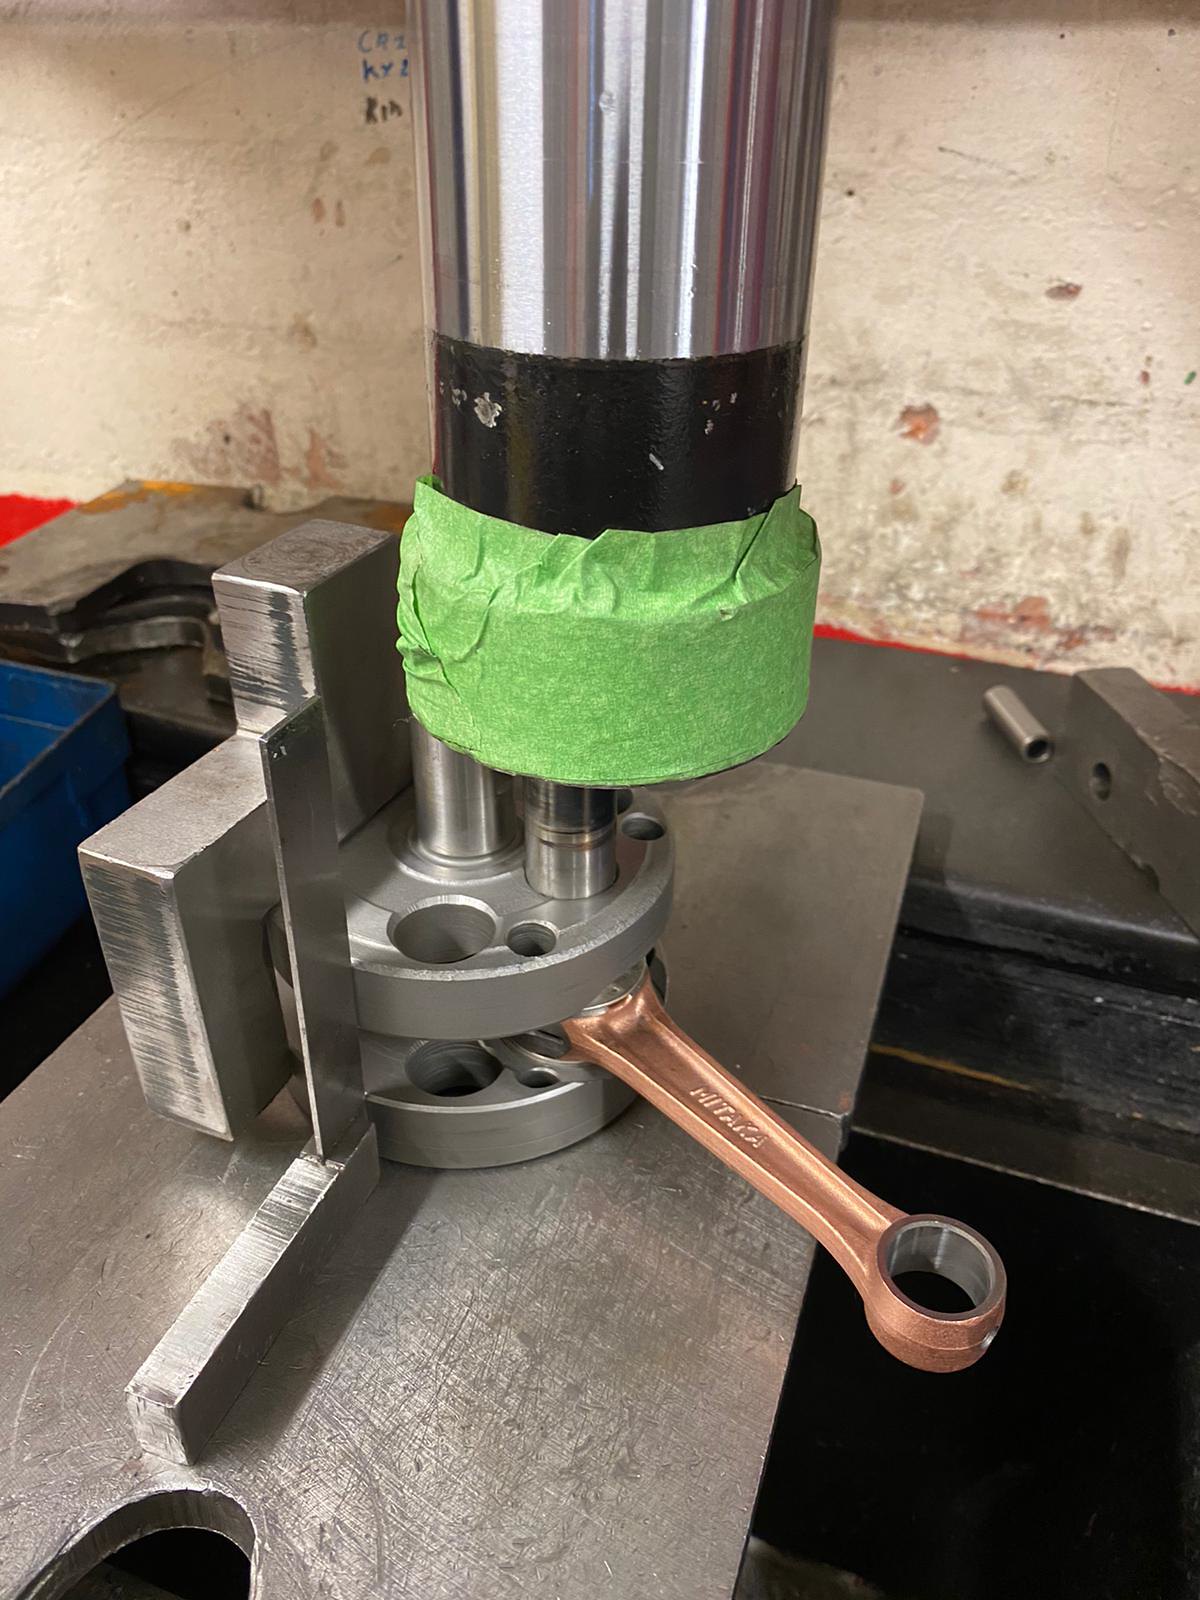 IMG-20200324-WA0008 IMG-20200324-WA0008 by dusty miller, on Flickr Once everything is back together, the crank goes back onto the jig for final trueing by hand;  IMG-20200324-WA0007 IMG-20200324-WA0007 by dusty miller, on Flickr So there it is, a rebuilt Rd400e crank, with all new Japanese parts/bearings, ready to fit straight into the cases. Paul is a master of his art, and as always I'm over the moon with the quality of his work, and the quality parts he supplies. I hope you found this interesting, and I hope I've got everything in the correct order !! Thanks again to Paul, for an excellent service and for taking the time and effort to take the pics for me/us. Dusty |
|
|
|
Post by donkeychomp on Mar 31, 2020 22:37:21 GMT 1
You need to write a 'How to build an LC or AC Yamaha' book matey. This stuff just makes Haynes Manuals obsolete.
Alex
|
|
|
|
Post by mellow on Mar 31, 2020 22:45:53 GMT 1
cool thread. very interesting |
|
|
|
Post by ERic350 on Apr 28, 2020 9:55:37 GMT 1
Thanks for this interesting thread with lots of pictures !
|
|
|
|
Post by rigga on Apr 28, 2020 11:07:46 GMT 1
Yet another quality thread Dusty.
|
|
|
|
Post by tacky1 on Apr 29, 2020 5:32:53 GMT 1
Top post Dusty. Thanks for that. A lot of work went into that crank!! Going to make such a difference when you get her up and running.
|
|
|
|
Post by dusty350 on Apr 29, 2020 7:33:15 GMT 1
Glad you found it interesting What I like about Paul is his passion to do everything right, even down to sourcing the correct Japanese outer bearings for the crank, when cheaper Taiwanese bearings are readily available. Same with the lab seal - there are cheaper versions out there without the grooves - in fact the one he removed from my crank was a cheaper seal, and I know he makes sure he gets the better version. The crank looks brand new once it's done When I get the time I will do a thread on the engine reboring process. Paul took some pics of that for me too, and it may be interesting for you guys to see whats involved with that Dusty |
|
|
|
Post by beardy on Apr 29, 2020 8:51:43 GMT 1
Fascinating thread seeing how it’s done.
I know what a rebore is but not a clue what the tools look like and how the barrels are mounted for boring.
Keep them coming 👍🏻
|
|


 The crank was miles "out of true", and Paul believes it may have been built this way previously. Paul always aims for zero run out once the crank is rebuilt, but that's not always possible due to wear and/or poor previous rebuilds. If the crank isn't pressed together correctly it can damage parts and make zero run out difficult to achieve, but he does spend considerable time trying to get it perfect.


 Yea, seen that vid before - he could knock you up an Lc or Pv petrol tank in a few minutes too I expect !!