|
|
Post by morgy on Nov 15, 2018 20:55:50 GMT 1
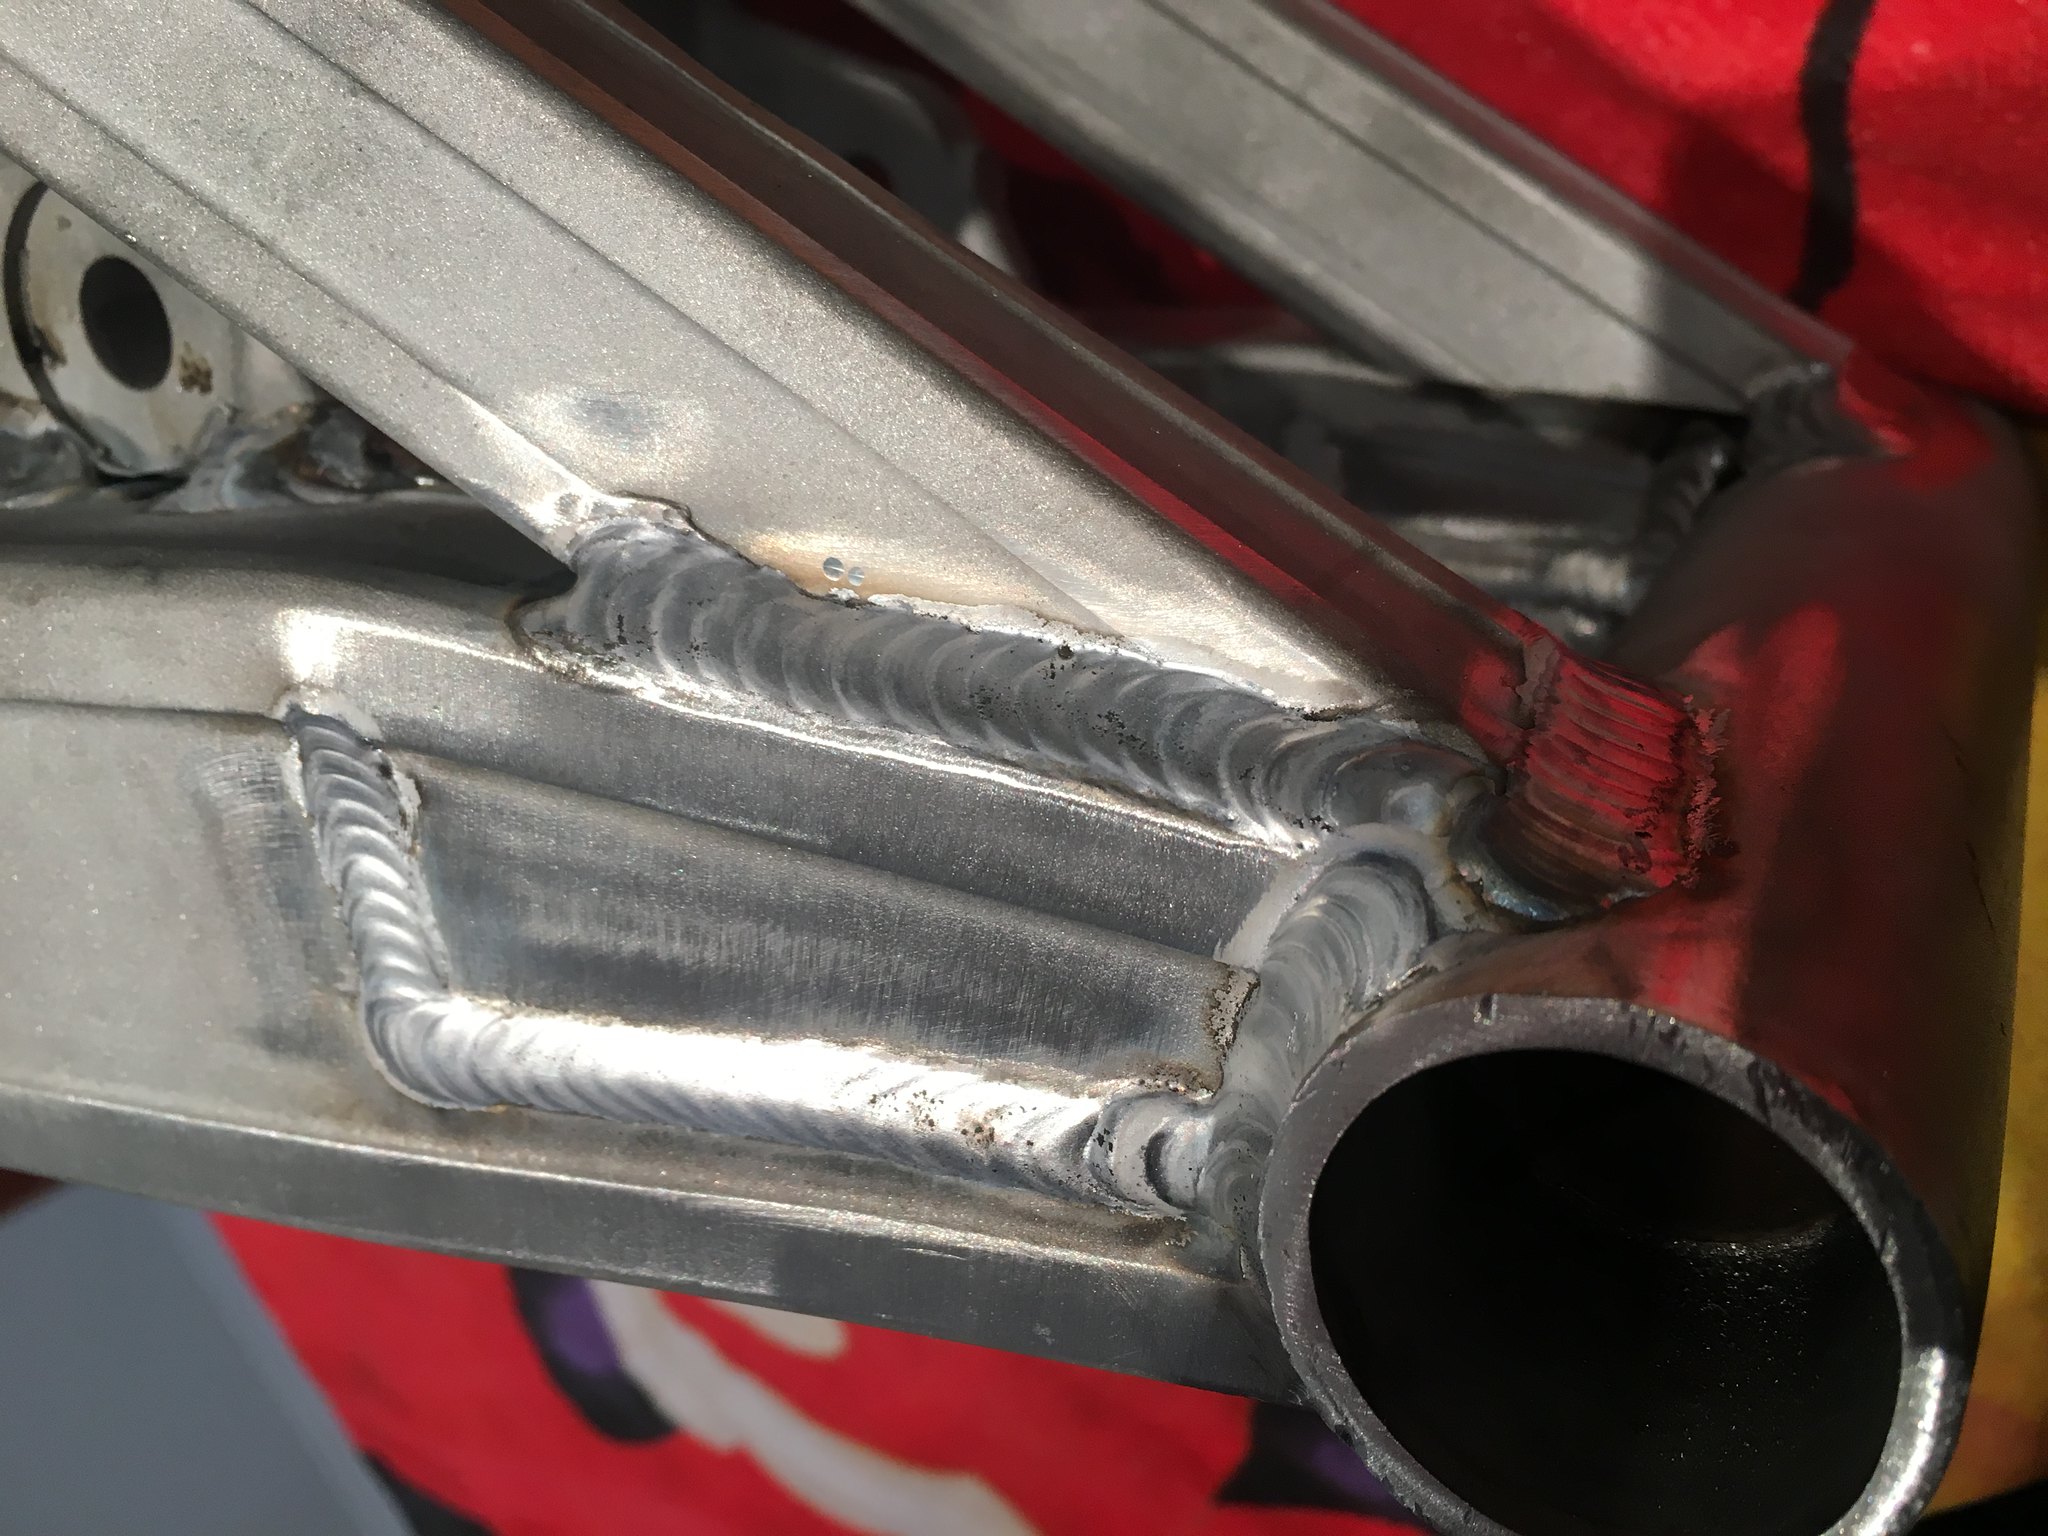
A bit more work done on the tail section... well when i say a bit but allot of time... 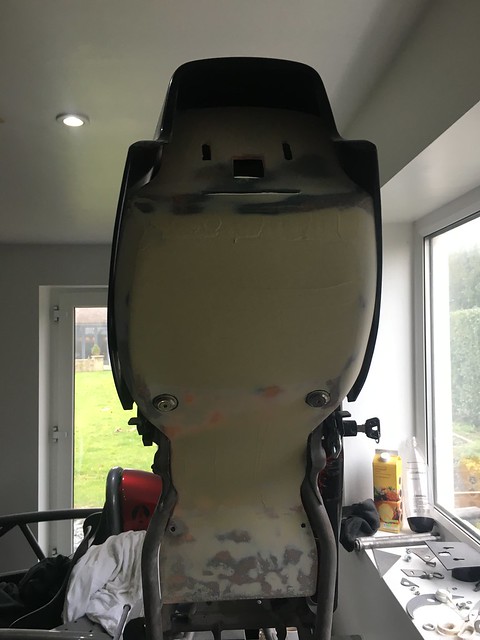 IMG_2203 IMG_2203 by mark.morgan07, on Flickr  IMG_2205 IMG_2205 by mark.morgan07, on Flickr 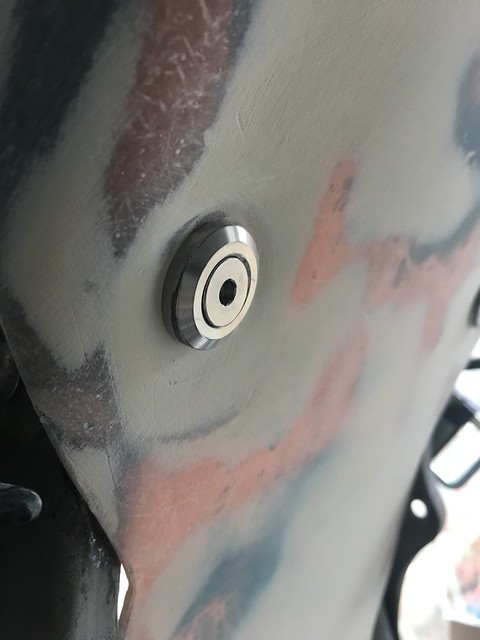 IMG_2206 IMG_2206 by mark.morgan07, on Flickr The stainless caps will be smaller and will also be black but i got these ones recessed in ok Just needs to be sanded finer and some stopper to remove pin holes etc and she will be ready for primer... I managed to get allot of crappy small jobs out of the way.. Cleaning up allot of finished parts boxing them all up ready for the build. Sorted out all the parts i need to send of for Chrome, Anodising and Zinc. My Swing arm is almost finished and should be back next week.. Then i can try and finish of the rear brake system as my new Brembo rear caliper has just turned up... 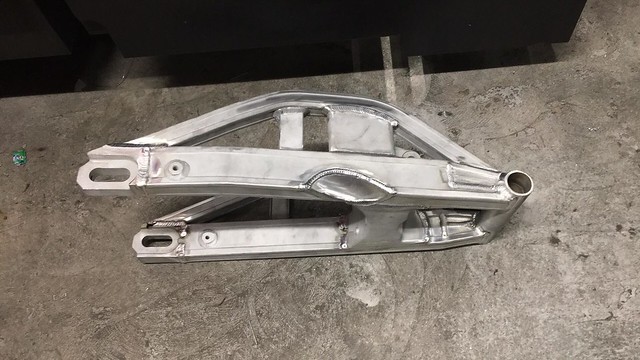 Swing Swing by mark.morgan07, on Flickr |
|
|
|
Post by donkeychomp on Nov 15, 2018 22:53:07 GMT 1
That's some serious braking ability!
Alex
|
|
|
|
Post by mouse on Nov 16, 2018 7:52:53 GMT 1
That is a huge amount of effort and time there. Looks great.
Mouse
|
|
|
|
Post by morgy on Nov 16, 2018 10:05:18 GMT 1
That's some serious braking ability! Alex You mean my ability to turn a nice unfinished project into boxes or unfinished parts or the Calipers and Galfer Wavy disc's..  |
|
|
|
Post by morgy on Nov 17, 2018 19:07:54 GMT 1
I decided to have a go at repairing my old batter tank today.. Right hand side before 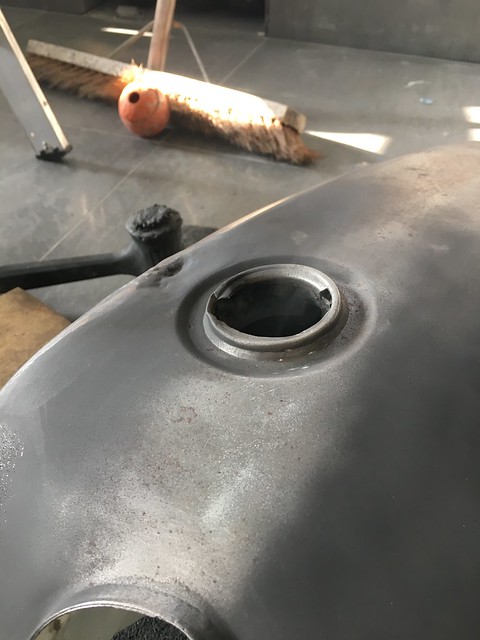 IMG_2237 IMG_2237 by mark.morgan07, on Flickr 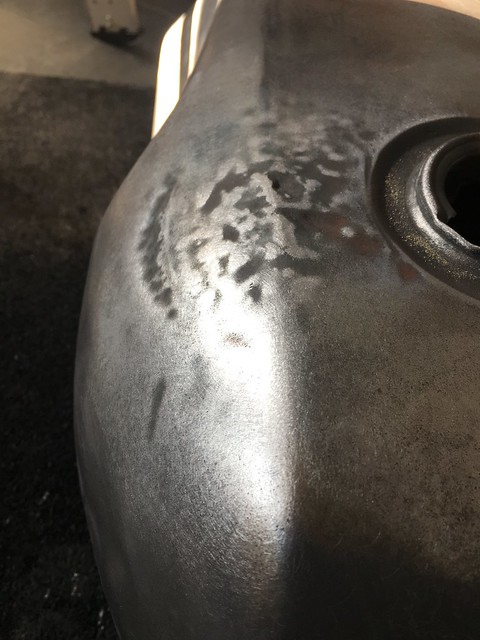 IMG_2239 IMG_2239 by mark.morgan07, on Flickr 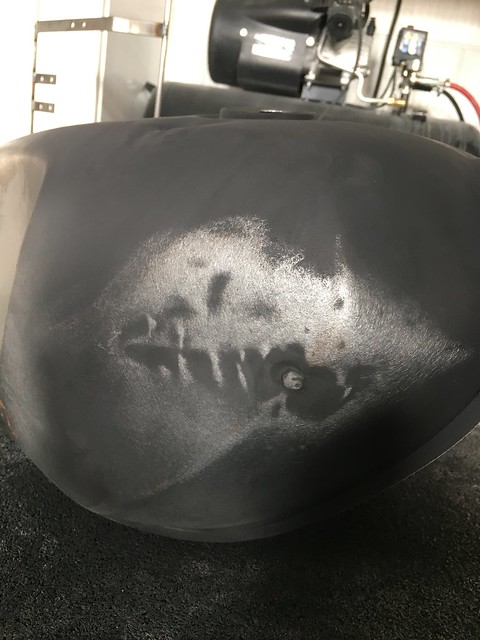 IMG_2232 IMG_2232 by mark.morgan07, on Flickr Not finished yet but getting there  IMG_2243 IMG_2243 by mark.morgan07, on Flickr 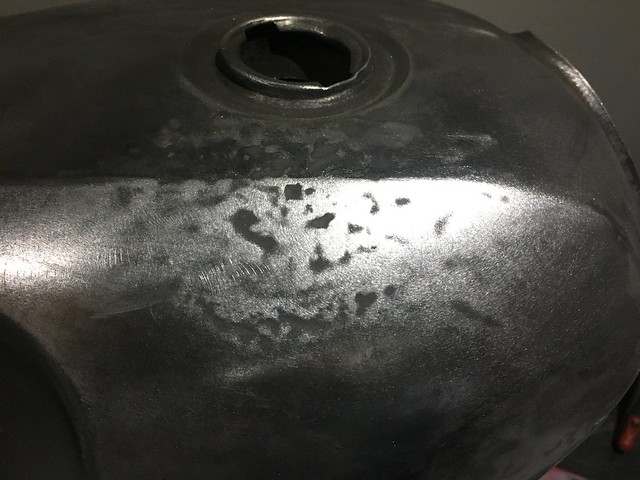 IMG_2246 IMG_2246 by mark.morgan07, on Flickr Left hand side before  IMG_2236 IMG_2236 by mark.morgan07, on Flickr 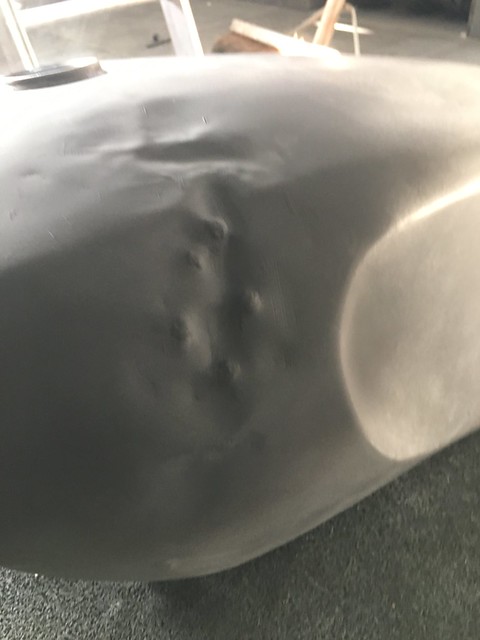 IMG_2235 IMG_2235 by mark.morgan07, on Flickr Half way there 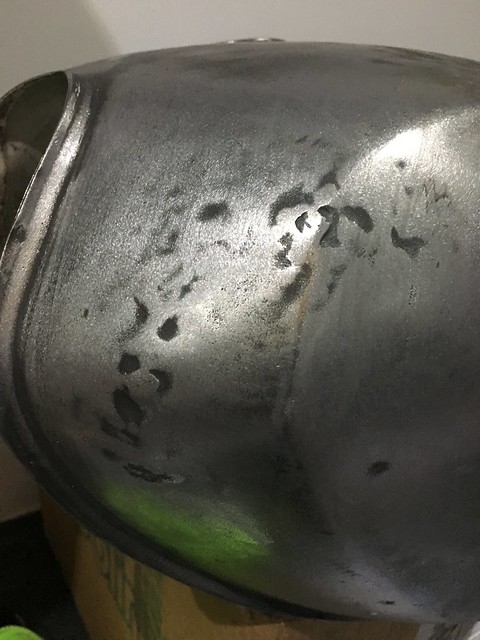 IMG_2247 IMG_2247 by mark.morgan07, on Flickr 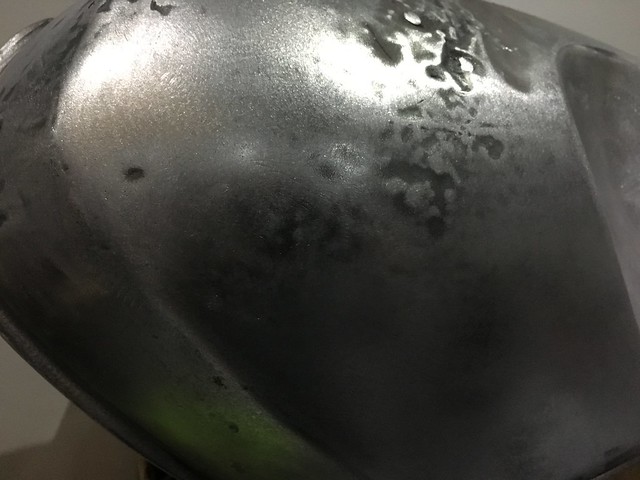 IMG_2248 IMG_2248 by mark.morgan07, on Flickr The top section still need allot of work 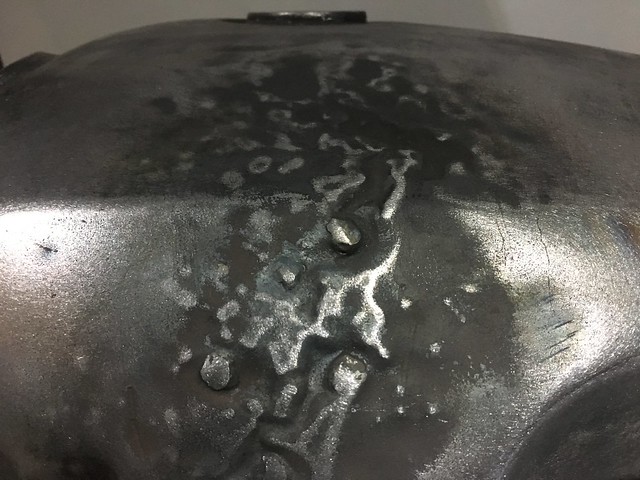 IMG_2249 IMG_2249 by mark.morgan07, on Flickr |
|
|
|
Post by morgy on Nov 18, 2018 11:14:08 GMT 1
A quick pic of the home made panel tools i made from an Old Paramotor engine crate i had laying around... 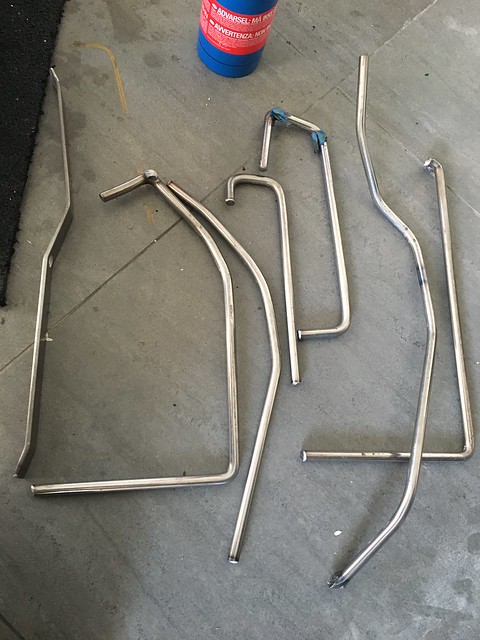 IMG_2253 IMG_2253 by mark.morgan07, on Flickr Each Dent or area had to have a tool made up to access the specific area 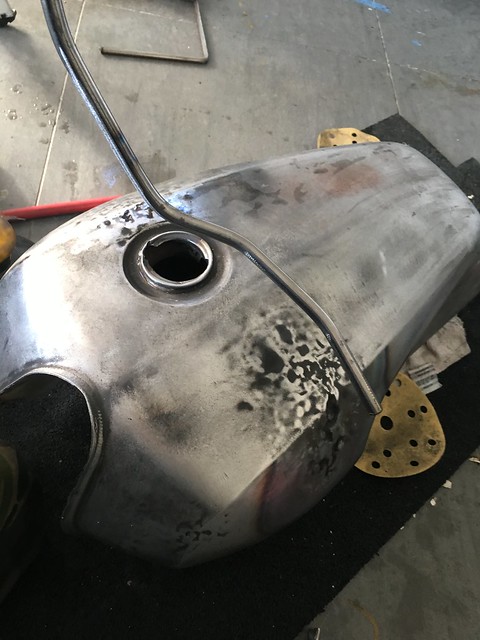 IMG_2254 IMG_2254 by mark.morgan07, on Flickr The Flat Z shaped tool i use as a flipper |
|
|
|
Post by mouse on Nov 18, 2018 13:12:29 GMT 1
What excellent results, well done!
Mouse
|
|
|
|
Post by morgy on Nov 18, 2018 15:55:05 GMT 1
Thanks Mouse... As i have now run out of Gas and also burst one of the previous welds that will not have to be re welded i've decided to call i quits... The main shape is back into the tank but will still need a thin skim of filler rather than a bucket load.. 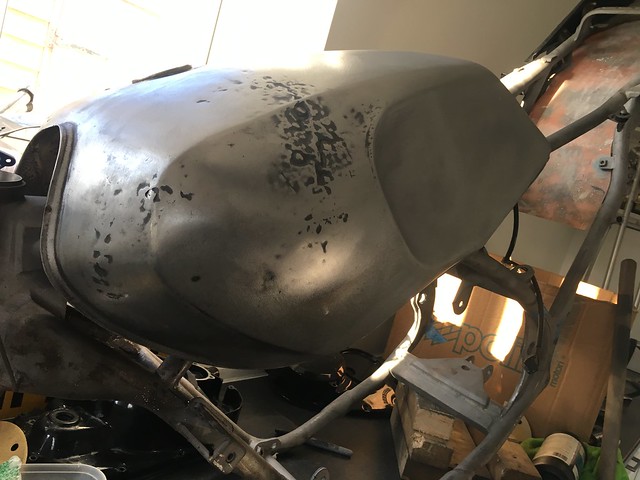 IMG_2261 IMG_2261 by mark.morgan07, on Flickr 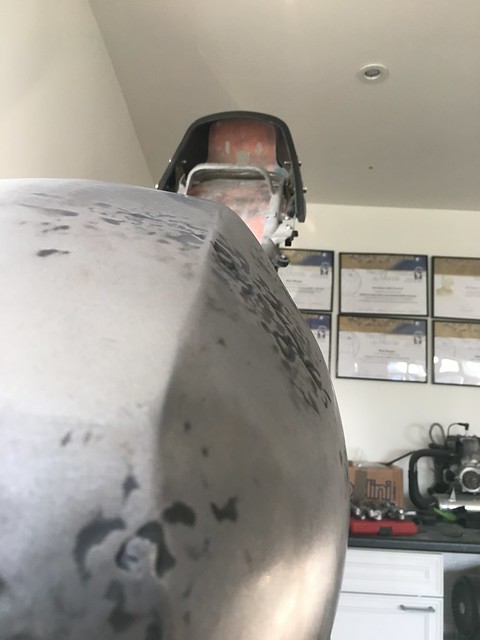 IMG_2258 IMG_2258 by mark.morgan07, on Flickr I was planning to file finish it until i looked at the price of a body file!!! I Really wish i had kept all my old Panel beating tools!!!!!!! |
|
|
|
Post by morgy on Nov 23, 2018 12:12:08 GMT 1
|
|
|
|
Post by morgy on Nov 23, 2018 16:28:16 GMT 1
|
|
|
|
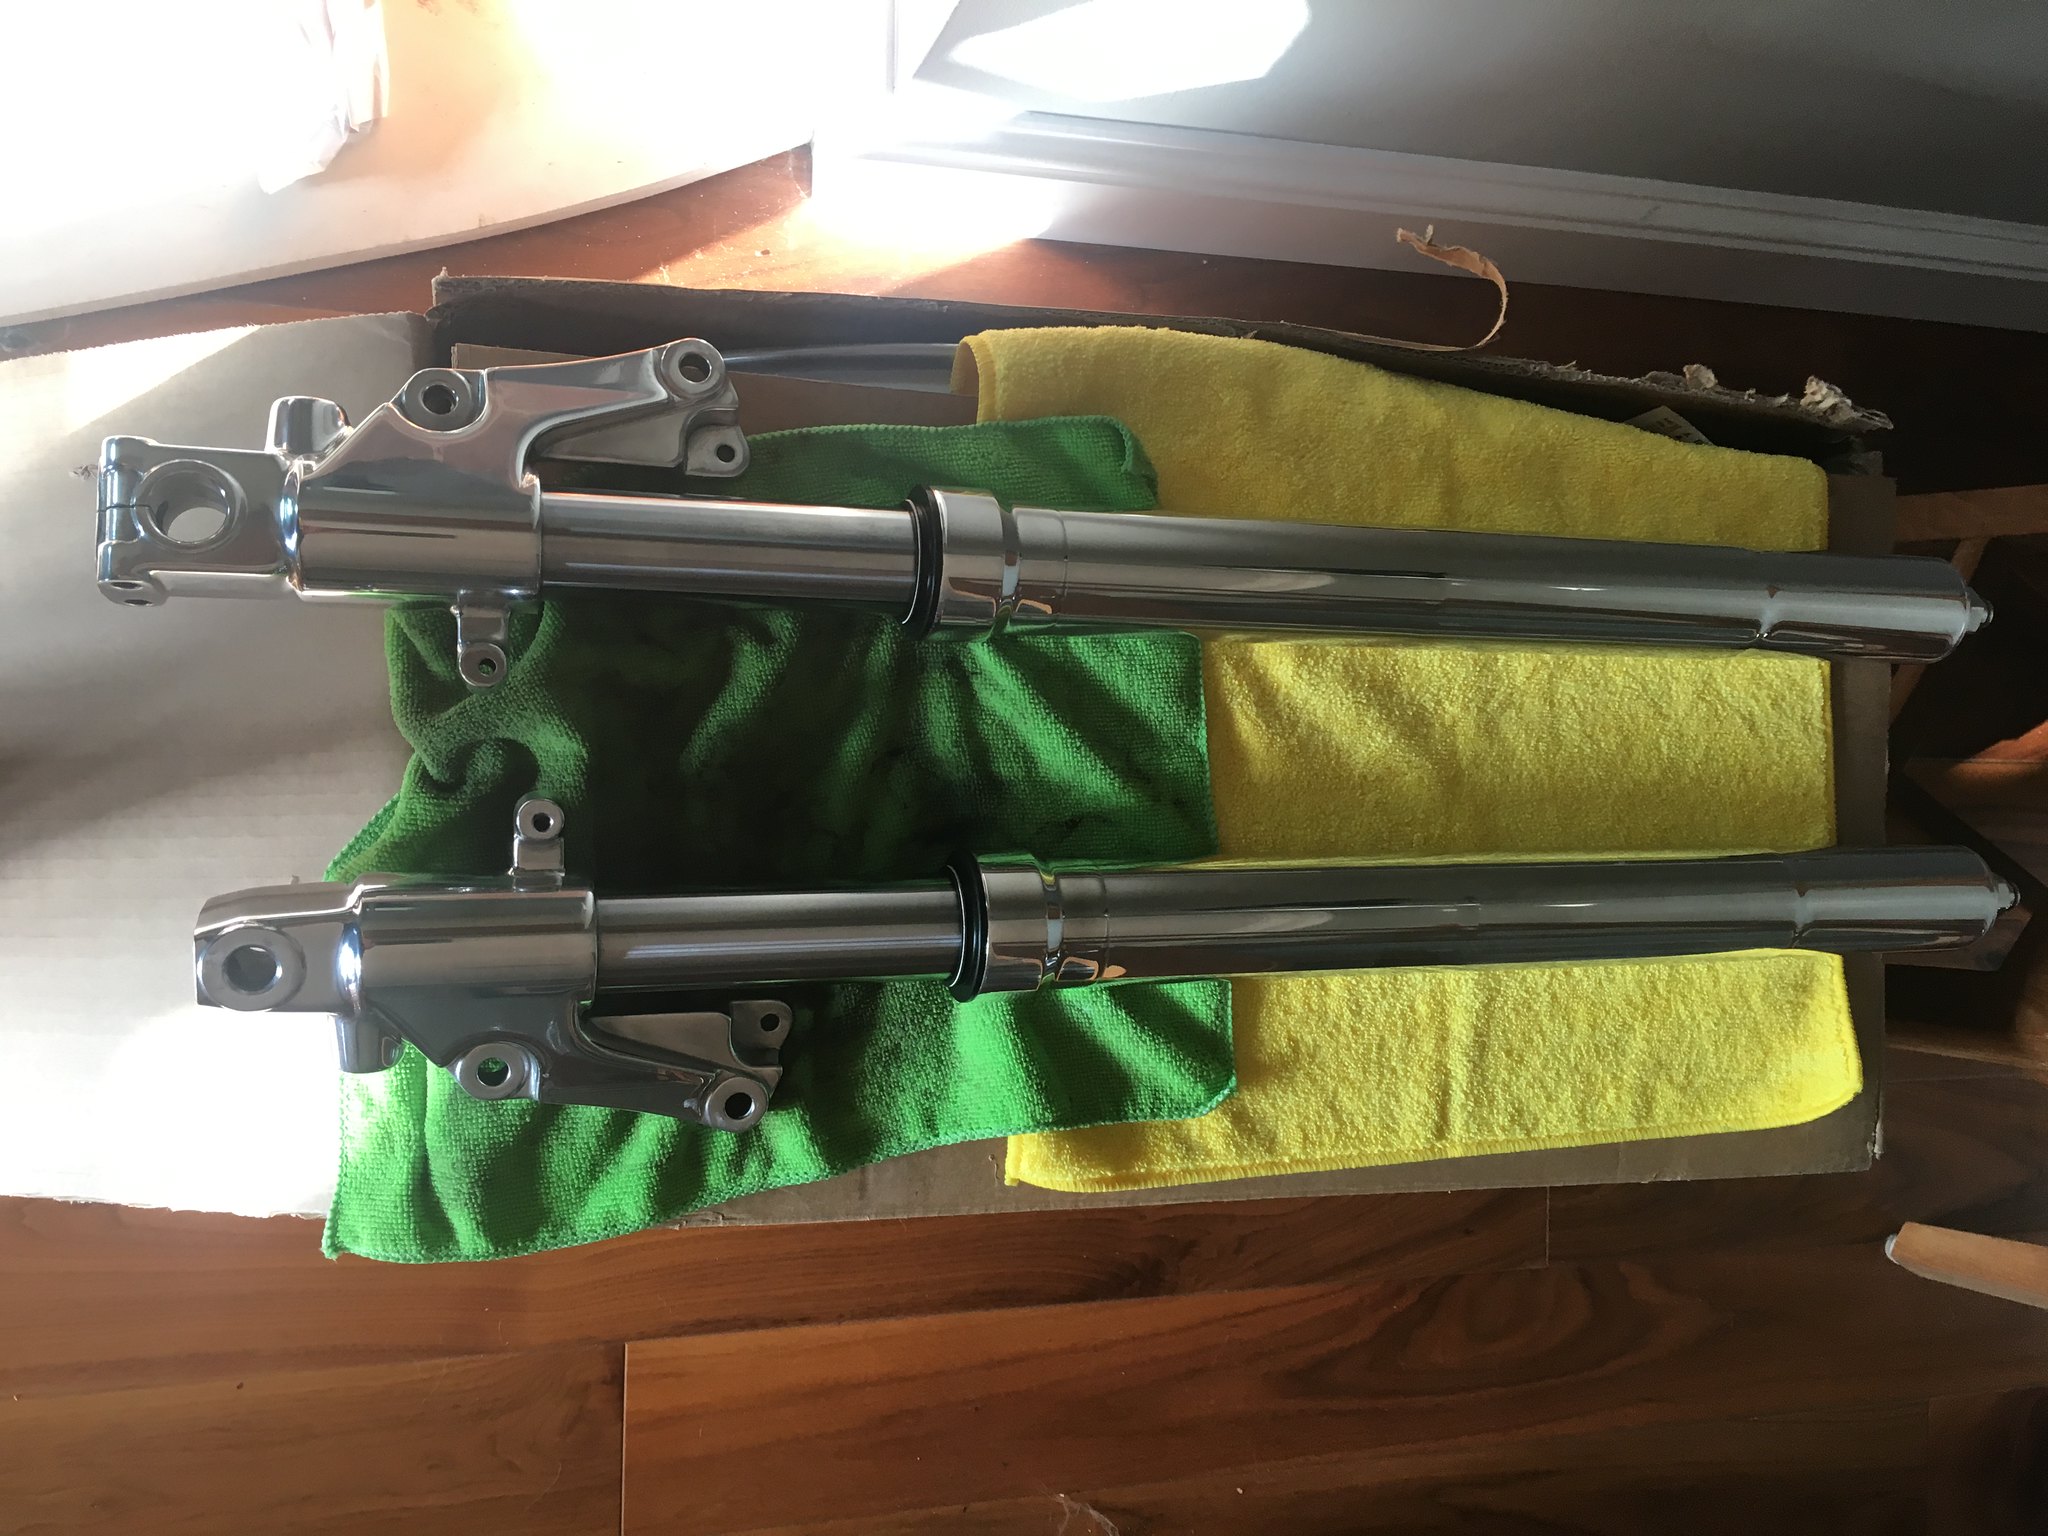
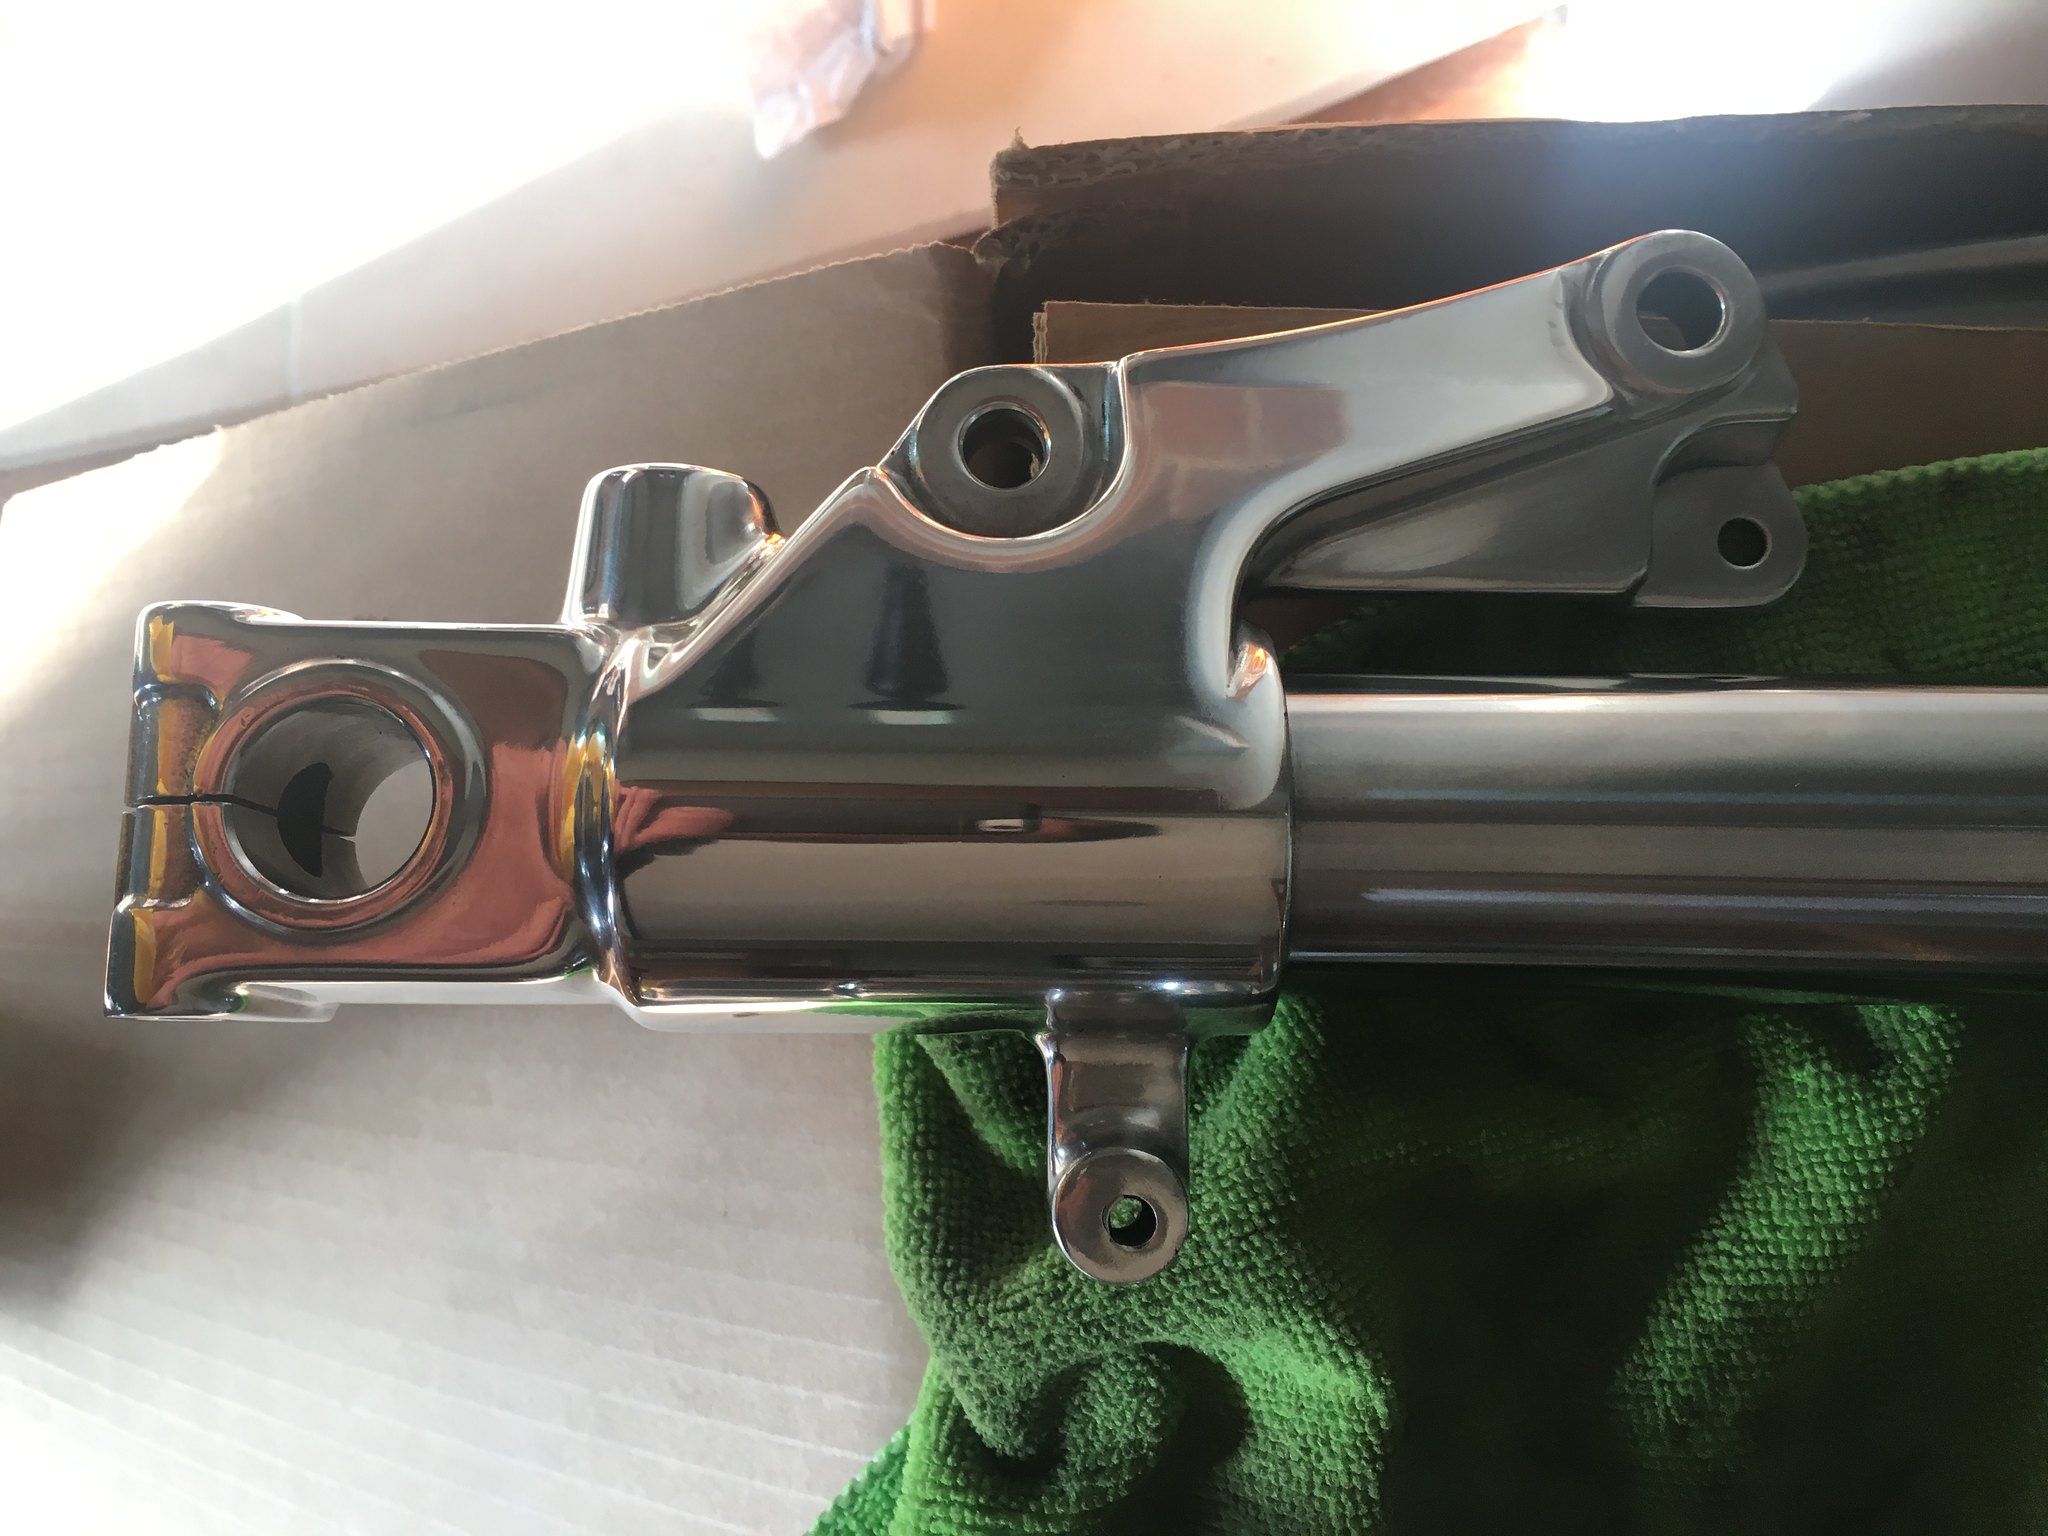
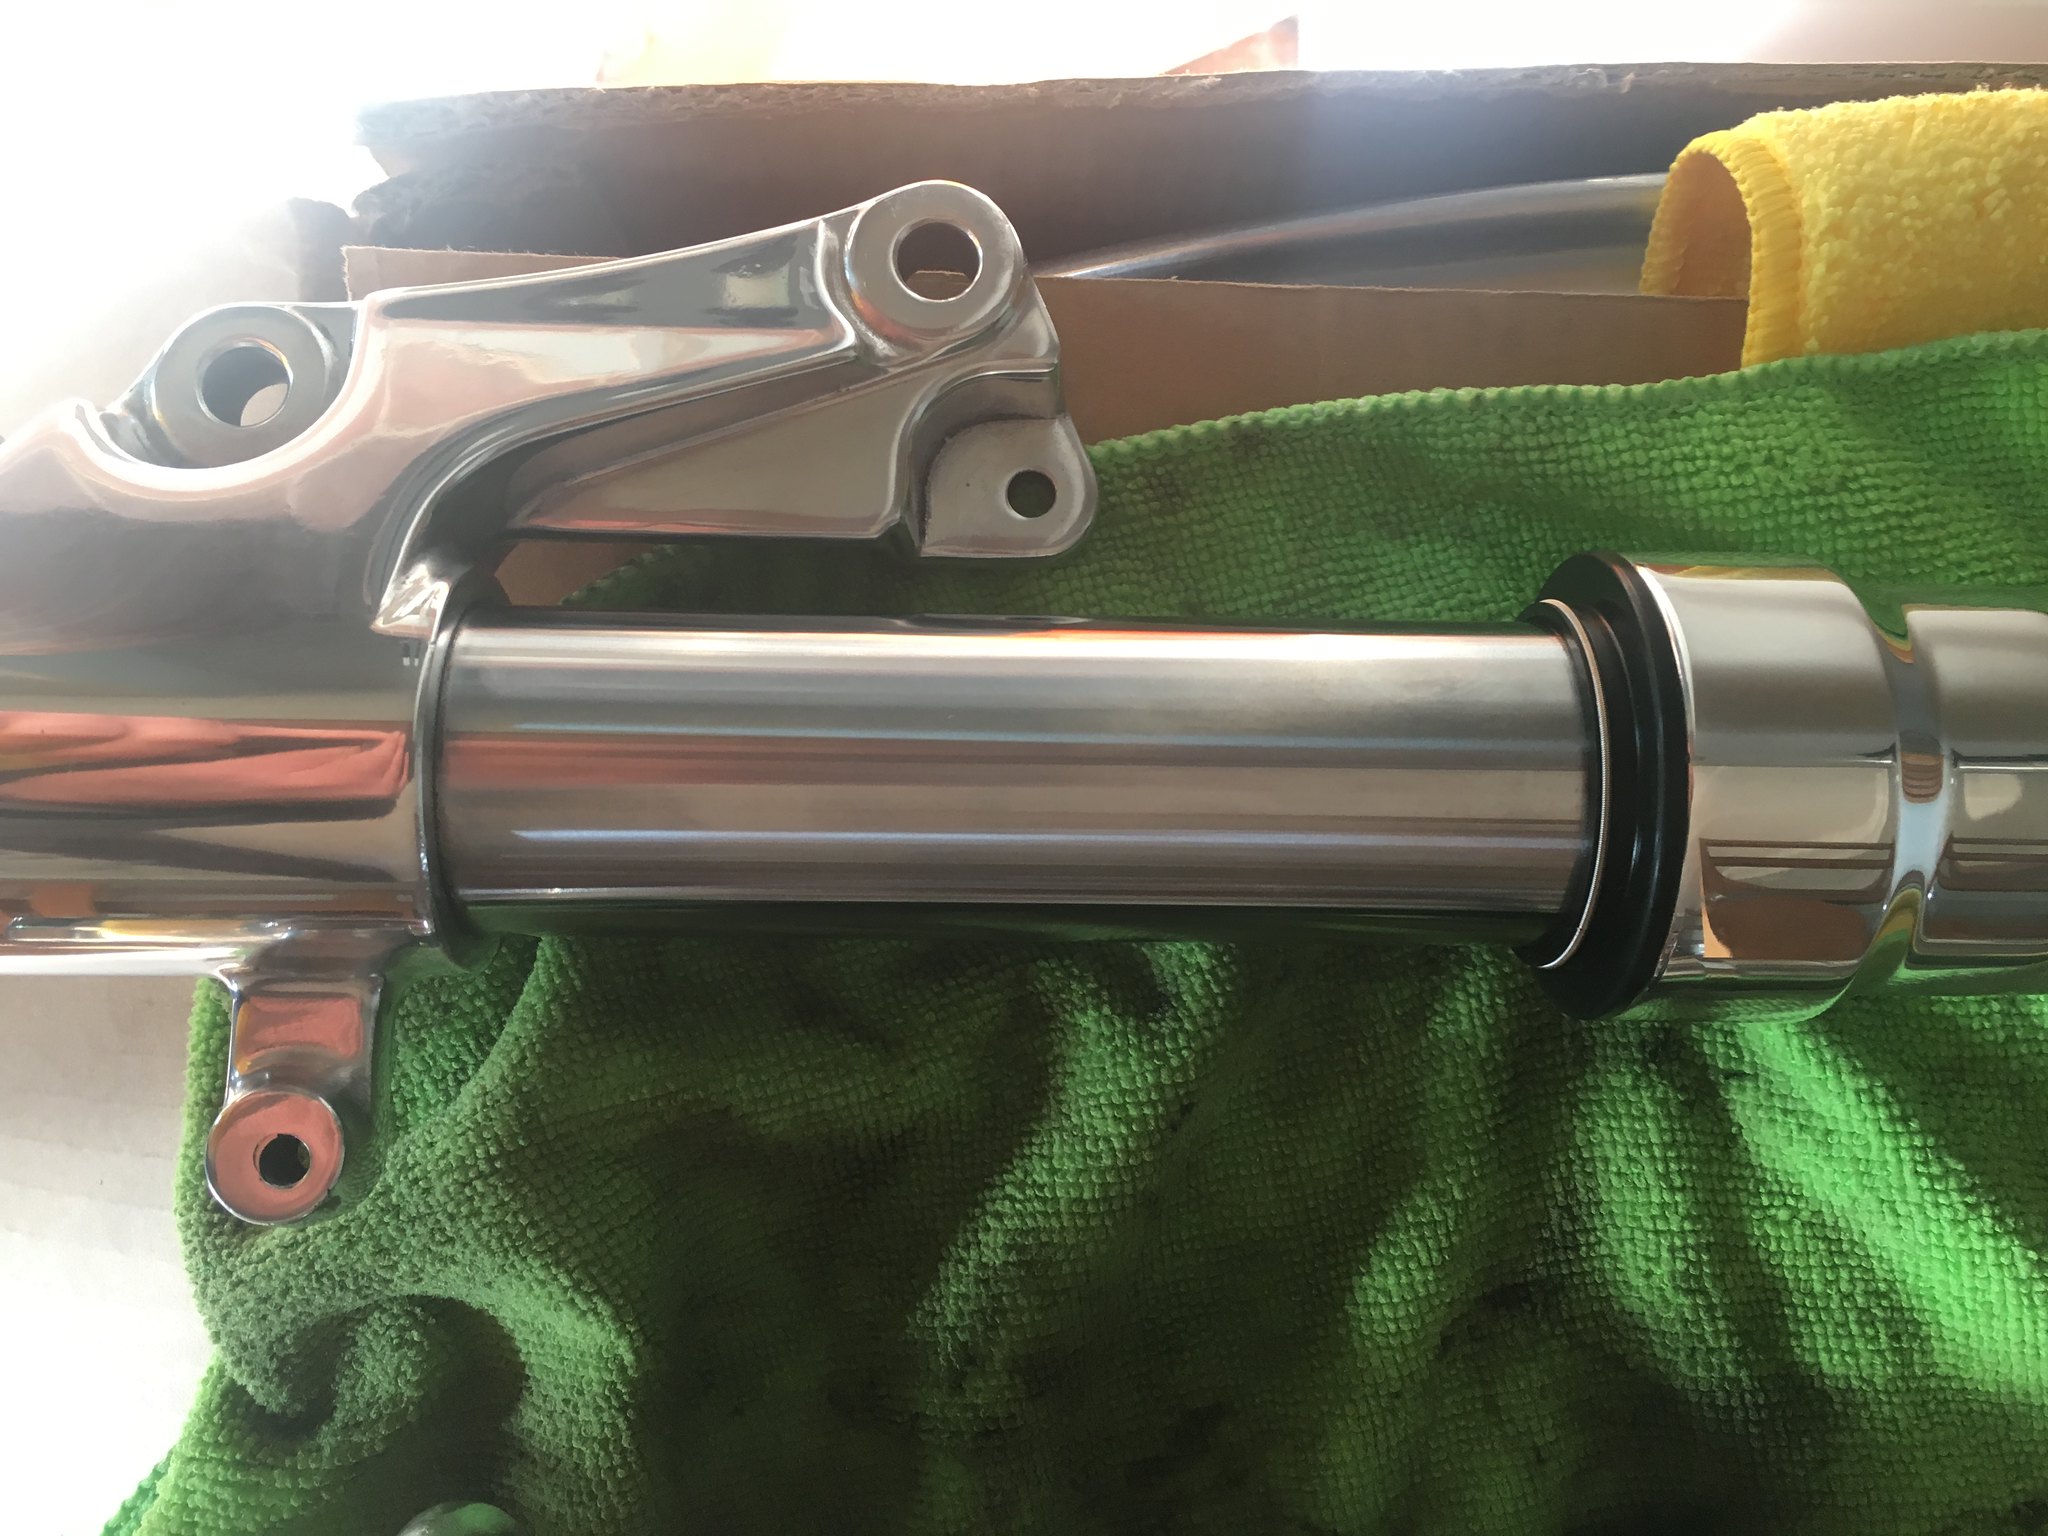
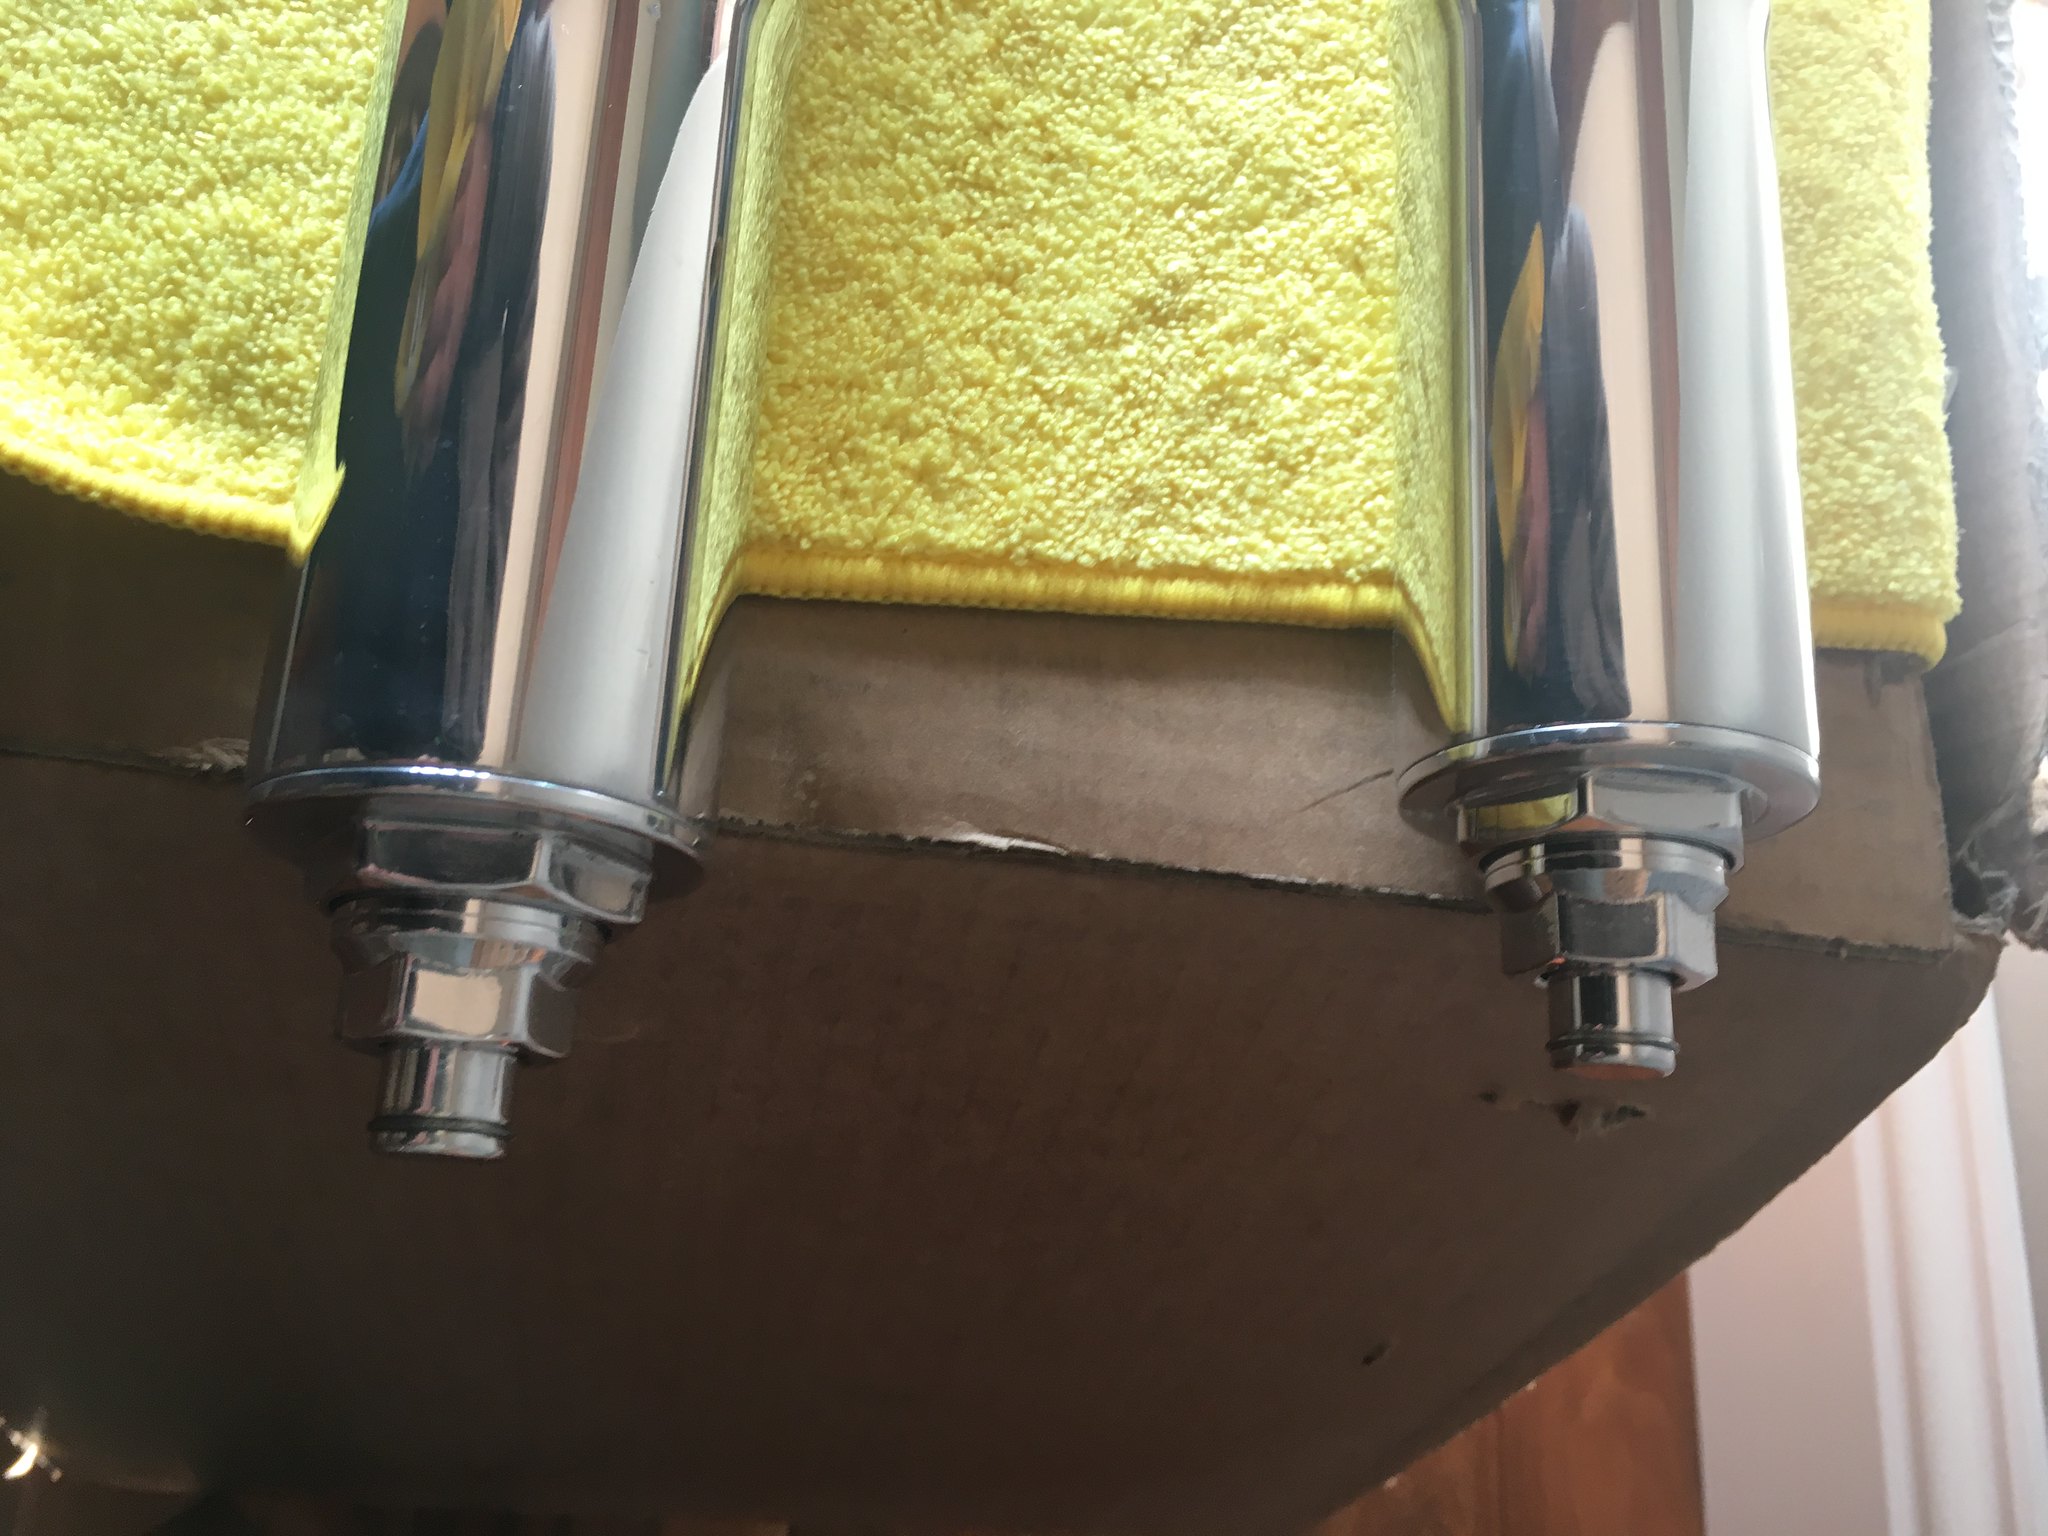
Post by Yogi on Nov 23, 2018 17:04:12 GMT 1
Loving the forks mate,,bet they cost a pretty penny  Nice panel beating skills on the tank too  Keep it up Matt |
|
|
|
Post by dave1963 on Nov 23, 2018 17:22:52 GMT 1
Hi morgy how much were the forks to be done was it a long wait.
I need to get my gsxr400 ones done as can't fined replacement legs anywhere
Thanks dave
|
|
|
|
Post by morgy on Nov 23, 2018 18:40:46 GMT 1
When you say Done you mean the Stanchions? The Hard Chrome was £280 they Quoted 8 weeks but i think it was closer to 12-14 as they had to do them 2-3 times due to imperfections when Grinding so they claimed... To be honest they didn't really need doing but...
I used A M Philpots
|
|
|
|
Post by oldbritguy on Nov 23, 2018 18:52:57 GMT 1
Looking absolutely brilliant buddy.
I love polished ally bits!
Amazing job on the tank too. You must be well pleased so far!
|
|
|
|
Post by jon on Nov 23, 2018 19:14:23 GMT 1
When you say Done you mean the Stanchions? The Hard Chrome was £280 they Quoted 8 weeks but i think it was closer to 12-14 as they had to do them 2-3 times due to imperfections when Grinding so they claimed... To be honest they didn't really need doing but... I used A M Philpots Had exactly the same story with my YPVS forks from Philpotts. Did a good job in the end, so not too disappointed. Jon |
|
|
|
Post by morgy on Nov 23, 2018 19:40:28 GMT 1
Looking absolutely brilliant buddy. I love polished ally bits! Amazing job on the tank too. You must be well pleased so far! Thanks... I love a bit of polished ally too!! I just hope i don't over do it!  I am pleased.... BUT i know it could have been better if the previous repairer hadn't tried the weld on pull out technique... I just need to try the Electrolysis route to remove any rust and old Tank sealant left inside the tank. |
|
|
|
Post by morgy on Nov 23, 2018 19:41:52 GMT 1
When you say Done you mean the Stanchions? The Hard Chrome was £280 they Quoted 8 weeks but i think it was closer to 12-14 as they had to do them 2-3 times due to imperfections when Grinding so they claimed... To be honest they didn't really need doing but... I used A M Philpots Had exactly the same story with my YPVS forks from Philpotts. Did a good job in the end, so not too disappointed. Jon It's all about the end product!!! At least they didn't just try and blagg it and send them out not right... |
|
|
|
Post by midlifecrisisrd on Nov 23, 2018 21:19:03 GMT 1
|
|
|
|
Post by dave1963 on Nov 23, 2018 22:35:07 GMT 1
Saw those but want some without pitting |
|
|
|
Post by morgy on Nov 24, 2018 15:58:00 GMT 1
|
|
|
|
Post by morgy on Nov 24, 2018 15:59:28 GMT 1
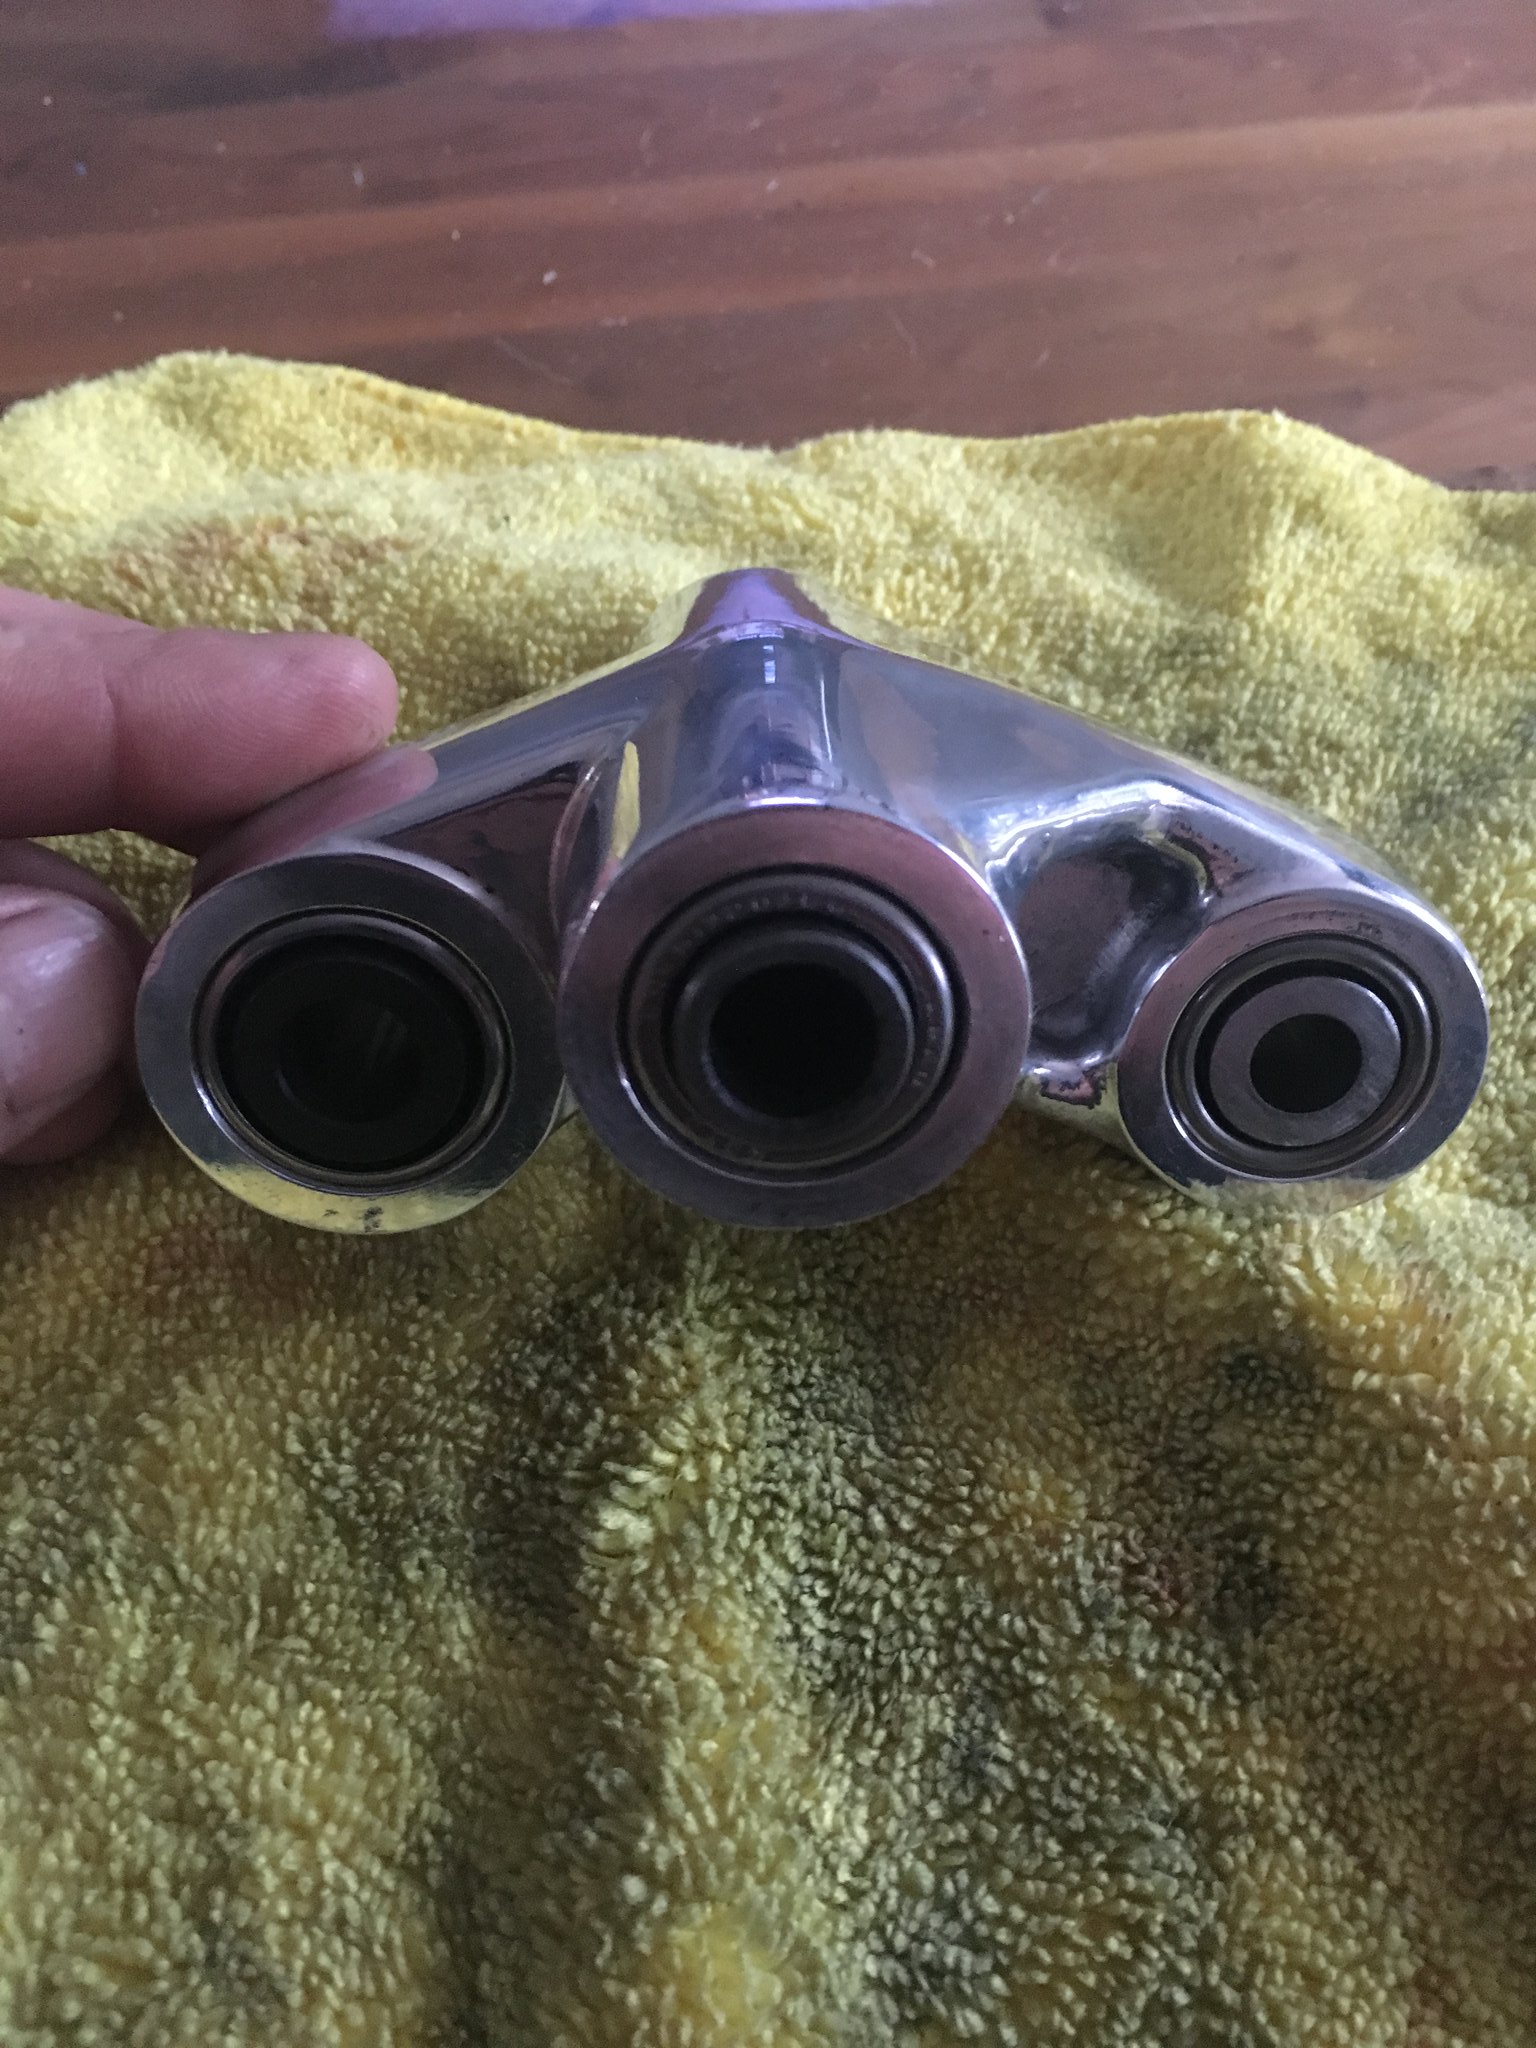
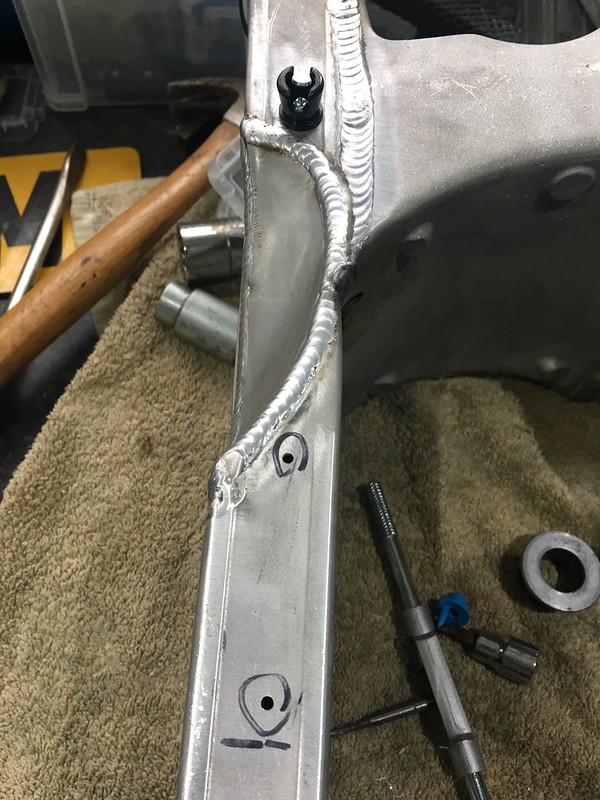
Now to get the old bearings fitted back in.. Rear brake system mocked up then finally i can send the frame off to be welded...
|
|
|
|
Post by morgy on Nov 25, 2018 16:20:57 GMT 1
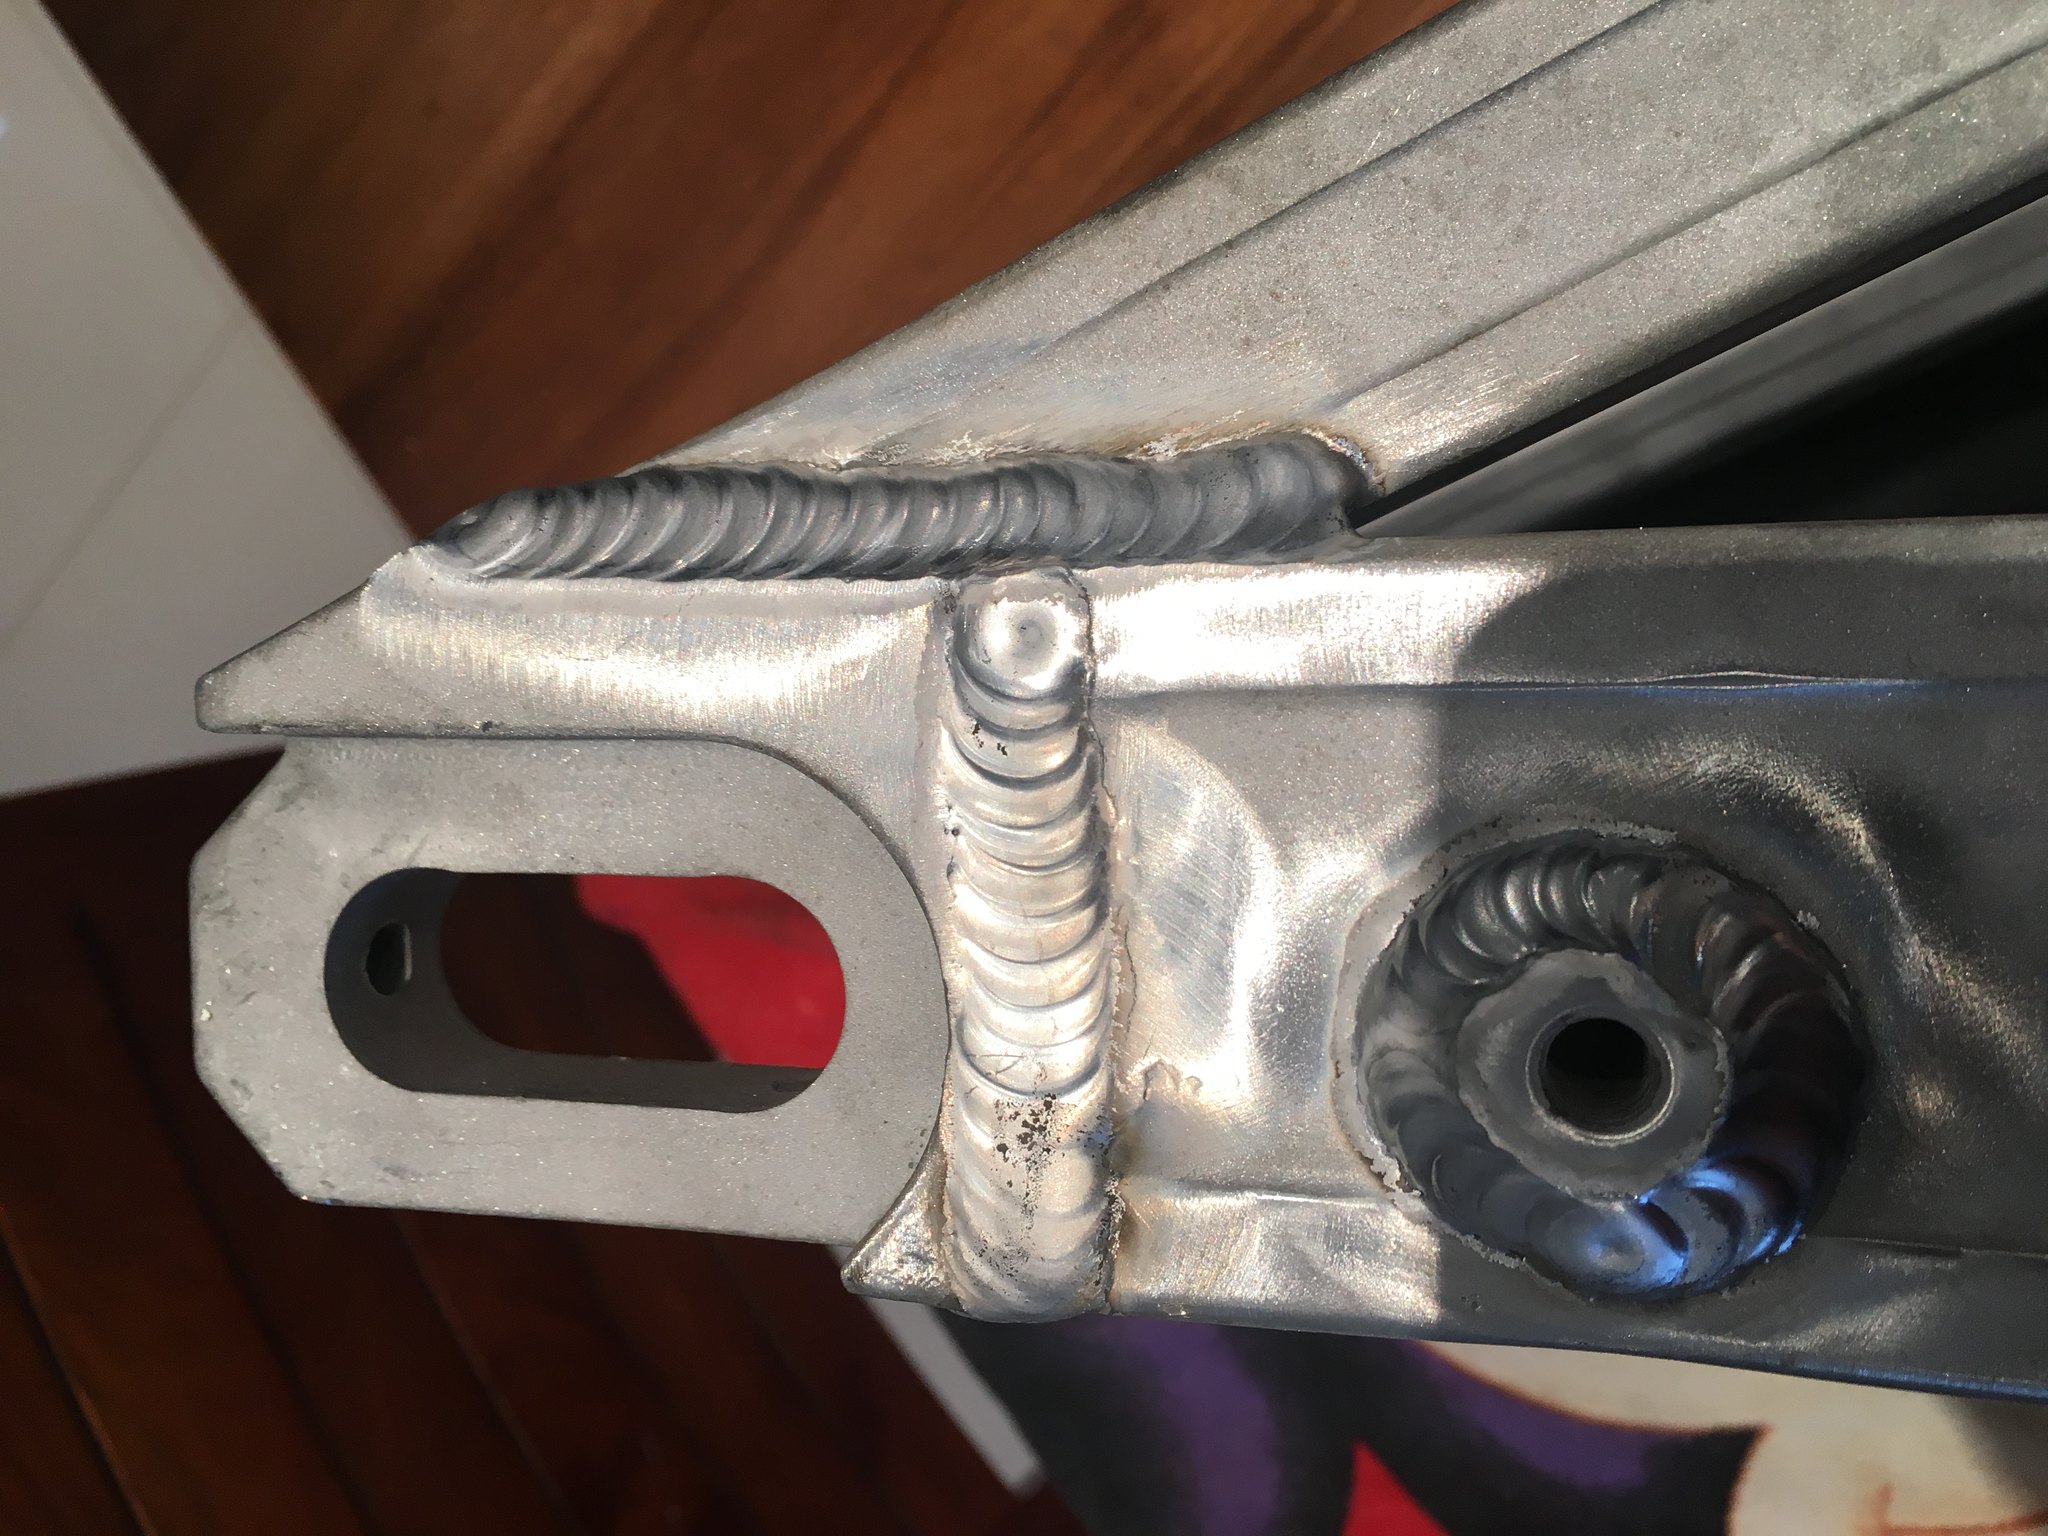
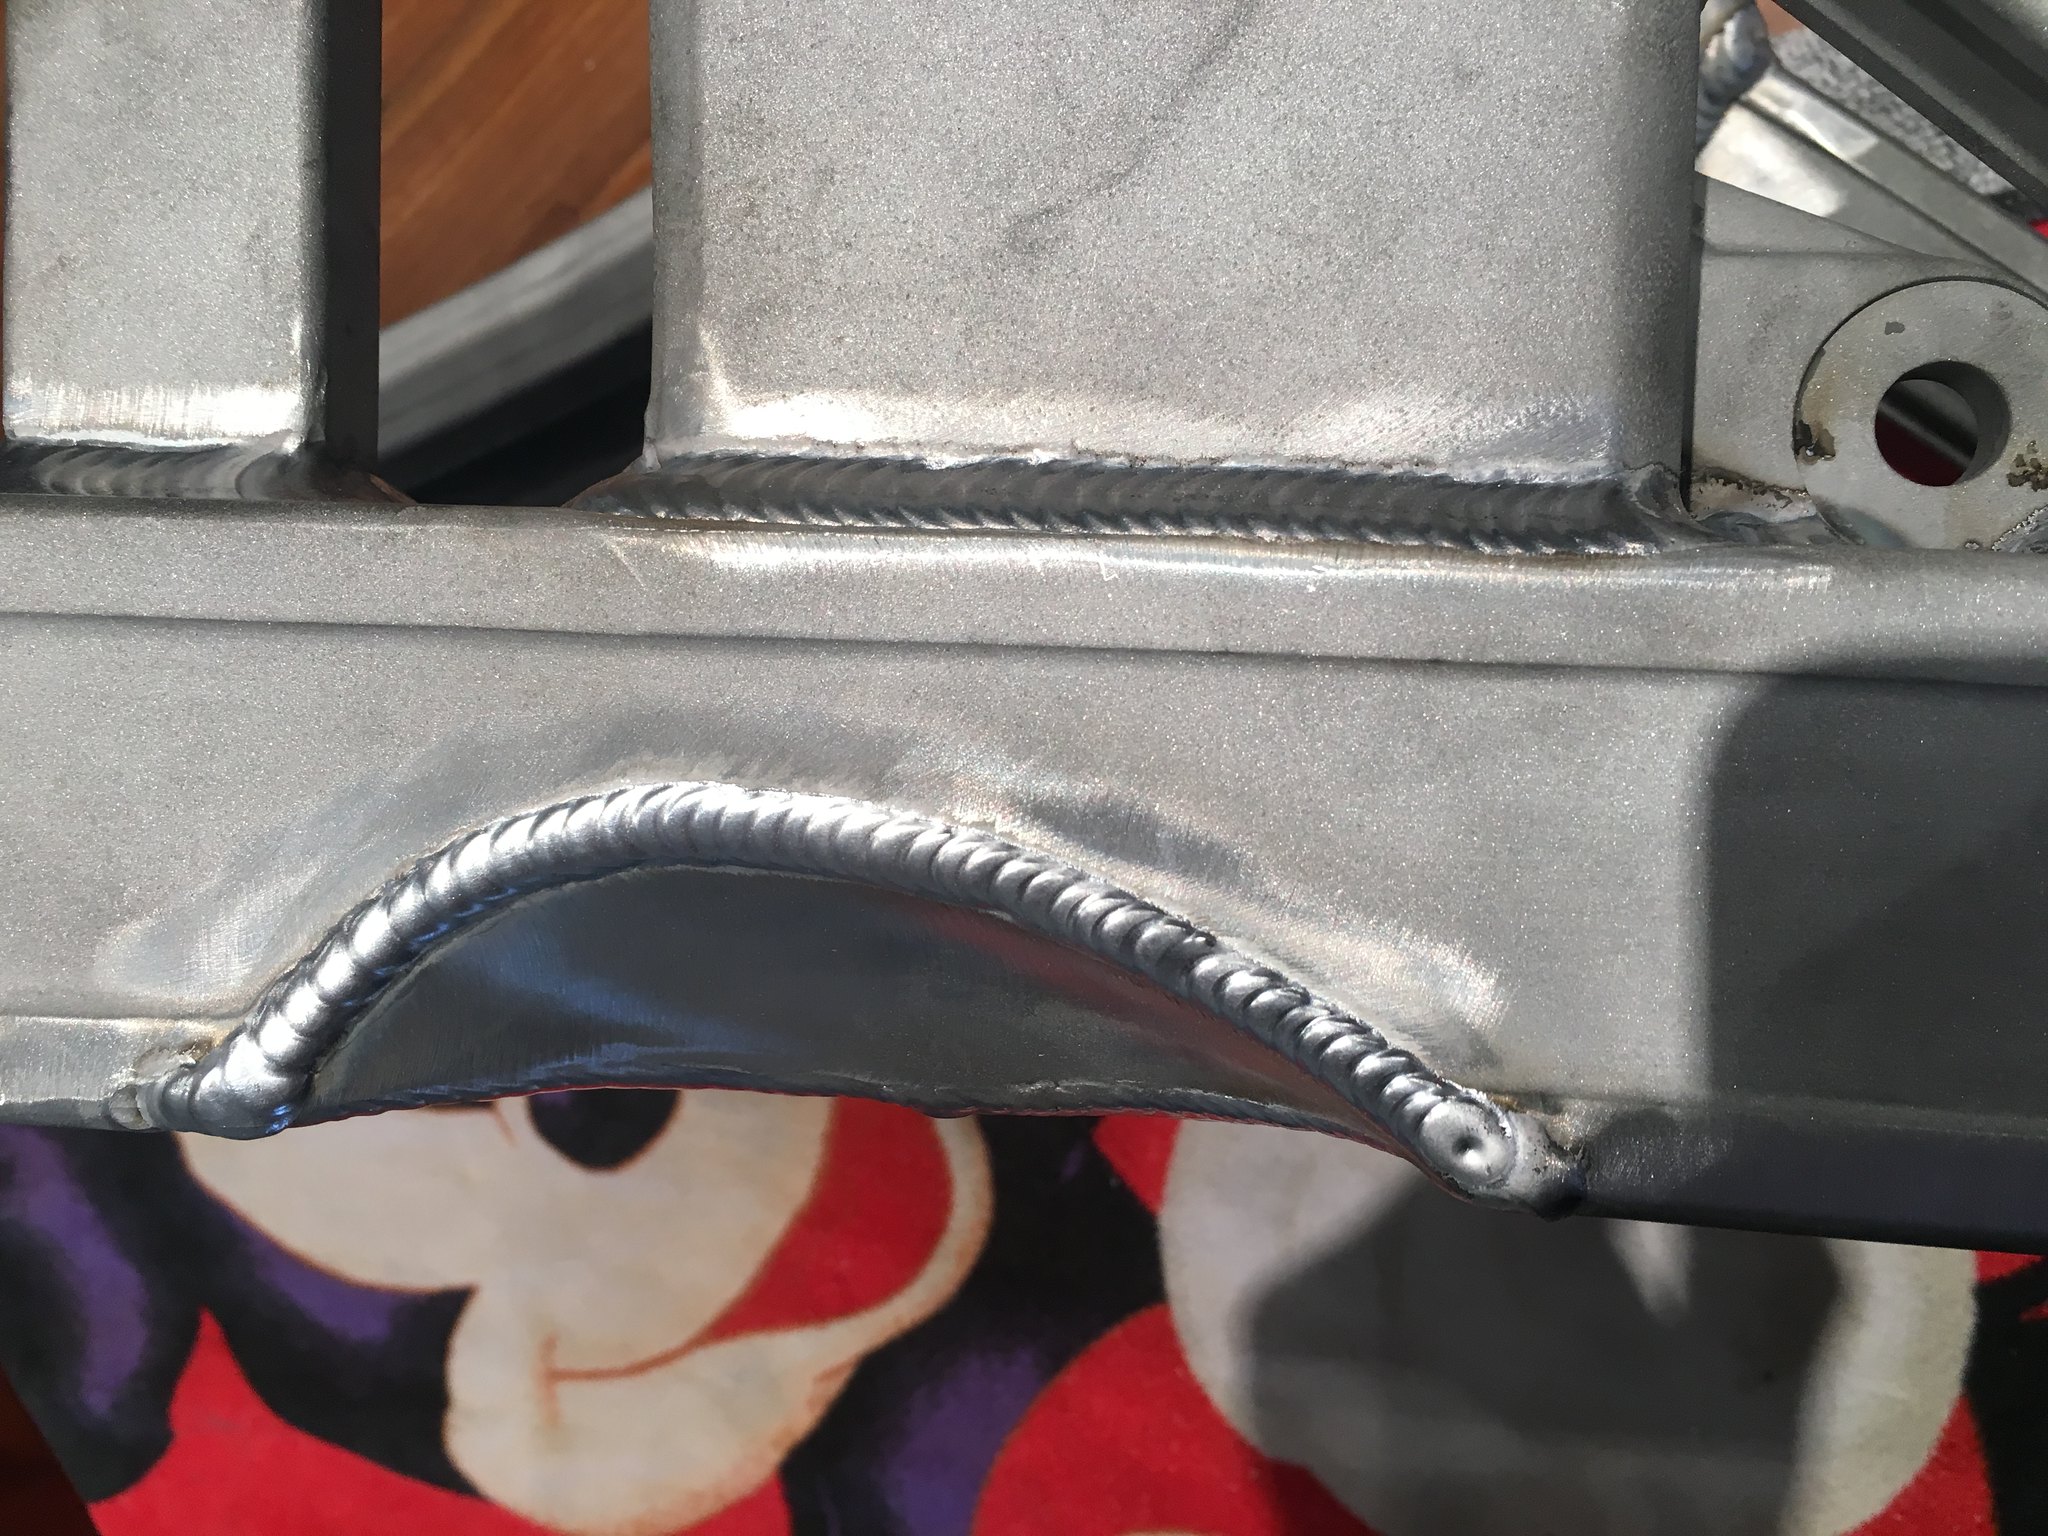
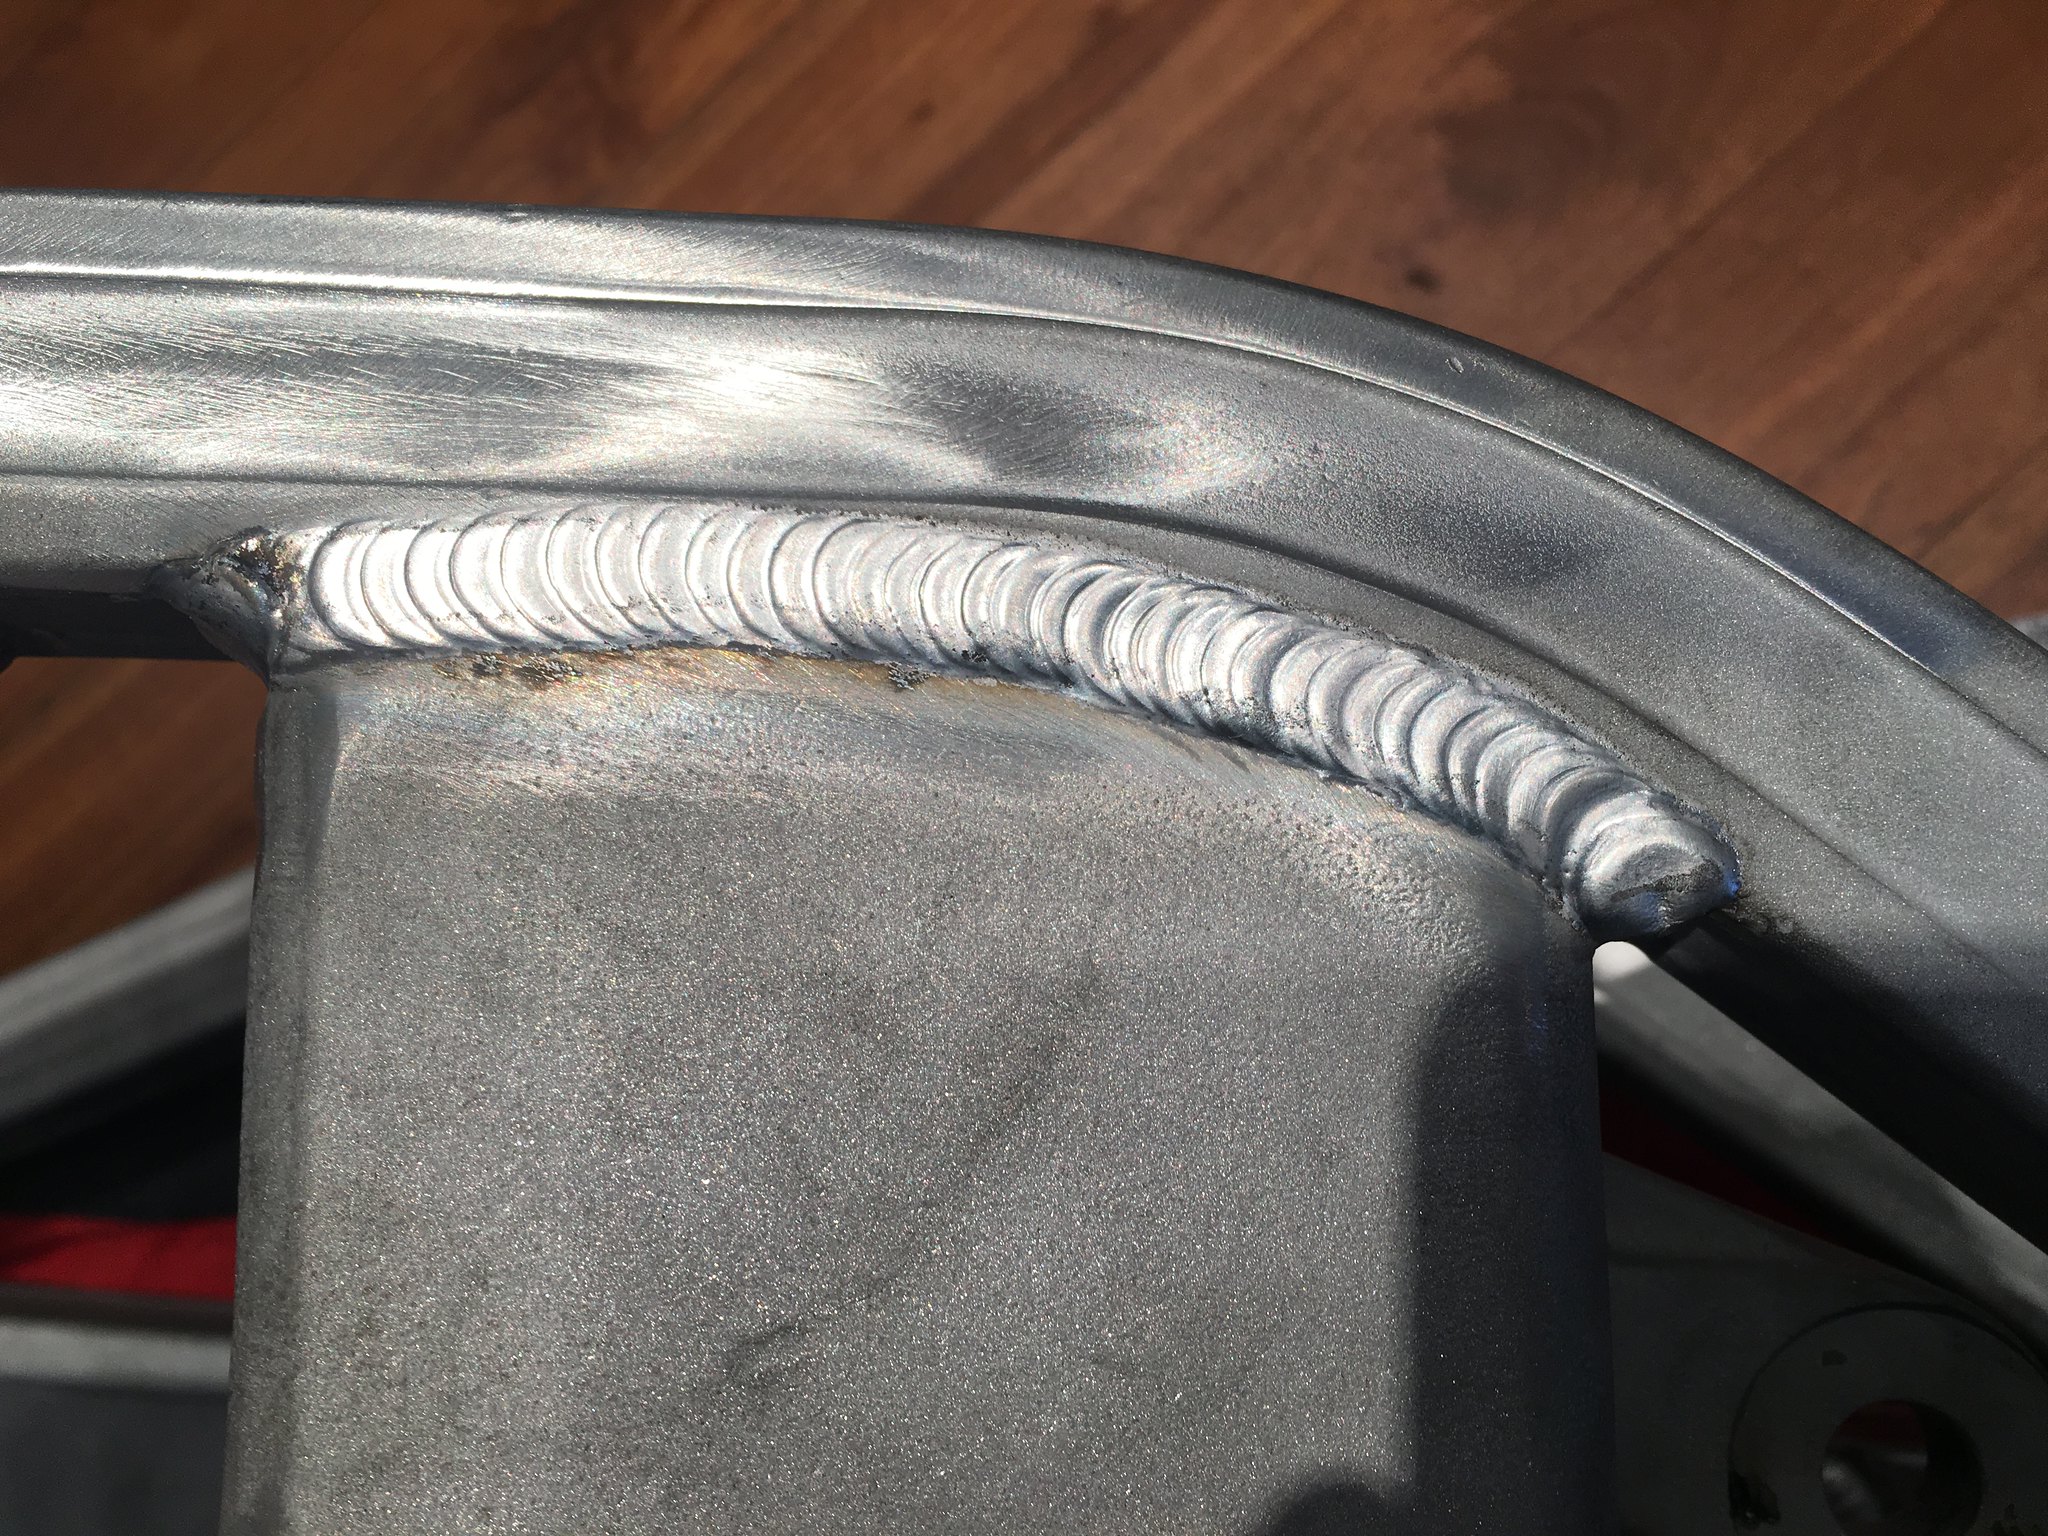
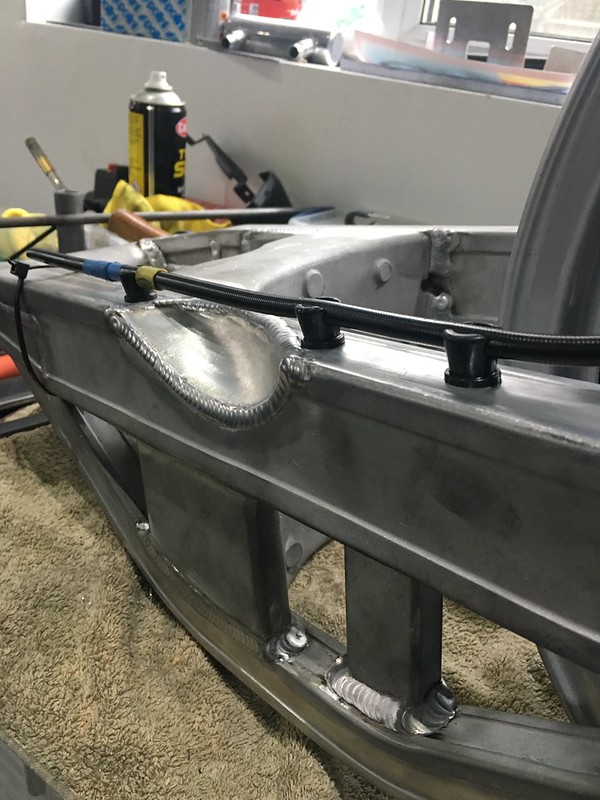
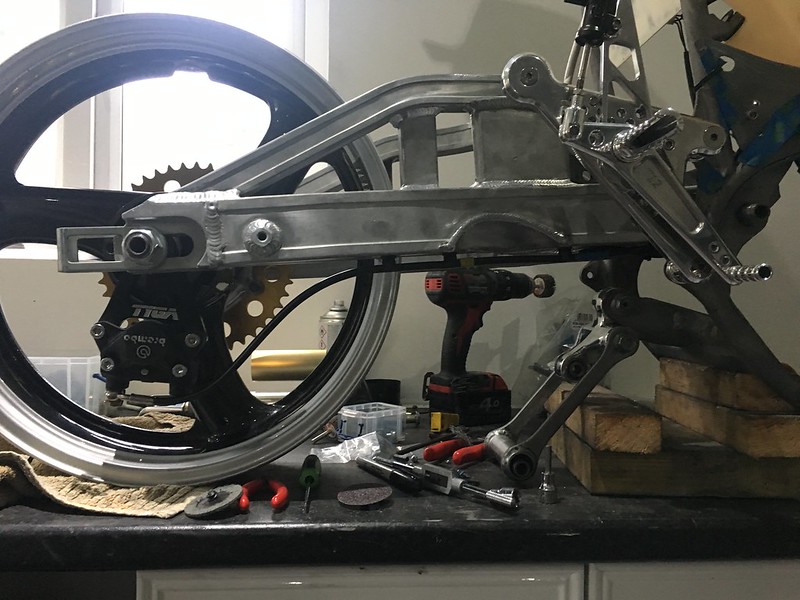
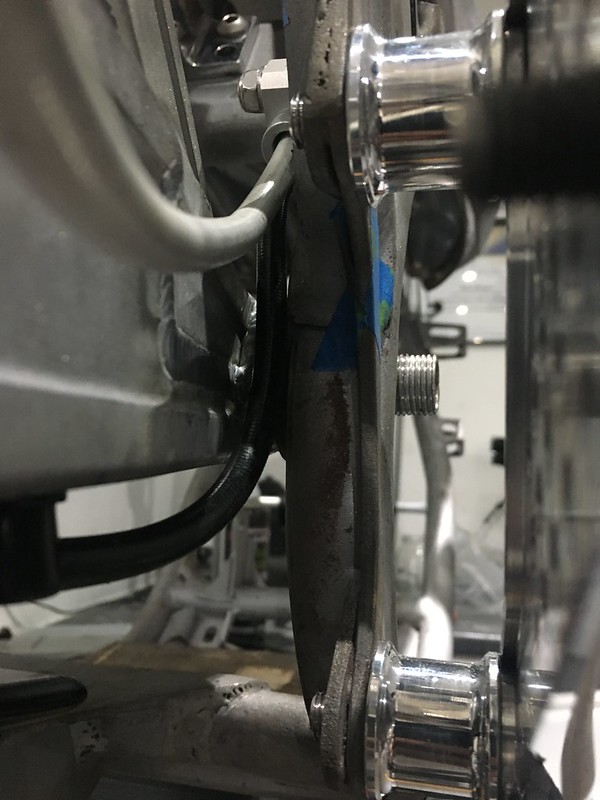
A quick install of the rear swing arm so i could mock up the rear brake system and make sure the new caliper bracket and Brembo Caliper were all fitting as they should, I want if possible to hide as much as possible keeping everything nice and neat.. All the Rear Brake lines are fitted and in place.. Cable ties for quick fitting but will be removed and replaced with something else... 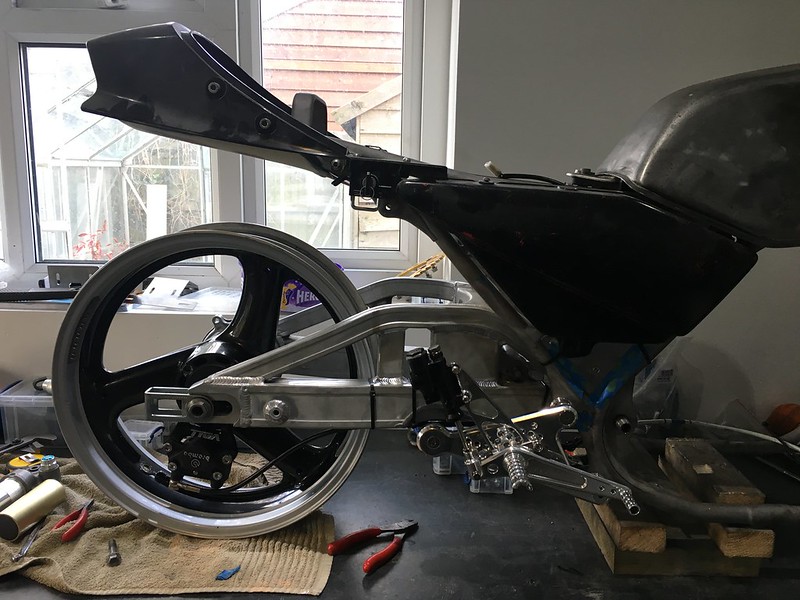 IMG_2319 IMG_2319 by mark.morgan07, on Flickr 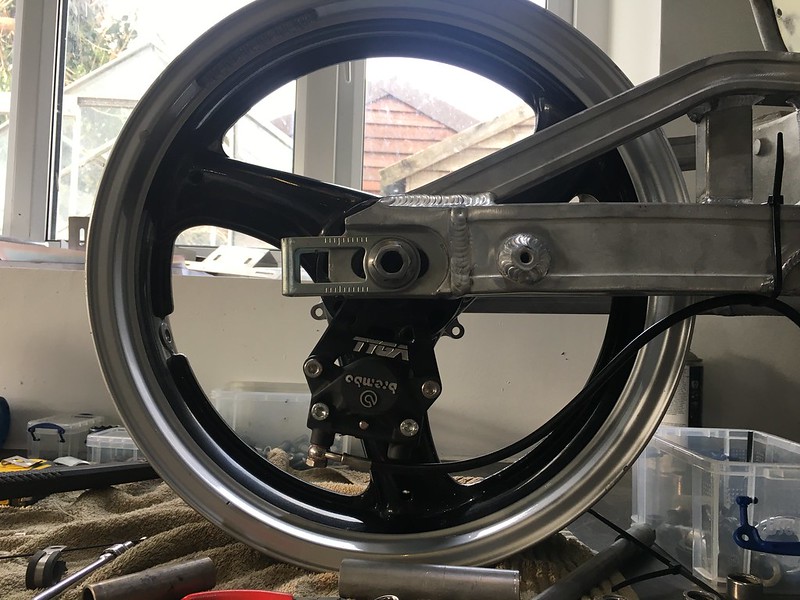 IMG_2299 IMG_2299 by mark.morgan07, on Flickr 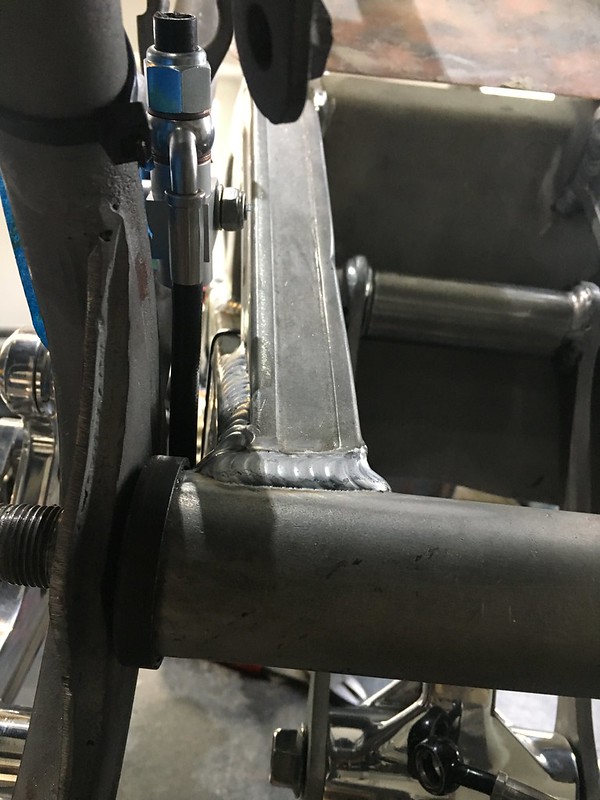 IMG_2318 IMG_2318 by mark.morgan07, on Flickr At the moment the Brake union is bolted through the plate but i plan to have the bolt welded to the plate so the outside can be made flush 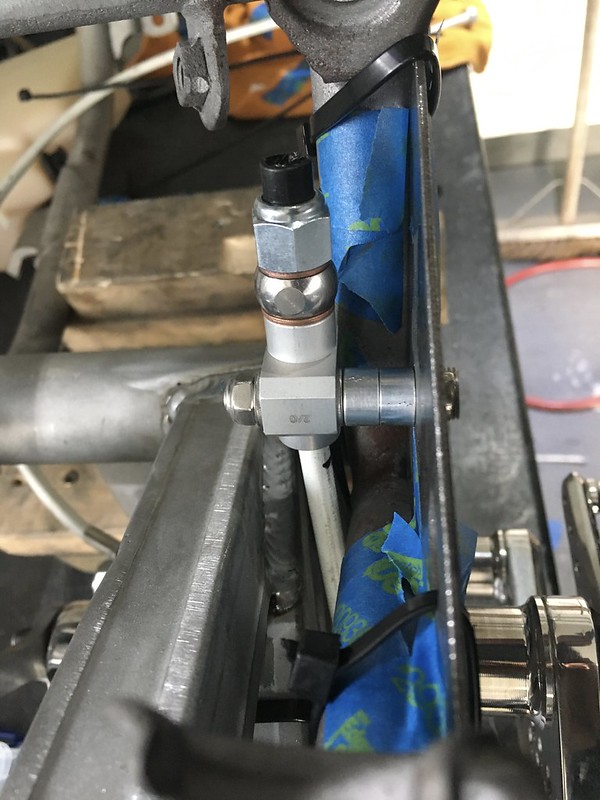 fullsizeoutput_e1 fullsizeoutput_e1 by mark.morgan07, on Flickr The Only thing i am unsure about is the routing under the swing arm and by the pivot point, I have added a small bend in the pipe to allow for some movement/suspension travel and the two way Brake union should be able to pivot on the bolt once i have the correct spacers made up to allow for any angle changes in the pipe.. 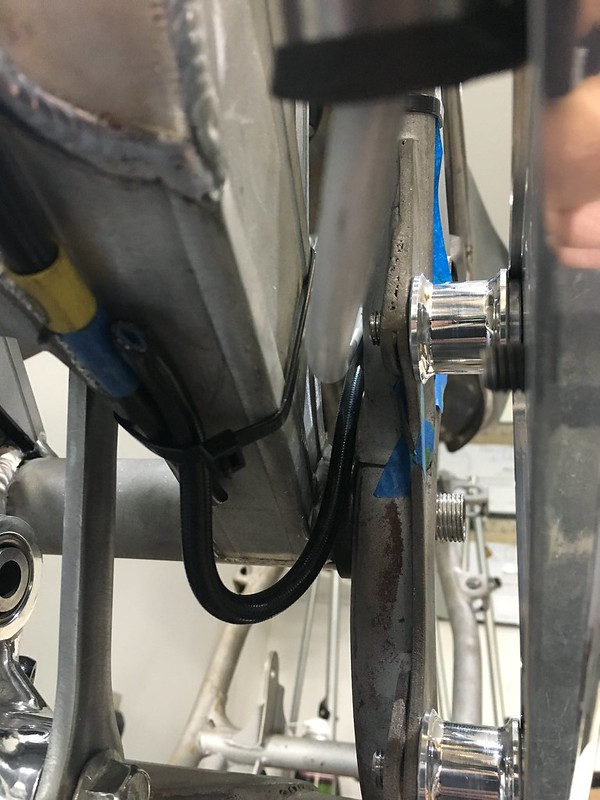 IMG_2308 IMG_2308 by mark.morgan07, on Flickr  IMG_2303 IMG_2303 by mark.morgan07, on Flickr I have had the wheel pushed all the way in and all the way out on the adjuster to make sure the pipe would flex/move when i need to adjust the chain.. |
|
|
|
Post by morgy on Dec 2, 2018 8:54:34 GMT 1
|
|
|
|
Post by dusty350 on Dec 2, 2018 11:19:10 GMT 1
Looks nice and neat like that Dusty  |
|
|
|
Post by morgy on Dec 2, 2018 15:26:26 GMT 1
Looks nice and neat like that Dusty Thanks Dusty... |
|
|
|
Post by morgy on Dec 2, 2018 15:31:20 GMT 1
I Ordered some Carbon Sheets the Other day and had some time today so make up the little infill panels for my Rearsets.. There are a few minor scratches from the dust of the carbon and from offering the infill panels on and off ALLOT!! Another quick polish and there should be good as new again 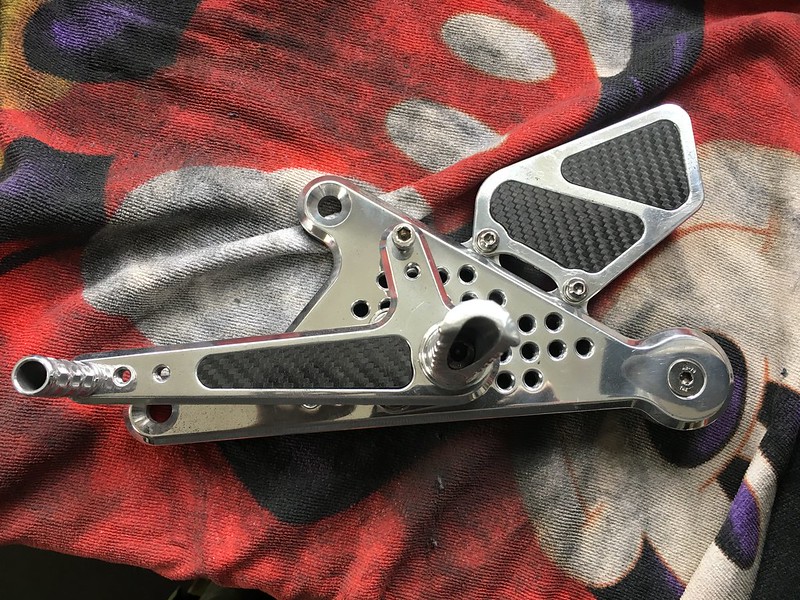 IMG_2347 IMG_2347 by mark.morgan07, on Flickr 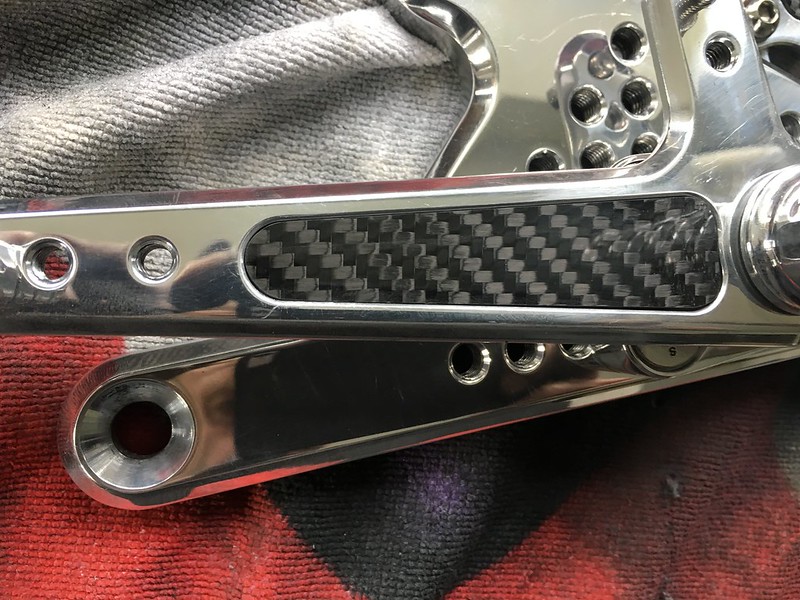 IMG_2349 IMG_2349 by mark.morgan07, on Flickr 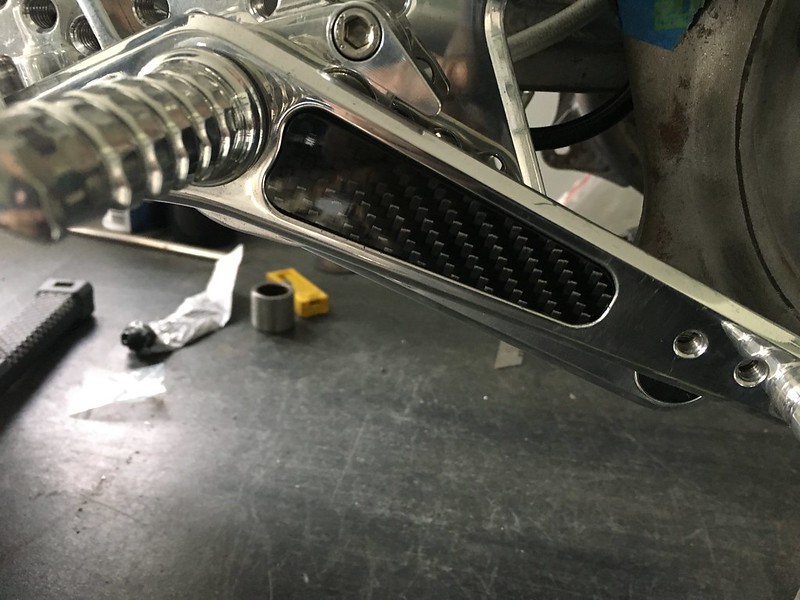 IMG_2346 IMG_2346 by mark.morgan07, on Flickr |
|
|
|
Post by panzermatt on Dec 2, 2018 15:44:14 GMT 1
jesus they look great! really nice work there.
|
|
|
|
Post by morgy on Dec 2, 2018 15:46:21 GMT 1
jesus they look great! really nice work there. danke mein herr |
|
|
|
Post by oldbritguy on Dec 2, 2018 17:05:03 GMT 1
Nice bit of trick fabrication going on here Morgy. Lots of one off things making this your own.
Keep 'em coming.
|
|
|
|
Post by morgy on Dec 3, 2018 18:14:26 GMT 1
Managed to pick up a cheap tank up, Loads of surface rust underneath and inside. The top looks like it has been Attacked with an angle Grinder by someone who isn't very good with tools but has no filler and only 3-4 very minor dents that should be easily removed with my new Bars.. The tank seems to have held water for a few hours so far but i guess i will see once the rust has been removed if it's still water tight... 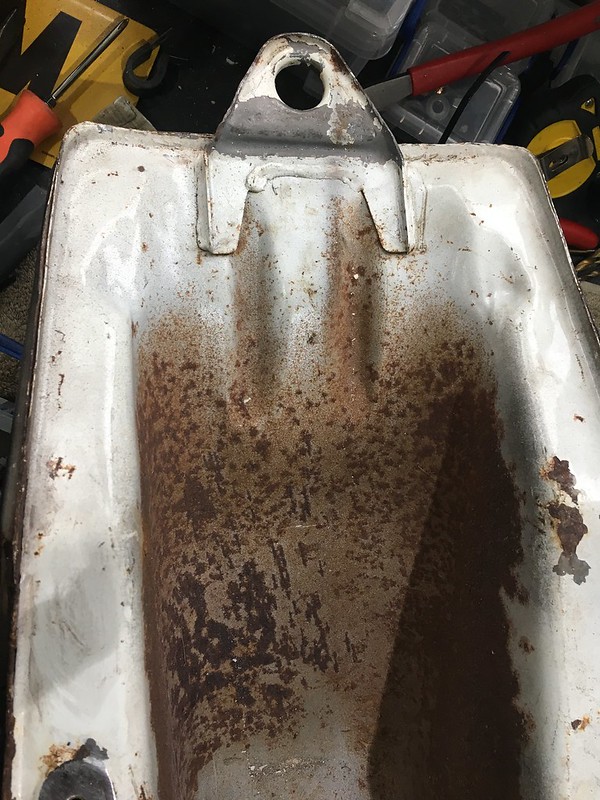 IMG_2339 IMG_2339 by mark.morgan07, on Flickr 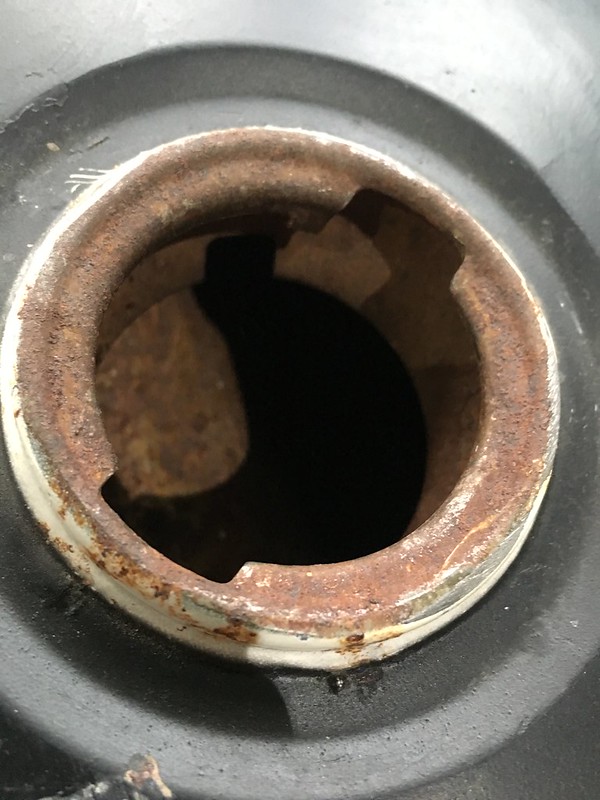 IMG_2342 IMG_2342 by mark.morgan07, on Flickr rust removal by electrolysis is underway... 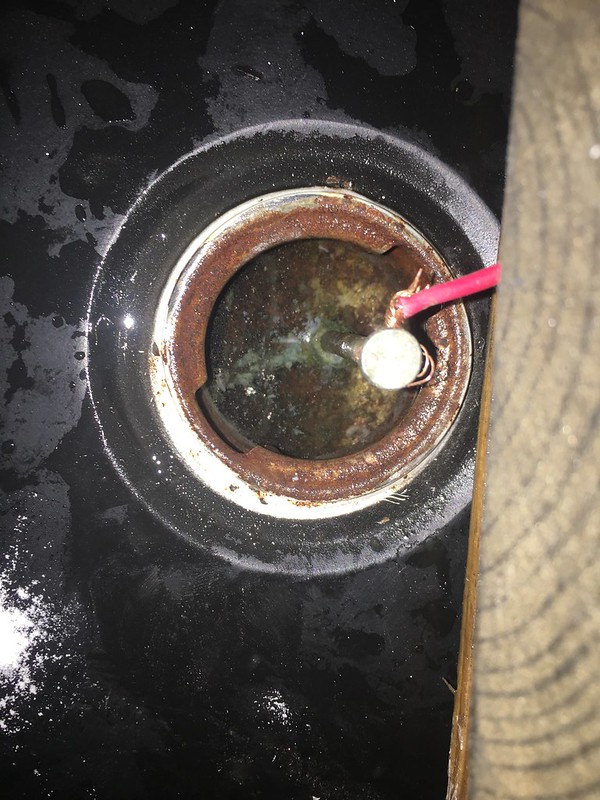 IMG_2350 IMG_2350 by mark.morgan07, on Flickr |
|