|
|
Post by dusty350 on Jan 25, 2020 9:47:03 GMT 1
I thought I would juggle even more bike related rebuild stuff by starting a thread based purely on an Rd400e engine rebuild ! I bought this engine off ebay just before Xmas, and picked it up from Maidstone whilst on my way to collect my old 400e, and deliver the orange hybrid to Ian, further on in Kent. I was looking for a 400E engine for ages when I was planning my Café racer build, but they never came up, hence I opted for the Pv engine that's in it now, so when I saw this, I made an offer and went and collected it;  20200124_201412 20200124_201412 by dusty miller, on Flickr 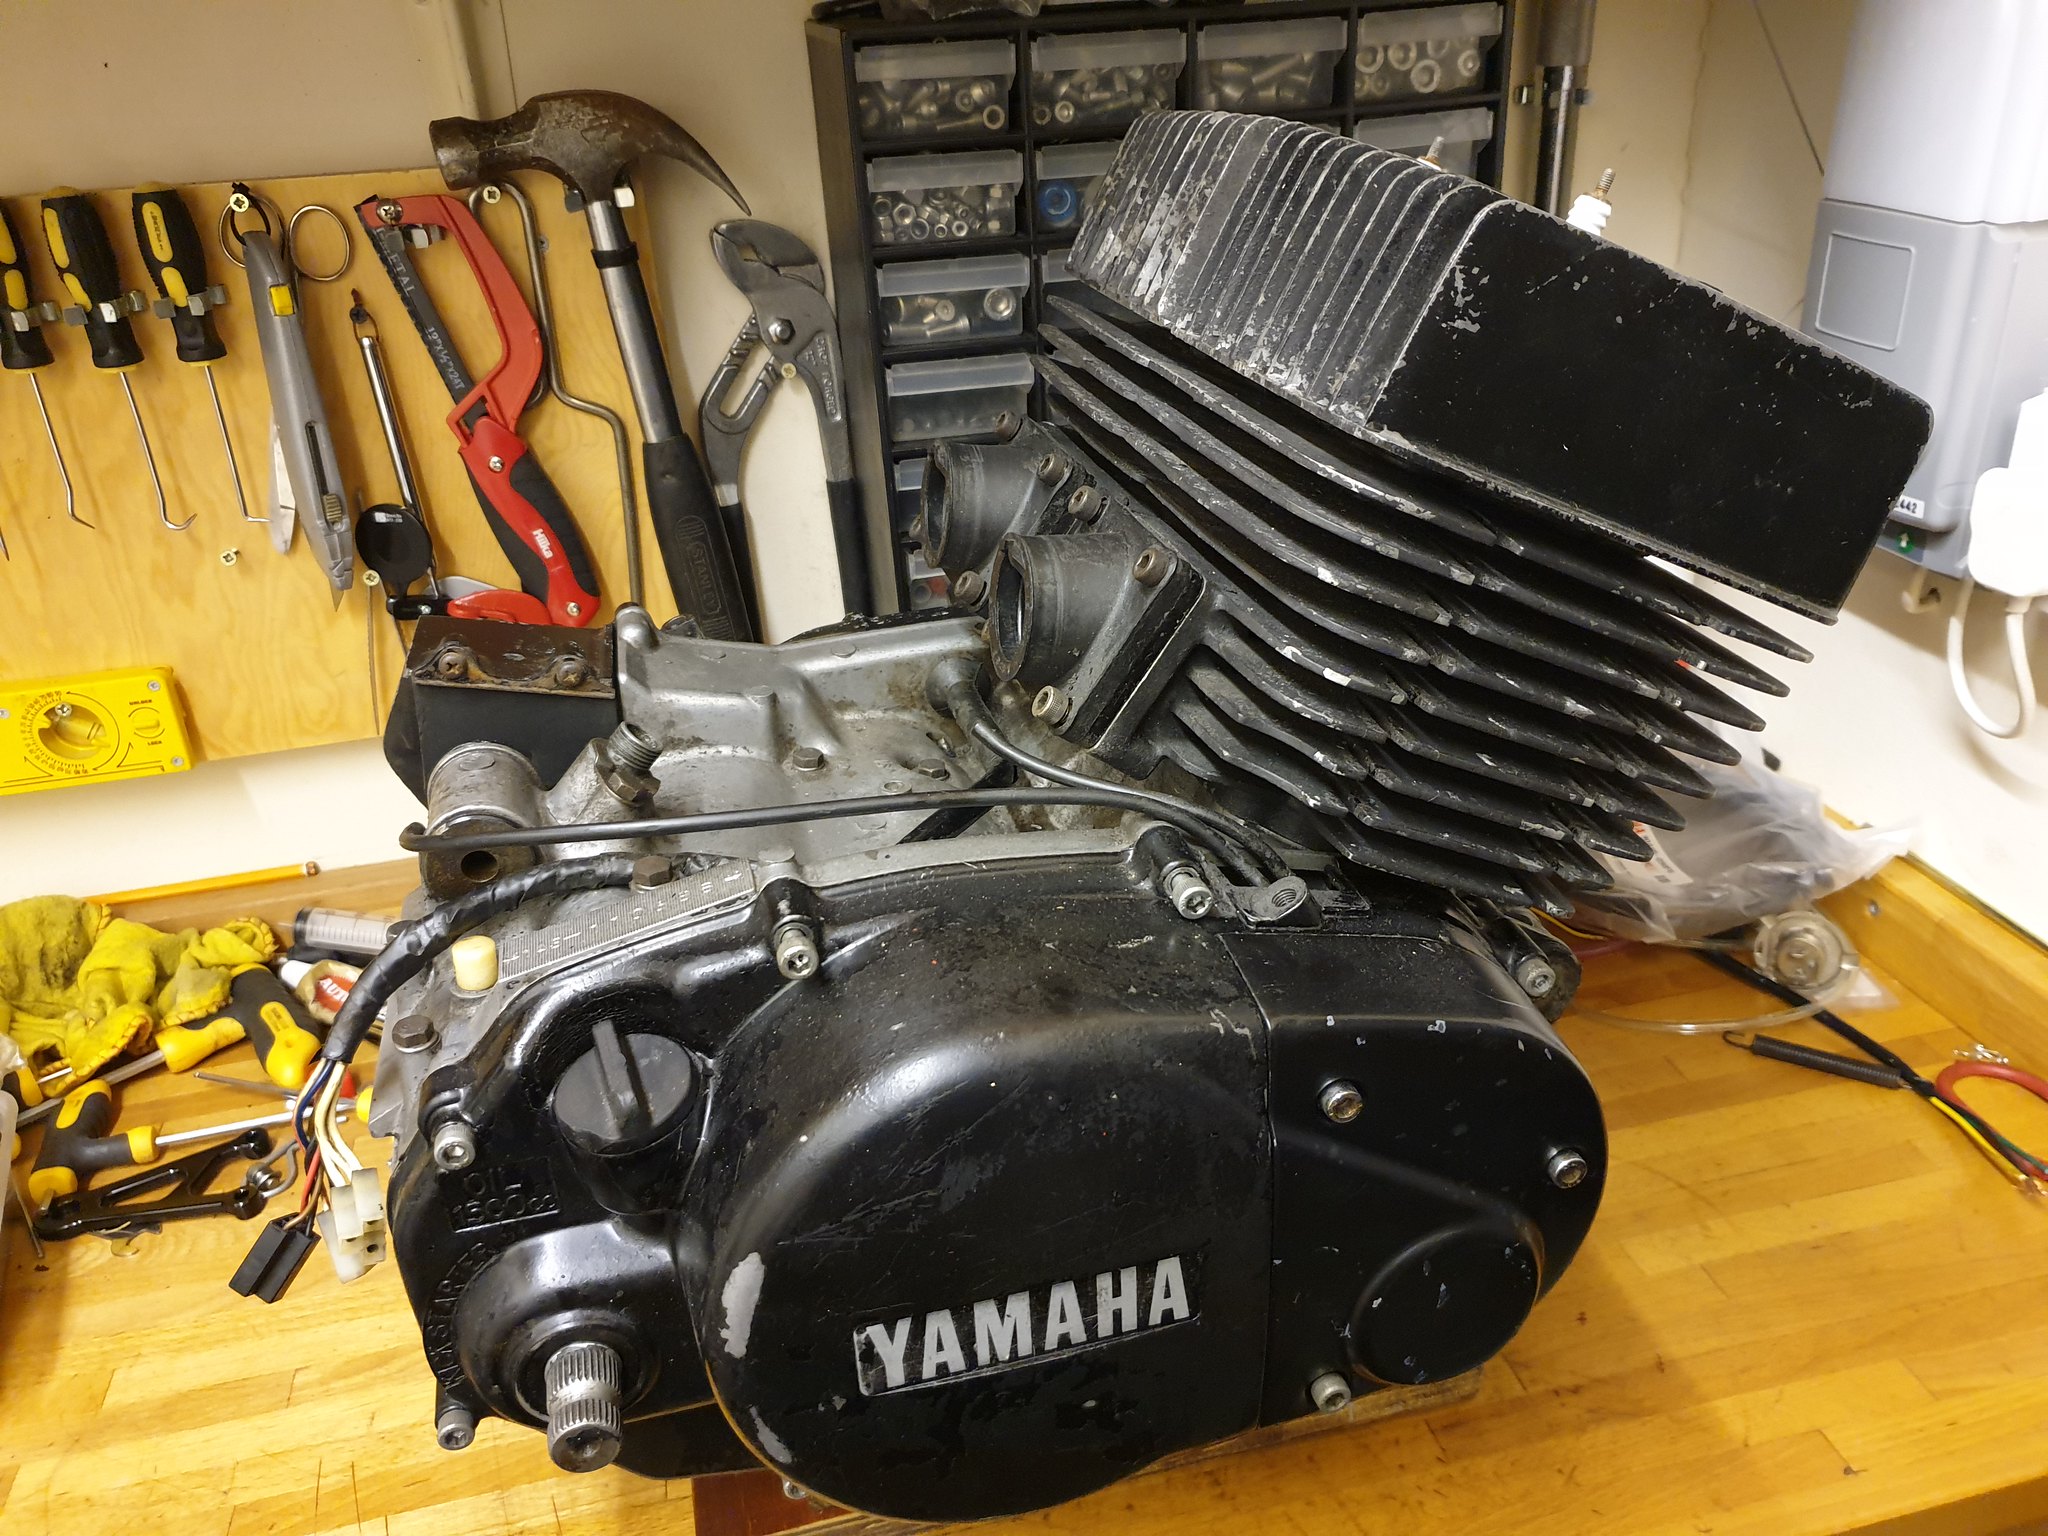 20200124_201309 20200124_201309 by dusty miller, on Flickr It's a 400E bottom end with 400D top end. The plan will be a total rebuild, with as much NOS Yamaha parts as possible, and only the best pattern if Yam stuff is nla. This engine will go in the 250D frame I have in the shed, and it will be a hybrid build, so I plan on a couple of "improvements" for the engine. It has sat as a spare under the sellers workbench for years apparently - he bought it as a spare for his 400e which he sold some time back, so it has been unused for many years it would seem. That's not always a good thing of course, so I'm hoping the strip down will be straightforward  Dusty |
|
|
|
Post by arrow on Jan 25, 2020 10:44:23 GMT 1
Legend.
Stand by lads for some lovely clear photos, and one of the best descriptive engine build threads that you will ever see online.
|
|
|
|
Post by dusty350 on Jan 25, 2020 10:49:56 GMT 1
So, top end off first. It was only loosely fitted anyway and came without pistons fitted. The seller did supply 2 used pistons but I doubt they were ever fitted to this engine, and he wasn't sure of their origin either. They are Pv pistons, one of which has picked up somewhat on the rear skirt. There are no matching witness marks on either barrel - in fact both barrels have fresh honing marks, so I think this pair of pistons are from something else. I wouldn't re use them anyway, so no big deal. The heads and barrels look to have been rattle can sprayed, so the plan will be to send the barrels to Paul at PJME for a check over, and bore if necessary, and supply the correct pistons and rings to suit. Then I will get my vapour blasting guru Jamie to clean them up as cleaning between the fins is a ball ache ! Jury is out as to whether to go with a black painted finish with polished fin edges, or bare ally finish. Option 1 is my current choice. The domes on the heads are free from damage which is a bonus;  20200124_201602 20200124_201602 by dusty miller, on Flickr And the barrels seem to be free from any tuning work; 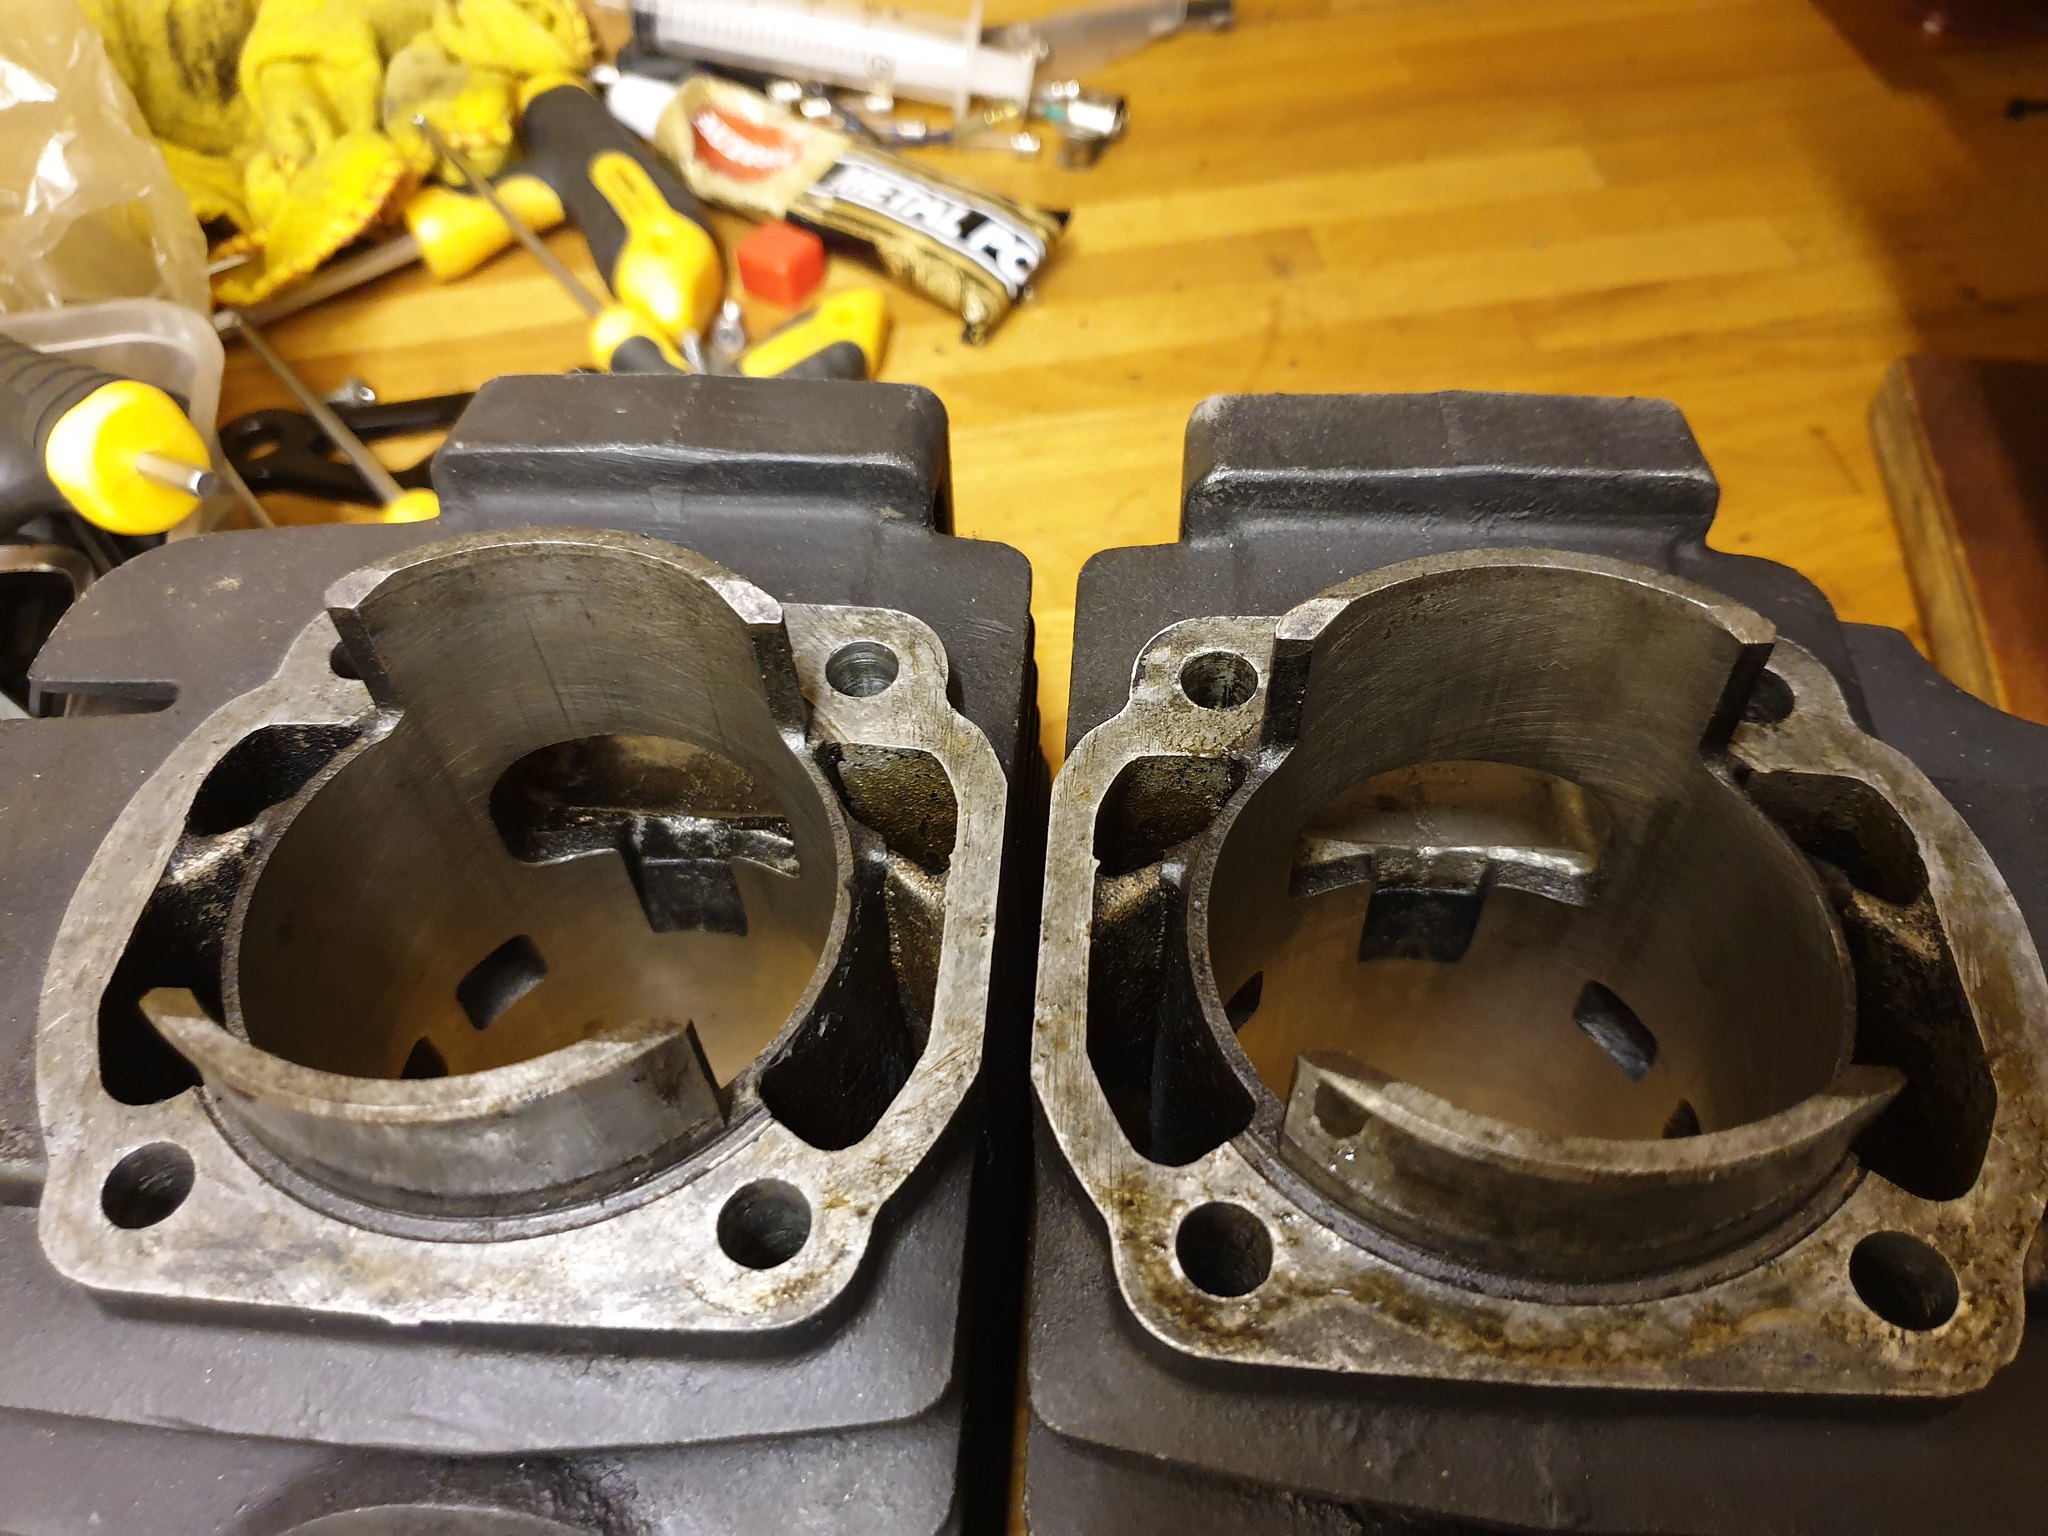 20200124_202011 20200124_202011 by dusty miller, on Flickr The "D" model inlet rubbers didn't get a cross over tube - that was "E and F" (E and F are exactly the same engine wise), and the reeds in these are fibre;  20200124_201818 20200124_201818 by dusty miller, on Flickr I plan on a different inlet track so wont be reusing them, so one less thing to refurb ! Stator case comes off next - it was missing most of the fixing bolts which could be a sign of stripped threads, but luckily all threads are good after checking. Both cases will go to Jamie for powder coat and new decals will be ordered. Underneath the casing, you can see the similarities with the Lc;  20200124_201501 20200124_201501 by dusty miller, on Flickr The Ac Rd has rubber bungs at the end of the gear selector rods - Lc and Pv's have an ally blanking plug, so those 2 rubber bungs will be replaced on rebuild. If I was to compare the aircooled engine to an Lc, I would say the Ac has a more "complicated" bottom end and a much simpler top end, and everything on the aircooled is larger and heavier - that's certainly the way it feels. You can see how Yamaha looked at it and thought they could improve with lesser parts and make the engine a lot lighter. This thing weighs a ton compared to the Lc and Pv engines. But it's easy to see this is the big brother to the Lc - a lot of the architecture is very recognisable between the 2, and I feel the E model is a bridge between the older points ignition Ac's, and the liquid cooled bikes. A lot of Lc part numbers carry over from the aircooled bikes - 1A0, 2R8 etc. Dusty  |
|
|
|
Post by dusty350 on Jan 25, 2020 10:55:54 GMT 1
Hi Gary Very kind of you mate Needless to say it will use one of you refurbed pumps Pics of those are coming up Dusty |
|
|
|
Post by dusty350 on Jan 25, 2020 11:28:34 GMT 1
Rotors can be a nightmare to remove but I was very lucky in that the nut was only finger tight, and span straight off I've had a 2ft scaffold tube on the end of a ratchet before now, so this was a pleasant surprise ! Some "monkey marks" on the face of the rotor but nothing too bad - these will be dressed out at some point;  20200124_202155 20200124_202155 by dusty miller, on Flickr And the inside will get a check over and clean up too;  20200124_202148 20200124_202148 by dusty miller, on Flickr The generator looks a little tired - she's 40 years old this year at least !, but will get a check over and clean up, and it's nice the original loom connections have survived;  20200124_202520 20200124_202520 by dusty miller, on Flickr Spinning the engine around - it fits perfectly on the wooden stand I made for Lc and Pv engines, so another reminder of how close they are - I remove the oil pump cover which is alloy on these Ac's;  20200124_202957 20200124_202957 by dusty miller, on Flickr I'm sure Gary will confirm or otherwise, but my vague recollection is that the Ac pumps with the plastic wheel at the back are the earlier models - C and D ? The seller included a second pump which I think is the correct one for the E, and that's in the foreground. I will ask Gary to rebuild the correct one. Clutch case off next - oil was drained some time back, and obviously no water to drain down; 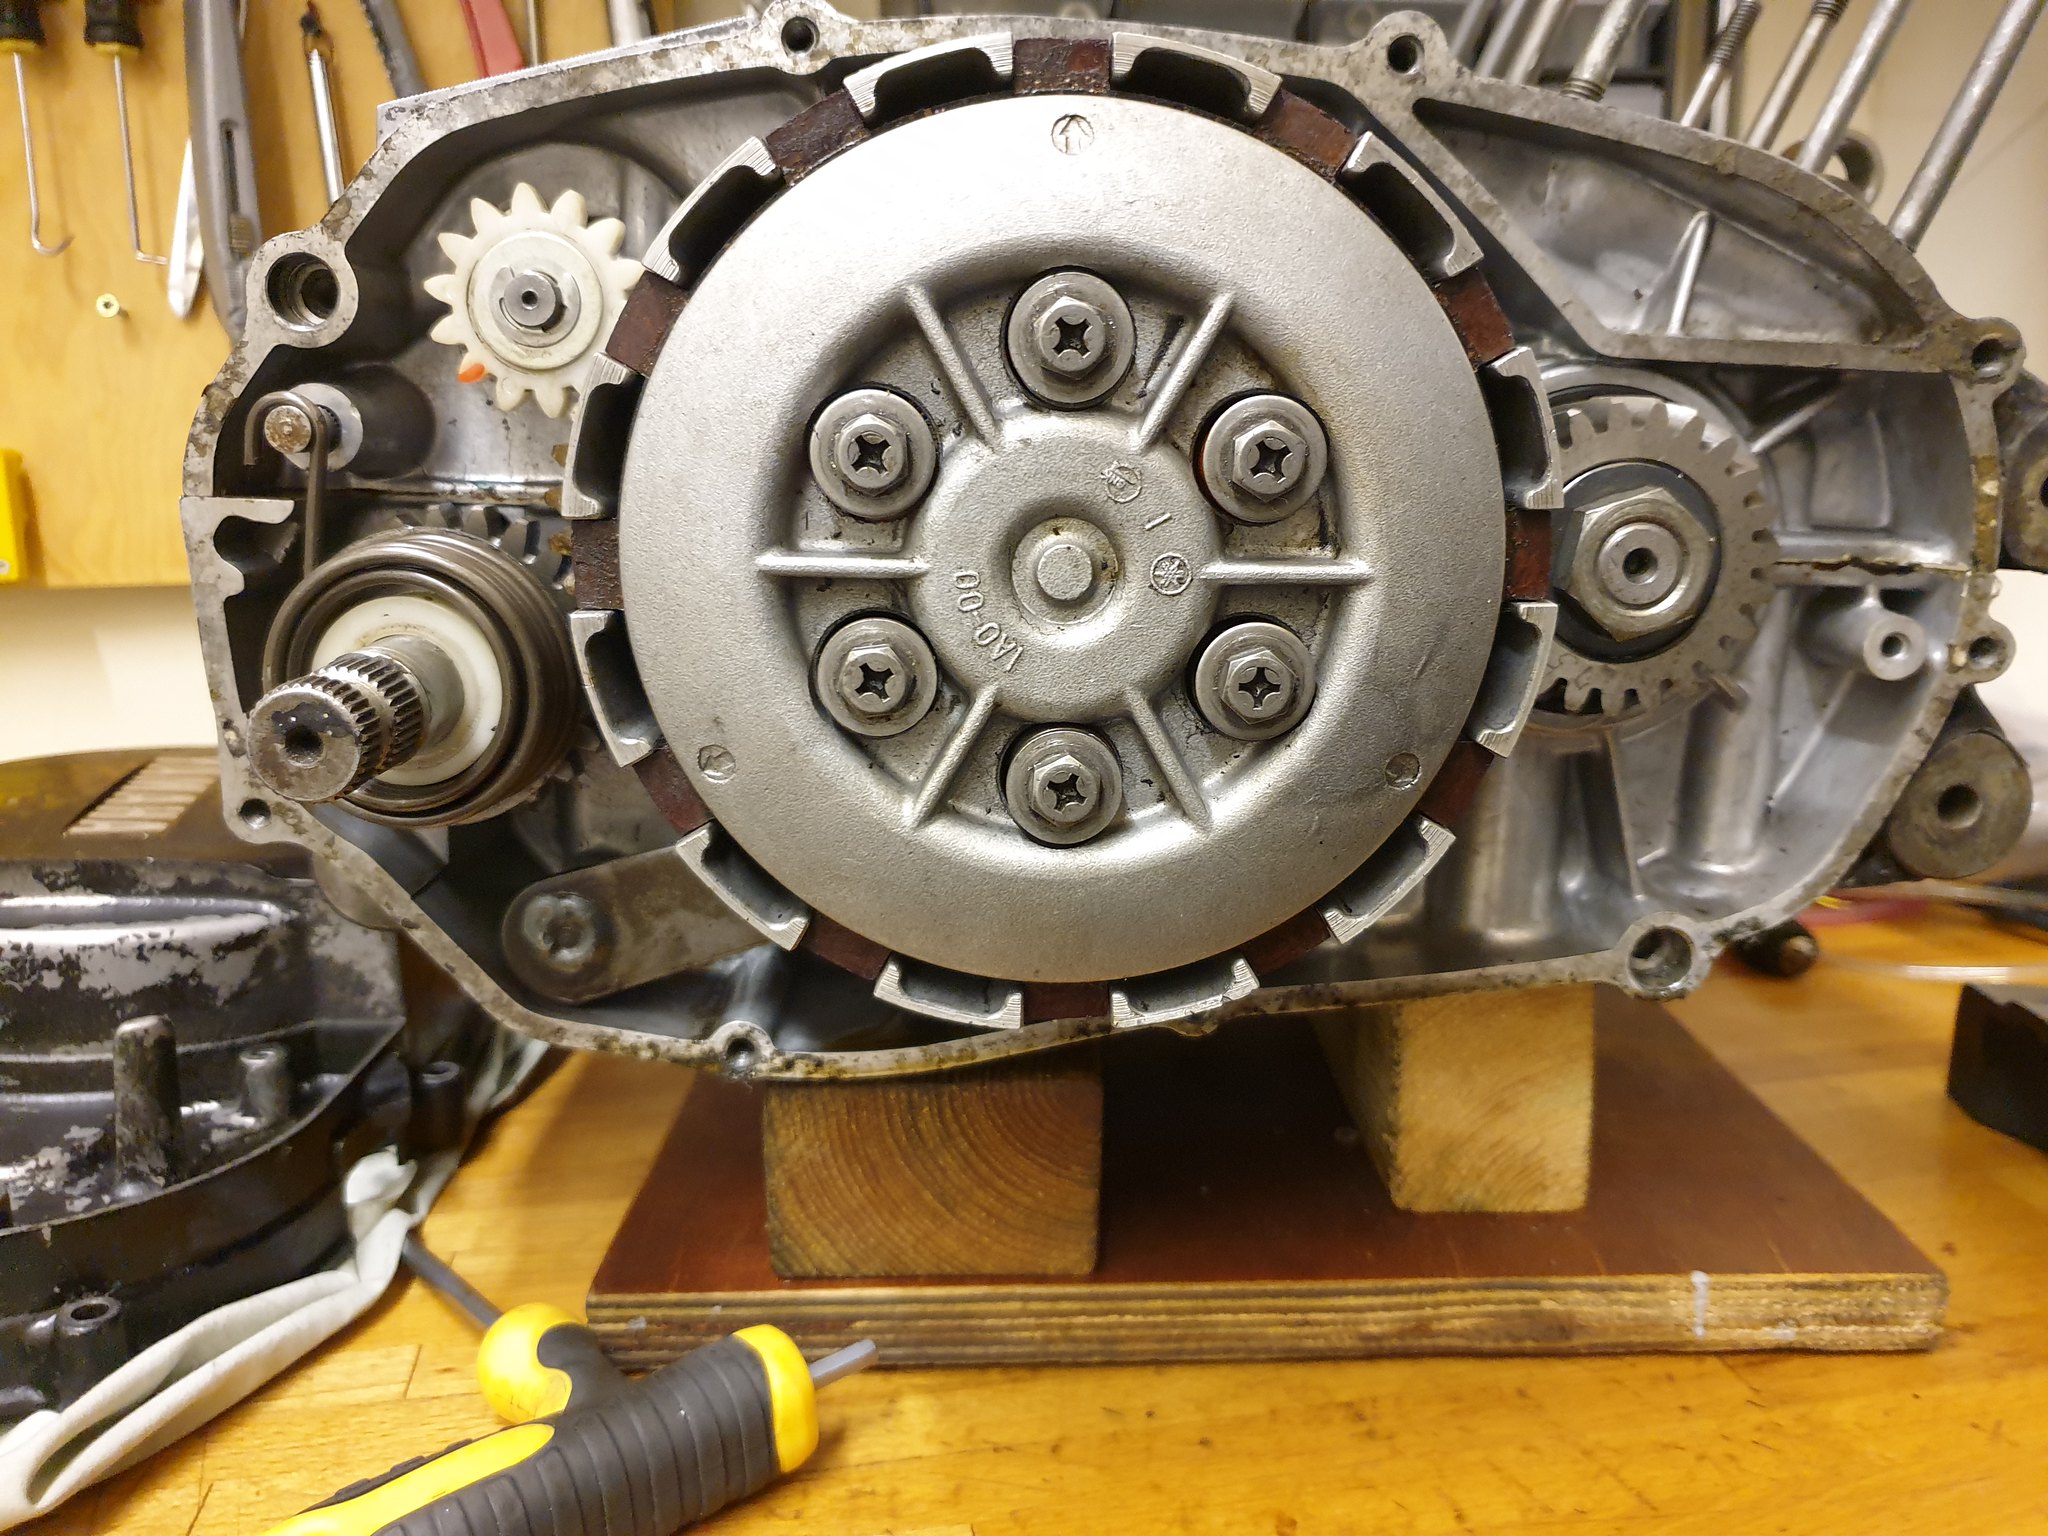 20200124_203526 20200124_203526 by dusty miller, on Flickr No nasty surprises yet ! Hope it carries on this way !! With the clutch casing off, I remove the oil pump sprocket so I can remove the pump drive shaft from the casing; 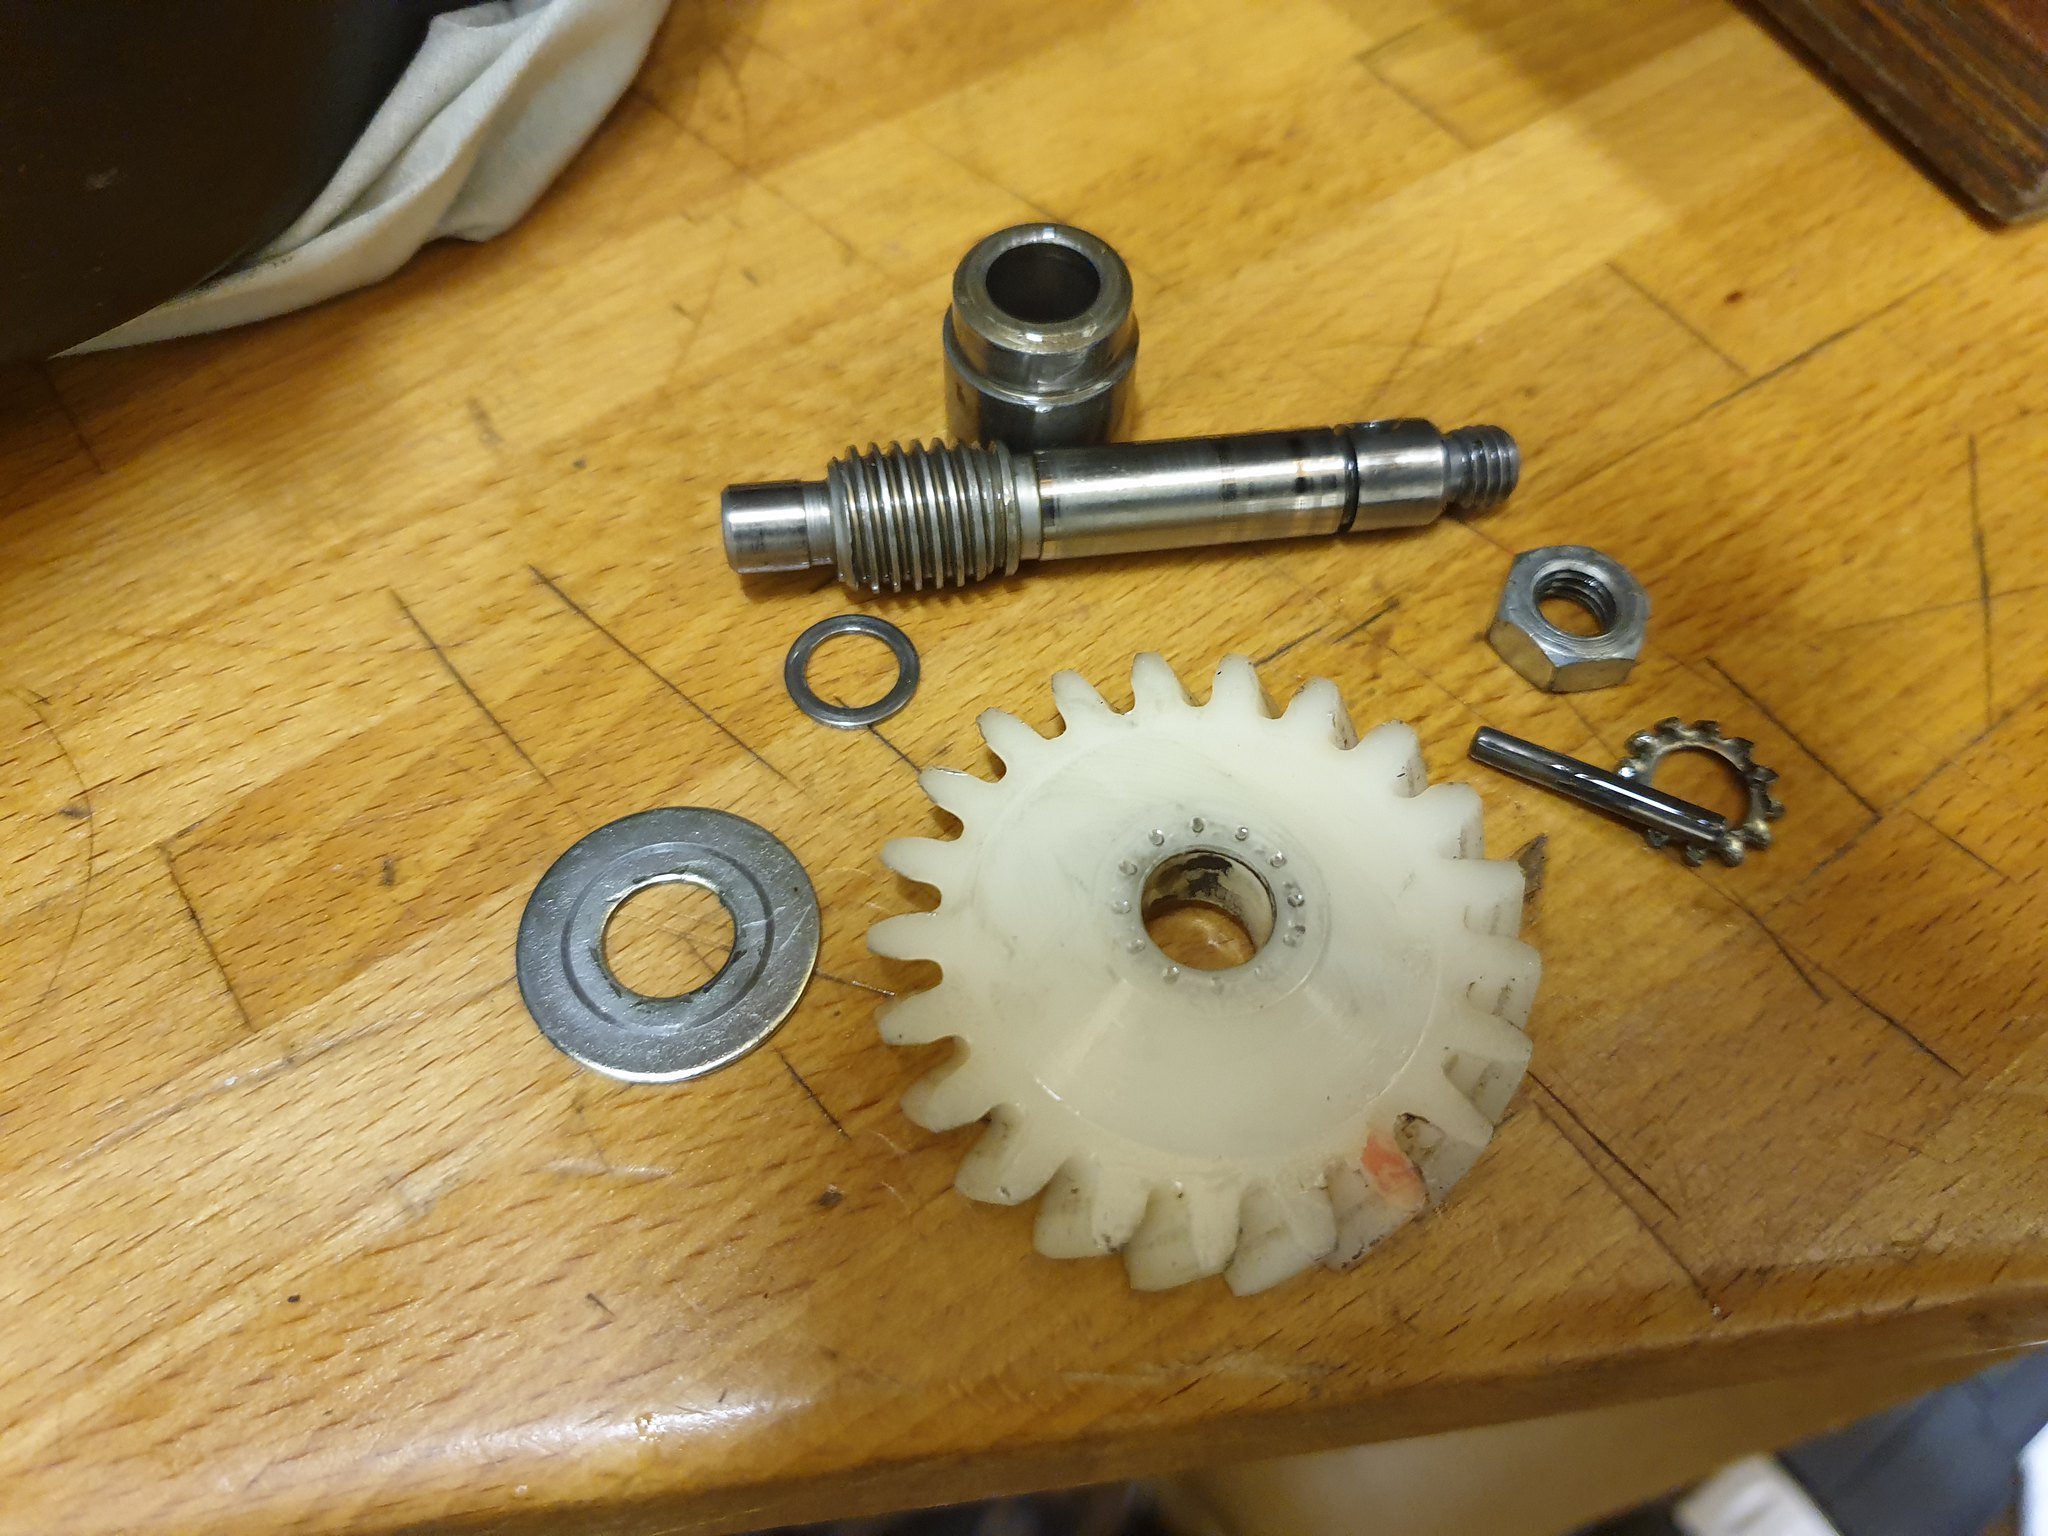 20200124_204040 20200124_204040 by dusty miller, on Flickr Everything gets bagged up in clean freezer type bags with the sealable tops, and I go through each assembly at a time, cleaning and refurbing as necessary. I unclip the spring so I can remove the kickstart gear;  20200124_203630 20200124_203630 by dusty miller, on Flickr And checking the housing behind it shows no damage thankfully. Sometimes the horseshoe shaped housing can break off - I had that on a 400 engine I built 10 years ago, and it needed an ally welded repair to allow the kickstart to work properly;  20200124_203636 20200124_203636 by dusty miller, on Flickr I'm not following any particular order, so I remove the tacho drive off the top case next. Remove the fixing bolt, and it pulls out;  20200124_204918 20200124_204918 by dusty miller, on Flickr This engine has 4 frame mounting points - Lc and Pv have 2, and on the 400, each mounting point has 2 rubber/metal bushes, so 8 in all. You can start to see where Yamaha started saving weight on the Lc's ! All of these bushes will be renewed as a matter of course - theses can be vibey engines so need all the help they can get ;  20200124_204700 20200124_204700 by dusty miller, on Flickr The 2 long tubes are from the 2 front engine mounts and sit between the bushes. These will be blasted clean and refinished. They are not seen but wont be going back on in that state !!  Dusty |
|
|
|
Post by arrow on Jan 25, 2020 12:10:36 GMT 1
Dusty, the pump on the bike is 400C. The priming wheel was phased out during the production run of the C the wormshaft is the correct 400C/D item although it can be circlip retaining type without the nut. Can't tell what the other pump is, can't see any paint. You could run either pump with a different wormshaft, but the pump fitted is the right one for the top end. Yamaha back tracked and went heavier on the oil for the E/F. The priming wheel pump can be made non priming wheel if you wish? Also correct for the C.
|
|
|
|
Post by veg on Jan 25, 2020 12:19:03 GMT 1
Are we going to see a ‘dusty motors engine refurb’ service soon? That’ll keep you busy and help out paying for your bikes and I for one would trust you to build mine 👍
|
|
|
|
Post by sidney81 on Jan 25, 2020 14:28:35 GMT 1
Great thread dusty !
Dose the 250 e/f inlets have a link pipe ?? Thanks Chris 👍
|
|
rickymac
Drag-strip hero
 Hi all new to this forum and owner of a barn find 250lc
Posts: 224 
|
Post by rickymac on Jan 25, 2020 17:07:44 GMT 1
Are we going to see a ‘dusty motors engine refurb’ service soon? That’ll keep you busy and help out paying for your bikes and I for one would trust you to build mine 👍 Sounds great I’ll box mine up now and drop it off, this will be another stunning build. |
|
|
|
Post by dusty350 on Jan 25, 2020 17:28:09 GMT 1
No fear I will be doing this as a business - purely keeps me entertained for a few hours !! Chris, I've never had a 250e so not sure regards the link pipe I'm afraid. I did Google images of 250e's and couldn't see a link pipe on them in general, but I'm not definite on that. Ricky, hopefully you will have the confidence to do yours once you see how relatively easy it is. I always think the hardest part is the strip down. Building back up is easier Dusty |
|
rickymac
Drag-strip hero
Hi all new to this forum and owner of a barn find 250lc
Posts: 224
|
Post by rickymac on Jan 25, 2020 17:39:53 GMT 1
Hope you’re right Dusty, I’ve stripped mine already which I thought was pretty easy if I can get anywhere near your standard I’ll be a happy man😊
|
|
|
|
Post by dusty350 on Jan 25, 2020 18:26:21 GMT 1
Next to be removed was the clutch. Undo the 6 bolts and remove with the springs, and the pressure plate can be removed to expose the plates. All removed and bagged up, it was time to undo the clutch centre nut. These can be tight, so I had an extension pipe on the end of the ratchet handle, and my lad trying to keep the engine on the bench !! Undid that and the primary drive nut without any dramas;  20200125_111050 20200125_111050 by dusty miller, on Flickr I could now remove the clutch basket and the primary drive gear. The differences between the Ac and Lc bottom ends now becomes more apparent;  20200125_111607 20200125_111607 by dusty miller, on Flickr The Ac gear change mechanism is very different to the later Lc. To remove the gear shaft you first need to spin the engine around and remove a ciclip on the sprocket side;  20200125_112935 20200125_112935 by dusty miller, on Flickr You can then pull the gear shaft out from the clutch side;  20200125_113103 20200125_113103 by dusty miller, on Flickr On an Lc/Pv, the selector star would be visible on the end of the selector drum, but on an Ac, it lives inside the engine, and the spring loaded detent mechanism acts upon the star via a bolt underneath the engine;  20200125_115559 20200125_115559 by dusty miller, on Flickr Once removed, the detent mechanism looks like this;  20200125_122141 20200125_122141 by dusty miller, on Flickr I removed the bolts and screws holding the last few components in the side casing, and as expected, a few heads chewed up as soon as I showed them the rattle gun  The Dremel is a useful tool for cutting a new slot in a bolt head, and made short work of the rogue bolts. I was now ready to split the crankcases, so after undoing the top case bolts, and removing the 8 lower case nuts, and the 3 bolts the Ac engines have, I could ease the 2 halves apart with the help of a rubber mallet;  20200125_120021 20200125_120021 by dusty miller, on Flickr First issue here. The gear clusters look to have suffered some moisture damage. I will need to have a closer look, as not all gears are affected, but it's obviously not what I wanted to see !  Never mind, lift the clusters out and you can see the other difference between the Ac ans Lc models - 4 selector forks instead of 3; 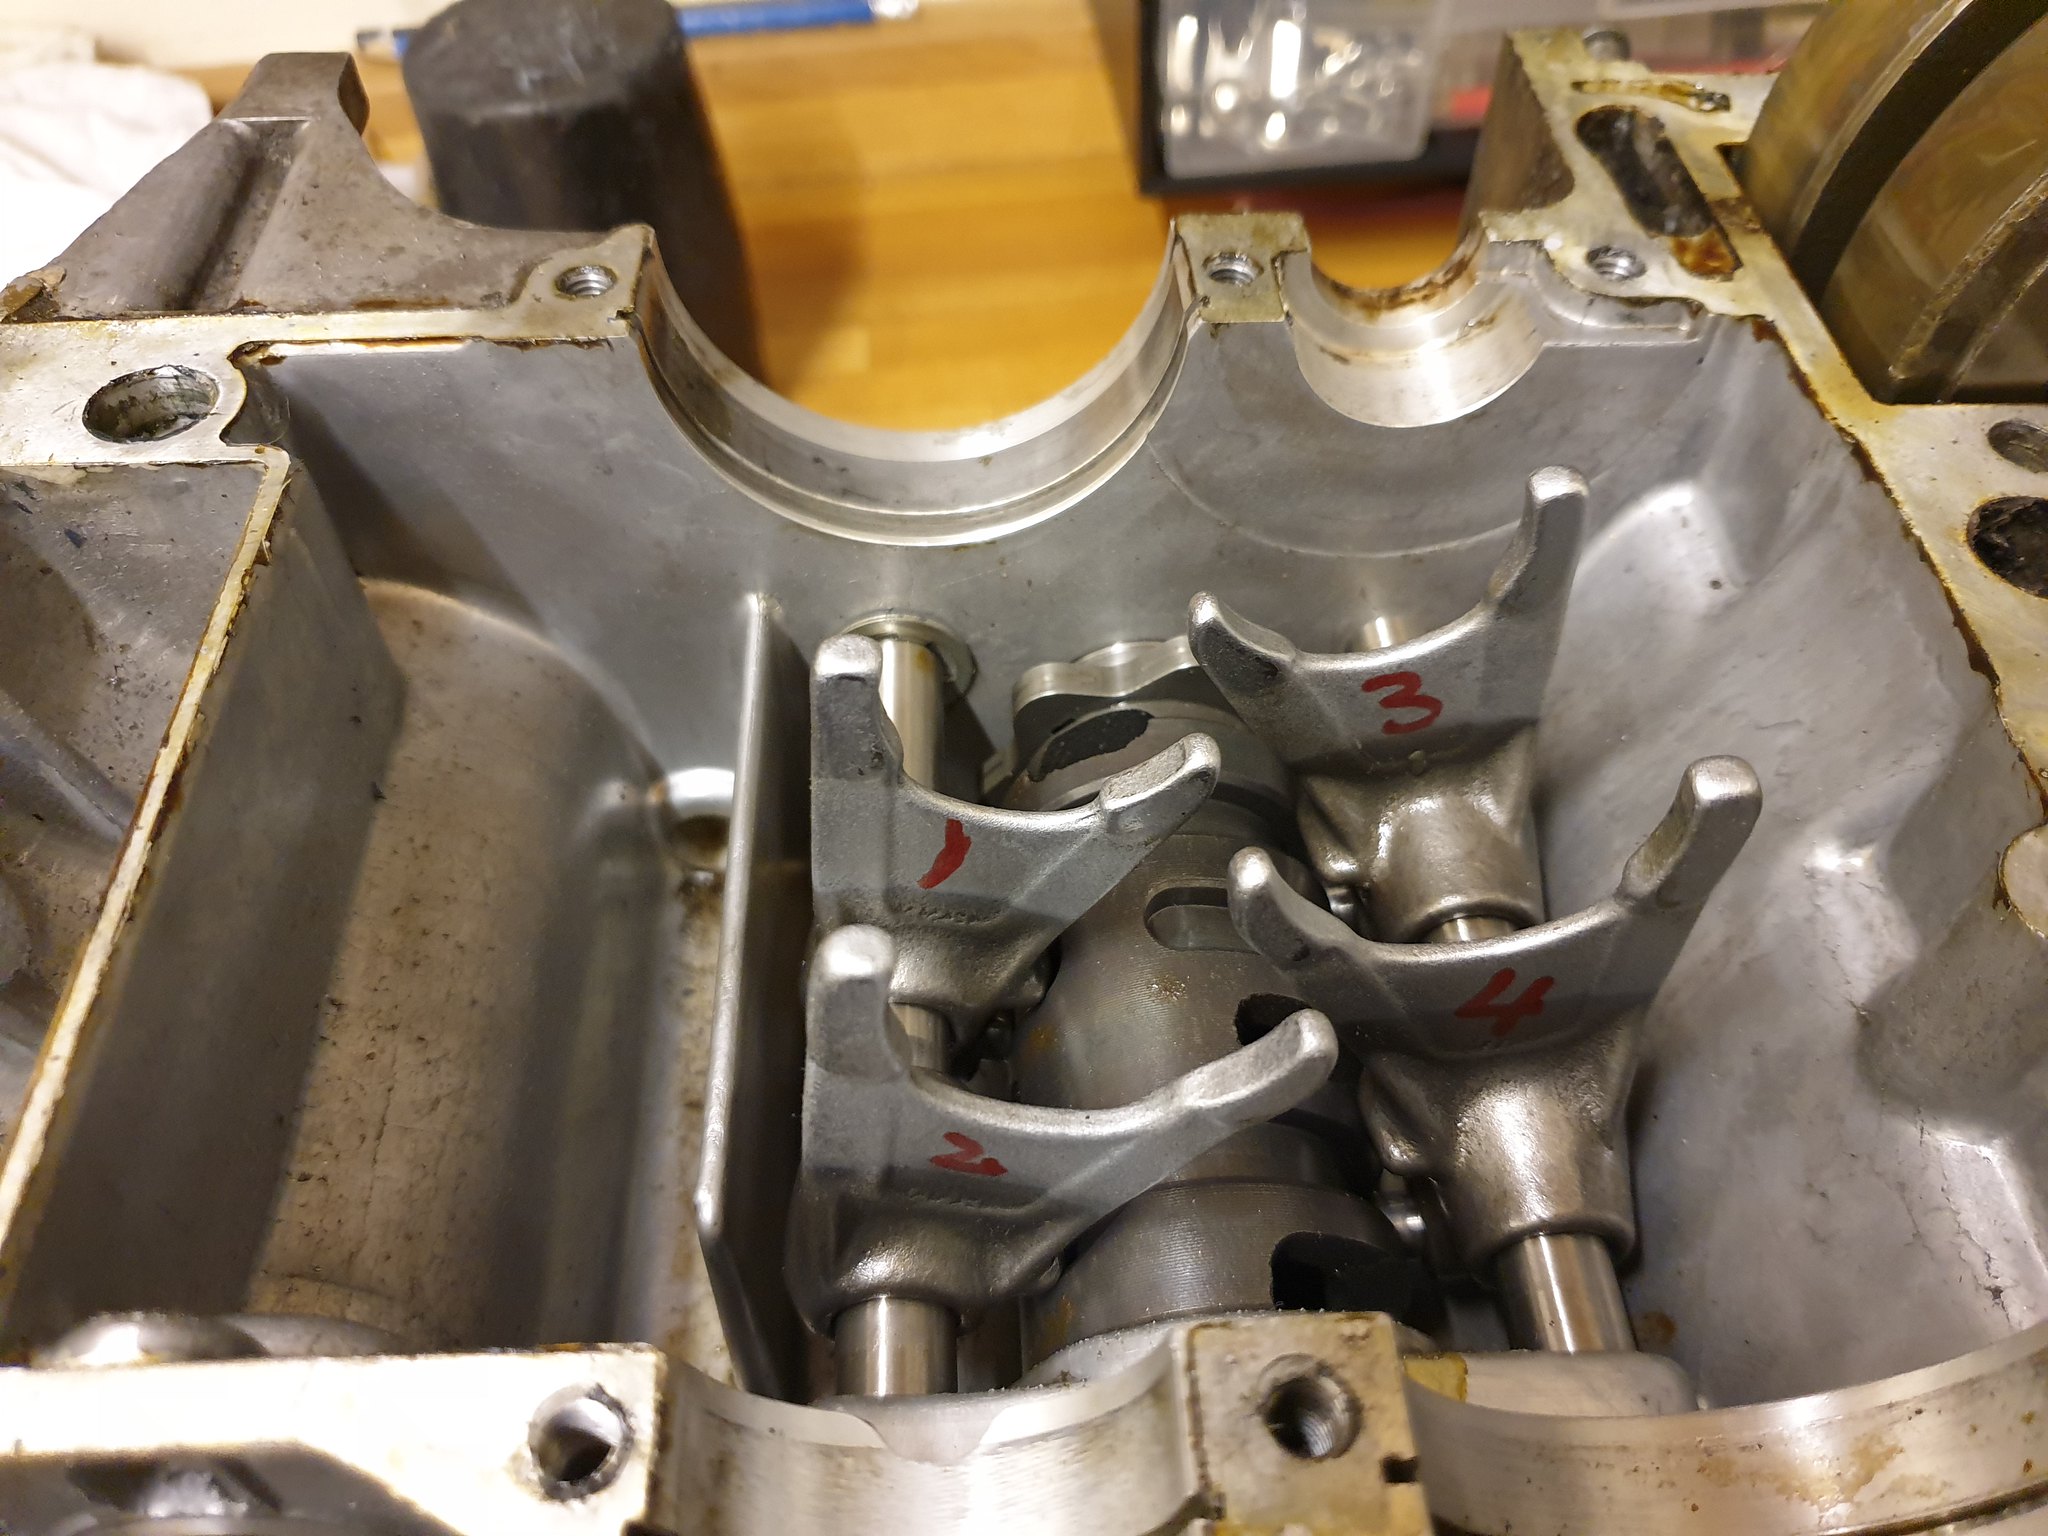 20200125_120730 20200125_120730 by dusty miller, on Flickr And there is the selector star;  20200125_120736 20200125_120736 by dusty miller, on Flickr 1 selector shaft has an internal circlip only, so once removed, both can be gently tapped with the rubber mallet to ease them out on the sprocket side, taking the end bungs with them;  20200125_121126 20200125_121126 by dusty miller, on Flickr Last part left to remove is the selector drum. You cant just pull it out as the selector star is held be a large circlip, which needs to come off so you can remove the star, then the drum can slide free;  20200125_123438 20200125_123438 by dusty miller, on Flickr It's interesting to note the shape of the star on the Ac;  20200125_124229 20200125_124229 by dusty miller, on Flickr It's a much larger star than an Lc/Pv, but has much shallower peaks. Modifying the Lc/Pv stars for improved neutral selection would mean ending up with peaks more like this Ac version. I don't remember ever having any issues with neutral selection on my aircooleds over the years, so maybe Yamaha went backwards with the star shape on the Lc onwards ?? I've got one chewed bolt left to remove on the tacho drive locking plate and then I can remove the drive shaft, and that's it - 2 empty cases. First thing will be to give them a clean up in clean petrol to gat as much crud off as possible, and check the general integrity of the cases, then it will be off to Jamie for vapour blasting. Dusty |
|
|
|
Post by midlifecrisisrd on Jan 25, 2020 19:21:34 GMT 1
Thats a shame about the rust on the gears 🙁
Luckily everything else looks good mind
This is reminding me of the 400c motor I did a couple of years ago. The little differences threw me as it made me question every step.
Is the o ring with the little rubber block between the crank and the primary gear still fitted to the E
Luckily it was still on the C I did as NLA
Good work there, putting me to shame with your speed 😞
Steve
|
|
|
|
Post by dusty350 on Jan 25, 2020 20:16:21 GMT 1
Hi mate I've worn myself out now, so it will slow up a bit The E's didn't have that bit of rubber you are referring to, so 1 less thing to try and replace ! Yea, a pain regards the gears. I did have a feeling there may be some corrosion waiting to be found as the idler gear had a small amount on it, which isn't an issue once cleaned off, but I think it's worst on the clusters  Dusty |
|
|
|
Post by 123 on Jan 25, 2020 20:45:11 GMT 1
great job ass always dusty
|
|
|
|
Post by earthman on Jan 25, 2020 21:19:45 GMT 1
Legend. Stand by lads for some lovely clear photos, and one of the best descriptive engine build threads that you will ever see online. +1. I doubt that I'll ever own this model but still interested to see the transformation. |
|
|
|
Post by gazzatt2 on Jan 25, 2020 21:44:10 GMT 1
Great thread dusty ! Dose the 250 e/f inlets have a link pipe ?? Thanks Chris 👍 No only the 400 E/F |
|
|
|
Post by sidney81 on Jan 25, 2020 23:03:59 GMT 1
Great thread dusty ! Dose the 250 e/f inlets have a link pipe ?? Thanks Chris 👍 No only the 400 E/F Thanks 👍👍 |
|
|
|
Post by loctite on Jan 26, 2020 20:40:42 GMT 1
hi dusty gonna be a great thread again,heres the o ring steve referring too,mine are fitted on my 400f and 250f,,,https://yambits.co.uk/rd400f-crankshaft-ring-p-87081.html?osCsid=9dkp9bcd7cuhihiij5o382eg26&osCsid=9dkp9bcd7cuhihiij5o382eg26
|
|
|
|
Post by midlifecrisisrd on Jan 26, 2020 20:44:48 GMT 1
hi dusty gonna be a great thread again,heres the o ring steve referring too,mine are fitted on my 400f and 250f,,,https://yambits.co.uk/rd400f-crankshaft-ring-p-87081.html?osCsid=9dkp9bcd7cuhihiij5o382eg26&osCsid=9dkp9bcd7cuhihiij5o382eg26 That's the one 👍 Think the omission of that on later models is why we sometimes get an air leak between the primary gear and the oil/water drive gear or on the thread although I tend to thread Lock it Steve |
|
|
|
Post by dusty350 on Jan 26, 2020 21:15:37 GMT 1
I've never had an "E" with that o ring fitted. I will check the fiche again but dont recall it on the later bikes. I always use 3 bond on the key way on the crank/primary drive to stop any leaks.
Dusty😉
|
|
|
|
Post by arrow on Jan 26, 2020 21:26:53 GMT 1
I've just looked, and it's not on the parts list for the e/f.
|
|
|
|
Post by donkeychomp on Jan 26, 2020 23:41:45 GMT 1
Dusty many thanks. Going to do what you do on my 250 engine. Thankfully mine is already apart! AGAIN!  Alex |
|
|
|
Post by muttsnuts on Jan 27, 2020 10:37:21 GMT 1
I've never had an "E" with that o ring fitted. I will check the fiche again but dont recall it on the later bikes. I always use 3 bond on the key way on the crank/primary drive to stop any leaks. Dusty😉 The E/F engine doesn't have the "O ring" on the clutch side of the crank, its not required, if you need a parts manual, let me know and I'll email you a copy Gear clusters should be fine, just strip the gearbox and wire brush the gears and check for pitting/flaking of the hardened surface, if you have any of that (badly anyway), then you'll need to replace those gears affected, otherwise they will be ok to go again. If you strip the gearbox and need new shims for setting the clearances, let me know as I keep a few on the shelf as they are getting harder to get hold of now Oil pump, speak to Arrow as the worm drive is specific to the E/F iirc and I bought the last one Fowlers had a year or two back now, they are longer than the LC/YPVS worm drive iirc, but Gary will confirm, the pump should have "pink" paint on |
|
|
|
Post by dusty350 on Jan 27, 2020 12:13:50 GMT 1
Hi Dave Cheers mate I've got a Yamaha fiche for a 400c and a 400e, so was able to cross reference all the gears and shafts. It's only the 5th and 6th gear cogs on the input shaft that differ between C and E models - even the 2 shafts are the same, so plenty of scope should I need spares. And a 250 gearbox from an E is the same as a 400e, so that's good news. I know other parts in the gear train differ though, and I think the primaries on this engine are mismatched too. I will send both pumps to Gary and get him to rebuild whichever one he thinks best. I've looked at the fiche's again, and as Gary rightly said, it's a C/D pump and drive in there at the mo. There is a fair amount on lateral play in the clutch basket, so aim to fit a Mitaka with new rubbers. Just waiting on some funds to arrive, then I will be onto you regards those Vforce 3's, and some other goodies Cheers Dusty |
|
|
|
Post by arrow on Jan 27, 2020 12:21:52 GMT 1
Just to confirm, the a/c wormshaft is the shorter item. It's the longer version on the lc/power valve.
|
|
|
|
Post by sispeed on Jan 29, 2020 13:44:04 GMT 1
You can also easily see if it needs the O-Ring on clutch side of the crank if you look at the primary on the crank if you have removed it.
If there is a little groove it is for the O-Ring. That is the place were the Ring goes in. If it is not there you can't use it because tightening the Primary will squeeze it and chances are high that the nut comes of after a while.
Guess why I know.
Regards Siggi
|
|
|
|
Post by dusty350 on Jan 31, 2020 20:42:27 GMT 1
So with the engine all stripped down, I started to prepare the cases for vapour blasting. I put old bolts into all the threadways;  20200131_091411 20200131_091411 by dusty miller, on Flickr  20200131_091425 20200131_091425 by dusty miller, on Flickr  20200131_091449 20200131_091449 by dusty miller, on Flickr I spoke to Jamie and he said bring the engine over today - I was gonna clean as much crud off as possible with clean petrol, but he said not to bother as he would put the cases through his parts washer. I saw a Facebook pic this afternoon from his page - he doesn't hang about !!;  83717138_546063049333131_1500039992670420992_o[1] 83717138_546063049333131_1500039992670420992_o[1] by dusty miller, on Flickr I also took the 2 cylinder heads over to him. They are pretty manky, and hard to clean due to the fins. Jamie will vapour blast them and we've decided to go with a satin black coat of Cerakote. He will then take the edges of the fins back to alloy, which should look nice. Cerakote is a very thin finish, but tough and heat proof, plus the type he is using is air dry in about half an hour. Once the barrels are sorted, Jamie will do the same with them. I had considered the new radial heads from the Us, but I read the fins can crack, plus they resonate more than standard and subsequently nosier. Plus they are quite expensive ! So the standard heads are staying !! Dusty |
|
|
|
Post by midlifecrisisrd on Jan 31, 2020 20:56:45 GMT 1
Fast work on the blasting Standard heads should be fine, just use Rob's base gaskets to set the squish I ended up on 0.6 with these bad boys and had to use thicker gaskets. Thankfully I checked Steve   |
|
|
|
Post by sidney81 on Jan 31, 2020 21:38:51 GMT 1
Looking good ,that case came up lovley ! Can't wait till I'm at that stage 😎👌
|
|


 The Dremel is a useful tool for cutting a new slot in a bolt head, and made short work of the rogue bolts.
 Never mind, lift the clusters out and you can see the other difference between the Ac ans Lc models - 4 selector forks instead of 3;


