|
|
Post by mak595 on Jul 18, 2019 19:56:24 GMT 1
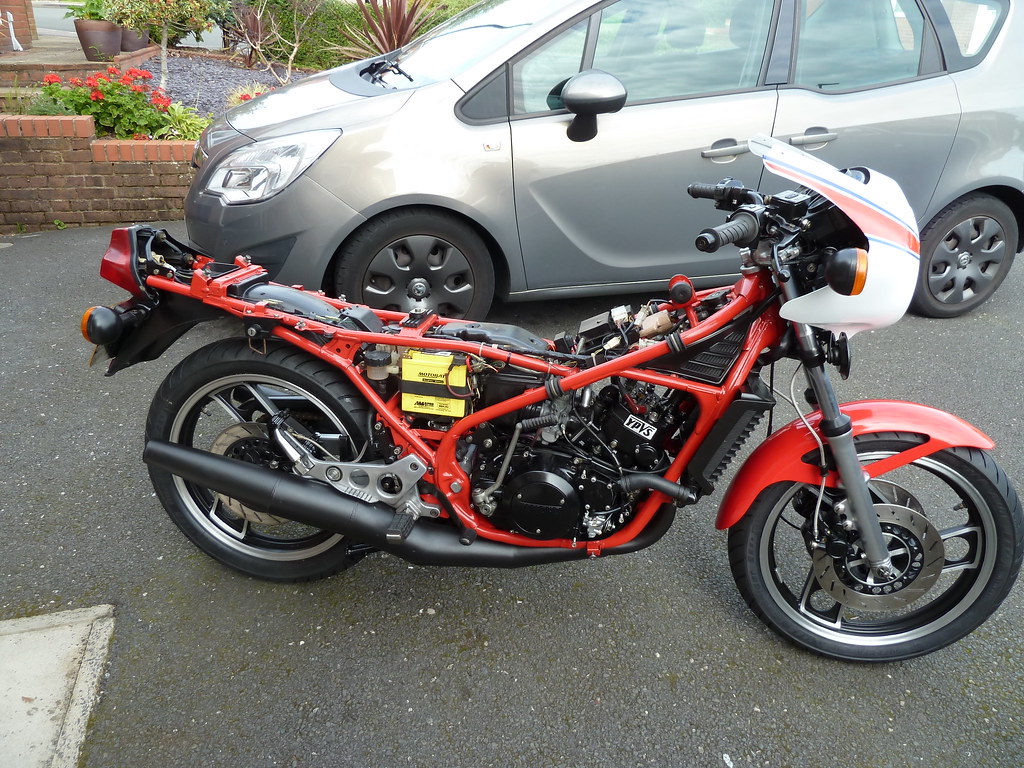
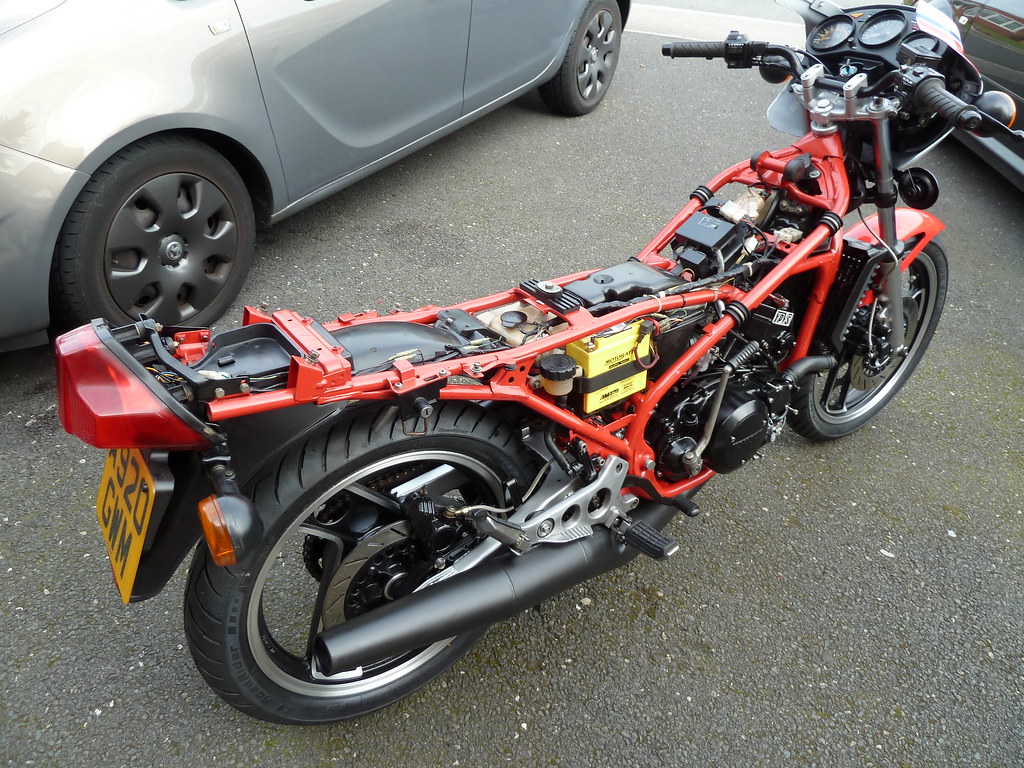
Got the tyres on and wheels fitted. DA sanded down the fork lowers then polished and lacquered over, fresh oil etc. Bottom yoke painted black and top again polished and lacquered, bike already had roller head bearings so good re-grease and good to go. Rebuilt the fresh powdercoated front calipers with a kit from powerhouse. Found an original rear mudguard in the stash to replace the cut down one, it was a bit scratched but a lick of satin black soon sorted it out.  P1020842 P1020842  P1020841 P1020841  P1020839 P1020839  P1020838 P1020838 P1020835 P1020835 Oh, and picked up the F1 frame & arm from the local powercoaters that started this whole ( surprise !) project off   P1020837 P1020837 |
|
|
|
Post by mak595 on Jul 24, 2019 18:04:03 GMT 1
Got the rear brake on but it fought me all the way, first the M/C piston was seized solid so i had to drill that out, then one of the caliper pistons was solid, first tried popping it out with air line but to joy, so split the caliper and tried with my piston removal slide-hammer tool jobbie, no chance. Left it in the freezer over night to try and shrink the piston but still no joy..   " src="//storage.proboards.com/forum/images/smiley/superangry.png"> Ended up welding a nut to the inside of the piston then used the slide hammer to finally remove the bugger. So coat of engine enamel, oven bake, new seal kit from powerhouse and its on, just waiting for a couple of spring hose clips to arrive then i can fit the reservoir..  P1020850 P1020850 |
|
|
|
Post by mak595 on Jul 24, 2019 18:12:02 GMT 1
My mate is free next week to crack on with painting the tank and fairing so today ive been doing abit of prep work for him, on one of the hottest days of the year !!  The fairing had a crack at the end and some previous repair by the bottom mounting point with some fiberglass matting on the inside. The matting was solid so rather that disturb it i just DA sanded the outside, and plastic welded the couple of cracks i found. I also welded the end piece back on  P1020847 P1020847  P1020846 P1020846 |
|
|
|
Post by mak595 on Jul 24, 2019 18:21:06 GMT 1
When i sanded the tank, i expected to find some filler and i wasn't disappointed !! To be fair there wasn't that much so i just skimmed it and sweated my nads off rubbing it down but its all good to go now. I've been out of the body-shop trade for 17 years now and dont miss it one bit !!!  P1020848 P1020848 P1020852 P1020852 |
|
|
|
Post by veg on Aug 5, 2019 0:08:41 GMT 1
Fair play I haven’t the patience to even attempt trying to get a tank back to shape oh and obviously the skill 😁
|
|
|
|
Post by mak595 on Aug 15, 2019 17:37:31 GMT 1
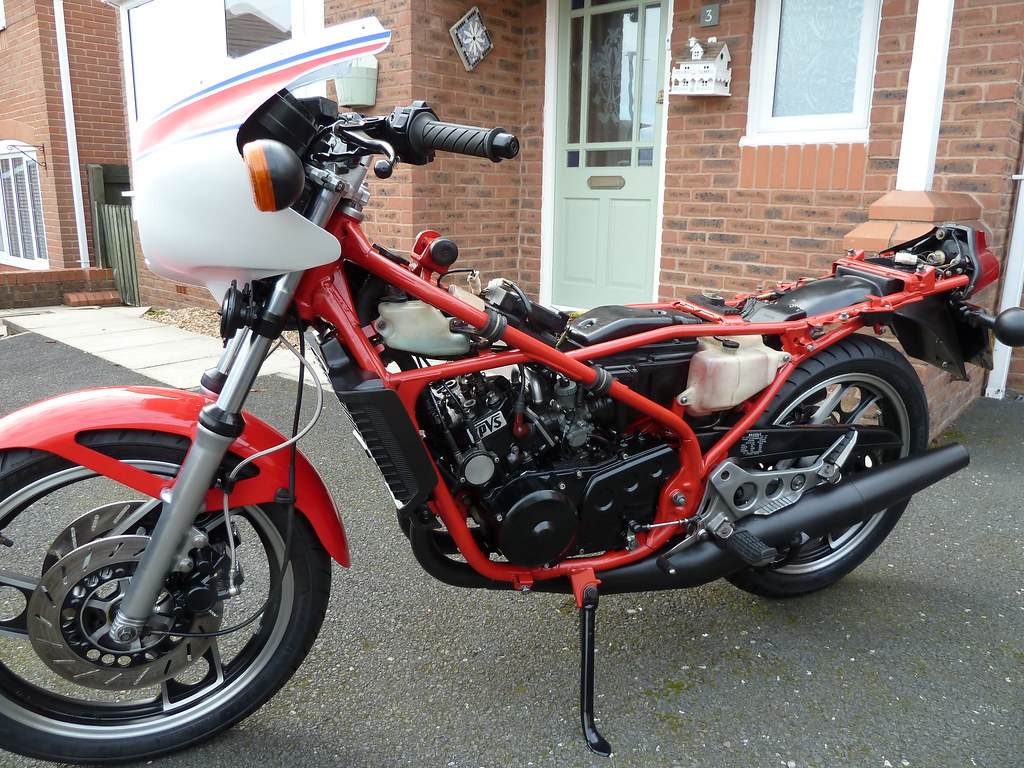
Bit more progress, one of the fork legs had some pitting, it probably would have been ok but i wasn't really happy with it, anyway picked up a NOS leg so swapped that over, of course the Allan bolt holding the damper rod in place was rounded off so had to drill that out  Painted the mudguard back to original red rather than the white that was on it.  P1020853 P1020853  P1020856 P1020856 Painted the switch gear and got some decals off ebay, also the clutch perch and brake M/C was painted.  P1020855 P1020855  P1020854 P1020854 All the brakes are bled up. So i think the rolling chassis is just about done.... ...next job, the engine.... Got my oil pump back from Arrow and the carbs from Dave so hopfully its just cosmetic and new seals  P1020857 P1020857 |
|
|
|
Post by Yogi on Aug 15, 2019 18:07:15 GMT 1
Coming along nicely now 👌
Just in the middle of doing my wheels 😡,this is definitely the last set I’m ever gonna do
Matt 🐻
|
|
|
|
Post by mak595 on Aug 15, 2019 20:27:48 GMT 1
Just in the middle of doing my wheels 😡,this is definitely the last set I’m ever gonna do Matt 🐻 Yep, pain in the arse !!! |
|
|
|
Post by oldbritguy on Aug 16, 2019 0:36:51 GMT 1
Coming on great buddy, looking really good
John
|
|
|
|
Post by mak595 on Sept 5, 2019 15:58:27 GMT 1
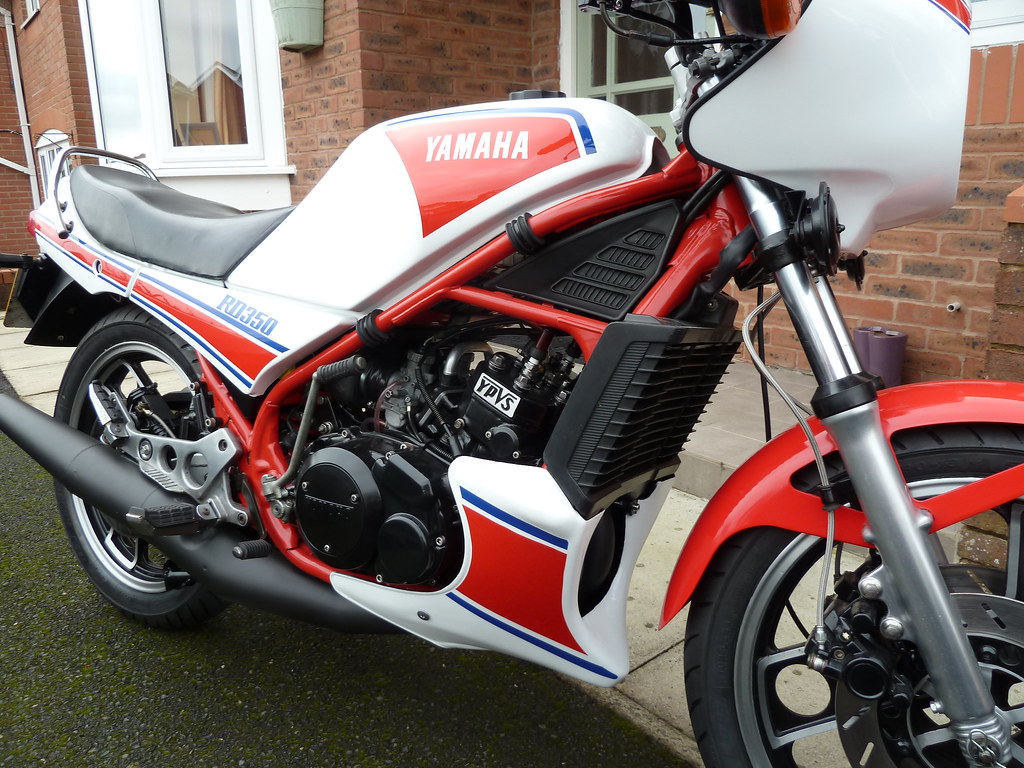
Engine done, all looked good inside just just new yammy seals, piston circlips etc, arrow rebuilt oil pump and the cases all painted up.... 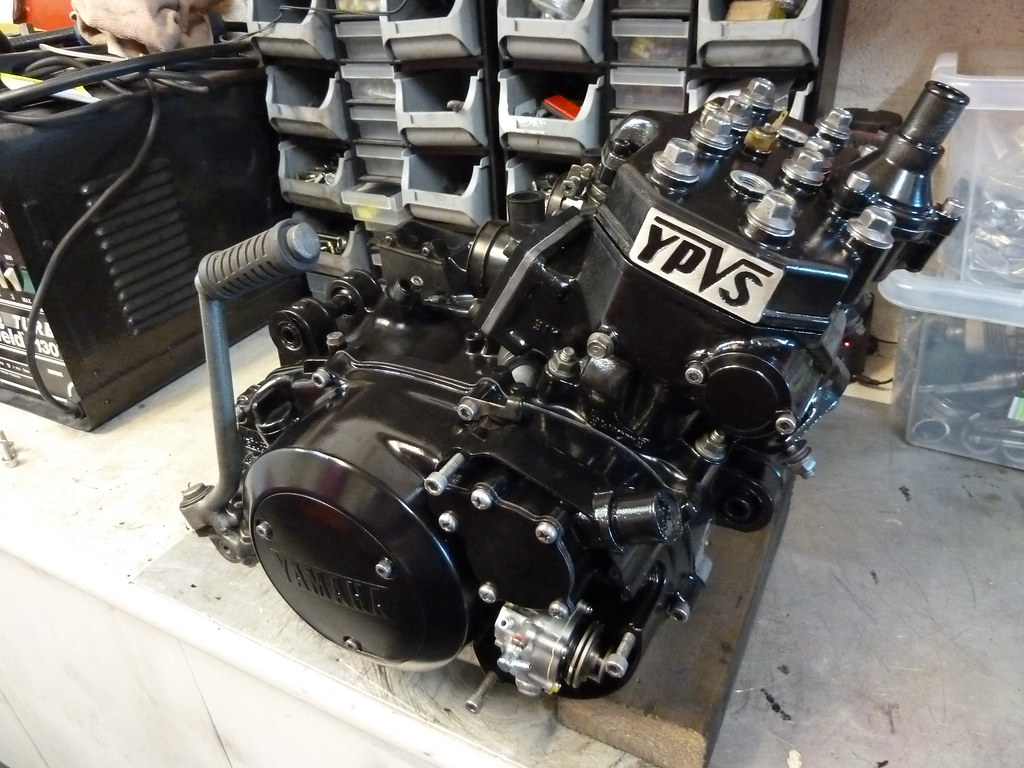 P1020877 P1020877  P1020876 P1020876  P1020878 P1020878 All ready to get back in the frame Got the first bit of bodywork back off my mate, after looking at the slight colour difference between the new pearl white and the original we have decided to paint all the panels, new decals that will be laquered over. The bodyshop my mate works at are using a new lacquer that is 50:50 with hardener so you only get 4 days to polish it once it sets like rock, awesome stuff, glad im not paying for it It will be a while before its all done as he's doing it as and when he can but i'm in no rush.... 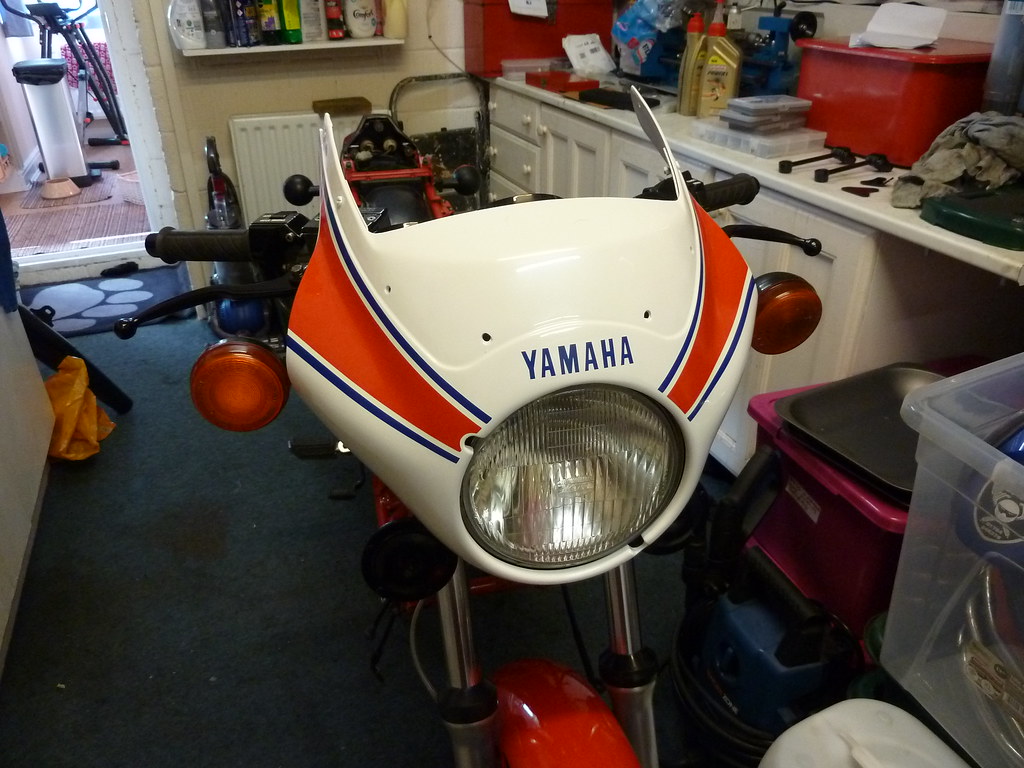 P1020879 P1020879 Next job is the exhausts, the left hand pipe had a few scratches and some slight damage at the end but i picked up a mint pipe off ebay for £50, well chuffed. Going to light sand them both down and repaint with some PJ1 |
|
|
|
Post by mak595 on Sept 8, 2019 18:40:57 GMT 1
|
|
|
|
Post by panzermatt on Sept 8, 2019 19:32:04 GMT 1
aww man that is lovely, you are doing a superb job, thats easily a 6 pinter job there, IE you skull 6 pints in reward for your hard work.
|
|
|
|
Post by mak595 on Sept 8, 2019 19:55:53 GMT 1
aww man that is lovely, you are doing a superb job, thats easily a 6 pinter job there, IE you skull 6 pints in reward for your hard work. Cheers, i enjoy building bikes as much as riding them ! |
|
|
|
Post by sundowner on Oct 11, 2019 19:26:14 GMT 1
Why cant i ever find things like this
|
|
|
|
Post by mak595 on Oct 11, 2019 19:42:39 GMT 1
Why cant i ever find things like this I was just very very lucky !! Or maybe karma after one of Chris Roe's PoS south American basket cases !! |
|
|
|
Post by sundowner on Oct 11, 2019 19:57:39 GMT 1
Its never seems to be me
|
|
|
|
Post by mak595 on Oct 20, 2019 16:27:32 GMT 1
My mate dropped the 3 stage pearl panels round other day for the decals to be applied, scotbrited down atm so looks like 20 year old emulsion white  P1020920 P1020920 |
|
|
|
Post by Dixie Dean on Oct 20, 2019 17:27:26 GMT 1
Hi mate loving the build ,how do I get my lc2 fork lowers the same as yours without a Da ?
|
|
|
|
Post by mak595 on Oct 20, 2019 21:44:33 GMT 1
Hi mate loving the build ,how do I get my lc2 fork lowers the same as yours without a Da ? Elbow grease ! i would rub down with 240 grit then scotbrite, finally i used etch lacquer to protect them |
|
|
|
Post by Dixie Dean on Oct 20, 2019 22:25:54 GMT 1
Thanks love rubbing down not
|
|
|
|
Post by veg on Oct 29, 2019 17:36:40 GMT 1
So got to get myself a 31k, every time i see these being rebuilt i realise i need another.
|
|
|
|
Post by mak595 on Oct 29, 2019 22:25:45 GMT 1
|
|
Deleted
Deleted Member
Posts: 0
|
Post by Deleted on Oct 29, 2019 23:42:37 GMT 1
Amazing, where did you get those decals made and applied?
|
|
|
|
Post by dusty350 on Oct 30, 2019 8:20:26 GMT 1
Wow, that's a lovely job on the paintwork That scheme works so well on an Lc2. Nearly there now  Dusty |
|
|
|
Post by mak595 on Oct 30, 2019 10:43:11 GMT 1
Amazing, where did you get those decals made and applied? The decals are from image works, my mate applied them but not easy to get on bubble or crease free !!! |
|
|
|
Post by mak595 on Oct 30, 2019 10:47:10 GMT 1
Wow, that's a lovely job on the paintwork That scheme works so well on an Lc2. Nearly there now Dusty Probably get it finish just as the grit wagons come out !!!! Will be tucked away until spring .... |
|
|
|
Post by midlifecrisisrd on Oct 30, 2019 17:50:50 GMT 1
Wow, that's a lovely job on the paintwork That scheme works so well on an Lc2. Nearly there now Dusty Probably get it finish just as the grit wagons come out !!!! Will be tucked away until spring .... That window of opportunity has gone up here Gritters were out Monday 😖 Steve |
|
|
|
Post by mak595 on Oct 30, 2019 20:27:26 GMT 1
Probably get it finish just as the grit wagons come out !!!! Will be tucked away until spring .... That window of opportunity has gone up here Gritters were out Monday 😖 Steve Not appeared up this neck of the woods yet but sure it wont be long.... |
|
|
|
Post by mak595 on Nov 3, 2019 21:59:36 GMT 1
|
|
|
|
Post by mak595 on Nov 5, 2019 20:57:05 GMT 1
Quick shake down run today, just a few miles round the local lanes, all seems good and great fun, like going back 30 years !!
|
|


 " src="//storage.proboards.com/forum/images/smiley/superangry.png">