dbgr
Drag-strip hero

Posts: 204
|
Post by dbgr on Jun 30, 2018 8:35:16 GMT 1
oh ducktail for me too
|
|
|
|
Post by Tobyjugs on Jun 30, 2018 8:35:22 GMT 1
Think your doing a good job Dusty. The more things you can think about and whittle down the options the better.
Personally i would prefer the TZ-ish look of the 4LO. You could also use some coloured cylinder head nuts/bolts for extra race bling. Also speak to Mutts for a +4 crank, and i'm pretty sure Kenny (TSA) can sort out a pipe plan and and port map for LC Touring or flat out LC rinding
If you talk to a pipe builder i would not be surprised if he told you he could offset the pipes or left to right with not too much fuss.
|
|
|
|
Post by dusty350 on Jun 30, 2018 9:43:11 GMT 1
Hi mate Pipes wont be an issue as long as it's standard Lc or Pv barrels I think. Cross over down pipes like Mutts does may make it even easier. Athena would be nice - purely coz I've never built one before, but it's not the end of the world if I don't go with it, plus it will save a fair lump of cash !! It is about looking right and working right, although I will probably not ride it much, if at all - my enjoyment is in the building of them now. It will have rearsets and clip ons, a long tank and a race seat so not something my aching body would endure for long !!  The Lc engine I have has the 375 top end, and the inlets have been worked for Ypvs reed blocks, so I could use my billet inlet, V force reeds and Pwk's could go on too. There are 8 ally Tz headbolts too, although they will benefit from getting the blue finish re anodized, but would look trick when done. Dusty  |
|
|
|
Post by bid on Jun 30, 2018 10:34:18 GMT 1
hi dusty,
this is gonna be awesome watching this unfold,
would deffo do the coils like a race bike as you said never seen it on a road bike, and yes duck tail much better or even an 80's tz 350g unit would look the dogs too, what ever cant wait to see it when its done,
atb dave😃👍
|
|
|
|
Post by reggieperrin on Jun 30, 2018 16:16:00 GMT 1
Looking good Dusty...
Ducktail for me as well....
|
|
|
|
Post by dusty350 on Jun 30, 2018 19:23:40 GMT 1
I do like the duck tail seat - just thought I would offer the other up to see how it looks. Will need to shorten it first. Today I tackled the paint on the ally tank. I'm going for a different scheme and wanted to get the paint off to see how good the tank was underneath. I tried the other day with a sanding disc in my angle grinder, but that was going to take for ever, so I ordered some strong paint stripper from ebay, and today "was the day" ! 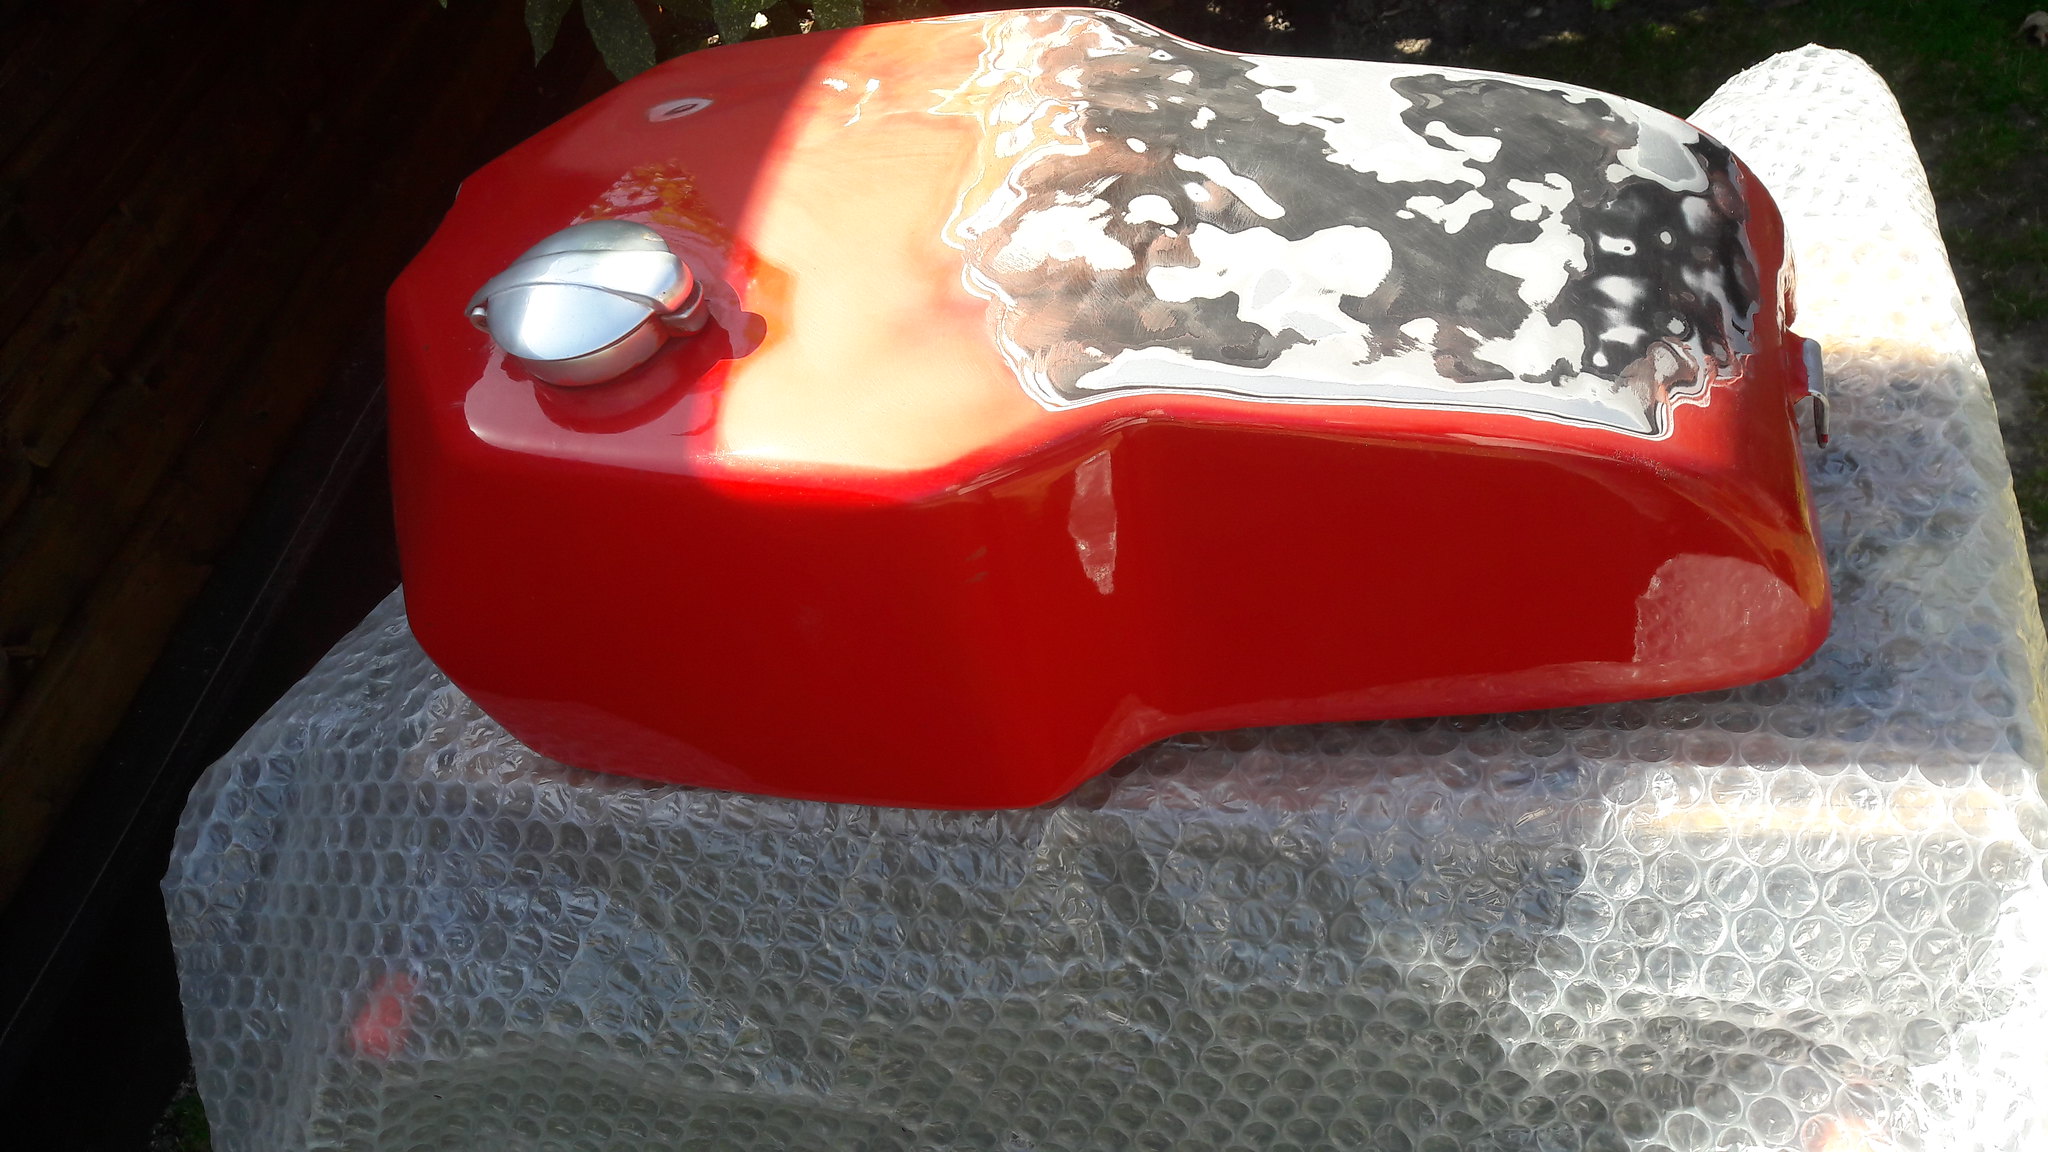 20180630_100734 20180630_100734 by David Miller, on Flickr It's taken about 4 hours so far - there is about 3 layers of paint beneath the red top coat. Still, mostly done now, just need to spend some time on the underside; 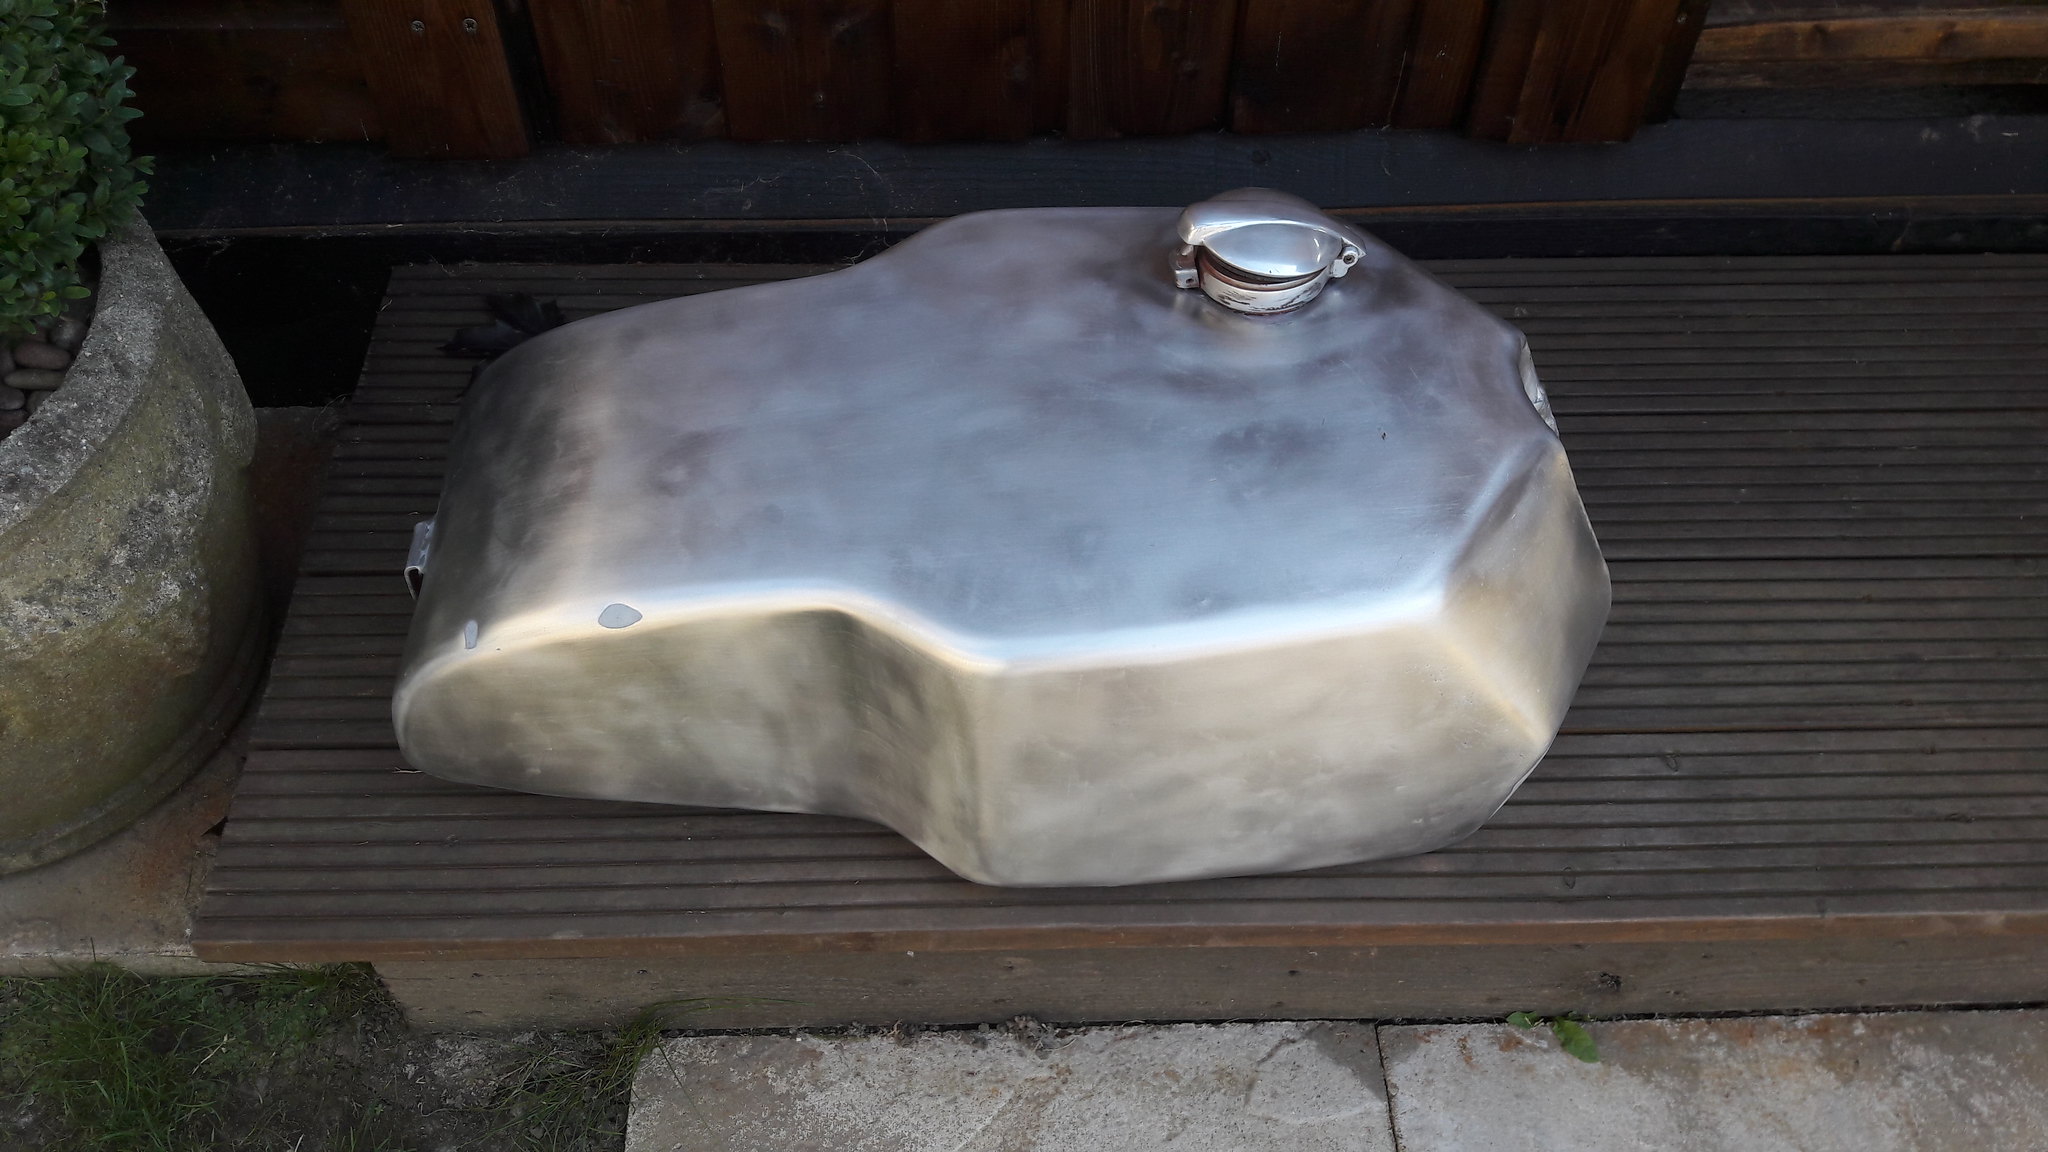 20180630_170047 20180630_170047 by David Miller, on Flickr 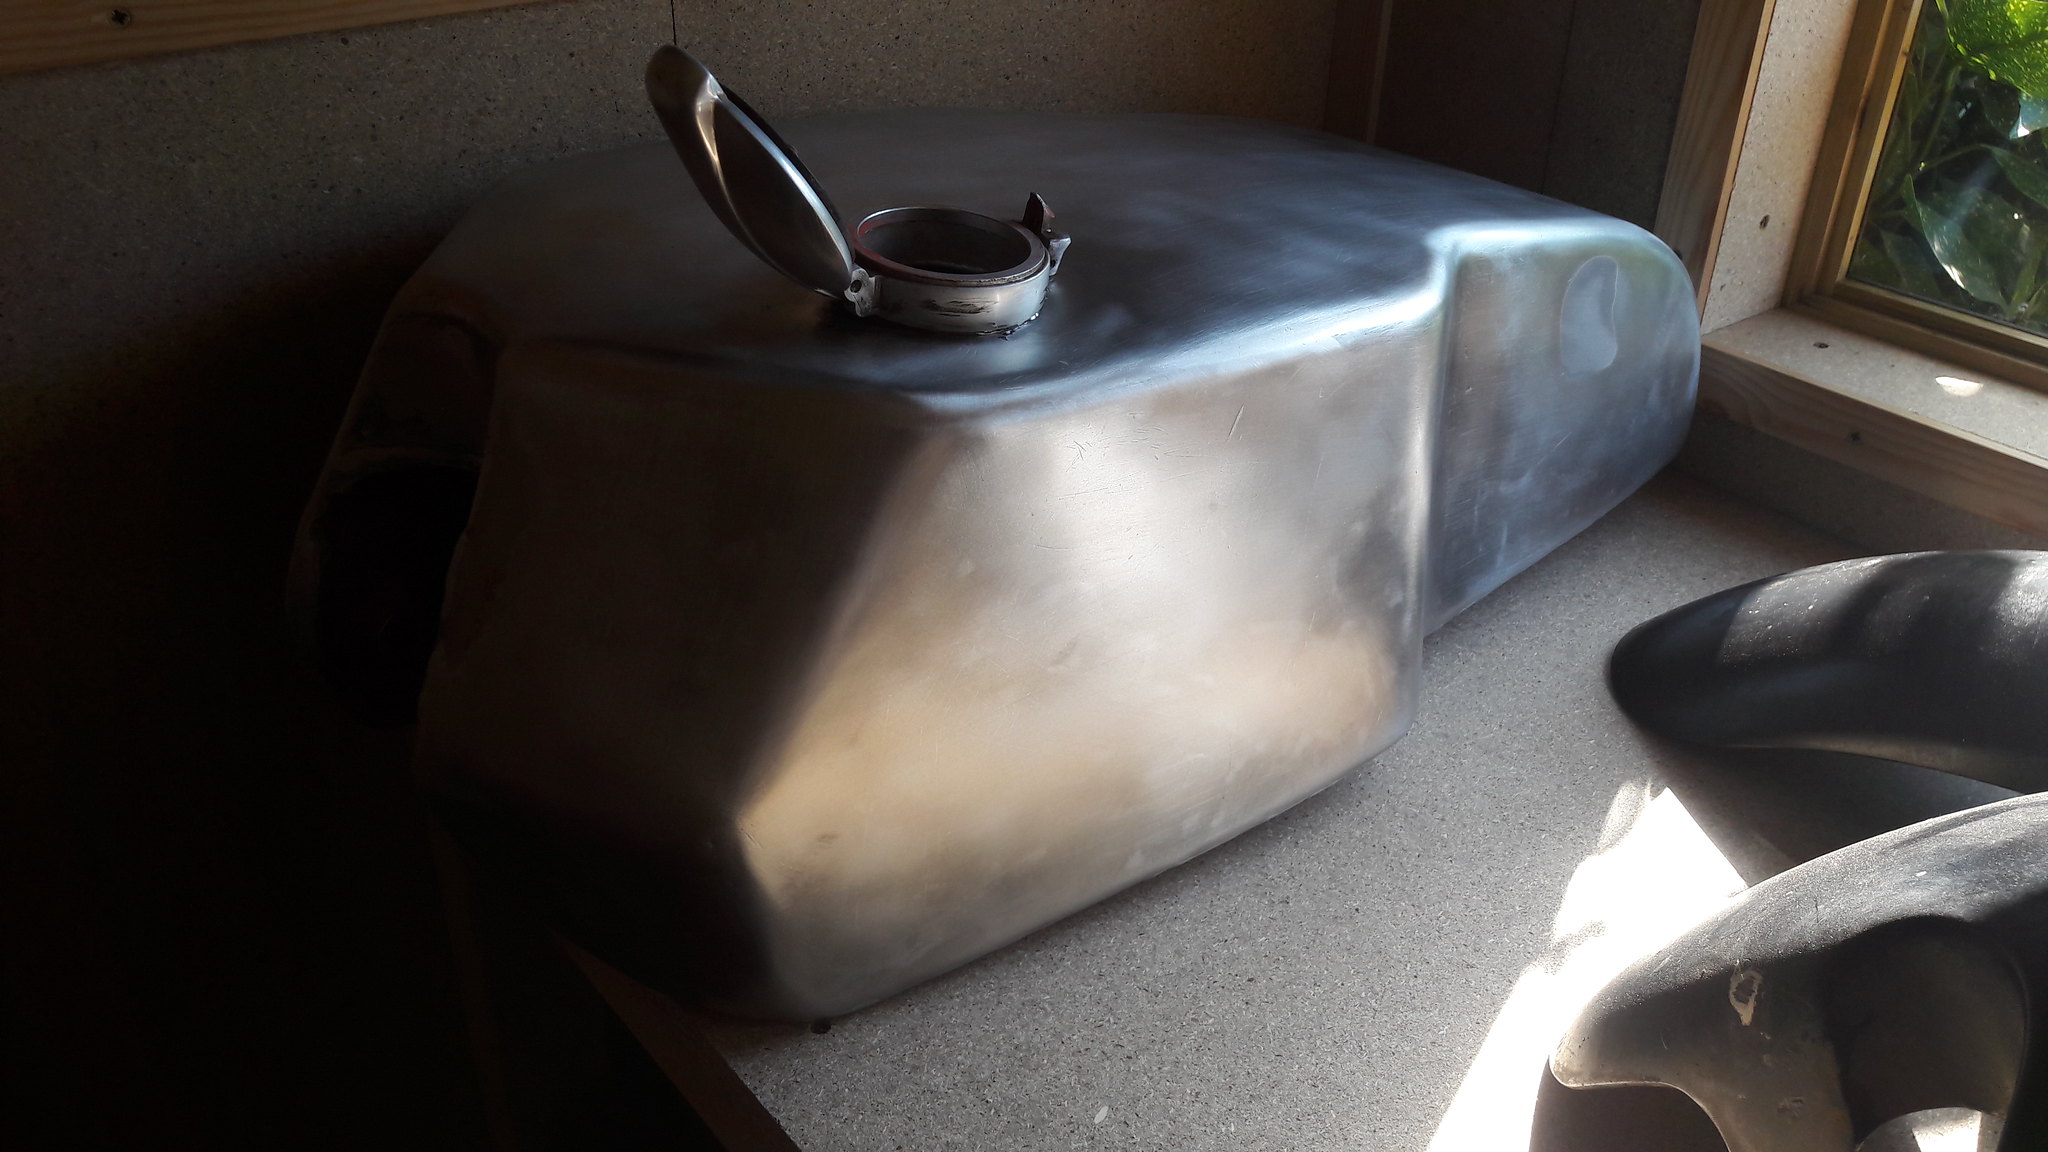 20180630_164553 20180630_164553 by David Miller, on Flickr Good thing is that there is not much filler considering it's a race tank ! Mark Cordwell will be my painter of choice when I'm ready. Still need to decide on a scheme  Dusty |
|
|
|
Post by headcoats on Jul 1, 2018 21:40:50 GMT 1
What stripper did you get ?
|
|
|
|
Post by dusty350 on Jul 2, 2018 7:19:10 GMT 1
|
|
|
|
Post by dusty350 on Jul 3, 2018 20:05:47 GMT 1
Back to the engineers today to drop off the bottom half of my Lc engine. They are going to reem out the gear shaft hole to press in the steel bush;  20180703_095911 20180703_095911 by David Miller, on Flickr Still not decided which engine will go in this bike, but both engines are getting rebuilt so the bush was the first job to do on the Lc. And I've waited a long time to get a proper, ally Tz tank, and then, like busses, 2 come along !! 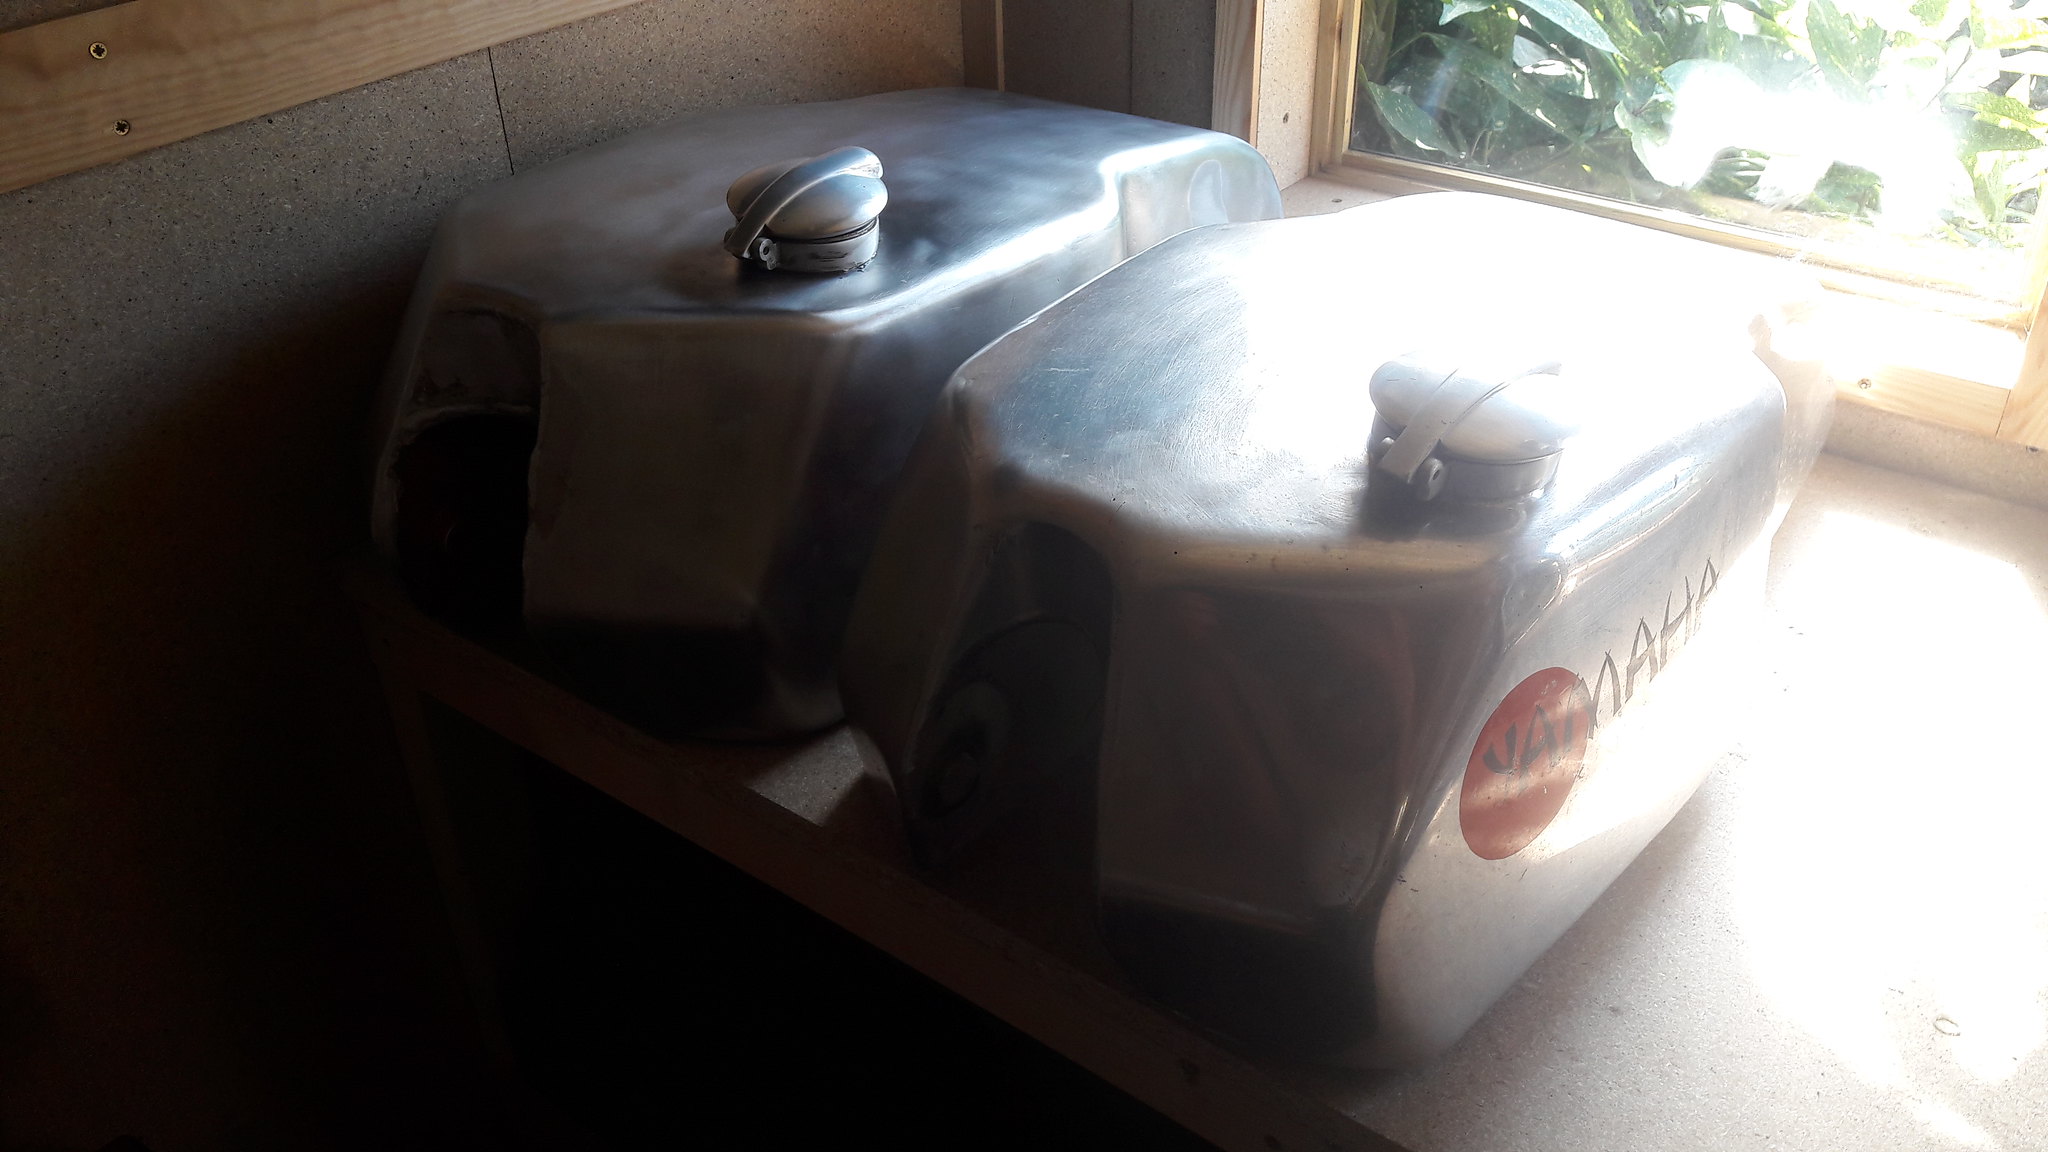 20180703_161846 20180703_161846 by David Miller, on Flickr Still waiting on fork parts. Next thing I would like to do is sort out new lock stops for the Rgv yokes so will source some taper bearings. And I was going to try and fit some stabiliser bars under the engine, but I think they will need a fair bit of work so probably wont bother unless I can find an easy way of doing it. Dusty |
|
|
|
Post by donkeychomp on Jul 3, 2018 21:35:10 GMT 1
Love the tanks Dusty. Hang one on the wall, sort of Art Deco lol! Didn't know Clive and the lads did engine work too...
Alex
|
|
|
|
Post by Tobyjugs on Jul 3, 2018 23:25:04 GMT 1
Hi Dusty here is an idea for your stabiliser bars. These where angled a little bit more to help against the movement of the engine. 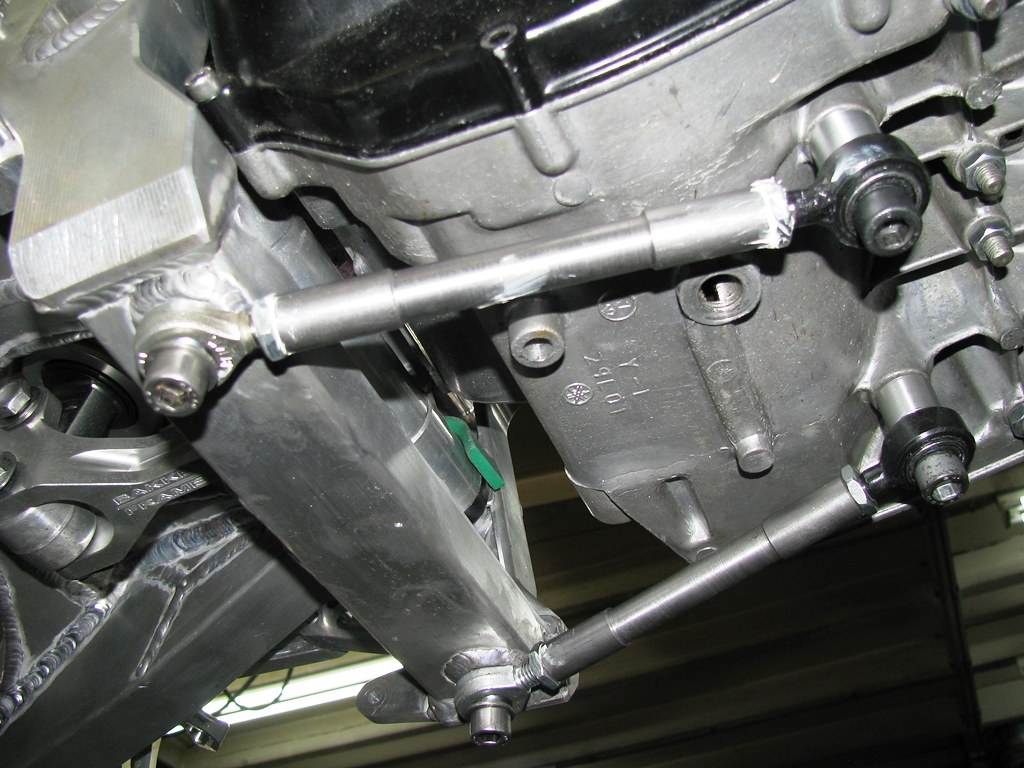 |
|
|
|
Post by dusty350 on Jul 4, 2018 7:13:10 GMT 1
Hi Alex The tank I just bought is exactly the same as my existing one - possibly made by Maxton - so it will fit the other aircooled frame for a possible future project ? And BWB will do any engineering projects. They did the last gear shaft bush for me - I didn't want to attempt it with my very limited tools/skills ! They are very busy again - filming just started at Shepperton this week so work has ramped up for them. I've got to ring middle of next week to see if it's been done. Toby - thanks for the pic I was thinking about going backwards too. The bottom engine mounts are still intact on the aircooled frame and I had wondered if I could use them. The dummy engine in the bike is an early one with no tie bar provision, but I have another set of cases that I could swap over to see how much work is involved. I'm not too bothered if it will be a ballache as I will be using expansions so it's not something I will throw lots of effort at. If it doesn't work out I will cut the bottom mounts out as they wont be needed. Dusty |
|
|
|
Post by 4l04ever on Jul 4, 2018 12:33:51 GMT 1
Hi Dusty here is an idea for your stabiliser bars. These where angled a little bit more to help against the movement of the engine. Those mounts look solid, so not sure if they might crack something or cause vibrations in the frame? May be worth looking at using a rubber bush in at least one end, or replicating the standard bars with a bush at each end. |
|
|
|
Post by 4l04ever on Jul 4, 2018 12:36:23 GMT 1
My engine with no tie bars in an LC twists loads when on the gas, as could be seen while on the dyno... I will fit some when I rebuild that bike.
|
|
|
|
Post by Tobyjugs on Jul 4, 2018 12:39:22 GMT 1
Hi Dusty here is an idea for your stabiliser bars. These where angled a little bit more to help against the movement of the engine. Those mounts look solid, so not sure if they might crack something or cause vibrations in the frame? May be worth looking at using a rubber bush in at least one end, or replicating the standard bars with a bush at each end. Hi Rob the black joints are silent blocks. |
|
|
|
Post by dusty350 on Jul 5, 2018 17:50:22 GMT 1
Hi Spent a bit more time on the frame today. I swapped the cases over for a pair with tie bar provision, and offered up a set of tie bars to see if they could bolt to the mounts that are used for an aircooled motor's bottom mounting point. Not gonna work - tie bars will be at the wrong angle and slightly too short, so that meant the mounts were not needed, so were chopped off; 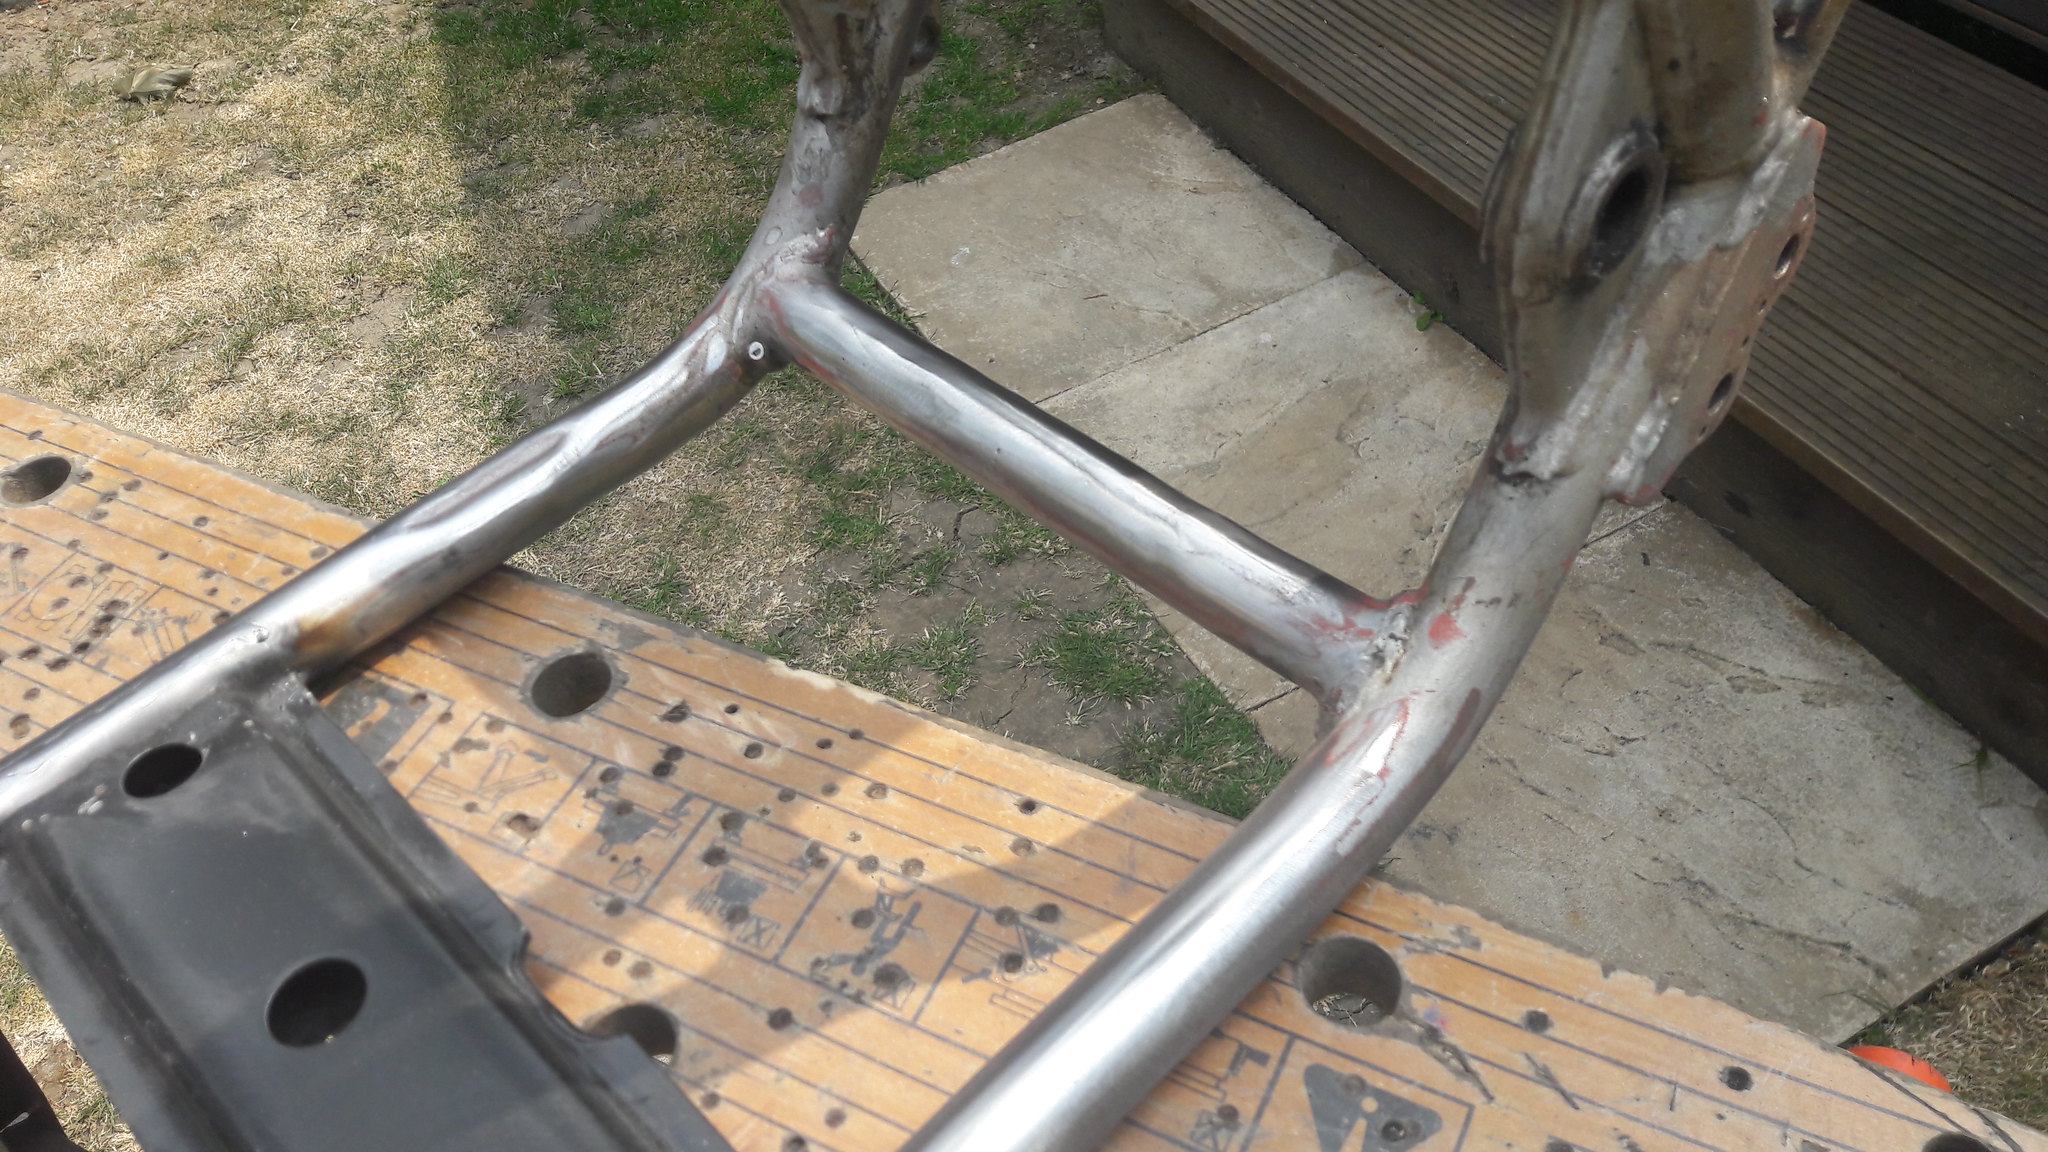 20180705_132829 20180705_132829 by David Miller, on Flickr I am still considering getting some plates welded in so the tie bars could be used. I will bolt the cases back in and see what needs to go where. Whilst the grinder was plugged in, I tidied up some other bits; 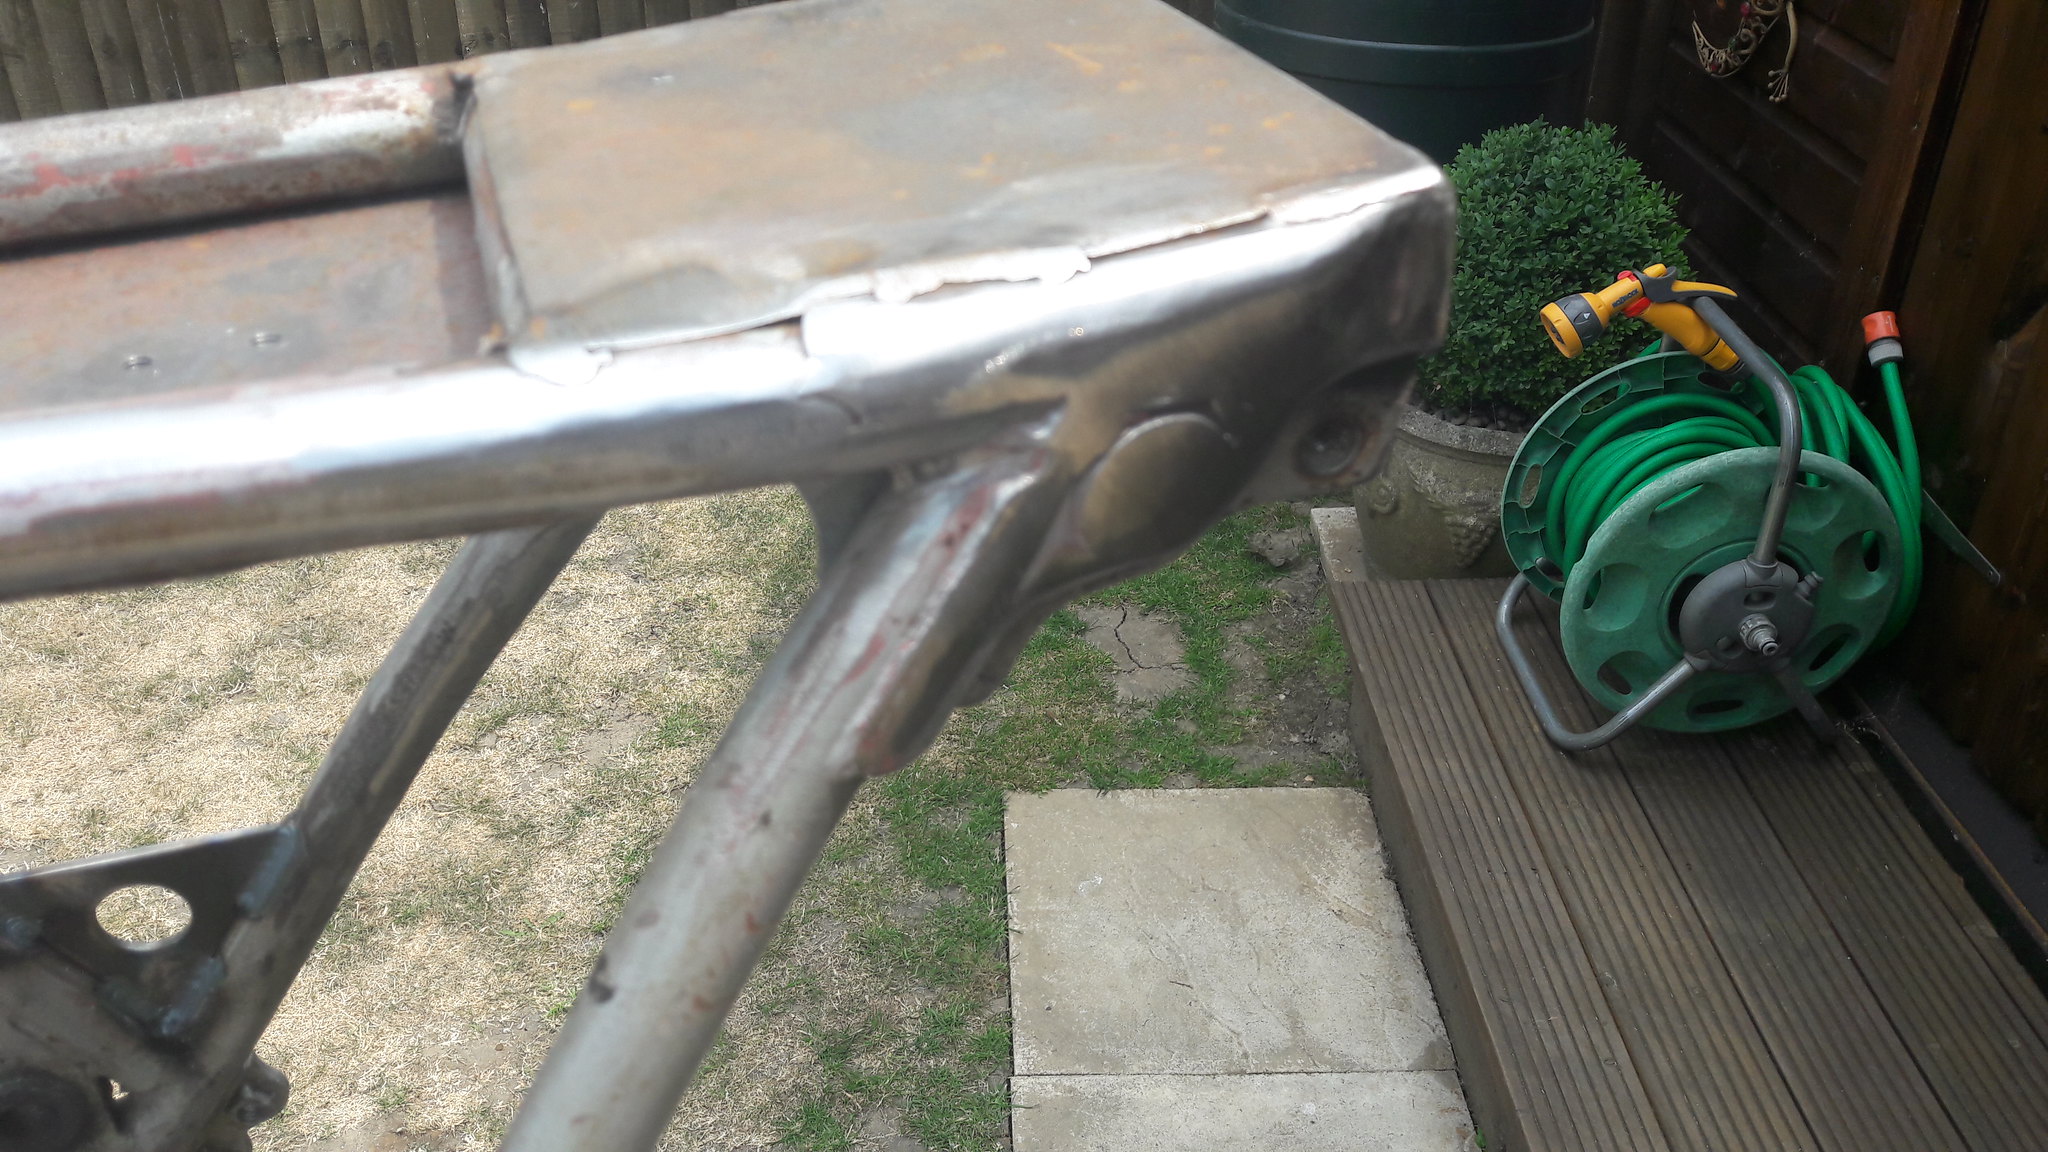 20180705_132922 20180705_132922 by David Miller, on Flickr 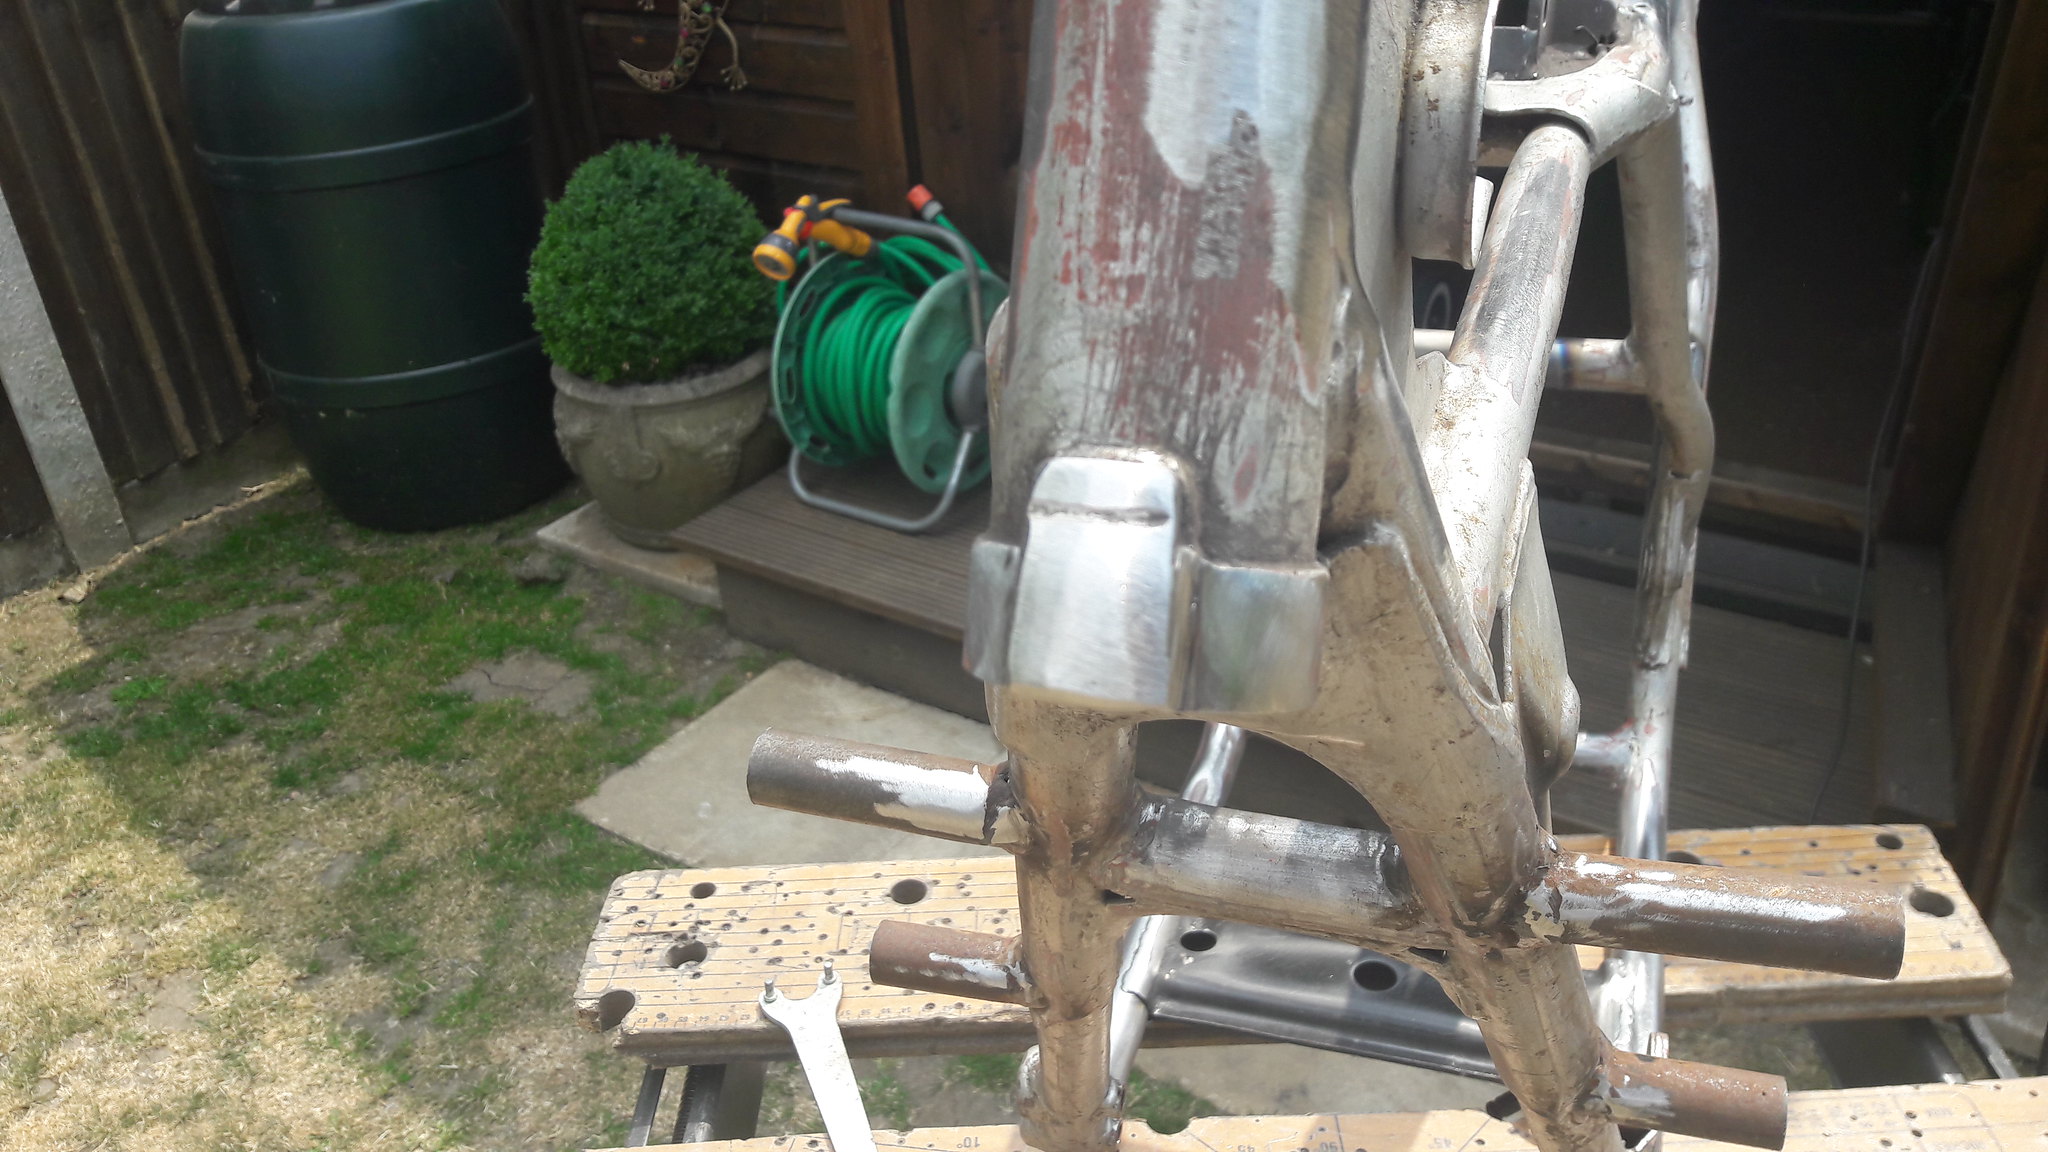 20180705_132839 20180705_132839 by David Miller, on Flickr The top shock mount rubbed the inside edges of the ally tank. May have caused a problem over time with vibration, so I trimmed the mount back a bit to clear the tank; 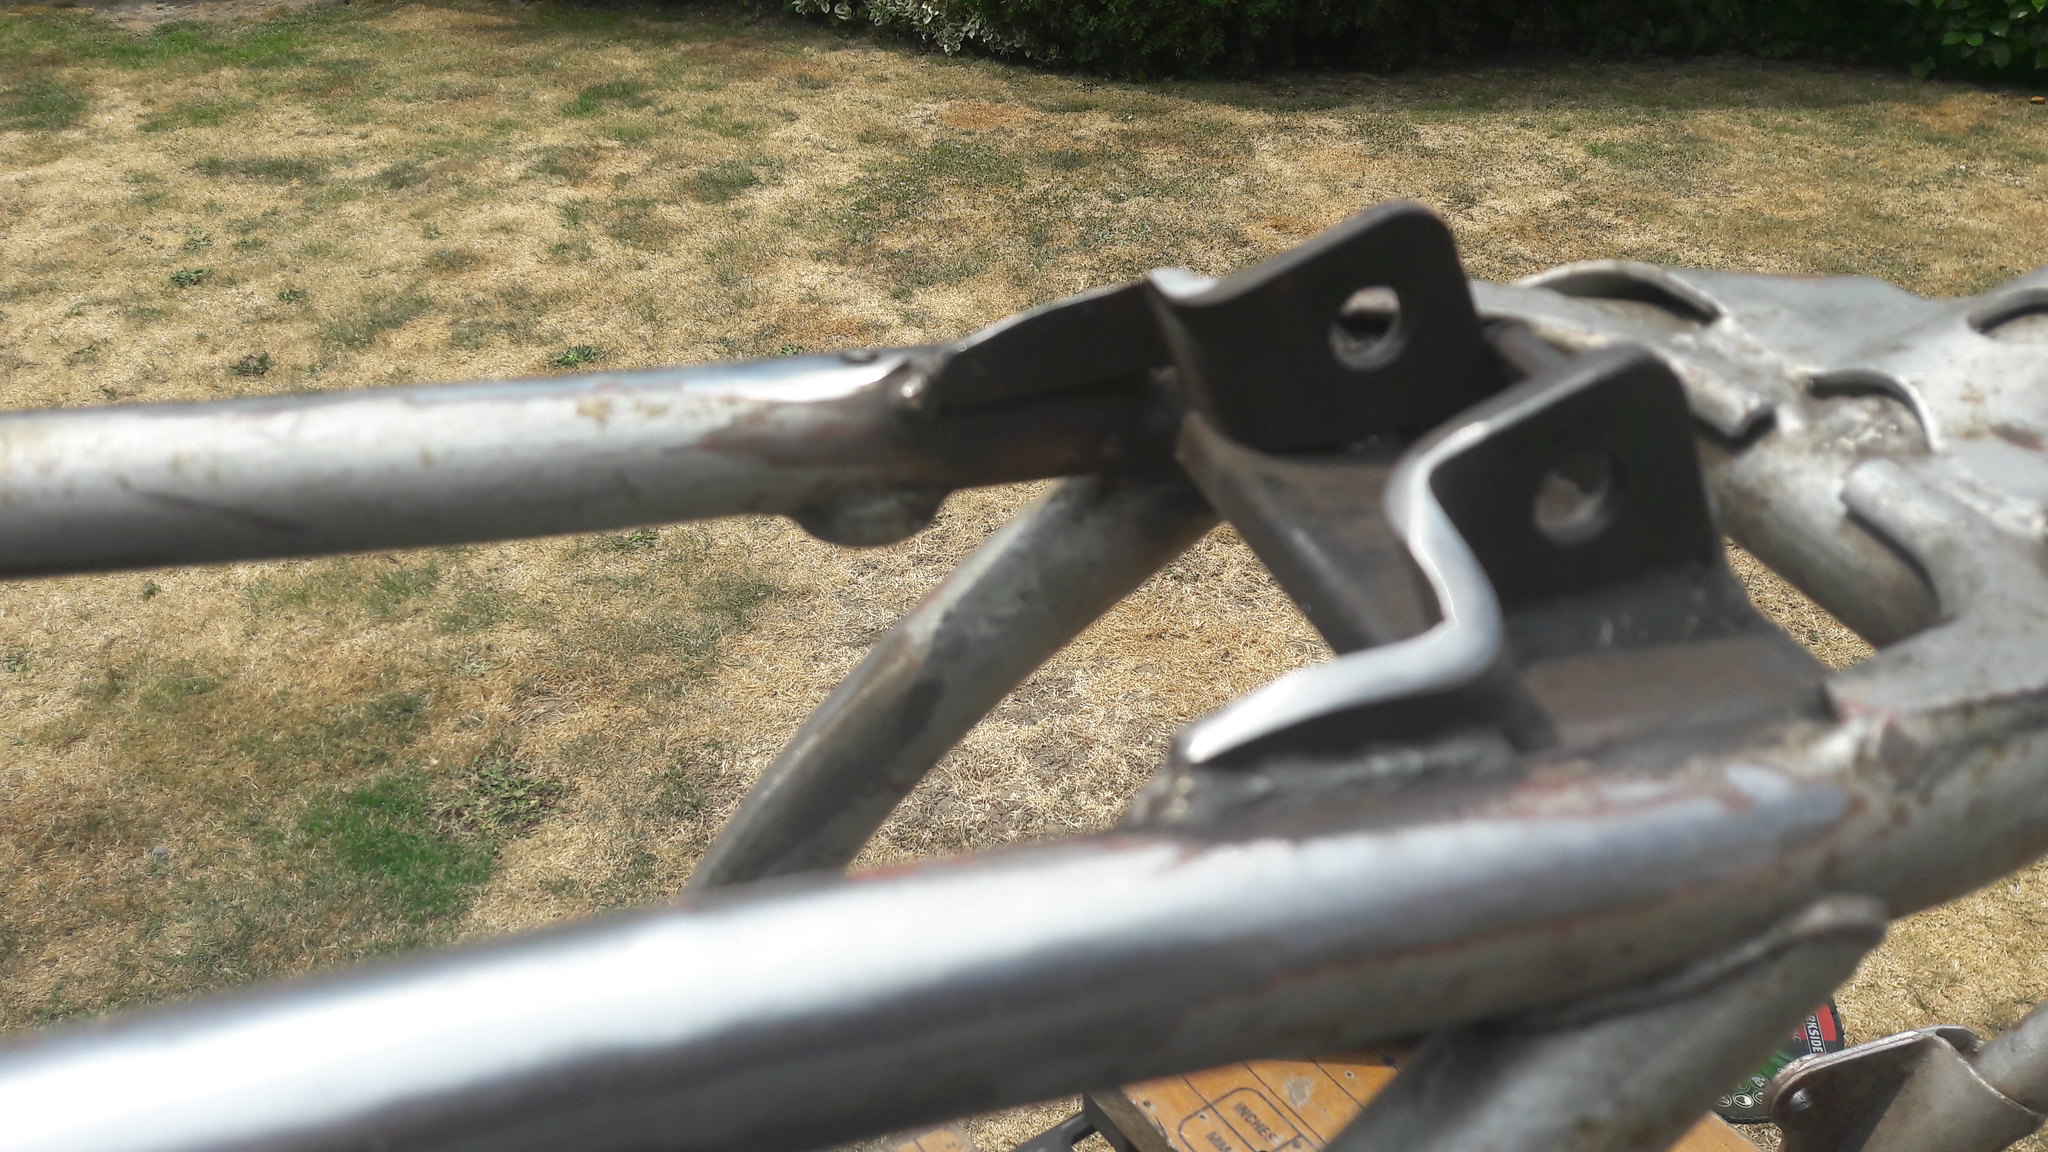 20180705_132849 20180705_132849 by David Miller, on Flickr There are a few jobs left for the frame. I need to get a tray made up to fit under the seat for battery, electrical boxes etc. I also need to decide on footrests. I've been looking at the Chinese made items on ebay - £70 or £80 gets a trick looking pair of billet rearsets for a modern bike - just got to decide whether it's worth the gamble ! Also need to sort lock stops. Although I will need to mod the bottom yoke, I think the main stem on the frame may need so more metal adding. Still undecided on engine. If I go with the Pv, I will need to find a place for the servo motor. And talking of engines, I'm going in a different direction with the Lc engine. I bought a pair of Lc barrels on standard bore size; 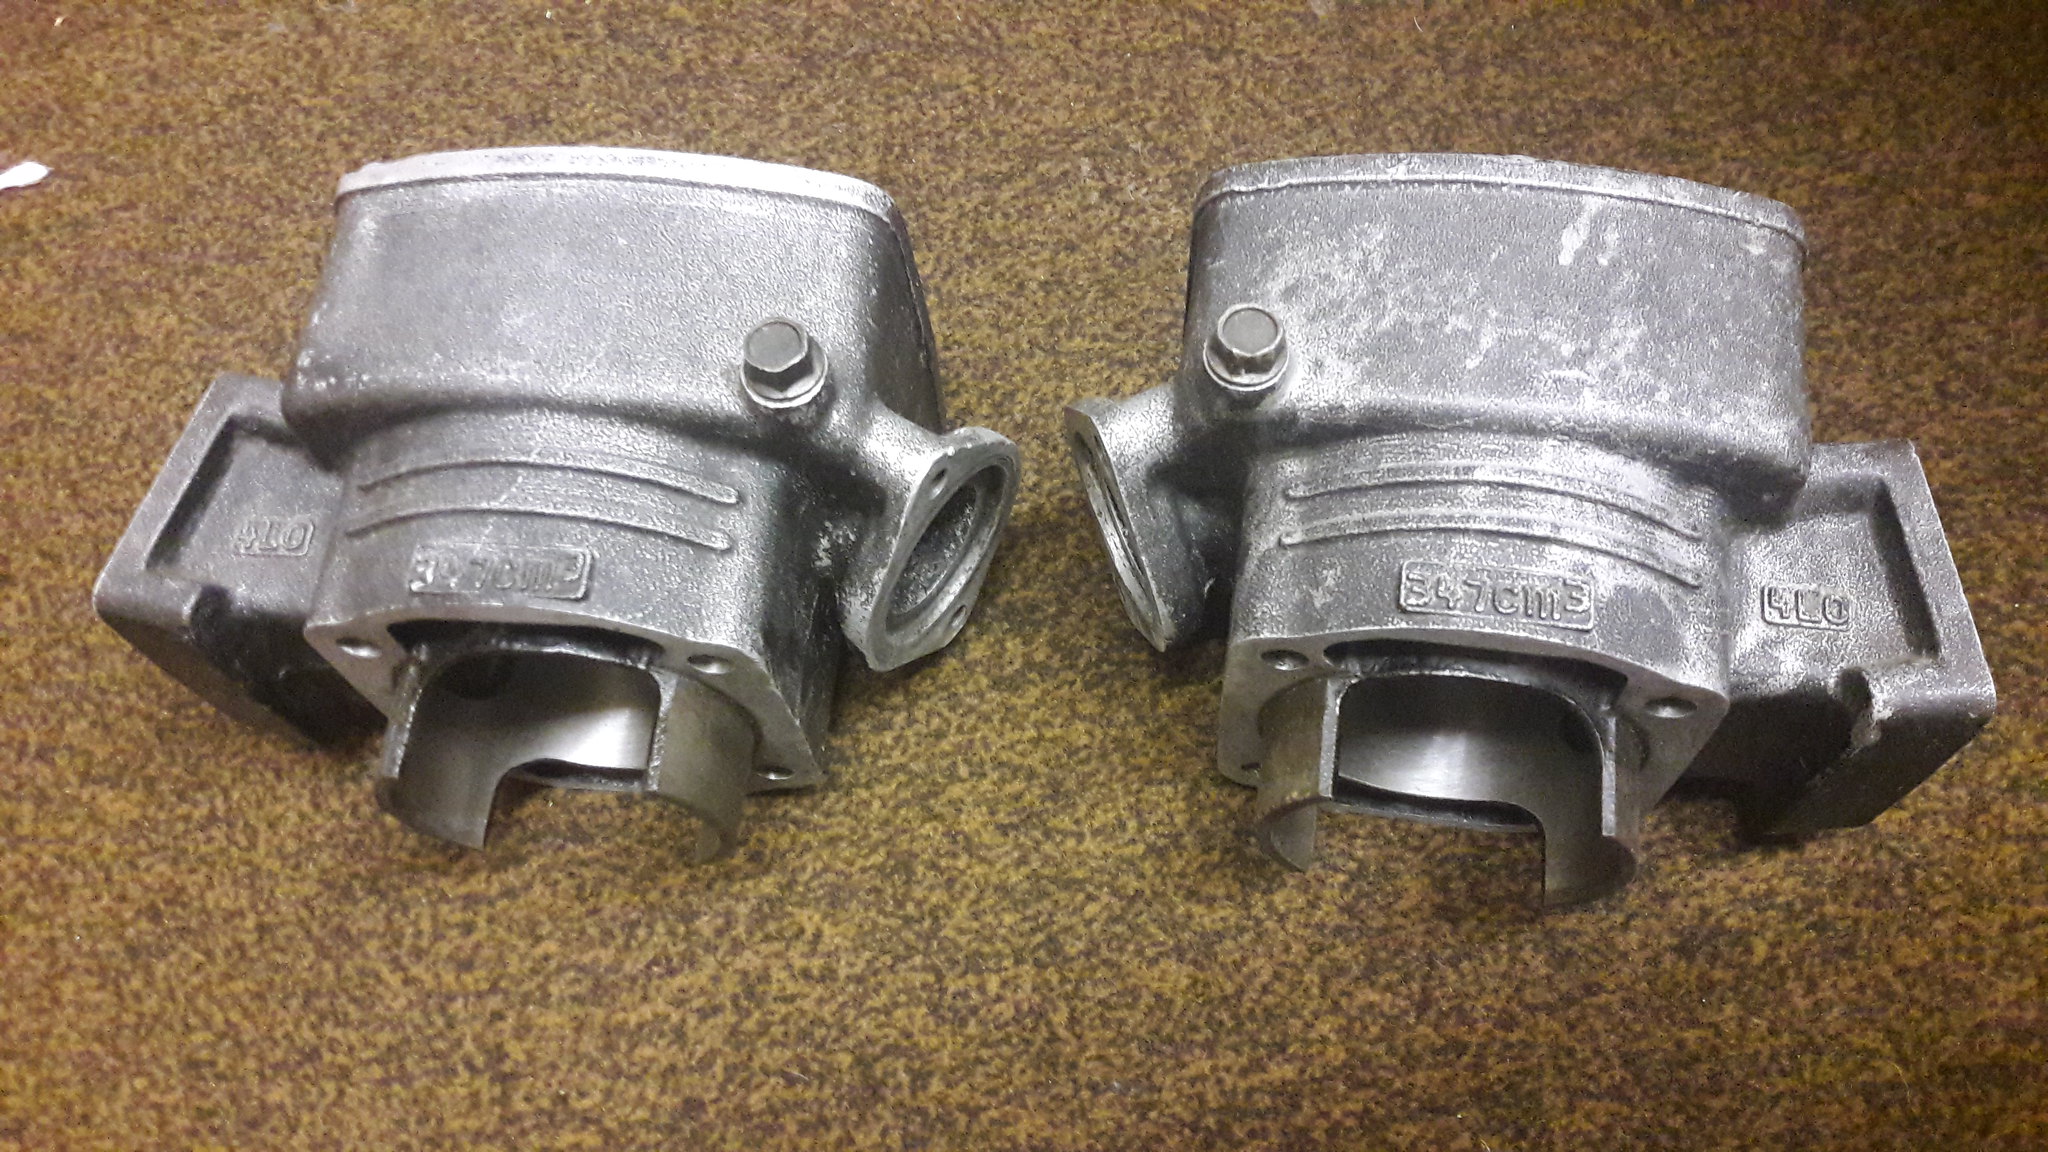 20180705_163005 20180705_163005 by David Miller, on Flickr They will need a rebore as 1 has a slight gouge by a port. I just felt that if I went with standard bores/cc, I could use my NOS head/airbox/set up if it goes back in the Lc. And I missed the postie today so hopefully the package at the sorting office contains the parts to start my fork rebuild. More soon Dusty |
|
|
|
Post by donkeychomp on Jul 5, 2018 21:51:26 GMT 1
I have a side stand Dusty!
I can drop it off tomorrow late afto early evening if you are about. And it would be nice to see the TZ again!
Alex
|
|
|
|
Post by dusty350 on Jul 5, 2018 21:54:39 GMT 1
Ah, brilliant Alex Let me know how much. Was that from the aircooled fella ? Dusty |
|
|
|
Post by donkeychomp on Jul 5, 2018 21:57:35 GMT 1
No. I had one I didn't even know about!
Alex
|
|
|
|
Post by dusty350 on Jul 5, 2018 22:02:26 GMT 1
Nice one Will pay you for it or swap something. Dusty |
|
|
|
Post by donkeychomp on Jul 5, 2018 22:10:08 GMT 1
pfft...  |
|
|
|
Post by dusty350 on Jul 6, 2018 9:15:26 GMT 1
Picked the first parts up from the Post Office this morning for the forks rebuild; 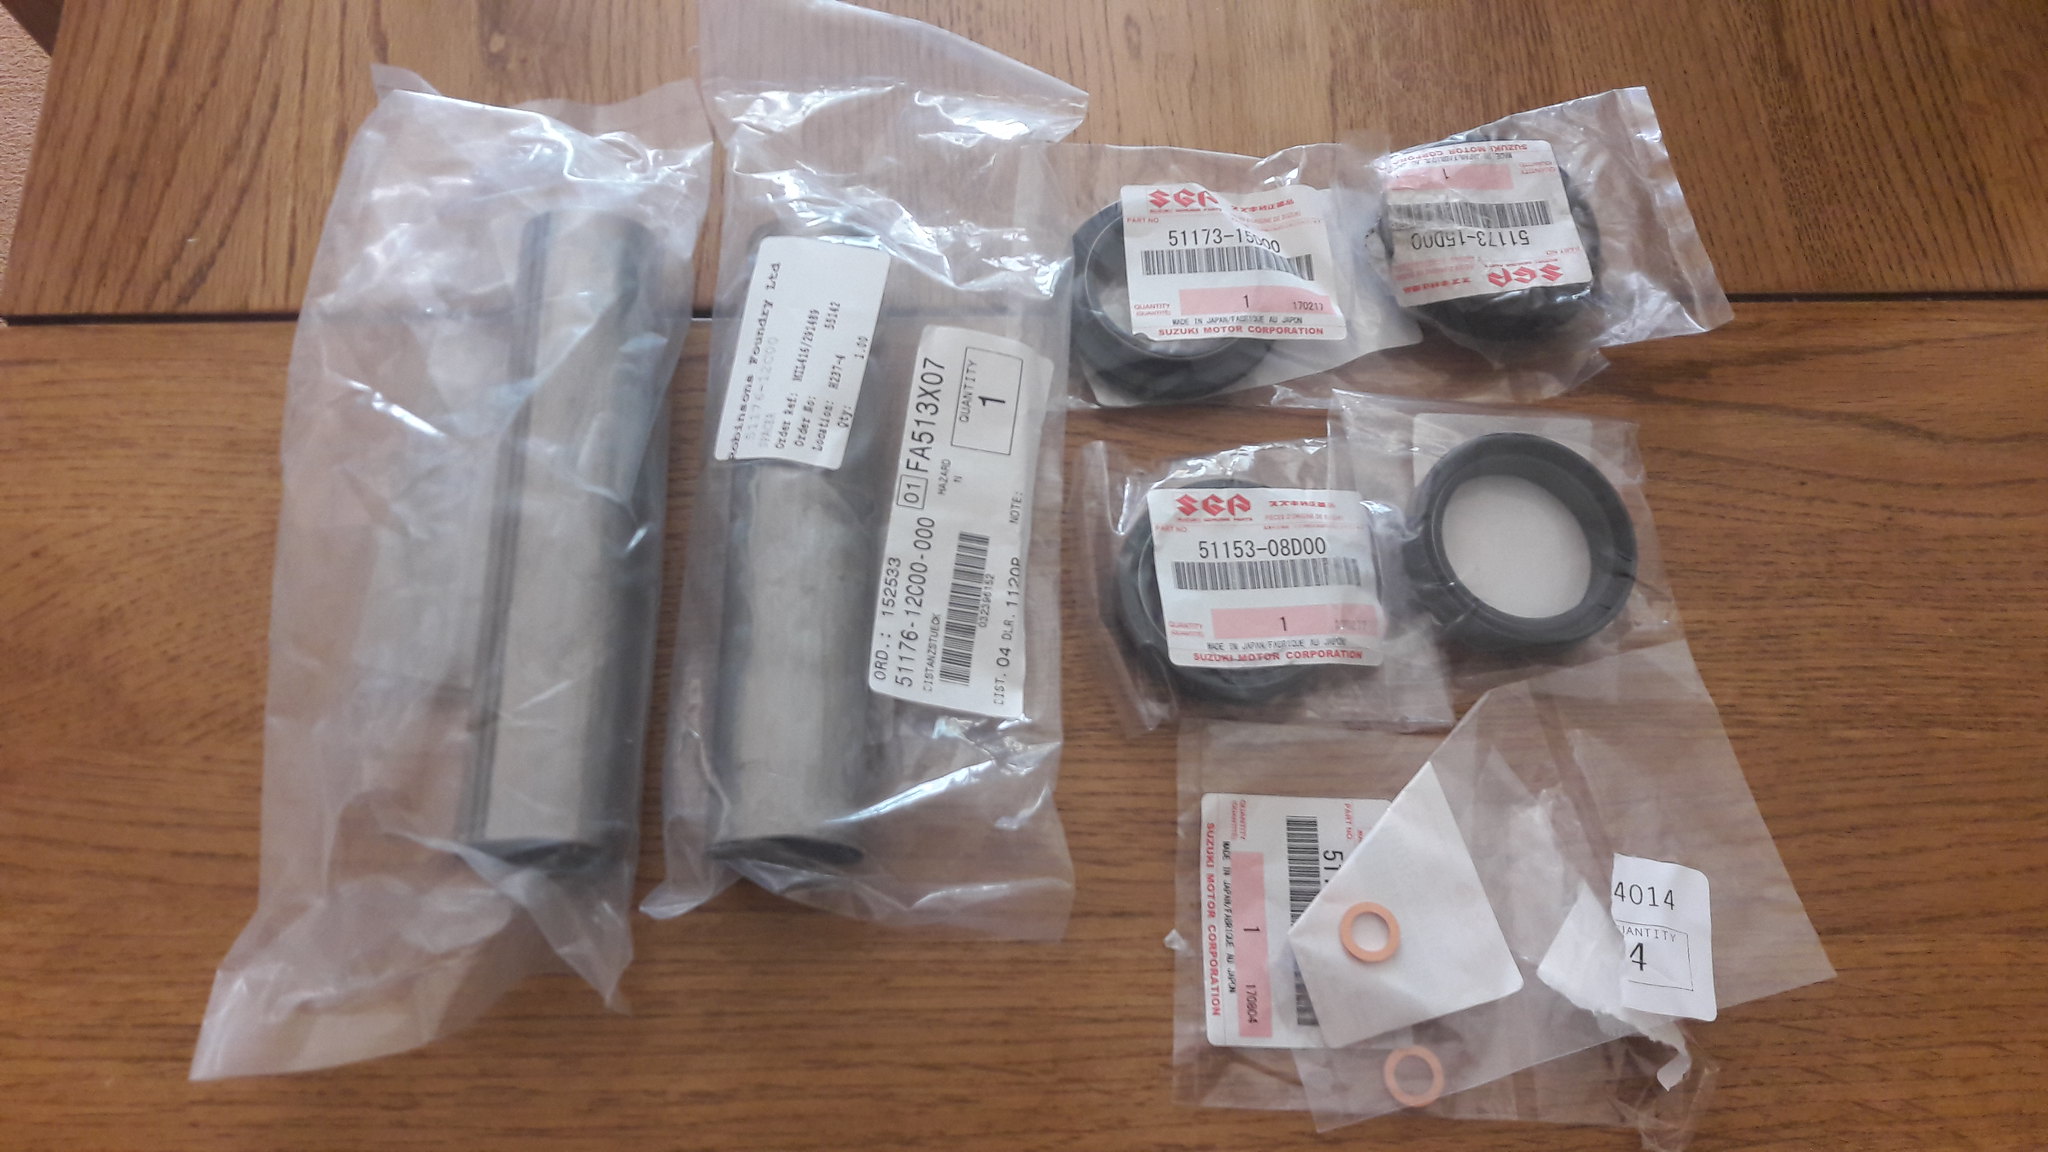 20180706_085011 20180706_085011 by David Miller, on Flickr I went with genuine Suzuki for the seals so hopefully no leaks ! Just ordered 2 new stanchions and some new springs too from Wemoto - they should arrive tomorrow so hope to start the rebuild over the weekend. Dusty |
|
|
|
Post by mouse on Jul 6, 2018 10:53:12 GMT 1
This is really taking shape Dusty, waiting with bated breath for the next instalment, looking great!
Mouse
|
|
|
|
Post by dusty350 on Jul 8, 2018 11:41:29 GMT 1
My new stanchions and springs arrived yesterday, just as I was leaving for Brands, so couldn't wait to open it all when I got in last night. I bought 2 new pattern stanchions from Wemoto. The tubes are made by Tarrozzi, and are obviously identical to the Suzuki originals, which are fairly well pitted. I also bought a pair of progressive springs, made in Germany by Wirth, so I now have all the parts to rebuild. These forks came with the spares that were with the yellow Lc I bought a few weeks back and were obviously in a really poor state when I started on them. Goodness only knows what sort of life they have led, but the internal parts bear no resemblance to standard springs and spacer tubes, and both sides are different too !!  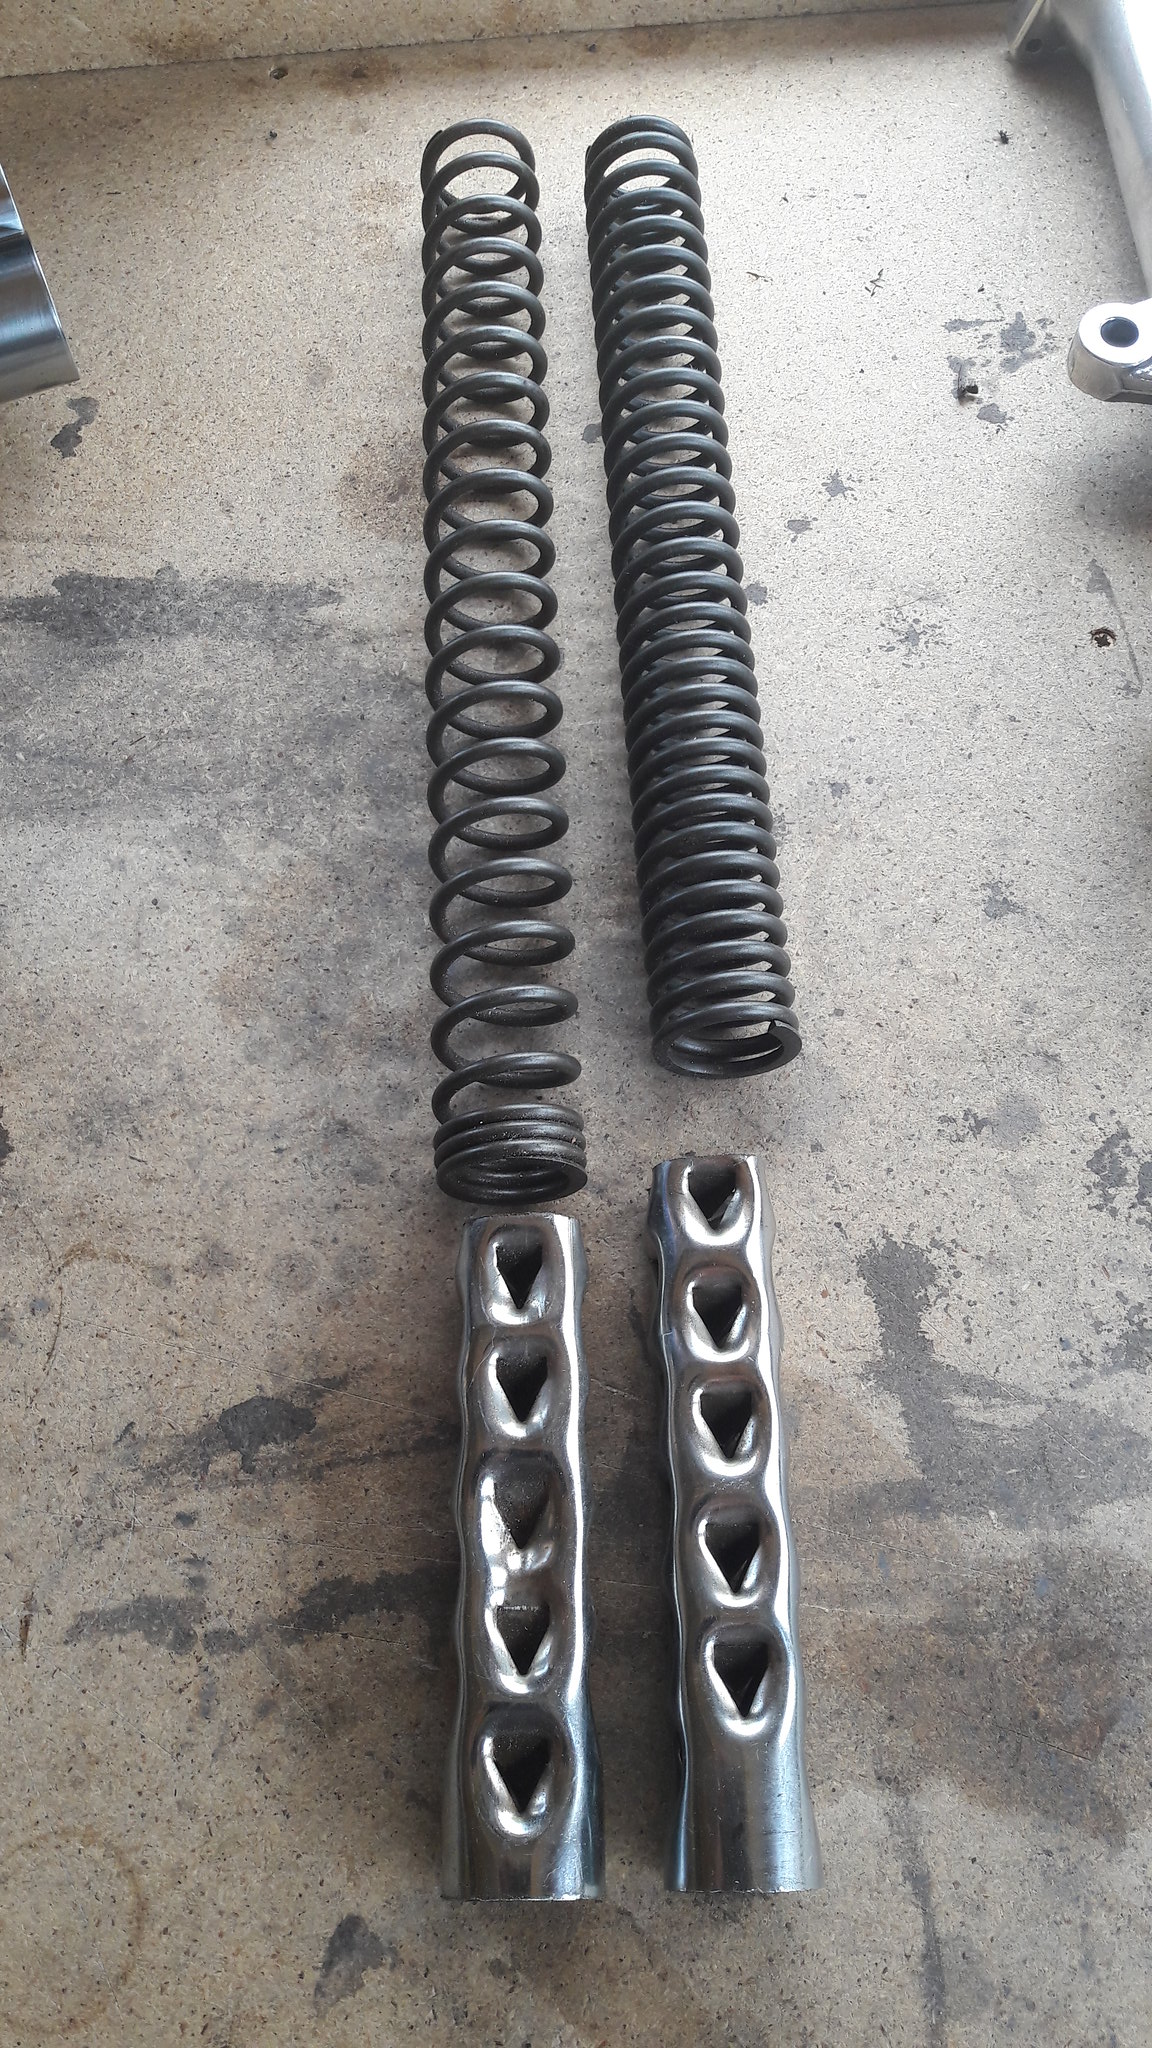 20180708_105825 20180708_105825 by David Miller, on Flickr Standard Vj21 spacer tubes are just plain steel tubes - both the same length. The Wirth springs are the same length as each other, but don't match the length of either of the existing springs. They are between the 2 existing springs, length wise. I know these forks aren't gonna set the world alight performance wise, but they will be a lot better once I've finished with them and I think they will suit the bike well. Everything has had a good clean, and I have rubbed down a few rough edges - both from manufacture and ham fisted previous owners !; 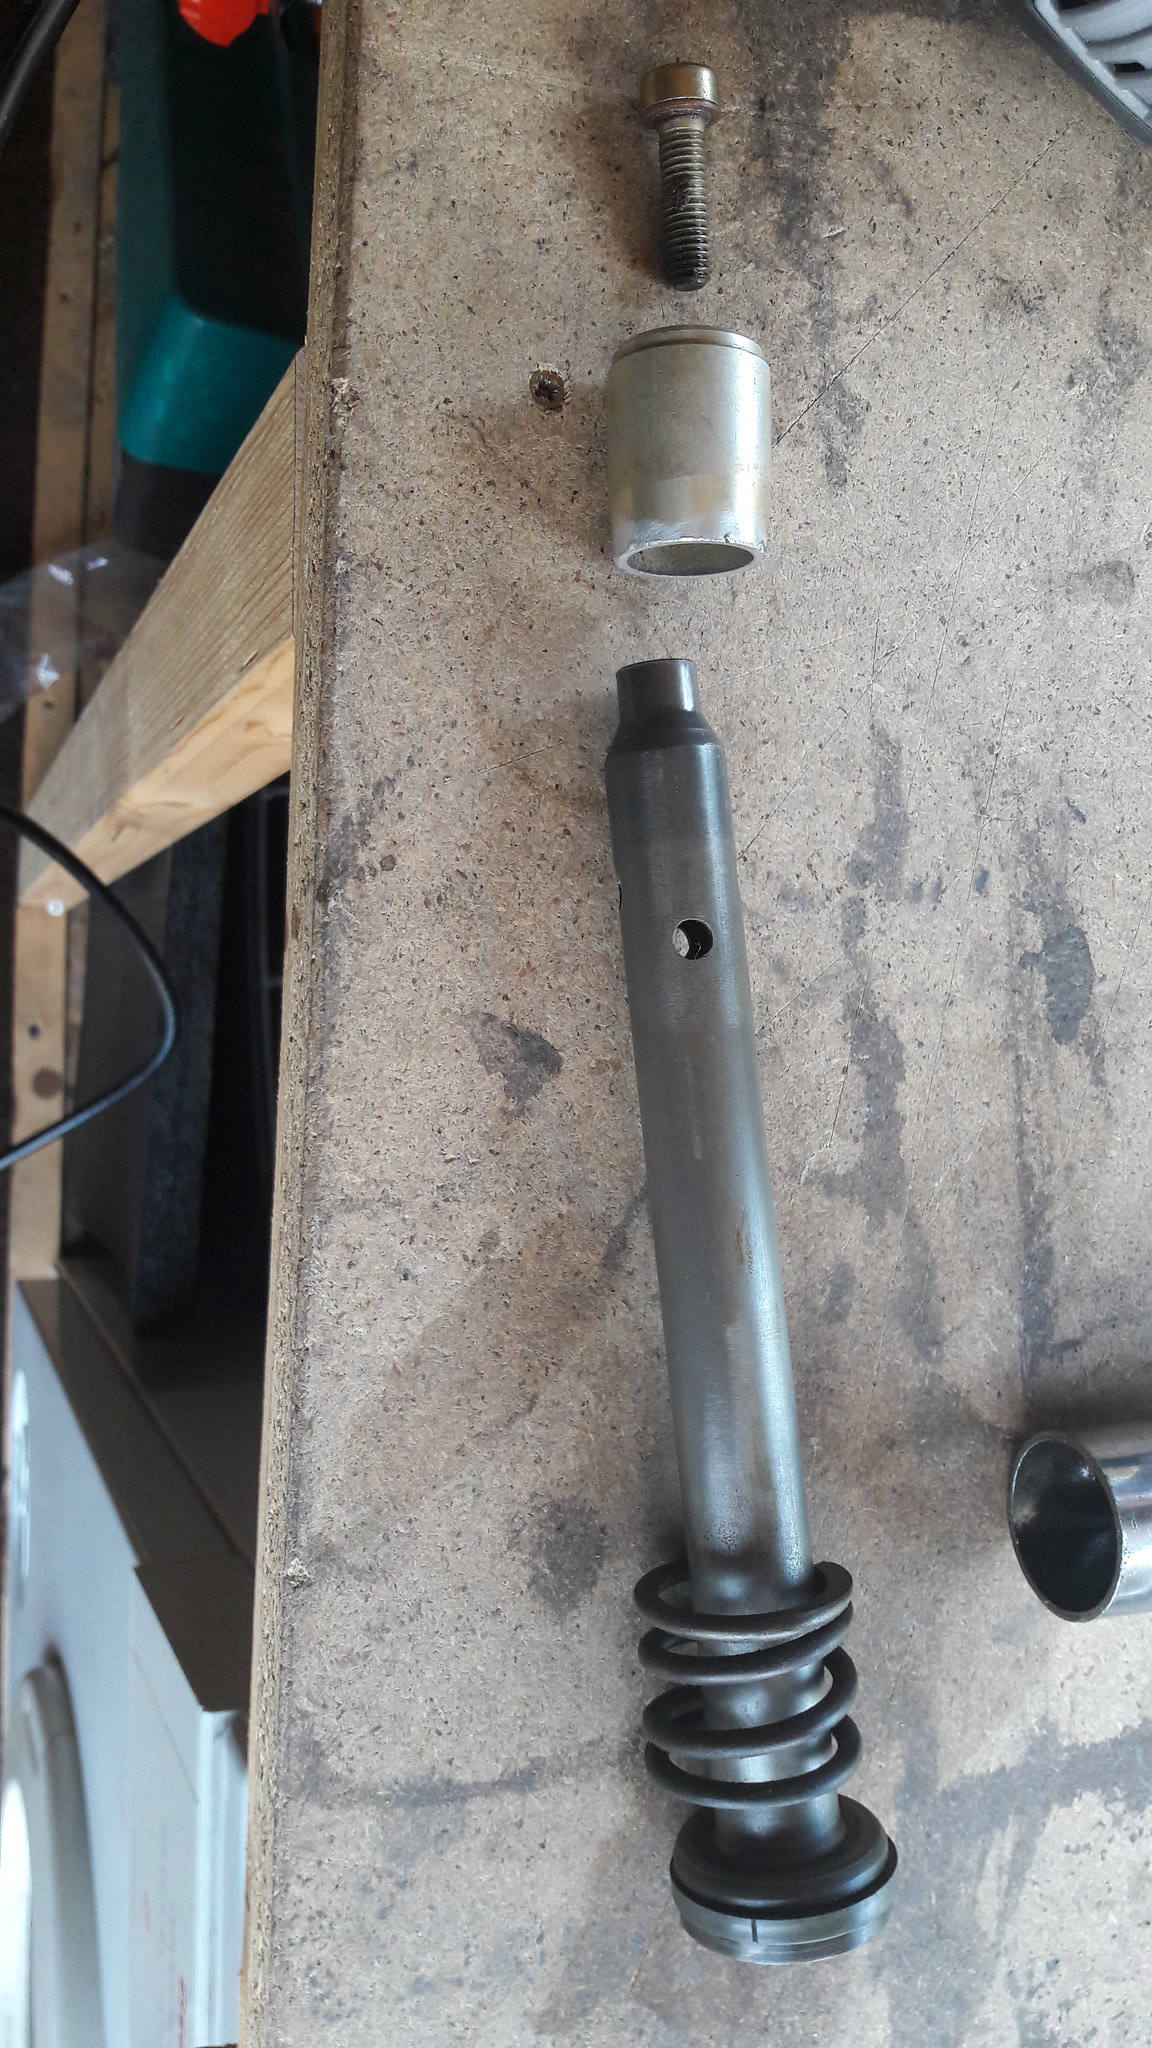 20180708_105217 20180708_105217 by David Miller, on Flickr New tube against old; 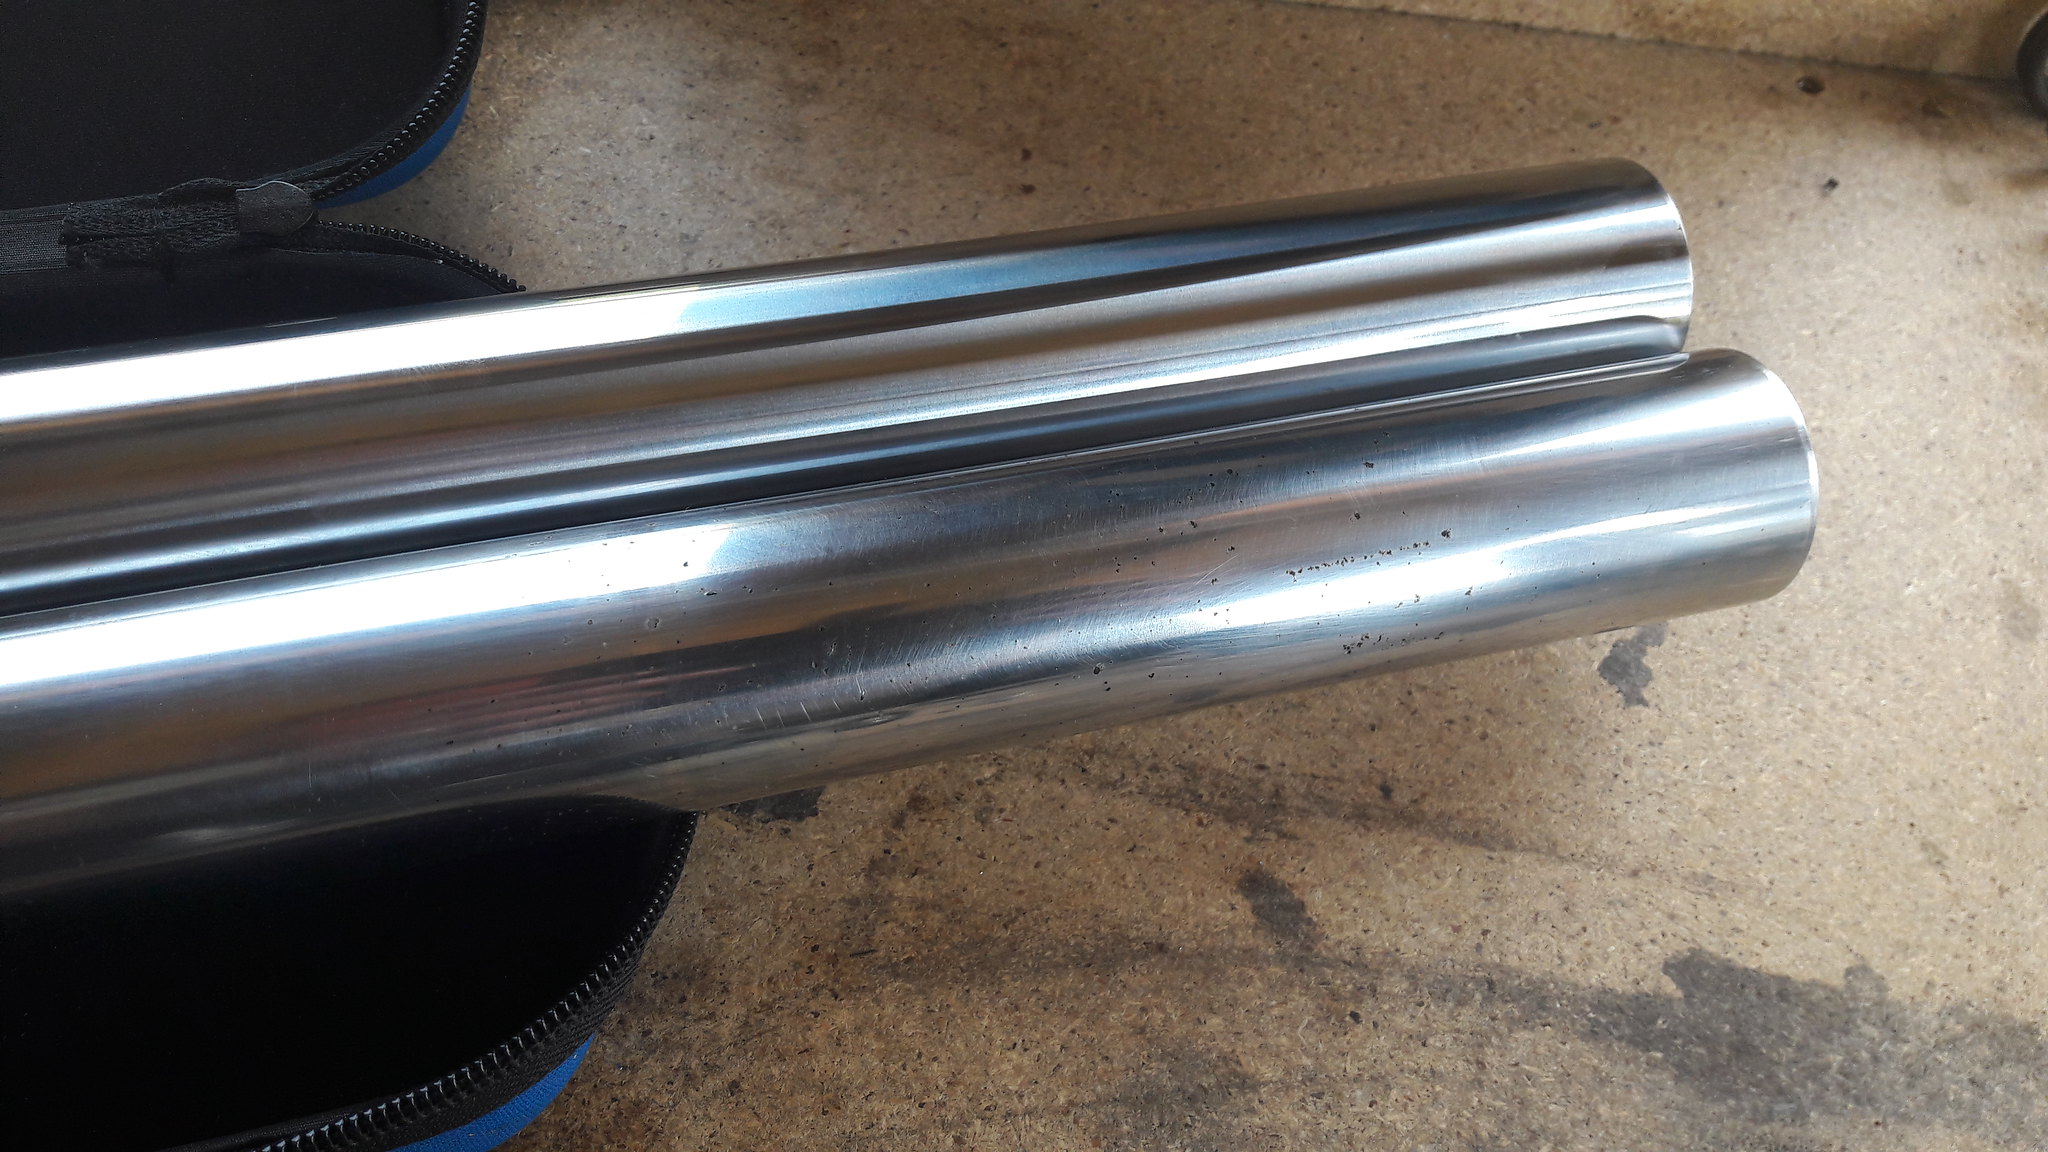 20180708_105742 20180708_105742 by David Miller, on Flickr And the Dremel has been in use again cleaning up the retaining clip grooves; 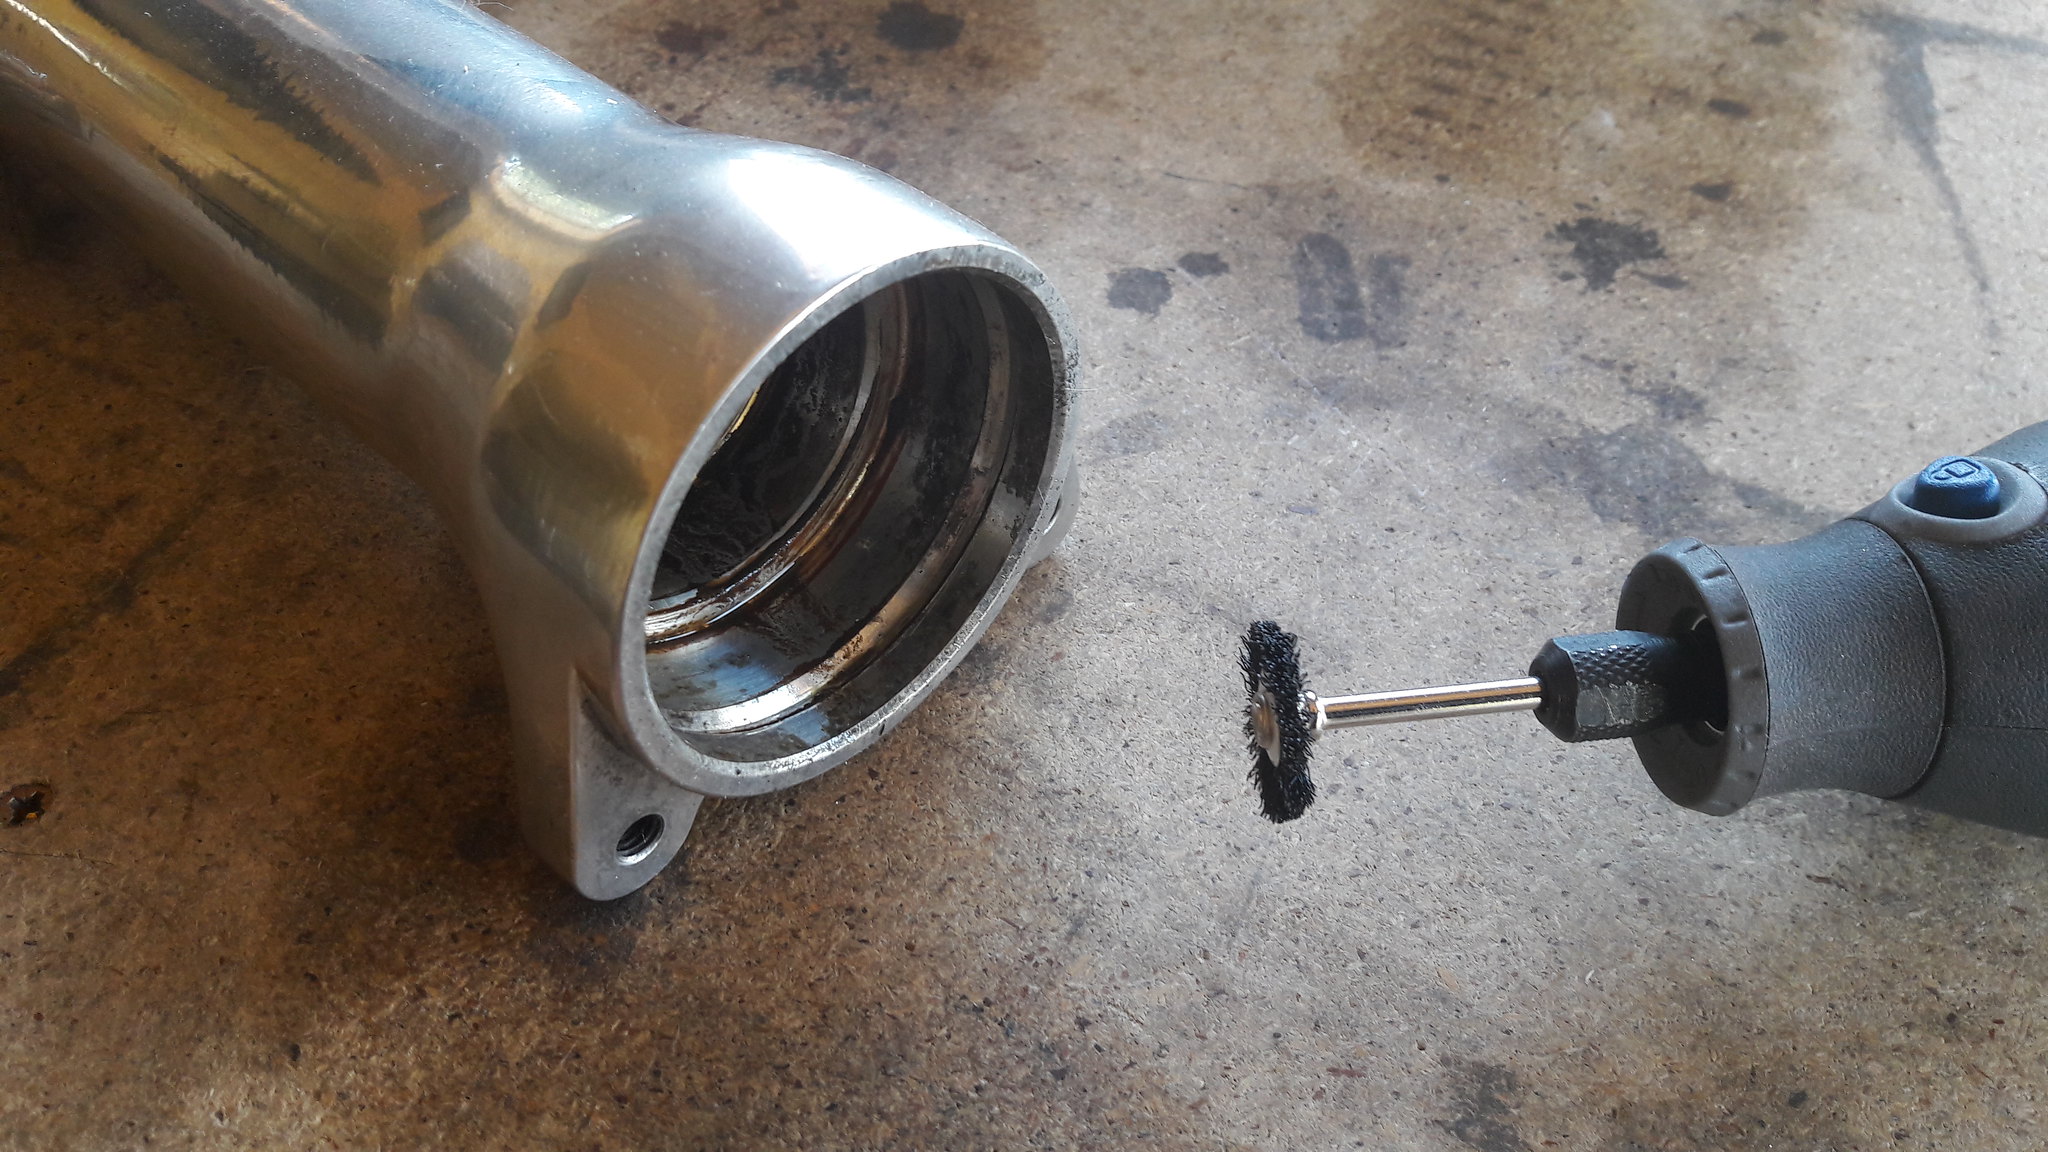 20180708_103054 20180708_103054 by David Miller, on Flickr Just off out to get some fork oil, and I can start the rebuild. Dusty |
|
|
|
Post by bid on Jul 8, 2018 13:40:31 GMT 1
lovely attention to detail there dusty gonna be a lovely build is this,
atb
dave😉👍
|
|
|
|
Post by donkeychomp on Jul 8, 2018 21:05:36 GMT 1
Could the springs be a different length for a reason? My Mito forks have damping in one leg and rebound in the other one (or something like that!).
Alex
|
|
|
|
Post by dusty350 on Jul 8, 2018 21:48:16 GMT 1
No, same part numbers for both sides. Someone has done a major bodge job in the past. You can even see the rough edges on those weird spacer tubes where they have hacksawed them and not tidied up the cuts ! I know what you mean regards the Paoli forks - the Belgarda forks were exactly the same as you describe. Anyway, thought I would rebuild them tonight. Trouble is, the damper rod wont easily fit inside the fork tube !  Same both sides with the new tubes. I "forced" one in thinking maybe it would ease nearer the bottom where it sits but no. I had to make a long drift to get it out again Luckily I haven't damaged anything but it was touch and go at 1 point. Put the damper inside the old tube and it drops in as it should, so it seems the internal diameter on the new tubes is slightly less than standard. The tubes are sold separately so it's worrying both are the same. Wemoto are getting a call tomorrow, but I;m now wondering what other makes are available. I don't want to go the rechrome route as I was trying to get it up on it's wheels quickly to sort the last of the frame jobs. Not happy !! Dusty |
|
|
|
Post by donkeychomp on Jul 9, 2018 0:02:27 GMT 1
Oh for pities sake. Was going to use another word there lol. Hope you get it sorted Dusty.
Alex
|
|
|
|
Post by dusty350 on Jul 9, 2018 7:14:06 GMT 1
Will be ringing them today. Looked at Brooksbarn but the ones they sell are the same make, so I've either got 2 random tubes that have been made badly or all the pattern tubes are not the same internal size as standard tubes. If so then I will have to go to Philpots/Pitted forks to get the originals rechromed but that will set me back about a month Dusty |
|
|
|
Post by jon on Jul 9, 2018 7:30:28 GMT 1
Will be ringing them today. Looked at Brooksbarn but the ones they sell are the same make, so I've either got 2 random tubes that have been made badly or all the pattern tubes are not the same internal size as standard tubes. If so then I will have to go to Philpots/Pitted forks to get the originals rechromed but that will set me back about a month Dusty Don’t rely on the 4-6 weeks quoted. They must be very busy at the moment. They’ve had mine for 8 weeks now. I’ll call them today. Edit ... they said they’d be finished this afternoon or tommorow morning and sent back next day delivery. Jon |
|


 Same both sides with the new tubes. I "forced" one in thinking maybe it would ease nearer the bottom where it sits but no. I had to make a long drift to get it out again