|
|
Post by Tobyjugs on Mar 27, 2016 8:57:41 GMT 1
nice idea about the extra clutch adjuster dusty
|
|
|
|
Post by dusty350 on Mar 27, 2016 21:15:35 GMT 1
Hi I did it on this engine when it was in the Ypvs/Tzr project bike. It's good coz it gives more adjustment and helps with a long cable. Pinched the idea from the R6 cables guys fit which has an adjuster at each end of the cable. The adjuster at the lever end is wound all the way in so plenty of life in it yet (it's not a new cable). Dusty  |
|
|
|
Post by arahim66 on Apr 14, 2016 14:28:58 GMT 1
Hi The F2 is sold now, so I have some funds to move this on a bit. Here is the Metmachex I bought for the Rgv wheel; 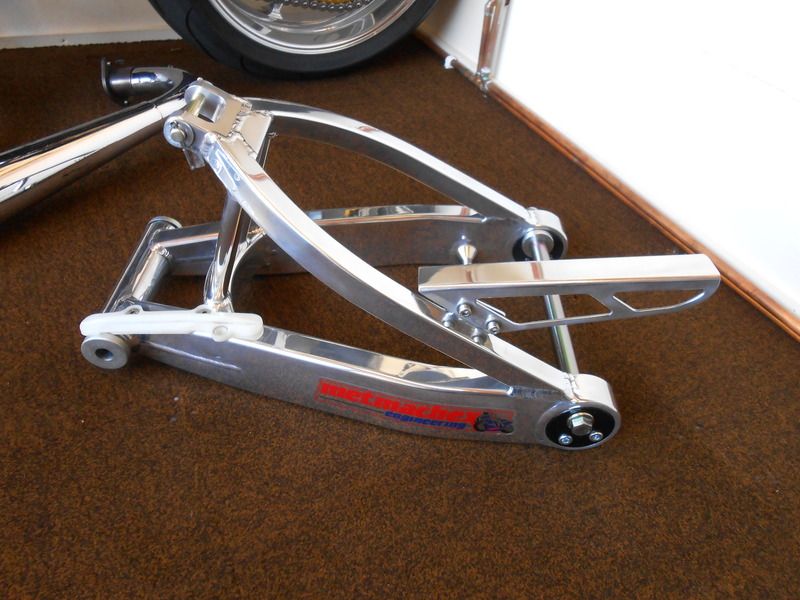 Frame and 14 other associated parts went off for powdercoating yesterday - gloss black again. I did take the frame to my engineers last week and had the powervalve motor bracket that I made welded in under the ignition coil mount. New taper bearings arrived in the post today too. I kept the Renthal straight bars off the F2, and removed the black anodised finish, and polished them up on my buffing wheel. I bought an Rgv front master cylinder off ebay to replace the Lc style cylinder that is fitted at the mo. I'll post some pics when the powdercoated parts are back. Dusty Hi Dusty I like your this build. I too got the same Metmachex swingarm installed to my Rd that fit with KR1 rear wheel. What I need to know where can I get those plastic chain protector screw on to the swingarm. |
|
|
|
Post by arahim66 on Apr 14, 2016 14:40:01 GMT 1
Metmachex arm is ready to go in, but I want to mod the chain slider. I think it's quite an ugly item, obviously not made for this arm  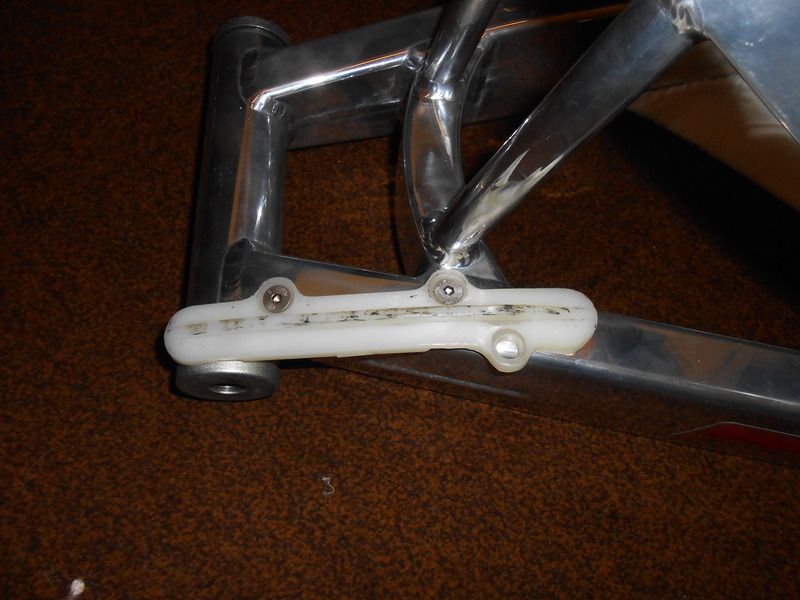 I will get the Dremmel on it and try and make it look a bit better. Still waiting for the shock to arrive, I will chase it up today. I am still undecided as to which engine to use. I have the F2 on the bench which has had a total rebuild and ready to fit, but I still like the idea of using the Lc engine. The Lc switchgear is new, as is the loom, and I like the simplicity of it all. I have done a ypvs/Lc hybrid before, so with a bit of a refresh, the Lc engine could get used - I'll probably change my mind a few times more though !! Here is the bike as it is at the mo; 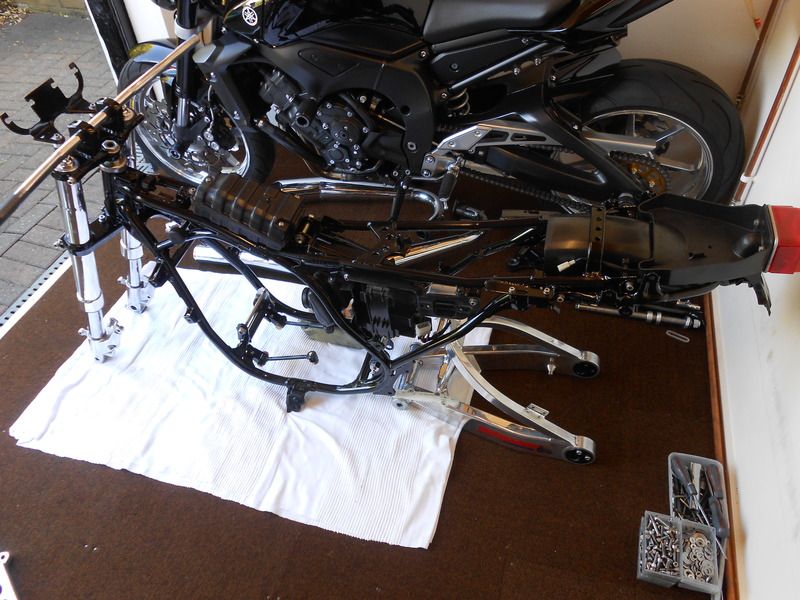 More soon Dusty Dusty I just saw this post, do you have any latest photo no the mod you have done on the chain slider for this Metmachex swingarm. I am very interested to copies the same design for my Metmachex. |
|
|
|
Post by dusty350 on Apr 14, 2016 15:00:15 GMT 1
Hi When I ordered my Metmachex, I paid for that slider and fixings as an optional extra. So Metmachex must stock them. It is an ugly thing though, and not "bespoke" for this arm due to the 3rd mounting hole overhanging the side. I was going to make a new slider from a plastic chopping board as it's the same hard plastic, but in the end I just trimmed the 3rd hole off to tidy it up. Once the chain is on you don't see it much anyway. I was annoyed at the time as I thought nearly £800 on a swingarm would have got me something a bit better than that, but with a bi of work it's now acceptable. I would add that it is worth fitting a slider - the chain would soon damage the swingarm without it. Dusty |
|
|
|
Post by arahim66 on Apr 15, 2016 0:47:48 GMT 1
HI Dusty, Thanks mate for the advice. I will try to look for some option on that.
|
|
|
|
Post by dusty350 on Apr 15, 2016 6:34:55 GMT 1
You are welcome. It would be fairly easy to make one yourself. The hardest part would be fitting Rivnuts into the arm to secure the slider but even that isnt really difficult. A nylon chopping board from a kitchen shop would be the same sort of material and thickness to get you a decent slider and when it wears from use you will have enough plastic to make more.
Good luck
Dusty
|
|
|
|
Post by gazsellars on Apr 18, 2016 20:45:20 GMT 1
Hi Dusty, bikes looking great mate! Are you gonna stripe it up or leave it bare?
|
|
|
|
Post by gazsellars on Apr 18, 2016 20:48:52 GMT 1
Apologies Dusty just read back you've got a 3 stripe kit. Must have been dazzled by all the shiney bits! Gaz  |
|
|
|
Post by Slabsideian on Apr 18, 2016 21:07:00 GMT 1
Hi dusty looking v. Nice mate!! Looking at this you got me thinking about some sort of chain slider for my Rgv arm. I haven't got my engine back yet or even a chain but rummaging around in my garage I found a Ducati 916 slider I had for my 1200 bandit with 916 arm conversion so hopefully can graft this on. Keep it coming, looks cracking!!!
|
|
|
|
Post by dusty350 on Apr 19, 2016 7:24:36 GMT 1
Hi Yep, 3 stripe kit sat here, waiting for me to get brave enough to attempt fitting it !! Never done decals before so don't want to mess it up. I think adding the decals will transform the look of the bike. The chain slider is a must I believe. I will need to get one for the black hybrid as that arm doesn't have one fitted. You would think it would be a standard fitment on an alloy arm - the Metmachex is a beautifully made swingarm but I wasn't impressed with the chain slider that was supplied, but it's ok now it's trimmed up and fitted. As said, a hard plastic chopping board from a pound shop/kitchen supplier is the same type of hard nylon. You could easily cut and shape a slider from that material. My slider does bow to follow the shape of the arm, but if you heated the nylon up you could shape it quite easily. Dusty |
|
|
|
Post by dusty350 on Apr 22, 2016 16:45:42 GMT 1
Took the plunge today and fitted a couple of the decals. I decided to use the recessed tail light bracket on this hybrid now. I trial fitted it by cutting up the tail unit on the black hybrid first. I wanted to keep the standard numberplate bracket from the Lc, strange I know, so I modded the tray part so the stainless bracket sits inside it. It also means the numberplate sits at more of an angle which I think looks better. Whilst the tail was off I fitted the decal for that, plus the right side panel. Pleased with the way it's looking;  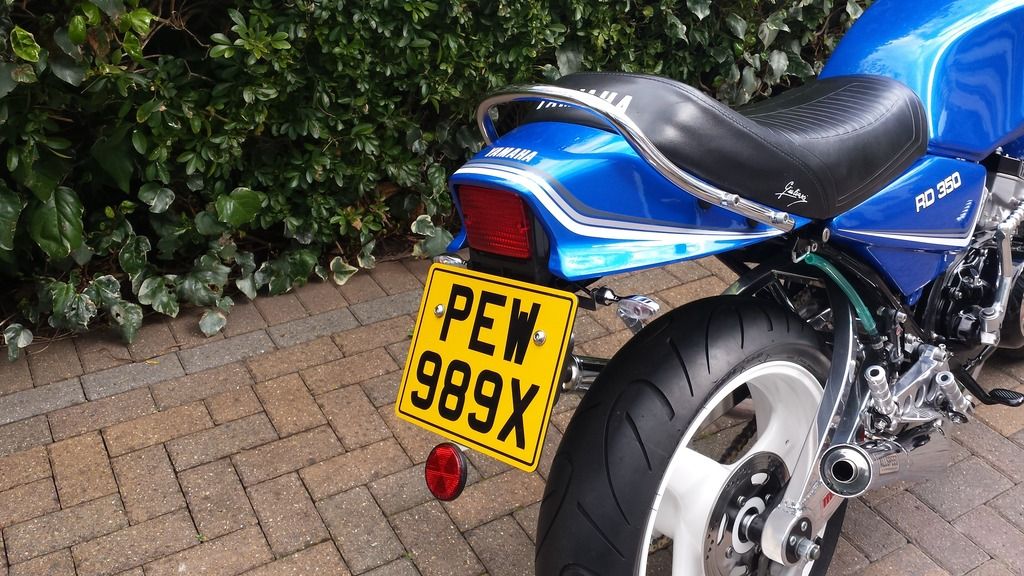 My MBD rad arrives next week, so I can start plumbing that in, plus I will fit more decals. Dusty |
|
|
|
Post by yamark on Apr 22, 2016 19:10:42 GMT 1
Nice work Dusty, a good idea to do the easier stickers first. The tank ones are the hardest to do someone told me.
I had a go at doing my LC tank stickers years ago and it didn't end well. (More wrinkles then a granny's knitting class.) A bit like my airfix planes when I was a kid - they ended up a big ball of glue with wings and wheels sticking out. I've got a bit more patience these days |
|
|
|
Post by dusty350 on Apr 22, 2016 21:50:36 GMT 1
Hi Mark
Hope you are well mate.
Yep tried the easier decals first. Had my lad help me which made it easier. Not looking forward to doing the tank !!
Certainly wouldnt want to fit them on a regular basis !!
|
|
|
|
Post by jumpstart on Apr 24, 2016 9:10:23 GMT 1
looking real smart dusty I must say,great job on all of these mate well done
|
|
|
|
Post by fatty on Apr 24, 2016 22:40:53 GMT 1
Love it !
|
|
|
|
Post by dusty350 on Apr 26, 2016 13:27:56 GMT 1
Thank you My rad arrived today, from Martin at MBD, and it is lovely;  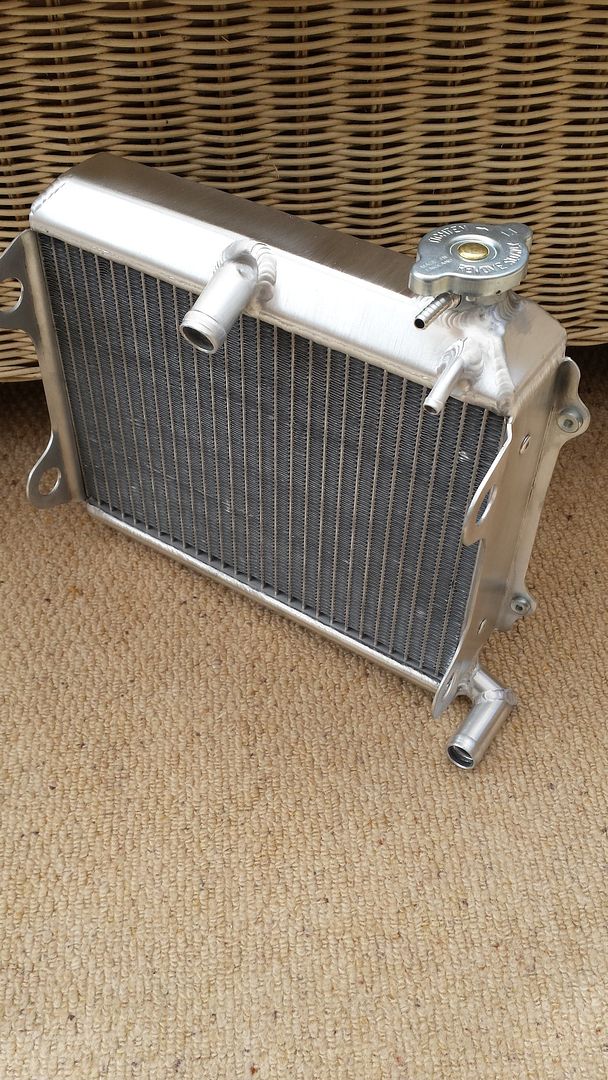 Fantastic quality, and a great service from Martin as usual. I have one of these rads on the 385 and the extra spigot for the Ypvs head is in the middle of the rad on that one, but I wanted this rad to have the spigot under the filler for ease of accessability. It was no problem for Martin to get it re sited for me Just waiting on some new mounting rubbers and then I will get some pics of it fitted. Regards Dusty |
|
|
|
Post by dusty350 on Apr 30, 2016 12:58:27 GMT 1
Hi Rad fitted today . Martin supplied some new Yam mounting rubbers for me, so on it went; 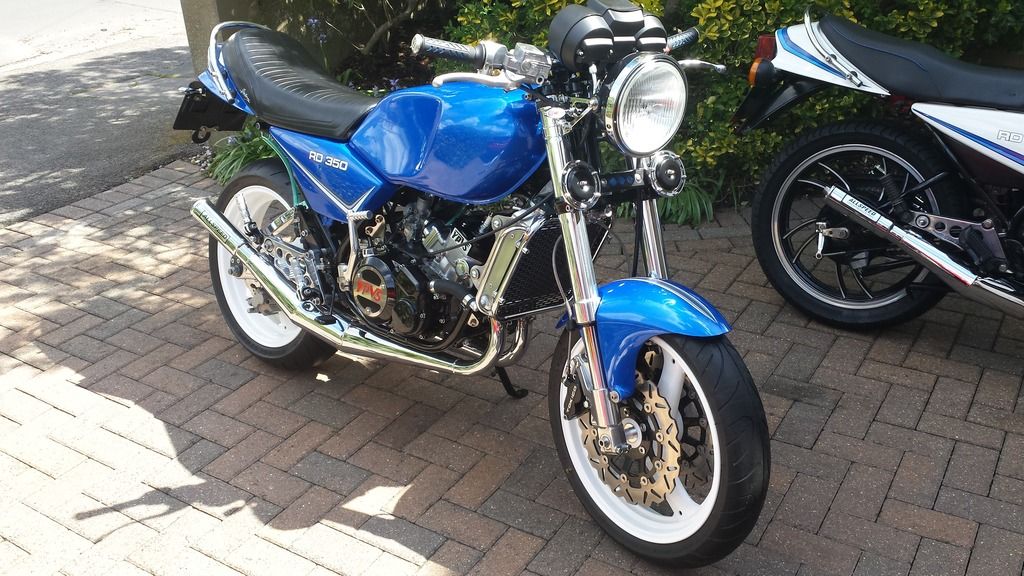 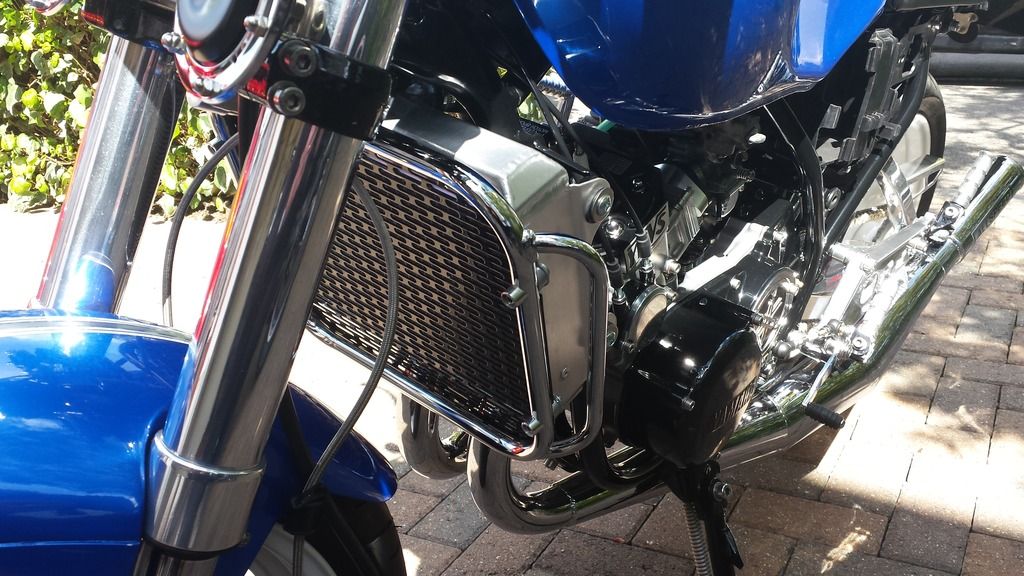 I pre-fitted the Rentec guard. I had to modify the mounting spacers though. On the 385 which is fitted with one of these rads, the spacers between the guard and the rad sit the guard too far forward, meaning the forks hit the guard on full lock. Luckily I had 2 mounting kits, so I used the outer spacers from both kits which are narrower than the inner spacers. This puts the guard closer to the rad but allows full lock of the forks with no contact; 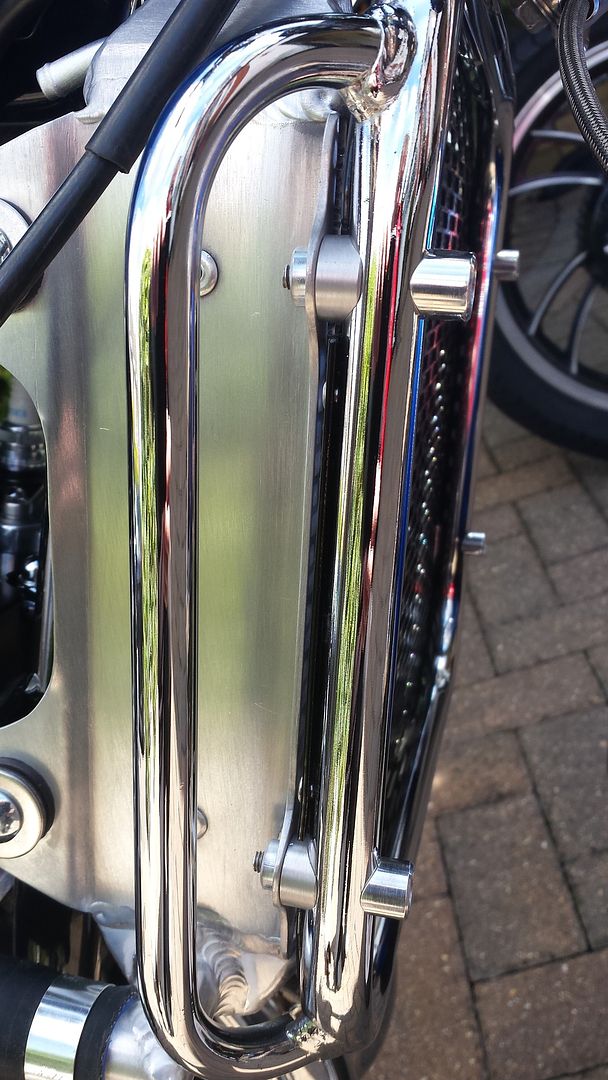 I also had to cut the inner spacers as the curved inside edge fouled the mesh of the guard and wouldn't let the rad sit properly. I cut about a third of the spacer off and it now fits as it should. I had new silicon hoses and stainless clamps to fit too. I have ordered some Samco hose from Martin that will go from the head bypass to the extra spigot on the rad; 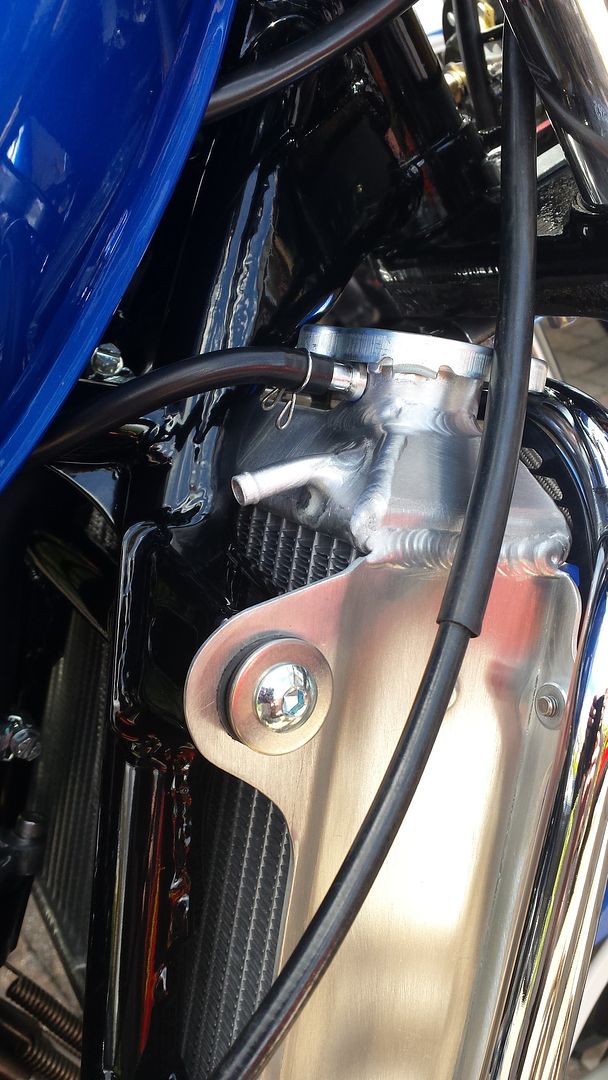 Really pleased with how it looks, and the quality is excellent  Dusty |
|
|
|
Post by Yogi on Apr 30, 2016 16:55:54 GMT 1
Looking good Dusty How comes your called dusty when I can never see a spec of dust on any of your bikes Matt |
|
|
|
Post by stusco on Apr 30, 2016 17:46:41 GMT 1
My guess is he 's a Miller
|
|
|
|
Post by Yogi on Apr 30, 2016 17:59:47 GMT 1
My guess is he 's a Miller Lol,I wouldn't call a Miller if my house was on fire,pretty sure he's a fireman  |
|
|
|
Post by dusty350 on Apr 30, 2016 21:19:17 GMT 1
Ha yes to both !! Dusty as in Miller and a fireman for 4 more months !!
Dusty
|
|
|
|
Post by Tobyjugs on Apr 30, 2016 23:25:20 GMT 1
got any plans for when you leave bike wise?
|
|
|
|
Post by dusty350 on May 1, 2016 11:41:06 GMT 1
Hi I want to get this hybrid finished this summer. I have the white Lc which is road worthy - don't plan to do too much to that really apart from improve the tired suspension. The black 385 is the next big project really - I had toyed with the idea of transferring the engine, pipes and running gear into a de lugged frame I bought recently to make a pared down café racer, but that will depend on getting that frame registered. If that did happen, the 385's existing frame would become home to the spare Lc engine, loom and electrics I have, plus the CMA wheels. Basically, another 2 projects lined up depending on the frame registration. I would love to do something with Lc's full time, but the days of making money from them has long gone I'm afraid. I would love to have my own blasting cabinet, lathe, welder, and the ability to use them to a good standard to become a bit less reliant on others, but the outlay would be considerable - and sometimes you are better going with the experience of more qualified people. I have a list of firms I use for the bits I cant do, but it doesn't stop me wanting to do more myself. Although I will retire from the Fire Service, I will still be working in some job or another - just need to protect my knackered back from the physical challenges of fire fighting, where you cant always control what you do and how you do it. My Osteopath's prognosis of further injury didn't make me feel great, so time for a change !! Dusty |
|
|
|
Post by iwantalc on May 1, 2016 12:04:51 GMT 1
how about going on one of them custom spraying courses theres always a demand 4 a good sprayer plus not too expensive to set up and work at your own leisure just a thought all the best dusty ..des
|
|
|
|
Post by Tobyjugs on May 1, 2016 15:32:14 GMT 1
I Think you should just sell me the black one Ha Ha
Its quite a move going from a fireman to another Job, good luck
|
|
|
|
Post by dusty350 on May 1, 2016 20:21:14 GMT 1
Hi Tobyjugs Yea, nothing quite like it jobwise. I joined when I was 18 so it's all I've known for 31 years !! I've done plenty of part time jobs over the years so can turn my hand to a variety of things when the time comes. I definitely wont miss night shouts though  Hi Des - I saw an ad for learning how to spray quite recently. Don't know if that's for me though - I'm a bit more "agricultural" if you know what I mean Hope you are well mate - you've got a knee op soon haven't you ? Dusty |
|
|
|
Post by dusty350 on May 3, 2016 7:28:08 GMT 1
Hi Fitted the first tank decal last night. Talk about nerve racking !! Hats off to people that do this on a regular basis - you think it would be a case of just peel off the back and apply, but it's not that simple Not looking forward to doing the other side as it has to line up with this one ! ; 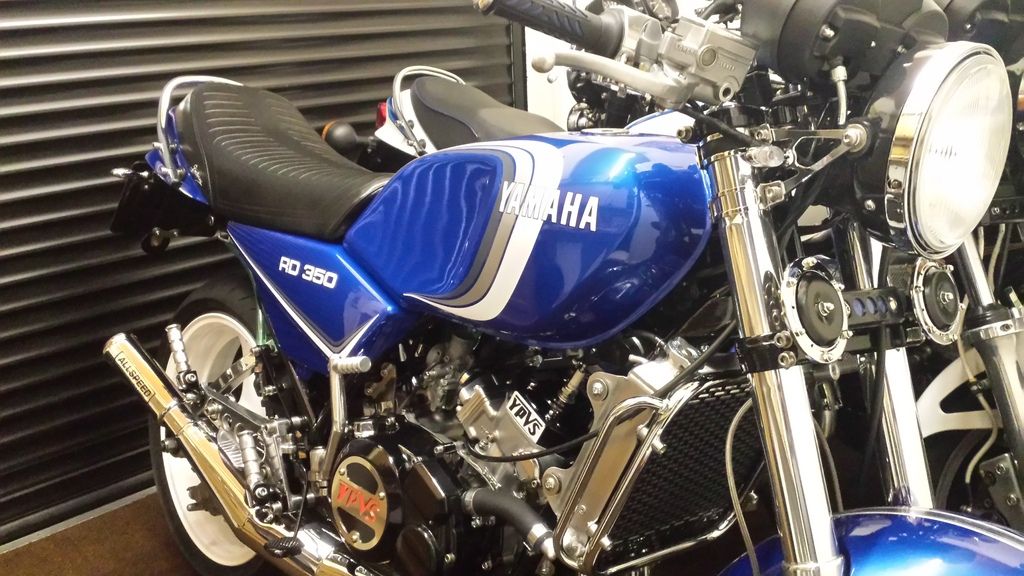 Pleased with the look of it though Dusty |
|
|
|
Post by bazzer5115 on May 3, 2016 7:58:48 GMT 1
Well done mate,I did the right hand side tank decal perfect first time,but for some reason un known to to me I have messed up 3 left hand decals,tried the wet method and the dry method but still getting tiny creases in the same place.
So I have now given up and getting a "professional" to do it!!!!!!!!!!
|
|
|
|
Post by jumpstart on May 3, 2016 10:23:47 GMT 1
Hi dusty, great build,, sorry to hear about your ongoing back problems, but l know that your bikes are a big part of your life, and will give you focus in the months to come, keep up the good work on here mate
|
|


