|
|
Post by farmboy on Nov 3, 2013 11:12:57 GMT 1
Hi having got to be a member of this forum for a little while and said I would start a thread on my rebuild so here goes. Just a quick history update on this bike . I have owned this LC since 1988 after owning a few other LC's . This was just a fun weekend bike when one Sunday around '90'91 year on a trip to Matlock had a fight with a Sherpa van . Bike brought home started repair when another mate at time said he was getting is bike frame stove enammeled !! and said if I brought my lc down to his garage I could finish the strip there and get me frame done same time . So great went there stripped down to last nut bolt , boxed and bagged it all up . Waiting for frame to go away he had a large fire in the garage , he was welding up a car and set it on fire ! burnt the car out , roof of garage etc. This was his business not a hobby and it was a customers car also . It neally closed him down but with some help and good insurance got his business back running. Not so good for my lc, we had stored alot of the bits on a loft , all the heat and smoke went for my bike. i went to have a look after the fire ,lots of melted plastics everthing covered in ash, smoke etc. So there the poor girl stayed , I had a car to run around in then and realised you could ride girls with almost a big as smile on your face so that was that. Fast forward to spring 2013 , and I have not been into bikes for a while as family.kids ,house etc. Talking to a guy at work how 2 stroke bikes are getting a cult said I should get my LC on the road. So I went down to see my mate, the poor old lc was still there covered in other junk and rubbish , and 2 inches of dust and crap. 'What you doing up there ' he says as I am digging through the rubbish .'Getting my lc out ' after much laughing and dicking around we got thew bike down and loaded into my car. Not a pretty site!    I got it all home and set too with the steam cleaner to just see what was any good and if it would be possible to rebuild. Turned out almost every part was still there some had damage from the spill and some melted but ever nut and bolt was there even the balls out of the headstock were bagged up in a little tin . I also had another stash of parts at the parents house so thought we had enough parts to give it go.............. |
|
|
|
Post by farmboy on Nov 3, 2013 11:43:52 GMT 1
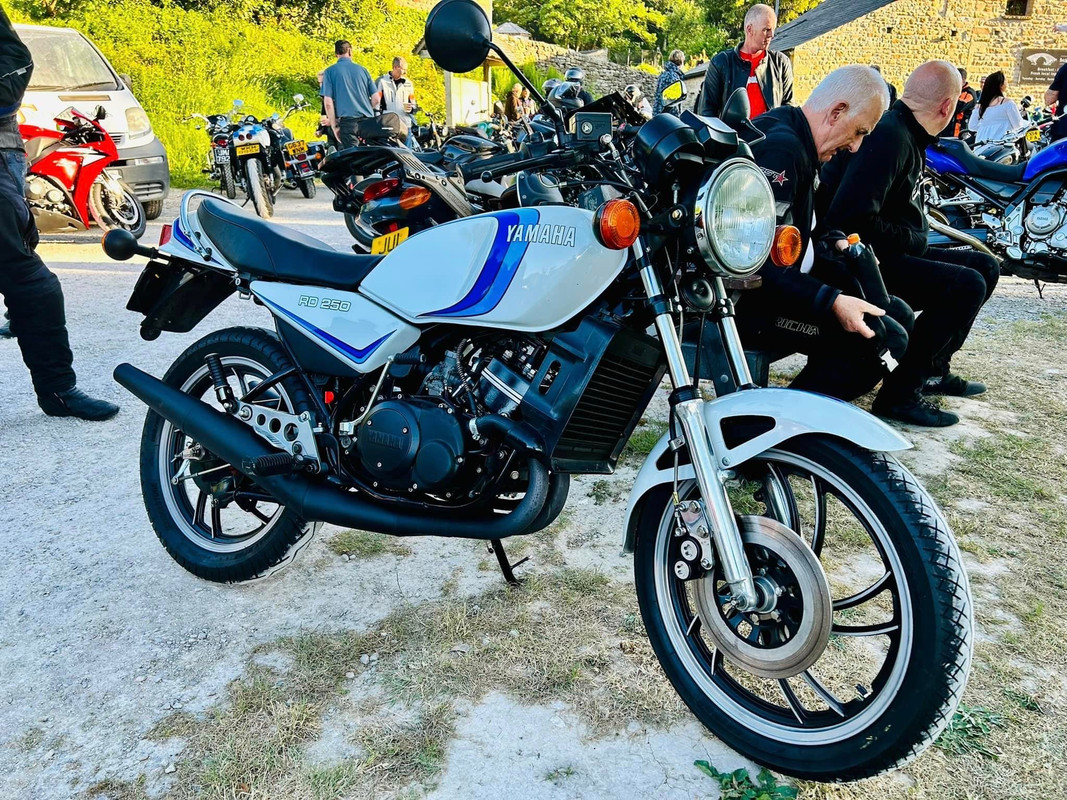
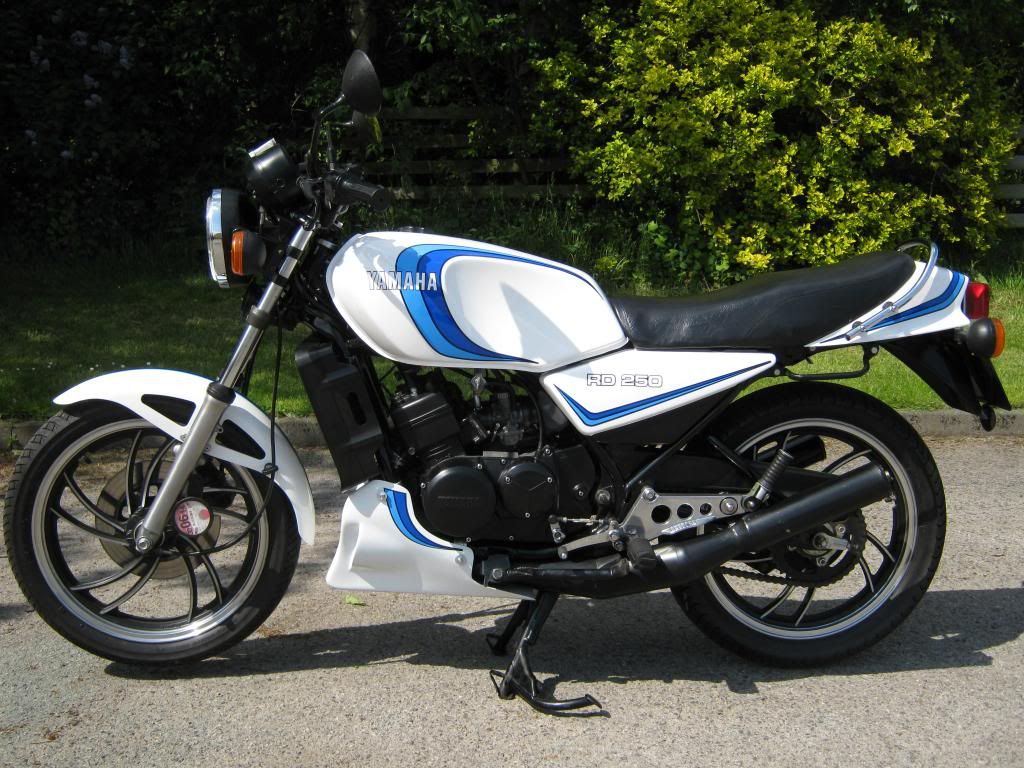
Well I am back, just checking the photobucket worked befrore I wrote any more. So with the invention of the internet since 1990 I did some looking on-line and on e-bay. Lots of used bits on e-bay and got to read a few other articals and stuff. I aslo found out about a lad not far from me who has some LCs and said about parts from a guy 'lc crazy' . So introduced me to this forum and a guy from Ravenshead who likes to take your cash  I went along to my local bike shop Foleys at fenton Stoke and met Kev and Phil who was still there from when I used to go up there all the time back then, also seen a LC one of the guys in the workshop had just rebuilt So that was it full on rebuild. After looking at other bikes and a trip to the spring Stafford show decieded I would not be biulding a nos concous rebiuld or a super trick YPVS engine bike. I thought i try and make it something like the bikes I used to have but try and use as many old parts as possible and keep it pretty standard in black mars bar colours. So got frame ,swing are etc coated gloss black  I then made a trip to see the man with only one name see above , after much cash changing hands started to build up the frame. I got a used oil tank, water tank from e bay , new harness and grommets etc from Norbo . With help from the harness layout from posting on this forum I got the harness and cables all fixed up. I have spent an age rubbing down and painting some of the small parts, as most had been smoke damaged not much of the olive green parts were any good, so its satin black for most of the parts. I also got most of athe alloy parts cleaned up with plenty of hours sat on the sofa with a tube of autosol.   I had decied to paint the wheels gold, yes I know its not 100% correct but i had a bike like that before and I liked the look , so again much cleaning and painting. I cleaned up the wheels to bare, primed and painted the gold , then lacyered the gold paint and the sides of the polished spokes , but I have left the outer rim bare just polished with autosol. fitted some BT45's thanks Foleys.  Ok I am going out now catch you later with some more pics. Alex. |
|
|
|
Post by rdlc2 on Nov 3, 2013 15:15:43 GMT 1
Nice work.
I like the Mars scheme with gold wheels, got a Tamiya I made painted up that way to see what it would look like (really nice), just waiting for a pile of parts much like yours to arrive to do for real now.
|
|
|
|
Post by crash on Nov 3, 2013 15:30:22 GMT 1
Like!
|
|
|
|
Post by crash on Nov 3, 2013 15:30:37 GMT 1
Like!
|
|
|
|
Post by kostas on Nov 3, 2013 19:42:59 GMT 1
Brave man Farmboy!
Gold wheels look nice.
Kostas
|
|
|
|
Post by marsbar350 on Nov 3, 2013 19:52:08 GMT 1
nice work alex gold wheels do suit the marsbar paint work  |
|
|
|
Post by copper99 on Nov 3, 2013 21:10:23 GMT 1
Thats some transformation, look forward to watching the build progress.
|
|
|
|
Post by farmboy on Nov 3, 2013 22:52:49 GMT 1
Not to add all the pics at once, but most of the above work was done late spring early summer . I did work well on the bike until July , then farmwork and holidays got in the way only giving me a few hours to work on it.Although I am further forward than I have pictured here . I spent loads of time cleaning up the plastics which were ok. I had to get another lower aircleaner box and lower rear mudgaurd , again the joy of e-bay. I cleaned up the rest of the plastic with trf truck wash to start with , then more kinder cleaner ,last with STP 'son of gun' .I stripped down the rear light and painted the rim , the rear section of the rear mudgaurd is the uncut original as is the reflector. I think the plastics cleaned up good from the first pic. You can see the rear light, tool roll holder and some other bits.  I then looked at the front end, the forks were good apart from some pitting on the tubes , not real deep rust marks , looked more like the soot/acid from the fire had eaten into the chrome. I tried cleaning them up but was never happy, all the used ones I found were as bad. I knew these were straight , so sent the tubes off to Phillpots for hard chrome more £££. I then cleaned up the lowers, new geniune seals and a fill of 10w/30 oil.  Well it was time to get the frame off my makedown workbench! did you like the use of an old kids picnic table? And turn it into a rolling frame. I had a busy weekend that time and told me youngest kid we were going on 'road test' . We didn't do many laps!  This was almost how the bike sat for a while, although I then spent more££ on rebuilding the front brakes with new piston,seals, and pads. Also a set on stainless braided lines and m/cylinder kit. I then started to pull the motor apart , thats the next chapter. I could have pushed on a spent more money than I made and got the bike on the road this year, but I have found working on this bike is a real pleasure and low stress work. no major deadlines to meet , enjoying sitting back and taking a look on progress. Also getting out among other bikers BSing about old times and taking a look at other projects. I have no imtention of selling this bike when its done , after all I paid £550 for it in 1988 . its not cost anything in the last 20 years , so I am happy to spend on it now ready for another 20 years! Alex |
|
|
|
Post by calum64 on Nov 4, 2013 11:32:28 GMT 1
Apart from the bit about the fire I could have wrote this myself alex. Mine is about the same stage as your last pic but cant figure out how to get photos from phone to forum every time I get time to try I just say stuff it I'm away to garage to work on bike lol.
|
|
|
|
Post by calum64 on Nov 4, 2013 11:32:58 GMT 1
Apart from the bit about the fire I could have wrote this myself alex. Mine is about the same stage as your last pic but cant figure out how to get photos from phone to forum every time I get time to try I just say stuff it I'm away to garage to work on bike lol.
|
|
|
|
Post by marsbar350 on Nov 4, 2013 12:31:00 GMT 1
Apart from the bit about the fire I could have wrote this myself alex. Mine is about the same stage as your last pic but cant figure out how to get photos from phone to forum every time I get time to try I just say stuff it I'm away to garage to work on bike lol. you can put photobucket on your mobile if you have wifi it will automatically be uploaded to your computer  |
|
|
|
Post by farmboy on Nov 4, 2013 22:06:28 GMT 1
Calum64 , you not got a digital camara?It may be easier for you than a phone? I took all the above with my camara , loaded onto pc as normal then pick the pictures from 'My pictures' file and load onto photobucket. I have 2 files on bucket now, one general bikes and one for this rebuild . Just have the bucket window behind this page while you post and copy/paste.
I don't own a smart phone so not tried to upload, I do see theres a upload from phone icon . I will have to get my kids to try on theres , they upload pics and video from there Samsung phones onto the pc.
I got real wound up with photobucket to start with , but its no problam now , so don't worry its not just you.
We need to have some pics of your rebuild on your thread .
Alex.
|
|
|
|
Post by calum64 on Nov 4, 2013 22:40:40 GMT 1
I'll try tomorrow alex I've had 4 bottles of miller and half a bottle of wine tonight so not much chance of sorting it tonight cheers calum.
|
|
|
|
Post by farmboy on Dec 17, 2013 21:13:28 GMT 1
Well its been a little while since I updated you all . Anyways once I got the rolling frame in order it was onto the engine. I stripped the engine a while ago to find some play in the left side big end and left main , so had the crank re con with new rods . Also the left side piston had just a few pic up marks on the skirt , I showed it to the guys doing the crank and after some measuring we decided to go up a bore size , its now up 2.00 over so will have to be careful or be on the look out for some spare barrels! I also had a local machine shop I use turn me a new bush for kickstart idle gear ,s o here we are with the new crank and geaR.   I don't know the history of these barrels , unfortunatly this is not the matching engine to the bike which is another story. The matching engine to the bike was 'loaned' to another mate??? 15 years ago , it now has disapeared off the face of the earth when i asked about it earlier this year when I fetched the bike back home. Turns out it got sold to a mate of a mate . its a real shame i would give good money back for the crankcases with tie bar holes with the s/n ending with 44 if you know of them brought from Staffordshire. Anyway I dont know much about tuning work on the barrels, this engine come from the North east , so local tuner to there or what? Its going to be fun jetting and getting this bike running from scratch. What you think of the work?     I have now built all the engine with all new seals etc , new EBC clutch plates and h/duty springs, a new clutch push rod to stop leaks . I have had our good friend Arrow go over the oil pump , so now have the r/h cover on ready to fit up to the bike. |
|
|
|
Post by farmboy on Dec 17, 2013 22:14:10 GMT 1
This is how I went about static timing the engine, I made a 5mm plate to bolt tight to the exhaust stds , then set up my dial gauge to it , then made an extension to the tip of the gauge. I set it 2mm BTDC as in the Haynes manual .  Before I stripped the backplate I marked it againest the crankcase, turns out the timing was just as before. While I had the engine on the bench and had plenty of time I thought I would go through some of the multimeter testing of the coils and pick up as listed in the Haynes manual. This is a mid range Fluke multimeter I had it checked/cal at work so hope its pretty close. First the pulser coil , use the red/white single wire and black on the black plug 87 ohms @20'c. My garage was about 10'c reading 86.9 , so then just warmed the coil with the fan heater .  Next the exciter coils ,which there is 2 sets low/high speed output. Used the red and the brown wire 5.1 ohms @20'c. Again just a hair low due to the temp.  2nd set of coils use brown and black 271ohms@20'c.  This again was low , but it did rise when I warmed the engine . The manual also gives a 10% leyway so hope this works OK. I also testing the ignition coil orange wire and earth , again close to the .33 ohms , although this is a low resitance to measure, this looked OK too. But in the manual it also tells you to place the multimeter across both HT leads ? a probe on each HT lead? I got nothing to show on my gauge , the Haynes book says 3.5 kilo ohms. Would you see anything on a multimeter as both leads go to the same coil? Or have I mis read the test? Anyway as you like pictures I got all the parts ready to fit the engine , these are the lower tie bars marked L and R the letters go at the front of the bike with the letters looking to the ground .I know we had a few questions about tie bars a while back.  Finally this last weekend we got the engine in the frame, got my helper to push the 2 mounting bolts through as I held the engine  I have asked Santa for a new ultrasonic cleaner , so hope to make a good pair of carbs for the next job. Having fun with my LC. |
|
|
|
Post by steve h on Dec 17, 2013 22:48:51 GMT 1
|
|
|
|
Post by copper99 on Dec 18, 2013 20:09:52 GMT 1
Very informative post and pictures, nice work mate...what would we do without our little helpers now and again eh?!
|
|
|
|
Post by copper99 on Dec 18, 2013 20:10:03 GMT 1
Very informative post and pictures, nice work mate...what would we do without our little helpers now and again eh?!
|
|
|
|
Post by 1966baz on Dec 18, 2013 20:24:04 GMT 1
That is going to be a stonker. Well done Mate.
|
|
artie
Thrash Merchant

Posts: 341
|
Post by artie on Dec 18, 2013 20:59:06 GMT 1
Really enjoying your thread mate,nice work |
|
|
|
Post by calum64 on Dec 20, 2013 19:31:12 GMT 1
Looking really good. Mine ground to a halt till after santa been.  ? |
|
|
|
Post by farmboy on Dec 30, 2013 14:44:10 GMT 1
So as I had been very good all year Santa did bring me a Ultrasonic cleaner to have a go at cleaning up my carbs and a few other bits for the bike. I didn't want anything to pricey just something I could fit a carb body in and have a heater on the tank from what I learnt . So after leaving some hints on the missus e -bay page I ended up with this model, think they come in around £80 ish.  So into battle we go, I first ried some 2p coins in and a few of my sockets , first with water, then some water and TFR , didn't seem to like the TFR. After reasding more on the www. thought I would go with the white vinegar mix. Dis a few trys , then in went the float bowls, then the bodies. I mixed 25% white vinegar and water , had the temp set to 60'C. I set the timer on 20 mins for the bowls , but on 40 mins for the bodies . When done I filled with clean watewr and run the again for 10 mins at 60'C. To givew them a rinse through . It did leave an oxadized dullness on the bodies , I gave them a blast with brake cleaner , they came out ok then .   You can see how they started off, this is the end product.   I did then give the bowls a bit of a polish with some autosol and you could make them really shine. Not sure about mixing the brass jets and bits in with the steel screws and bits , the brass bits a clean of dirt but end with a dull black look , again have to just clean them with some brake cleaner to shine up. I am not 100% happy on how to do the tiny parts yet , not sure if you can just let them sit on the base of the cleaner, i used an old arosol cap , drilled a load of 4mm hole in the sides and palced at the base of the basket with the tiny bits in . Any better ideas? I did not take a pic of the body in the cleaner , it just goes in and filled with solution will just cover it all, though I cleaner mine for 40 mines I turned it over every 10 to see if it would work better. Going to do some more some time so I have enough bits to make a good set of carbs up. I have the 4l1 carbs with the ledar jets in I am playing with as seen on the main page. I will put a new set of float valves in I think and some new gaskets , then rready to fit to my bike. |
|
|
|
Post by farmboy on Dec 30, 2013 14:49:47 GMT 1
This is a better pic of the bodies , the one on the right is just how they came out of the cleaner, the one on the left is after a light brass wire brush and a wipe with touch of autosol, geuss if you really wanted to spend time you could polish them so more.  Alex. |
|
|
|
Post by billbott on Dec 30, 2013 16:34:57 GMT 1
Looking Good!
|
|
|
|
Post by marsbar350 on Dec 30, 2013 16:44:26 GMT 1
they look great alex better than the super clean vapour blasted ones more a factory finish |
|
|
|
Post by 1966baz on Dec 30, 2013 18:39:58 GMT 1
Attention to detail is fantastic, love the pics. Well done.
|
|
|
|
Post by jon on Dec 30, 2013 20:26:32 GMT 1
I did my carbs the same way and they turned out dull.
Went over them with a toothbrush and toothpaste as it is water soluble afterwards.
I did try bead blasting a float bowl once, but the finish was too clinical.
|
|
|
|
Post by jollyjoiner on Dec 30, 2013 22:06:10 GMT 1
Loving this thread, and such a great story to go with it too. Keep up the good work, oh and the spending |
|
|
|
Post by fatfastroger on Dec 30, 2013 22:20:18 GMT 1
|
|


 I went along to my local bike shop Foleys at fenton Stoke and met Kev and Phil who was still there from when I used to go up there all the time back then, also seen a LC one of the guys in the workshop had just rebuilt So that was it full on rebuild.


 ?
?