|
|
Post by lovelydog on Sept 23, 2013 19:11:54 GMT 1
I am just waiting for my decal kit to arrive,then I can finally crack on with the body work. I reckon this is a good deal. . . .I have a painter who is going to spray the tank and panels flat black,I will then take them home and apply the decals myself,then return them to him to laquer. He is the dad of a good friend of mine (with his own body shop and paint booth) and is charging me £100 to paint and clear coat afterwards. I have another mate that will help with the decals,so obviously I'll have to bung him a drink but I can't help feeling pretty good about the cost. How many of you guys have done your own decals? Am I likely to screw it up?
|
|
|
|
Post by billyboy on Sept 23, 2013 19:25:09 GMT 1
if its 4l0/1 tank decals best of luck ,i screwed my tank decals, you are fitting a flat sheet onto a radiused surface so streching as you go is needed , i was told a mist coat before the decals of clear is the way to go (obviuosly letting this set hard ) so some room for manuveouring is possible . all the best and i'm sure with patience it can be done
|
|
|
|
Post by wizard on Sept 23, 2013 19:48:25 GMT 1
Got my mate the sign man to do mine, glad I did it took him ages and it still had a little crease in it(LC tank)
|
|
|
|
Post by sheeney on Sept 23, 2013 19:49:52 GMT 1
Ive found a car painter in clay cross whose painting my x7 for 60 quid..he refused point blank to apply the decals..the last time I had a go at applying decals I fooked on of the side panels I got a air bubble underneath it...thats not going to happen again image works are putting them on for me and for only 20 quid then its back to the painter for lacquer
|
|
|
|
Post by steeley on Sept 23, 2013 20:29:06 GMT 1
yes best of luck with the decals mate.painted my 350 lc and put clear coat on it.i was never happy with the finish,so got some decals and clear coat and hardener and took the stuff to a painter who we have used for years.when I spoke to him he said I would never have got the decals on he said it took him an age and he knows what he is doing.the best off it all was he could have made the decals for me for less than I paid.bugger.
|
|
|
|
Post by lovelydog on Sept 23, 2013 21:12:13 GMT 1
Pwwwfffttt! Yep,it's a 250lc tank. My mate that's helping me has recently done his R1 (may I add,very very well) He said he used mild soapy solution to help the decal slide about in to place easier,then squeezed the air bubbles out with a home made 'thing'. I'm gonna give it a go,if it goes Pete Tong then it's cost me a decal set,but I'm still within budget. Thanks for your input guys,anyone else please feel free to advise and offer hints and tips. I'll photo the whole process and make a 'decal thread' so that it may be of help to others on either how or how not to do it.
|
|
|
|
Post by stfocus on Sept 23, 2013 21:13:43 GMT 1
Hi lovelydog I put mine on wet 1 L of water and 2 or 3 drops of washing up liquid in a spray bottle put plentey on and u can move the decal and take your time and just work it once you r happy u can start to push the water out people say use a hair dryer I do not if u use Nobel decals u will be OK that r the best I used if u need any more info pm me and I will give u my number have fun its easy just take your time pal
|
|
|
|
Post by stfocus on Sept 23, 2013 21:17:57 GMT 1
O buy the way when u put the decal on wet leave them for a week to make sure all the water is out and dry
|
|
|
|
Post by midlifecrisisrd on Sept 24, 2013 8:39:39 GMT 1
Did a few now but all YPVS, no Lc's but if you can get an early LC2 tank decal bubble and wrinkle free over the curve of the tank I reckon you can do anything.
As said fill a spray bottle with water and add a drop or 2 of washing up liquid then soak the surface then place the decal into place and "float" it till in the right position. Most difficult bit I find is getting the application tape off without lifting or stretching the decal.
I have found it easiest with decals in one piece to remove the tape and backing then simply lay over the wet surface ( spray decal on back too) then position. I don't use a squeegee, just thumbs. If you are at a difficult curve on the tank lay the decal down and look at where it lies, if it is wanting to crease it means you need to stretch the rest to take up the slack at the crease or if it wants to lift off the surface you need to stretch it at that point. At first I never realised you have to stretch and shape them a bit.
Don't worry if they don't stick, just work slowly on a half inch at a time working from the centre out with your thumbs and it will eventually stick. If it goes a bit wrong with a bubble or a crease then slowly peel back and try again.
As said leave for a week or so, not just to let the water dry but to let the adhesive dry out and the decals settle. Better to have a decal lift a bit and you can either work it back or replace as when clear coated it is back to the beginning.
On another note I did get a one off set of decals from the image works and the back of the vinyl had little crazed lines in it. Could not see from the front but as they were applied the little lines allowed the air/water out to the edges. Easiest and best finish decals I have ever done.
Steve
|
|
|
|
Post by alext on Sept 24, 2013 9:08:51 GMT 1
I did mine - the painter point-blank refused to do them. they were tricky, but not impossible - it did take over an hour to apply them to my satisfaction. a plant-sprayer with warm water and a few drops of sqeezy and they "float" quite easily - getting all the water out from under them is awkward due to the curved shape - I did the best I could, then the painter left them in the oven overnight to dry out completely before he put on the laquer. Im happy with them - no creases and they appear to be the same on each side - no doubt the sticker brigade will say they arent right, but they look good.  that was the as I finished and they headed off to the oven for the night.... |
|
|
|
Post by fatfastroger on Sept 24, 2013 18:00:09 GMT 1
I made my own as I screwed up the ones I got from Norbo. I had a hard time getting them on without creases and bubbles. Then the paint re-acted and they all had to come off again  So I spent a few evenings in and made my own set in Adobe Illustrator, complete with cut paths. I got them printed and cut for free as I'm a print engineer in the trade.  I used good quality vinyl , if you use this then it conforms better when you apply it over curved areas. Cheap stuff will never be bubble or crease free unless its on a flat surface. Here is the finished job applied and clear-coated. Flat with no bubbles   |
|
|
|
Post by arrow on Sept 24, 2013 19:41:33 GMT 1
And very nice it looks too.
|
|
|
|
Post by calum64 on Sept 24, 2013 21:16:58 GMT 1
I hope that is the spare bed it's on coz thats where I'd be sleeping if the soup dragon caught me with it on the bed
|
|
|
|
Post by fatfastroger on Sept 24, 2013 21:30:28 GMT 1
Yes it is the spare bed - all of it is now in the front room on top of the shelving unit, along with my TSA pipes. Had to move the frame from the side of my bed though, its now in the garage :-(
My wife is very tolerant I have parts of my 31k all over the house. Will be a shame to have to put it all together one day in the cold garage.
|
|
|
|
Post by calum64 on Sept 24, 2013 21:40:00 GMT 1
Mine bought me a kettle for fathers day and wants to know if I can put a toilet in the garage to save me coming into the house. Nice to be loved eh.
|
|
|
|
Post by majortom on Sept 25, 2013 7:45:48 GMT 1
I did mine, took ages , also when you put the first layer of clear on, put a mist coat on, as i put a little too much on and one of the stripes reacted , only a bit, but it really p!&&ed me off , i knwe it was there,
Good idea to put a mist coat on before you add the decals as this will protect the paint if you need to reposition.
Also make sure you check the two stripes are even from the riding position, its easy to concerntrate on the side view , i have seen them looking uneven when looking from the back of the bike.
Good luck and take your time
|
|
|
|
Post by lovelydog on Sept 26, 2013 20:17:22 GMT 1
Thanks very much for all your input guys,very useful. My decals arrived today so I best get a move on and get the parts painted. I will make a thread following the whole sorry affair. . .watch this space. 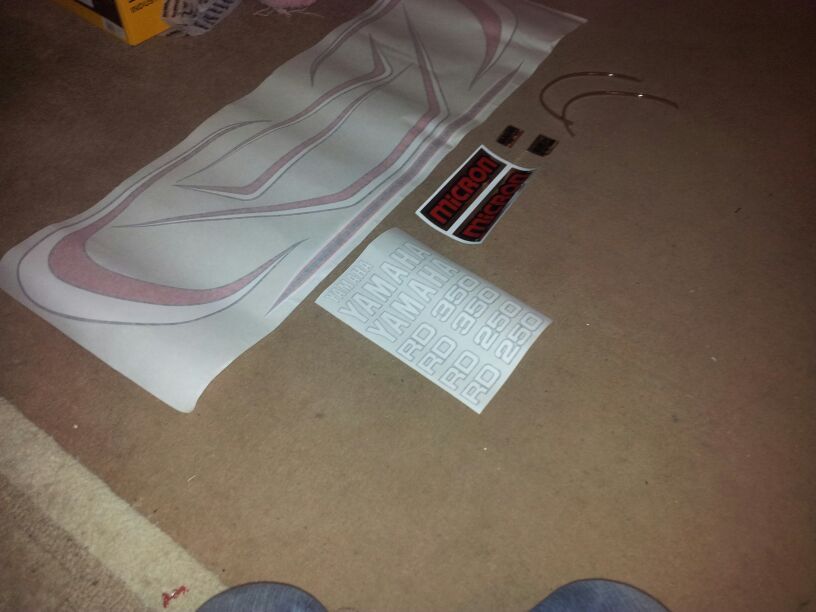 |
|
|
|
Post by fatfastroger on Sept 27, 2013 16:35:39 GMT 1
Good luck , take your time and show us pix !!!
|
|
|
|
Post by jon on Sept 27, 2013 18:13:55 GMT 1
Lovelydog, I got my decals custom made in non standard colours by The Image Works.
They made a nice job, and like you was apprehensive about applying them so asked a mate in the trade.
The Image Works were quite helpful, and even have a fitting guide specifically for an RDLC on their website as they are notoriously difficult to fit.
After watching it done, I would possibly try myself, but for the fitting cost if you can get the decal maker to apply them I would.
|
|


