|
|
Post by captaincaveman on May 23, 2012 23:33:05 GMT 1
ive been using 1500 grit to flat back the paint and get ride of the orange peal effect. Then mop it back to a shine. The trick ive found so far is knowing when to stop. You or me, always think i can get a better shine with just bit more and in no time its worn through the paint.  Its all in the prep work ive found myself getting a bit anal now trying to get it perfect. But there's only so much you can do without a spray booth as in keeping the paint shit and dust free. |
|
|
|
Post by Denzil on May 23, 2012 23:43:27 GMT 1
So what about the transfers dude? You have a lovely job there, would you advise to get the paint polished mopped etc transfers on then lacquer over the whole lot?
|
|
|
|
Post by captaincaveman on May 24, 2012 9:39:07 GMT 1
Yeah that's what the plan is but i don't to lacquer over the polished paint as it may react.
So just going to buff it up clean it all off fit the decals and lacquer of the top.
Then mop and polish the whole lot again.
Anyone know if i should flat back the lacquer top coat or just mop it?
|
|
|
|
Post by Denzil on May 24, 2012 12:01:26 GMT 1
All this is achieved just using ordinary halfords paint I thought it had got to be special plastic paint to stop it cracking on the panels etc. I'm still not sure whether to paint it all polish it all like captaincaveman has then transfers on then lacquer all over the lot. What you all think?  |
|
|
|
Post by chamber66 on May 24, 2012 19:50:53 GMT 1
well saw his handiwork tonight, and I have to say it is pretty good  Still can't believe the donkey let me go into his garage when he was at work mind. Anyone need any LC spares ;D |
|
|
|
Post by captaincaveman on May 25, 2012 11:09:10 GMT 1
A complement off you  Just been watching a vid on you tube, The gay painted his tank left it dry then lacquered it without rubbing down or buffing up the base coat. Have i just spent a few hours wasting my time sanding and buffing for no reason? I know i,l have to do the same with the lacquer but i thought i,d get a deeper better finish with doing the same to the colour first. Any painters out there? |
|
|
|
Post by captaincaveman on May 27, 2012 20:11:47 GMT 1
Started putting the lacquer on today at 11.30 put a coat on every 10 to 15 minuets finished the last can about 2.30. Must have put about 10 or so coats on the tank so hopefully i should be able to flat it back and get a really good deep finish. No runs or sags either just one poxy fly that decided to embed its self in the paint half way through. also managed to repair my air box. 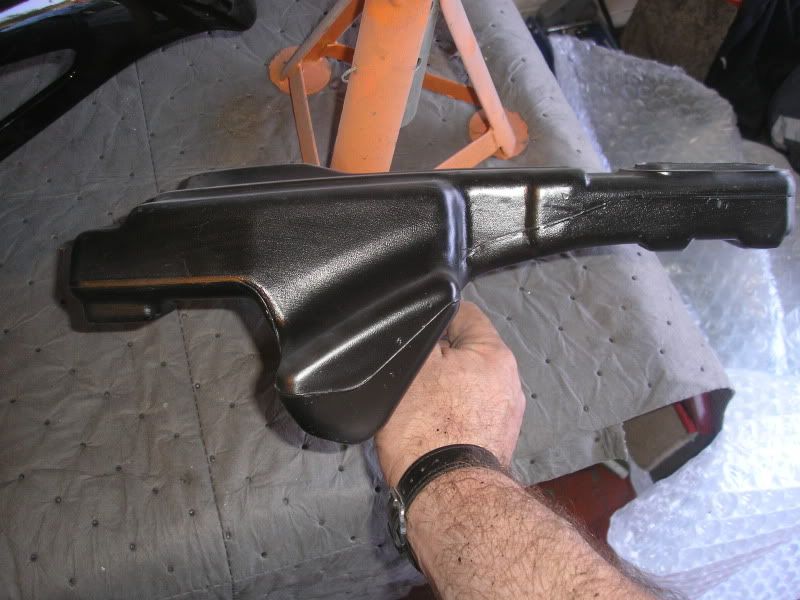 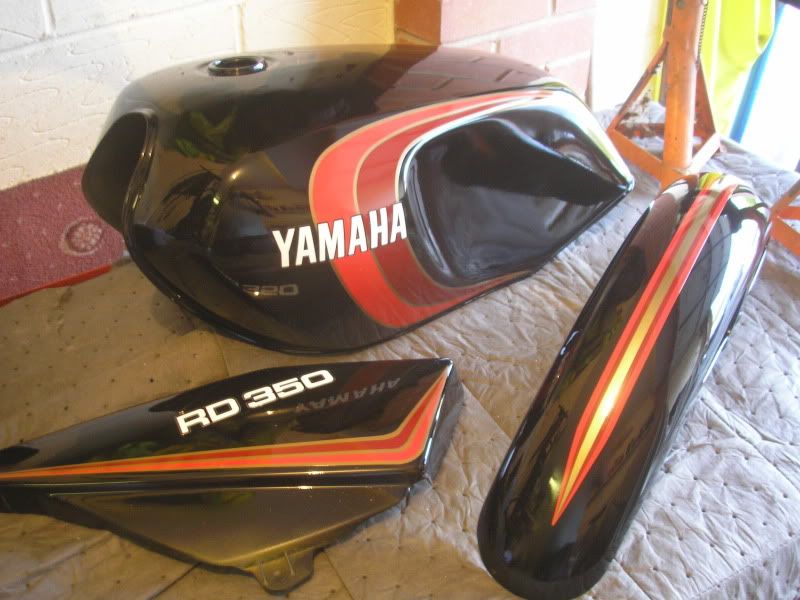 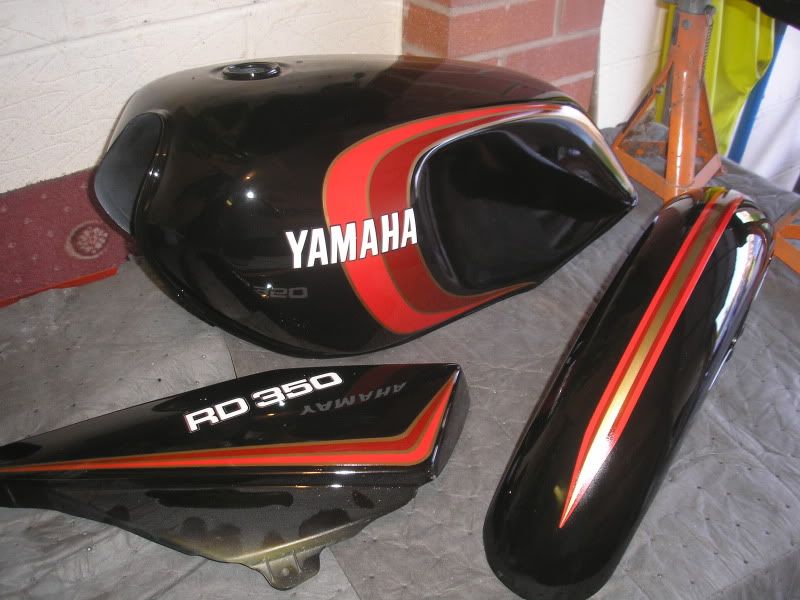 Fitting the decals were the hardest part the tank letters are all separate. Now realised that ive set the word Yamaha in the wrong position not really major but i know that's going to bug the shit out of me. Total cost of paint and decals is about £160 quite shocked at the amount of used cans ive gone through. If i was to do it again i wouldn't bother to flat the colour back so would get away with less paint. Decals form Norbo |
|
|
|
Post by marsbar350 on May 27, 2012 20:43:30 GMT 1
crackin job steve cant see the fly ;D yamaha logo looks good too  |
|
|
|
Post by Shane on May 28, 2012 20:55:07 GMT 1
Looks great mate. Top job. Might need some tips when it comes to painting mine:)
|
|
|
|
Post by captaincaveman on May 31, 2012 21:37:24 GMT 1
Had my polished parts back today. Very happy done a cracking job rear pegs forks and wheels £50 had to wait a while but worth it in the end. 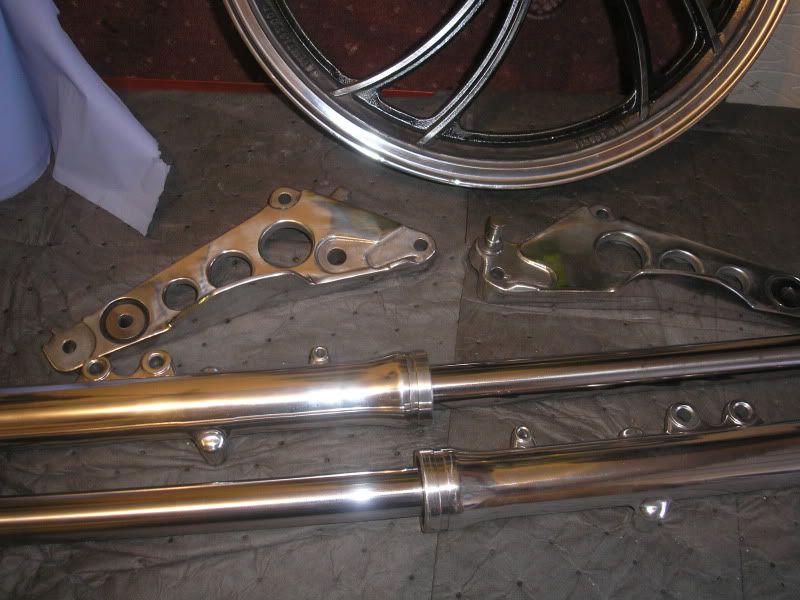 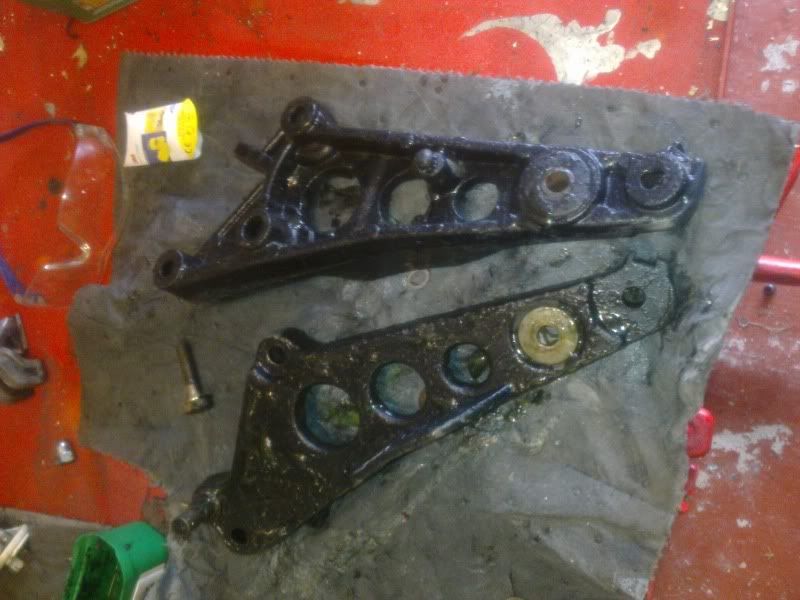 |
|
|
|
Post by marsbar350 on May 31, 2012 21:53:20 GMT 1
|
|
|
|
Post by scoobytoo on May 31, 2012 21:55:59 GMT 1
Well done m8, that paint job looks amazing for rattle cans, just goes to show its all in the prep. I painted a Dt125lc tank in white using rattle cans. My paint shop guy thought it had been done by a paint shop. Just goes to show it can be done |
|
|
|
Post by captaincaveman on May 31, 2012 22:23:54 GMT 1
I did try to paint stripper what ever was on the hangers but failed. I then took drill and wire brush to them. Came up ok apart from the 1000,s of scratches the wire wheel left. 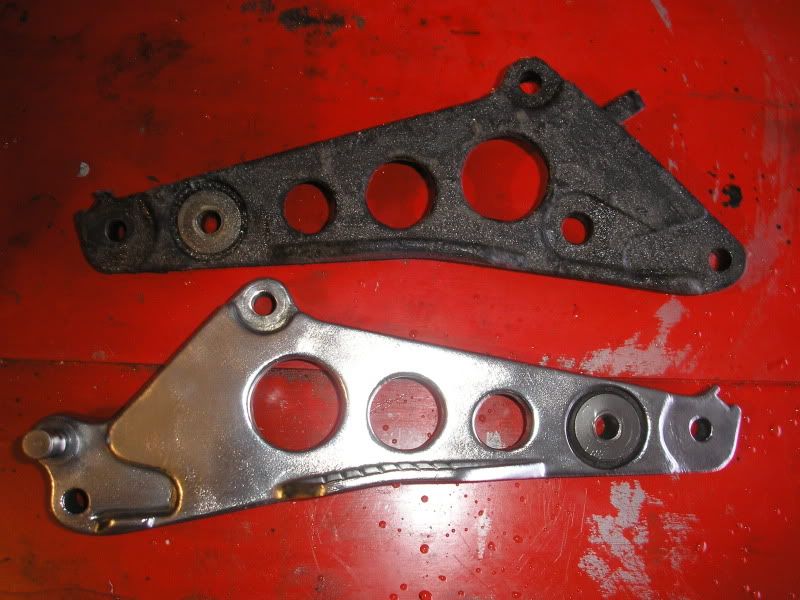 You can just make out the marks was going to leave them like that but they just didn't look right. So from what the chap said they actually had to re-machine the finish on them. Starting to take a bit of shape now but still a fair way to go. |
|
Deleted
Deleted Member
Posts: 0
|
Post by Deleted on May 31, 2012 22:24:11 GMT 1
gotta agree, looks great,well done
|
|
|
|
Post by captaincaveman on Jun 10, 2012 18:39:26 GMT 1
Well had planed on a nice spin on the road bike today until it failed to start just a dead battery i hope. So spent a few hours on the rd instead and got a bit done. Even the other half commented on that its starting to look like a bike now. 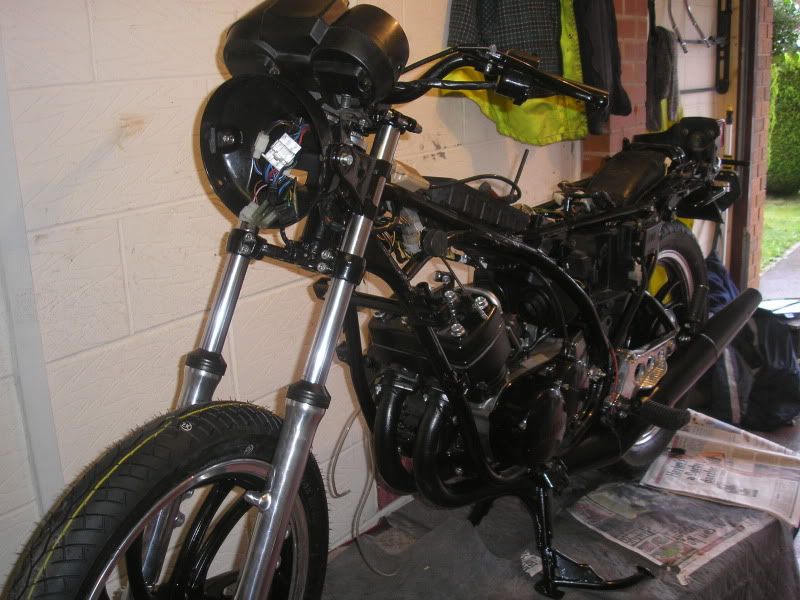 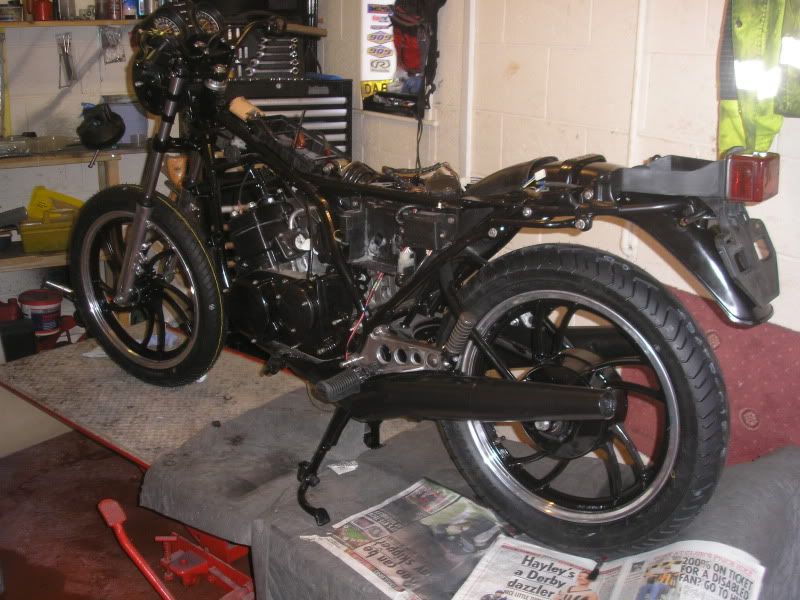 Anyone know what this plug is for? and where does the cdi bolt to? 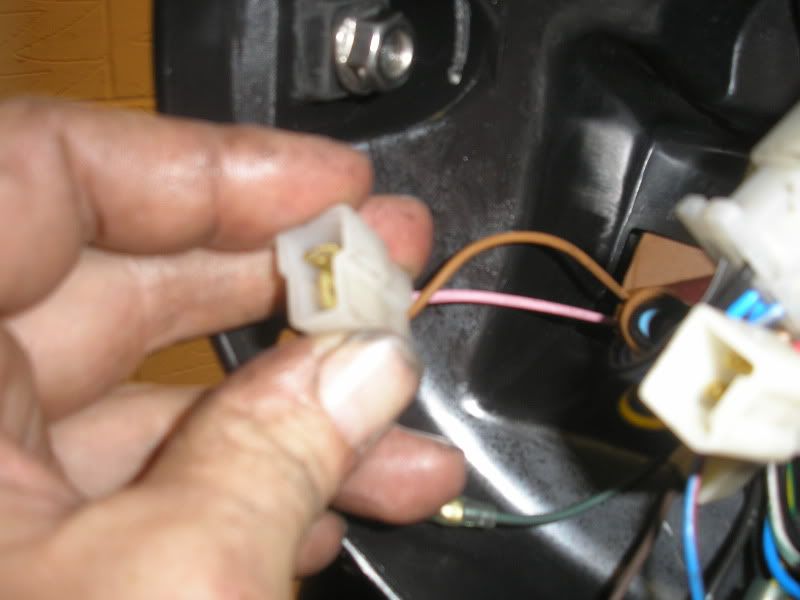 |
|
|
|
Post by huskysteve on Sept 16, 2012 23:33:10 GMT 1
ive got some side panels that need painting i think i will have a go at now ive seen all the tips on here.
|
|
|
|
Post by captaincaveman on Sept 17, 2012 11:05:55 GMT 1
Just dont wrap them in bubble wrap even if you thing there dry |
|
|
|
Post by LC_BOTT on Sept 18, 2012 8:32:26 GMT 1
sorry can't help with the plug, but the CDI bolts to the bottom of the inner mudguard, should be a couple of brass threaded inserts moulded into the plastic. Took me ages to find too (had to ask myself, as got the bike in boxes)
|
|
|
|
Post by weirdomagnet on Oct 10, 2012 23:19:23 GMT 1
nice black and white bike and great reading the threads,its nice to pick up tips on painting etc.nice work so far on the lc,cant wait to see more.
|
|