|
|
Post by dusty350 on May 1, 2022 8:21:52 GMT 1
Whilst I am still undecided on a clear way forward, one thing that is a "given", is to pull the 350 engine from the Fzr and give it a complete rebuild. It will either go back in the Fzr or make the 250 a 350, but either way the Fzr was bought so it could provide the engine. It's a runner, and sounds pretty good, but that doesn't prove anything of course, and it's gonna get the full treatment, especially as I have no history of a rebuild or how much it's been used. The bike has migrated to the shed from the garage as there is more room down there;  20220430_141945 20220430_141945 by dusty miller, on Flickr  20220430_141928 20220430_141928 by dusty miller, on Flickr First job was to remove the Allspeeds. Mounted on horrible box section tubing "brackets" that extend from the footrest heel guards, they were removed easily enough. If the engine goes back in, the brackets will be redesigned, or more likely the brackets on these pipes, or whatever pipes get fitted will be re-sited to mount the pipes properly. Then it was drain the rad and the barrels, and remove the rad to get a better look at the engine mounts. Now these really can be improved !  20220430_150324 20220430_150324 by dusty miller, on Flickr  20220430_142050 20220430_142050 by dusty miller, on Flickr  20220430_142028 20220430_142028 by dusty miller, on Flickr  20220430_142016 20220430_142016 by dusty miller, on Flickr Really cheap and nasty job on those  One issue I found was you cant remove the left side casing with the engine bolted in - the back part of the case wont clear the frame so the engine will need to be canted forward. A simple trim up would suffice - makes you wonder why someone wouldn't bother ? Anyway, nothing that cant be sorted with some effort. So, with the rad out of the way and the top end drained, I thought I would pop the head off to see what horrors await !! Head has some minor pitting but is very clean - maybe too clean ??   20220430_152214 20220430_152214 by dusty miller, on Flickr I suspect a crappy pattern head gasket and lots of silicon goo, allied with staining on the head and an overfull cooling system, and very clean domes and pistons, indicates there may have been coolant getting into the combustion chamber ? Good news is the pistons look great - bad news is they are on 2.25   20220430_152224 20220430_152224 by dusty miller, on Flickr Bigger than what I would like, and as I build all my engines for maximum longevity, I am thinking I will get these resleeved. Only issue being I'm not sure how much meat needs to left on the existing liner to allow a sleeve to be fitted ? I've messaged Paul at PJME who is the Guru for this, so when I know I will post it up. Hopefully today will see the engine out and on the bench. Dusty  |
|
|
|
Post by dusty350 on May 1, 2022 17:32:23 GMT 1
Today was engine removal day ! With the bike in the shed, I started by removing some bodywork. The dummy tank has 2 bolts in the cap outer assembly that fix it to the real tank underneath;  20220501_120008 20220501_120008 by dusty miller, on Flickr 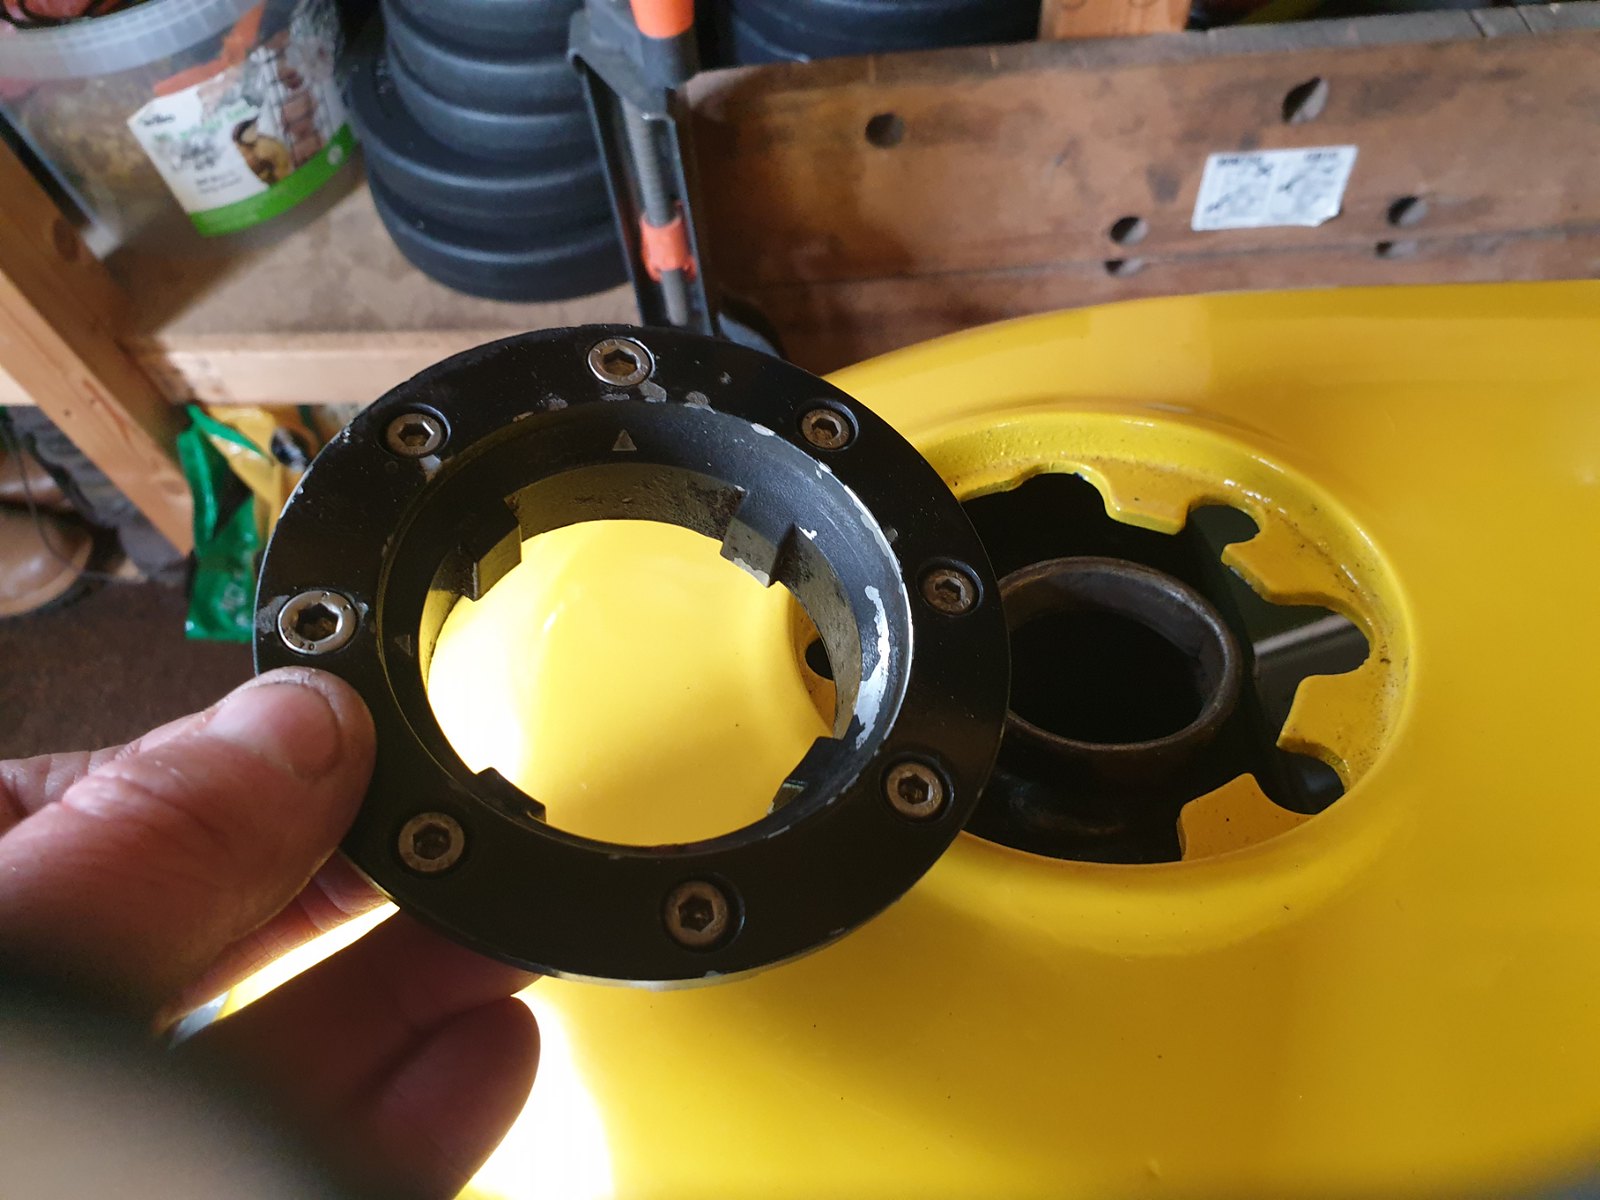 20220501_120057 20220501_120057 by dusty miller, on Flickr With the dummy tank off, I removed the seat unit, and then the actual petrol tank, that has been cut and shut previously;  20220501_120631 20220501_120631 by dusty miller, on Flickr  20220501_123711 20220501_123711 by dusty miller, on Flickr Undo the sump bolt next and drop the gear oil - fairly clean but will be refreshed anyway;  20220501_120000 20220501_120000 by dusty miller, on Flickr Then start disconnecting everything. Carbs off, throttle cable to oil pump disconnected, stator wiring unplugged, chain removed (split link);  20220501_123719 20220501_123719 by dusty miller, on Flickr Once everything was disconnected, I had to work out how the engine had been fitted. Sounds simple, but the way it has been done is actually a bit weird. If the builder had made up spacers and a couple of simple engine plates it would have been fairly simple, but instead made life complicated with all sorts of metal work ! In the end, I slid my wooden frame stand under the engine and removed both the side rails which meant I could finally remove the left side cover/hydraulic clutch actuator, and then slide the engine out on the stand;  20220501_144010 20220501_144010 by dusty miller, on Flickr With some thought, it would be fairly easy to improve this hybrid massively. It looks like it has been made to work with minimal effort, and components have been bolted on wherever there is a Rivnut available! The coil being a case in point, with only 1 fixing and some crappy spacers;  20220501_151532 20220501_151532 by dusty miller, on Flickr A project for the future I think  Anyway, engine out and on the bench;  20220501_145529 20220501_145529 by dusty miller, on Flickr  20220501_145539 20220501_145539 by dusty miller, on Flickr  20220501_145549 20220501_145549 by dusty miller, on Flickr  20220501_150503 20220501_150503 by dusty miller, on Flickr It's pretty grubby, but I removed the Ypvs clutch case to find a new looking clutch pack; 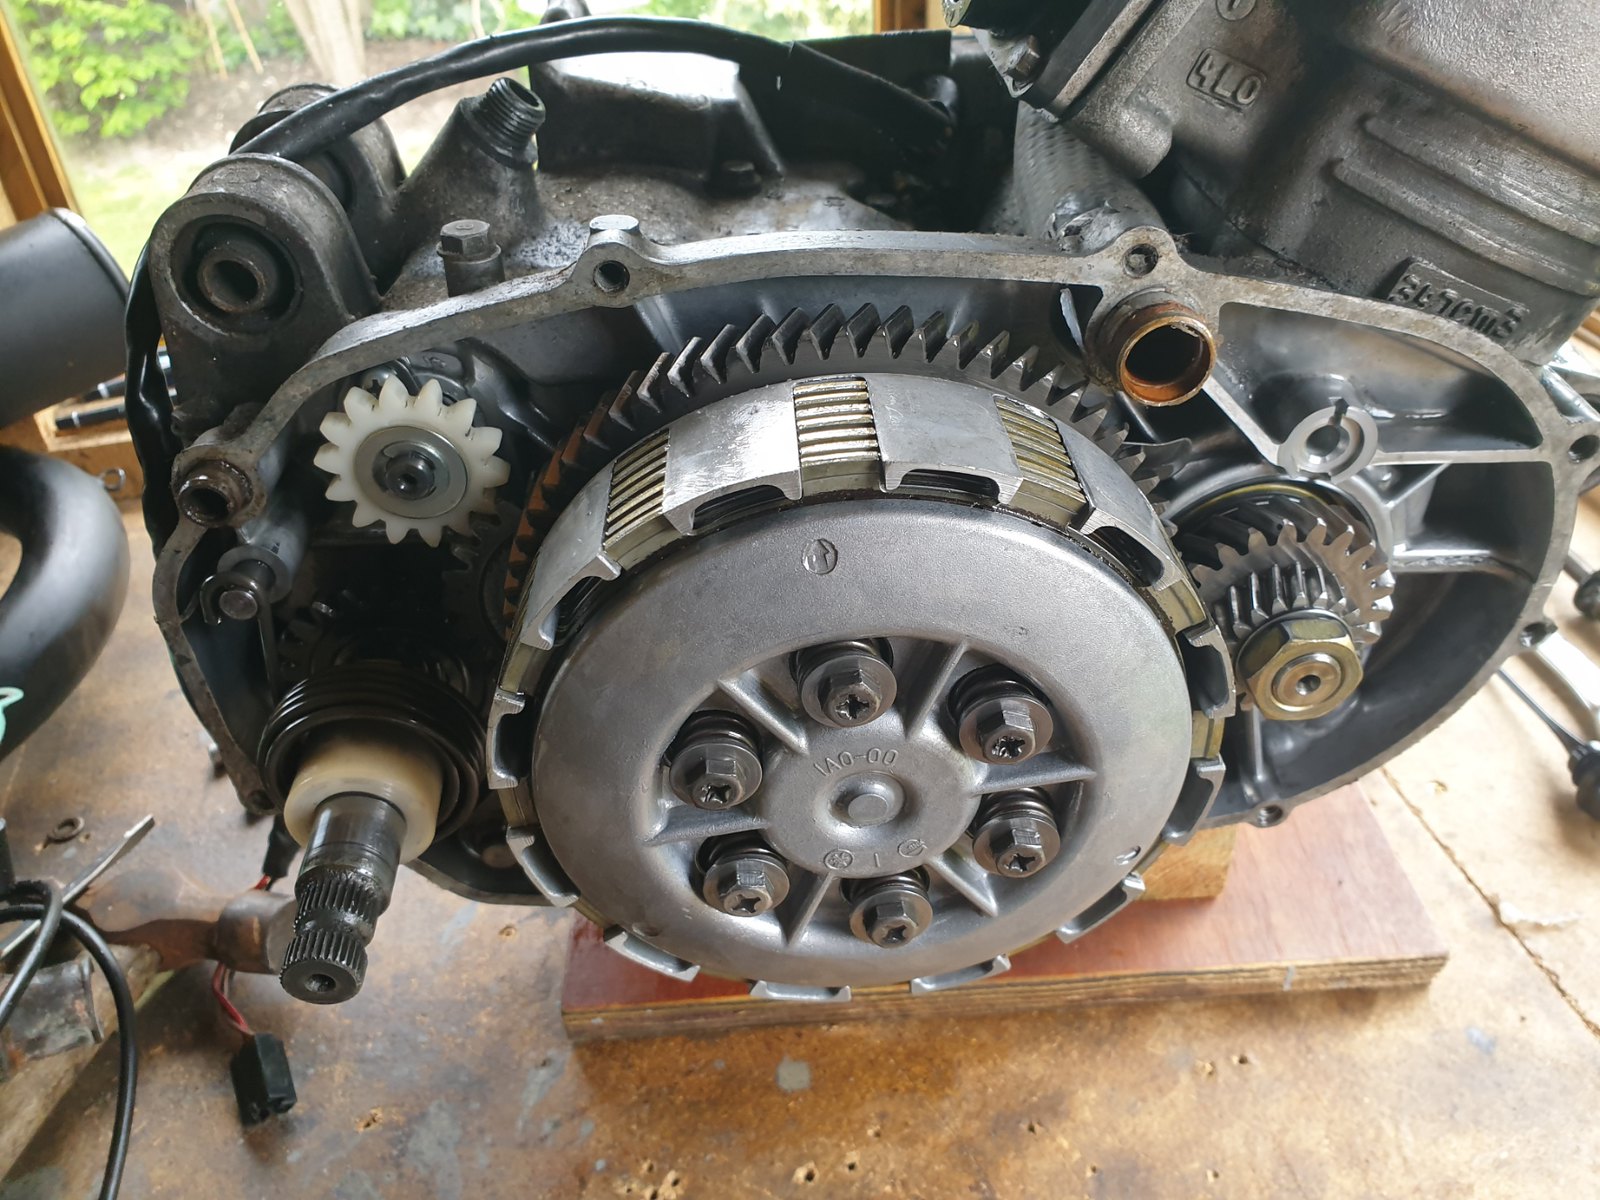 20220501_151317 20220501_151317 by dusty miller, on Flickr That's as far as I got today. Hope to get it stripped down completely over the next week. Cases will get the shift shaft bush and then vapour blasting. I've won a new shift shaft on ebay so that should arrive this week, and then I will start making a list of parts to get. As before, I will try and do a comprehensive build thread as I go. Dusty |
|
|
|
Post by midlifecrisisrd on May 1, 2022 17:50:20 GMT 1
Great progress Dusty
Just a thought, if you are thinking of relining the barrels and you want to change the 250 to a 350 why not get some 250 barrels relined to 370?
I may be reading this wrong but it seems the LC is your main interest but you can't bare to just junk the FZR as its an interesting bike that you can no doubt improve
If you did the 250 to 370 you could refresh the FZR engine leaving it's current good bore, sort the engine mounting and exhausts as a mini project
Just a thought
Steve
|
|
|
|
Post by mouse on May 1, 2022 17:54:07 GMT 1
Well that doesn't look to bad, shame about the bore size but could have been a lot worse, as you know!
Mouse
|
|
|
|
Post by dusty350 on May 1, 2022 19:56:02 GMT 1
Hey Steve, I would like to get the 350 barrels back to standard bore if I can. I hope not to have to touch the 250 engine for the time being, and I think I would leave it as a standard 250 anyway. The Fzr may well be a project for the future. I dont think it has much value without the engine and assorted Lc parts, so probably not worth trying to sell it anyway. The loose plan at the mo is build the 350lc engine and fit it in the 250 bike. Not sure whether to do something with front and rear ends or leave standard with period mods ? At some point I will see if that 3 spoke wheel I have fits the Rg front end. If so, will the Rg front end fit the Lc ? The dust is beginning to settle and it looks like the Lc build, as originally intended, will take precedence Then again, I have been known to change my mind, quite often !!  Dusty |
|
|
|
Post by dusty350 on May 1, 2022 19:57:15 GMT 1
Hi Mouse, Yea, could have been awful, but as you know, it did sound ok when running. Might have to grab my rattle gun off you to do some fasteners Dusty |
|
|
|
Post by oldbritguy on May 1, 2022 20:18:31 GMT 1
Looks like a decision has been made now. That engine although sounded fine when you picked it up has obviously seen some rough treatment in its time Some Dusty magic (and a pedantic eye for detail) will have that sorted soon enough. Paul at PJME relined a set of 350 cylinders I had which were on +2.0 and had about another 1mm worn out the bore due to the old PV tang being left in. I don't think there will be any problem there and Paul will let you know as he is the man for the job. Looking forward now to see how you get on here. John |
|
|
|
Post by midlifecrisisrd on May 1, 2022 20:21:06 GMT 1
Sounds like a plan then Dusty 👍
Steve
|
|
|
|
Post by dusty350 on May 1, 2022 20:23:47 GMT 1
Hi John Engines are always a lottery. The fact they were ragged from new, and by everyone that ever owned an Lc makes you wonder at how many are still going !! Good to know regards your resleeving. I'm hoping it can be done. Dusty |
|
|
|
Post by dusty350 on May 1, 2022 20:25:13 GMT 1
Cheers Steve It's "Plan A" !!  |
|
|
|
Post by yamark on May 1, 2022 21:16:15 GMT 1
I knew your sleeves would be rolled up in rapid response I can't stop laughing at those front engine mounts Nice to see you back on the horse mate |
|
|
|
Post by dusty350 on May 1, 2022 21:23:07 GMT 1
Hi Mark, Cheers mate I'm no engineer, but it makes you wonder why they didn't choose the obvious, and easier option ? |
|
|
|
Post by donkeychomp on May 1, 2022 21:29:23 GMT 1
Rapid progress already mate. I'm wondering how many LC engines you've rebuilt now. Could be an interesting side line. Myabe call it 'Dusty's Lumps'. Then again, maybe not...
Alex
|
|
|
|
Post by dusty350 on May 1, 2022 21:38:27 GMT 1
It will be interesting to see the price differences on Yam parts, from the first pictorial engine build I did a few of years back ( 6 years !). I did win a Yam shift shaft on ebay yesterday, new in the bag. £65 plus 4 quid post. Checked Fowlers and it's over £100 now, plus post |
|
|
|
Post by JonW on May 2, 2022 5:29:11 GMT 1
Decent buy on the shift shaft Dusty, sadly the UK/EU/AU get shafted for prices on stuff like that. A snip at US$50 in the good ole USofA. meh. Interesting 'workmanship' on the FZRD. I reckon more effort went into the naming of it than the engine/coil mounts lol. Tho the stickering was done on the cheap of course. That said this was probably done pre to 2012 since thats when the youtube video was uploaded, at that point the engine and the FZ roller were all cheap things to buy and easily found. The downside is that it now looks like a project that was completed over a weekend when the Mrs went to a spa with her mates. Copious beers, a single trip to B&Q for some threaded bar and the scrap bin close at hand and... lo n behold a bike is made! The engine does look like its drinking its coolant, rare to see it on both sides tho and there is no wash marks where some of the soot remains etc. Maybe that isnt the case and instead its hardly been run at all since its was built, the oil and the brand new clutch perhaps points to that? The silicone sealed (aftermarket?) gasket looks like a reused one, again fitted to get the bike done. Like you I see the poor pipe brackets and engine mounts and think its looks like a mock up and how much better even I (some one not trained as an engineer) could improve what is there and think, Oh yes... that might be fun to do as well. I do think the engine is a good buy all up, sure the cyls are well used but there is no chain damage and it has a decent engine number as well. In 2022 thats not something you can always say about a loose engine from ebay etc. I'll grab some popcorn and hold on tight, should be a fun ride as you make these into something (some things?) superb! |
|
|
|
Post by dusty350 on May 2, 2022 7:44:20 GMT 1
Cheers Jon Correct on all points I think Someone has offered the engine up, realised it will fit, and with whatever they had to hand and some crappy welding, made it happen. The vid shows different pipes and no hydraulic clutch - I guess these came with a different owner, as did the ignition coil and the CDI which both look fairly new. The Chinese rad also came later it would seem, and the engine does sound quieter now than it does in the vid but always hard to tell with phone microphones. I bought it for the engine really, and got lucky with the coil and CDI. The carbs may work out ok if they have been sorted properly, or could sell them on, along with the pipes. I did think I would flog the front end and Banana arm and then I would probably get near to my money back, after the value of the parts, but I'm thinking it will stay in the shed till after the Lc build is finished for a potential future project. I'm never quite sure how I feel about an Lc/Pv engine in a completely different bike- especially one that started out as a 4 stroke, but I do quite like it and I know I could improve it considerably. As for the engine - lots of silicon and pattern gaskets. Clutch plates will come out today and tell their own story I'm sure. Any engine is a gamble, but I particularly wanted another 4l0 for a rebuild and felt this the best way to get one, plus some other useful parts. I'm gonna have a look through the paperwork that came with it today, and see what else I can find out. I love that part of a new project Dusty |
|
|
|
Post by dusty350 on May 2, 2022 21:49:06 GMT 1
Had a proper look at the receipts today. The last MOT ran from October 2017 to 2018. It's only done 38 miles in that period if the speedo odo reads correctly. The CDI is an HPI unit from Belgium - I'm not familiar with that make ? That was purchased in October 2019. Clutch pack was purchased in March 2018. Seems parts were still being purchased up till late 2019, and then the receipts stop. I stripped the engine today. Pics to follow Dusty |
|
|
|
Post by dusty350 on May 3, 2022 7:38:24 GMT 1
Start of the engine strip. Aside from the usual workshop spanners, socket set etc, the only specialist tools needed are rotor puller, rotor holding tool and clutch basket tool. The addition of a rattle gun is a "must have" I think, and my Parkside version from Lidl was bought originally to deal with all the internal fixings. I used to have to shock them out with a hammer and old style impact driver, which I hated using on old cases, so a battery rattle gun is a godsend. Best part is, with various adaptors from my socket set, I can remove every nut on the engine - even the sprocket and clutch hub nuts are whizzed off with virtually no effort. So whilst I would love a bigger gun, this will do everything on an Lc/Pv engine with no problem, and saves a lot of effort and any potential damage;  20220502_135101 20220502_135101 by dusty miller, on Flickr The freezer bags are for the components as they come off. I bag them up, and come back to them for clean/refurb as I build the engine back up. I started with the rotor;  20220502_135322 20220502_135322 by dusty miller, on Flickr The rattle gun spun the rotor nut off with ease. The last metal washer can be fiddly to get out so a small magnet saves any faffing about. Then wind the rotor puller in, anticlockwise, as far as it will go, then tighten the inner bolt to break the grip of the rotor on the crank taper;  20220502_135808 20220502_135808 by dusty miller, on Flickr  20220502_135920 20220502_135920 by dusty miller, on Flickr Rotor will get a good clean up. Magnets all look good inside and there are virtually no hammer marks on the outside like some I've had. Whilst I have the rotor holding tool nearby, I use it to lock the sprocket so I can whizz the nut off. This can be tricky to hold, but the rotor tool works well, and the rattle gun makes short work of the nut;  20220502_140245 20220502_140245 by dusty miller, on Flickr 20220502_140245 by dusty miller, on Flickr  20220502_140447 20220502_140447 by dusty miller, on Flickr |
|
|
|
Post by midlifecrisisrd on May 3, 2022 8:58:53 GMT 1
Nice work with the adapters on the rattle gun 😉
I've the opposite, mine is 1/2 inch drive so I've got to reduce it with adaptors
Steve
|
|
|
|
Post by JonW on May 3, 2022 9:30:21 GMT 1
Dusty, be a bit careful of rattle gunning with non Impact sockets. I know these smaller rattle guns are not like the bigger versions but if one lets go it could get nasty  . |
|
|
|
Post by dusty350 on May 3, 2022 20:07:49 GMT 1
Cheers Jon, I hear what you are saying. I used my pro range sockets which are pretty heavy duty, plus my rattle gun doesn't have the torque of the bigger/more expensive units. I also think the nuts weren't super tight like some I've had in the past. One engine I did - the clutch nut was so tight it deformed and broke my clutch holding tool whilst I was hanging off the end of a 2ft steel tube on the end of my ratchet handle ! Must have been done up with a h/d rattle gun I reckon The rattle gun I have makes life really simple, and the added bonus is you are not unduly stressing parts like the crank or gear shafts. I wouldn't be without one now. It also allows 1 person disassembly. With the sprocket, I held the rotor tool in place on the sprocket with one hand, and spun the nut off with the gun in the other hand. The generator was next to be removed. 3 bolts hold it on, and the backing plate needed gentle encouragement to wriggle free . Couple of the wiring connectors have been chopped, so will improve those when the time comes. Once the genny was off, it revealed matching case halves which was nice to see;  20220502_142336 20220502_142336 by dusty miller, on Flickr At this point, I spun the engine around to tackle the clutch side. Unhook the kickstart spring to allow that assembly to be removed, and then undo the spring bolts and remove the pressure plate, showing what looks like an EBC clutch pack, with the pin planished steel plates;  20220502_143945 20220502_143945 by dusty miller, on Flickr  20220502_144042 20220502_144042 by dusty miller, on Flickr  20220502_144131 20220502_144131 by dusty miller, on Flickr |
|
|
|
Post by stusco on May 3, 2022 20:33:51 GMT 1
Dusty, be a bit careful of rattle gunning with non Impact sockets. I know these smaller rattle guns are not like the bigger versions but if one lets go it could get nasty  . A couple of turn of insulation tape to be on the safe side ,and don’t hold the socket ive had one split and pinch my hand 😩 |
|
|
|
Post by donkeychomp on May 3, 2022 21:32:16 GMT 1
I need to get me a rattle gun like that.
Alex
|
|
|
|
Post by oldbritguy on May 3, 2022 22:07:28 GMT 1
I’ll second/third the rattle gun.
Really handy tool but as others have said with a bit of caution.
Making short work of those big nuts which usually benefit from an extra pair of hands.
Hopefully no horror stories once you get inside there Dusty and the rebuild is gentle on your wallet (probably not knowing your standard of build and also in the process myself £££)
John😉
|
|
|
|
Post by dusty350 on May 3, 2022 22:14:01 GMT 1
It's not gonna be gentle on the wallet I'm afraid John  I'm pretty sure I listed parts costs in the first build thread I did 6 years ago - will have to find it and check ! I do have a new Yam clutch case gasket I ordered by accident a couple of years ago. Checked the part number on Fowlers tonight just to be sure (superceded part number) and that's 25 quid now, plus post ! Pretty sure it was about £16 odd when I last bought one. Doesn't change anything of course, but it's interesting to see how parts prices rocket Dusty |
|
|
|
Post by oldbritguy on May 3, 2022 22:36:46 GMT 1
Labour of love buddy.
Prices are now beyond silly hence I have given up counting.
I have been getting loads of parts from Chris Clack and Norbo. Mutts too. Saved a few quid on the gen yam parts.
Kids are now gonna see a reduction in Dad’s contributions to their flat/house refurb 😂. Mine certainly have 🤣🤣
John 😉
|
|
|
|
Post by dusty350 on May 4, 2022 7:45:27 GMT 1
Labour of love indeed. Just a shame that they cost so much to do right. The good thing is parts are plentiful, both standard and trick, so that makes rebuilding so much easier. With the clutch plates removed, I could lock the inner hub and undo the clutch nut;  20220502_144658 20220502_144658 by dusty miller, on Flickr Remove inner hub, and then the main basket;  20220502_144828 20220502_144828 by dusty miller, on Flickr 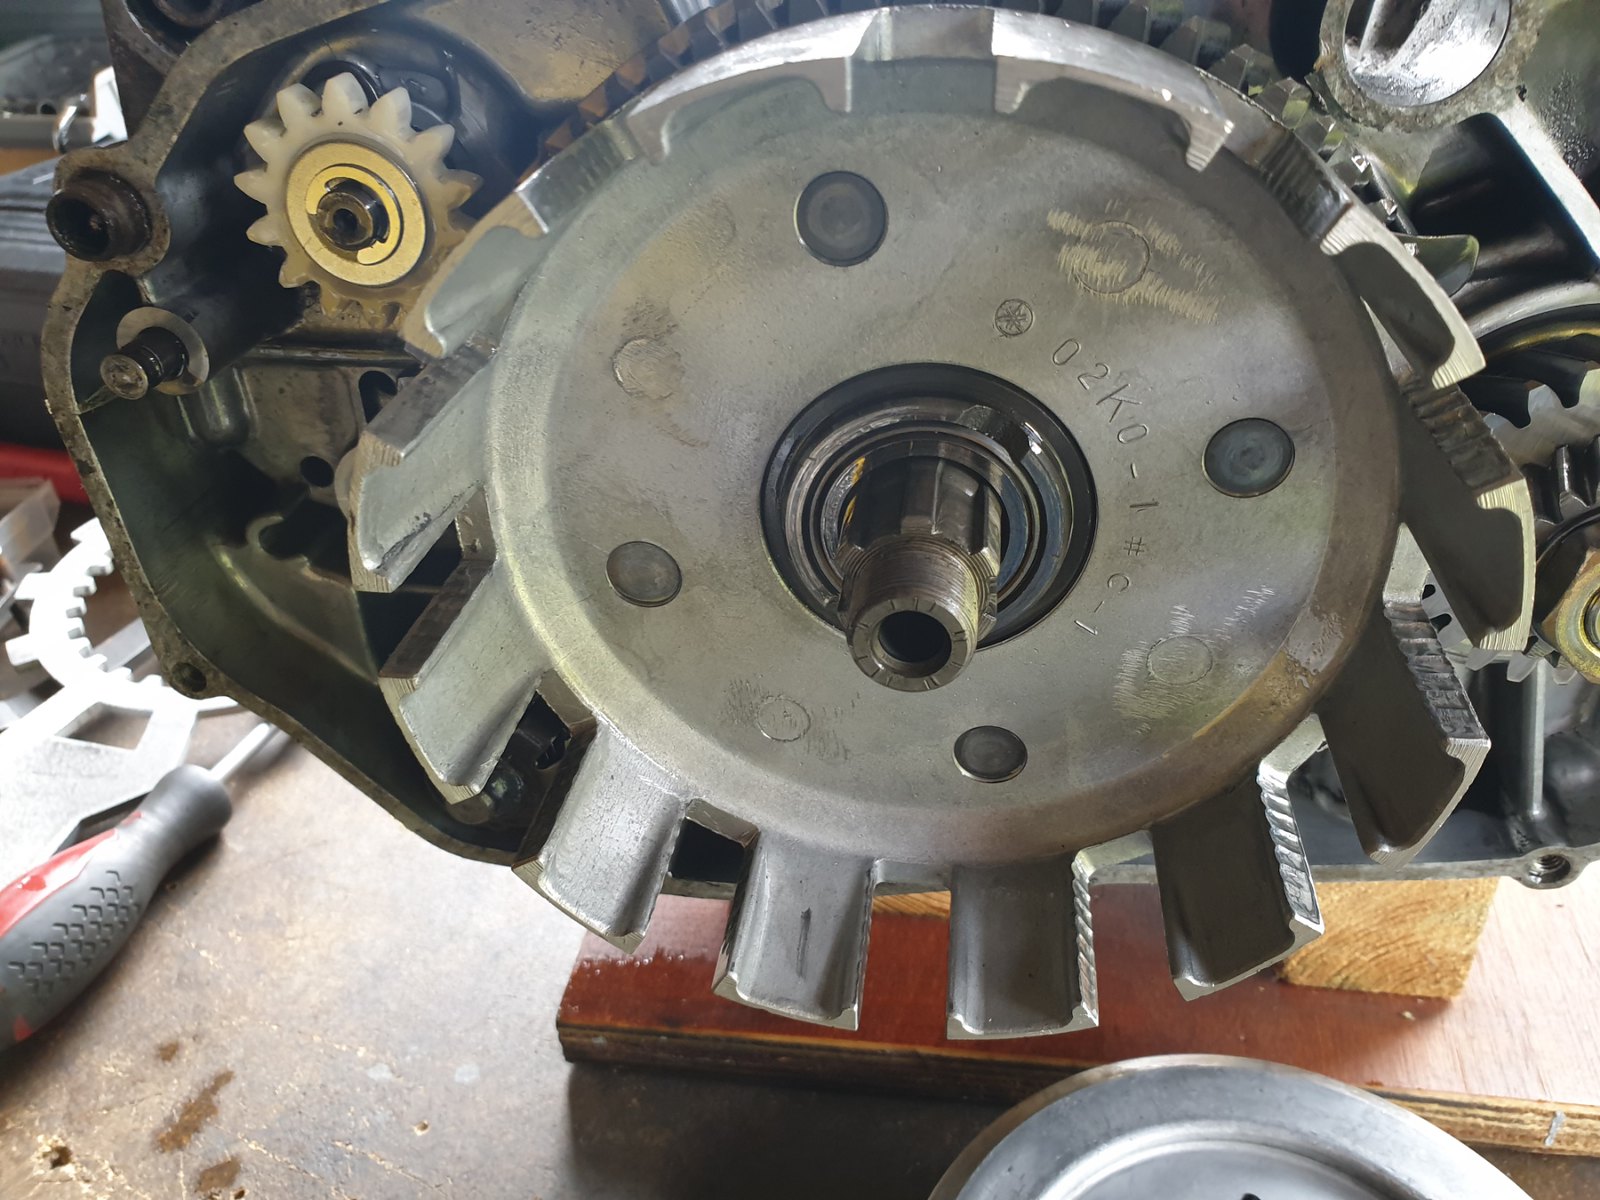 20220502_144830 20220502_144830 by dusty miller, on Flickr Some fairly heavy "ribbing" on the basket fingers. Some edges have been filed back, a lot of edges haven't - guess someone got bored after doing a few, and didn't bother with the rest "!! Slide the basket off and check the lash numbers - 91 on the crank primary, and 64 on the back of the basket, so 155, which is a matched pair. |
|
|
|
Post by JonW on May 4, 2022 8:15:24 GMT 1
Wow, ribbed for her pleasure indeed.
You replacing or filing Dusty?
|
|
|
|
Post by shaunthe2nd on May 4, 2022 8:36:33 GMT 1
Cracking on like a coiled spring Dusty.
I second what John says above, I sent Chris Clack (Suzukiexpert) my list of Yam engine part numbers and he provided me a quote within a day, far cheaper than Fowlers, and once ordered they arrived within 2-3 days. All genuine and fully receipted. Worth an email to him before you order from Fowlers.
Whilst you are in the clutch, do you mind measuring the little round bearing that sits on end of the push rod for me?
Mine has got mixed up with a load of other bearings and I want to be sure I put the correct one in, thanks.
|
|
|
|
Post by sidney81 on May 4, 2022 10:05:42 GMT 1
Making good progress dusty ,you must be happy you have something to get your teeth into 🙂👍
|
|


 One issue I found was you cant remove the left side casing with the engine bolted in - the back part of the case wont clear the frame so the engine will need to be canted forward. A simple trim up would suffice - makes you wonder why someone wouldn't bother ? Anyway, nothing that cant be sorted with some effort.


 .
.
 .
.

