rolie
Weekend rider

Posts: 67
|
Post by rolie on Mar 4, 2021 15:22:33 GMT 1
I’ve just picked the frame, swinging arm et al of my 4L1 up from the painter. It looks great. I’ve a box full of bits that I have refurbished and are ready to bolt on. Spring is here and I can now work in the shed for longer than ten minutes without losing the feeling in my fingers. I can’t wait to get at it!
I know it’s simplistic but I’m a complete novice at this and the last time I worked on a bike was when I took it to bits in 1994 - my memory isn’t that good. Do you know if anyone has posted a logical rebuild sequence for a rolling chassis? Or is there a really detailed restoration that you can point me to that will give me a good steer. I don’t want to get to a place only to realise that I should have attached the ‘horizontal steam pump flange’ earlier and I have to take bits off again -and I really don’t want to have to read the Haynes guide backwards.
Any pointers you can give me will be much appreciated.
Rolie
|
|
|
|
Post by tacky1 on Mar 4, 2021 15:46:46 GMT 1
Very first thing I do with all mine is get the swingarm in, shock, the forks, wheels, sidestand, Couple of towels in the frame to stop accidental scratching and get the engine in, then the wiring, coils, cdi clocks bars and then all the remainders like exhausts, carbs and cables, Bodywork and hopefully the biiiiatch will fire up  |
|
|
|
Post by abar121 on Mar 4, 2021 16:25:04 GMT 1
Nothing really to catch you out in terms of the installation order to be honest.
The only one that comes to mind is the airbox. Make sure you get that in there before fitting the carb rubbers, cables and whatnot.
Also get your cable runs correct and don't bleed the brakes until the hoses are run correctly.
|
|
|
|
Post by lcmarky on Mar 4, 2021 17:39:36 GMT 1
I tend to start with the swing arm spindle all nicely greased up etc along with the head bearings (taper roller of course) in a similar state of greasiness.
From here you can put in swing arm, yokes, shock, airbox, inner mud guards, battery tray, wheel spindles, lay the loom etc etc.
Have fun its a rewarding process!
|
|
|
|
Post by chrisg on Mar 4, 2021 17:48:34 GMT 1
I put some pipe insulation foam around the frame to protect it. Put the engine rear bolt in first and then lower the engine down on a small jack to get the front mounting bolts in, as there is a danger of catching the frame with the exhaust studs. Alternately, fit the cylinders after the engine has been fitted.
Good luck.
|
|
rolie
Weekend rider
Posts: 67
|
Post by rolie on Mar 4, 2021 18:34:15 GMT 1
Many thanks, very helpful. That’s exactly what I wanted to know - if there are any tips that would help, any traps to avoid and hopefully learn from and avoid the stupid mistakes that have been made in the past. With the number of bikes that you guys have rebuilt there must be a book of Homer Simpson moments. That’s before you could do it blindfold of course!
|
|
|
|
Post by headcoats on Mar 4, 2021 18:47:45 GMT 1
Get it on the wheels so you can move it about
|
|
|
|
Post by abar121 on Mar 4, 2021 19:03:04 GMT 1
Don't be tempted to try and force any bolts or screws in, if they are stiff.
Always clean them up with a tap, especially after paint / powder coat.
Put the centre stand on if you have one. It's good for access under the bike when you having a rolling chassis.
|
|
|
|
Post by dusty350 on Mar 4, 2021 20:23:36 GMT 1
I always fit front and rear suspension whilst it's on the floor, plus bars and other small parts (optional) but try and keep it light to save on hernias !   20200724_200621 20200724_200621 by dusty miller, on Flickr I made up a stand from some CLS 3x2 as my bikes dont have centre stands;  20200502_145824 20200502_145824 by dusty miller, on Flickr I can add a piece of CLS under the front or rear cross piece to lift the frame and bias the weight forward or backwards - great for fitting wheels, adjusting chain etc if there is no centre stand. I use pipe lagging to protect the frame when fitting the engine; 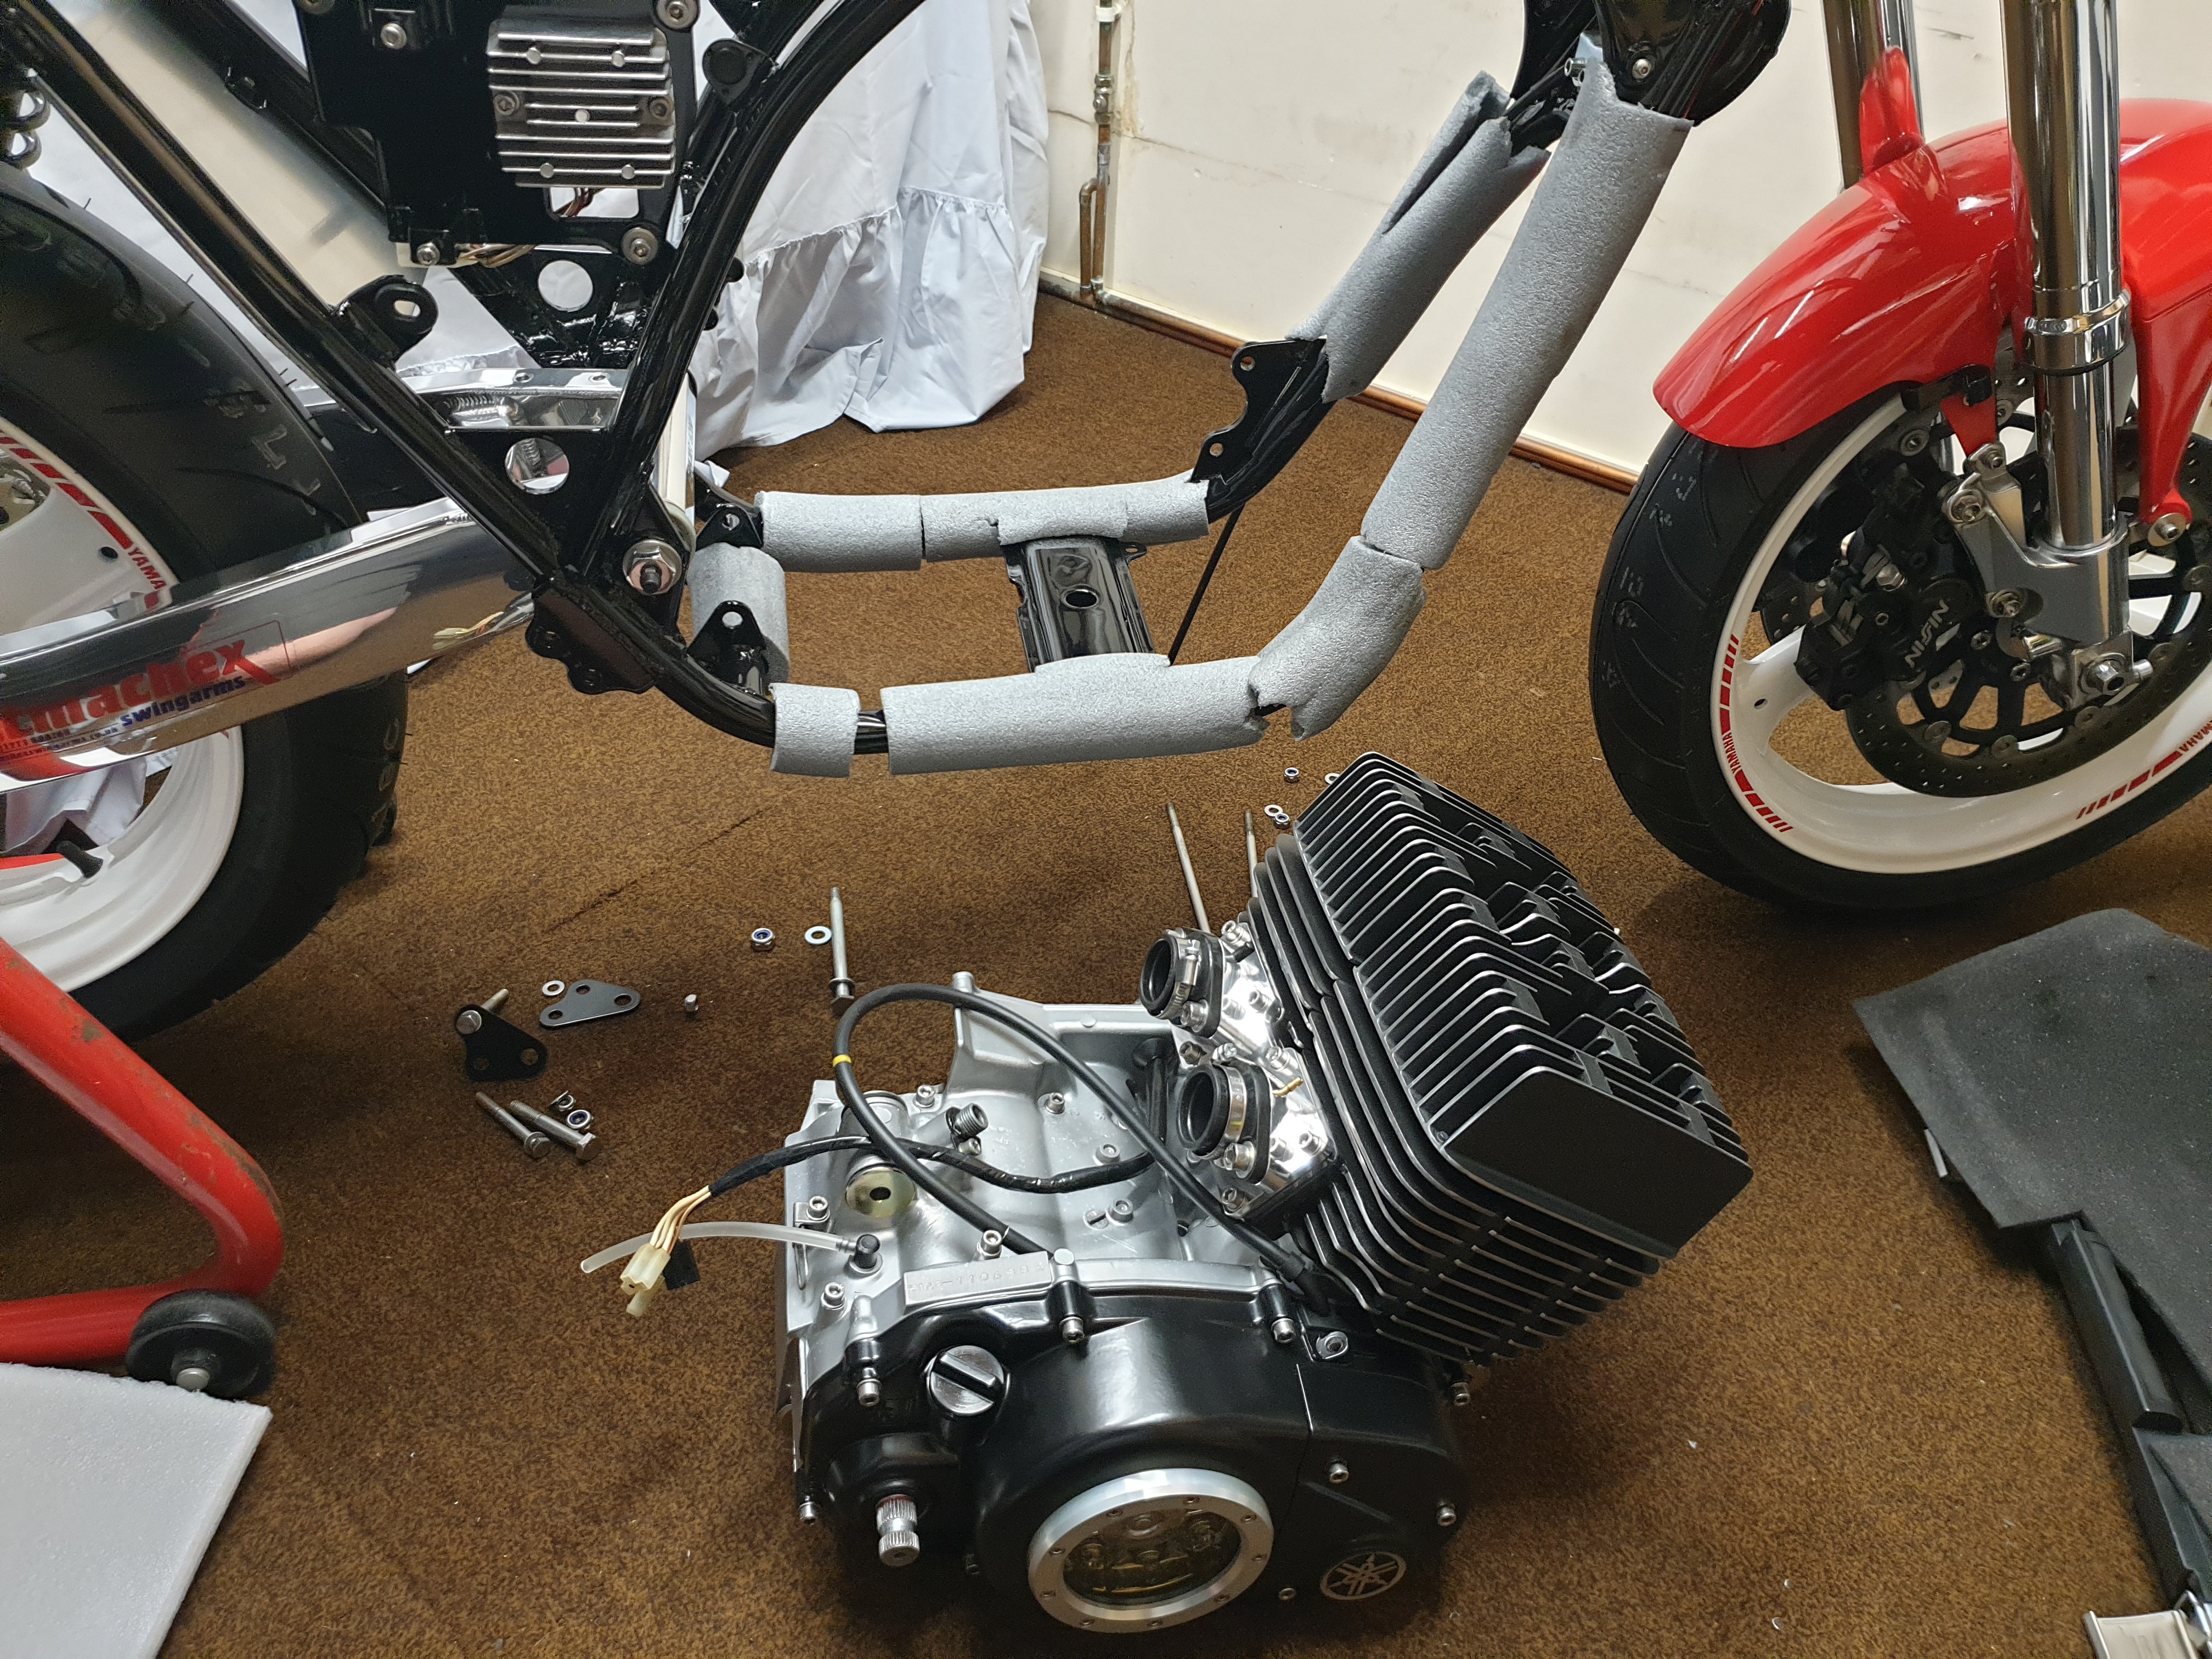 20200812_092241 20200812_092241 by dusty miller, on Flickr On an Lc, fit the loom before you bolt the airbox in as it passes by the frame tube and airbox side and is tight. Everything is much easier when it's on it's wheels Dusty  |
|
|
|
Post by reedpete on Mar 5, 2021 0:53:57 GMT 1
Nothing really to catch you out in terms of the installation order to be honest. The only one that comes to mind is the airbox. Make sure you get that in there before fitting the carb rubbers, cables and whatnot. Also get your cable runs correct and don't bleed the brakes until the hoses are run correctly. ... the inner mudguard/rear shock would be the classic id suggest to keep in mind... there’s a natural temptation to think ‘tubular parts’ together first, then hang on the plastics.... but airbox and mudguard are there to catch you out... |
|
|
|
Post by JonW on Mar 5, 2021 0:55:34 GMT 1
for me, front end and center stand if it has one. now its stood up you do airbox and loom. Then free form form there.
|
|
rolie
Weekend rider
Posts: 67
|
Post by rolie on Mar 5, 2021 15:30:07 GMT 1
This is really great. It’s these simple nuggets of information that you have learned over time and now take for granted that are a real help to first timers like me sitting nervously looking at a pile of bits. I’ll probably still make a balls of it!
Thanks again
|
|


