2taol
Thrash Merchant

Posts: 378
|
Post by 2taol on Nov 11, 2020 8:40:24 GMT 1
great work so far, i like the idea of repairing and cleaning parts as the come off the bike. this gives a chance to order parts while not delaying proceedings.
|
|
|
|
Post by sidney81 on Nov 12, 2020 23:08:24 GMT 1
Wow you're doing a lovely job and cracking on with it 🙂
|
|
|
|
Post by shaunthe2nd on Nov 16, 2020 21:02:32 GMT 1
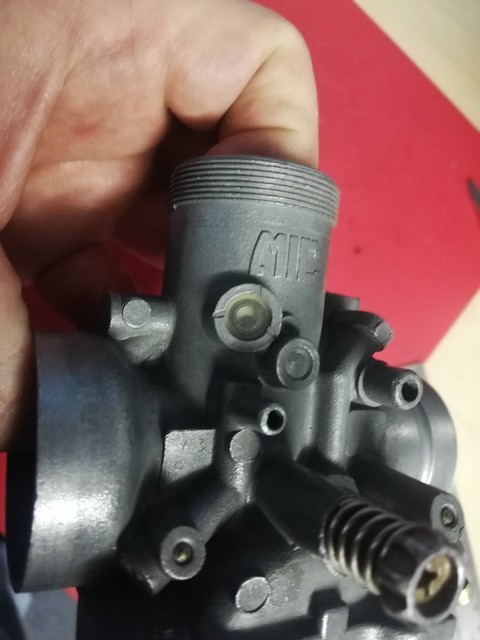
Delivery man came, but will be a while before these are fitted...   So thought I would spend some time in the kitchen....  Nice session in the dishwasher, followed by a light spray of silicon cleaner. 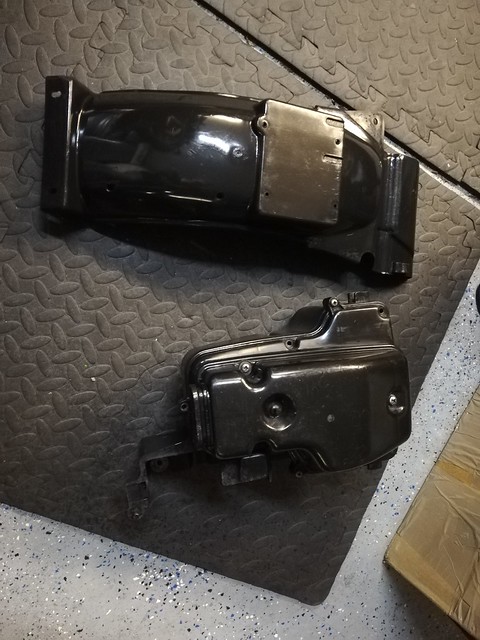 I had a trip to Norbo a while back and bought new rear muddy, radiator cover and side panel infills, so want the other plastics to be half decent. Then had a go at the radiator, boring and not so productive effort at trying to straighten the broken fins, followed by a splash of paint. Not too happy with this, but will see if anything better comes up at a decent price.  Next job is to strip and clean the carbs. Bought what look to be a decent set off ebay as bike didn't come with any:  Balls out to get to the air correction circuit.  40 mins per carb in the ultrasonic...  A bit of red paint on the pip to make balancing carbs easier when i get to that stage, or if!  The emulsion tubes fitted are those ledar type, which I've no experience with. Luckily I have a pair of stock ones to stick in. Ordered some stock jets and some replacement gaskets from Rob (4L0forever) so now carbs on hold waiting receipt of parts.  Shouldn't take long to assemble those. Another job I enjoy. |
|
2taol
Thrash Merchant
Posts: 378
|
Post by 2taol on Nov 17, 2020 8:42:34 GMT 1
A lot of work done there.
Cleaning carbs in the US cleaner is very satisfying. Big difference when they come out!
|
|
|
|
Post by shaunthe2nd on Nov 19, 2020 20:15:09 GMT 1
The carb gaskets arrived thanks Rob, look great, and also the main jets, so thought I'd finish the carbs off.  New brass balls inserted and locked with a bit of loctite.  Don't forget to clean the inside of the view glass, that combined with the painted red dot on the slider will make balancing the carbs a lot easier, especially with my eyes. No visable dot... 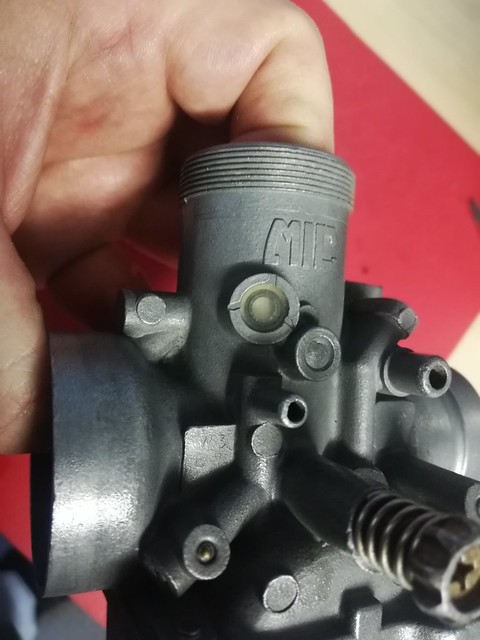 [/url [/url
here it comes...
 . and here it is at WOT position  . Nice and clear. Here is the finished carbs already to be bagged and stored until called upon. 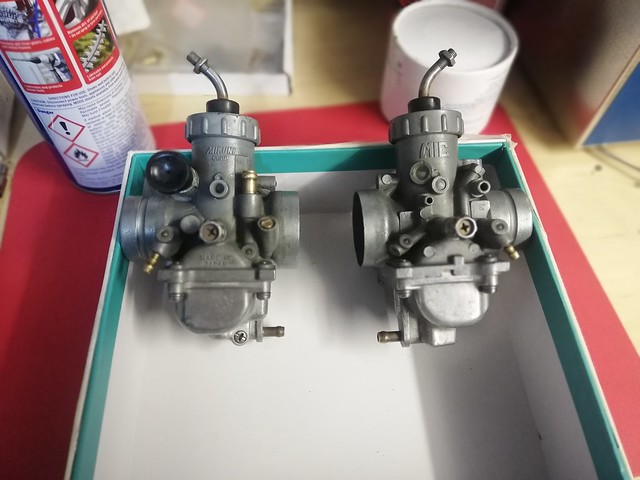 For the record, well for me as I will forget. Carbs have been set to stock settings as follows: Type 31K 00 Main jet 240 Pilot 22.5 5K1 needle fitted, 4th clip down Stock emulsion tube P0 345 fitted Air screw 1 and 1/4 turn out Float set to 21mm Another job crossed off. |
|
|
|
Post by andy748 on Nov 19, 2020 20:56:14 GMT 1
Cracking on nicely there Shaun, smashing job. Andy.
|
|
|
|
Post by lc350pete on Nov 20, 2020 10:45:18 GMT 1
Excellent Shaun
Really good job on the brake callipers too I thought about painting them myself but wasn’t sure so I got the powder coaters to do the callipers as well they did an amazing job and masked everything off properly
nice job on the carbs too
I stripped my carbs as well though for some reason mine has powerjet carbs probably because when I bought my 31K nearly 20 years ago it had a 1wt engine
|
|
oldman
Weekend rider

Posts: 73
|
Post by oldman on Nov 22, 2020 20:29:52 GMT 1
Hi good job on the clock but where did you get your dials from be trying to get some with the yellow on them
|
|
|
|
Post by shaunthe2nd on Nov 22, 2020 20:37:50 GMT 1
Hi good job on the clock but where did you get your dials from be trying to get some with the yellow on them Thanks. Look out for ebay seller classic_gauges - they don't have any listed at the moment, but search for other guages and send them a message. They are semi rigid overlays, so don't bubble nor ripple when fitting. Good quality. If I remember correctly cost me about £35 for a set. |
|
oldman
Weekend rider
Posts: 73
|
Post by oldman on Nov 22, 2020 20:49:10 GMT 1
cool
|
|
|
|
Post by allspeeds on Nov 30, 2020 22:54:37 GMT 1
You are doing a great job there Shaun.
|
|
gambit
L plate rider.
75 % done but I have come up to a problem I need a rd 350r fuel tap any body got any ?
Posts: 43
|
Post by gambit on Dec 1, 2020 11:09:00 GMT 1
Well its been a while since I did a build thread on here, so thought its about time I contributed something new. All my builds to date have been stock, and have included a few 4L1 and 4L0 LC's , and an aircooled RD200 so fancied something a bit different. I posted an advert on here a couple of months ago and was offered a stripped down 31K YPVS from a nice fella in Ireland. It had about 75% of the parts, needs a full refurb and build, UK registered and matching numbers so ideal for a standard build. Warning- if yr not a member of the matching numbers olive green brigade you may want to switch off now! sorry. Bike turned up on a pallet....   It doesn't look like much even after unpacking....   So first job is to evaluate what I have, what is usable and importantly which parts are model/year correct. First thought was to quickly put it together and also reach out to a few people on here to try work out what parts are correct. So here it is as a rolling chassis....  I'm told that the wheels are incorrect, so have sourced a pair of early 31k's. More on that when I refurb them. Believe it or not' I've spent a lot of time on ebay, a trip to Norbo's and got some stuff off Dejan, and it currently looks like this....  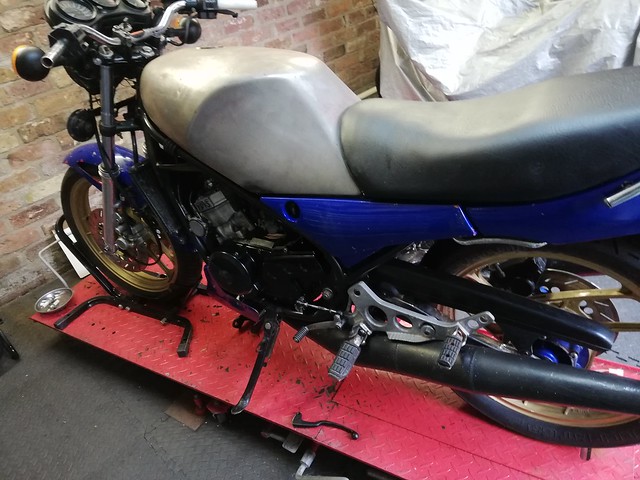 This is just a very rough dry build. Since then I have sourced a genuine nose cone and a fibreglass belly pan, as the blue one in the picture isn't correct, looks to be off another model. I'm missing a few small parts but hope to pick them up as I go along. So this is my starting point. My plan now is to progressively strip it down, refurbing the parts as I go. I appreciate all comments and feedback, and piss taking etc. Also if anyone notices anything that isn't model correct please let me know as this is my first YPVS project. |
|
gambit
L plate rider.
75 % done but I have come up to a problem I need a rd 350r fuel tap any body got any ?
Posts: 43
|
Post by gambit on Dec 1, 2020 11:09:12 GMT 1
Well its been a while since I did a build thread on here, so thought its about time I contributed something new. All my builds to date have been stock, and have included a few 4L1 and 4L0 LC's , and an aircooled RD200 so fancied something a bit different. I posted an advert on here a couple of months ago and was offered a stripped down 31K YPVS from a nice fella in Ireland. It had about 75% of the parts, needs a full refurb and build, UK registered and matching numbers so ideal for a standard build. Warning- if yr not a member of the matching numbers olive green brigade you may want to switch off now! sorry. Bike turned up on a pallet.... It doesn't look like much even after unpacking.... So first job is to evaluate what I have, what is usable and importantly which parts are model/year correct. First thought was to quickly put it together and also reach out to a few people on here to try work out what parts are correct. So here it is as a rolling chassis.... I'm told that the wheels are incorrect, so have sourced a pair of early 31k's. More on that when I refurb them. Believe it or not' I've spent a lot of time on ebay, a trip to Norbo's and got some stuff off Dejan, and it currently looks like this.... This is just a very rough dry build. Since then I have sourced a genuine nose cone and a fibreglass belly pan, as the blue one in the picture isn't correct, looks to be off another model. I'm missing a few small parts but hope to pick them up as I go along. So this is my starting point. My plan now is to progressively strip it down, refurbing the parts as I go. I appreciate all comments and feedback, and piss taking etc. Also if anyone notices anything that isn't model correct please let me know as this is my first YPVS project. |
|
|
|
Post by shaunthe2nd on Dec 1, 2020 21:22:13 GMT 1
Not sure why someone reposted the above twice, sorry about that.
|
|
|
|
Post by shaunthe2nd on Dec 1, 2020 21:50:39 GMT 1
A bit more progress. Managed to get hold of a standard nose cone. It needs a bit of work before painting but thought I'd do a trail fit first whilst all is in a rough state.    Gosh that took a lot of fettling to get it to sit correct without putting too much force on the brackets and plastic. It seems like all the brackets were a bit misaligned, but they are a mix of about 4 bikes, so probably expected. Glad it wasn't after market as I assume that would be even harder to get right. I've ordered an new aftermarket screen, and put the nose cone aside for now, that will get dealt with when i take on the body work. So next stage, remove the head end to make it easier to remove engine. More on this later.   Clutch removed whilst in frame...  Flywheel removed....  and finally engine removed from bike. One man job when stripped this far:   So finally got the dry build back to rolling chassis. Got a few stripped threads and snapped nuts with the frame to sort now, before getting it to a fabricator to weld in a centre stand mount bracket which has been previously removed. Then get it stripped and painted. |
|
|
|
Post by arrdy350 on Dec 1, 2020 23:10:35 GMT 1
Looking great😀👍
|
|
|
|
Post by shaunthe2nd on Dec 1, 2020 23:20:16 GMT 1
Thank you, but it looks terrible at the moment, but it will look great in 4 months!
|
|
|
|
Post by arrdy350 on Dec 2, 2020 7:47:53 GMT 1
Thank you, but it looks terrible at the moment, but it will look great in 4 months! I hope to get mine done in 4 months. It looks better then mine at the moment. |
|
|
|
Post by lc350pete on Dec 2, 2020 9:39:48 GMT 1
Good start and nice to see you have all the main parts
Great idea to partly disassemble the engine while still in the frame 👍
|
|
|
|
Post by shaunthe2nd on Dec 2, 2020 10:47:16 GMT 1
Good start and nice to see you have all the main parts Great idea to partly disassemble the engine while still in the frame 👍 I like to preserve my glass back whenever possible. I probably will get a mate to help put it back, due to weight and also to protect the new paint at that point. |
|
|
|
Post by lc350pete on Dec 2, 2020 23:30:31 GMT 1
Good start and nice to see you have all the main parts Great idea to partly disassemble the engine while still in the frame 👍 I like to preserve my glass back whenever possible. I probably will get a mate to help put it back, due to weight and also to protect the new paint at that point. Yes know what you mean my back isn’t brilliant either, I wrapped plastic sheet around the frame when I put the engine back in 👍 |
|
|
|
Post by shaunthe2nd on Dec 27, 2020 23:21:19 GMT 1
Not too much progress in last few weeks, work was full on, and in my spare time was sorting a few clocks for people. Anyway, bike fully stripped now, and done some work on the frame to prep it before painting. Biggest job was that the centre stand mounts had been chopped so got a donor section from Dejan (thanks). Here's what it looked like before I did anything with it.  Was a bit nervous before I made the first chop in the cross member...  ...and this is after I chopped and did some grinding on the frame...  Here's the bit I chopped out on left, and the donor section in red on the right. I had to do some cutting and dressing of the donor part too to match the frame as I didn't want to chop or amend the frame tubular main bars.  Here's the donor part sat in position. seems to fit ok. Just need to get it welded up now.  I also had 4 damaged nuts at various points around the frame, so ground them off and prepped some new ones for welding.  So a little bit of welding to do, then its off to the powder coaters for the frame and lots of other parts. Frame has been previously powdered so that may be a bit of job to remove. Fingers crossed he is geared up for that. |
|
|
|
Post by shaunthe2nd on Jan 10, 2021 23:52:21 GMT 1
Bit of an update. The centre stand brackets/cross member has been welded to the frame, and some netaining nuts welded on up by local company, so that job ticked off. Frame is now ready for stripping and painting.   I'm starting to put together a pile of bits for powder painting, so thought I'd strip the shock absorber for the spring, and do a bit of tidying up on that...    I've ordered some bushes and bits and bobs for the shocker/swing arm so put that aside for now, but the spring is ready for painting. I'm on the lookout for the '31k-00' decal on the shocker if anyone has any or know where I can get them. Drew a blank with Norbo and Simon Wells on those. Thought I'd try out my new bearing/bush puller set to remove the exhaust mount bushes out of the alloy peg mounts. Was a bit trickier than I thought, but found best way was to soak in WD40 for a while, then position the puller and apply a bit of tension. Then I heated the area around the bush with a gas torch and was pleased how it started to be drawn out soon after. Good practice before I use similar technique on the crank case clutch mechanism bearing. 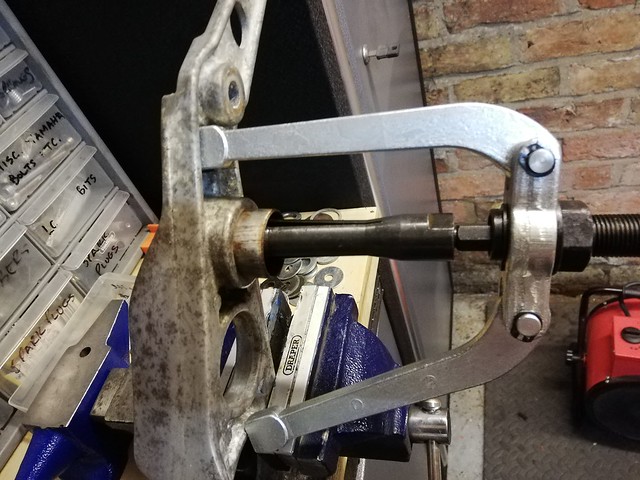 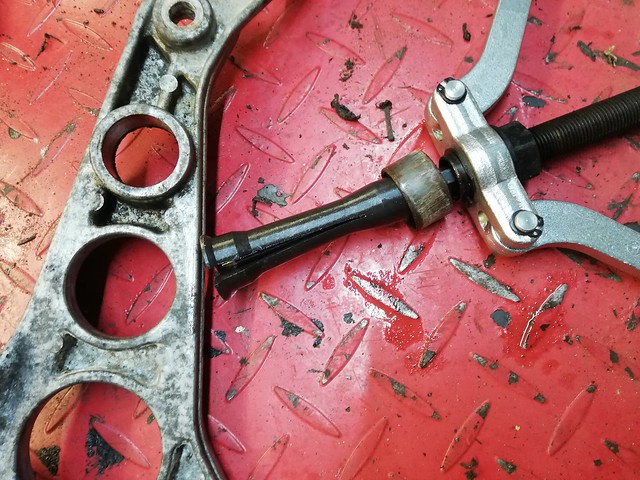 Next job was to finally fully strip the engine. Took loads of pictures as I went. Was quite straight forward, but the biggest problem I encountered was some of the small M5 retaining screws that chewed and needed a combination of dremel, heat and an impact gun to remove. Little buggas, looked so innocent!     Removed the notorious clutch adjuster bearing using similar technique to what I practiced earlier and cheered with relief when it popped out. Good job I did as its goosed.   So engine and frame now both fully stripped. Finally got to ground zero, no going back now!  |
|
|
|
Post by shaunthe2nd on Jan 13, 2021 13:54:40 GMT 1
Just dropped the frame and other frame related parts off for powder coating and the crankcases and footrest hangers for vapour blasting.
Ordered lots of engine and other parts this week from Norbo/Mutts/Fowlers/PJME, so I'm like an expectant father waiting delivery.
Crank will be going off for rebuild once bearings/con-rods etc arrive, and the barrels off for a rebore once pistons/rings arrive.
It really feels like I've turned the corner on the build now.
|
|
|
|
Post by shaunthe2nd on Jan 14, 2021 13:35:53 GMT 1
Just when things started looking up...... Took the power valves out of the barrels and on stripping them down one of the long M5 screws that keeps the 2 halves of one valve together broke inside.  You can see the difference in length of the 2 screws. The upper one in the pic has sheared leaving about 20mm inside the valve on the right. Its recessed so very difficult to get to the the bit inside. Grrrrr. Doesn't look too easy to remove the bit so plan A is to ask my engine reborer if they are able to machine it out. Plan B is to buy a replacement so if anyone has a spare one for sale please give me a shout. |
|
|
|
Post by stumpy on Jan 15, 2021 20:47:09 GMT 1
image works at ilkeston have just done me some stickers for my ohlins on my gsx, excellent job.
|
|
|
|
Post by shaunthe2nd on Jan 16, 2021 1:14:29 GMT 1
Used them a lot in the past will give them a call thanks
|
|
|
|
Post by shaunthe2nd on Feb 14, 2021 23:04:04 GMT 1
I've not posted for a while, progress has been a bit slow as most my spare time has been taken up repairing, refurbing and converting clocks for people but I'm on top of that now. So to update. Mutts Nuts sorted the broken screw inside the powervalve for me. Thanks Dave. Very efficient. Frame and other parts came back from powder coaters:    Very happy with all those. Just tucked them away for now whilst i get on with other stuff. Various deliveries been arriving too...  Got lots of yamaha bags littering my garage now. Crank cases back from vapour blasting, and then painted and baked in satin black by me:   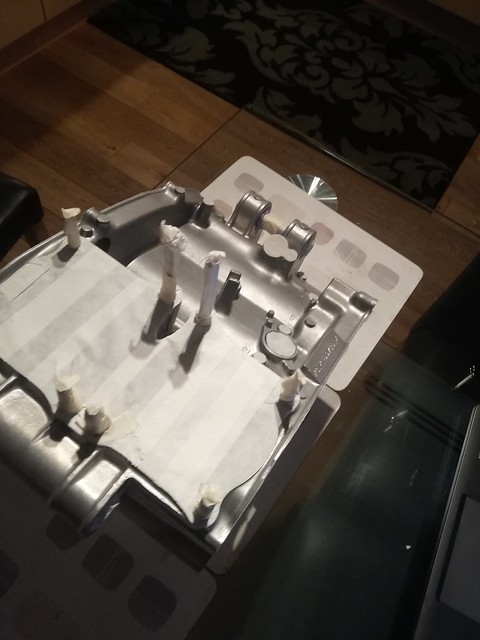 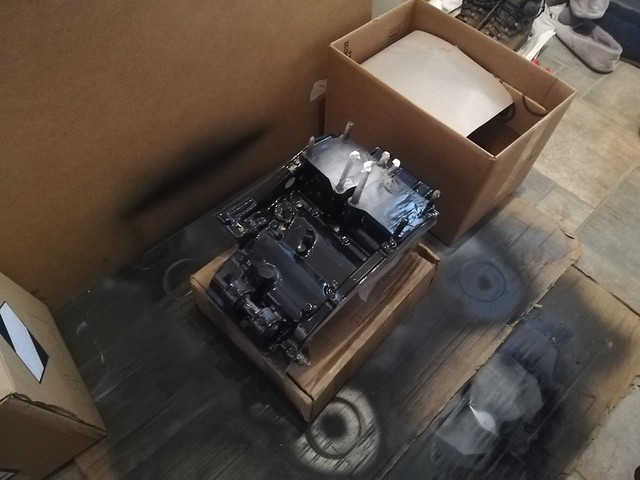 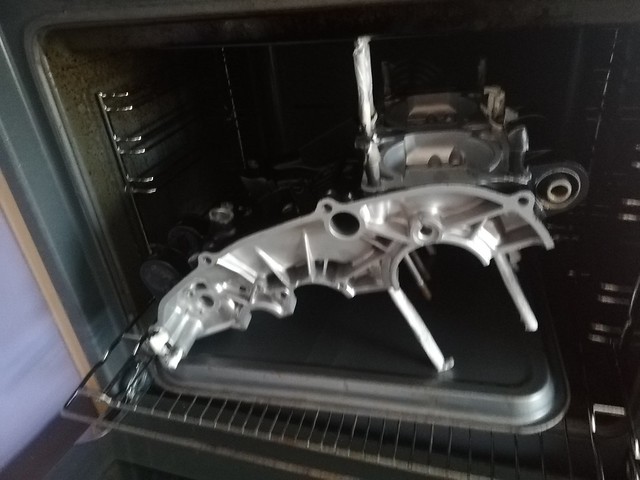 Shame I had to paint the crank upper as much prefer the vapour blast alloy finish, but originality is what its about. Barrels are back from fresh re-bore. One was previously on +0.25mm the other +0.5mm so both now rebored at +0.75mm to match the new Mitaka pistons. So the barrels and heads got blasted, masked, painted and baked in Simoniz black gloss engine paint:    The finished product is very shiney! The crank is also back from full rebuild with all new bearings and rods etc, so I'm just starting on the engine rebuild and will post on that later. As an infill job over a couple of nights I sat and polished the allow hangers. Its a dirty job but worth it in the end...  |
|
|
|
Post by JonW on Feb 15, 2021 2:29:22 GMT 1
Great work on the frame. I had to do a similar job but on one of mine it also included a section of the frame rail with the side stand bracket as well on my F2 build. pics on the thread if you like horror films lol. See youve got Mitaka pistons, trust they are not the nasty sand case Taiwan 2nds that I was once sent with poor finishing and divots in the metal. They were shockingly badly made. Loving the fact you didnt just get another PV and put the effort in to sorting the old one. Thats real restoration effort. Superb.  |
|
|
|
Post by shaunthe2nd on Feb 15, 2021 10:17:41 GMT 1
Great work on the frame. I had to do a similar job but on one of mine it also included a section of the frame rail with the side stand bracket as well on my F2 build. pics on the thread if you like horror films lol. See youve got Mitaka pistons, trust they are not the nasty sand case Taiwan 2nds that I was once sent with poor finishing and divots in the metal. They were shockingly badly made. Loving the fact you didnt just get another PV and put the effort in to sorting the old one. Thats real restoration effort. Superb. Thanks Jon. The pistons came from Norbo and are the nice Japanese variants. Like you I like to try re-use what I have if possible and keep it genuine. |
|


