Here are a few photos a brief write up of the restoration.
I got Beatrice back in 2013, and for a long time I didnt really do anything with her, which was a bit of a shame, and didnt really do much until end of April last year.
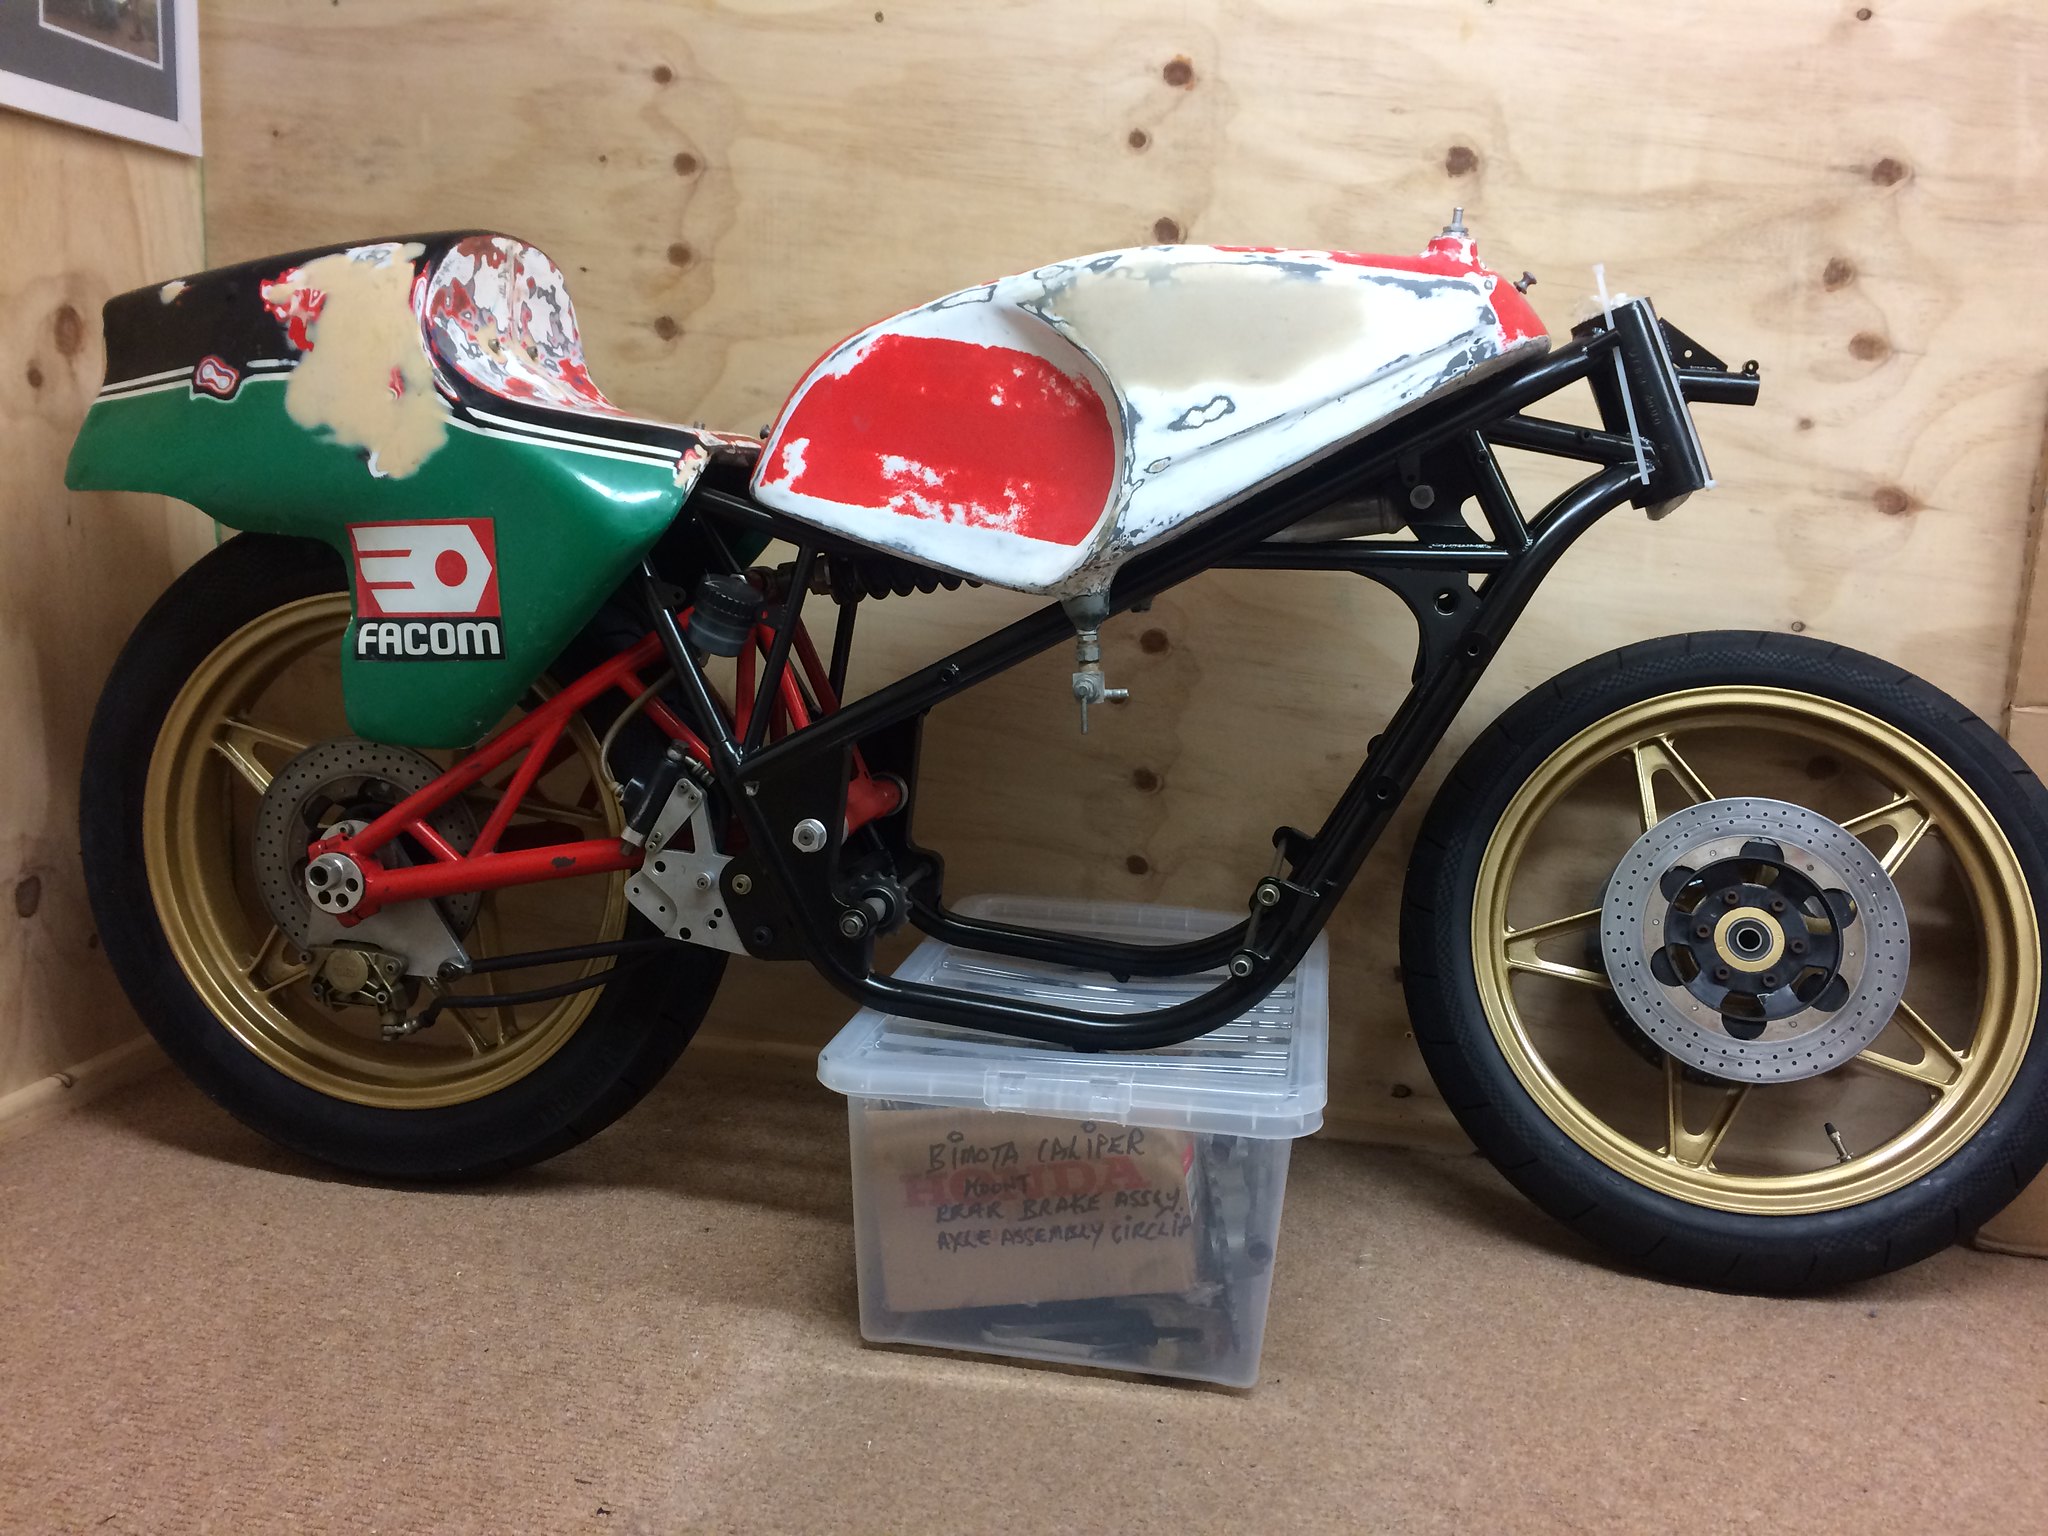
As stated before there was damage to various parts but most of it was there.
As with most race bikes things got damaged or changed from time to time from the original bike to suit the rider ect.
My aim was to get it as close to original bike as possible as it would have left the factory when purchased.
As stated before, unfortunately I lost lot of the very first photos as computer died so I lost all of those! Not too pleased with that, as she was all in boxes when I collected her and it would have been good to see some more of the before and after photos.
I have some photos of the restoration, so I have selected a few here.
As information on YB3’s has been a bit hard to come by, so this is what I have learned over the past few years whilst restoring her, however everyday is a school day so still looking.
Bimota YB1, YB2 & YB3’s were rolling chassis/bikes kits, once purchased they were all tailored by the individual rider. So when looking at different photos on the net, they are all slightly different, either brake callipers, calliper hangers, discs, forks, wheels, footrests, rev counters ect ect…..
Then there is the Mark 2 “YB3”, with different fuel tank, as this has the fuel filler cap on the top right side and Beatrice’s is on the left, its also more square shaped and has a fuel vent box part at the front of the tank. Also the Fairing and seat unit on the mk2 are more square looking the Mk 2 also has a flat bottom to the fairing.….
You can see here on Mathias Farwick’s bike the fuel cap location on the mk2

Ok, So back to Beatrice,
The original fuel tanks were made of fibreglass back then (eventually banned from racing due to crash damage and the odd fire) and her’s was damaged in an accident so it was unusable.
Luckily we had another tank on the other 350cc YB3 bike so I could make molds from to copy and make a new carbon/Kevlar tank.
Also the original tank had gone very soft over the years. So this will never be used other than for display purposes.
So I ended up making two carbon tanks, luckily it’s my day job so no worries!
So five split molds for the top of the tank due to the shape, & also its also got two threaded tank strap mountings bonded into the tank, which obviously couldn’t be removed so 2 small molds just for these, and then just two molds for the lower half of the tank.
I got the threaded fuel tap inserts copied thanks to
“Spondon440” he’s been very helpful with a few of my bike builds over the years many thanks Top man!
I sourced the original fuel breather and tank cap in Italy so happy with that.
Lower half of tank with threaded insets & tank cap thread insert & tank mountings bonded in place before bonding both halves together, and then sealed with ethanol resistant sealer.


I also made all the molds for the fairings and the seat unit from the original parts, however these finished parts are fibreglass to keep the bike “period”.
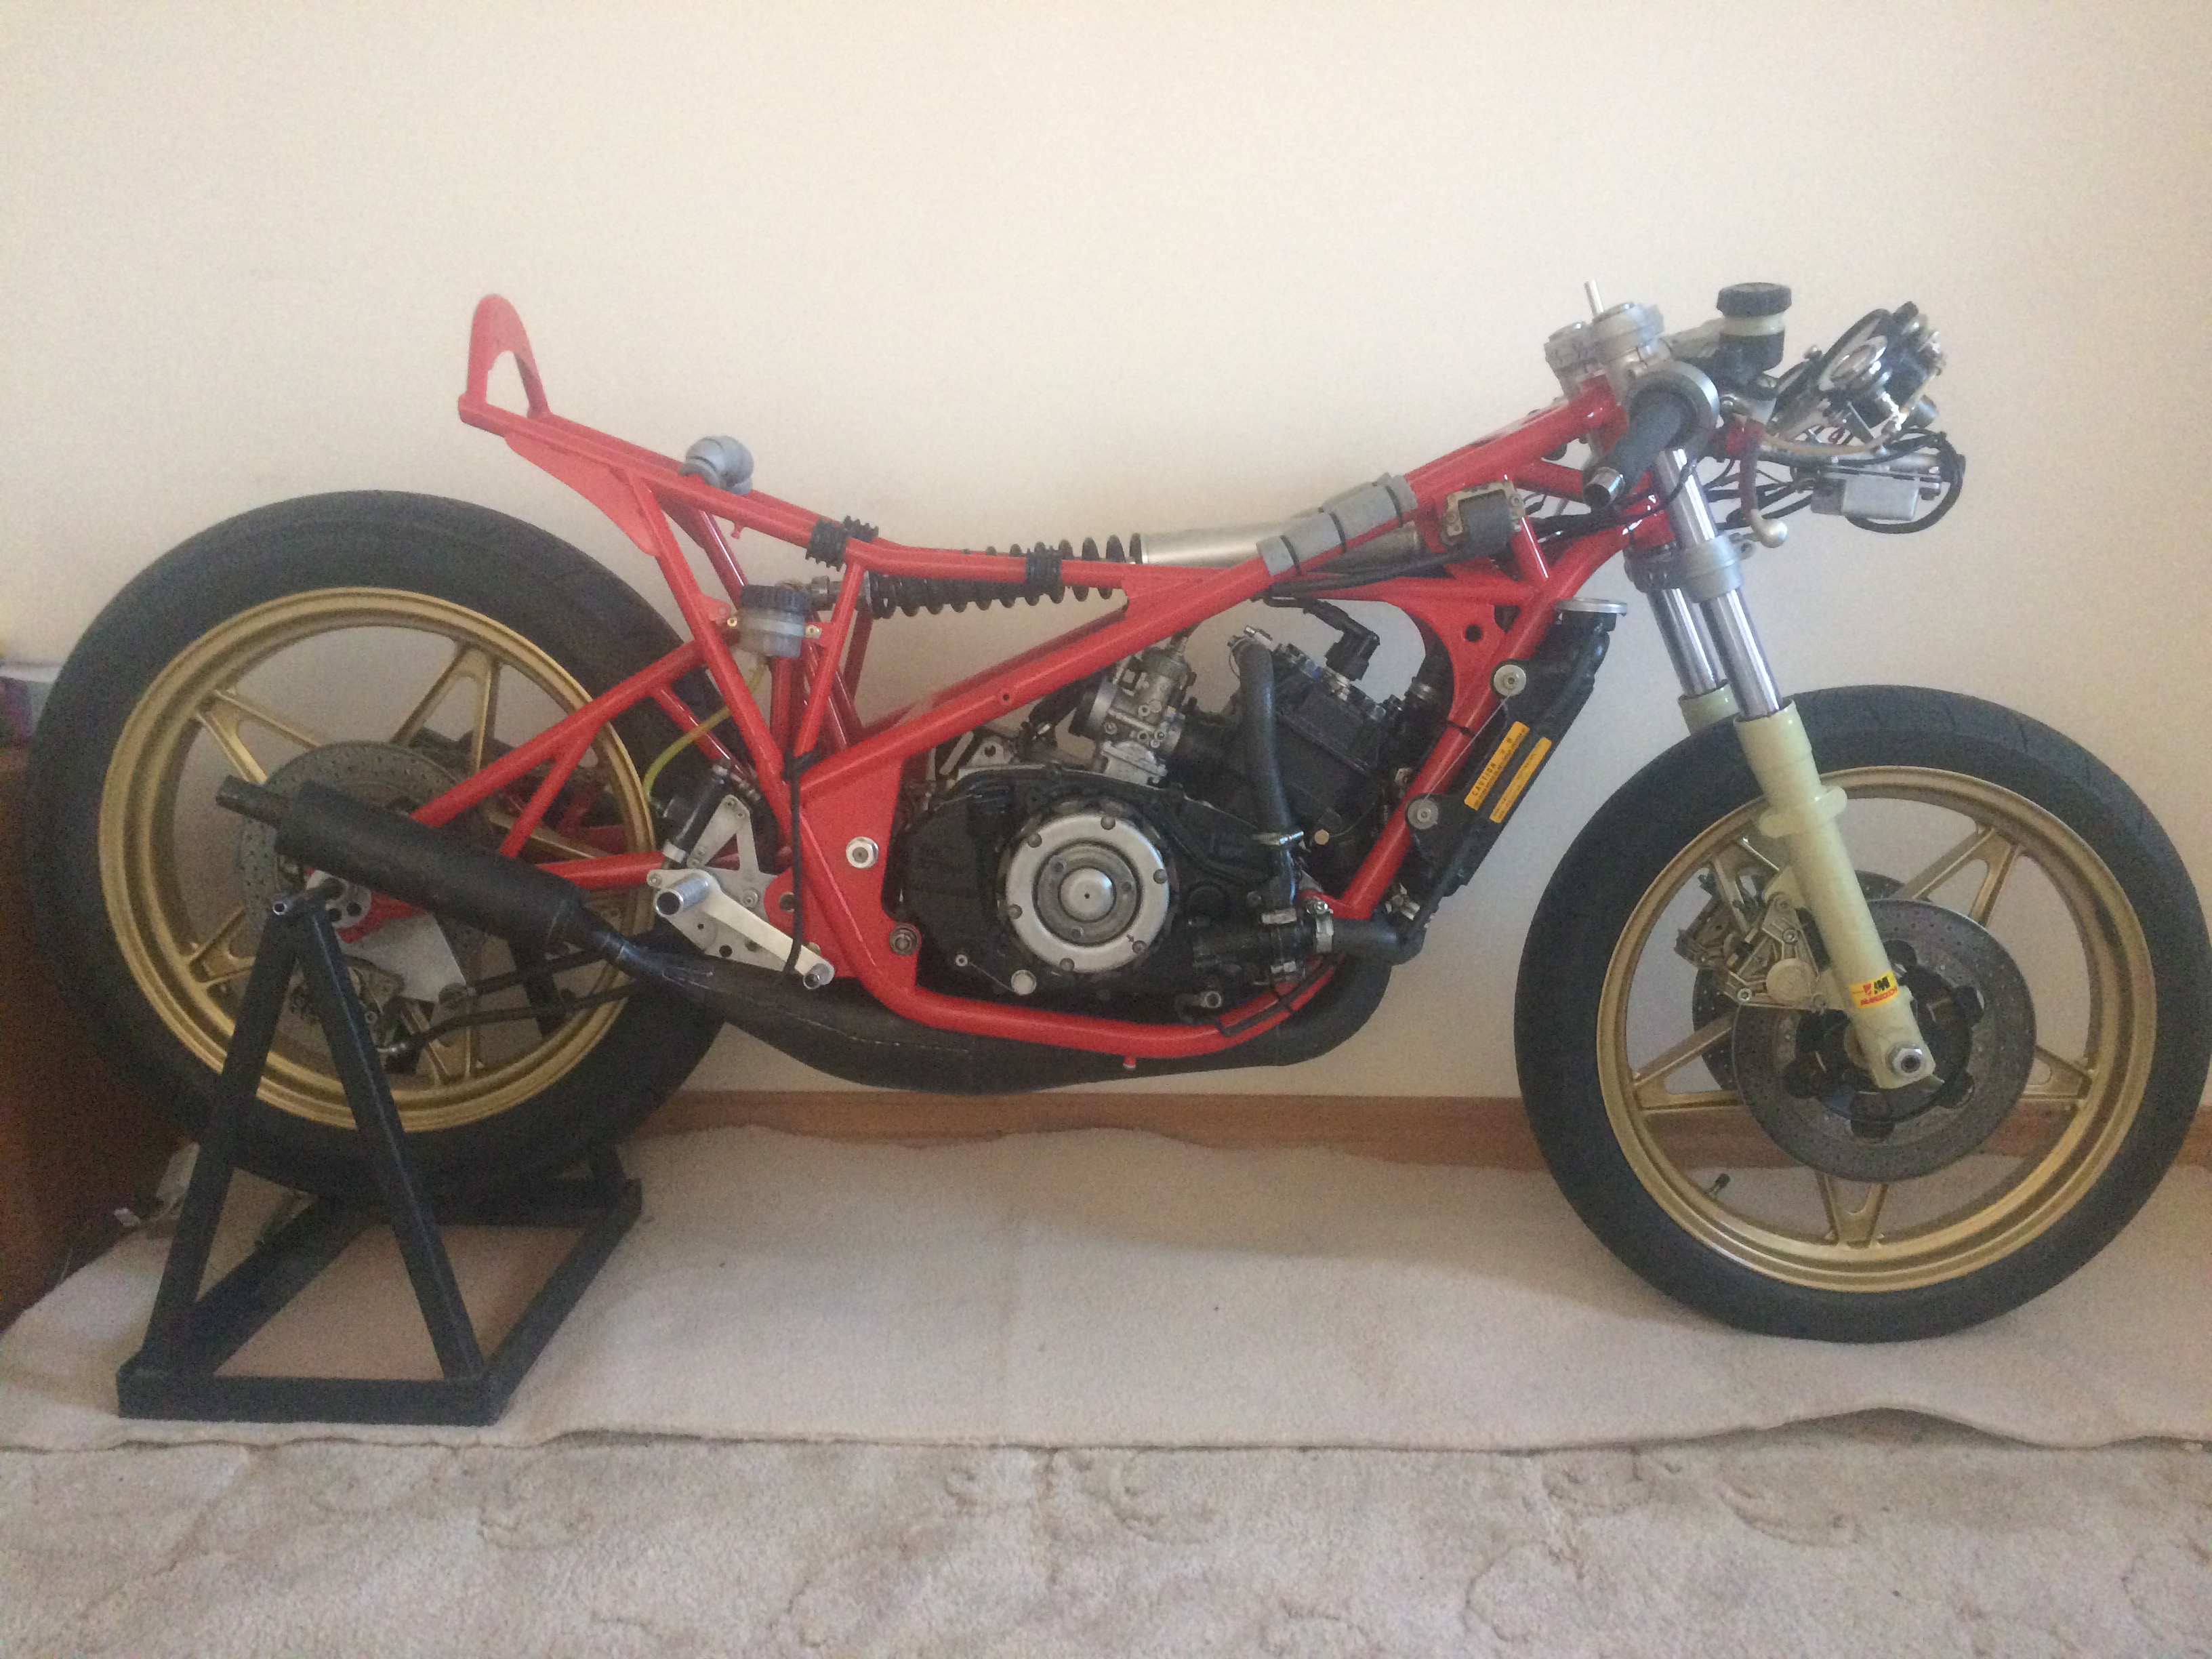
So on to the frame/swingarm.
I got the frame cleaned up & Etch primed.
The Swingarm was fine, but just needed a good clean up and then repainted at a later date together with the frame.

Also the idler shaft was a bit scabby but cleaned up ok, & new bearings fitted


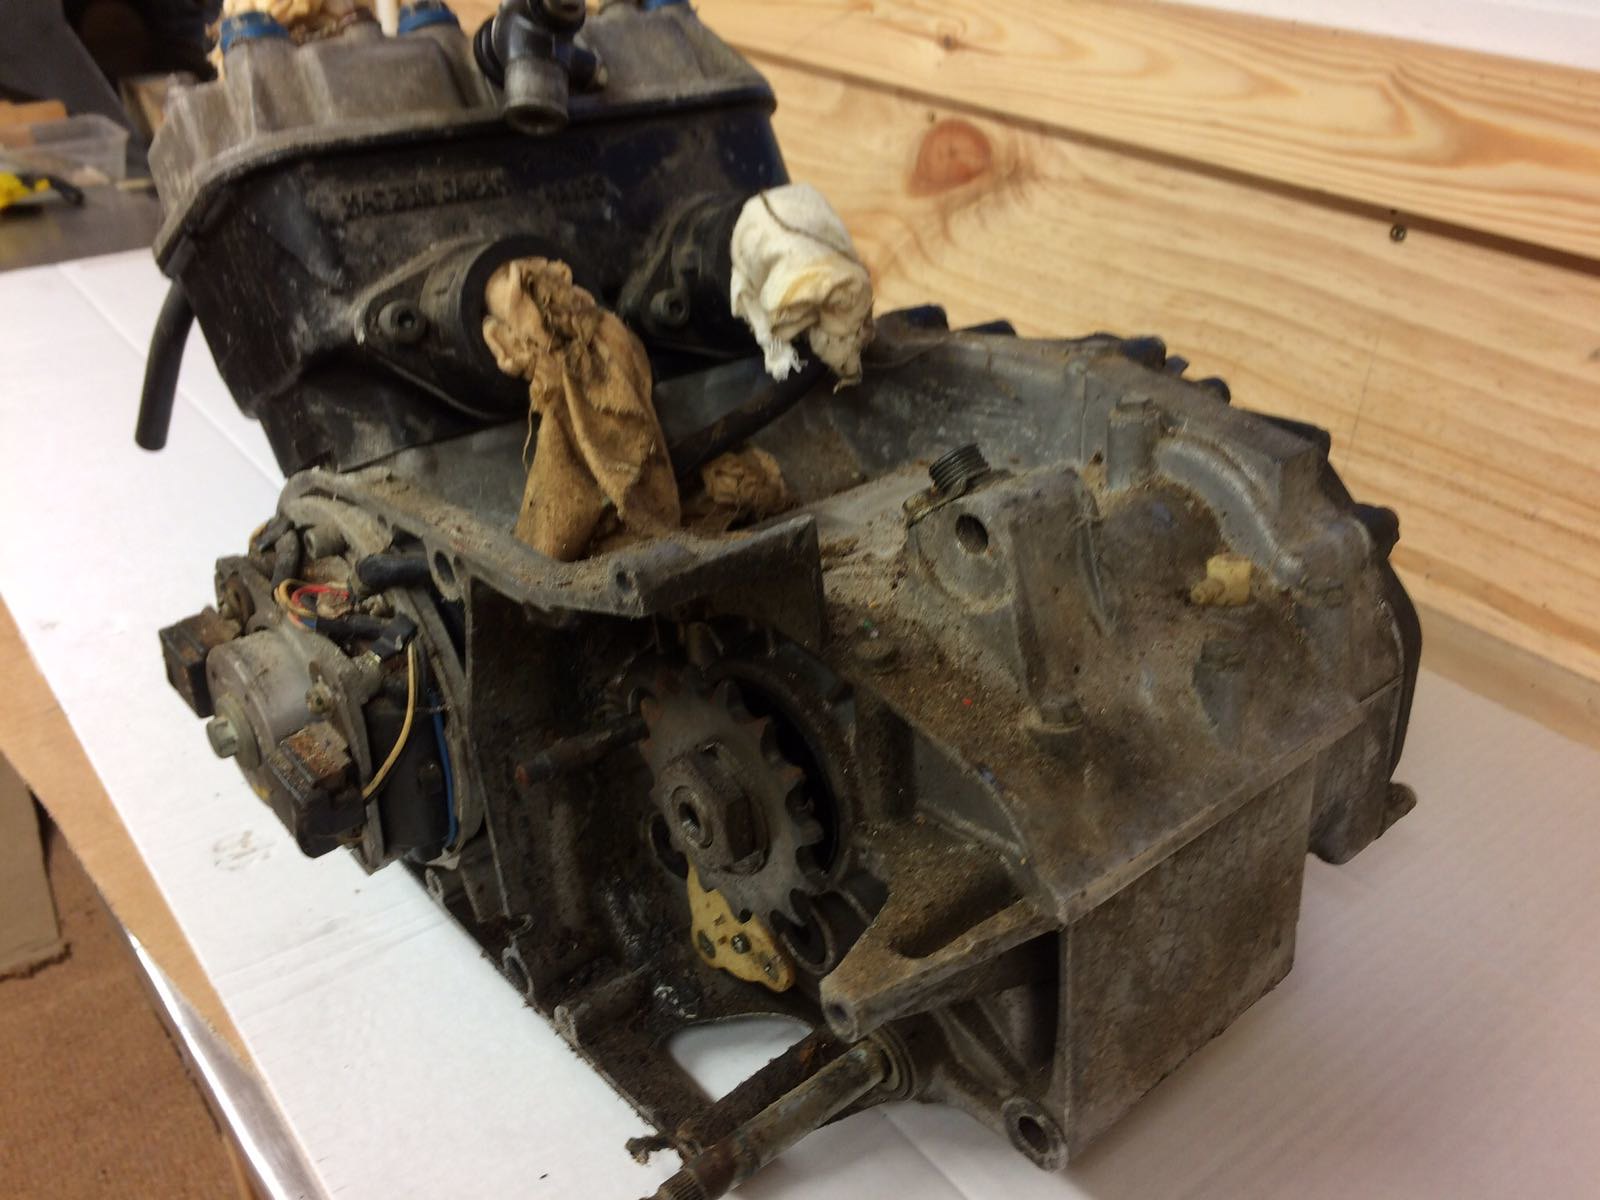
Then the motor TZ250 “G” with an “A” head fitted.
This had been sealed up when the bike was stripped so looked much worse that it actually was. Inside was well preserved to be fair as it still had oil in gearbox and on the crankshaft; however it still needed a full rebuild.
I ordered a load of new parts, and job sorted.
The bottom end of the motor is similar to the old air cooled RD’s apart from the dry clutch and the ignition. So much so that some RD (R5) cases where modified to take TZ parts when TZ cases weren’t readily available as they share the same mounting points ect…
The main things with these motors are the gear selector fork shafts.
These have a tendency to try to ever so slightly bind/grab the inside of the selector fork when changing gear which in turn moves the shaft sideways, the shaft can’t come out as its held in place by C clip, however over time this movement can cause the shaft get oil between the end of the shaft and the inside of the oil seal and can hydraulic & push the seal out or at minimum get an oil leak.
You can now get a Aluminium plate that bolts to the outside of the crankcase which holds the seals in place; however this doesn’t cure the fault.
I always polish the shafts on the area where the fork sits to eliminate this happening.
It also improves the gear-change making it a bit smoother. A bit like super finishing.
I was told about this modification many years ago by a friend who was a Yamaha GP mechanic in the 70’s & 80’s.
I have since done this to all my engines ever since, even on the TZR535, even though this has got plugs in the cases instead of oil seals, it’s still worth doing in my opinion.


The Campagnolo Magnesium wheels were sent to Steve Turner TPCS Powder Coating (UK) Limited, for crack testing and painting.
Clean bill of health, thank goodness as these are very hard to find now.
I highly recommend Steve as he’s done a few sets of Magnesium wheels for me now on a few of my other bikes and its piece of mind as well.
Also, Many thanks to
“Spondon440” He machined the front wheel hub so as to give more clearance between the discs to forks as 1.2mm really wasn’t enough, many thanks again for all your help, top man!


The front discs were a bit rough but cleaned up ok.

Beatrice came with three sets of forks, Yamaha TZ forks & Marzocchi Magnesium, & Marzocchi Aluminium forks, plus two different sizes of Brembo calipers.
So in the end opted for the Marzocchi magnesium forks as they didn’t need the caliper mounting plates and as its never going to get raced only Parade laps, I don’t need the larger twin pin pad callipers ect.
So stripped the forks & cleaned & fitted new seals & painted.
Calipers stripped cleaned and seals replaced.

Marzocchi Forks


The yokes are a work of art, you can see that the bottom yoke is used as a brake line splitter.

The previous Team/owner modified the original dashboards on both bikes, and had “cut off” the beautiful aluminium dashboard.
So I downloaded photos from the net, copied the shape of the original dash, and made a symmetrical template and then made 2 dashboards from aluminium plate and welded it on to the fairing stay. The second dash will be fitted to the other bike.
I then fitted the tacho, temp & pressure gauges and tested the frame for air leaks, job sorted.
Modified dash mounting/fairing stay!

Original Dashboard

Template

Checking for correct size


The Dashboard has a pressure gauge & Schrader valve to pressurise the frame top right of the tacho.
Also the top fairing stay (repaired threads & straightened) fitted to the top yoke which also holds the fuel expansion tank on the bracket on the right side of the stay.

Original Tarozzi rearsets are almost impossible to find, as with most race bikes they will have been down the road at some stage of their life.
As I had a few worn down footrests, so I copied them.
I did the same making the replica brake and gear leavers.


So a few photos of the dry build.
Original tank & seat which were used to make the molds

Marzocchi forks fitted with wheel machined and callipers now centred on discs.

Original pipe work connected to the pressure gauge and the headstock.

Finally got the bodywork on.
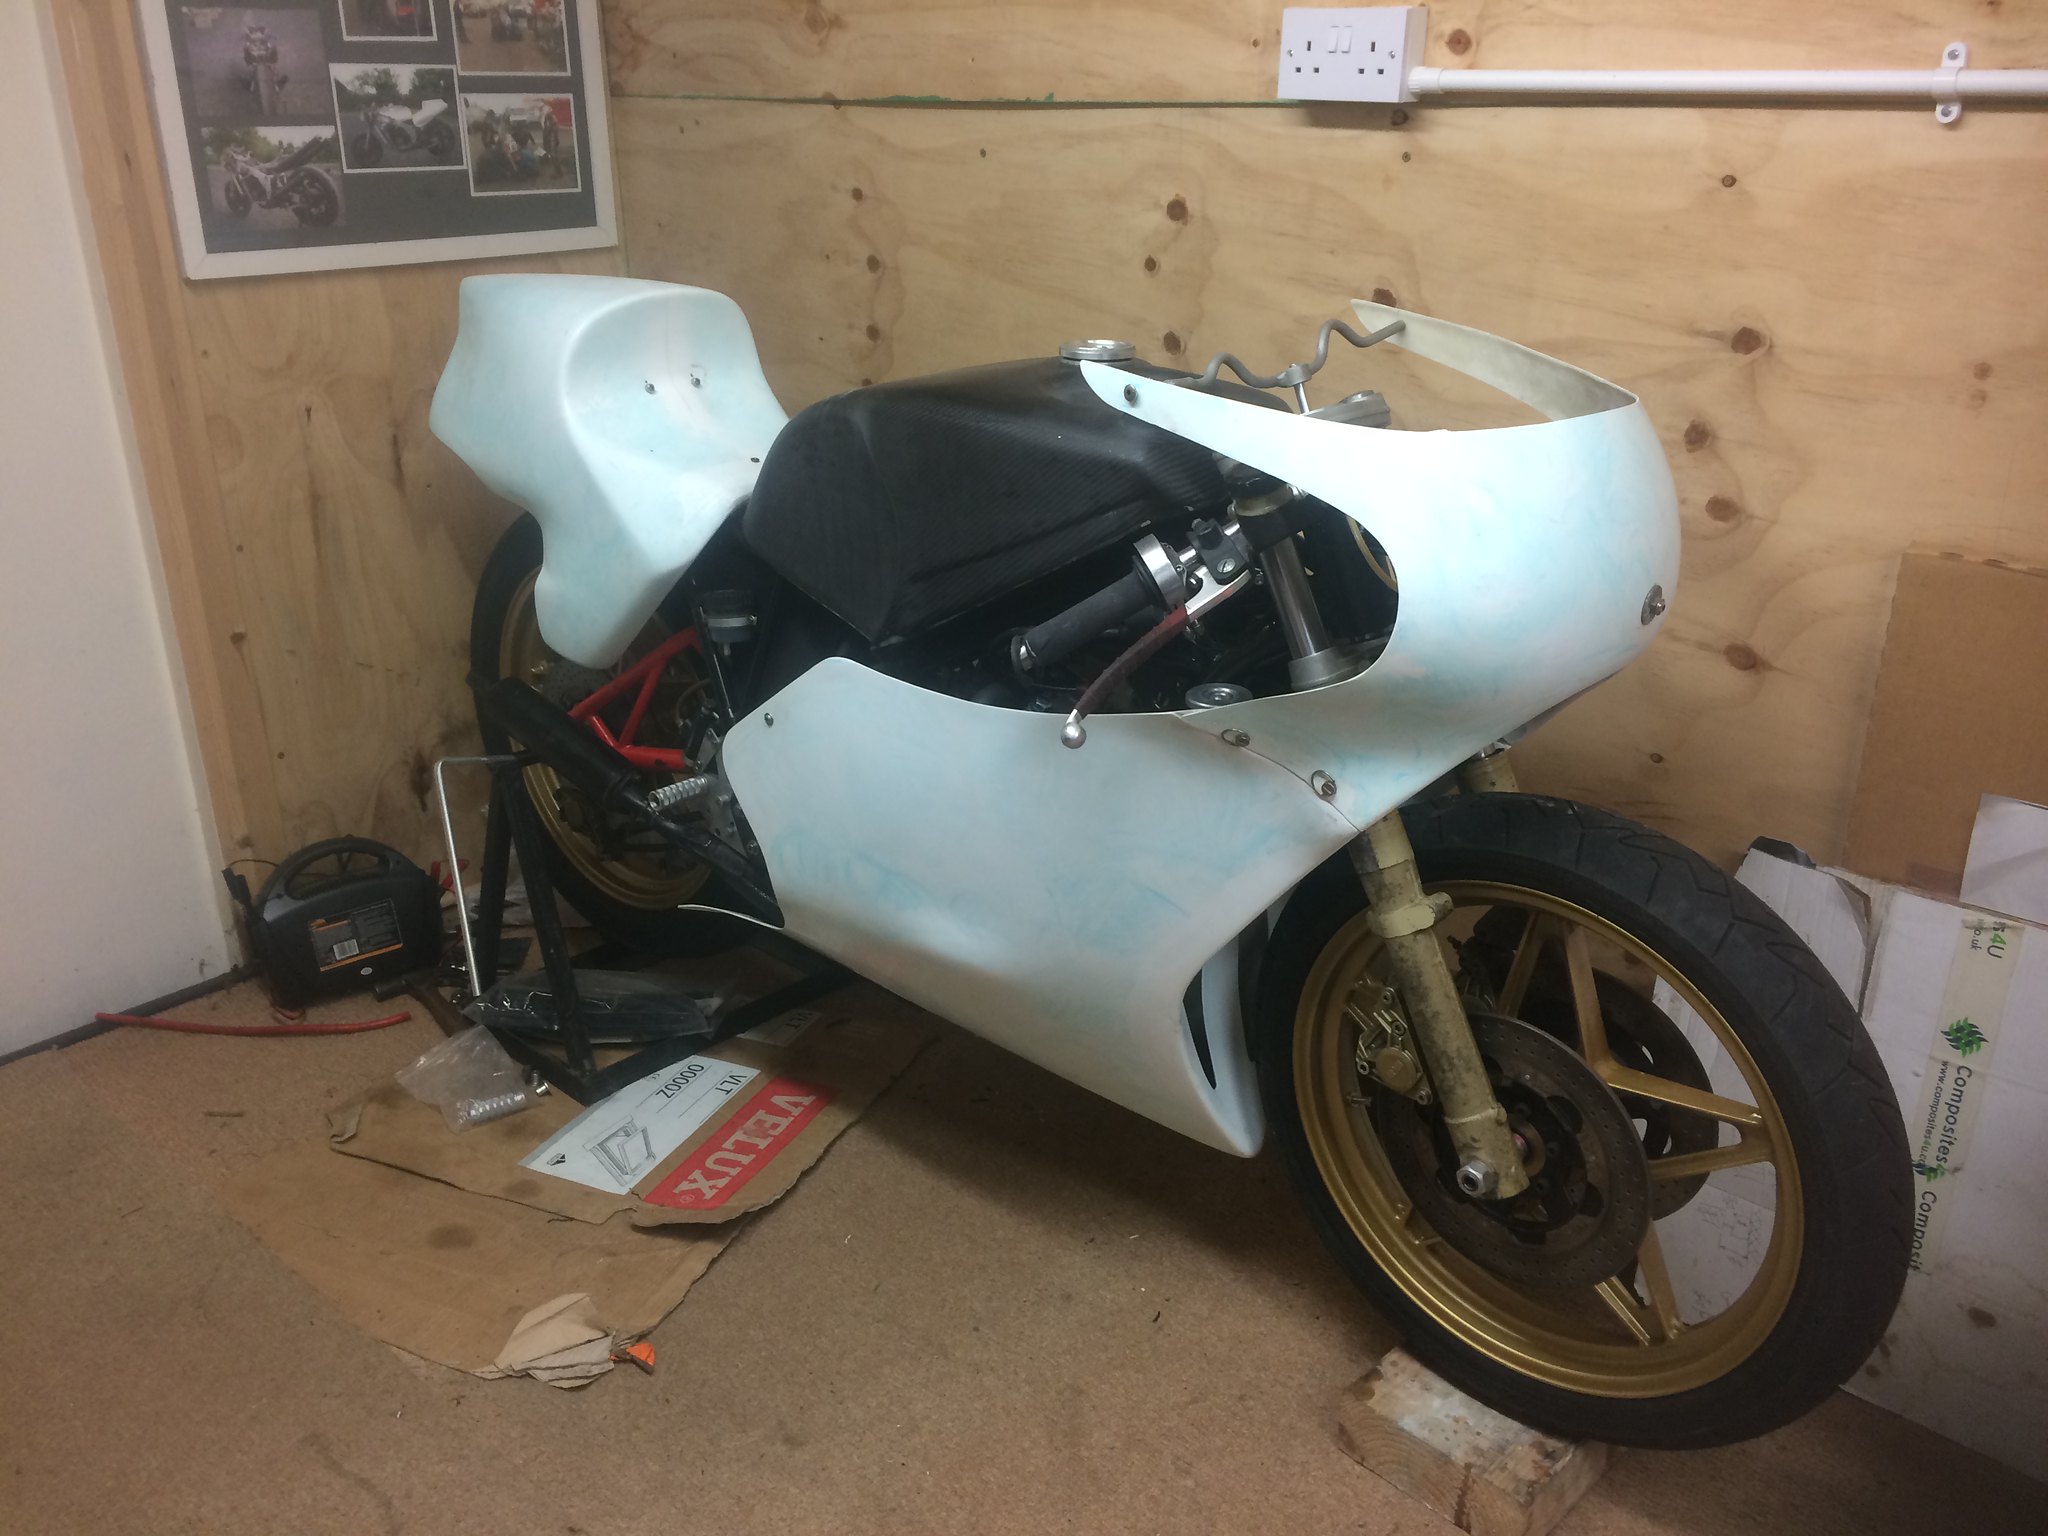

The dry build was finished in October last year.
Beatrice was then stripped and had her frame/swingarm painted and started final build.

Lots of foam pipe insulation and insulation tape where the foam wouldn’t fit to protect the paint.


Fuel expansion/Catch tank fitted to the fairing stay but thought it really should be lock wired in place as I don’t want that thing coming out when ridding.
It cleaned up nice with some hot soapy water & bleach and a toothbrush.

Same thing with the Brake pad pins, they do have a spring clip but I have never trust them, so again lock wired & also the calliper bolts & disc bolts.

This is going away from the original bike now as I made carb stone guards to reduce the amount of debris thrown up from the rear wheel entering the carbs, even though it has got a rubber stone guard which fits to the frame by the swingarm to prevent this from happening, but best safe than sorry.
I got a kitchen sieve from Asda “other stores are available”.
I cut it to size then used a small plant pot as a former to shape the sieve then fitted, they work a treat.


Beatrice finally started up in October 2019 for the first time in 39 years and she’s fine.
So here she is out in the sunshine, I am quite pleased with the result so far, still a couple of jobs to do like fit front brake lines once they arrive from Hel Performance.
Also need to fit a couple of catch tanks, and replace the yellow brake pipe to the rear reservoir to keep it more period, but its all I had at the moment.

So just waiting for the all the bodywork to be painted and decals made by my mate.
Hopefully I will get them soon.
The original bike was in Derry’s Racing Team colours (green/Black & White)
Which I am not very keen on, but have got a set of original bodywork if it needs to go on display sometime.

So she will be painted as the Bimota race team colours:-
Red, white & Blue with Green number boards as she’s a 250.

I will post a few photos of the final result when I eventually get the bodywork returned, and Beatrice is finally fully dressed, she’s a Brazen hussy!
Best regards
Johnny C.


 I love these old 2 stroke race bikes, and the more we see of them, the better I say. Thanks for sharing Johnny


 [/url]
 [/url]
 [/url]