|
|
Post by Tobyjugs on Aug 15, 2020 22:18:07 GMT 1
Engine looks great John
|
|
|
|
Post by oldbritguy on Sept 2, 2020 13:40:36 GMT 1
Another small step today Fitted new tyres onto the wheels so I can assemble the rolling chassis. BT46s which I have never tried before but these are apparently replacing the 45s so we will see how they go.  coat of paint on the sprocket and some new lock tabs. They will get bent over when I eventually tighten the nuts up 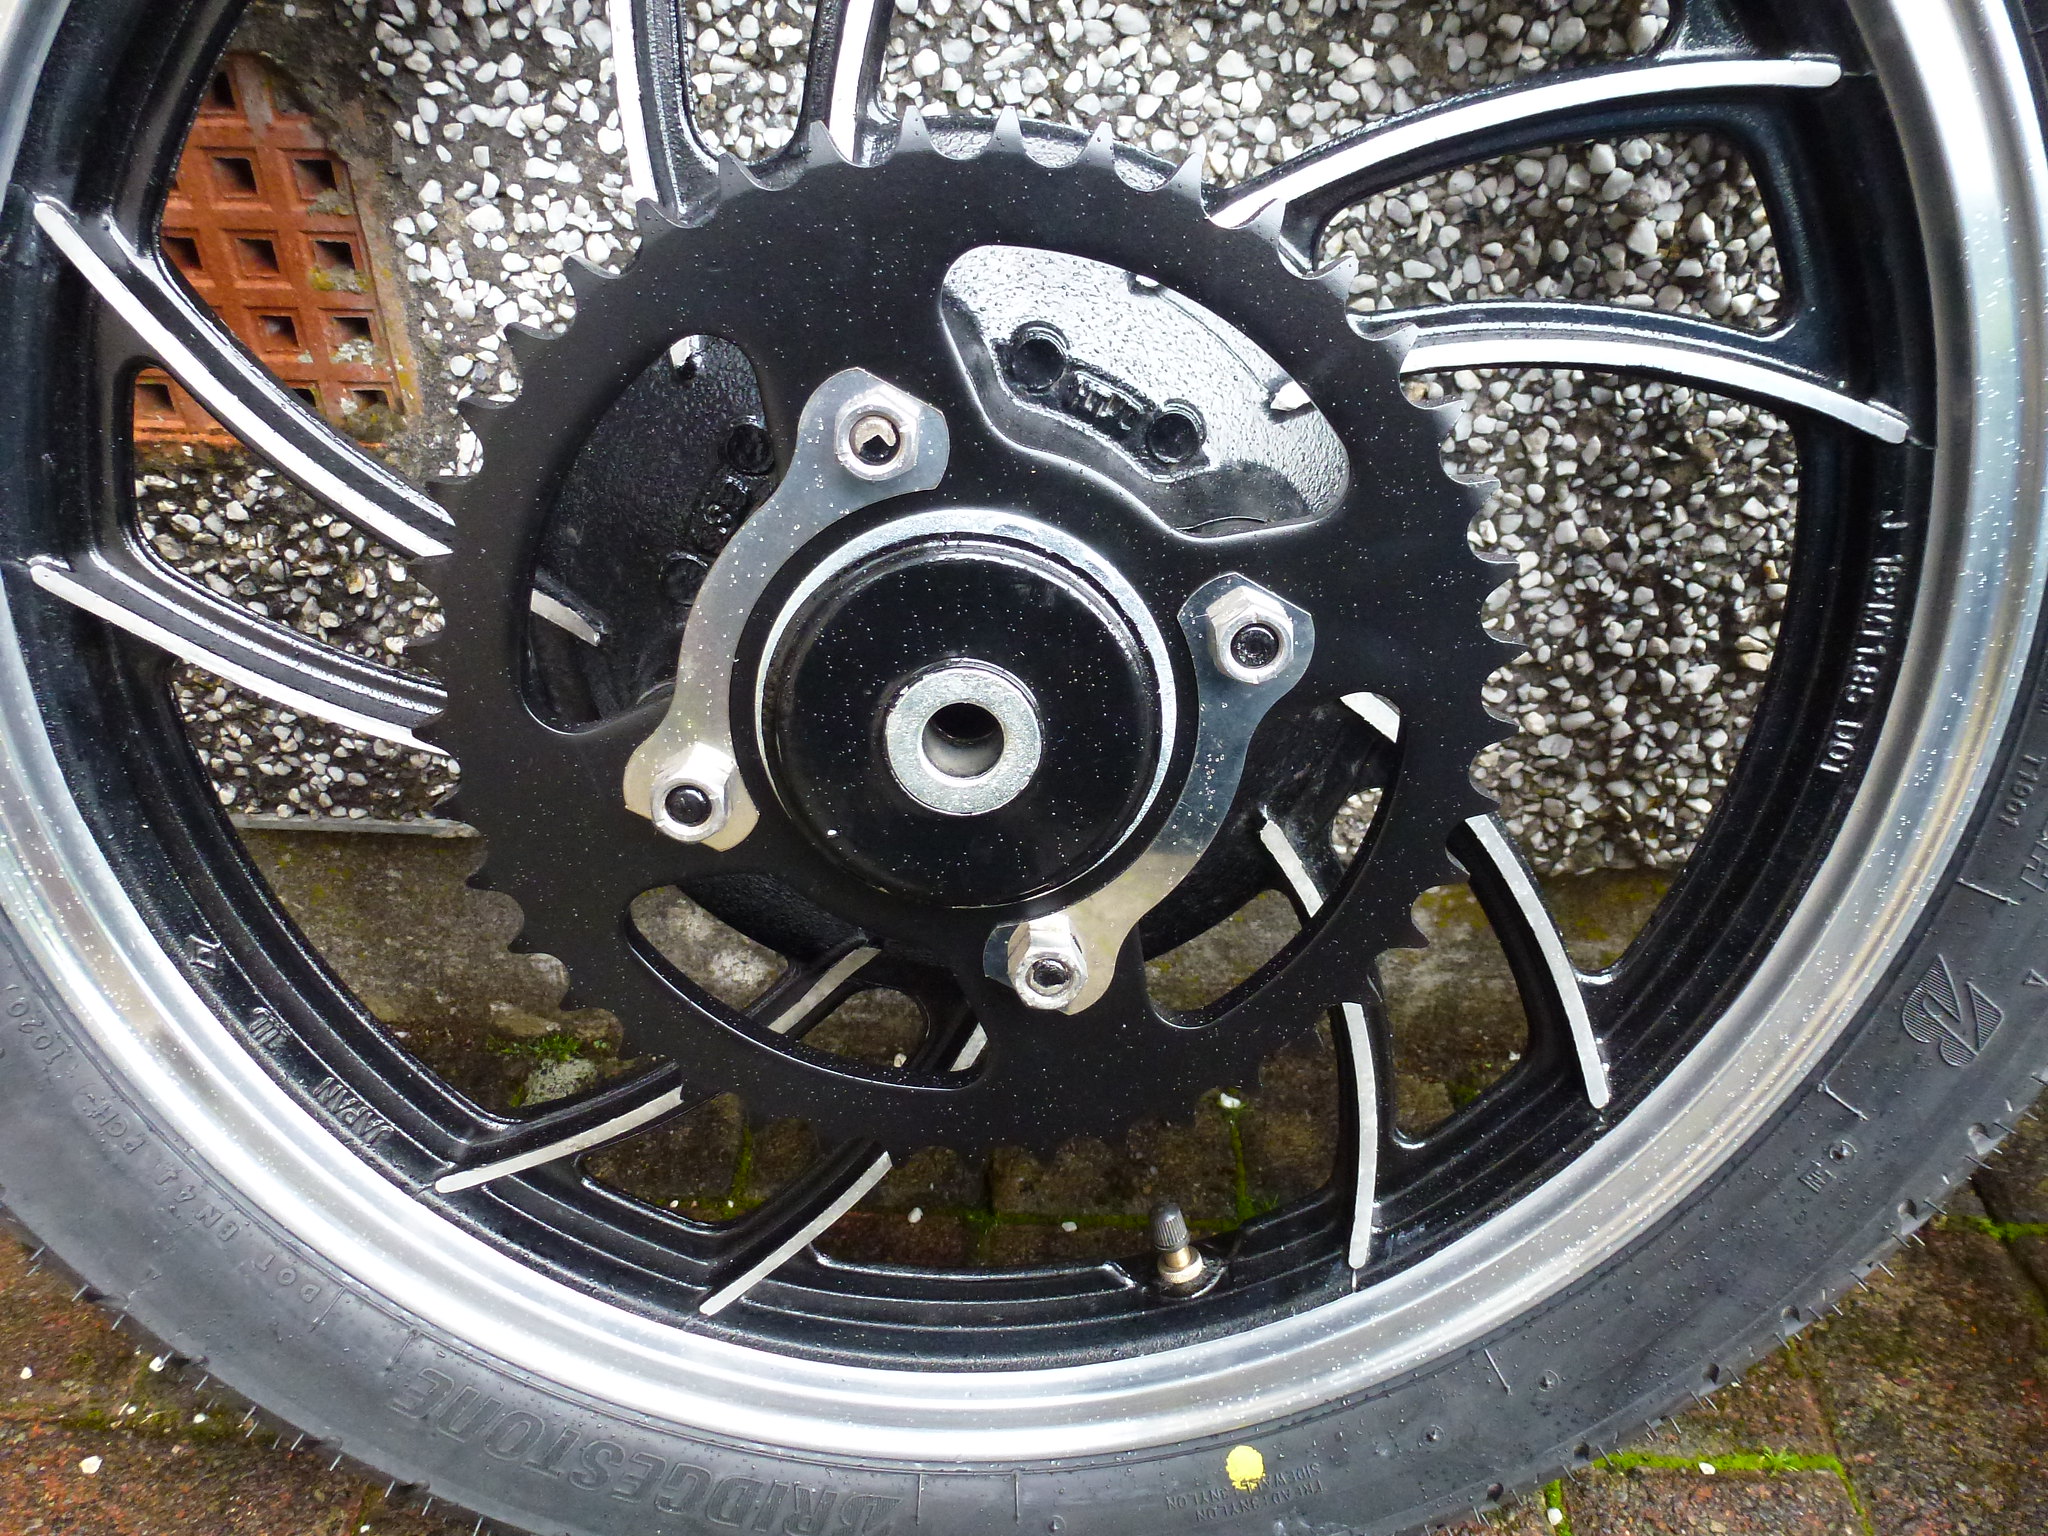 Picked up a pair of 4 pot calipers so will be acquiring some adapter plates down the line and probably some floating discs but funds are slow just now so might just run std to get the thing on the road.   |
|
|
|
Post by flames on Sept 2, 2020 18:24:31 GMT 1
Very nice. I ordered some triumph calipers for my xj/fz front end this week. Do the 46's have the same or similar tread pattern to the 45's?
Coming along nicely buddy.👍
|
|
|
|
Post by dusty350 on Sept 2, 2020 18:30:13 GMT 1
Looking good John  Always nice to get the tyres on. Dusty |
|
|
|
Post by oldbritguy on Sept 2, 2020 19:36:58 GMT 1
Very nice. I ordered some triumph calipers for my xj/fz front end this week. Do the 46's have the same or similar tread pattern to the 45's? Coming along nicely buddy.👍 Cheers Neil Tread pattern is very similar. Here are the 46s  and a pic of the front 45 on my 31k. Cannot pull the cover off to get a pic of the rear tyre as it is bouncing down  John |
|
|
|
Post by oldbritguy on Sept 2, 2020 19:45:22 GMT 1
Looking good John Always nice to get the tyres on. Dusty Thanks Dusty It is a big corner turned as I can now get the thing up on its wheels which might move things along. I have a LC2 front end for it and a Metmachex arm at the back so just waiting on head bearings just now and we will have something which starts to look like a bike again instead of a big pile of parts. Hopefully I will have some more pics for the weekend John |
|
|
|
Post by arrdy350 on Sept 2, 2020 20:20:44 GMT 1
Nice project. It is looking good |
|
|
|
Post by flames on Sept 2, 2020 20:52:03 GMT 1
Very nice. I ordered some triumph calipers for my xj/fz front end this week. Do the 46's have the same or similar tread pattern to the 45's? Coming along nicely buddy.👍 Cheers Neil Tread pattern is very similar. Here are the 46s and a pic of the front 45 on my 31k. Cannot pull the cover off to get a pic of the rear tyre as it is bouncing down John Cheers mate. Have seen the 45's but not the 46's. I've always got on well with Bridgestone a but only ever had them on my old blade. LC I've only ever had Avon roadrunners, but the front I have going in has a roadrider so going to match it on the rear. I like the pattern on them so will see how I get on with them.cant wait to see the roller with the metmachex swingarm.. something tells me it's going to look very special.😁 |
|
|
|
Post by oldbritguy on Feb 13, 2021 10:56:00 GMT 1
So, after doing hee haw on this project for the past six months other than gathering bits n bobs, it is at long last time to kickstart things off again. Following sage guidance from the better informed, I sourced a 31k LC2 front end from a fellow forum member to improve the spindly standard forks on the LC (I actually picked up two in case I make a dogs dinner of things) And again following more reasoned discussion I picked up a set of fork PD valves (emulators) from Martin at Mad Biker to improve the damping.  These are 26.5mm ones for the LC2 forks Then it was time to strip the forks and take some measurements. With the top cap off, the fork spring projects 11.5mm above the top of the fork stanchion  Then the fork spring out to measure its full length  505mm which is 1mm less than the book says so we will need to re visit this later. I will be cutting the spring so might not be that important in the longer run but we will decide that at the time. And then it was time to get the damper rods out. I took the precaution of cracking off the bottom bolt before loosening the top nut. the fork spring under tension makes life much easier when getting these things out.  Game on ! John |
|
|
|
Post by dusty350 on Feb 13, 2021 12:21:06 GMT 1
Good to see you back on this John Dusty |
|
|
|
Post by oldbritguy on Feb 13, 2021 18:24:44 GMT 1
Thanks Dusty Yes it has been too long but we are now moving again John |
|
|
|
Post by wallcraft on Feb 13, 2021 18:53:43 GMT 1
Will watch this with interest as never seen a step by step guide to fitting the emulators to 31K forks, may well go down this route myself.
|
|
|
|
Post by sidney81 on Feb 13, 2021 20:40:00 GMT 1
Lovley work enjoyed catching up on this 🙂Chris
|
|
|
|
Post by oldbritguy on Feb 14, 2021 10:29:37 GMT 1
Looking at the instructions which came with the valves, it seems a straight forward enough job. Spring out, drop the valve on top of the damper, spring back in, make some adjustments to spring/spacer/valve pre load and we are good to go.  Well not quite so simple. The valve does not sit quite right on top of the damper rod 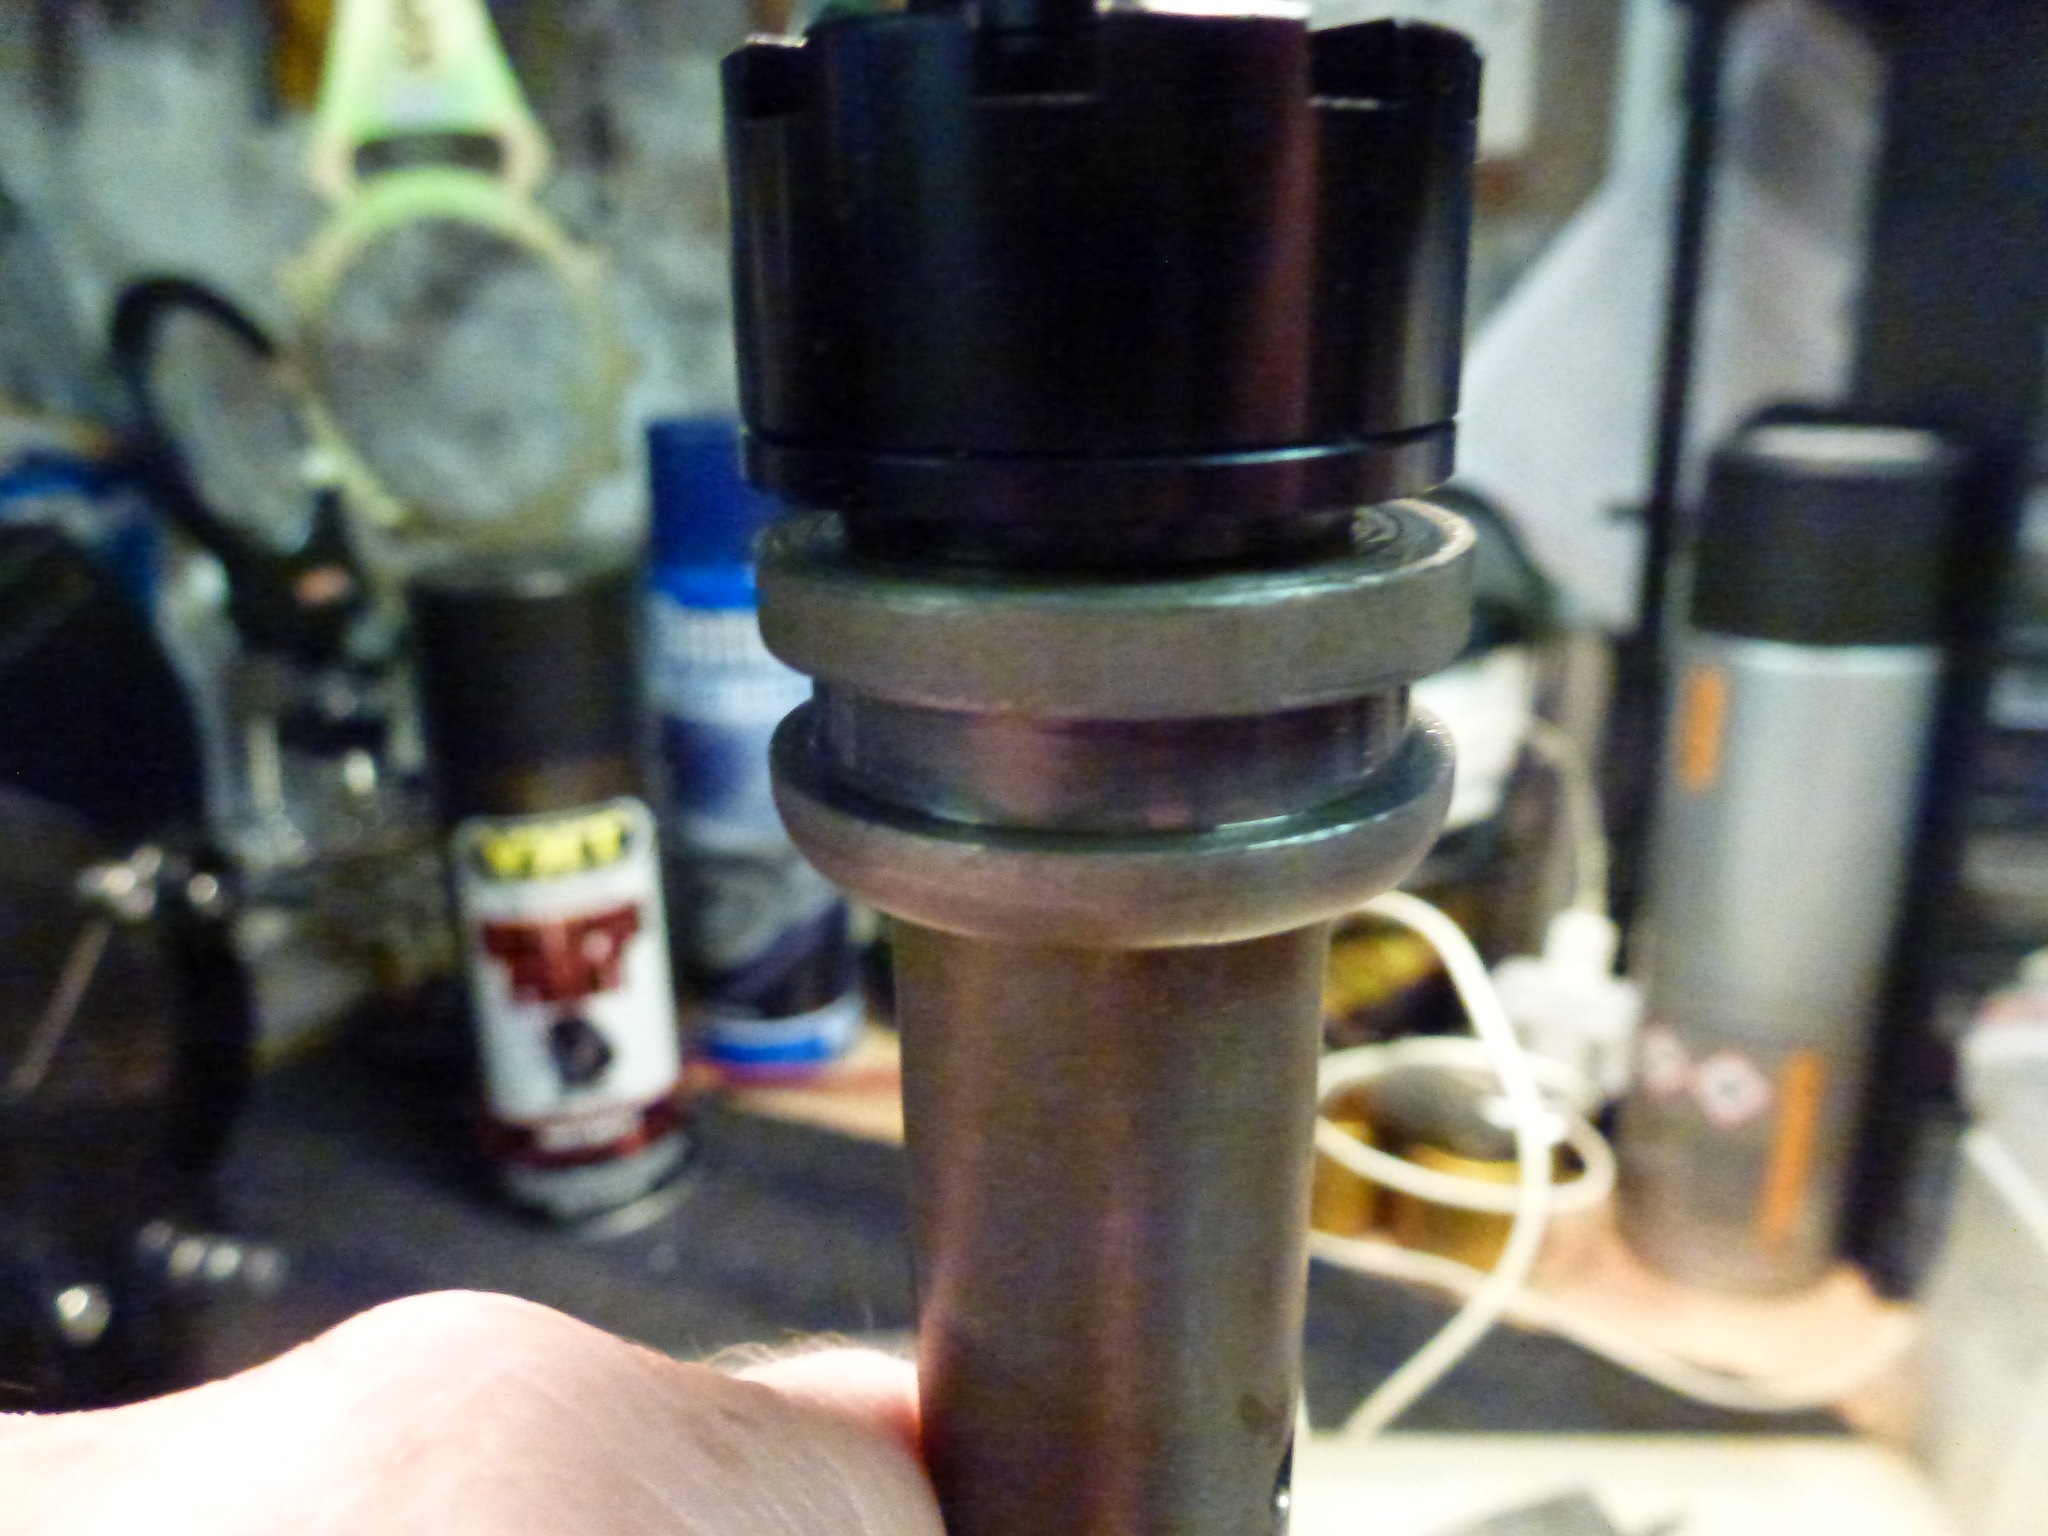 Holding them side by side it can be seen that the hole in the top of the damper is not quite big enough to accommodate the PD valve to sit flush  Looks like I'll have to consult the Hong Kong book of Kung Fu to find a way around this one More to follow John |
|
|
|
Post by wallcraft on Feb 14, 2021 14:17:18 GMT 1
Thanks john.
Simple fix for an engineer or home hobbiest with a lathe, turn out the diameter and depth on the damper rod to suit, expect you've worked that out in though.
How much were they?
Mark.
|
|
|
|
Post by oldbritguy on Feb 14, 2021 19:59:55 GMT 1
Thanks john. Simple fix for an engineer or home hobbiest with a lathe, turn out the diameter and depth on the damper rod to suit, expect you've worked that out in though. How much were they? Mark. Thanks Mark and yeah it looks like the metal taking off machine will be pressed into action. Before I go down that route though, I will do a bit more digging as I half expected this to be a simple job at least I got these emulators from Martin at Mad Biker Designs late last year and I think they were about £70. I looked at his site today and it has changed quite a bit and couldn't see them but it would be worth giving him a call if you are looking for a set. John |
|
|
|
Post by JonW on Feb 15, 2021 3:04:35 GMT 1
Sorry to say but its well known that you need to turn down the damper rod to get the valves in. Its one of my issues with these PD valves as it leaves the damper rod land pretty thin. I dont like considering the forces / weight of everything sitting on this ledge or the fact that the valve is a bit of alloy, but... all that said, it seems to work well enough as plenty of people use them, me included. I assume youre also drilling and brazing the rod holes as per the instructions? |
|
|
|
Post by oldbritguy on Feb 16, 2021 21:26:53 GMT 1
Well it is looking like Jonw is bang on the money here. Seeing as the YSS instructions were a bit generic I looked at Racetech units and the fitment instructions for some enlightenment. It would appear that the RZ350/LC2 fork damper rods have another slimmer rod fitted inside which needs to be removed when fitting emulators. You can see the edge of this inner tube looking at the picture i posted comparing the valve and rod itself www.racetech.com/page/title/DRod%201-2%20RZ350So following this guidance it was into the vice and out with a long drift to knock the inner damper out. 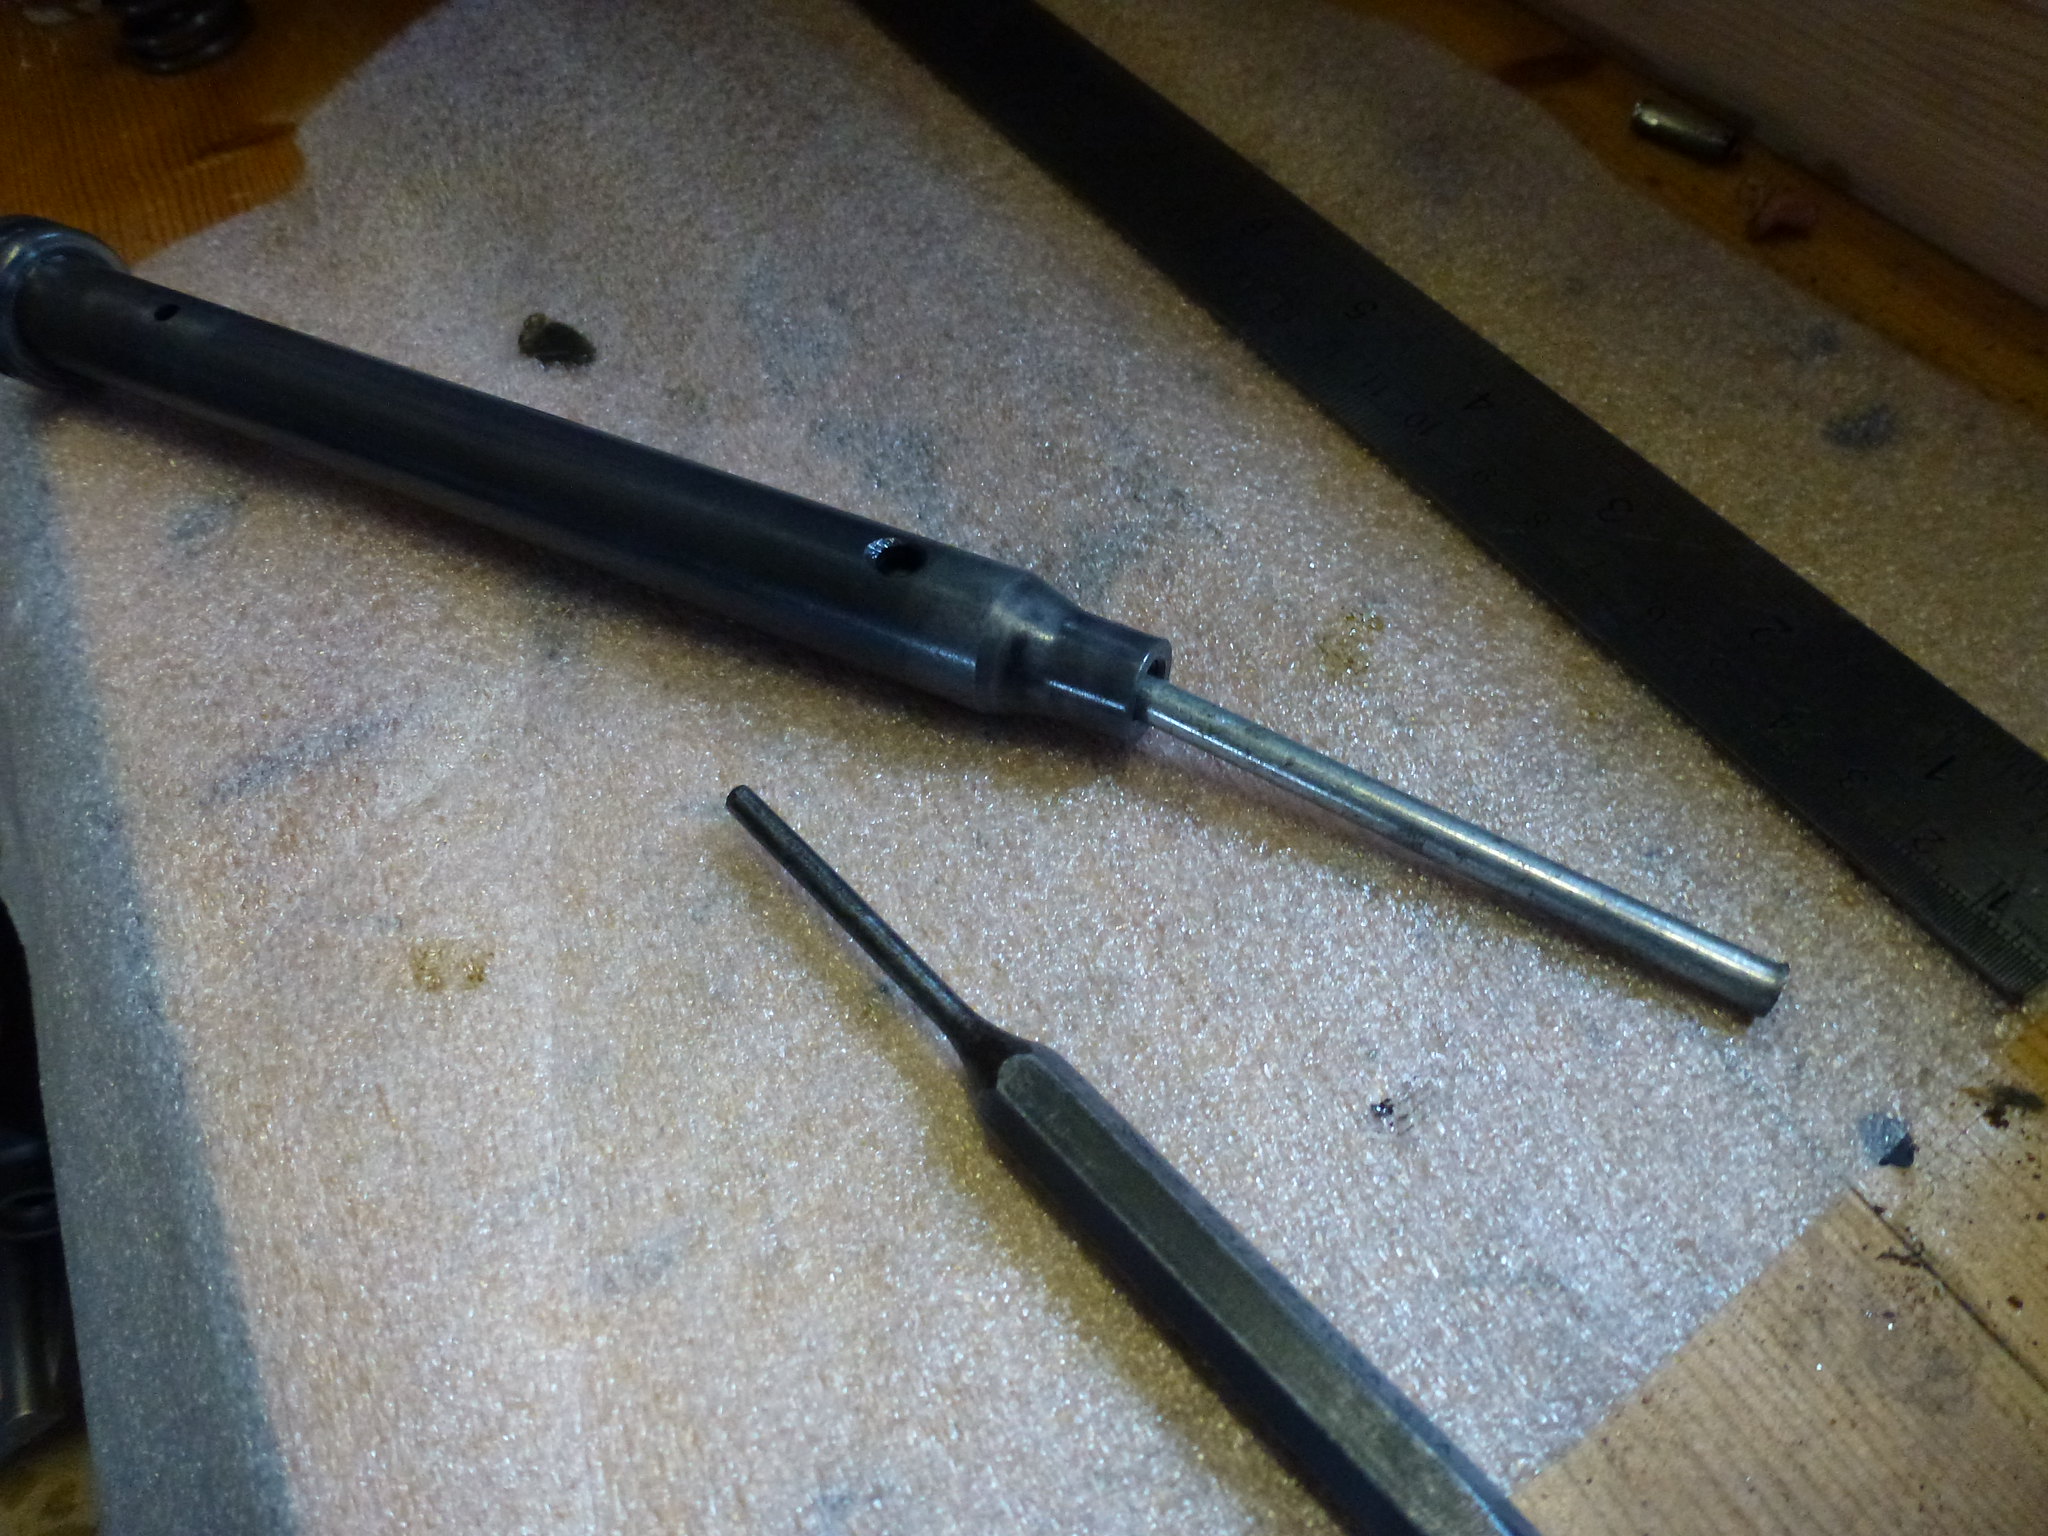 Mmmmmm. I bashed several shades of sh*t out of the thing but the inner tube would not budge. Absolutely solid even when applying heat from a torch. Into the lathe it was then to cut the thing out. Me old chum Keith to the rescue once again.  10 minutes later both inner tubes were out and the ends of the damper rods machined to fit the valves   Now I need to find someone who can braze up the holes for me. John |
|
|
|
Post by shaunthe2nd on Feb 16, 2021 23:44:00 GMT 1
Great progress and a good read, thanks for sharing.
Its a minor detail, but if you want to convert your clocks fully to mph, ie the odo and trip, I have gathered up enough mph spares to be able to do it and have done quite a few already. Just drop me a pm if this is of interest.
|
|
|
|
Post by sully70 on Feb 17, 2021 0:03:01 GMT 1
Awesome story on the forks thus far, mate.. Looking forward to your next chapter.
|
|
|
|
Post by oldbritguy on Feb 19, 2021 23:53:42 GMT 1
Couldn't find anyone able to braze the dampers without travelling quite a distance however my brother took this to a welder near his place who is really good with a tig torch and he carefully welded up the holes in the rods  Next job was to clean up the welds without removing any of the steel from the damper rod themselves. doing so will affect the damping function of the fork. I think that is why the process suggests brazing as it is softer and relatively easy to dress off the excess. After some careful fettling with the file and scotcbrite, the welds were nice n smooth  A check with the micrometer along the length of the rods and we are still in shape, phew! next job was to drill new holes in the damper rod to suit the valves. A 2mm hole 32mm from the underside of the valve cap, and two 6mm holes 10mm and at 90 degrees from the bottom damper holes. A quick de-burr and we are getting ready for reassembly  Now for some adjustments to the springs John |
|
|
|
Post by JonW on Feb 20, 2021 2:32:00 GMT 1
Great work John. I often think these valves are not a simple fit, most people dont have access to a lathe or brazing equipment and so would have to pay to have these jobs done, that would significantly increase the cost to do the work if locating a local machinist via the yellow pages / google etc. It defo helps to have a tame one of those in your address book or mates with skills.
|
|
|
|
Post by mouse on Feb 20, 2021 9:41:29 GMT 1
Christ what a fiasco! Still great result in the end!
Mouse
|
|
|
|
Post by jon on Feb 20, 2021 10:03:26 GMT 1
|
|
|
|
Post by oldbritguy on Feb 20, 2021 10:58:35 GMT 1
Christ what a fiasco! Still great result in the end! Mouse Hahaha 🤪 yes Mouse, a fiasco indeed. It is that situation where you think that a task will be a simple plug n play job and when you start it just gets a little more involved as you progress along. Once committed though there is no option but to keep going. Not finished yet as I have to cut the springs which no doubt will be a complicated bugger too. Fingers crossed 🤞 John |
|
|
|
Post by oldbritguy on Feb 20, 2021 11:00:55 GMT 1
Great little tool Jon. Got one which has saved my bacon so many times plus one of those long slinky claw jobs as well. Every tool box should have one 😉 John |
|
|
|
Post by oldbritguy on Feb 20, 2021 11:03:12 GMT 1
Great work John. I often think these valves are not a simple fit, most people dont have access to a lathe or brazing equipment and so would have to pay to have these jobs done, that would significantly increase the cost to do the work if locating a local machinist via the yellow pages / google etc. It defo helps to have a tame one of those in your address book or mates with skills. Thanks jonw I totally agree. These valves should come with a bit more detailed fitting instructions or at least a link like the race tech ones. Still keeps the old grey matter working John |
|
|
|
Post by mak595 on Feb 20, 2021 16:57:12 GMT 1
I've had a go at my 31k forks, ive not got the emulators for now, i cut 40mm from the springs, dressed them so there flat, machined up a 40mm spacer to compensate, then went with 20w oil, 130mm air gap and 7 psi.
So in essence, its cost me bugger all !!
They certainly feel firmer so i'll give them a whirl and if there still crap, i'll go emulators to match the YSS rear shock...
|
|
|
|
Post by JonW on Feb 22, 2021 0:40:27 GMT 1
Great work John. I often think these valves are not a simple fit, most people dont have access to a lathe or brazing equipment and so would have to pay to have these jobs done, that would significantly increase the cost to do the work if locating a local machinist via the yellow pages / google etc. It defo helps to have a tame one of those in your address book or mates with skills. Thanks jonw I totally agree. These valves should come with a bit more detailed fitting instructions or at least a link like the race tech ones. Still keeps the old grey matter working John I reckon the issue is that the instructions are generic as the valves fit multiple bikes, not all need the same work. It would be better if people selling them to the RD/RZ crowd did instructions for 'our' bikes, but i guess they felt they didnt need to with the racetech info out there. I have the MikesXS units, need to get em in the bike, all the work is done Im just waiting for the fork seals and new DU bushes etc. |
|
|
|
Post by sidney81 on Feb 22, 2021 8:08:26 GMT 1
Colchester Bantam ??
|
|


