|
|
Post by philmill on Dec 7, 2019 12:59:31 GMT 1
Look great John, if only I could get my project to move forward again! too much work and now a house move will mean nothing until next spring. Keep the pictures coming, all these projects keep my on my toes...
Phil
|
|
|
|
Post by Tobyjugs on Dec 9, 2019 19:15:48 GMT 1
Looks fantastic John.
|
|
|
|
Post by oldbritguy on Feb 5, 2020 0:08:23 GMT 1
After dragging the LC out of bed for a going over, I thought it was about time to fire up the LC2 rebuild again. It has been a while, too long !  Picked up a new set of indicators last year so they were the first things to get fitted . Also picked up a set of Norbo's pattern bolts which look spot on.   Then It was time for the pipes. I know I am not the first who has fitted a set of Dave's pipes (or any set of spannies for that matter) but I absolutely love these.   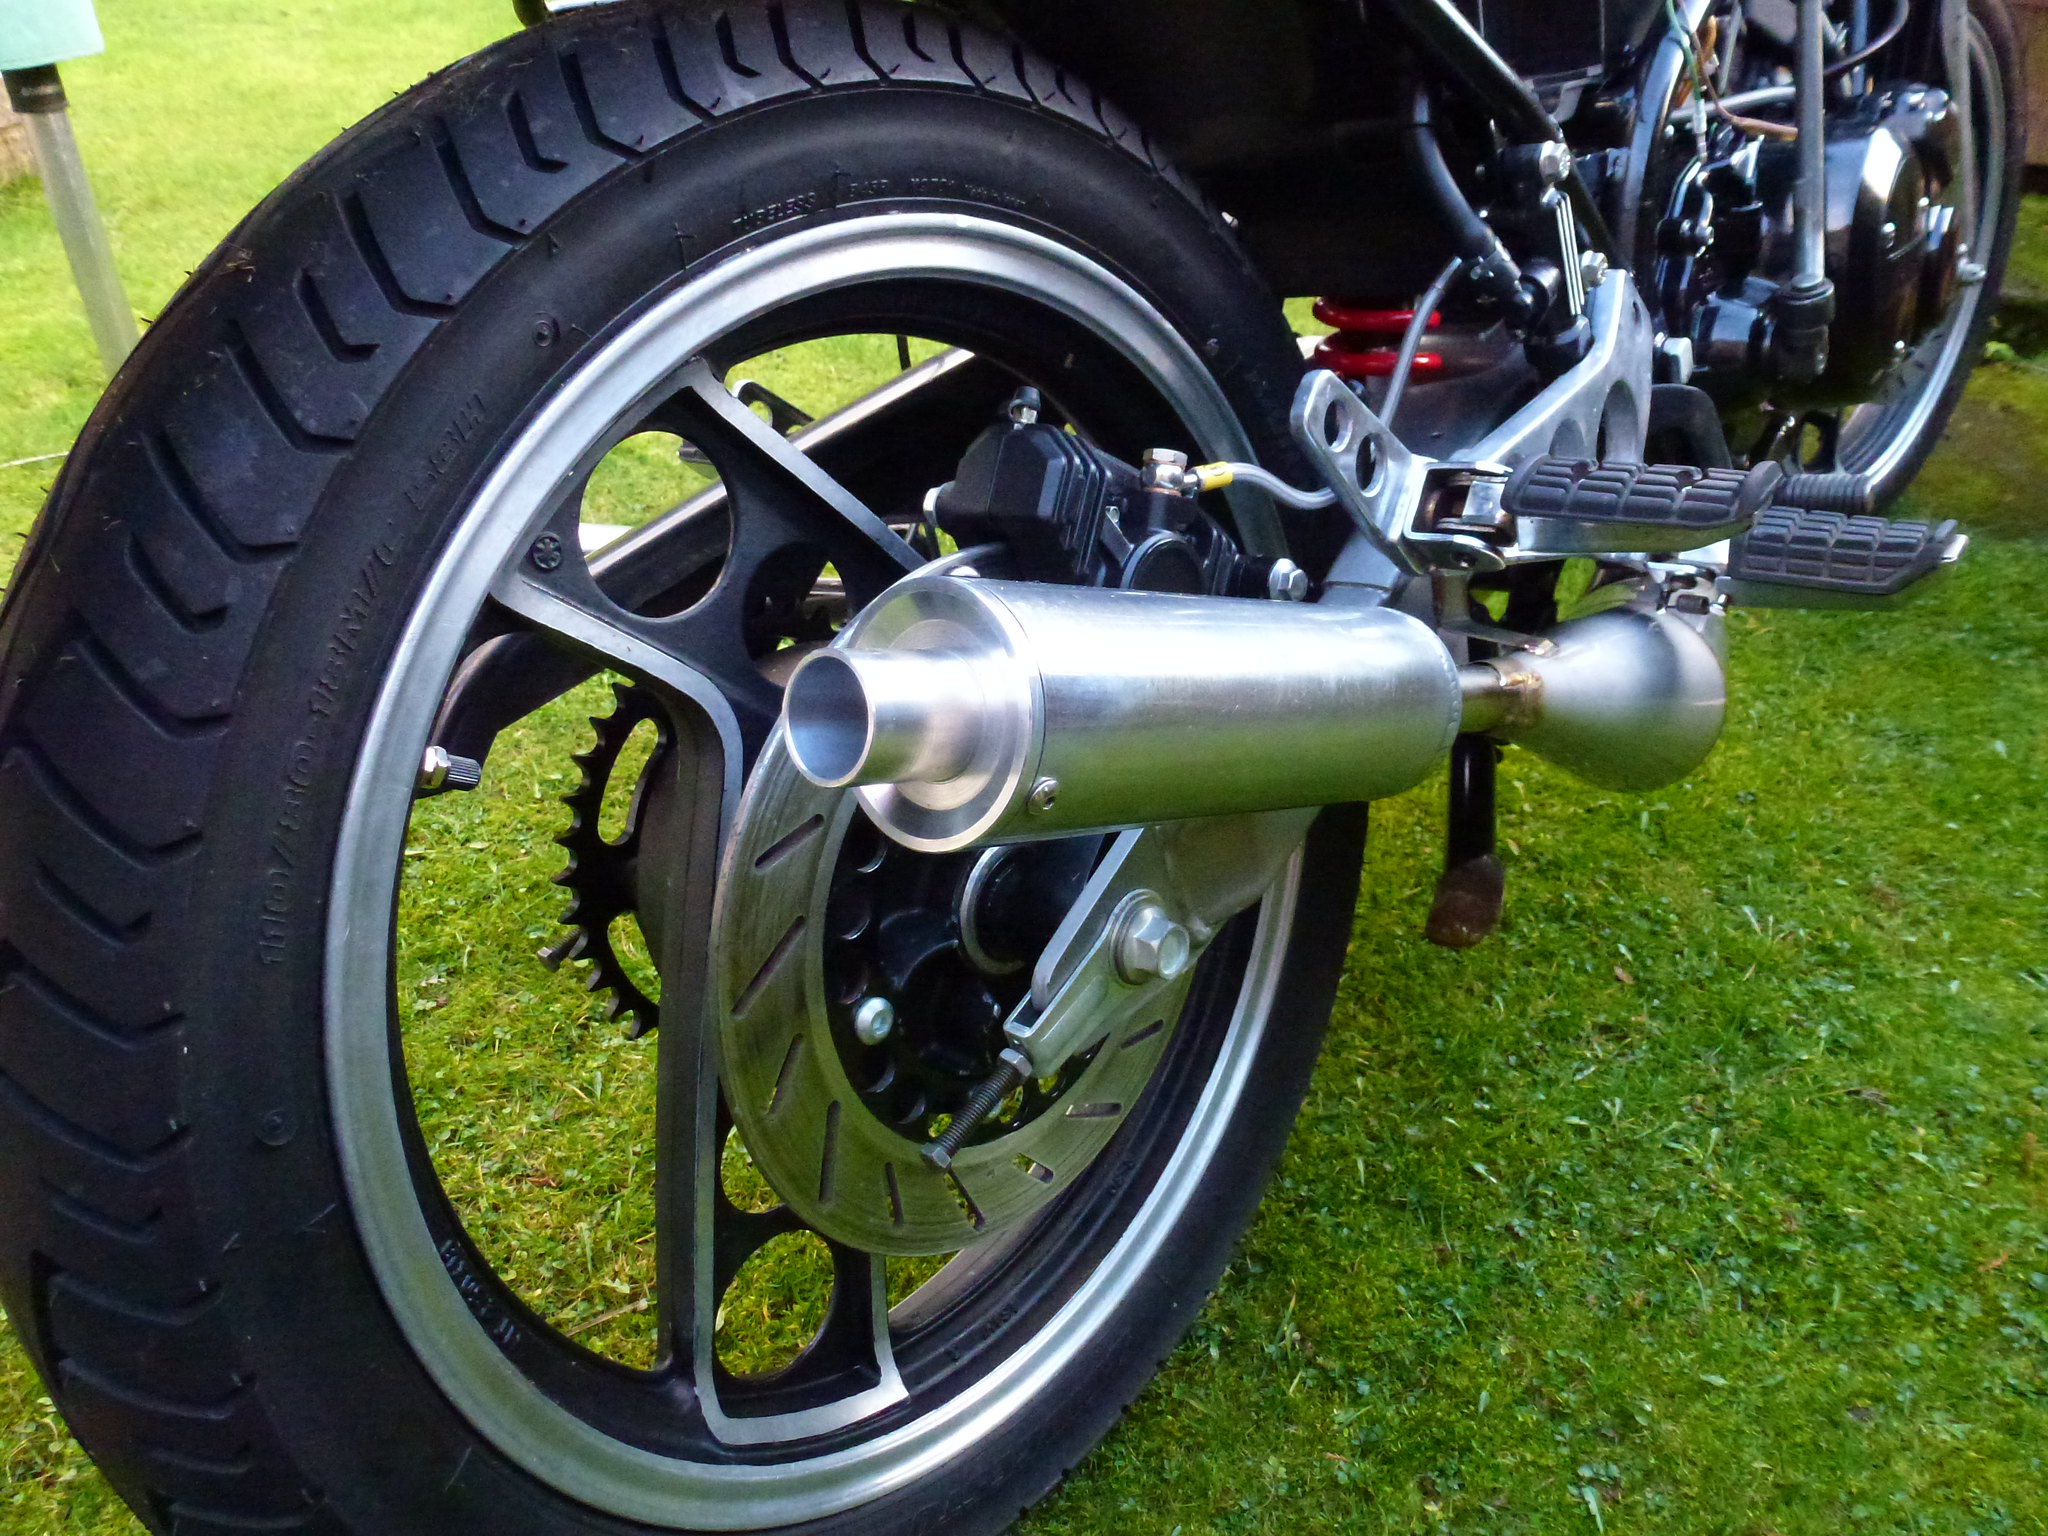  Another bit of good news is we have a working ignition at last. I sent the Ignitech off to Mutts before Christmas and he worked his magic on it, solving the puzzle and sent it back ready to plug n play. Cheers Dave, you are a star. A few more days like today and we will be ready for a fire up in no time  John |
|
|
|
Post by donkeychomp on Feb 5, 2020 0:49:45 GMT 1
Yep, those pipes truly are the nuts!
Alex
|
|
|
|
Post by oldbritguy on Feb 5, 2020 11:25:53 GMT 1
Fitted a set of Renthal ultra low bars as I think they have better ergonomics than the std bars. I will also need to source a pair of top fork caps for the F2 forks.  Looks like the winter dampness has lifted the paint from the master cylinder body. Looks like another strip and paint. Must have a slight fluid weep from the cap even though a new rubber seal/bellows thing is fitted.  And then onto the switchgear  Only managed one side before finishing up for the day. Throttle side later. John |
|
|
|
Post by oldbritguy on Feb 9, 2020 1:45:06 GMT 1
I went to fit the throttle side switch gear and immediately hit a snag. When I fitted the throttle tube to the cable and then slotted the tube into the switch, the only way it would fit properly is with the throttle cable being pulled wide open. I have fitted a new pattern cable, one of Norbo's top Jap made ones and it fits perfectly at the carbs and oil pump but seems short at the twistgrip. I checked everything over including inside the junction block and all looks fine. I even fitted my old original cable but it is still the same.  Opening up the switch is looks like the alloy throttle stop is engaging with the plastic butt on the throttle tube in this preset position. See picture.  So, fitting F2 switches onto a 31k LC2 I think the issue is one of the following:- I have the wrong cable for this switch and throttle tube. Is LC2 cable different to F2? I have the wrong throttle tube. Same question? The switch is from another bike and not an F2 (came in original box of parts so unsure of origin). I picked up a set of LC2 switches from Eddie a while back so next thing is to try that. It looks a different set up inside the switch so fingers crossed. |
|
|
|
Post by midlifecrisisrd on Feb 9, 2020 11:42:10 GMT 1
I think your throttle tube is wrong as the cables should all fit
I have an f2 tube for mine, I'll try and find it later and see what it looks like
Steve
|
|
|
|
Post by JonW on Feb 9, 2020 12:31:26 GMT 1
|
|
|
|
Post by midlifecrisisrd on Feb 9, 2020 14:44:20 GMT 1
Genuine f2 throttle tube Steve  |
|
|
|
Post by oldbritguy on Feb 9, 2020 15:39:24 GMT 1
Cheers guys. That looks like the very thing I need.
I fitted the LC2 switchgear to try it out and everything fitted OK.
The joys of building from a collection of mismatched unknown parts.
I will pick up the correct tube eventually but for the moment and to speed things along I will just run with the early switchgear.
John
|
|
|
|
Post by stusco on Feb 9, 2020 16:18:13 GMT 1
I had to drill another hole in my f2 tube in f2 switch gear to take a 4l0 cable on my lc
|
|
|
|
Post by oldbritguy on Feb 9, 2020 23:56:07 GMT 1
I had to drill another hole in my f2 tube in f2 switch gear to take a 4l0 cable on my lc That is an option which did cross my mind but thought I would make some enquiries before I got the drill out. As said I am now gonna run the LC2 switches I picked up recently and source an F2 tube to complete the other set of switches. Means then I have got a spare set. |
|
|
|
Post by dusty350 on Feb 10, 2020 8:09:04 GMT 1
Looking really good John  This has come such a long way - great transformation Not far off now ! Dusty |
|
|
|
Post by oldbritguy on Feb 11, 2020 0:16:17 GMT 1
Got another little job done and out the way. As I am using the LC2 switchgear and the later coffin type front master cylinder, I noticed I no longer have a connection for the front brake light switch. The wiring for the planned set up with F2 switch is contained within the switch wiring and the earlier type has separate switch/wiring setup with the rectangular type m/cyl. (same as LC) Time to get crimping! I picked up some 4.8mm flag connectors with insulating covers from Fleabay and already had bullet connectors, cable and sleeving from my earlier endeavours.  First i fitted the insulating covers then crimped the flag connectors. This was a little tricky as I dont have the proper flag type crimper but the one I have did the outside then used needle nosed pliers for the crimp on the inside.  I later gave the ends a little bit of solder just to make sure the connection was sound. Next it was get the sleeving on and fit the bullet connectors   Then it was job done  Just waiting on a decent day again to get the bike outside and finish things off. Basically all that is left to do is balance the carbs, fit the rear chain and tighten the gearbox sprocket, fit the headlight and bodywork and it is MOT time. So close now. John |
|
|
|
Post by midlifecrisisrd on Feb 11, 2020 10:17:08 GMT 1
It's getting near now. Nice job on the brake switch wiring, got the same to do with mine for the Fazer master
Steve
|
|
|
|
Post by oldbritguy on Mar 3, 2020 0:35:21 GMT 1
Managed to drag the bike out of the hut today and got a couple of things done. Replaced the sight glass on the master cylinder and got it fitted back on the bike.  Bled the front brake up and fitted the switches. These were a set I picked up and could do with a bit of a tidy but they are in good enough shape so they will do for now. Also balanced the carbs and adjusted the oil pump setting so ready for the fire up now  Got the chain fitted and torqued up the sprocket nut. Picked up a bit of surface rust in the damp shed so ill give it a bit of a clean later with the wire brush and a bit of oil  Last thing I got done today was fit my first bit of bodywork. Rest will go on later this week and hopefully get it MOTd next week   |
|
|
|
Post by mak595 on Mar 3, 2020 16:36:50 GMT 1
Looking great
EDIT, watch out for the side stand sinking into the grass !
|
|
|
|
Post by donkeychomp on Mar 4, 2020 0:02:41 GMT 1
Must feel great to get her outside for a bit. Looking lovely too.
Alex
|
|
|
|
Post by Mr Kipling on Mar 4, 2020 19:53:04 GMT 1
Looking rather nice now, not much further to go ...
|
|
|
|
Post by dusty350 on Mar 4, 2020 20:11:25 GMT 1
Love the French blue on the bodywork John It's all looking sweet Dusty |
|
|
|
Post by oldbritguy on Mar 5, 2020 0:28:00 GMT 1
Thanks guys Yes the finish line is in sight now but I still have a few little jobs to do before I can get her MOTd and on the road. Seeing as the weather has brightened up a bit and I can get the bike out of the shed I am managing to get a few things done and getting me in the zone again. I really need to declutter the garage and the shed so I can at least work on the bike under cover rather than wait for a dry day Today I loosely fitted the rest of the bodywork on the bike for a preview of how the finished article will look seeing as it has been stashed in boxes since it came back from the painter.    Well pleased with how things are turning out both with the lines of the bike and colour. Got a question though on the routing of the loom under the bottom yoke and past the fairing into the headlight. There is not a lot of space and the loom is quite fat and I am having a bit of trouble fixing the fairing at the bottom pin.   If anyone can steer me in the right direction on the correct route for the loom that would be magic. Meantime I am about to search through a few rebuild threads to see if I can shed a bit of light on the subject John |
|
|
|
Post by midlifecrisisrd on Mar 5, 2020 9:24:23 GMT 1
It doesn't go through the middle at the pin
It should go between the 2 brake hoses then when looking from the front up the right side of the bracket
I'll try and find a pic
Steve
|
|
|
|
Post by midlifecrisisrd on Mar 5, 2020 9:30:18 GMT 1
Not the best pics but hopefully you get the idea Steve   |
|
|
|
Post by Dixie Dean on Mar 5, 2020 10:05:17 GMT 1
How hard was it to fit the sight glass into the master cylinder?
|
|
|
|
Post by oldbritguy on Mar 5, 2020 11:39:15 GMT 1
It doesn't go through the middle at the pin It should go between the 2 brake hoses then when looking from the front up the right side of the bracket I'll try and find a pic Steve Thanks Steve That sort of makes sense and the pics are definitely a help too. I probably wont get a chance to look at it now before the weekend but will try that route as suggested. There is not a lot of room though between the fairing and the mounting bracket for such a thick loom and I take it that it doesn't go between the bracket and the bottom yoke as there is a decent space there by the looks of things? I also need to sort out the route for the throttle cable too before i finally button things up. Ill post more pics once I am sorted John |
|
|
|
Post by oldbritguy on Mar 5, 2020 11:53:34 GMT 1
How hard was it to fit the sight glass into the master cylinder? It was actually quite straightforward. Unfortunately in my haste to get the job done, I never took any pics  Hardest bit was getting the old one out. I used a thin electrical screwdriver to punch it out from the inside through the slot in the m/cyl body taking care not to damage the sides of the vertical slot itself. Made a couple of holes before I managed to pull most of it out with thin pointy pliers then gave the hole a good clean up with brake cleaner and one of those plastic Scotchbrite pads. The new glass came with an o ring which I lubed very sparingly with a bit of red grease and gently pressed the glass in with a small wooden dowel wrapped in tissue, and used a 4" clamp to gently wind it in. The glass is 18mm diameter and with everything spotlessly clean, it is a nice tight press fit once in. As this was an aftermarket glass it sits a bit further into the master cyl but does the job. No leaks so far I used this video as a reference before I started which gave me the bravery jag I needed. John |
|
|
|
Post by philmill on Mar 5, 2020 19:53:34 GMT 1
John, the bike looks great, a credit to your hard work and patience. Well done.
Phil
|
|
|
|
Post by oldbritguy on Mar 5, 2020 20:06:21 GMT 1
John, the bike looks great, a credit to your hard work and patience. Well done. Phil Thanks Phil Still a wee bit to go but yeah, nearly there and well pleased with how things are turning out John |
|
|
|
Post by perazzi350 on Mar 5, 2020 20:40:31 GMT 1
love your bike looks really cool
|
|
|
|
Post by Dixie Dean on Apr 14, 2020 23:28:55 GMT 1
Hi mate looking to respray some plastics on my lc2 rad gaurd chain gaurd could you recommend primer and satin black thanks Michael
|
|


