|
|
Post by marrcel on Sept 9, 2020 20:48:33 GMT 1
Do i see in the last picture there are 2 radiators on top of each other?
You can can line them up in series or run them paralel.
When operated in series you have to choose were the water inlet is.
In heatexchanger design you choose between cross flow and paralel flow.
|
|
|
|
Post by Tobyjugs on Sept 10, 2020 8:19:46 GMT 1
Do i see in the last picture there are 2 radiators on top of each other? You can can line them up in series or run them paralel. When operated in series you have to choose were the water inlet is. In heatexchanger design you choose between cross flow and paralel flow. Hi Marrcel it's running in parallel. I did consider running in line but after a long talk with someone from this forum i decided against it. After opening it up it would have been a lot more work to make it run in line as well. Plus which way do you run it when in line? Hot at the front or hot at the back? In Parallel its one slow flow from left to right. This radiator malarkey is something i have no enthusiasm for. |
|
|
|
Post by Tobyjugs on Sept 19, 2020 13:47:26 GMT 1
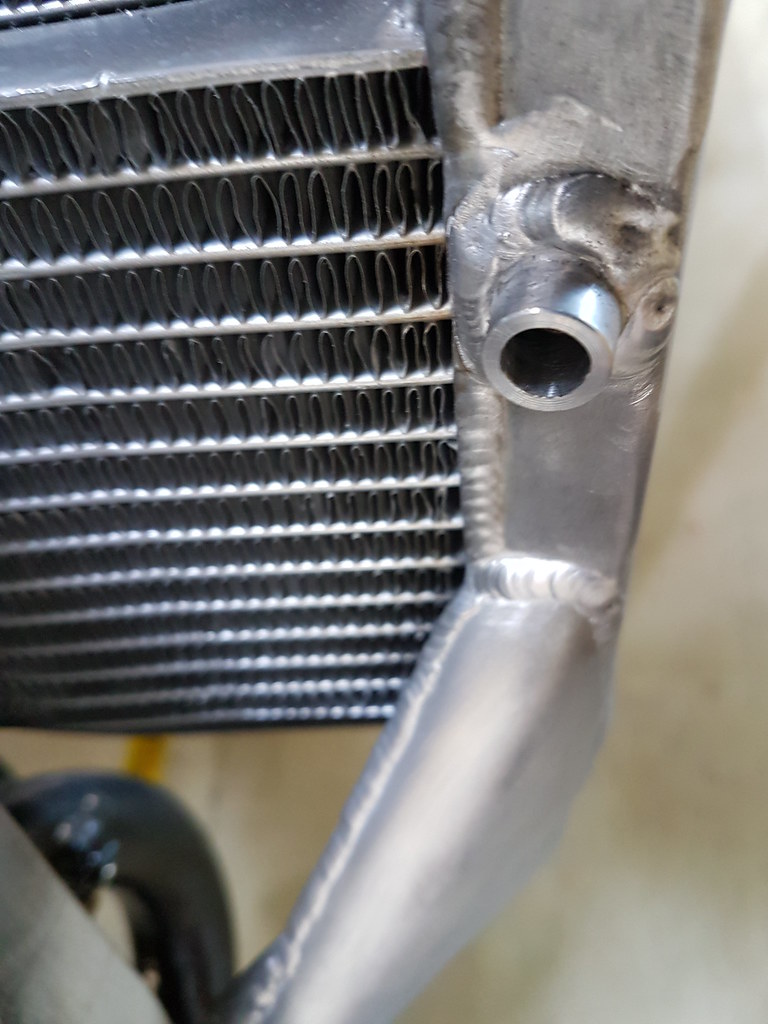
After a lot of duct tape and silver paint the radiator is finished.  Well almost i just have to tap one M10 thread but my tap has gone AWOL.   MK2 has just over twice the surface area of the last radiator. With the first radiator i was measuring two different temperatures in the radiator where i should have been measuring almost the same temperature. I think this was due to how the inlet and outlet were positioned. I could have changed the position of the pipes but i don't think it would have dropped below 65 degrees unless it was a cold day. Here's some pictures of the MK2 radiator fitted.   Next step is to start it up and check if the new engine fittings are going to work. Fingers crossed |
|
|
|
Post by Tobyjugs on Sept 21, 2020 19:36:16 GMT 1
I borrowed a tap from work and made the thread in the radiator it is now plugged. The radiator was filled and the bike started initial tests look very promising it is dissipating the heat better that the old rad. I have found one small leak which very slowly drips once the bike is up to temperature. This is an easy fix.   |
|
|
|
Post by muttsnuts on Sept 21, 2020 19:42:19 GMT 1
looking good now, mine runs a cool 40c most of the time, on the last track day (before it went down the track at 100mph on its side), it got upto 48c, so the radiator is working exactly how I wanted, and my 443 is pushing 109bhp, so plenty of heat to get rid of, think your's will work really well
|
|
|
|
Post by Tobyjugs on Sept 21, 2020 19:53:15 GMT 1
looking good now, mine runs a cool 40c most of the time, on the last track day (before it went down the track at 100mph on its side), it got upto 48c, so the radiator is working exactly how I wanted, and my 443 is pushing 109bhp, so plenty of heat to get rid of, think your's will work really well Sorry to hear about that, which bike was it the Aprilia or the Mito? Why did it happen? Was it due to the harshness of the power band? This bike will stay in the RD Touring club with a mellow power band until i feel confident to ride it and progress to the full fat RD club. Then i will want more than 109 bhp  |
|
|
|
Post by Tobyjugs on Jan 27, 2021 20:58:13 GMT 1
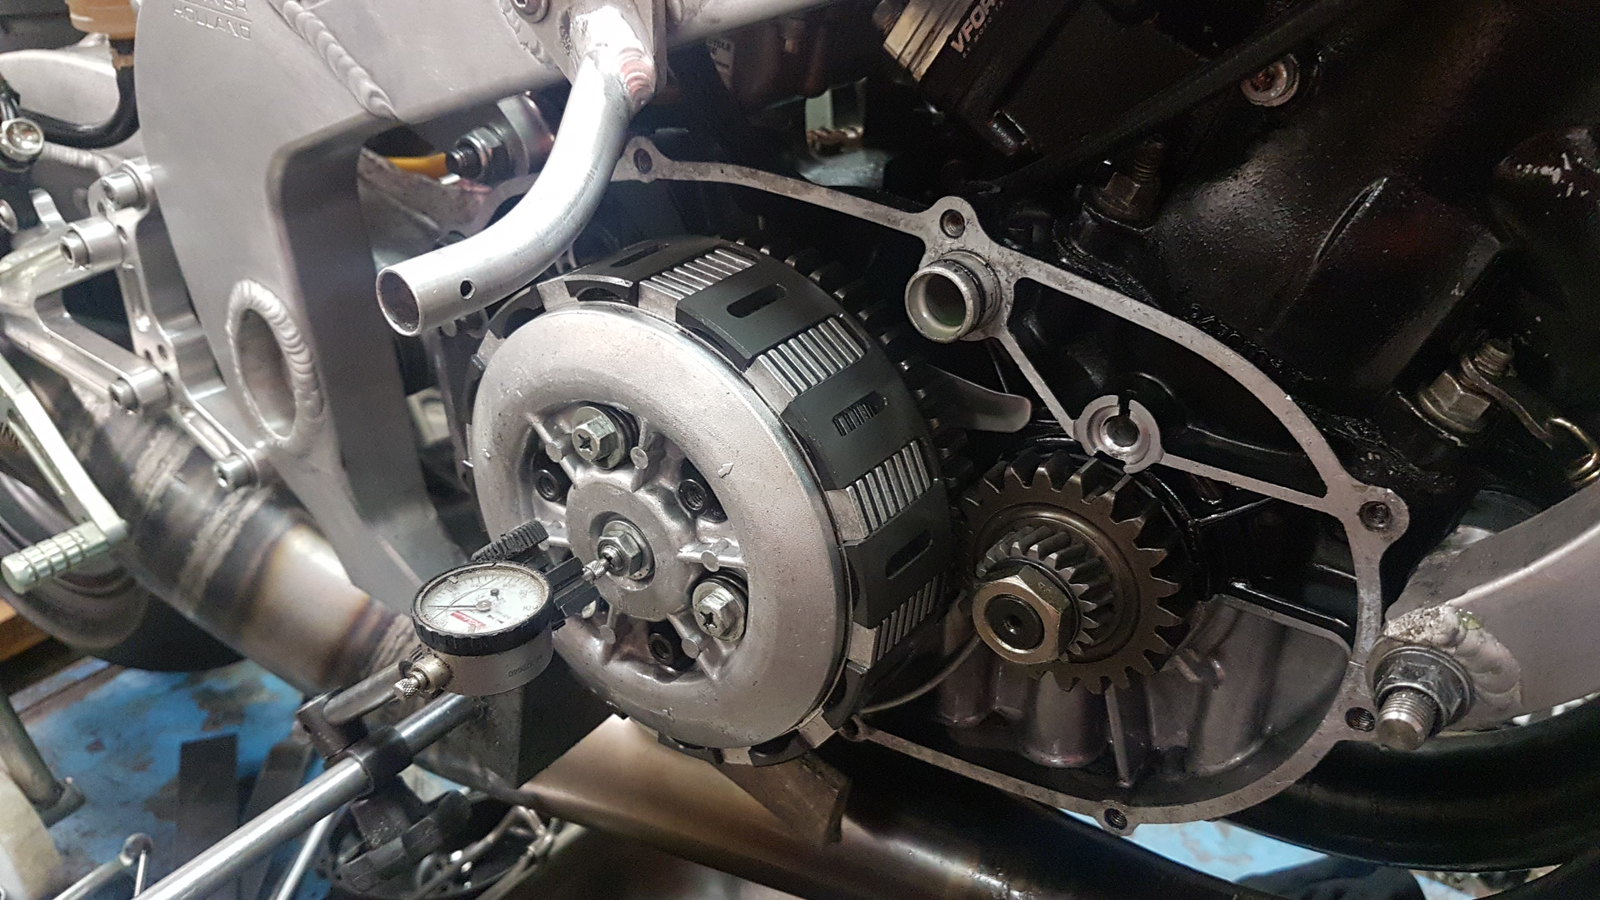
I really wanted to run the bike up to check the engine mounts but i decided to fit the the 8 plate clutch instead. This has been bouncing around in my head for a long time ever since Midlife mentioned it when i first joined the forum. With this bouncing around in my head when i needed a new clutch basket i decided to buy a Chariot basket as i read that they could be used for eight plates. Easy peasy right? One of the things i think is very important is the space between every plate. I have two RD's to play with and have changed the engines around in both of them. I always thought i was lucky with the gearbox in my Powervalve engine as the gearbox felt slick and easy to select neutral. What i have noticed every engine i put in that bike has a good gearbox and when i put the engine in the other bike it magically turns back into a pain in the ass short stab down from second to neutral gearbox. The difference between the 2 bikes is a standard LC clutch perch/lever and an R6 clutch perch/lever. I genuinely believe the R6 setup have more range and opens the plates up a bit more. i've never measured the difference to prove/disprove this. The first thing i measured was the amount of movement the pressure plate can move. I measured 1.7mm movement, i'm using a Brembo clutch perch/lever.  I bought a Hinson clutch hub which is made for an eight plate setup, now just use the Chariot basket with the Hinson hub. Plug and play.  Bugger all the plates don't fit. There are a few ways to solve this, and i choose the easiest way for me. This was to grind the 3mm thick washer that sits between the basket and the hub down to 1mm thick. Great all the plates fit and operate with the top friction plate still inside the basket.  Now that the hub sits deeper in the basket the end of the input shaft sticks out above the hub instead of under the hub, this renders the normal locking plate and nut useless. 
 My normal way of solving a problem is to just sit next to it and stare at it until i have an idea. I realised i could use the front sprocket locking plate very effectively as a clutch locking plate.  The locking plate isn't thick enough to take up all the extra length from input shaft so i just copied the sprocket nut and machined a counter bore 2mm deep with a diameter of 25.3mm. I will make a titanium nut the same as this one except 2mm thicker to compensate for the counter bore. From the standard clutches i have measured the standard free length of the spring under tension is around 23mm, in the setup here i have 22mm. After a lot of imming and amming i decided to use yellow coded springs which i think are standard YPVS clutch springs. One of the reasons i went for these was the extra 1mm pretension i have. Fingers crossed, its no big problem to put 3 slightly heavier springs in and try again. Can anyone see the next problem i have to solve which is shown in the picture below?  |
|
|
|
Post by midlifecrisisrd on Jan 27, 2021 21:13:55 GMT 1
Either not enough lift or it hits the case when the lever is pulled?
Steve
|
|
|
|
Post by arrdy350 on Jan 27, 2021 21:18:22 GMT 1
Cool bike 👍 looks like a tight job getting the clutch cover on under the fairing bracket?
|
|
|
|
Post by Tobyjugs on Jan 27, 2021 21:24:10 GMT 1
Either not enough lift or it hits the case when the lever is pulled? Steve Hi Steve not sure what you mean about enough lift, but you are correct about hitting the engine case. I forgot to mention this. The only pressure plate lift info i have was provided by Rob he measured 1.3 to 1.5mm lift on a 4LO set up. I used a YPVS casing and ground down the three nubs that are on the inside of the case it now fits. This means you have three small threaded holes so i fitted a plastic cover and put loctite sealant on the threads of the bolts used for the plastic cover. |
|
|
|
Post by Tobyjugs on Jan 27, 2021 21:25:19 GMT 1
Cool bike 👍 looks like a tight job getting the clutch cover on under the fairing bracket? Thank you, its just the angle of the camera. |
|
|
|
Post by midlifecrisisrd on Jan 27, 2021 21:45:17 GMT 1
For lift I was meaning to get the same lift per plate
If a 7 plate clutch averages 1.4mm then to get the same clearance per plate would need 1.6mm as in 0.2mm per plate
Steve
|
|
|
|
Post by Tobyjugs on Jan 27, 2021 21:52:28 GMT 1
For lift I was meaning to get the same lift per plate If a 7 plate clutch averages 1.4mm then to get the same clearance per plate would need 1.6mm as in 0.2mm per plate Steve Ok yes i understand you now. I felt lucky when i measured !.7mm even though it looked a lot more. i did the sum slightly different as i added up all the parts frictions and steels.. I have a feeling only Mutts or Pedro can see the next problem to solve.  |
|
|
|
Post by midlifecrisisrd on Jan 27, 2021 22:00:34 GMT 1
Cooling?
Steve
|
|
|
|
Post by Tobyjugs on Jan 27, 2021 22:04:39 GMT 1
Yes and no with this set up i do not have any cooling. Getting warm |
|
|
|
Post by midlifecrisisrd on Jan 27, 2021 22:06:04 GMT 1
I'm out of ideas 🤔
Steve
|
|
|
|
Post by donkeychomp on Jan 27, 2021 23:08:28 GMT 1
Warming?
Alex
|
|
|
|
Post by Tobyjugs on Jan 28, 2021 21:39:09 GMT 1
Ok no eagle eyed readers last night. The driving primary gear has clearance issues with the water pump drive.  |
|
|
|
Post by midlifecrisisrd on Jan 28, 2021 21:56:27 GMT 1
Oh, that is a bit tight
Will the shaft clear it if you cut back the plastic gear and make another circlip groove to hold the trimmed gear
Steve
|
|
|
|
Post by Tobyjugs on Jan 28, 2021 22:09:40 GMT 1
Yes Steve thats the sort of plan i have, but the cir-clip has to be protected from the axial thrust produced by the gear wheel. In the original way the cir-clip sits behind the large washer, which is supports the thrust by pushing against the outer ring in the casting.
|
|
|
|
Post by Tobyjugs on Feb 8, 2021 21:21:12 GMT 1
|
|
|
|
Post by muttsnuts on Feb 8, 2021 21:51:19 GMT 1
Ok no eagle eyed readers last night. The driving primary gear has clearance issues with the water pump drive.  yep, had that before when I fitted some 2.36 primaries, what ratio you running ?, what make ? Not had this issue with 2.67 ratios I made a new shaft up for the water pump, but itwas a right pain to sort out TBH |
|
|
|
Post by boulding59 on Feb 10, 2021 13:04:22 GMT 1
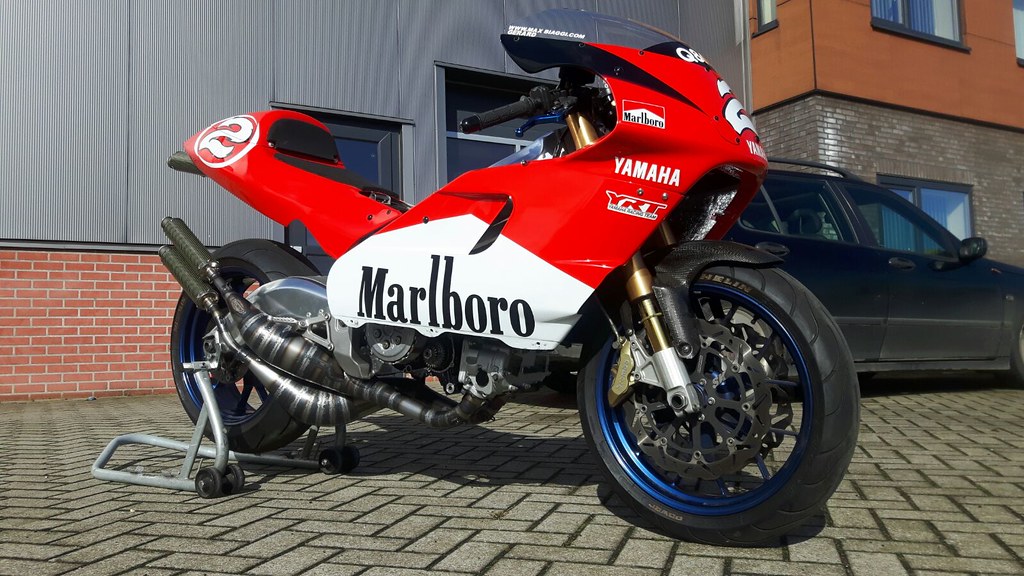
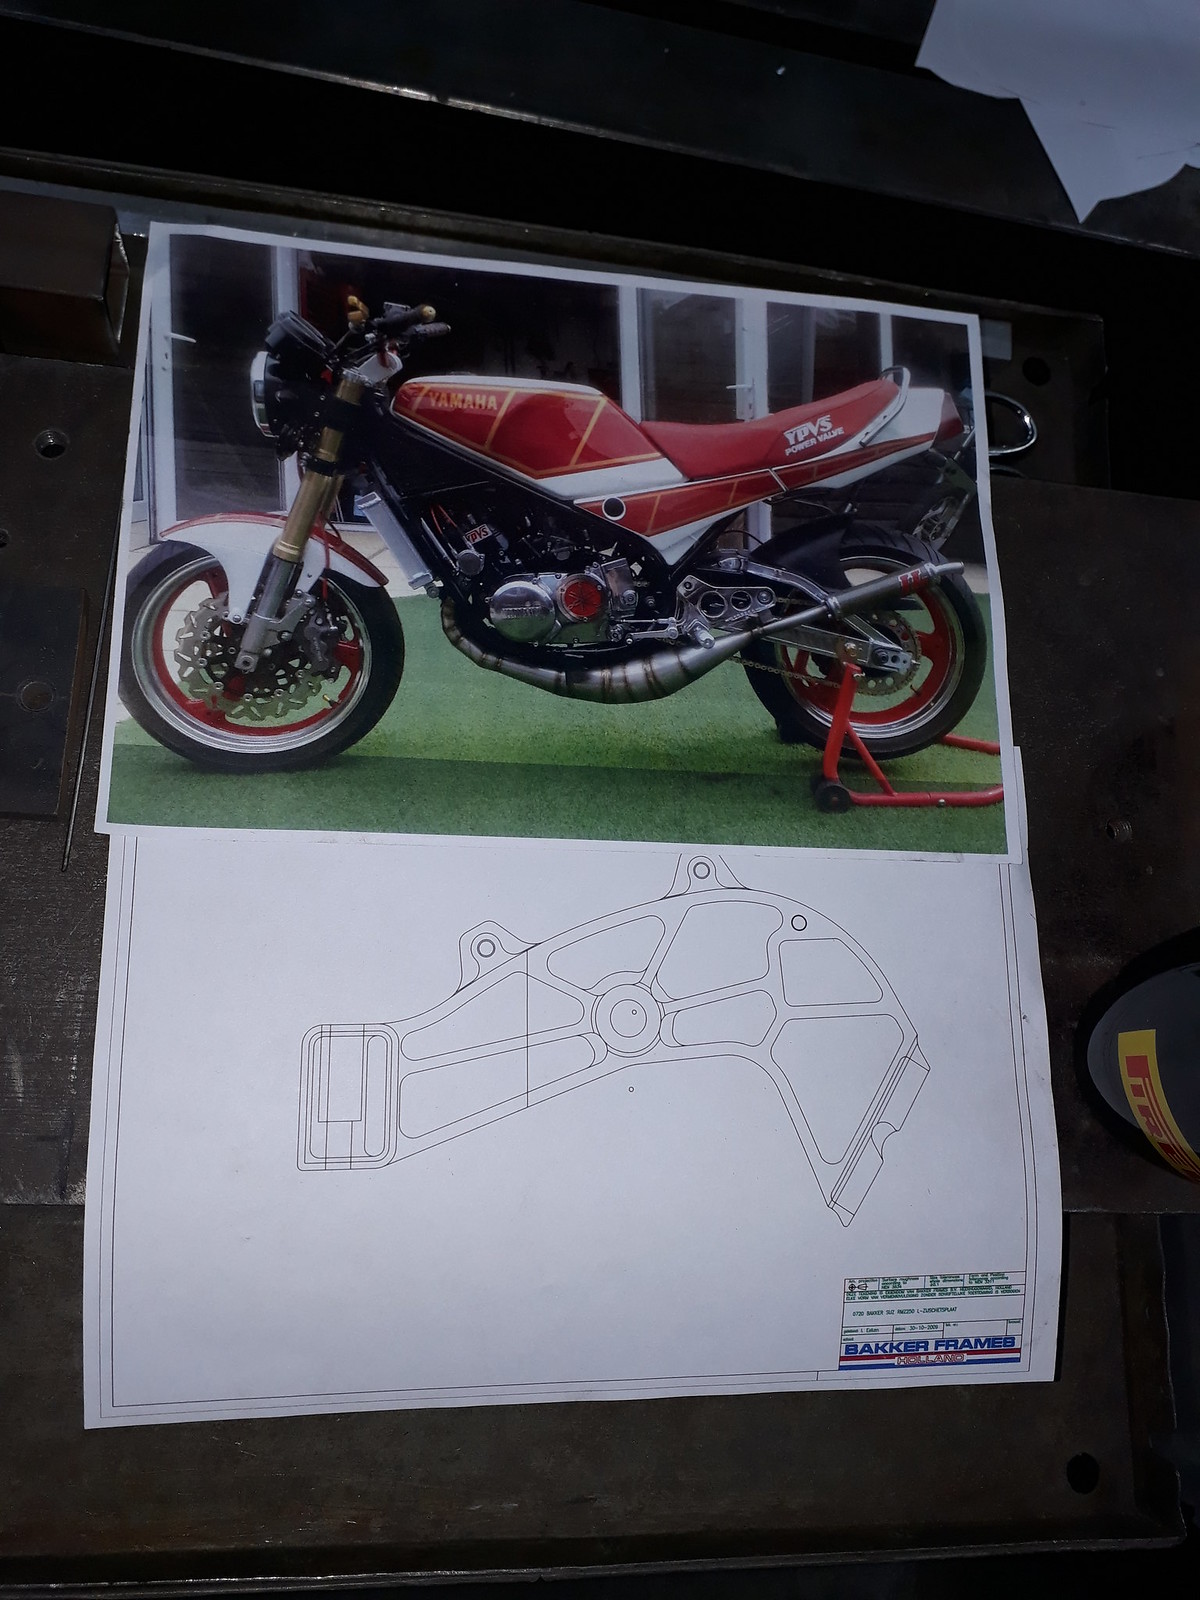
I was very surprised at the interest and comments you chaps have made. So he we go. I have always called this project the Bakker RD, but that title has been claimed by William and his very nice Nico Bakker Power Valve. A couple of years ago a group of track day guys commented that i should get rid of the two strokes as they were only good for mopeds. This was a comment i could not forget and decided to build something that would mean they would only be smelling my tailpipes. The reality of me being able to out ride some young guns on a track is very small, but i don't think this would not be a problem for Kees. I decided to buy a rolling chassis and put a big bore engine in it. I saw Mr Mellor's ad for a 3XV running chassis and decided to buy it. After i got it home and hung the engine in the chassis it became painfully obvious that this would be a massive under taking to fit it into the chassis. Also i should do some research instead of just jumping in with a "how difficult can it be attitude". Next my attention turned to an Aprillia chassis, but my eyes and ears were now scrutinising every bike which was modified and most of them had something not up to scratch due to the mods in my opinion. I visited PS tuning and Pieter had just finished a set of pipes for an RD 500 and he was telling me how difficult the back suspension was making his job.  After seeing how low the pipes were i made my mind up there and then on the spot to get something taylor made. That RD 500 is one of the best 500 conversions i have seen and with almost 110 hp it's not exactly slow. I have come to know the owner of this bike a little and i value his opinion even though it has been a little harsh sometimes. I decided to pay Nico Bakker a visit and after a bit of a chat i asked him to make a chassis for my engine block. I asked him to keep in mind the expansion chambers take up a lot of room under the engine and that i wanted it built for GP style pipes. Later he phoned me up and told me he had found the inspiration for the bike and he wanted me to look at a picture to try and change my mind and have a pipe each side of the bike. When i visited his workshop he showed me a design for a part of the chassis and a picture of a bike for some inspiration.  Looks fantastic to me👍🏼 |
|
|
|
Post by Tobyjugs on Feb 10, 2021 20:13:48 GMT 1
I was very surprised at the interest and comments you chaps have made. So he we go. I have always called this project the Bakker RD, but that title has been claimed by William and his very nice Nico Bakker Power Valve. A couple of years ago a group of track day guys commented that i should get rid of the two strokes as they were only good for mopeds. This was a comment i could not forget and decided to build something that would mean they would only be smelling my tailpipes. The reality of me being able to out ride some young guns on a track is very small, but i don't think this would not be a problem for Kees. I decided to buy a rolling chassis and put a big bore engine in it. I saw Mr Mellor's ad for a 3XV running chassis and decided to buy it. After i got it home and hung the engine in the chassis it became painfully obvious that this would be a massive under taking to fit it into the chassis. Also i should do some research instead of just jumping in with a "how difficult can it be attitude". Next my attention turned to an Aprillia chassis, but my eyes and ears were now scrutinising every bike which was modified and most of them had something not up to scratch due to the mods in my opinion. I visited PS tuning and Pieter had just finished a set of pipes for an RD 500 and he was telling me how difficult the back suspension was making his job.  After seeing how low the pipes were i made my mind up there and then on the spot to get something taylor made. That RD 500 is one of the best 500 conversions i have seen and with almost 110 hp it's not exactly slow. I have come to know the owner of this bike a little and i value his opinion even though it has been a little harsh sometimes. I decided to pay Nico Bakker a visit and after a bit of a chat i asked him to make a chassis for my engine block. I asked him to keep in mind the expansion chambers take up a lot of room under the engine and that i wanted it built for GP style pipes. Later he phoned me up and told me he had found the inspiration for the bike and he wanted me to look at a picture to try and change my mind and have a pipe each side of the bike. When i visited his workshop he showed me a design for a part of the chassis and a picture of a bike for some inspiration.  Looks fantastic to me👍🏼 The picture of the YPVS is from Yogi from this forum. Nico Bakker likes it. |
|
|
|
Post by Tobyjugs on Feb 10, 2021 20:40:14 GMT 1
Ok no eagle eyed readers last night. The driving primary gear has clearance issues with the water pump drive.  yep, had that before when I fitted some 2.36 primaries, what ratio you running ?, what make ? Not had this issue with 2.67 ratios I made a new shaft up for the water pump, but itwas a right pain to sort out TBH Yes that is a 2.36 primary made by Liberty gears. I got the wrong one sent to me by accident, the vendor said try and if you don't like it i will send the correct ratio over. Well thats on it's way now. These gears are also thicker, which could also be a problem for the water pump. I also have a set of Norbo's 2.65 primaries and i still had to reduce the outer diameter of the large washer on the water pump a little for it to fit properly. The problem with my spares is they are all old ex racer spares so i don't know what is standard some times. Heres two water pump gears i have as an example.  At present i have refitted the 2.65 primaries until get my 2.54 gears. What ratio are you running on your 443? |
|
|
|
Post by muttsnuts on Feb 10, 2021 21:06:07 GMT 1
I am running 2.67, just looking into getting some 2.5's made (or as close as anyway), just COVID restrictions have slowed me down on that front, still got plenty to keep me busy, so many plates spinning I need to get a few of my projects finished, e.g. new igntion systems (95% done, 2 in test at the moment), 8 plates clutches (need to send them off for anodising), 496cc Aprilia project, Turbo project, PV projects, exhaust noise reduction development to name a few !
|
|
|
|
Post by itsnick350 on Feb 11, 2021 9:02:39 GMT 1
I only joined this forum last Nov once I had bought myself a 31k, so I am just catching up on the huge number of threads which are available. This particular thread demonstrates perfectly the knowledge and enthusiasm of this community. I get excited when I managed to fit braided brake lines and a set of expansions 🤣🤣🤣
|
|
|
|
Post by donkeychomp on Feb 11, 2021 23:15:27 GMT 1
Nick, some people can't even do that so fair play to you. But it's not all about twirling spanners at dawn, we're all here because we love LCs!
Alex
|
|
|
|
Post by Tobyjugs on Feb 12, 2021 20:07:14 GMT 1
I'm slowly bringing this thread back up to date. For a long time i havent been able to upload pictures from my phone to my computer. I have now realised i can do it by E-mail. As you are all aware, one of the goals of this build is to try and hit a dry weight of 100 kg. Whilst working on a new ship i noticed one of the hydraulic engineers had a selection of plugs with magnets. These were inserted into the new system to catch any steel particles that could be in the system due to component failure. They are made of aluminium and he had lots of different sizes. One size he had was the same size as the YPVS sump plug.    There is quite a weight saving to be had by using this pug.   BEWARE BEWAREIt might be a bad idea to copy this in a standard engine. In the bottom casing where the normal plug fits there are two separate drain channels. One from the side casing and one from the middle of the gearbox. They are at two different heights and the length of the original drain plug blocks off the side casing drain channel. This keeps the oil level in the side casing at a certain height. If you fit a short plug to your engine block you will alter Yamaha's idea about the two oil levels. My road bikes use a standard plug. This engine block has been modified and a few bits like the idler gear and the kickstart mechanism have been ditched. This means there are lots of holes between the side casing and the middle of the gear box for oil to pass through. I don't know if this is good or bad. Time will tell |
|
|
|
Post by Yogi on Feb 12, 2021 20:40:04 GMT 1
I’m feeling pretty chuffed to get a pic of my first hybrid build on this epic build thread 😊
Keep it up Toby your getting there mate, you’ve solved a few problems since I got lost in my mancave build 👌
You’ve also caused a few too 🙈
Atb Matt
|
|