|
|
Post by Tobyjugs on Oct 7, 2018 22:30:28 GMT 1
Hi Mark i have made the same fork conversion on my 4LO. If you use the yokes from the R6 you will have a limited steering lock (if using the R6 clipons). This works out ok for a bike used on tracks but is a bit of a pain for daily use.
I asked Andy (spondon440) to make me a pair of yokes for the 5eb forks with more offset. I still havent fitted them yet as i still use my bike for trackdays etc.
|
|
|
|
Post by JonW on Oct 8, 2018 2:20:02 GMT 1
Great work Mark! Ohh, thats the basis for 2 fork tools right there, dont chuck em away...! if you dont want em and the post isnt killer... {whistles}... lol 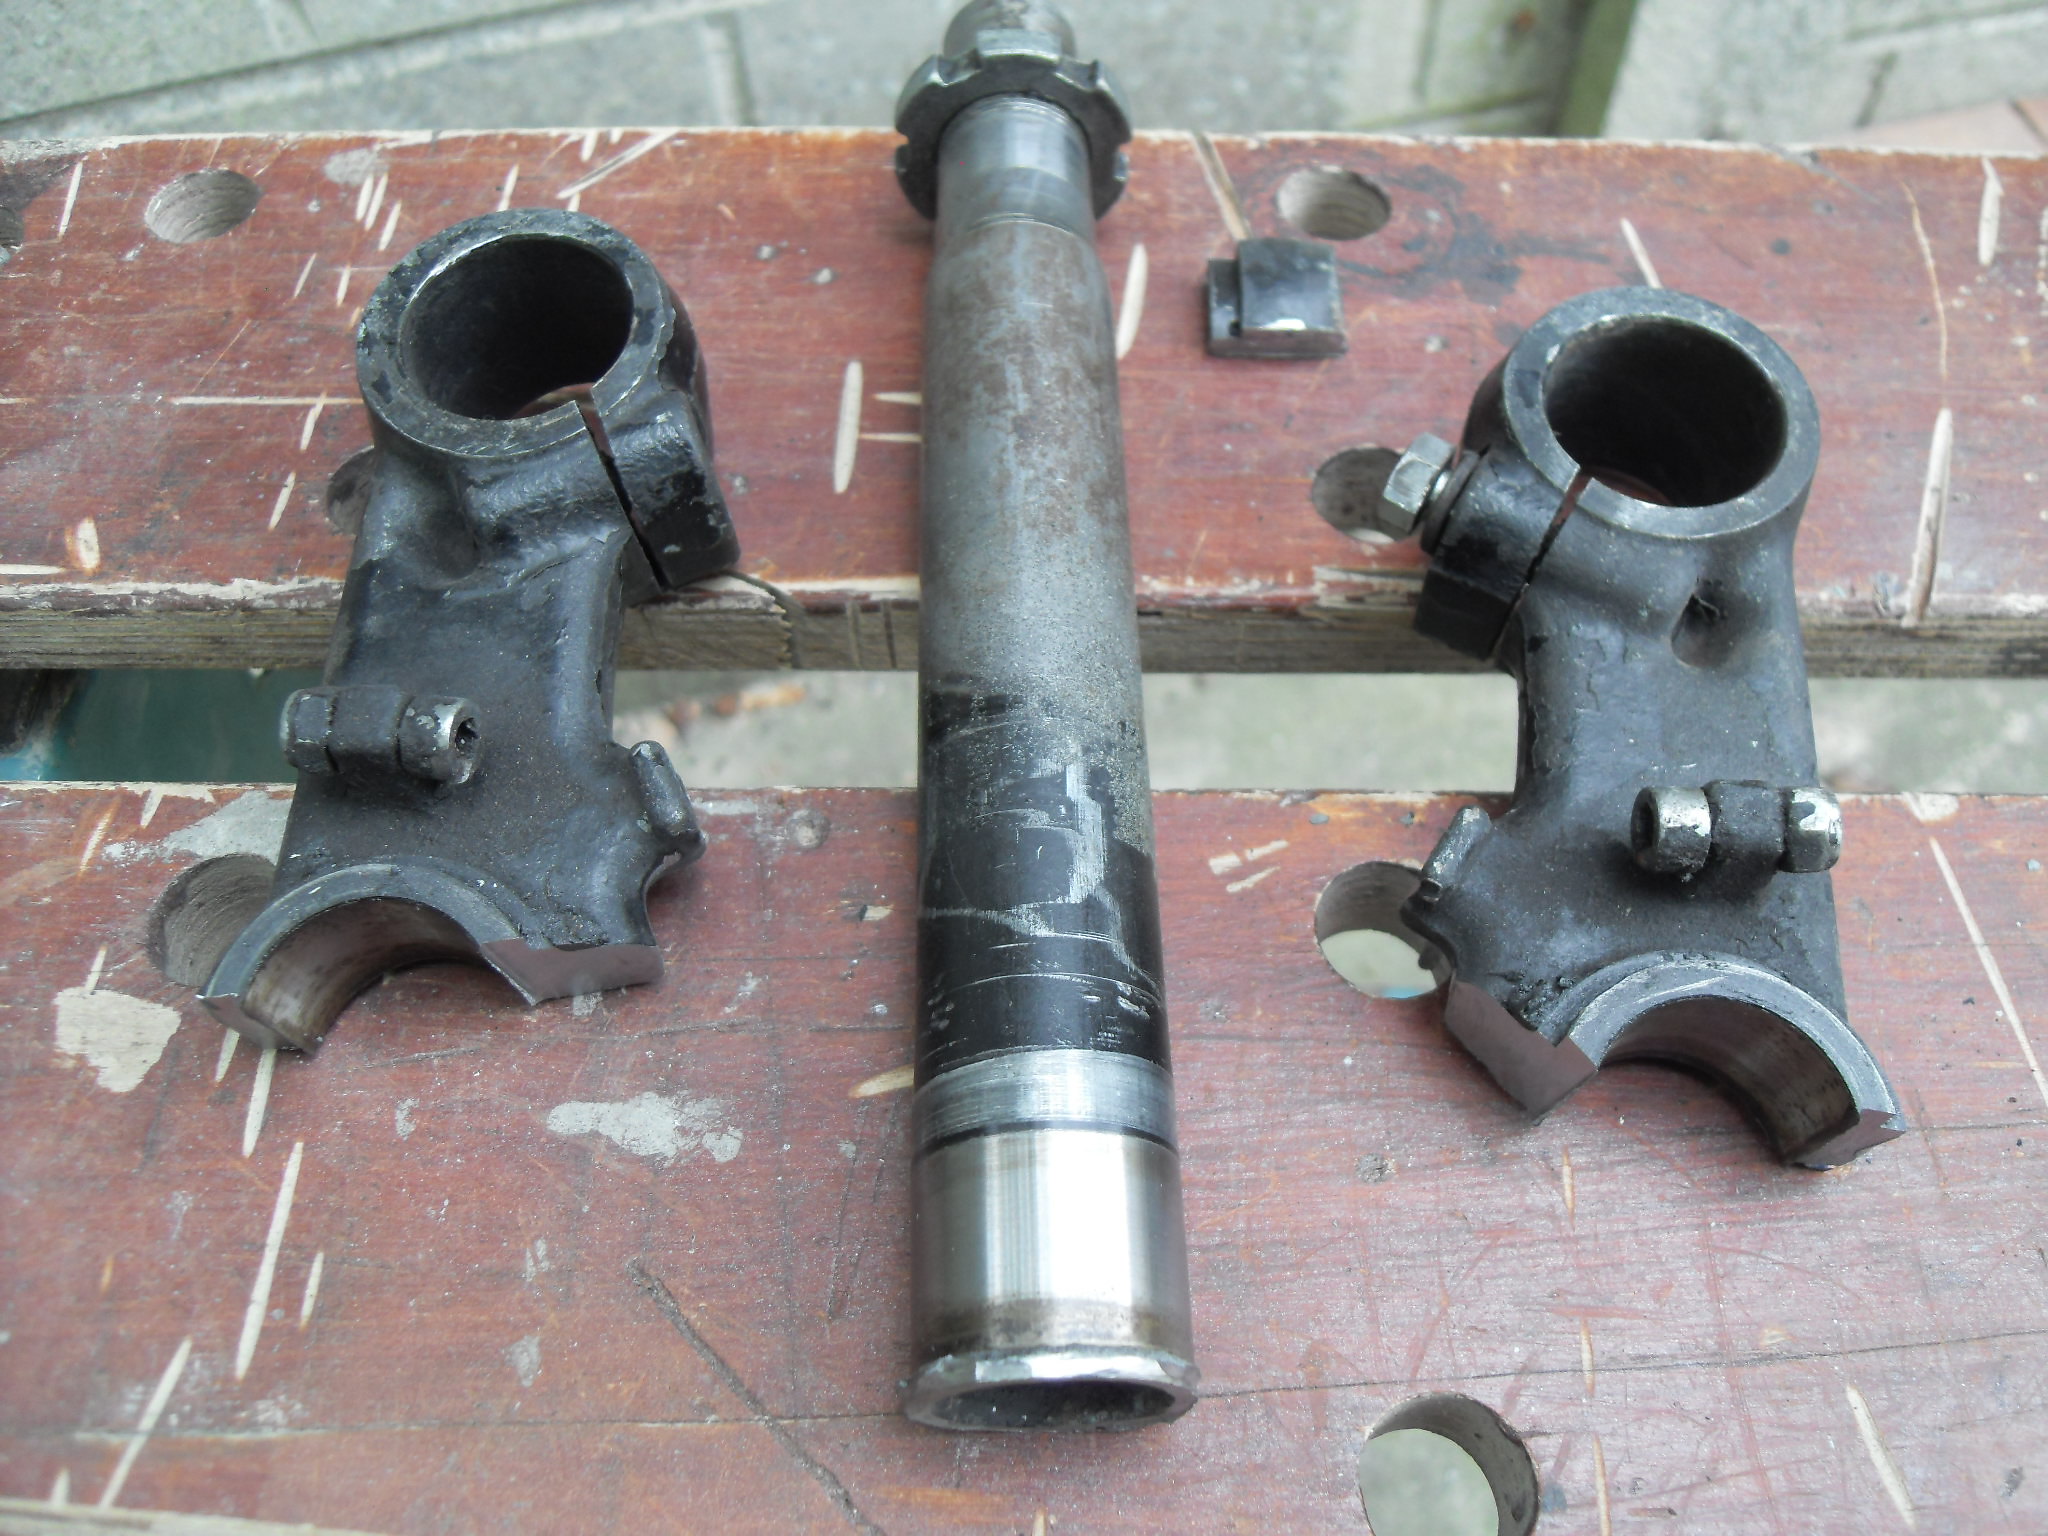 |
|
|
|
Post by yamark on Oct 15, 2018 6:46:56 GMT 1
Hi Mark i have made the same fork conversion on my 4LO. If you use the yokes from the R6 you will have a limited steering lock (if using the R6 clipons). This works out ok for a bike used on tracks but is a bit of a pain for daily use. I asked Andy (spondon440) to make me a pair of yokes for the 5eb forks with more offset. I still havent fitted them yet as i still use my bike for trackdays etc. Hi Tobyjugs, I'm planning on using bar risers, so I hope the steering lock will be OK- better than RGV setup I have on the triple  . . Like most of the guys on here, my back wouldn't thank me if I used clip-ons.
|
|
|
|
Post by yamark on Oct 15, 2018 6:49:58 GMT 1
Great work Mark! Ohh, thats the basis for 2 fork tools right there, dont chuck em away...! if you dont want em and the post isnt killer... {whistles}... lol Jon, DOH - already gone to a scappy. I definitely missed that one! |
|
|
|
Post by yamark on Oct 15, 2018 7:12:11 GMT 1
Sorry for the late replies and update on the build, super busy week and late back from the Stafford Show.
Moving on to the R6 yoke
 SDC11559 SDC11559
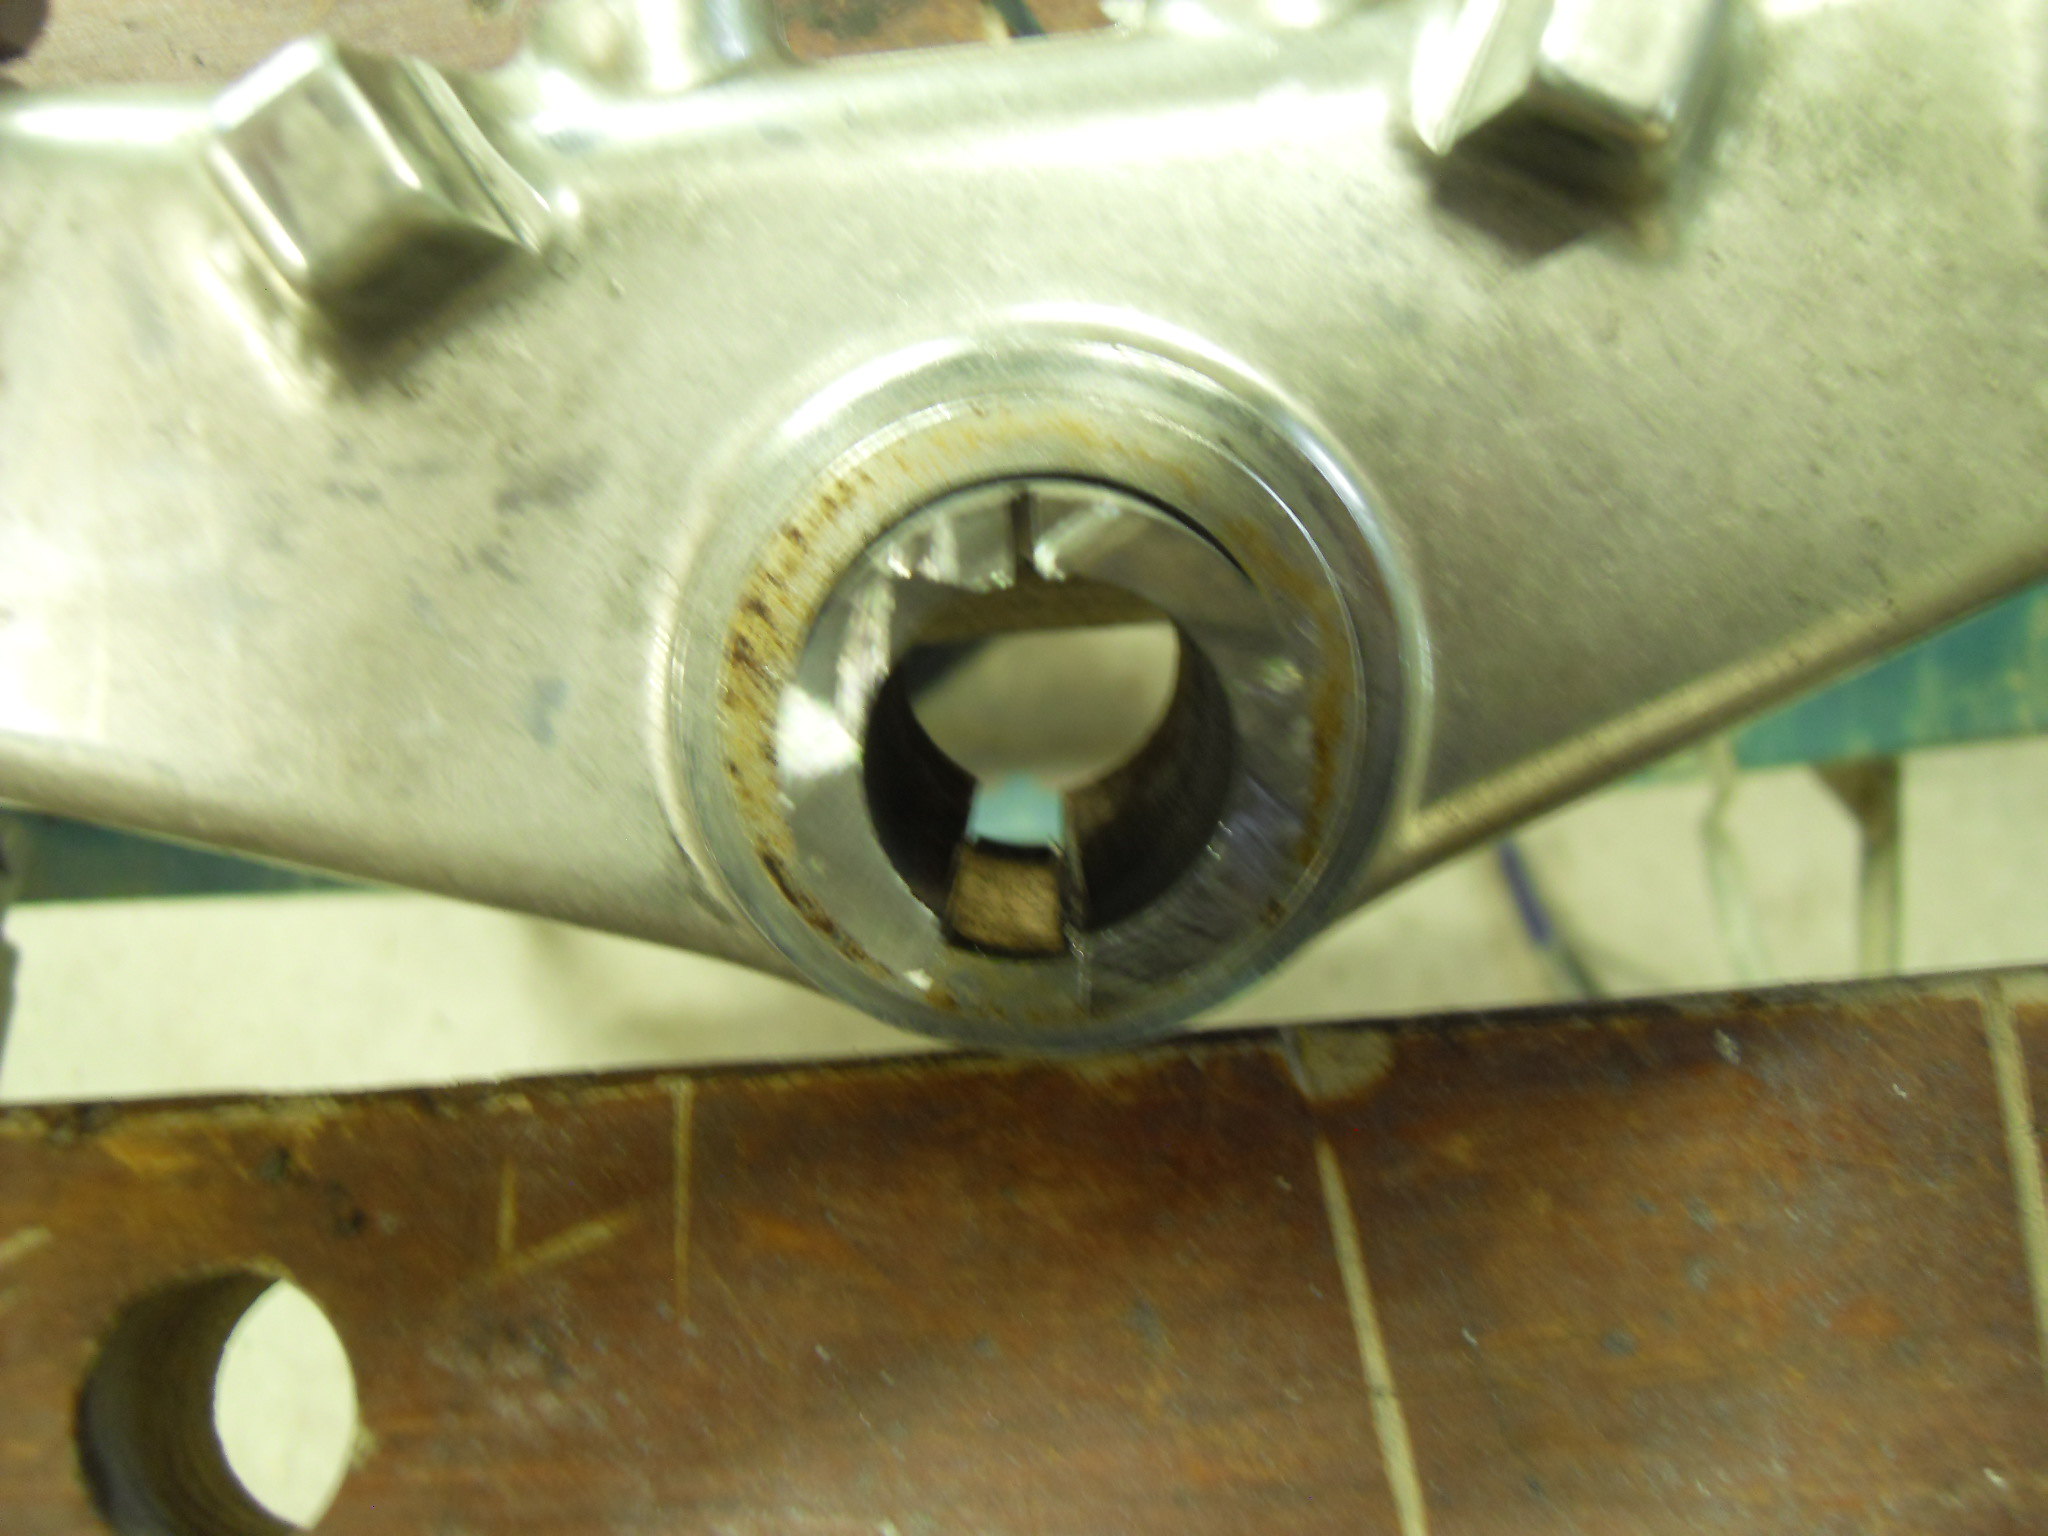
As the stem is not needed, once again I'll remove it, damaging the stem, but taking care of the lower yoke. So I cut off the stem first using an angle grinder
 SDC11560 SDC11560
I then had to get rid of the remains of the lower bearing
 SDC11561 SDC11561
Next, I cut a couple of slots in the remaining stem
 SDC11562 SDC11562
I plan to saw the remaining tube out (3 slots) and crush the tube inwards so to not damage the alloy yoke. Once removed I can check the fit to the LC stem I'll let you know how that goes next week.
Cheers, Mark
|
|
|
|
Post by mikee on Oct 16, 2018 9:39:20 GMT 1
I usually just put them in the lathe and bore them out , but they will press out too
mike
|
|
|
|
Post by Tobyjugs on Oct 16, 2018 11:30:50 GMT 1
I warmed the ally up and pressed the stem out.
|
|
|
|
RD700LC
Oct 16, 2018 12:05:54 GMT 1
via mobile
Post by midlifecrisisrd on Oct 16, 2018 12:05:54 GMT 1
Looks similar to the Fazer yoke i just did
Bearing inner sizes were same as rd so I got my local engineer to cut the threads and plain section 20mm further down the stem then cut 20mm off the end.
Is the r6 stem pressed in with a circlip on the bottom to stop it pressing through
I was going to do it the same way as you but chickened out as wasn't brave enough to start cutting
Steve
|
|
|
|
Post by yamark on Oct 17, 2018 9:49:20 GMT 1
Looks similar to the Fazer yoke i just did Bearing inner sizes were same as rd so I got my local engineer to cut the threads and plain section 20mm further down the stem then cut 20mm off the end. Is the r6 stem pressed in with a circlip on the bottom to stop it pressing through I was going to do it the same way as you but chickened out as wasn't brave enough to start cutting Steve Hi Steve, your choice sounds like a neat solution. Yes the R6 stem has a circlip at the bottom. I didn't chicken out (it's the "mad professor" within me that gives me Dutch courage!)
Tobyjugs - I don't own a press, and I was quoted £80-£100 for a stem swap, so I thought I'd give it a go myself
|
|
|
|
RD700LC
Oct 17, 2018 10:25:58 GMT 1
via mobile
Post by midlifecrisisrd on Oct 17, 2018 10:25:58 GMT 1
The cost of the stem swap frightened me off too
The engineer said one of the threads was weird as between 2 metric sizes
He did it on a lathe and still cost £70
Steve
|
|
|
|
RD700LC
Oct 17, 2018 11:13:30 GMT 1
via mobile
Post by Tobyjugs on Oct 17, 2018 11:13:30 GMT 1
Looks similar to the Fazer yoke i just did Bearing inner sizes were same as rd so I got my local engineer to cut the threads and plain section 20mm further down the stem then cut 20mm off the end. Is the r6 stem pressed in with a circlip on the bottom to stop it pressing through I was going to do it the same way as you but chickened out as wasn't brave enough to start cutting Steve Hi Steve, your choice sounds like a neat solution. Yes the R6 stem has a circlip at the bottom. I didn't chicken out (it's the "mad professor" within me that gives me Dutch courage!)
Tobyjugs - I don't own a press, and I was quoted £80-£100 for a stem swap, so I thought I'd give it a go myself
I guess I forget how lucky I am for this sort of jobs |
|
|
|
Post by yamark on Oct 21, 2018 18:37:54 GMT 1
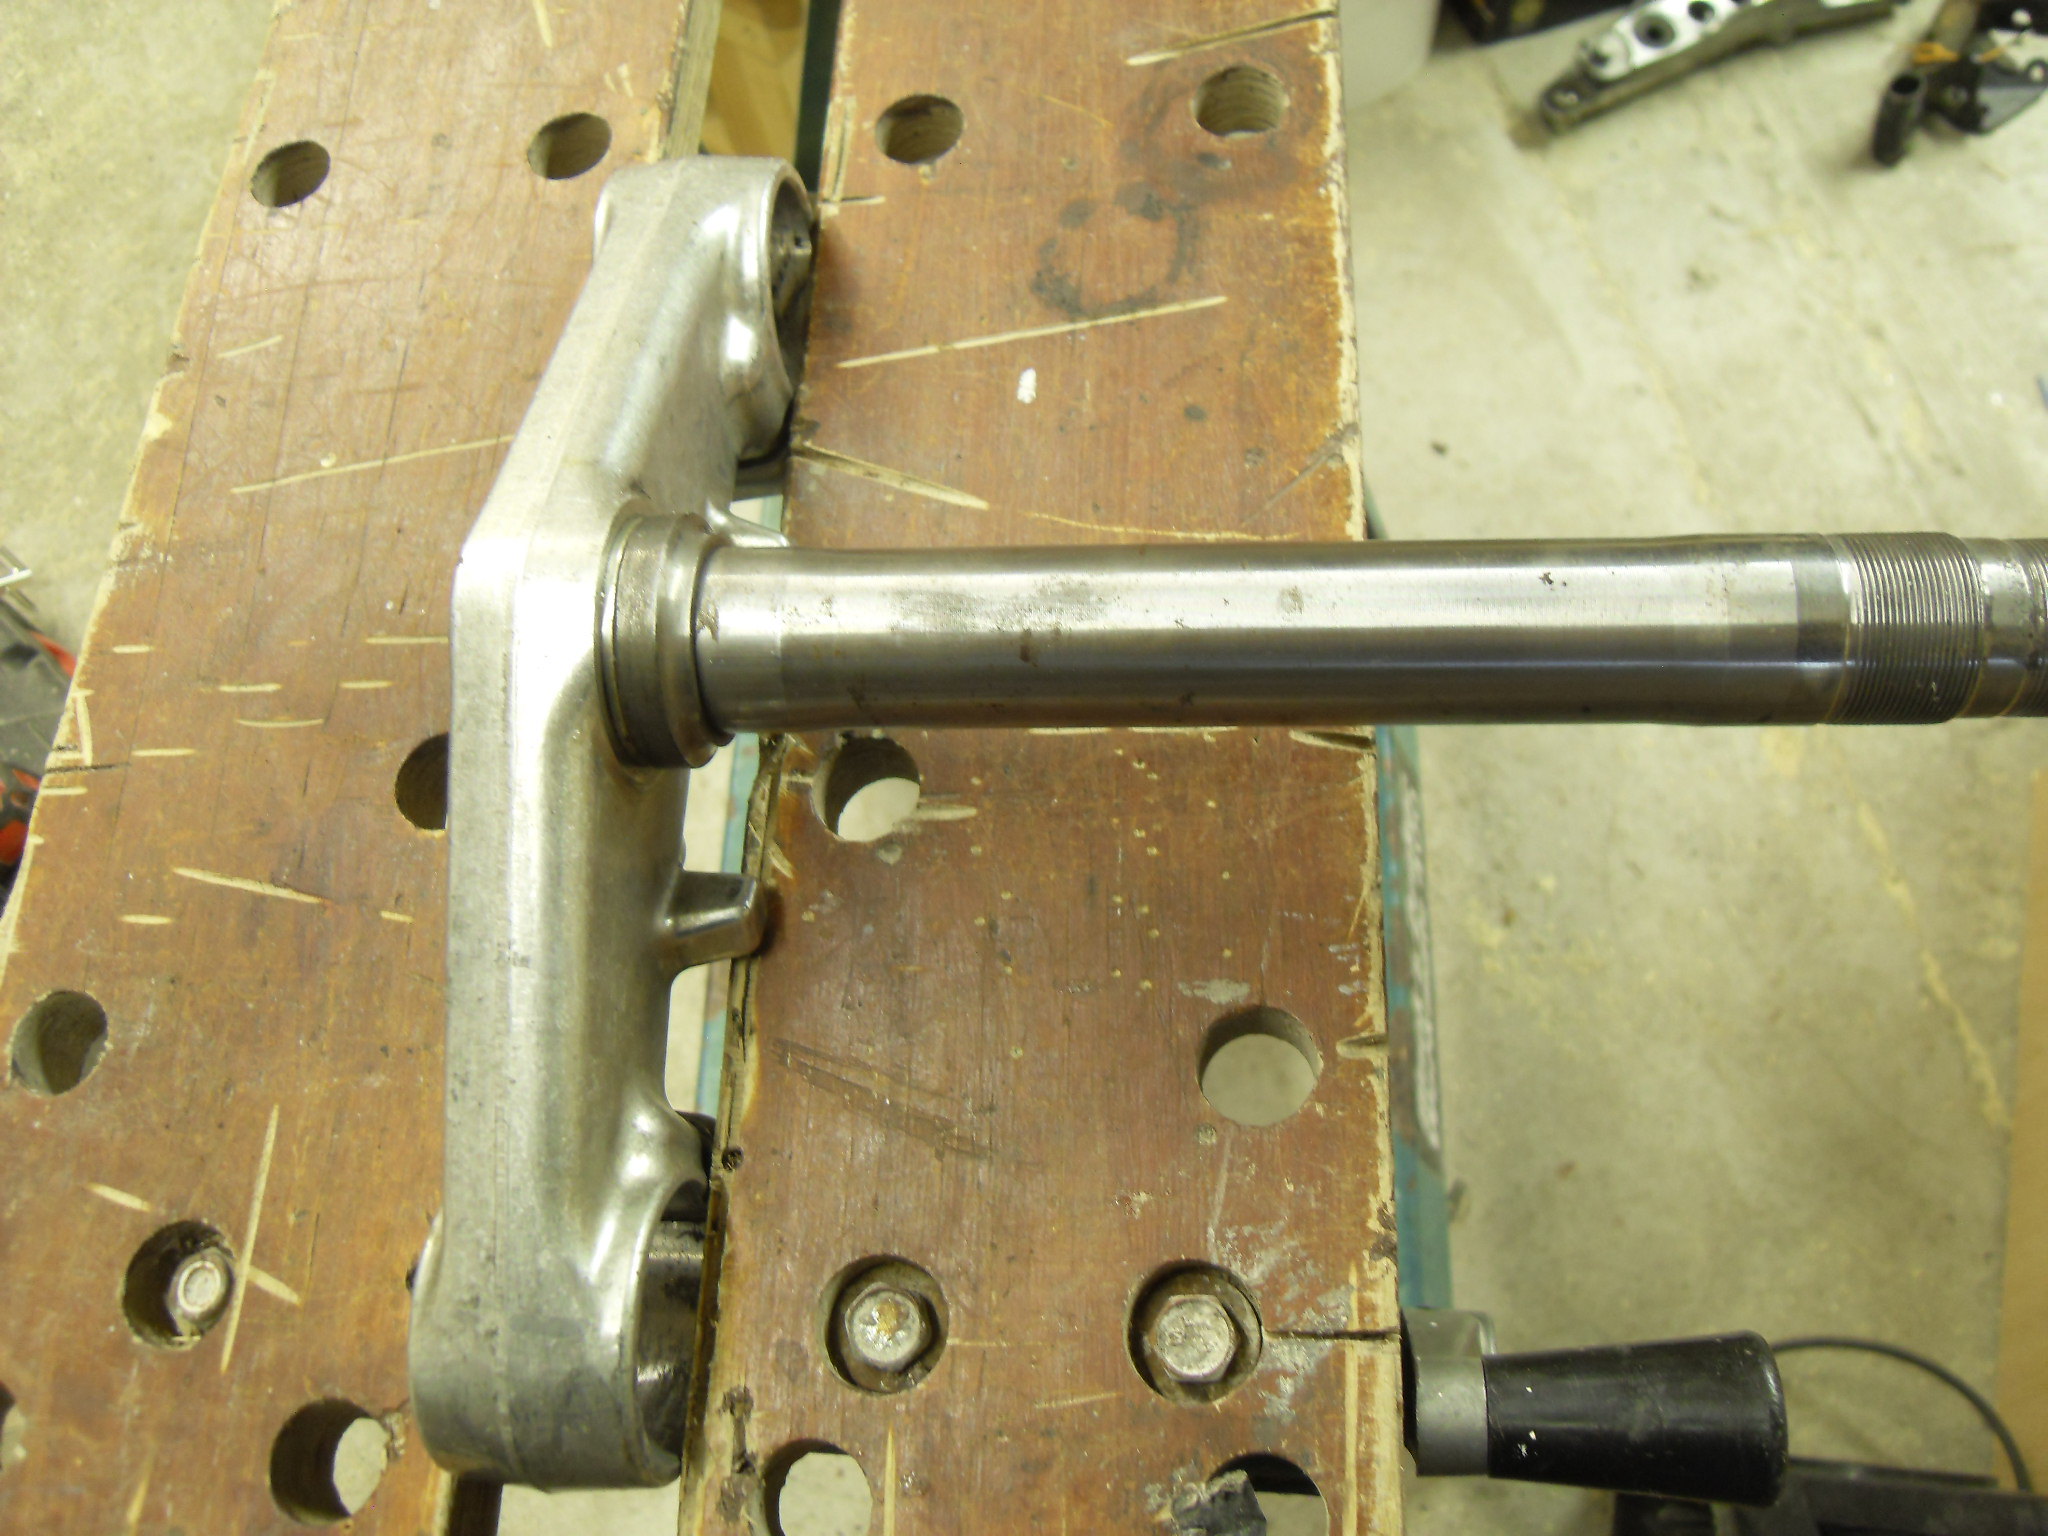
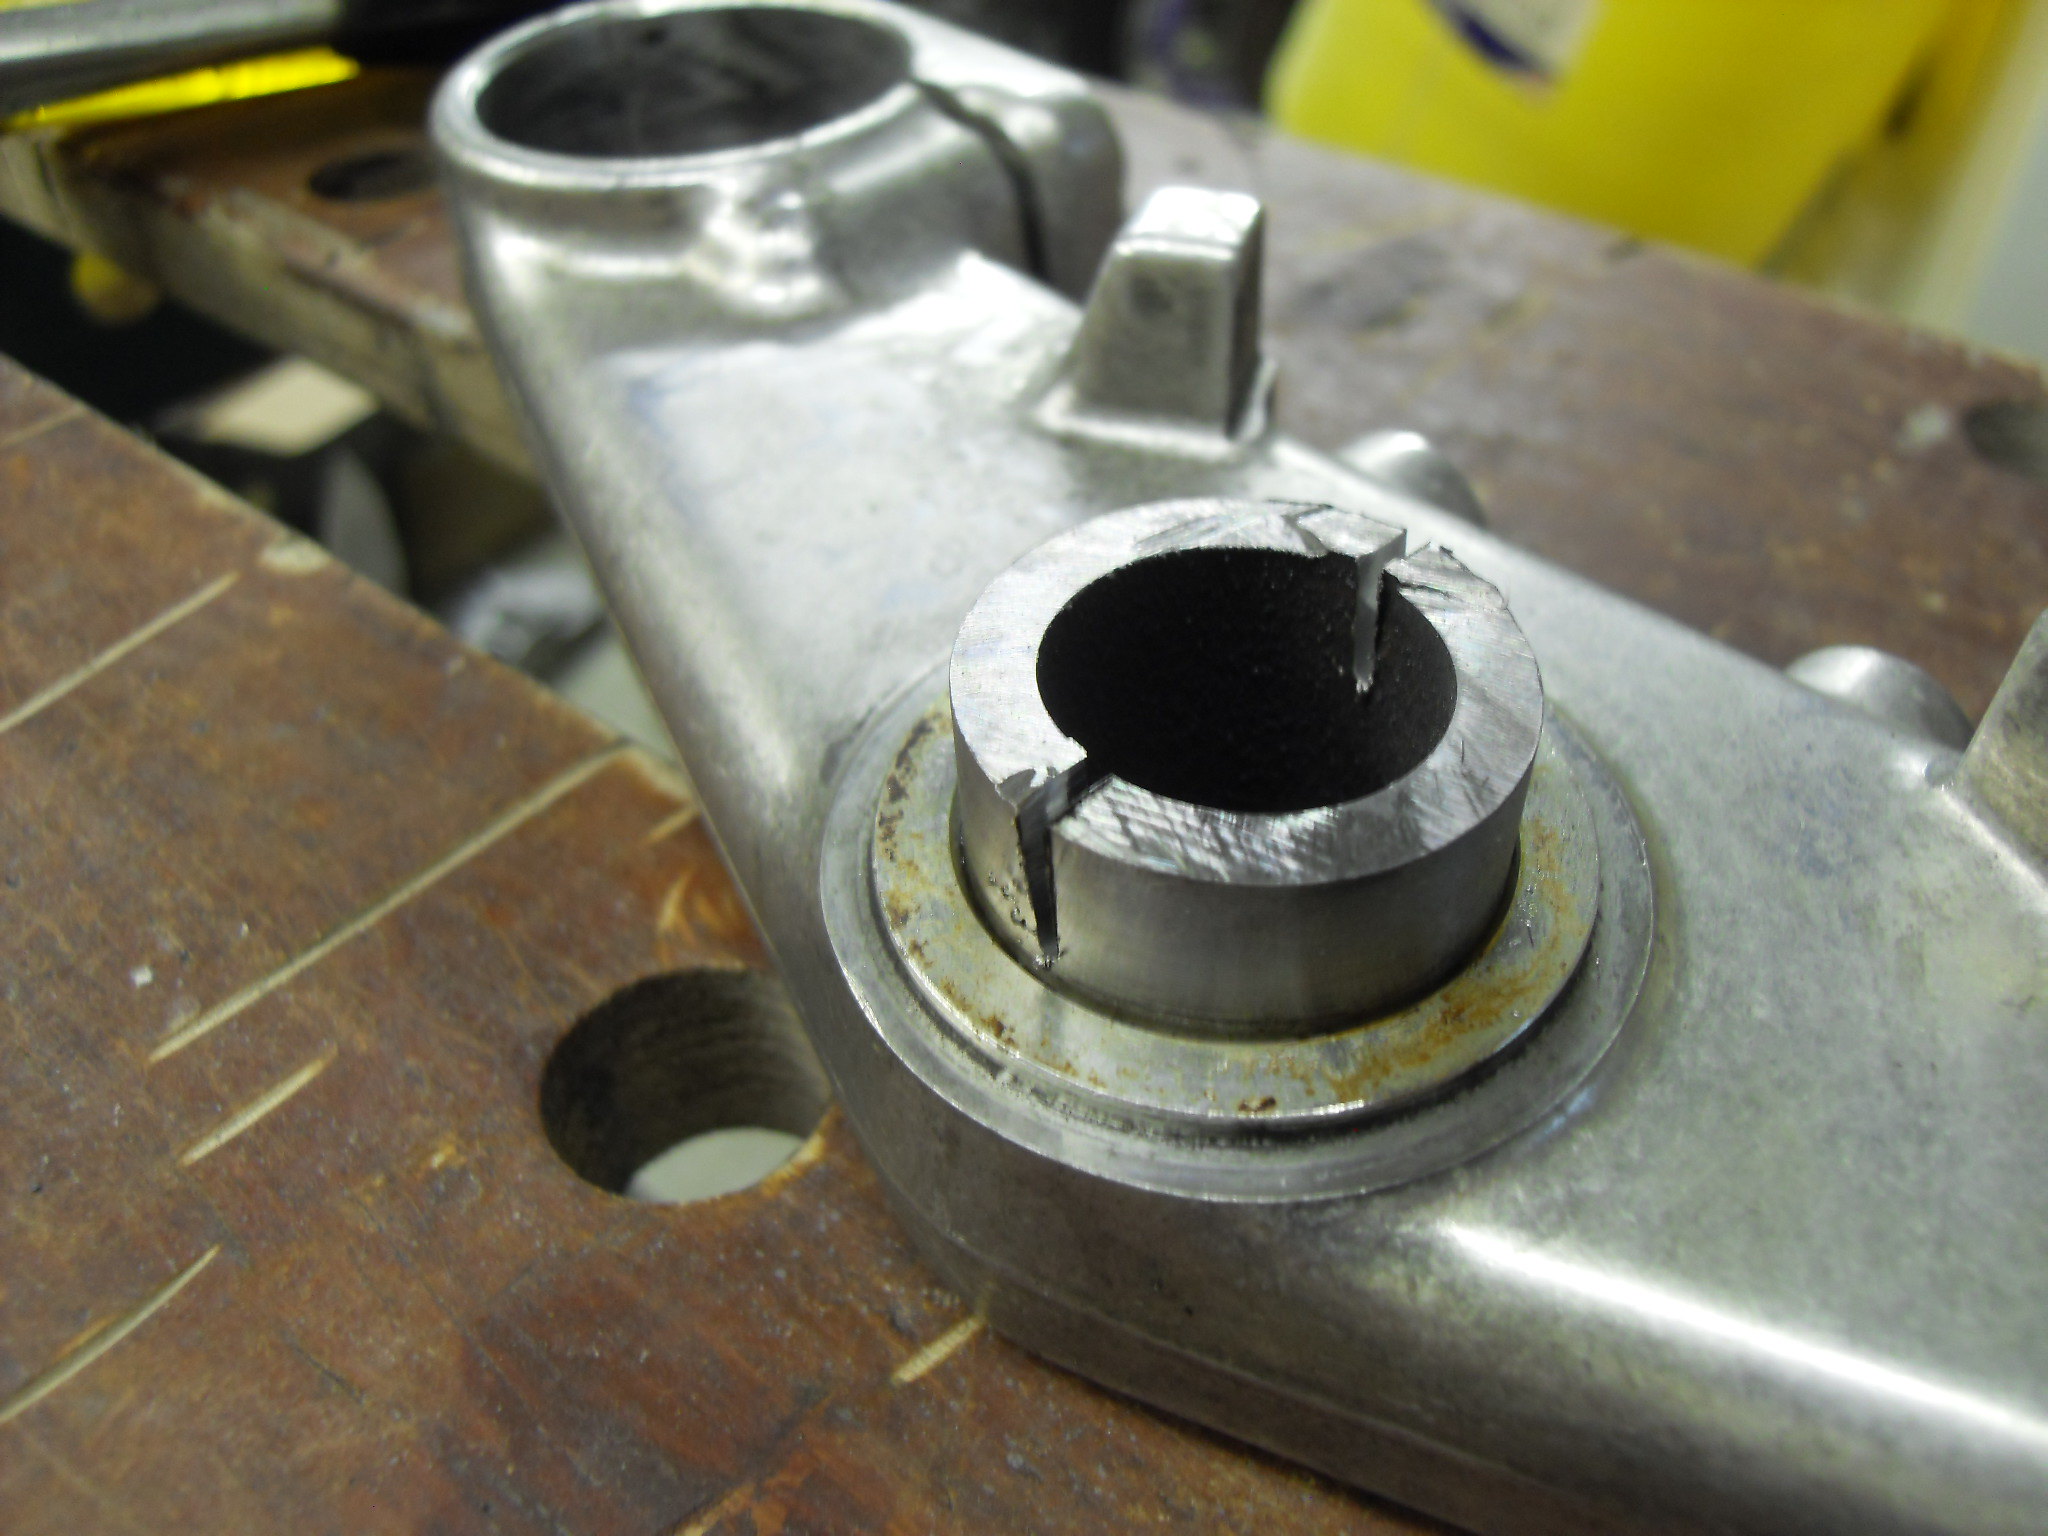
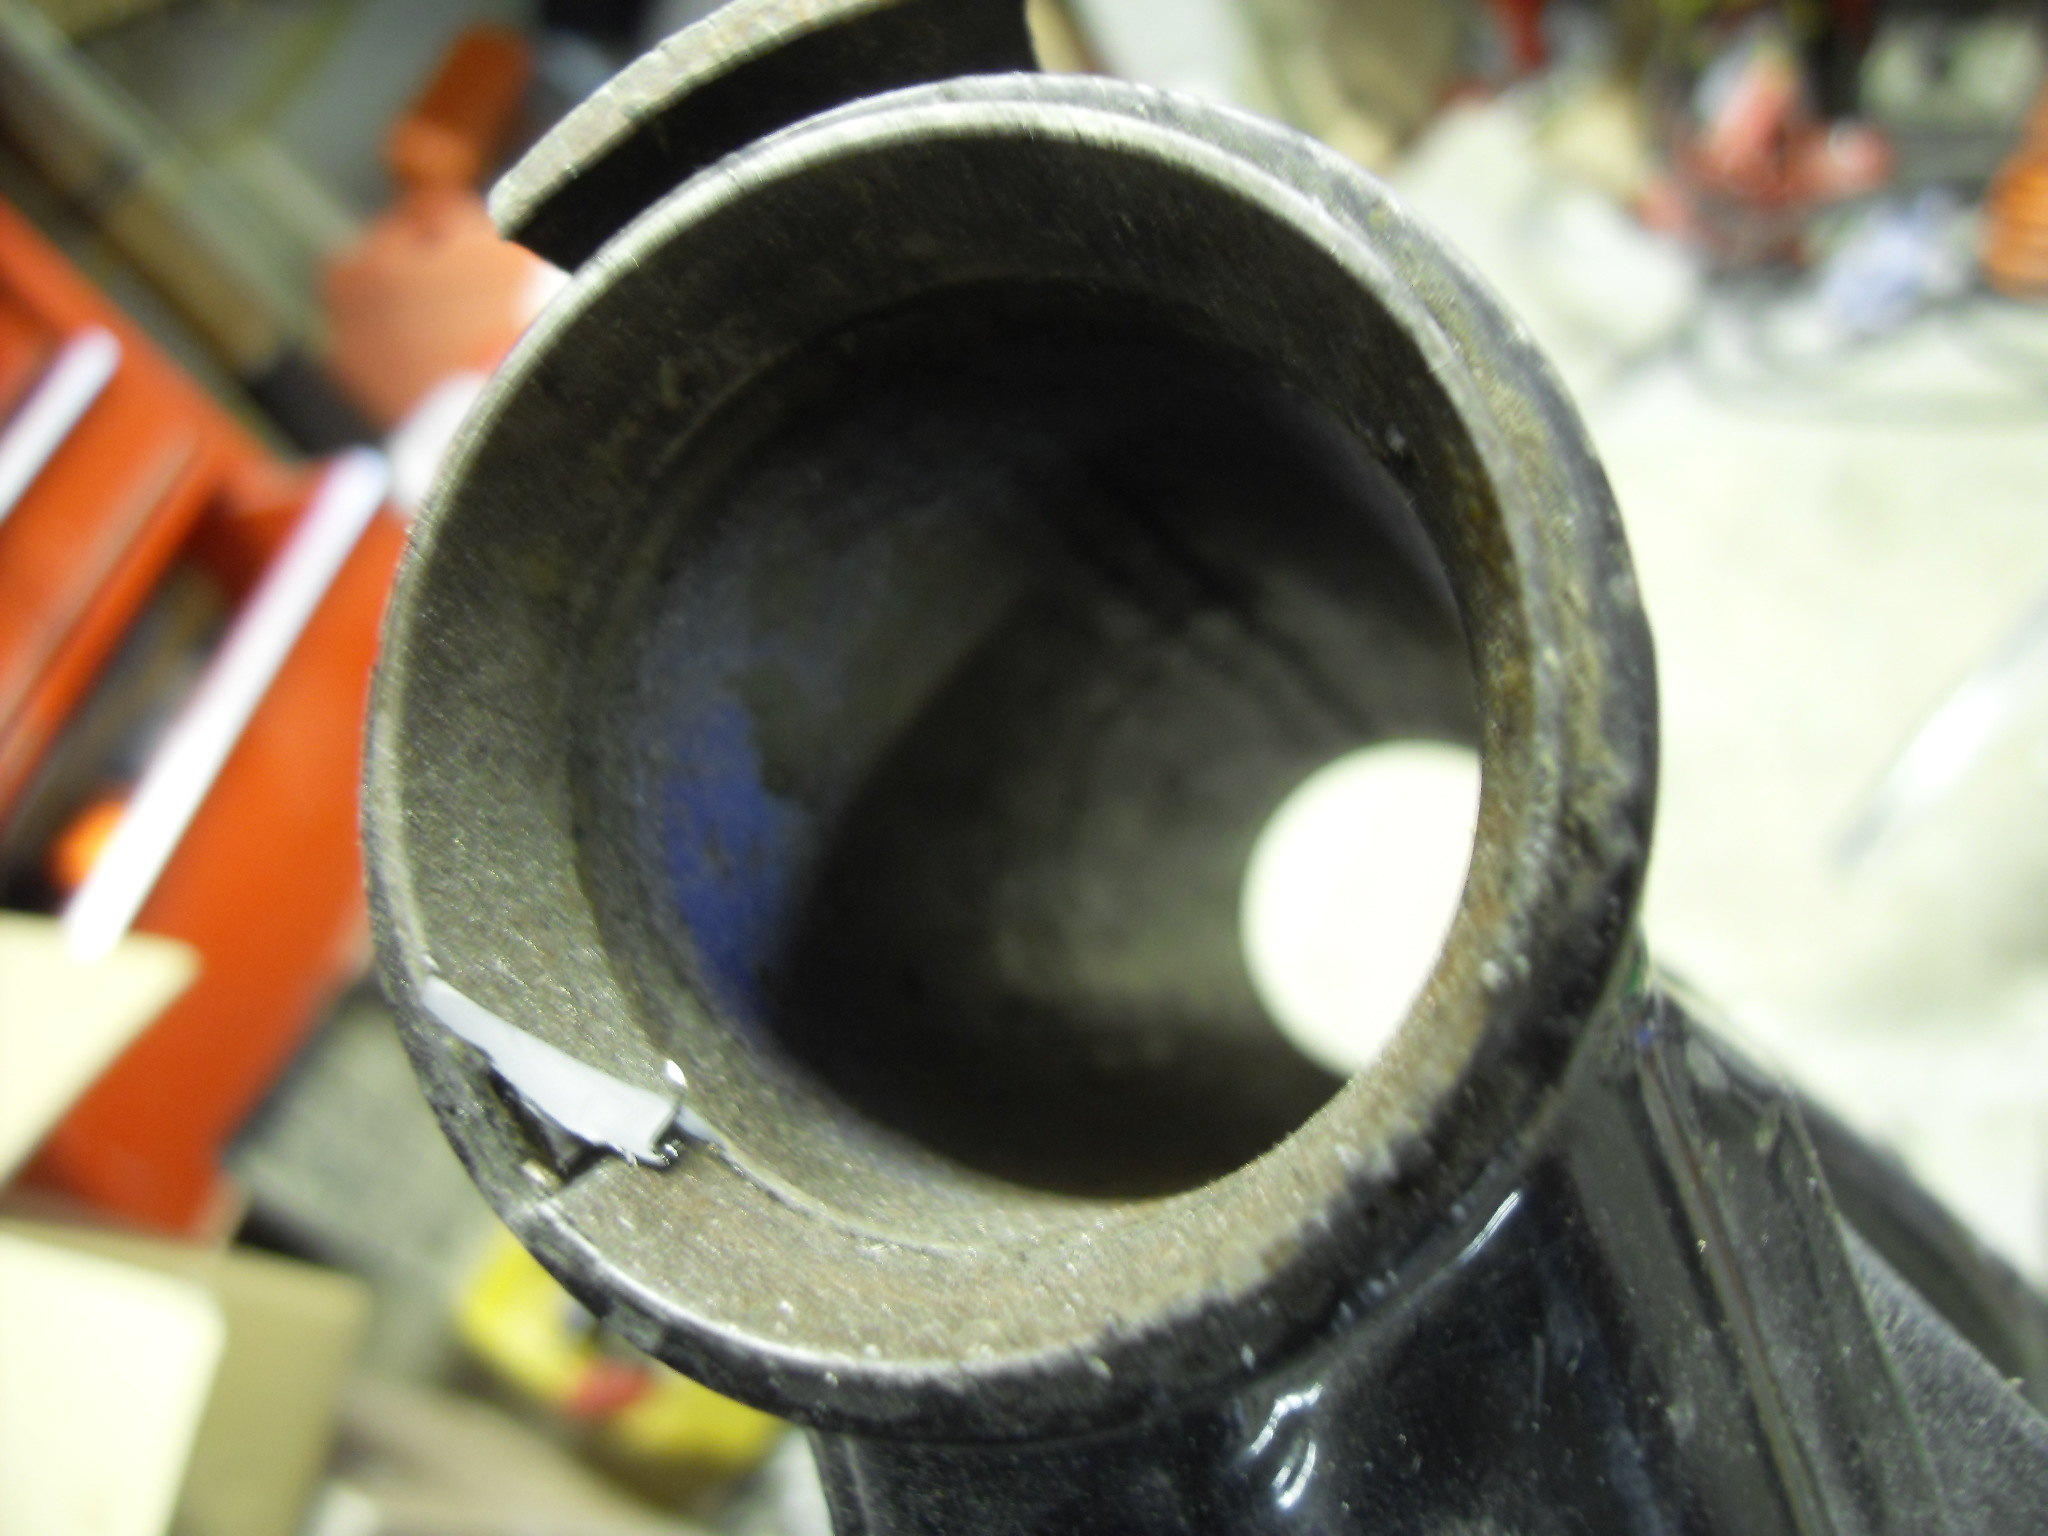
Onwards with the R6 lower yoke. After grinding the two slots in the remaining stem, I carefully used a hack saw to cut the slots inside the tube
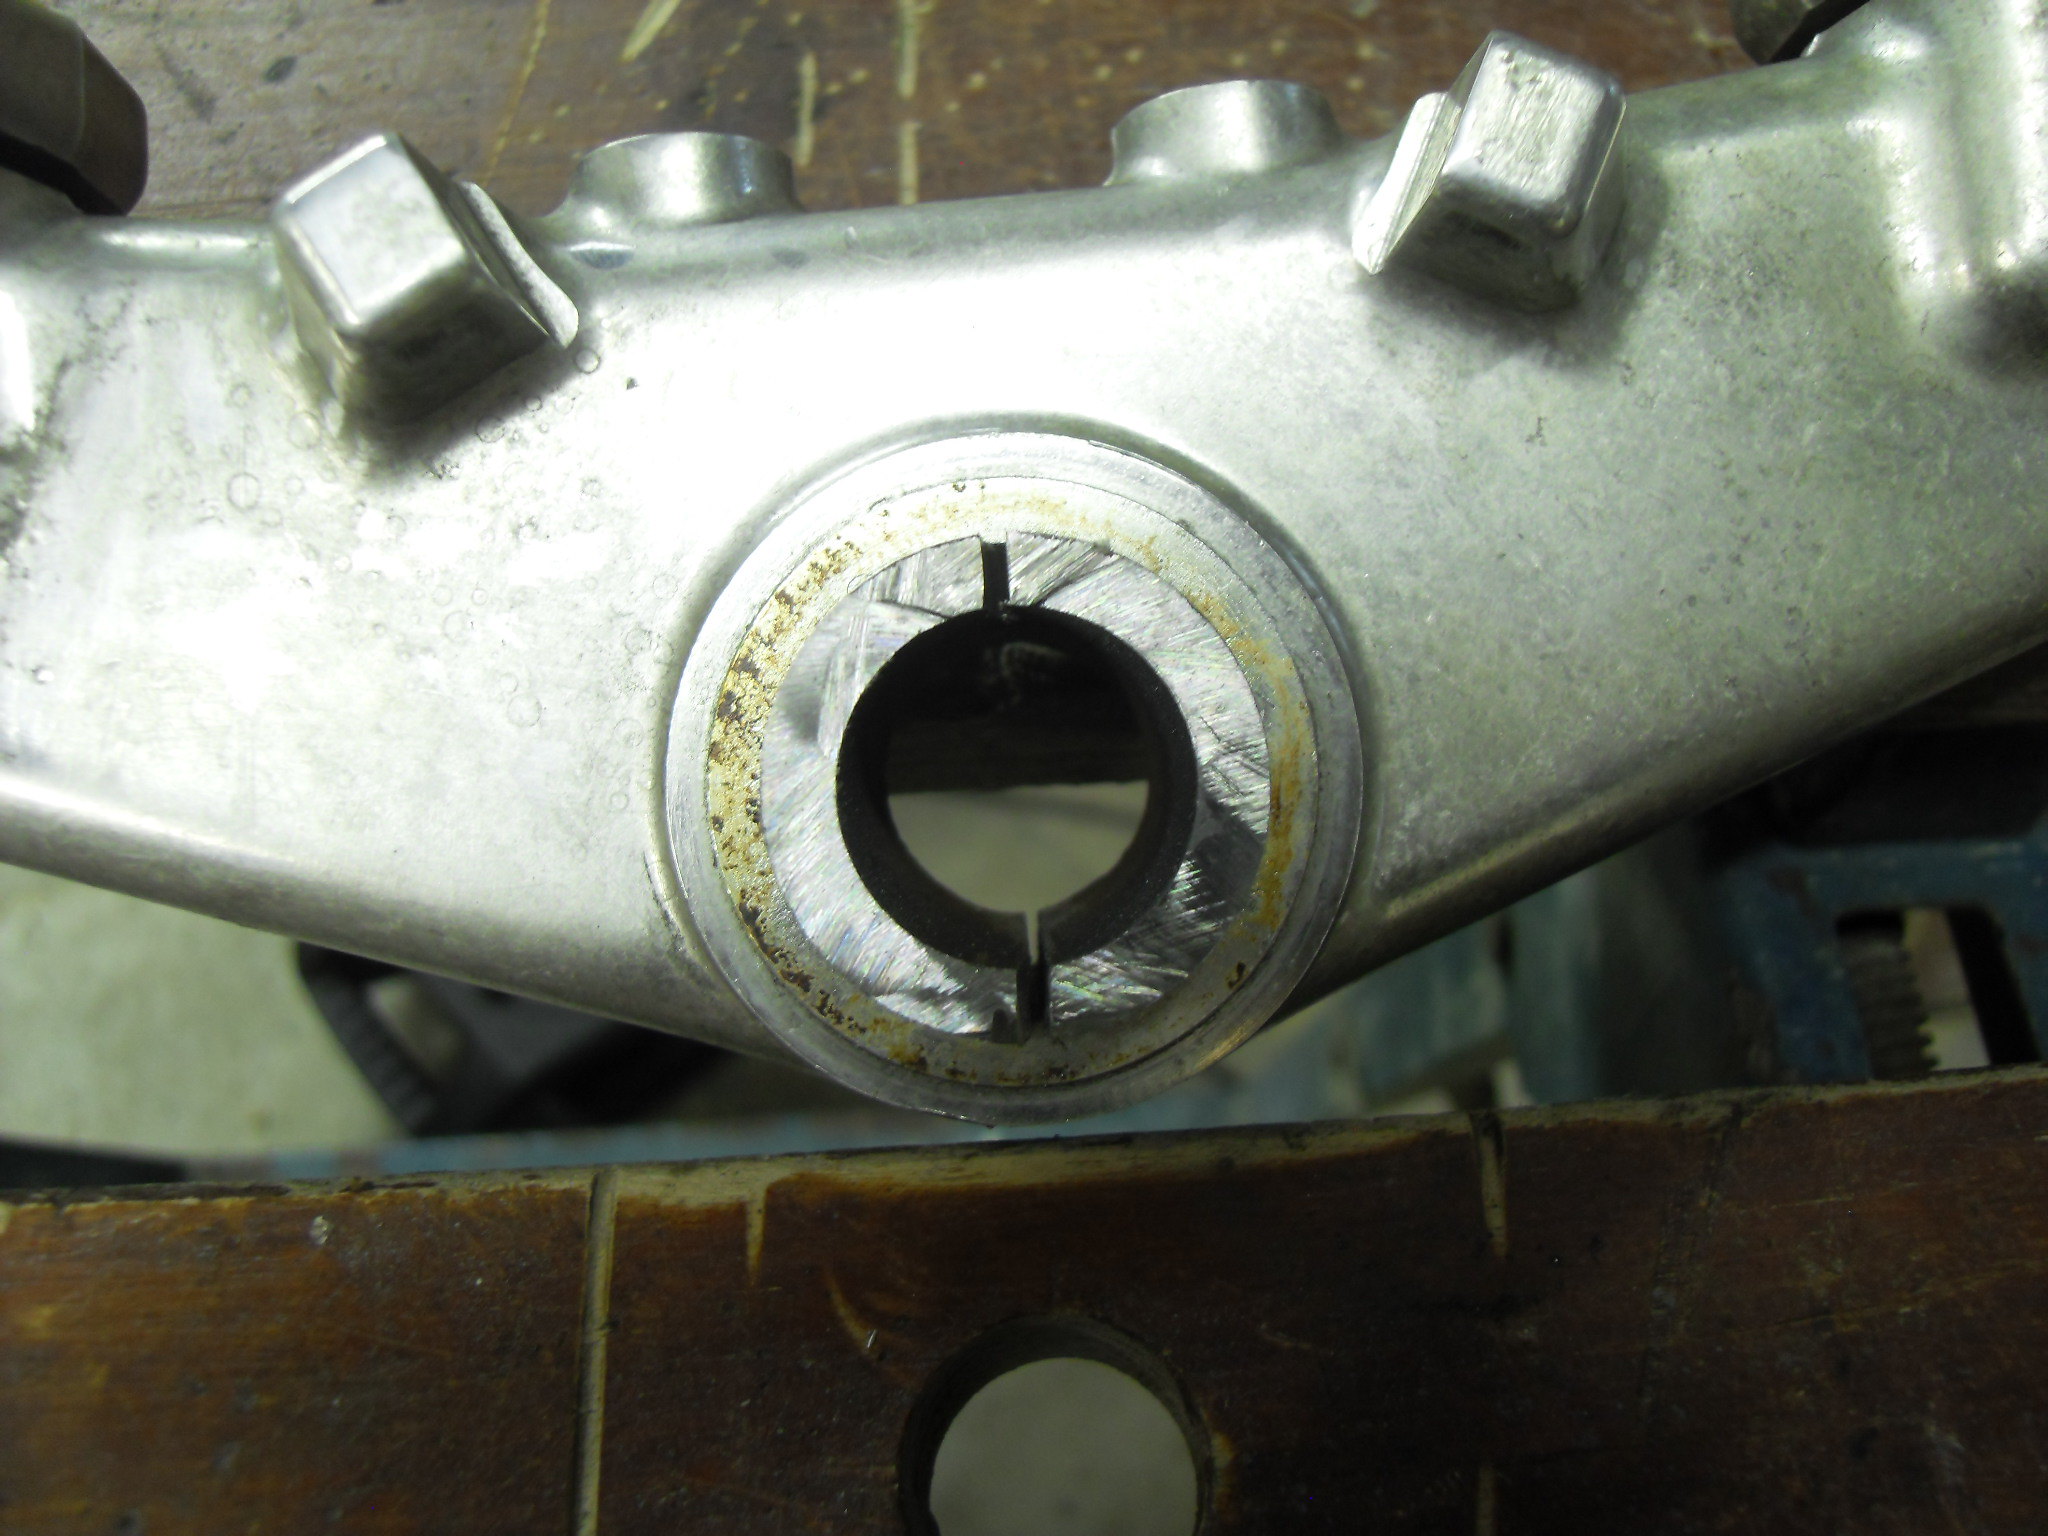 SDC11563 SDC11563
Next, another slot so I could remove a section of tube
 SDC11564 SDC11564
I then crushed the tube in a vice to reduce its diameter - you can now see the circlip that Steve mentioned (Midlifecrisisrd)
 SDC11565 SDC11565
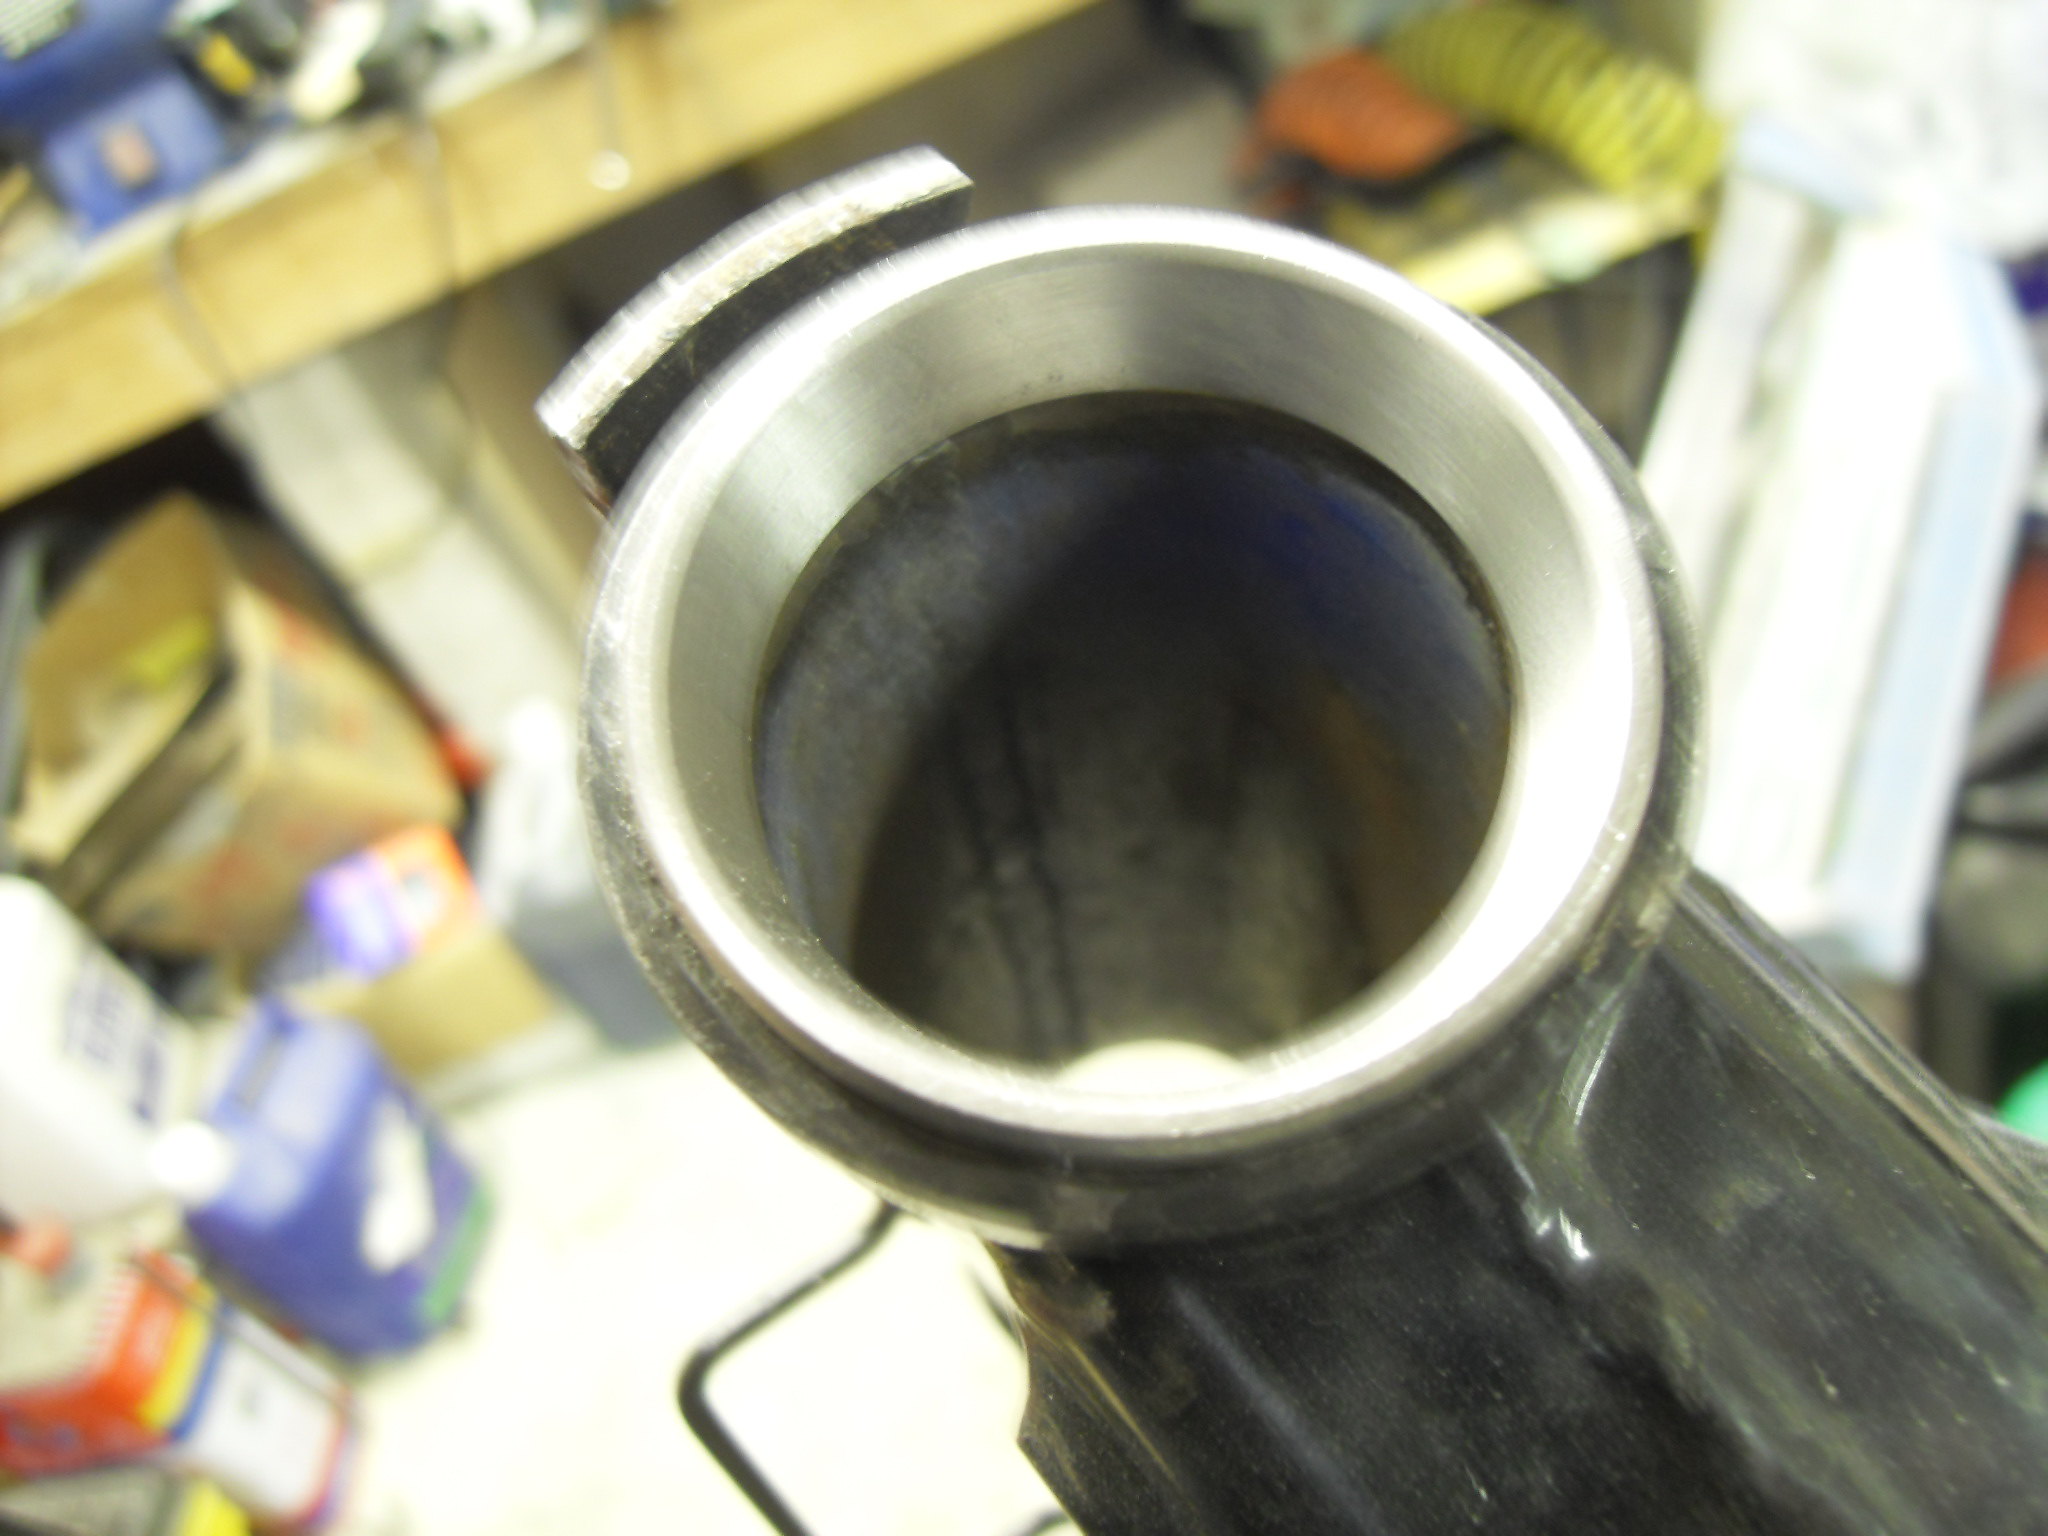
The R6 lower yoke without the stem
 SDC11566 SDC11566
A quick check with the LC stem fitted, it's a nice tight fit
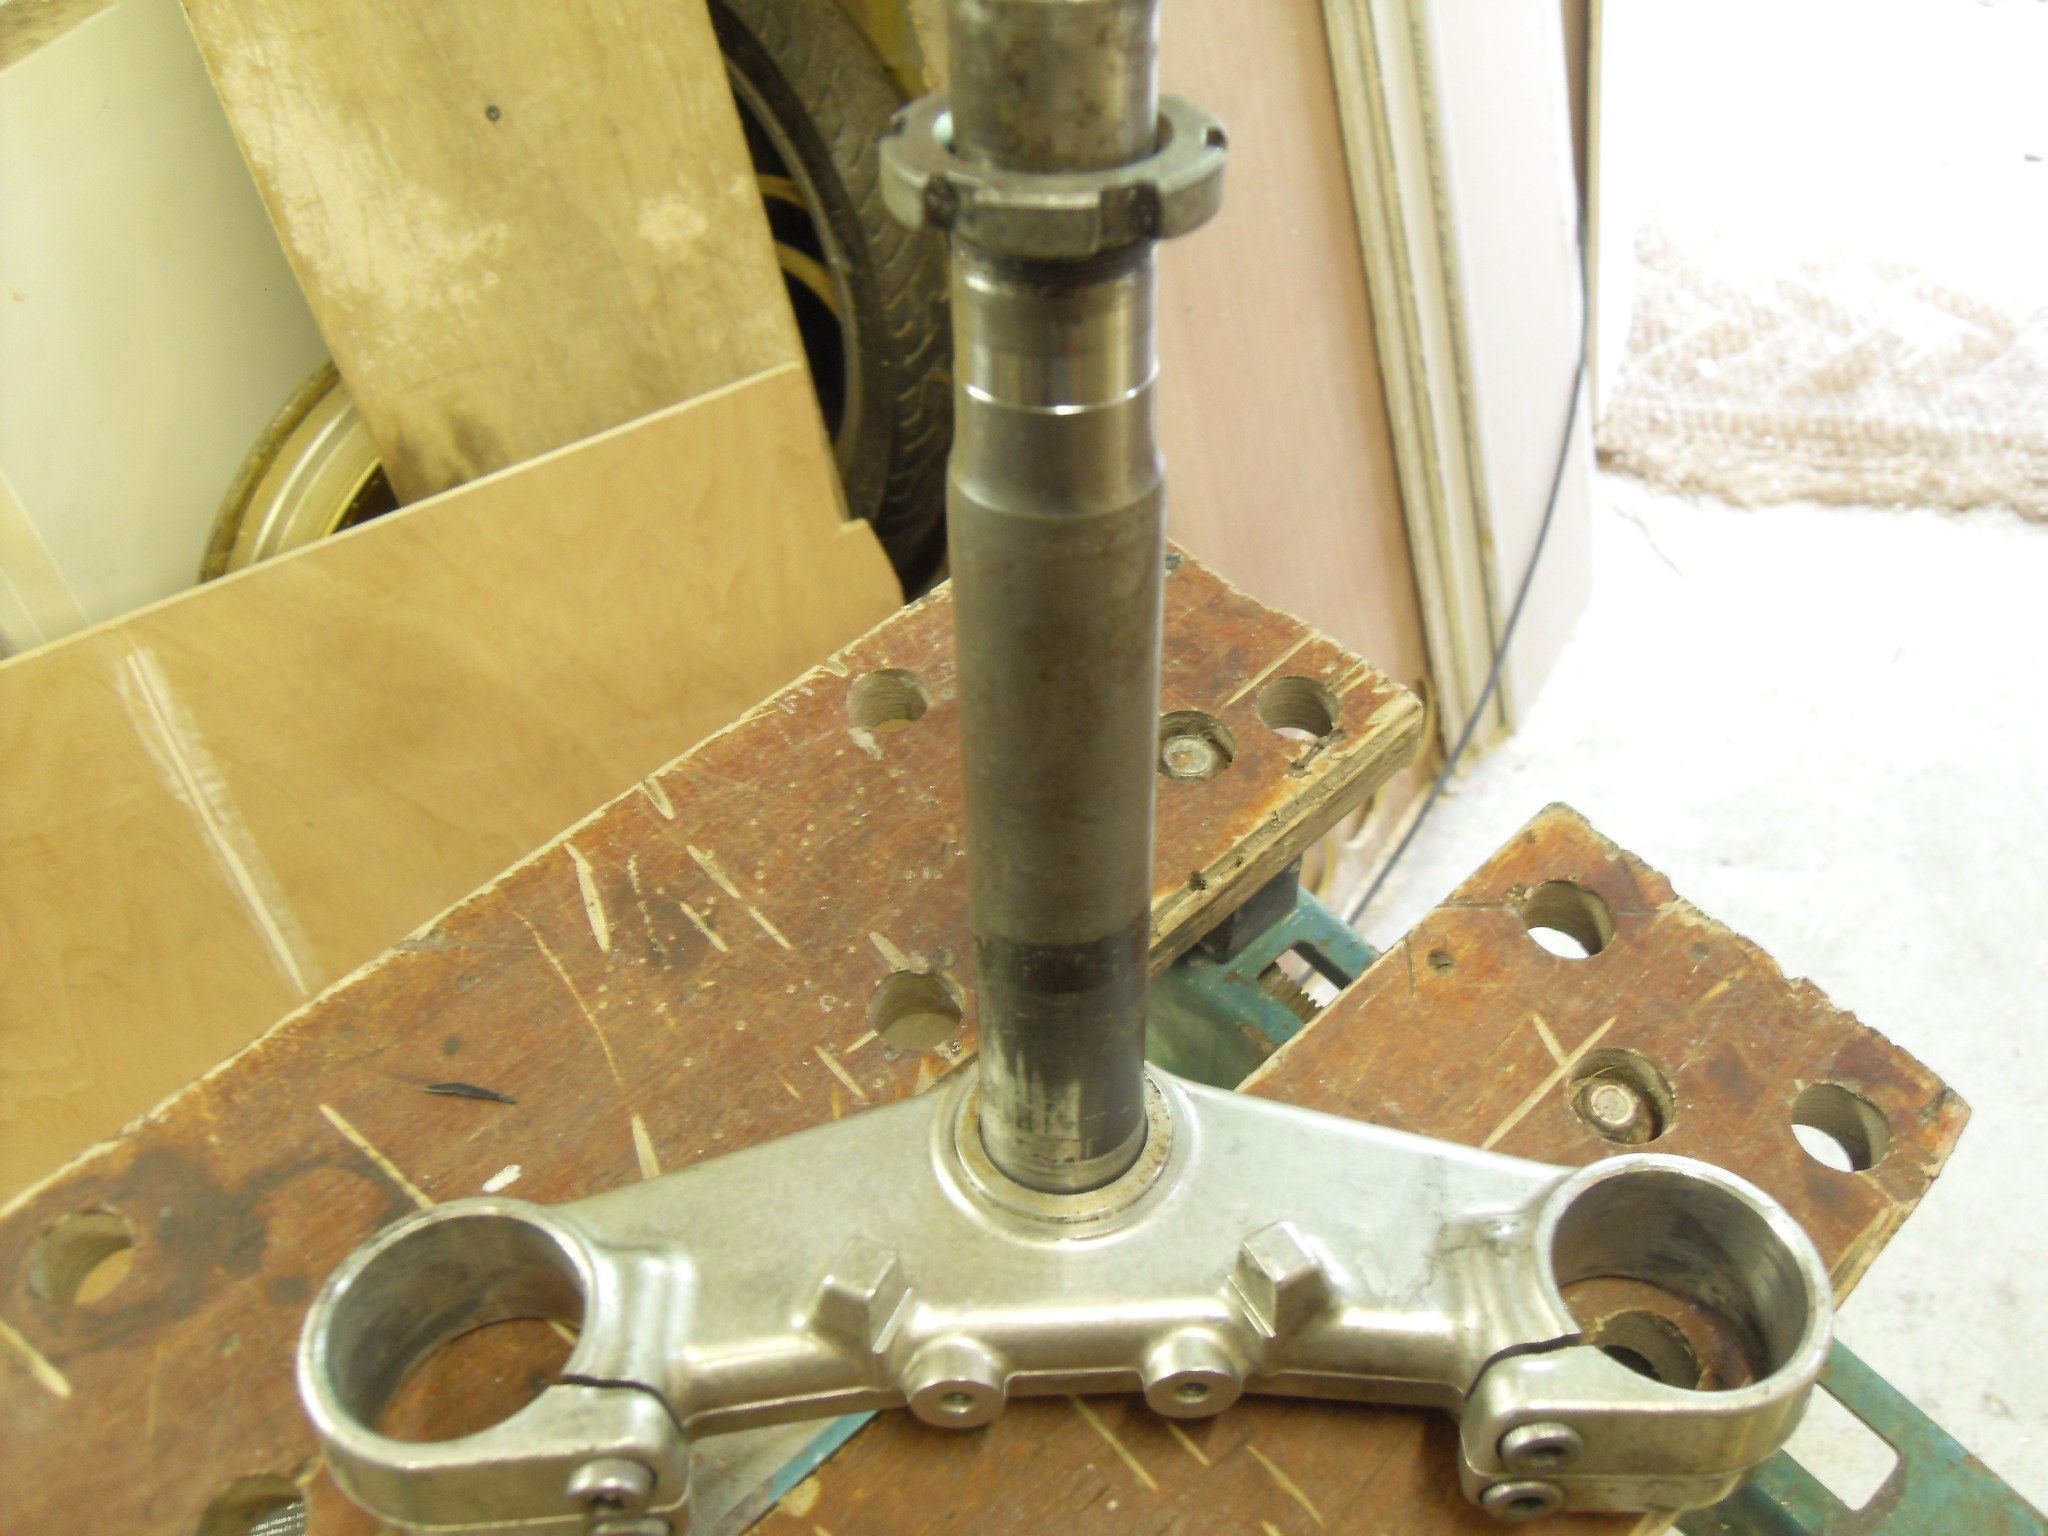 SDC11567 SDC11567
Now I have to work out spacers and bearings to make it all fit
Cheers, Mark
|
|
|
|
Post by yamark on Oct 28, 2018 19:29:54 GMT 1
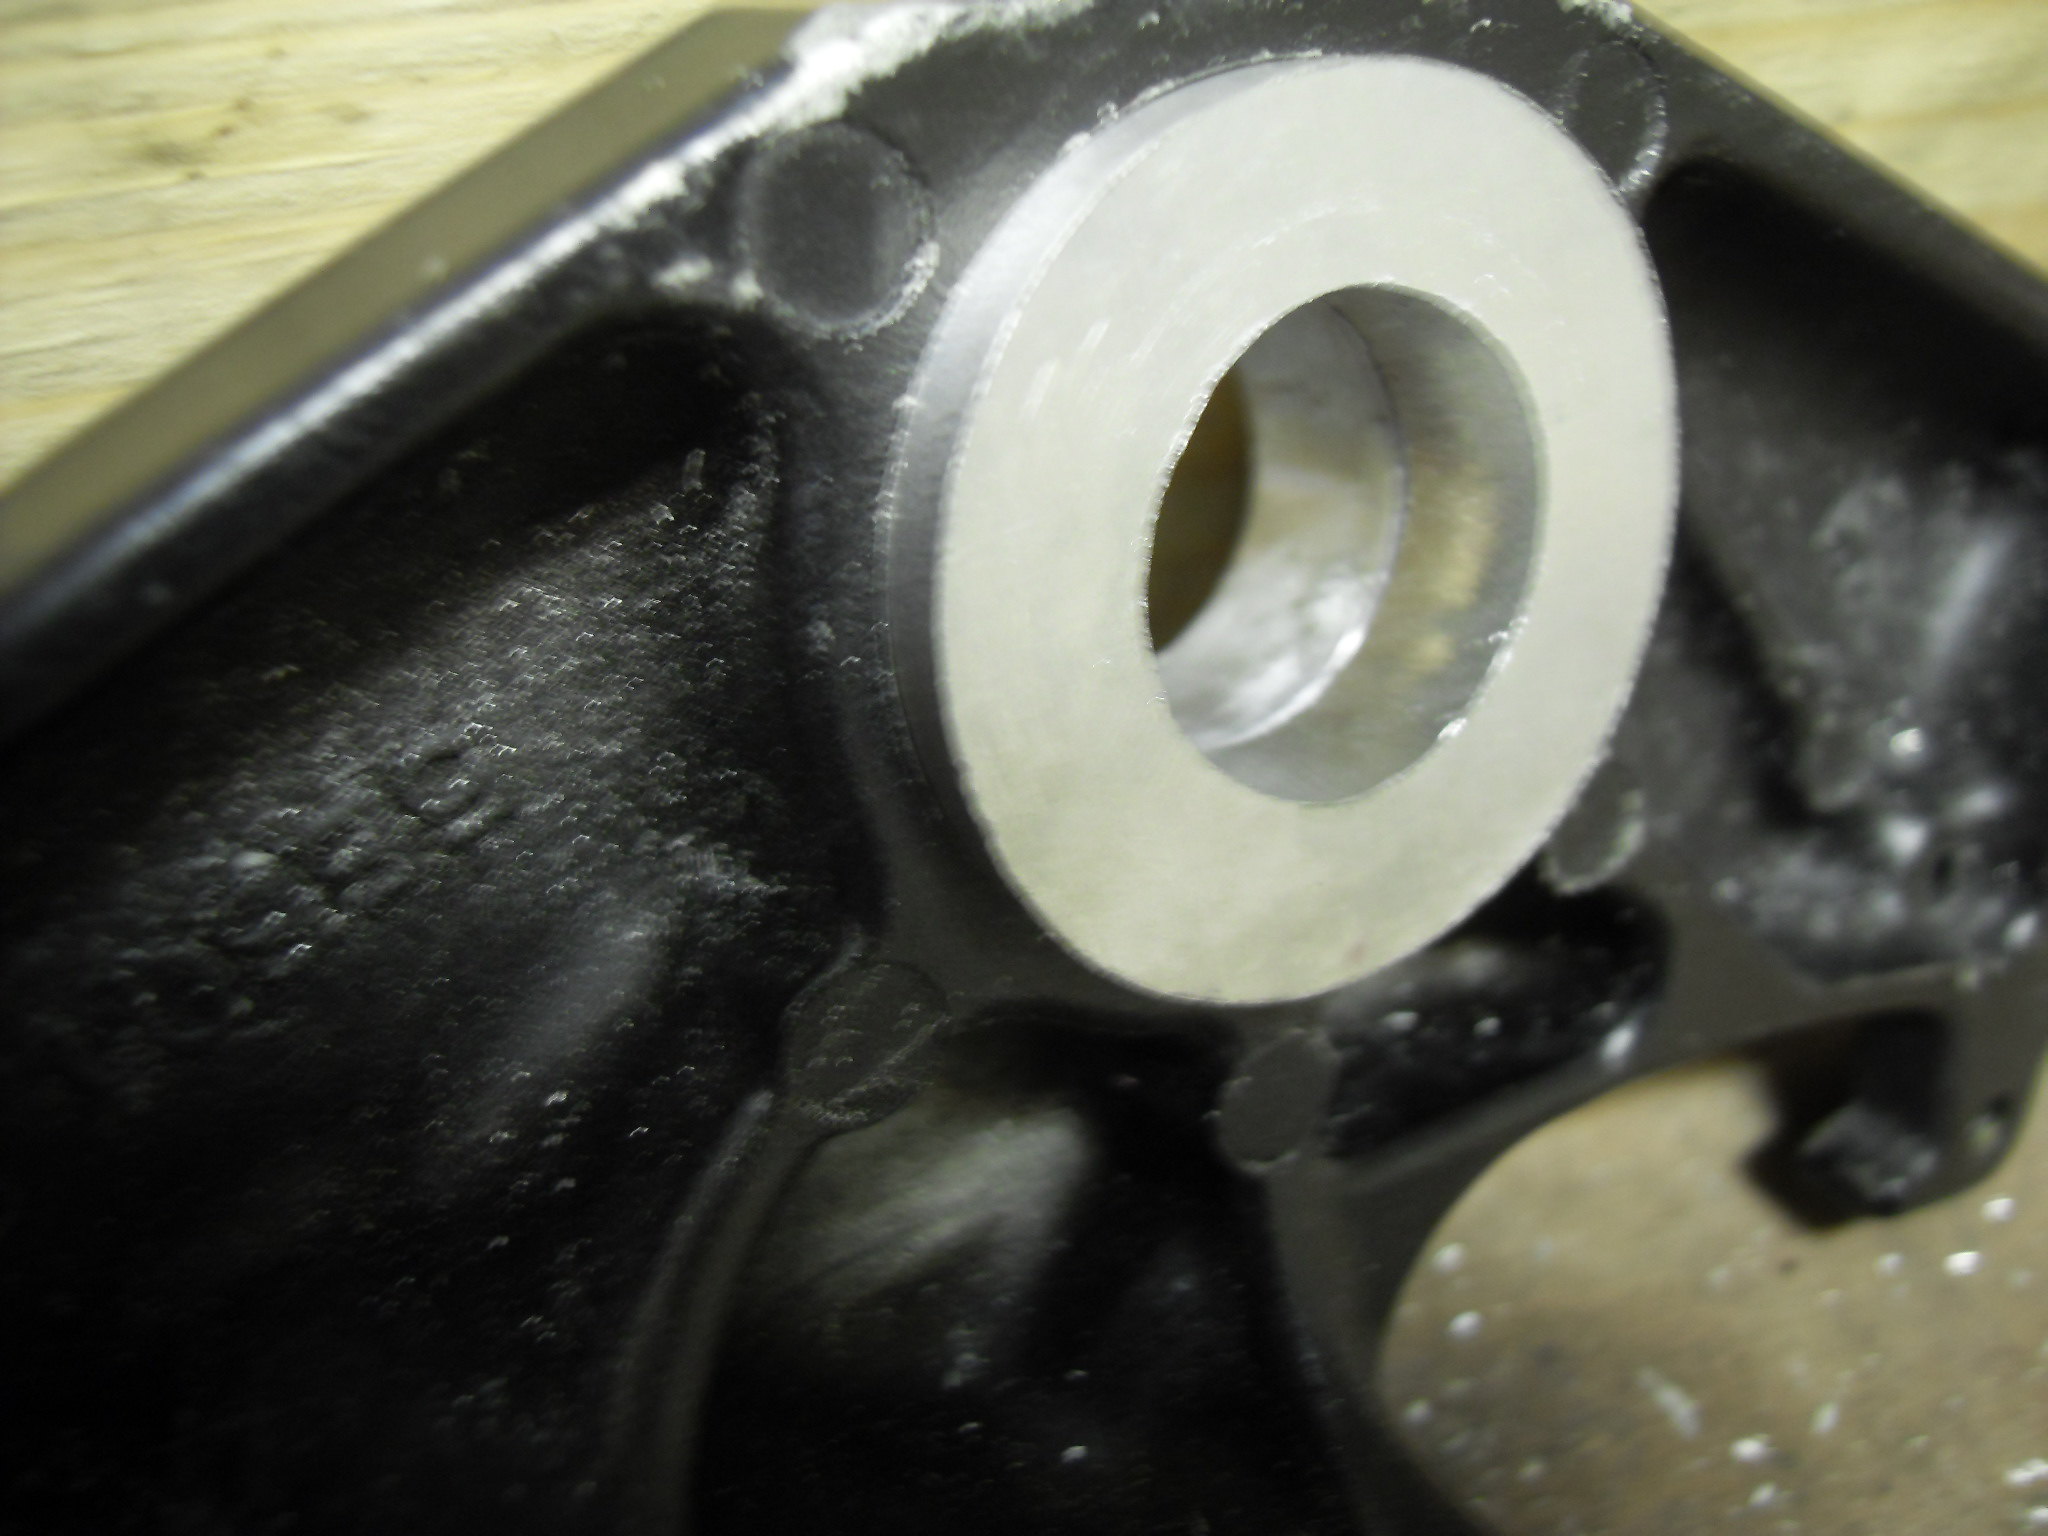
After a bit of measuring, I worked out a 2mm spacer under the lower bearing will give me the lower yoke/frame clearance. (I bonded the LC stem to the R6 yoke).
So I made a spacer
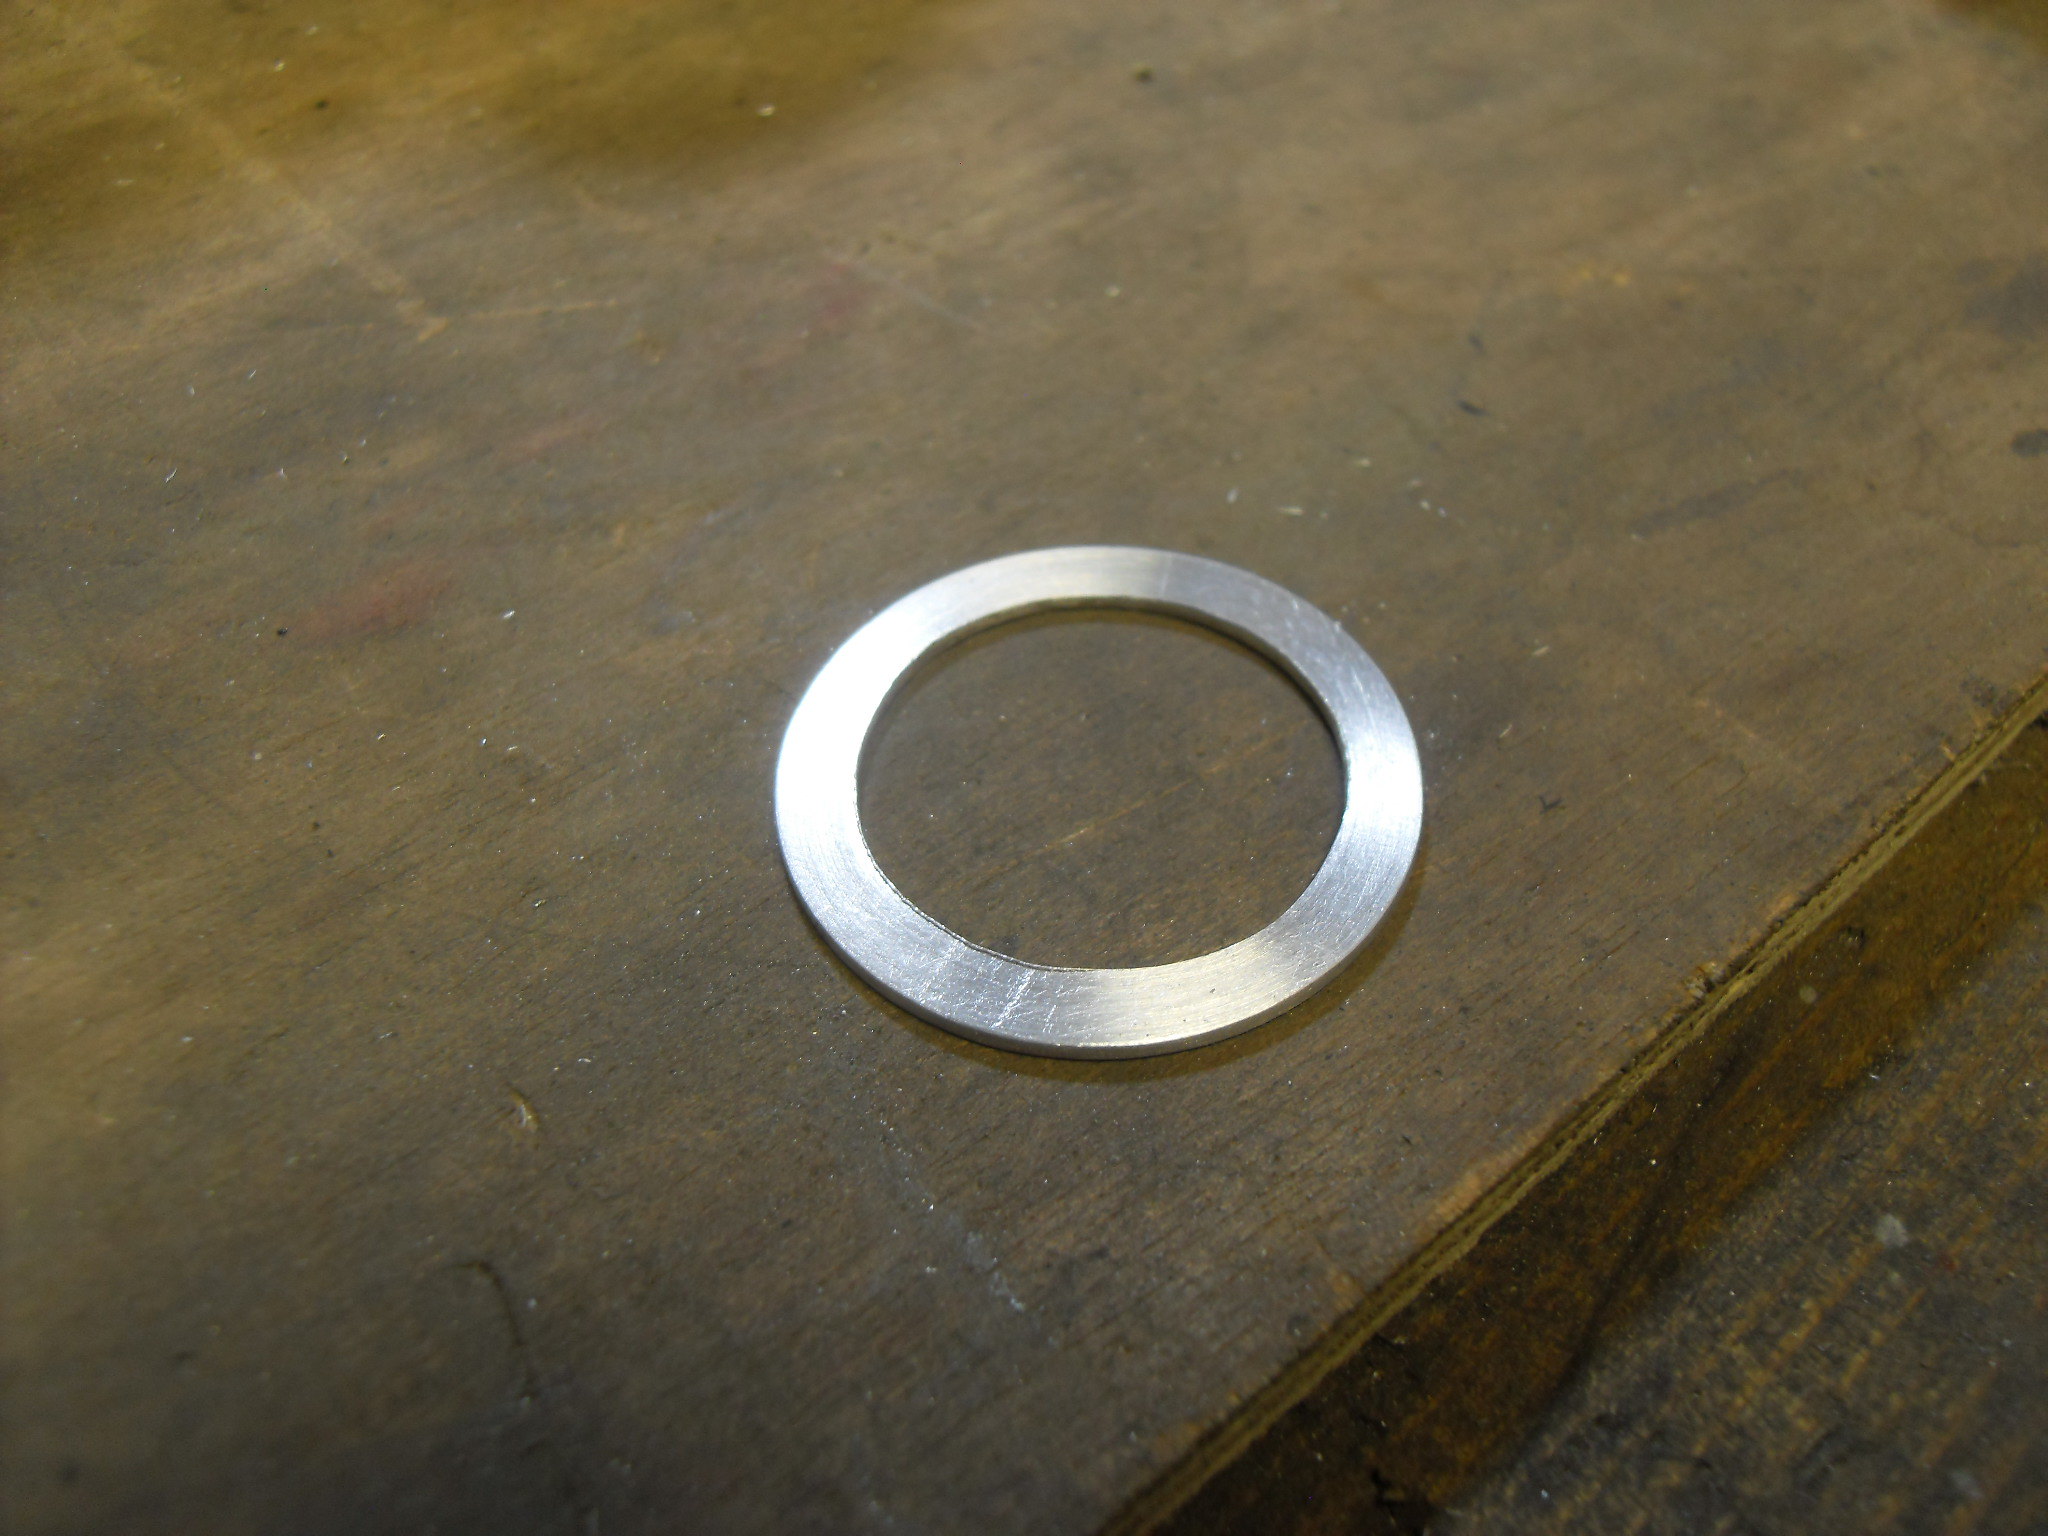 SDC11600 SDC11600
Spacer in position
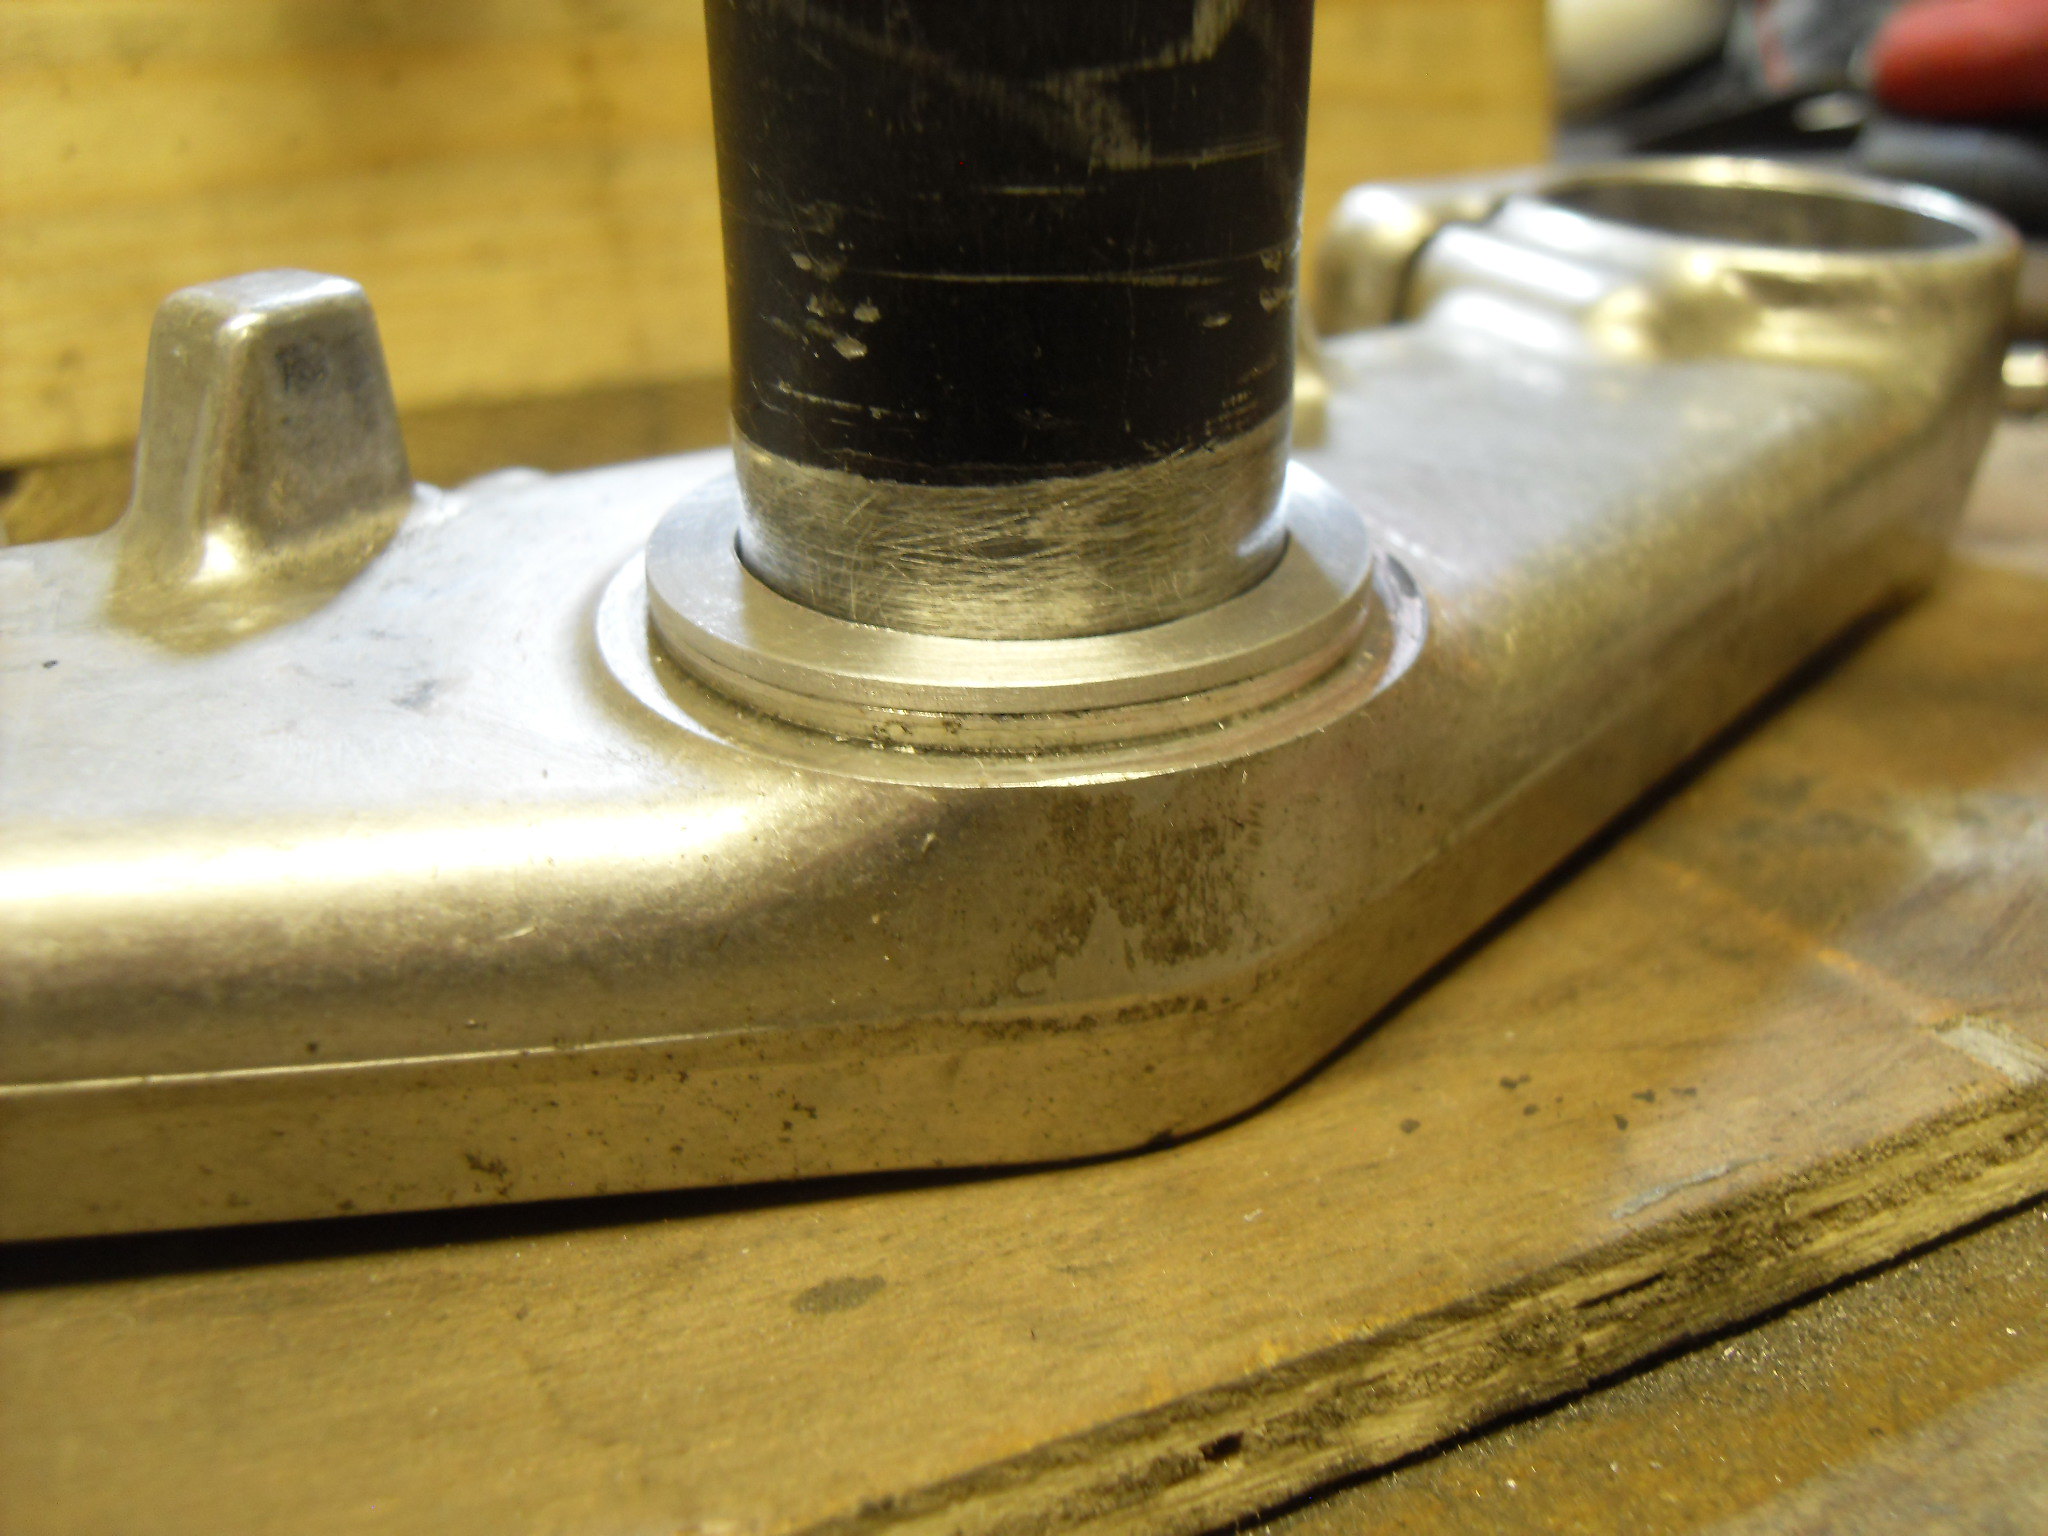 SDC11601 SDC11601
Then I put the yoke in the freezer, lower bearing in the oven, and assembled with the dust seal in place
 SDC11602 SDC11602
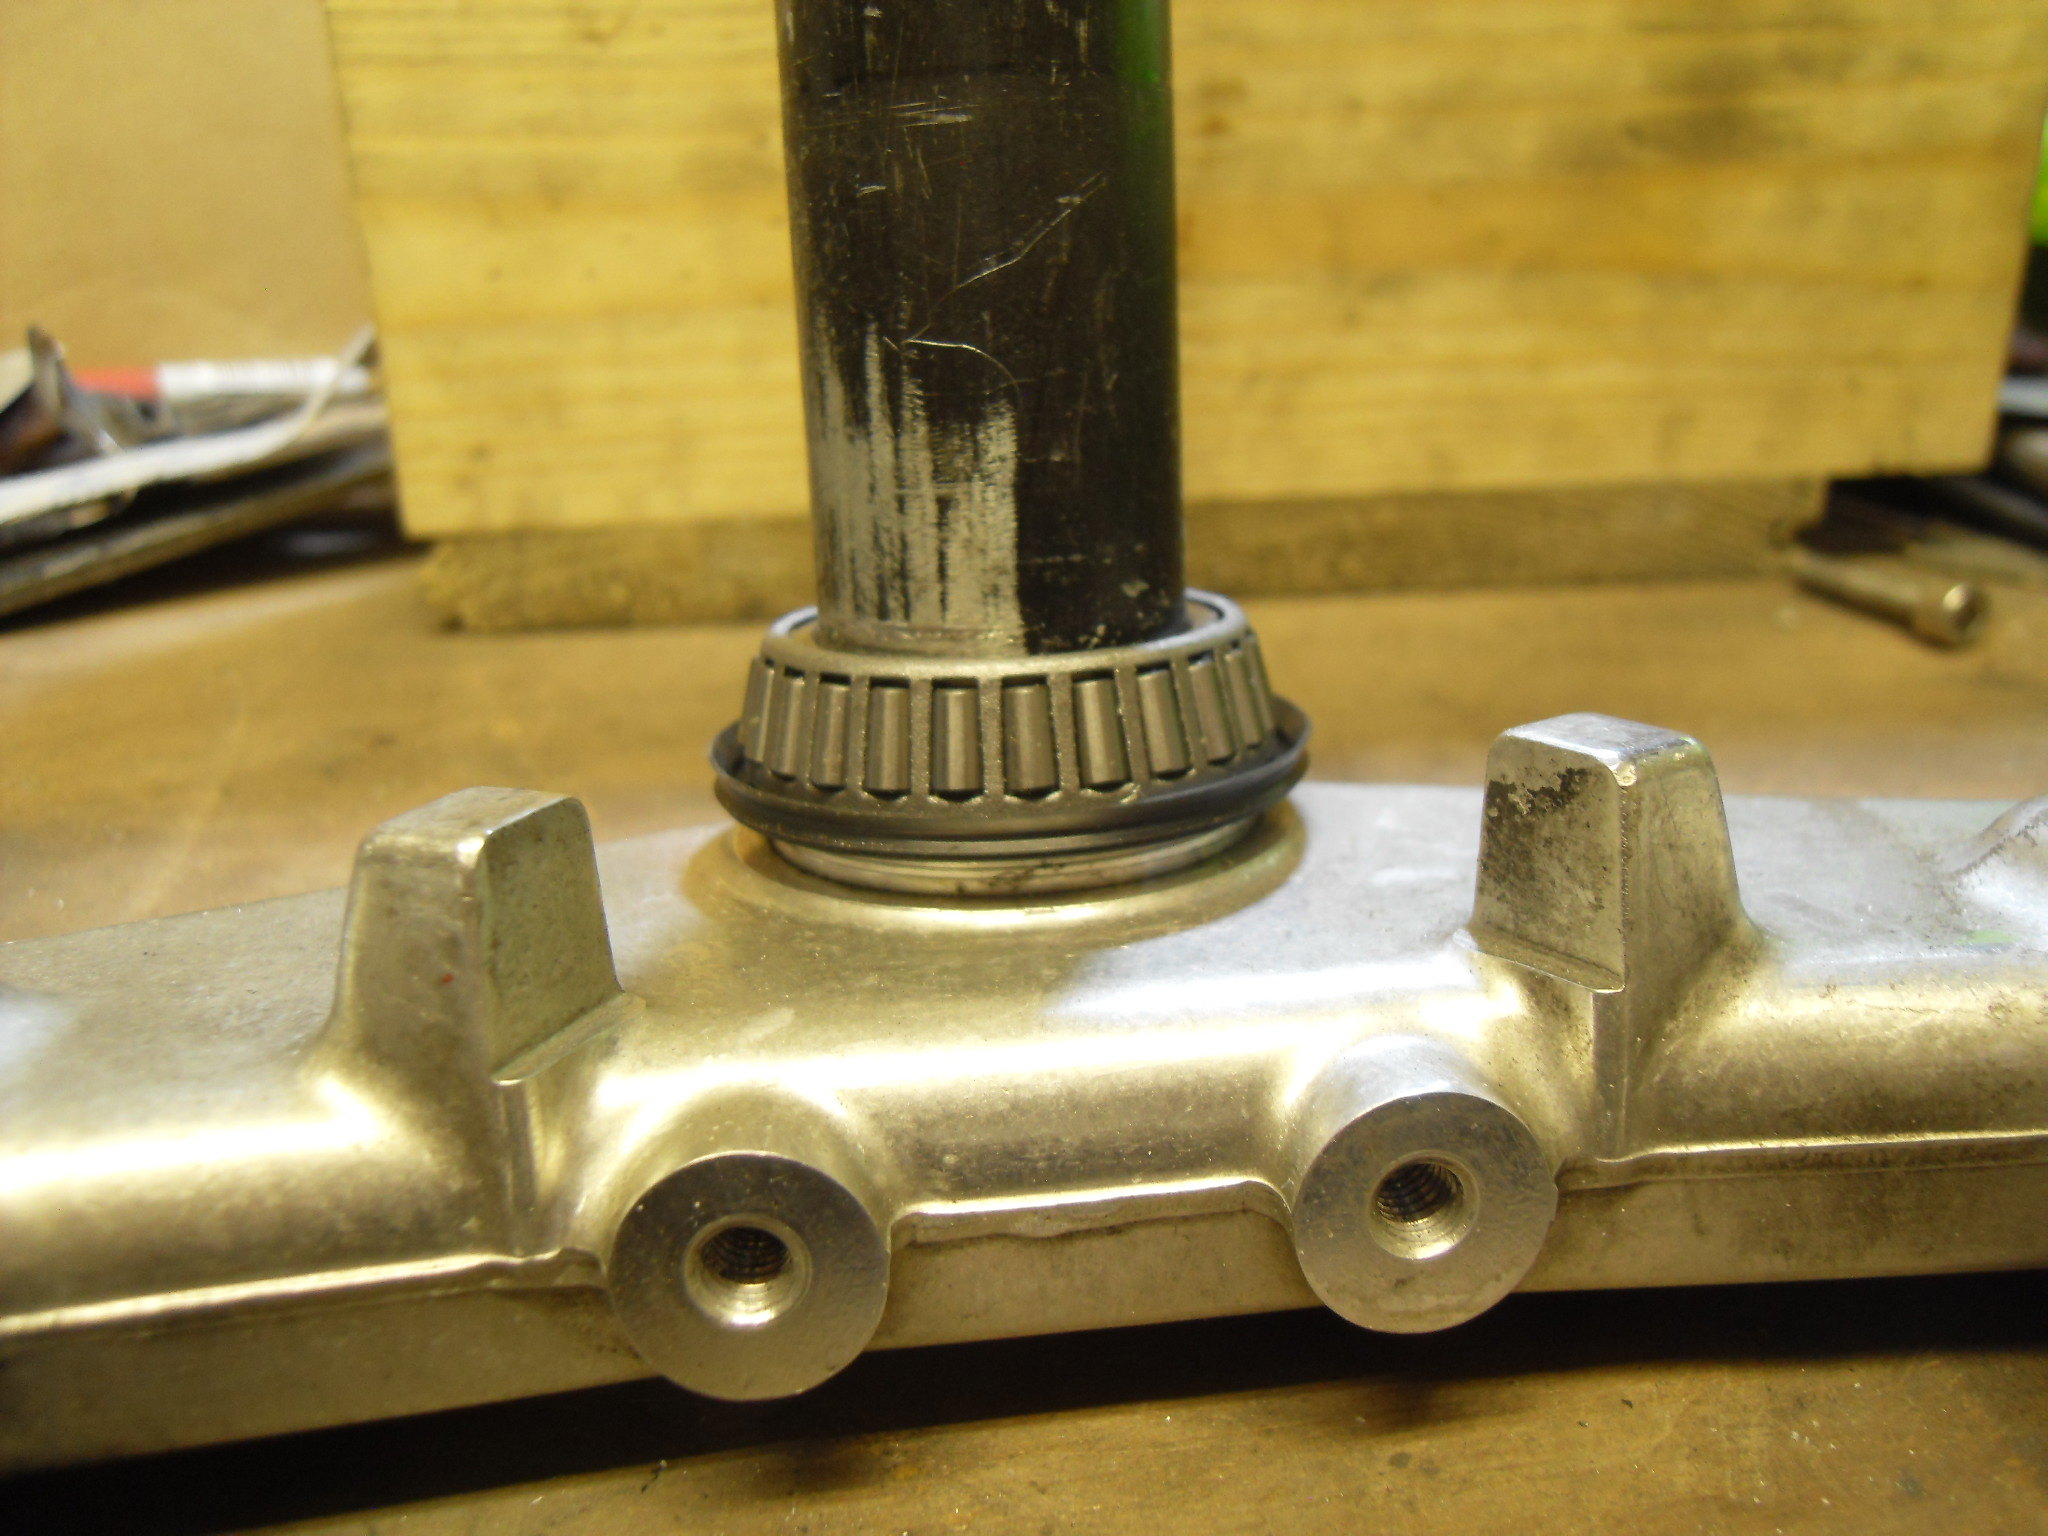
After fitting the lower bearing tapered seat, I ground out the upper old bearing seat and split it
 SDC11603 SDC11603
The new bearing seat fitted
 SDC11605 SDC11605
And finally the yoke in position (using an old shield and castle nut).
 SDC11606 SDC11606
I've got to sort out the lock stops, and make 2 spacers to make the upper yoke fit. Then it's just the handle bar risers and that will be the front end almost sorted.
Cheers, Mark
|
|
|
|
Post by morgy on Oct 28, 2018 19:53:06 GMT 1
WOW!!!
I am so envious of your engineering skills..
|
|
signal
L plate rider.

Posts: 20 
|
Post by signal on Oct 29, 2018 5:32:16 GMT 1
I check in every week to watch your progress. Thanks for posting.
A quick way to remove the bearing shell from the frame is to run a bead of arc weld on the inside of the shell.
When the weld cools it shrinks the shell and it comes out easily.
|
|
|
|
Post by mouse on Oct 29, 2018 8:29:37 GMT 1
Steady but fantastic progress/workmanship Mr Yamark. I feel another award coming!
Mouse
|
|
|
|
Post by yamark on Oct 30, 2018 9:09:35 GMT 1
I check in every week to watch your progress. Thanks for posting. A quick way to remove the bearing shell from the frame is to run a bead of arc weld on the inside of the shell. When the weld cools it shrinks the shell and it comes out easily. I've heard this before. With my lack of welding skills, I would probably manage to weld the bearing shell to the frame!
I Dremel the bearing until it's nearly through, then use a long drift and the bearing splits and comes out easily.
Cheers for the tip Signal - learning to weld is on my list of skills to learn. 
|
|
|
|
Post by yamark on Oct 30, 2018 9:11:24 GMT 1
Steady but fantastic progress/workmanship Mr Yamark. I feel another award coming! Mouse Cheers Mouse - nearly a rolling chassis |
|
|
|
RD700LC
Oct 30, 2018 10:22:41 GMT 1
via mobile
Post by dusty350 on Oct 30, 2018 10:22:41 GMT 1
Great work as always Mark😉
Look forward to seeing it rolling.
Hope all is well mate
Dusty😊
|
|
|
|
Post by urbantangleweed on Oct 30, 2018 19:40:01 GMT 1
Amazing build this, that engine is going to look fantastic.
|
|
|
|
Post by yamark on Nov 4, 2018 20:03:12 GMT 1
Amazing build this, that engine is going to look fantastic. Thanks mate , the engine is going to look a bit intimidating- which is a good thing
Cheers, Mark
|
|
|
|
Post by yamark on Nov 4, 2018 20:31:02 GMT 1
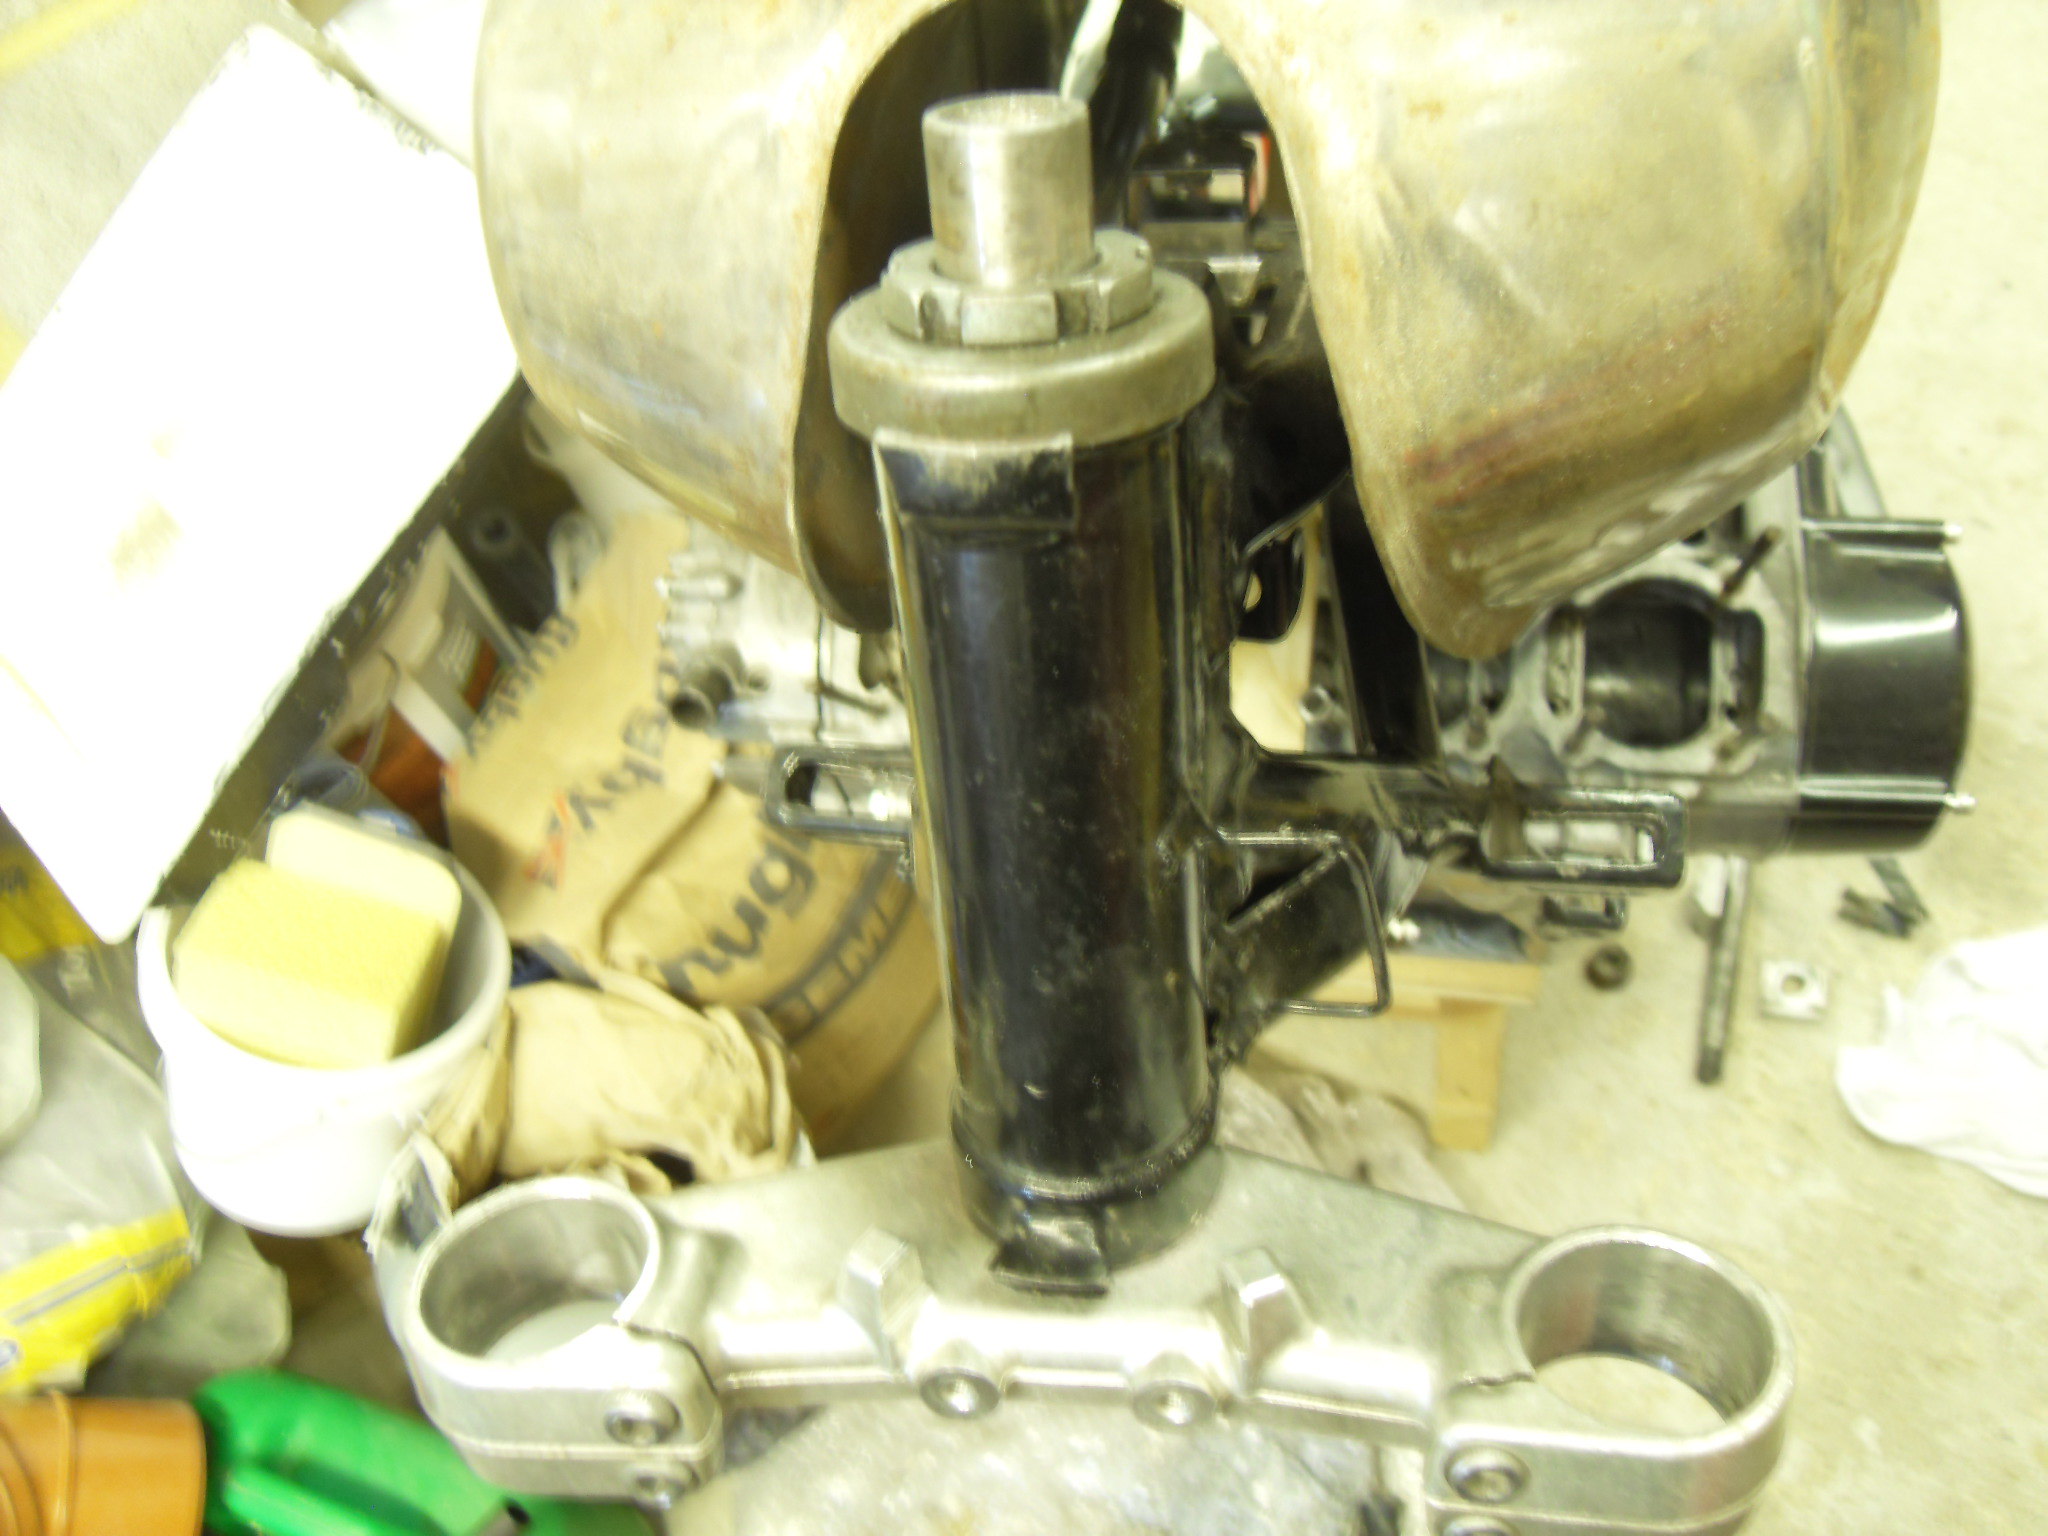
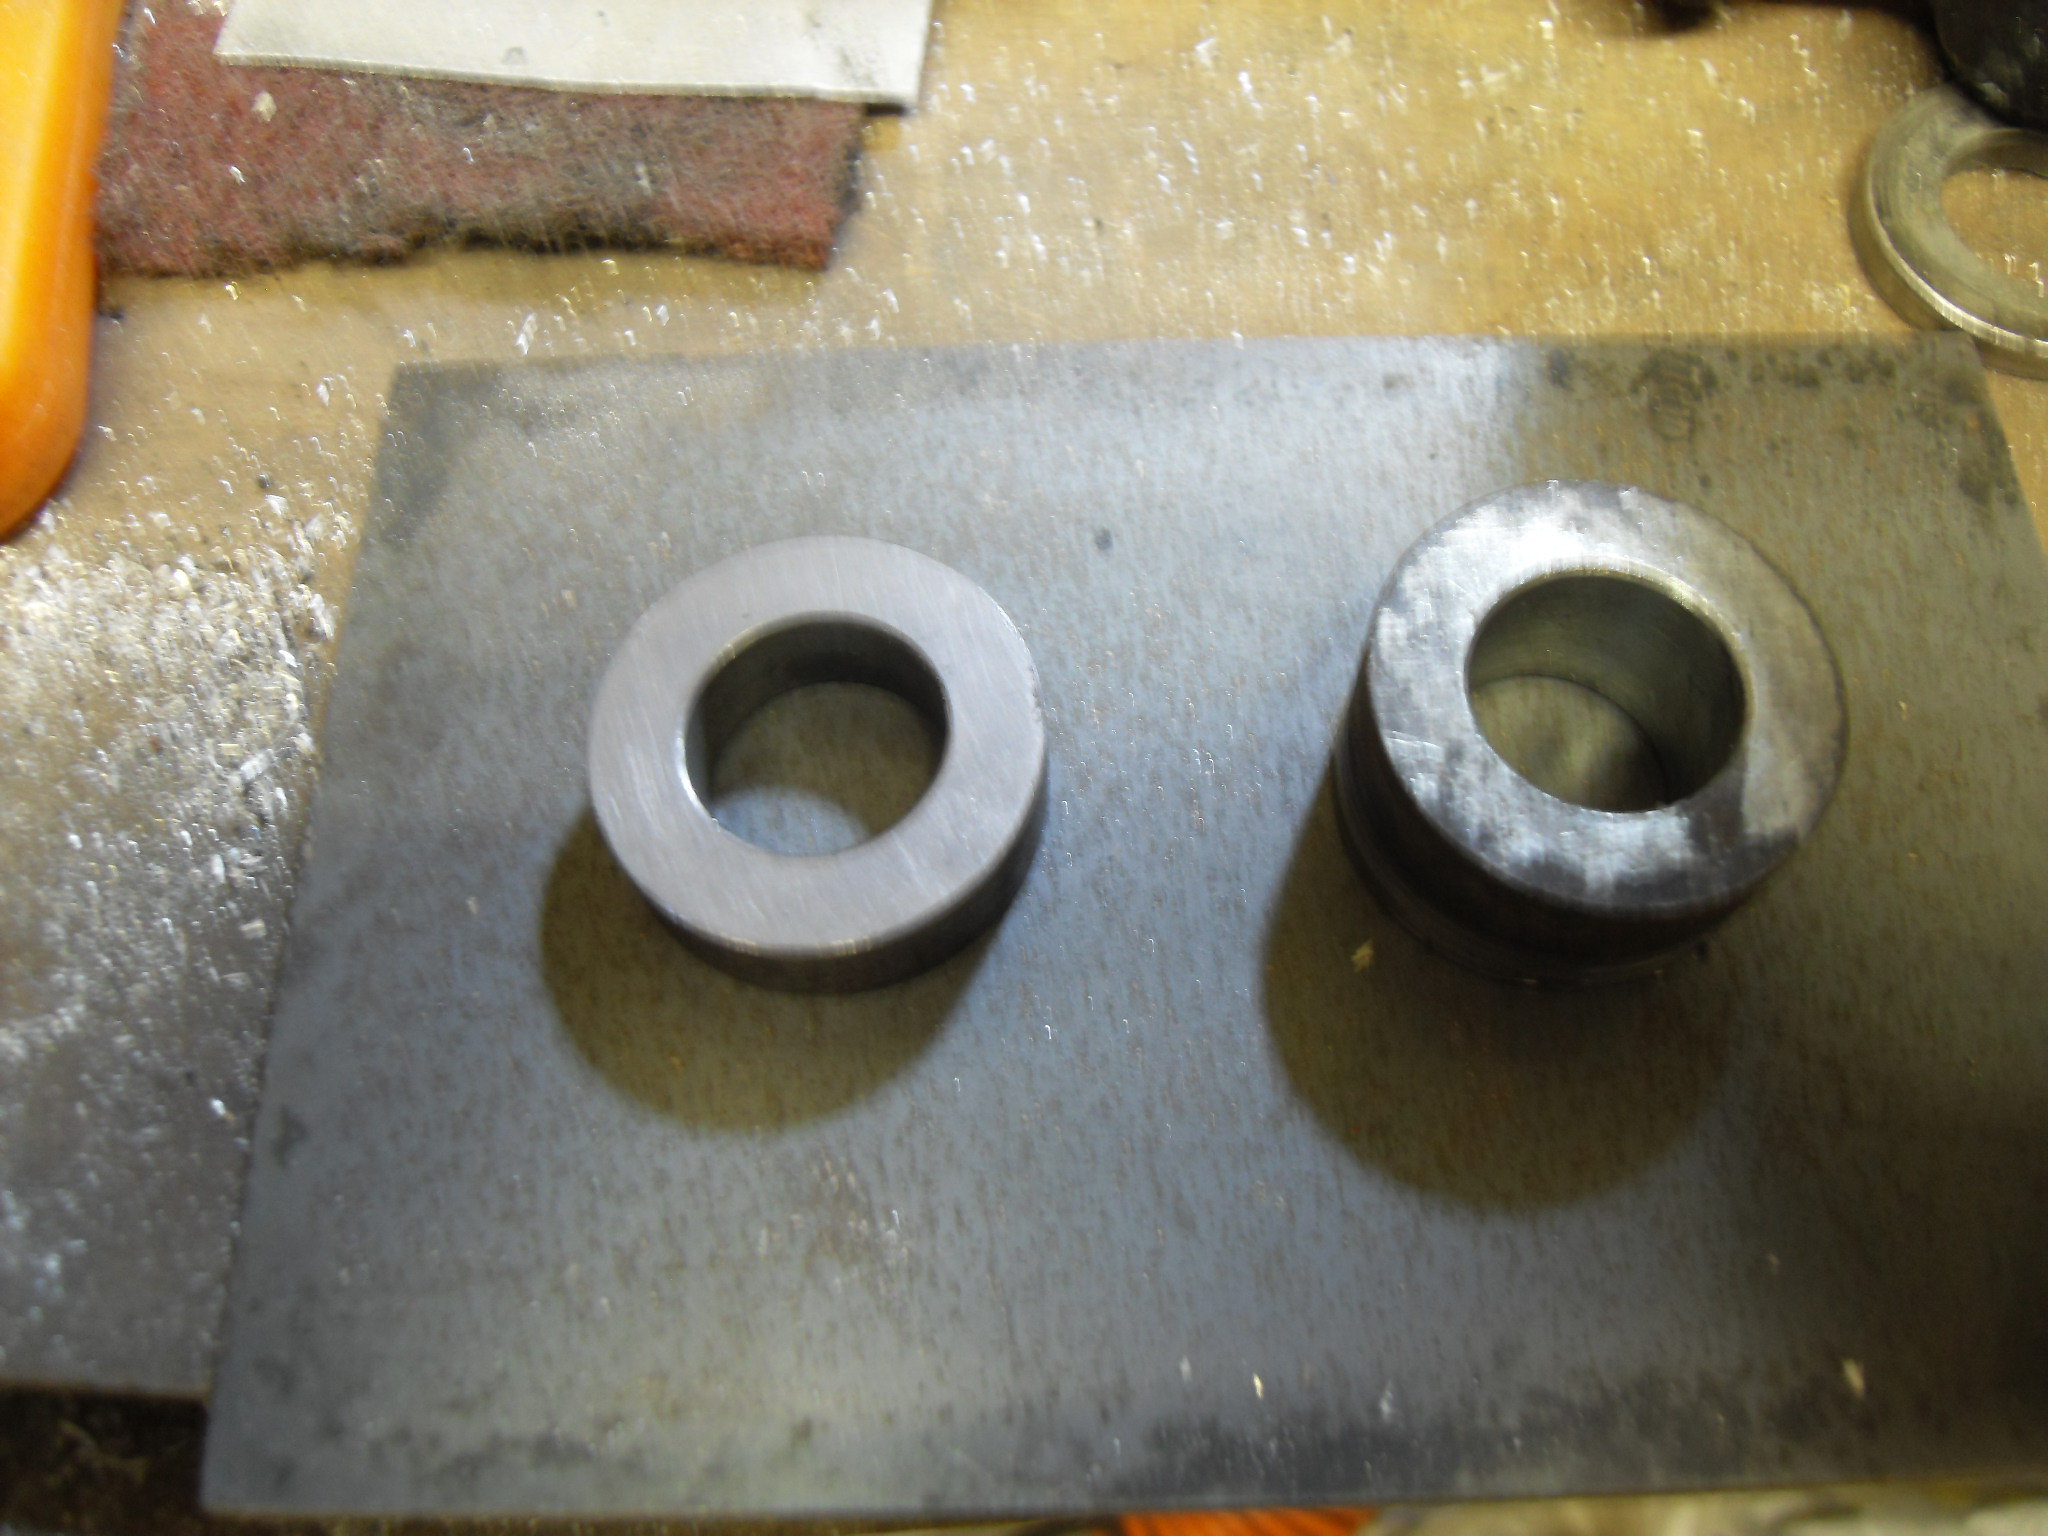
Continuing with the front yokes
I made 2 spacers so the R6 upper yoke will fit the LC stem
 SDC11607 SDC11607
This image shows how they fit in the upper yoke
 SDC11608 SDC11608
And with the stem bolt fitted
 SDC11609 SDC11609
I'll finish the lockstops and bar risers later, I also want to graft the LC clock mounts and ignition switch mounts to the R6 yoke.
Switching to the rear suspension/wheel. I'm opting for a 600 Bandit wheel, this has the same diameter wheel spindle as the NC29 and is similar in width at the swing arm. I can use a 150 section tyre.
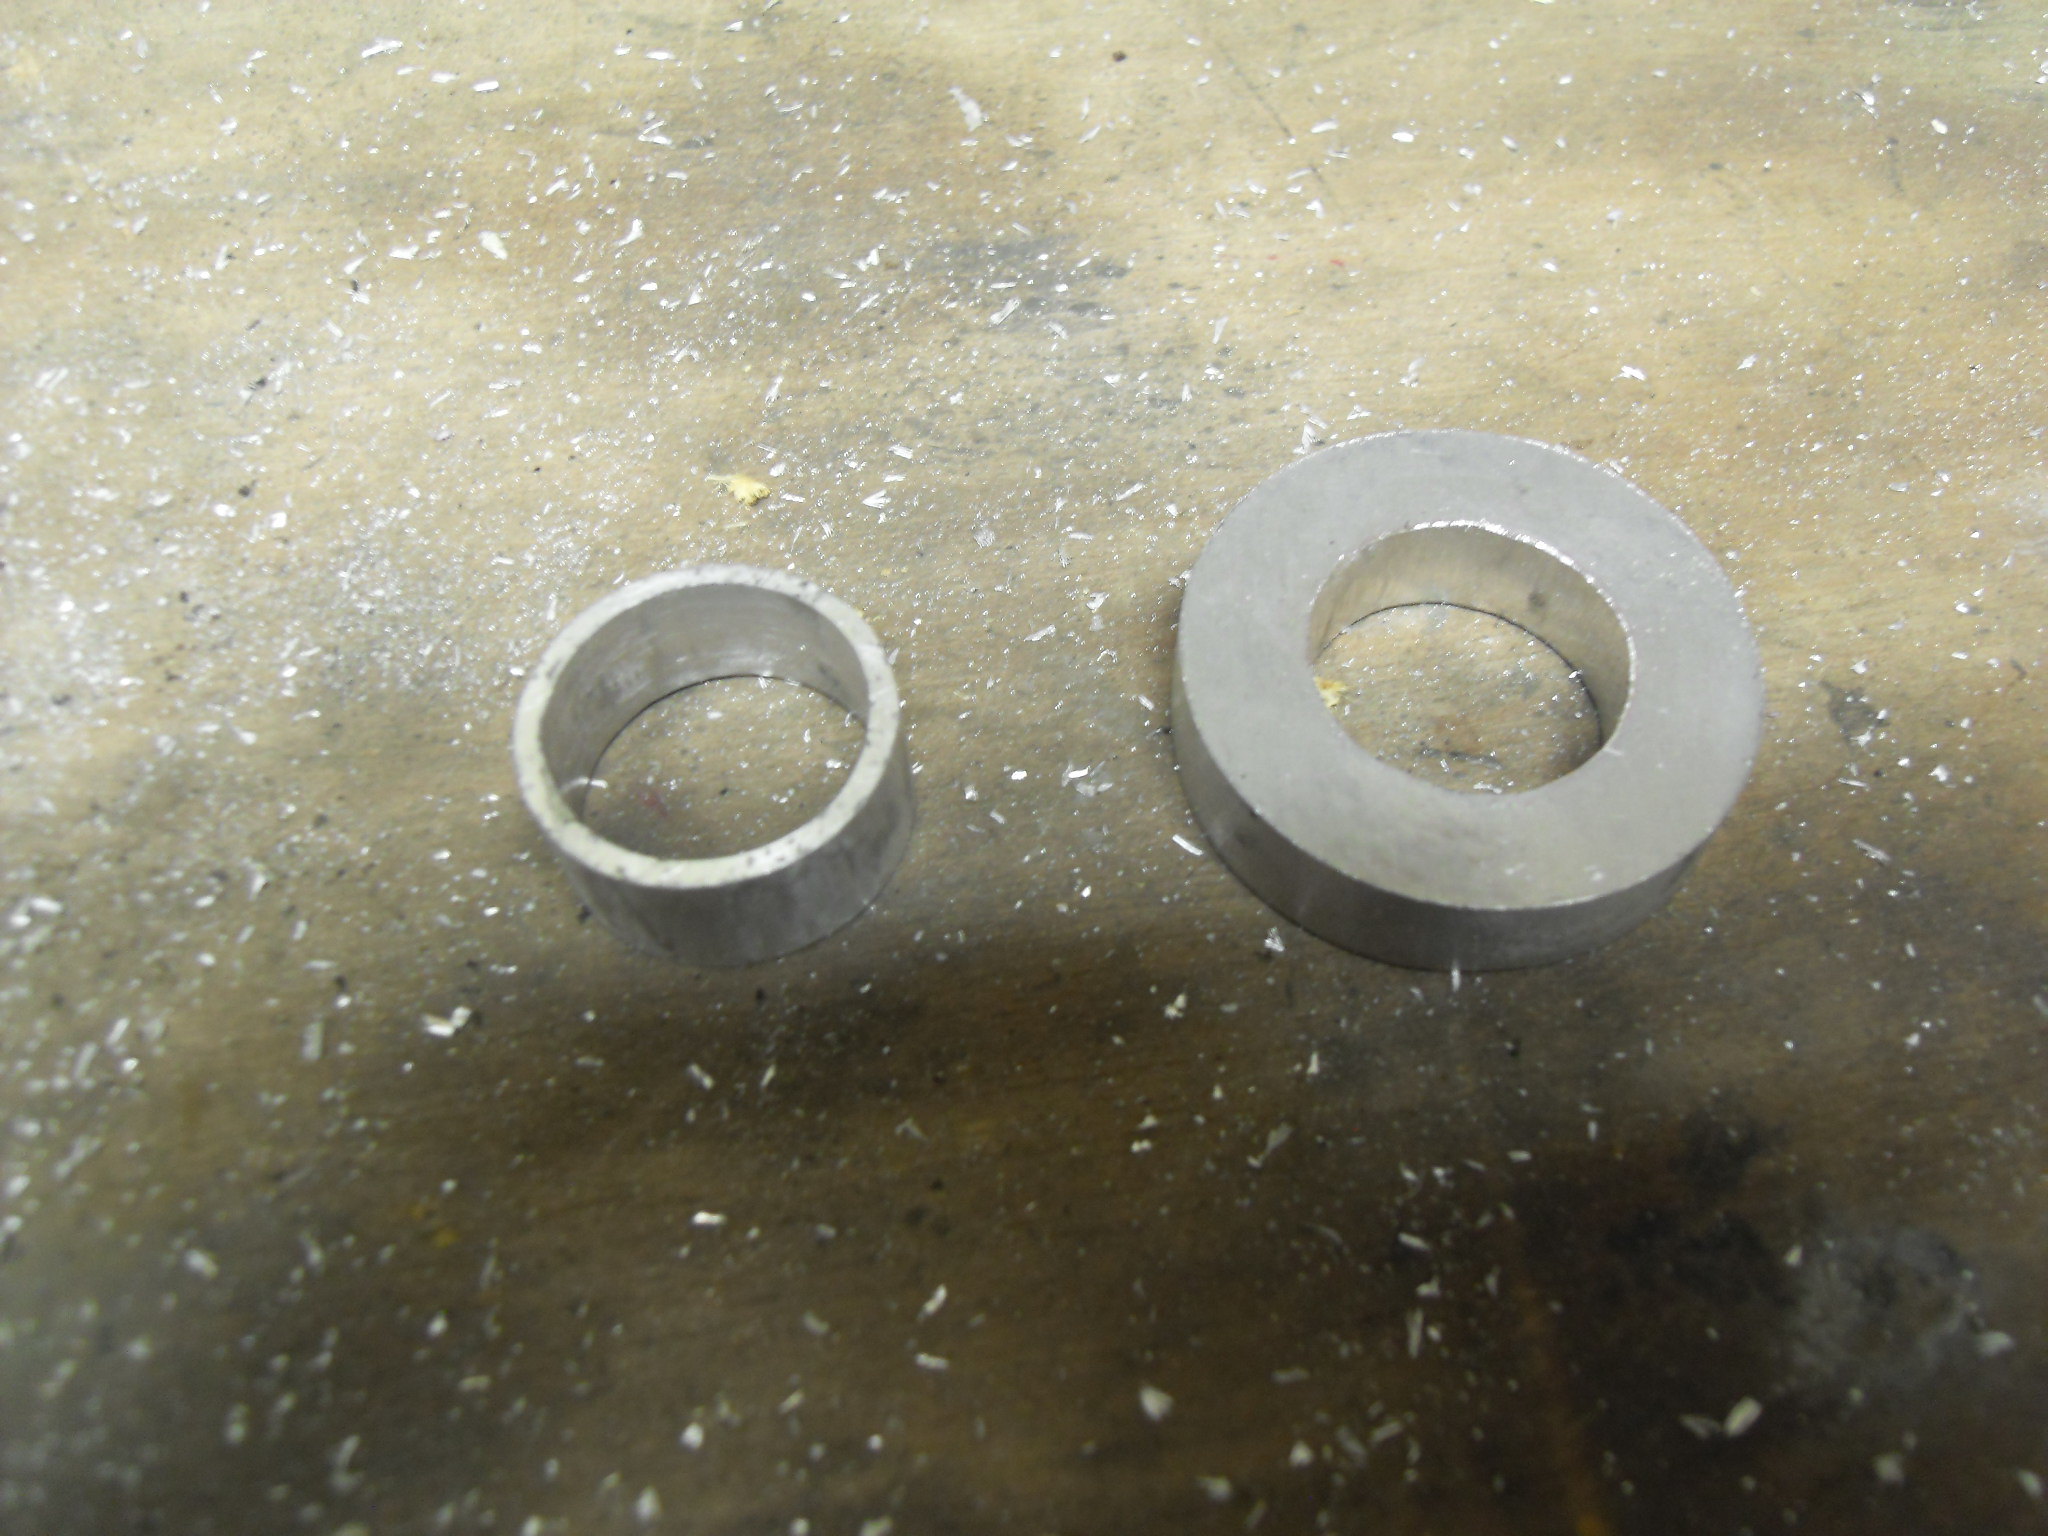
After chatting to Graham King (Cinder) he gave me the new spacer sizes (widths) I check the measurements to keep the rear wheel central, 7mm off the left sprocket spacer, so I reduce a Bandit spacer. This shows the original and modified spacer
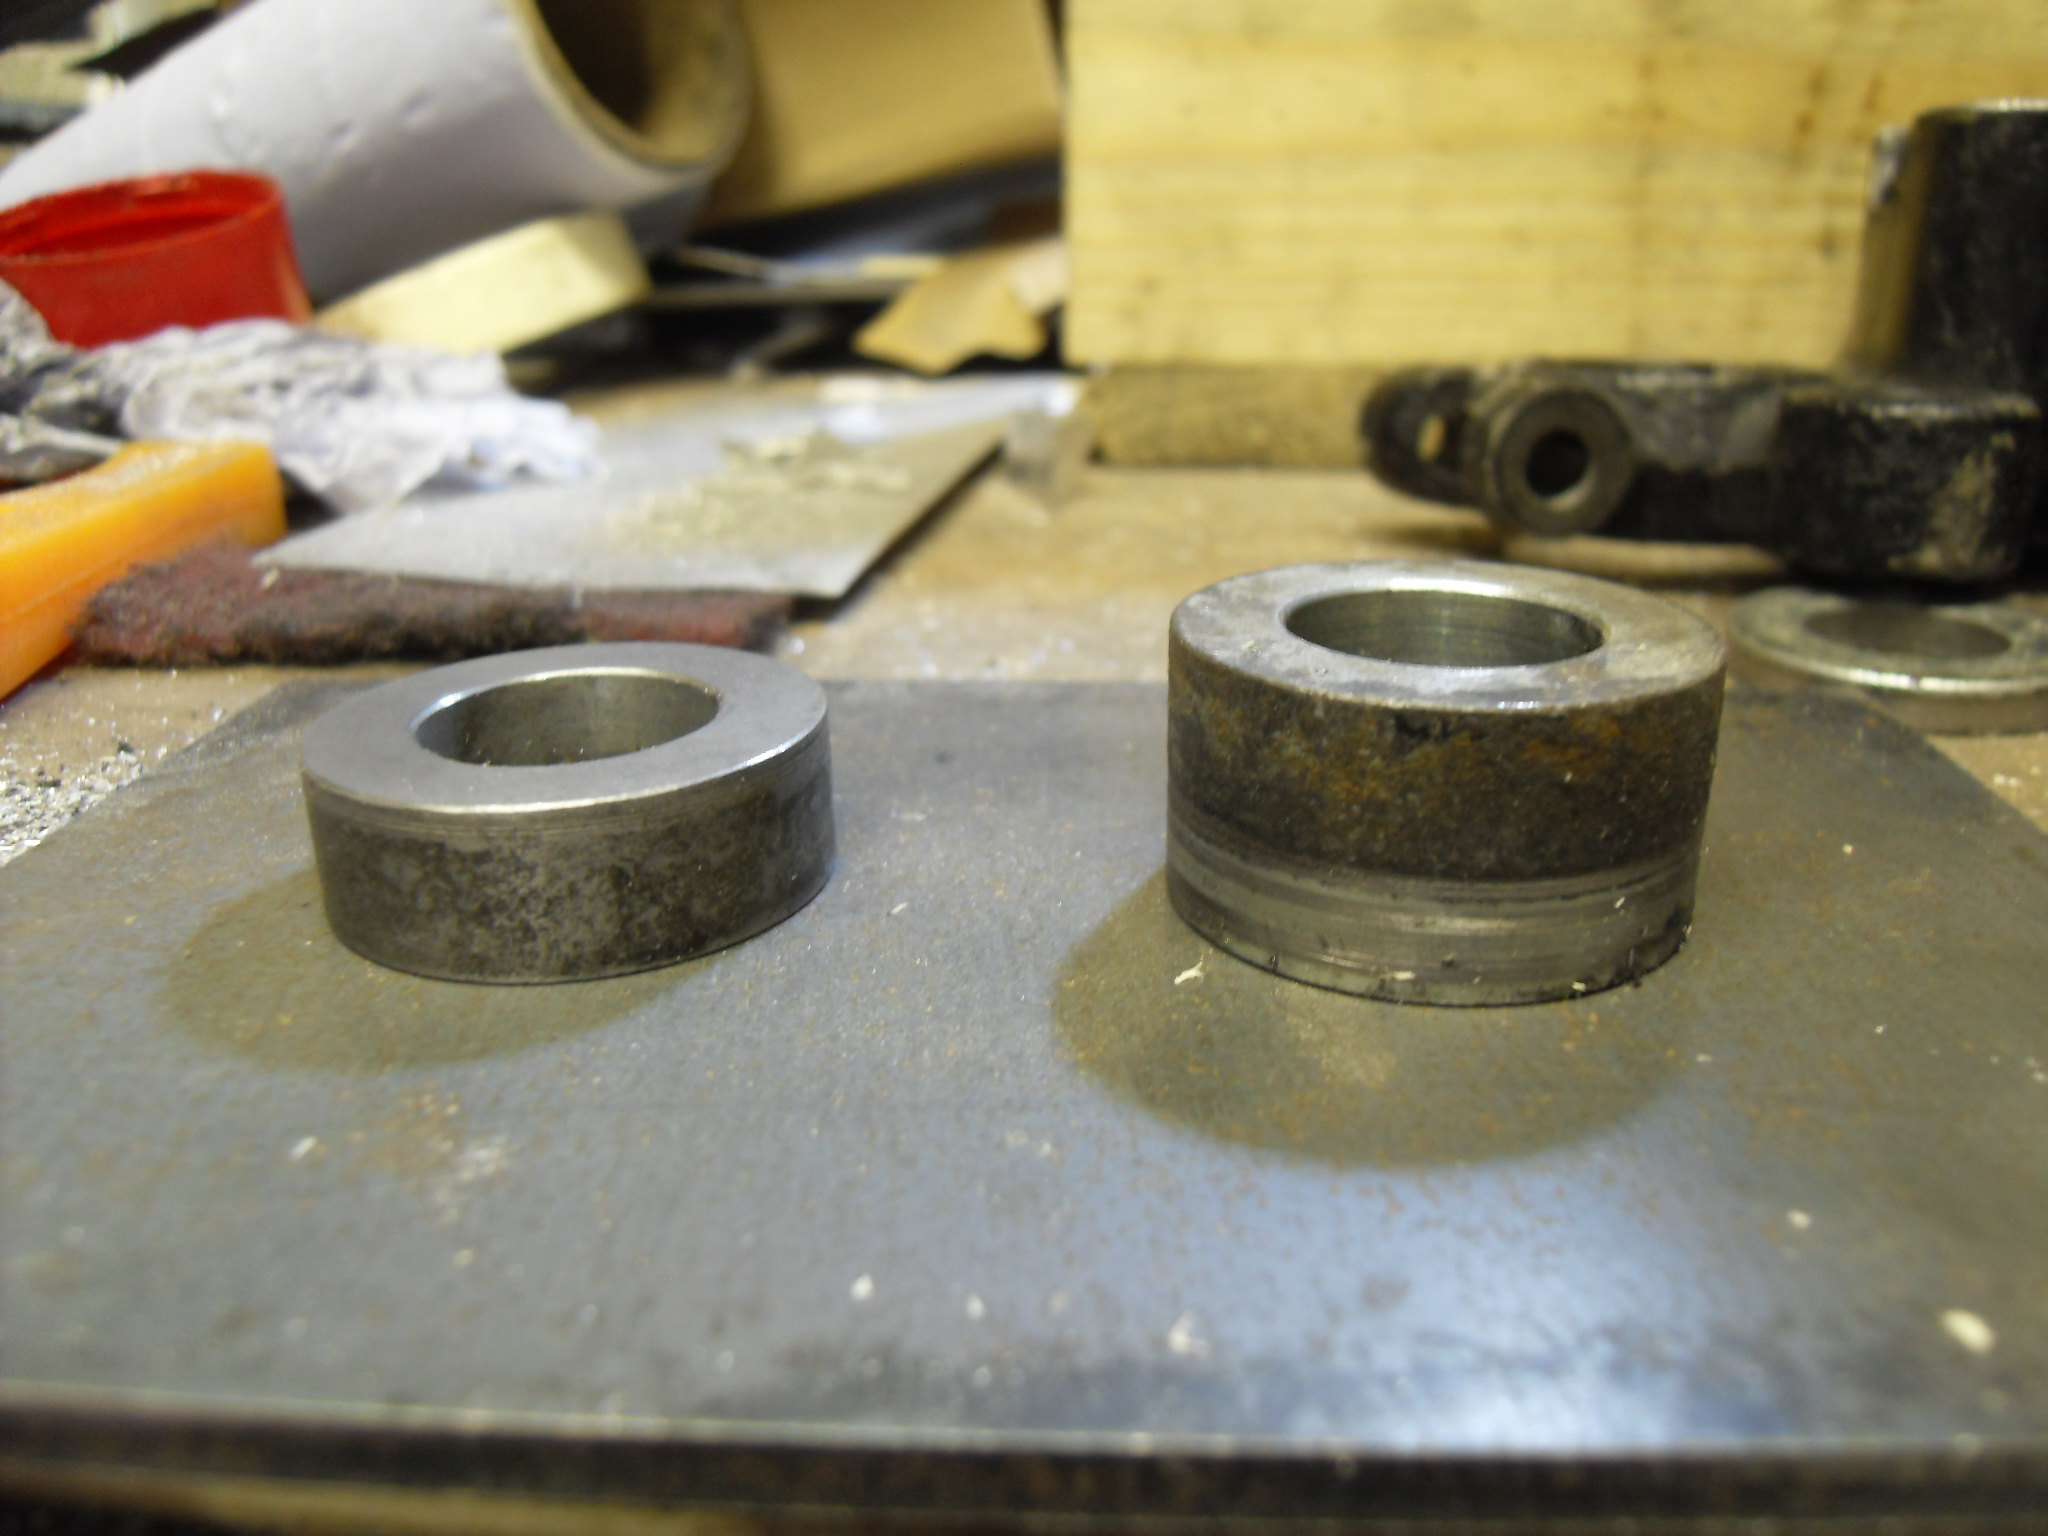 SDC11612 SDC11612
 SDC11611 SDC11611
I then removed 1mm off the caliper bracket to give me the 220mm total width, and fitted the rear wheel
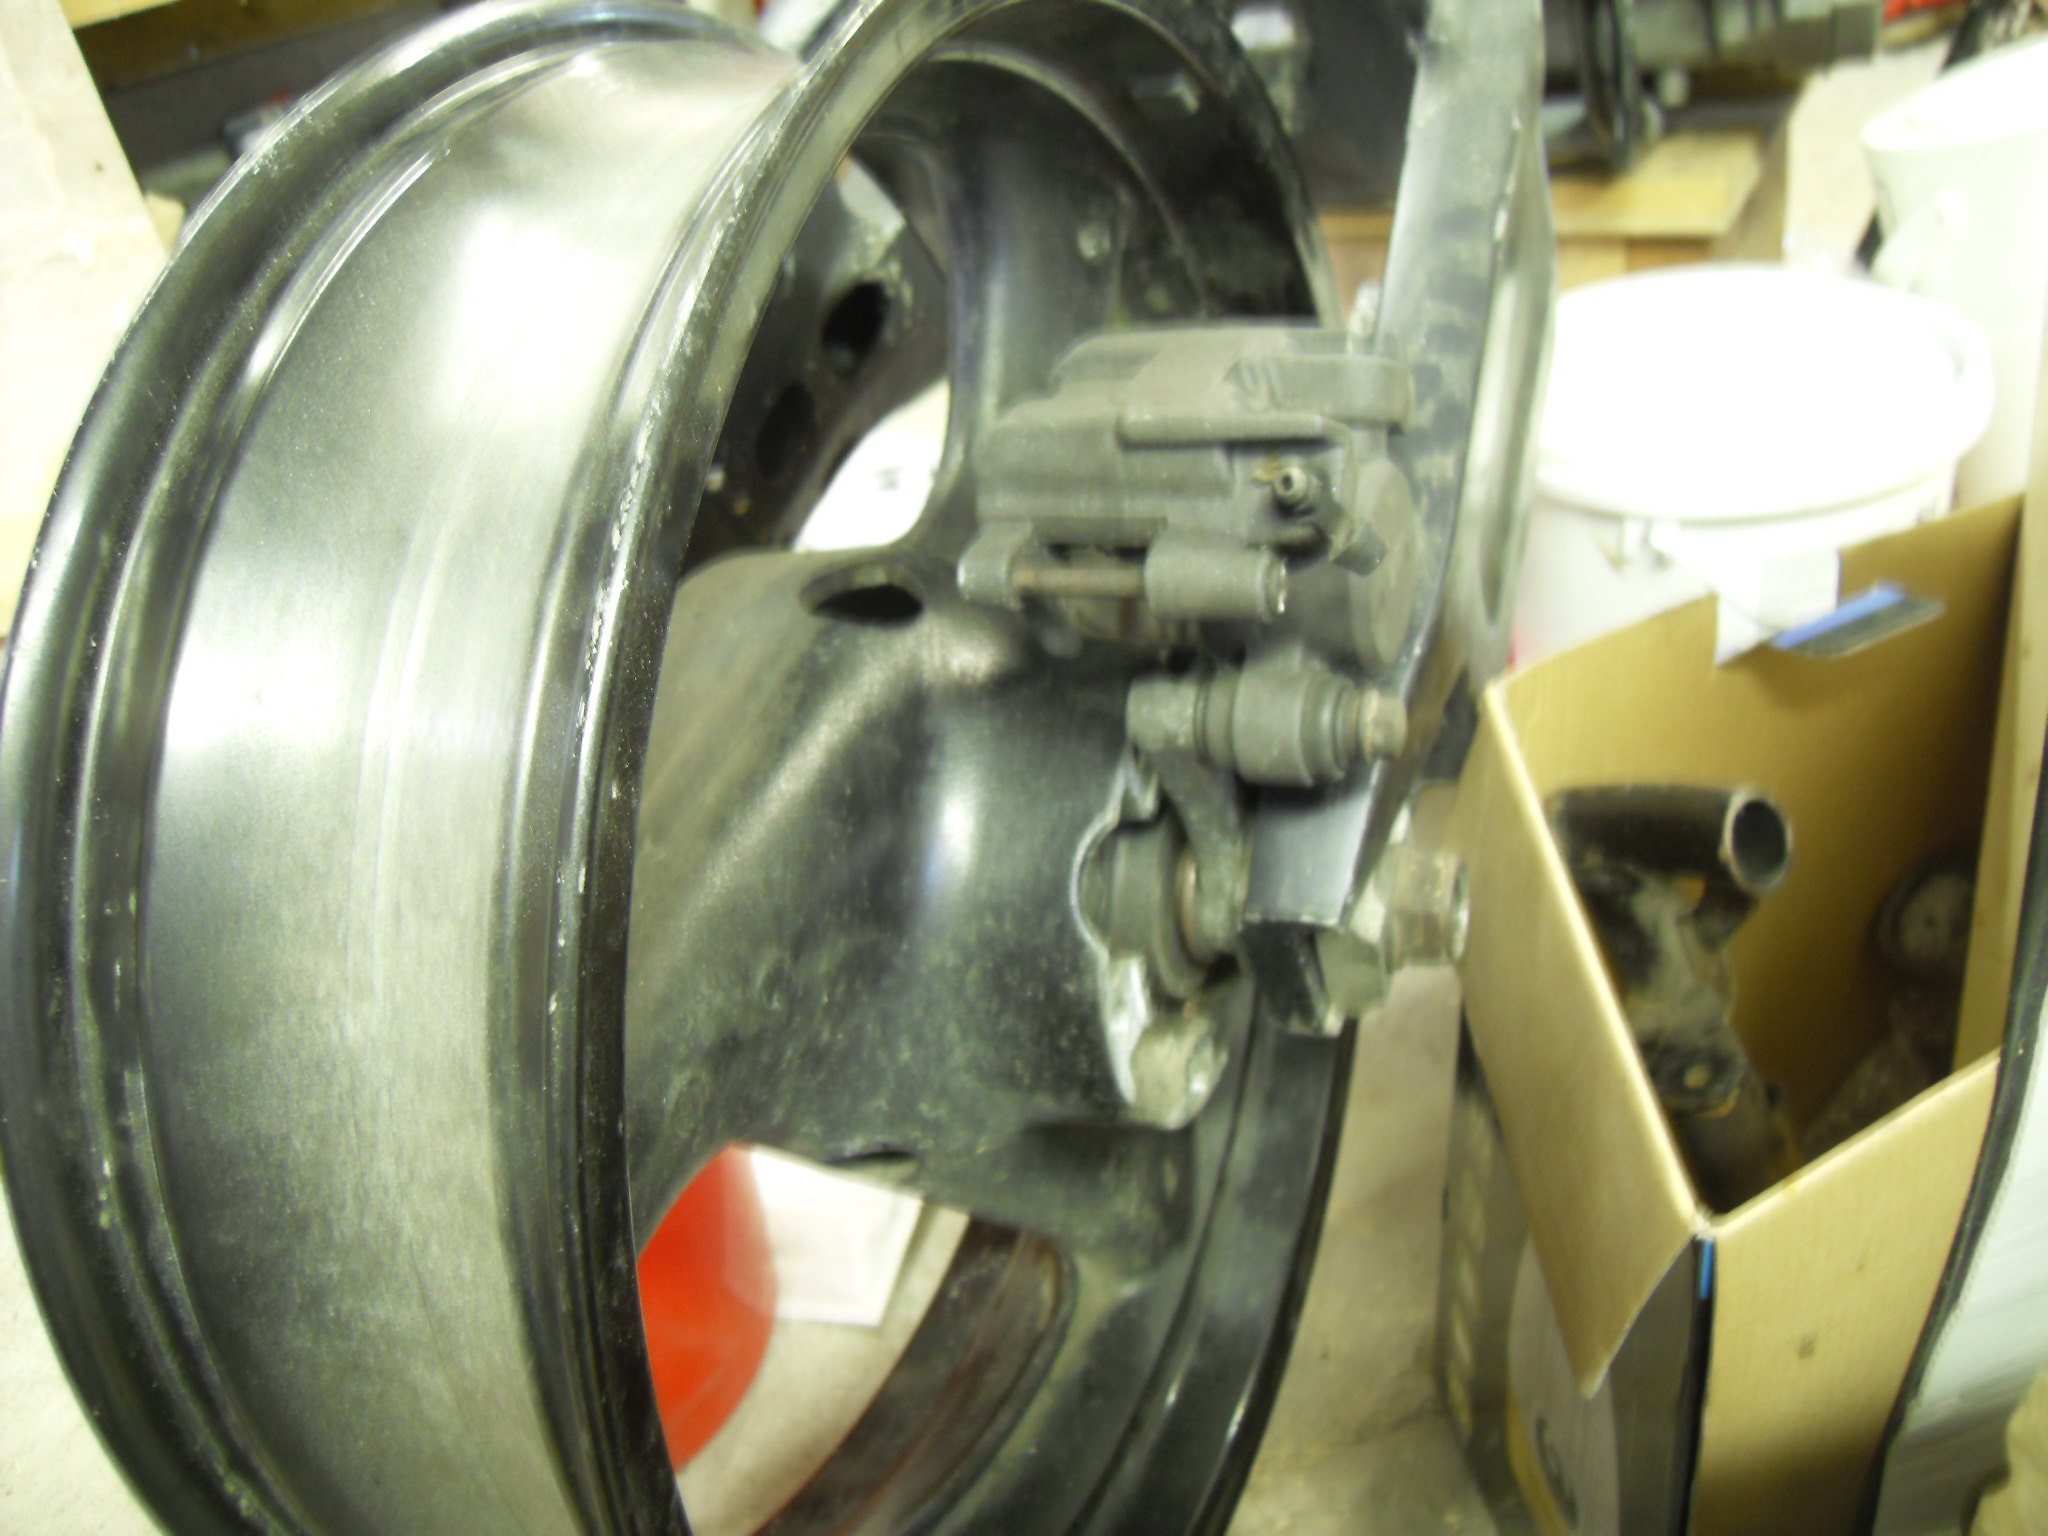 SDC11610 SDC11610
The disc aligns up perfectly .
So I have to get the sprocket hub machined to move the rear sprocket inwards, a distance that I cant calculate yet. Again Graham has given me an idea of how much material has to be removed.
A little more work and the rear end is sorted.
Engine mounts next time
Cheers, Mark
|
|
|
|
Post by dusty350 on Nov 4, 2018 21:36:27 GMT 1
Brilliant work on the spacers Mark. Certainly not easy without a lathe !! It's gonna be a roller soon enough Dusty |
|
|
|
Post by donkeychomp on Nov 4, 2018 23:41:20 GMT 1
Superb as usual. Kinda expect nothing less nowadays lol! Yep, a rolling chassis is always a great achievement.
Alex
|
|
|
|
Post by rostrumorhospital on Nov 5, 2018 8:19:20 GMT 1
Shaping up nicely, now that the dark nights are well and truly here, nothing better than out in the garage, tinkering with an LC - Enjoy
|
|
|
|
Post by yamark on Nov 7, 2018 17:51:41 GMT 1
Cheers Dusty, Alex and Rostrumorhospital Now the rear end is sorted, I'll work on the front again. The R6 forks should now fit straight in, and the FZR front wheel has already been modded by Cinder (Graham). As well as the wheel he also gave me the modded speedo drive and spacer in exchange for a couple of parts, a true gent.
After the front end, I've got to sort out the engine mounts. The new mounts are difficult to make look "factory", but I think my idea will work and look good.
I might have to break out the "rose coloured glasses!"  |
|
|
|
Post by Yogi on Nov 7, 2018 18:14:10 GMT 1
Hi Mark Just had a good read as not been keeping up due to bungalow build  Looks like you've been busy getting it up on its wheels Some superb skills and attention to detail as always Keep it coming mate Atb Matt |
|
Deleted
Deleted Member
Posts: 0
|
Post by Deleted on Nov 7, 2018 18:23:32 GMT 1
Total admiration to skilled work. Photos just illustrate the practical expertise. The academic engineering skills to plan and undertake such a build is amazing.
Well done
|
|
|
|
Post by philmill on Nov 7, 2018 18:57:19 GMT 1
Thats going to be another awesome build Mark, I admire the technical skills and the ability to get on and sort the issues, I wish I had knowledge to even attempt it!
Phil
|
|
|
|
RD700LC
Nov 11, 2018 20:18:58 GMT 1
Post by yamark on Nov 11, 2018 20:18:58 GMT 1
Thanks Yogi, Penno, Philmill - as always, you kind words mean a lot. Sorry for the late response, spare time seems to be at a premium at the moment. |
|


 .
.