|
|
Post by Tobyjugs on Nov 16, 2020 20:57:45 GMT 1
Increase the water passageways it is then. I know I have to be careful with water pump housing, as my clutch cover is already modified for the RG500 oil pump. I would hate to do all that work again.
The bottle neck in the cooling water system is the water pump housing. I cant post the pictures at the moment to show you. Unless another member wants to post them for me. |
|
|
|
Post by JonW on Nov 17, 2020 5:58:57 GMT 1
Your right the restrictions are in the water pump housing. I have opened up the pressure side of the pump housing, but the gains are limited. This is easier to do on a YPVS housing than a 4LO. In making the pressure side of the pump bigger I've penetrated the cover itself. This was obvious so I welded up that area before the dremel came. Because of the built up weld an original cover oil pump will not anymore. Not a problem for my build. I also have a different set of water pump gears to spin the pump faster, but not sure about that option. I also think the design of the hi flow impeller I have is pants and could easily be improved. Beware on brand new covers from Yam for the YPVS that they dont always remove the flashing inside the waterway in the cover. Always worth looking in any used cover as well to see what that area is like Ive found. |
|
|
|
Post by peddrotzr on Nov 17, 2020 9:55:26 GMT 1
Increase the water passageways it is then. I know I have to be careful with water pump housing, as my clutch cover is already modified for the RG500 oil pump. I would hate to do all that work again.
The bottle neck in the cooling water system is the water pump housing. I cant post the pictures at the moment to show you. Unless another member wants to post them for me. Here are the photos 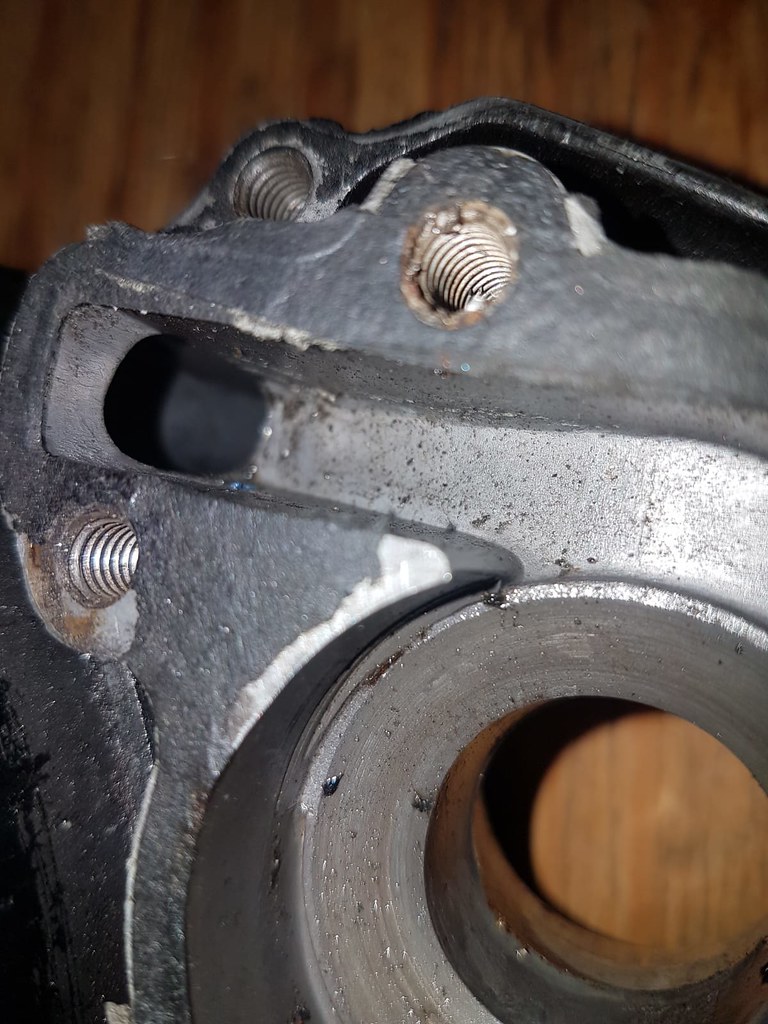  |
|
|
|
Post by shaunthe2nd on Nov 17, 2020 12:13:44 GMT 1
I love catching up on this thread every few weeks or so, always inspires me. Great work.
|
|
|
|
Post by abar121 on Nov 17, 2020 12:55:40 GMT 1
I love catching up on this thread every few weeks or so, always inspires me. Great work. Yes absolutely. My favourite thread to catch up on. |
|
|
|
RD700LC
Nov 19, 2020 22:22:46 GMT 1
Post by yamark on Nov 19, 2020 22:22:46 GMT 1
It always puzzled me, why the water pump outlet was about half the area of the hoses. I would agree with Tobyjugs, that it is the most restrictive part on the cooling system. Also the inlet on the rear of the cylinder head is quite small. I know cooling becomes an issue on big bore LC's when the power gets to over 90BHP, but I have more surface area in my 4 cylinders and heads to soak up the heat. I think the stock LC's temperature needle hardly moved, so was probably over cooled. I'm pretty confident that improving the restrictions should take care of any potential problems.
Thanks Shaunthe 2nd and abar121- I'm chuffed with your comments 
Cheers, Mark  |
|
|
|
Post by yamark on Nov 22, 2020 21:37:27 GMT 1
I pressure tested both cylinders in the week, and both have a few minor leaks. The cylinders are quite difficult to re weld and get water tight, so I'm pretty happy that a bit of minor tweaking will have them sorted.
I first pressurise the cylinders, and then brush on a solution of water and Fairy liquid
The bubbles are quite clear
Cylinder 2
 SDC11975 SDC11975
Cylinder 3
 SDC11976 SDC11976
I'll grind back and get the cylinders re welded.
I then thought I'd check the two small plates on the heads, but I can't find a temp sender to blank off the sender hole in the head, so that will have to wait.
Cheers, Mark |
|
signal
L plate rider.

Posts: 20 
|
Post by signal on Nov 22, 2020 21:47:39 GMT 1
Enjoying watch this bike come together. With the reworking of the cylinders don't grind the aluminium back, particles of the abrasive will contaminate the weld site and things go down hill from there. In my workshop I have a set of files and burrs that are only used on aluminium for this reason.
|
|
|
|
RD700LC
Nov 29, 2020 19:02:52 GMT 1
Post by yamark on Nov 29, 2020 19:02:52 GMT 1
Enjoying watch this bike come together. With the reworking of the cylinders don't grind the aluminium back, particles of the abrasive will contaminate the weld site and things go down hill from there. In my workshop I have a set of files and burrs that are only used on aluminium for this reason. Hi Signal, probably my poor terminology, I use a small Die grinder with Hss burrs, to take off material in preparation for welding.
Many thanks for making sure I was aware of contaminating the work to be welded
Cheers, Mark
|
|
|
|
Post by yamark on Nov 29, 2020 19:15:33 GMT 1
Now that I know the cylinders have minor leaks, I made another blanking plate to test the cylinder heads.
Both heads had small leaks, but I only photographed one of them
 SDC11978 SDC11978
Returning to the water pump housing, I enlarged and smoothed out the outlet passageway
 SDC11977 SDC11977
And finally, I bolted the front end back on the frame so I could check the headlight brackets and indicator/headlight fit
 SDC11974 SDC11974
Very happy with the look, I checked the clock clearance as well and it is very close to stock
Cheers, Mark |
|
gambit
L plate rider.
75 % done but I have come up to a problem I need a rd 350r fuel tap any body got any ?
Posts: 43
|
Post by gambit on Dec 2, 2020 11:42:38 GMT 1
I am a new boy just looked at your project it amazing. You must be an engineer?
When I have been trying to find parts I came across a gentleman who had bought all the engine which had been developed for a film called silver machine from a company in Wales. If I remember rightly they were 700 square four. He had started to modify a rsv 250 frame for the engine. The frame was very small as you know and I could not see how he could get the engine in.
Can not wait to see you finished bike.
|
|
|
|
Post by yamark on Dec 2, 2020 20:36:01 GMT 1
I am a new boy just looked at your project it amazing. You must be an engineer? When I have been trying to find parts I came across a gentleman who had bought all the engine which had been developed for a film called silver machine from a company in Wales. If I remember rightly they were 700 square four. He had started to modify a rsv 250 frame for the engine. The frame was very small as you know and I could not see how he could get the engine in. Can not wait to see you finished bike. Hi Gambit, thanks for your comment and as your new, I'll post some pictures of my 550LC Triple.
 SDC11453 SDC11453
 SDC11450 SDC11450
The build thread is on this Forum
Cheers, Mark
|
|
jimmyg
Drag-strip hero

Posts: 232
|
Post by jimmyg on Jan 3, 2021 19:36:36 GMT 1
Hi,I have just sat and read this from start to finished and it's blown my socks off. The level of work and skill involved are as good as I have ever seen.i look forward to seeing it finished, now off to find the triple build thread
Cheers jimmy
|
|
jimmyg
Drag-strip hero
Posts: 232
|
Post by jimmyg on Jan 3, 2021 19:50:58 GMT 1
You don't have a link to the triple do you? I just can't find it
|
|
|
|
Post by stusco on Jan 3, 2021 20:01:02 GMT 1
|
|
jimmyg
Drag-strip hero
Posts: 232
|
Post by jimmyg on Jan 3, 2021 20:26:42 GMT 1
Thank you 👍
|
|
|
|
Post by yamark on Sept 12, 2021 13:06:51 GMT 1
Hi all, it's been a mad year, life has been getting in the way of bike building- some good, some bad things slowing progress. But I have been busy with the build behind the scenes. To continue the thread, I had minor leaks on both cylinders and both heads. I marked and ground a trench where any leaks were (all pin holes). These trenches were then welded up  SDC11982 SDC11982 SDC11983 SDC11983 After grinding back the welds and re testing, I still had a couple of minor leaks, but more worryingly the cover plate started to distort on the cylinders. So, I decided to make new thicker ali plates for both cylinders and both heads. First step was to grind some slots and break out the old plates  SDC11984 SDC11984 Next step was to prepare the edges of both cylinders ready for new plates to be made 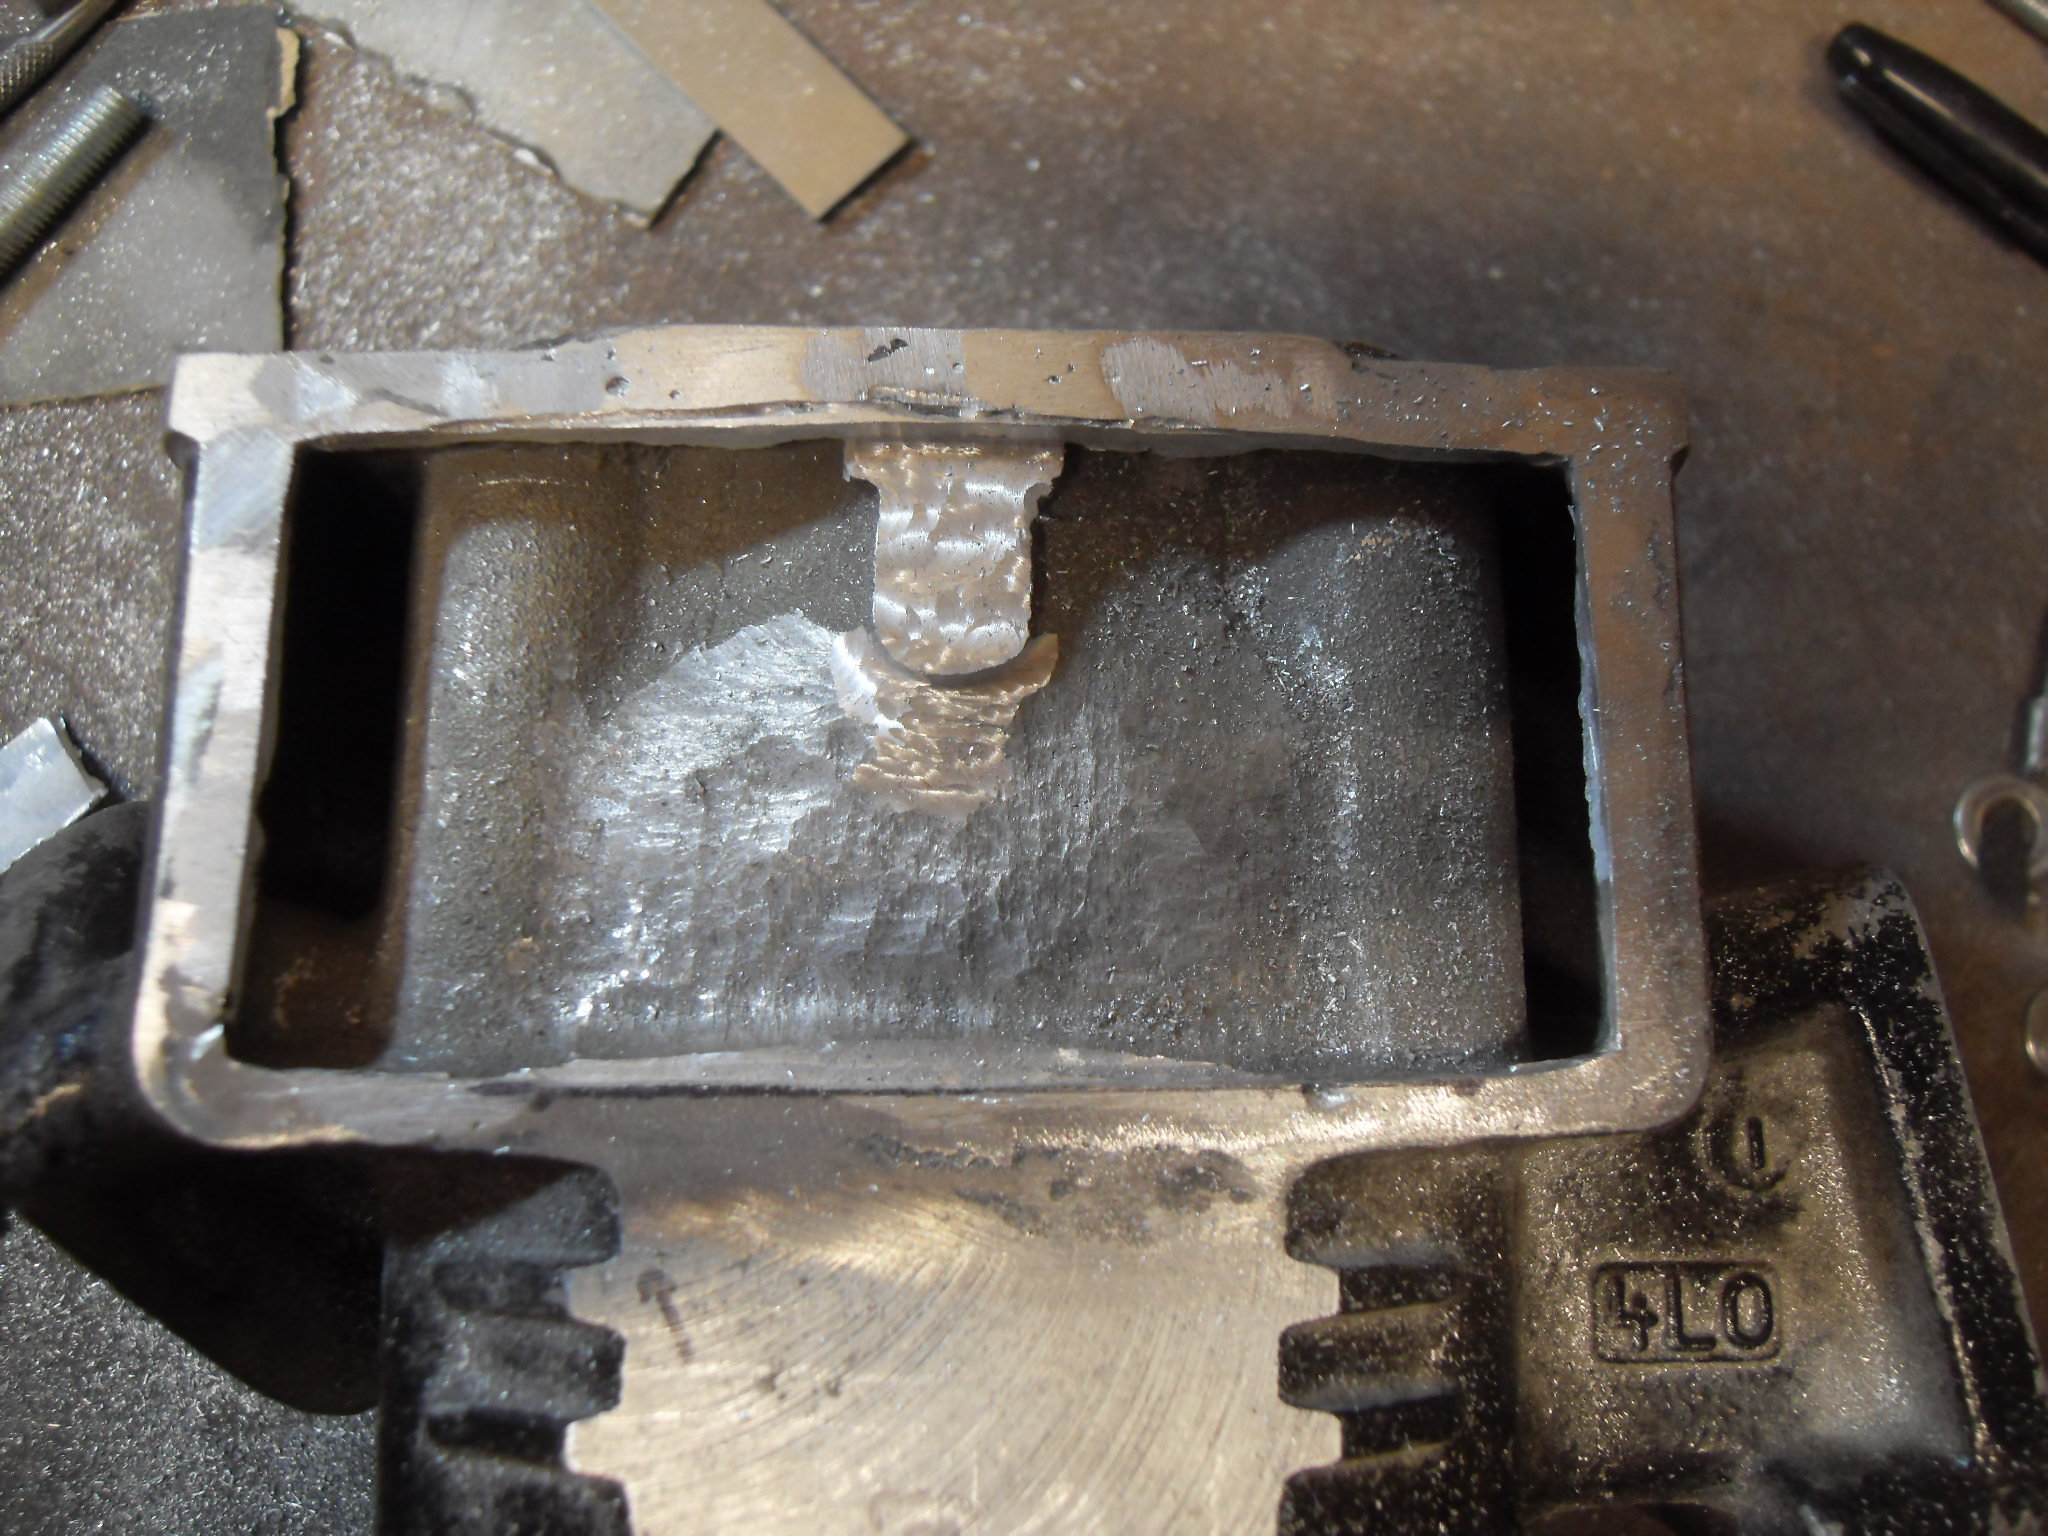 SDC11985 SDC11985  SDC11988 SDC11988 And then new plates made from 3mm ali  SDC11986 SDC11986 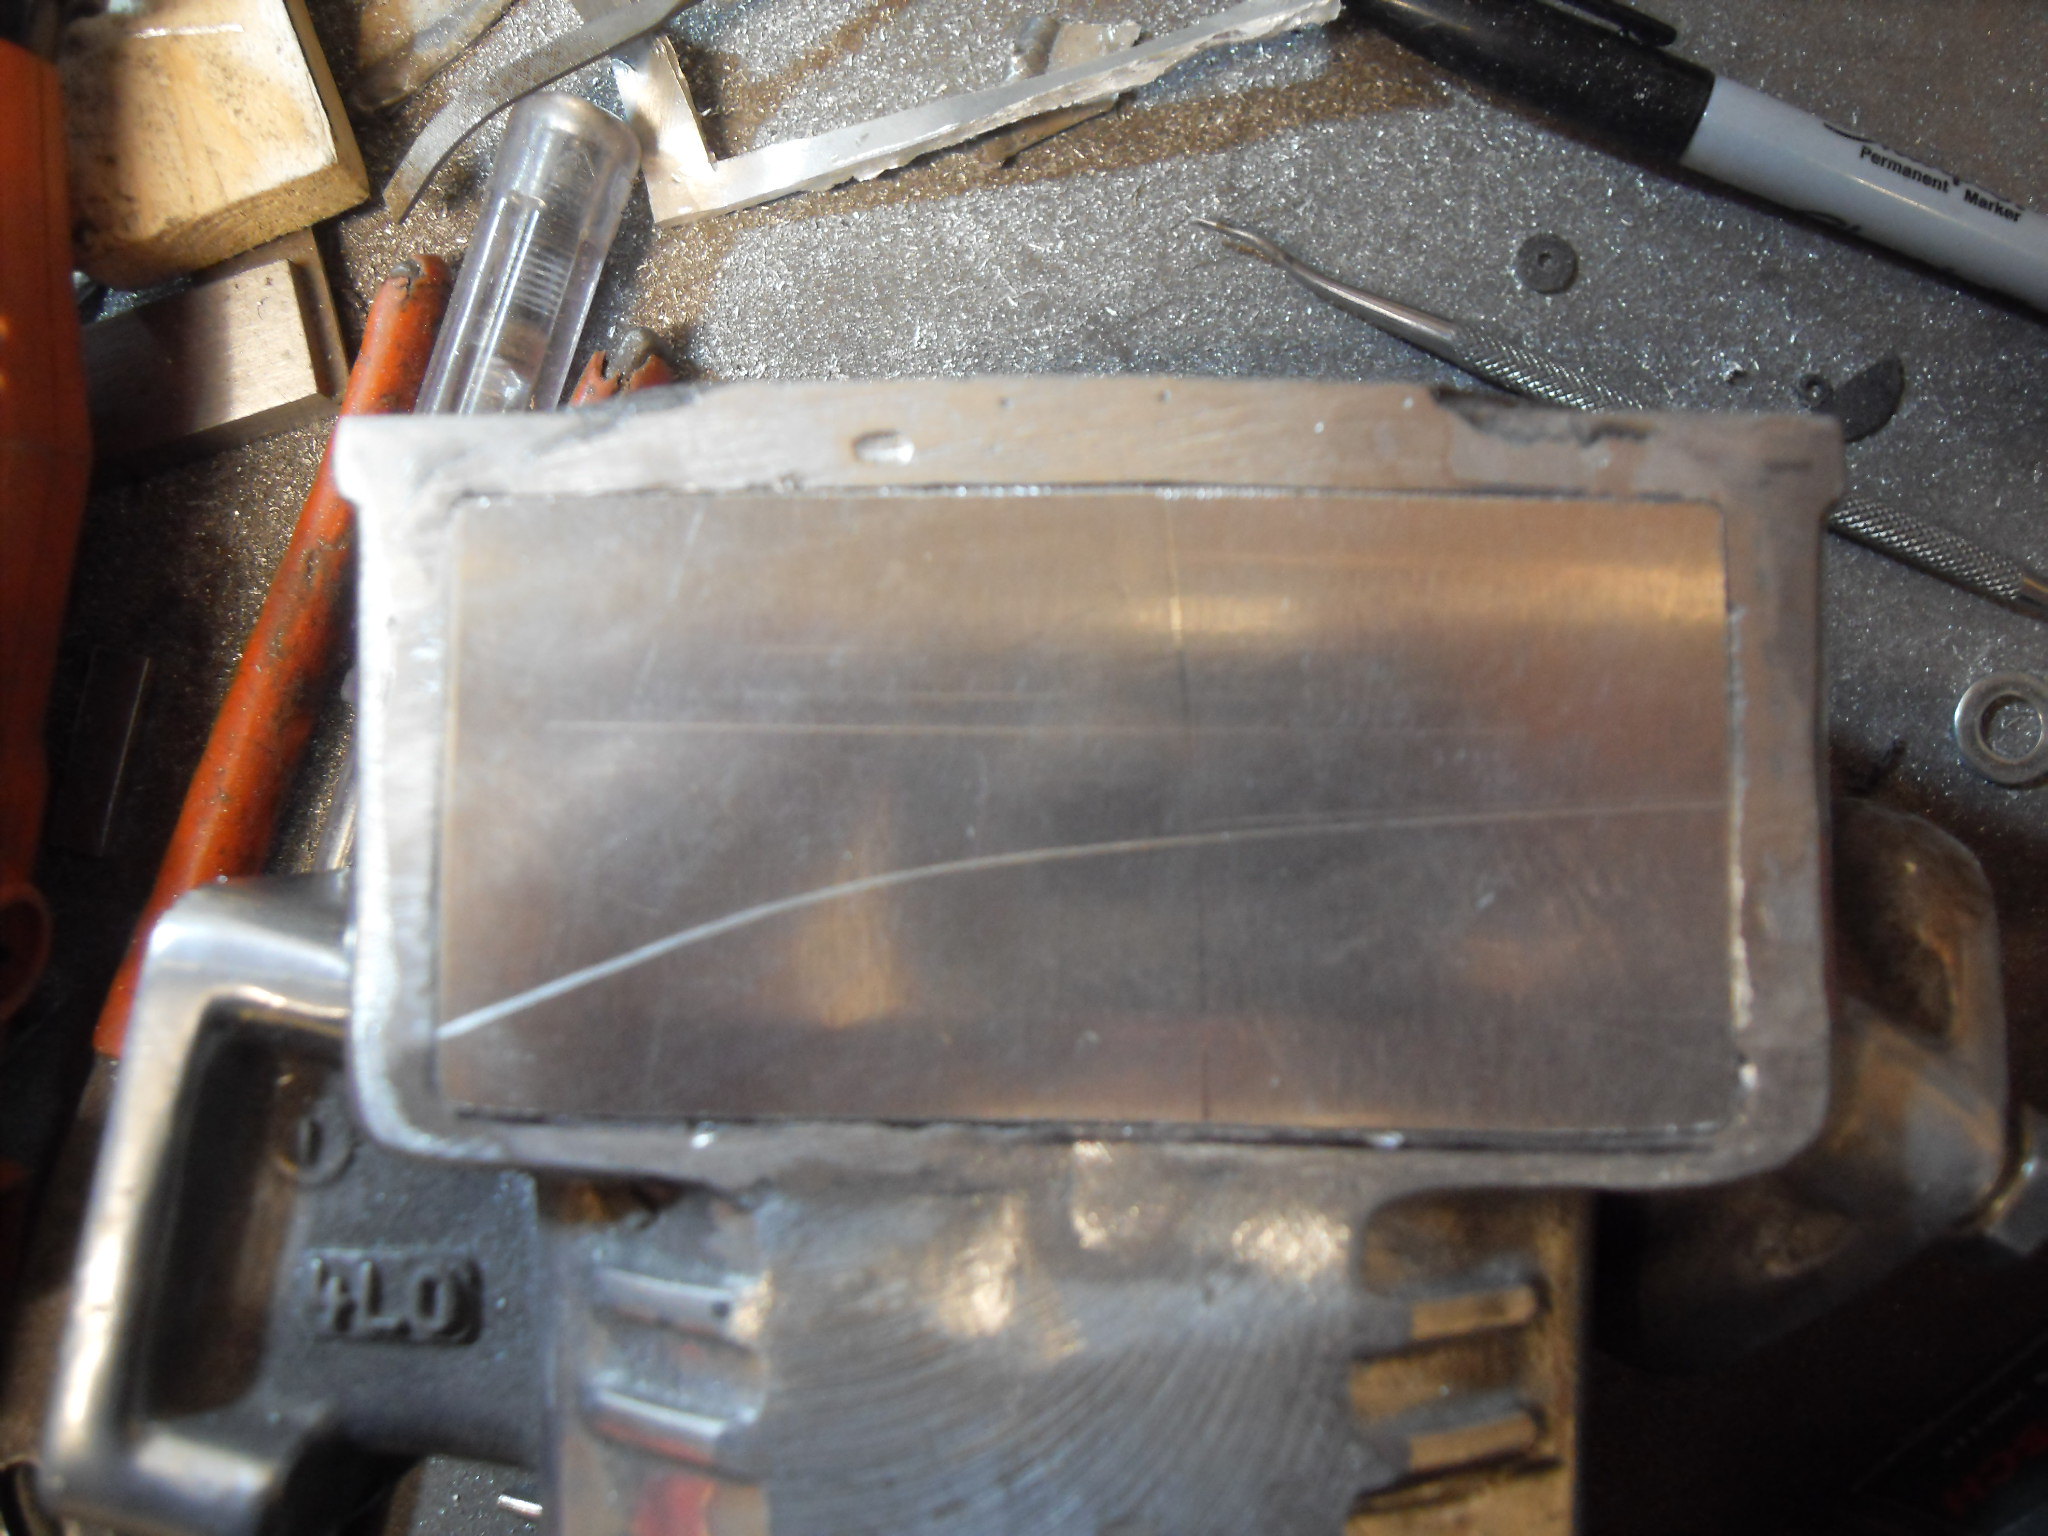 SDC11987 SDC11987 I've done the same with the heads, so all 4 parts just have to be welded and ground back to flat. I feel like I've gone backwards a bit, but better to be sure I have no porous welds Mark |
|
|
|
RD700LC
Sept 12, 2021 14:12:31 GMT 1
via mobile
yamark likes this
Post by oldbritguy on Sept 12, 2021 14:12:31 GMT 1
Great to see you back Mark.
You have been missed.
John
|
|
|
|
RD700LC
Sept 12, 2021 14:26:29 GMT 1
via mobile
yamark likes this
Post by sidney81 on Sept 12, 2021 14:26:29 GMT 1
Hi mark , great to see some progress 👍👍
|
|
|
|
Post by Yogi on Sept 12, 2021 14:53:26 GMT 1
Welcome back Marky boy 👌
|
|
|
|
Post by raven13 on Sept 12, 2021 15:20:01 GMT 1
Welcome back mate.
|
|
|
|
Post by donkeychomp on Sept 12, 2021 21:23:33 GMT 1
Great to see you back on this Mark.
Alex
|
|
|
|
Post by dusty350 on Sept 12, 2021 21:29:21 GMT 1
Bout time mate  Good to see you back Dusty |
|
|
|
Post by Denzil on Sept 13, 2021 7:58:34 GMT 1
Welcome back. Superb build.
|
|
|
|
RD700LC
Sept 13, 2021 18:03:42 GMT 1
Post by yamark on Sept 13, 2021 18:03:42 GMT 1
Thanks chaps, I'll try to post on Sunday's as usual.
Hope life is being good to you all
Cheers, Mark
|
|
|
|
Post by hudtm60 on Sept 13, 2021 18:06:54 GMT 1
Great to see Barry Sheene’s smiling face signaling the prospect more engineering genius on the bike we all love.
|
|
|
|
Post by Tobyjugs on Sept 14, 2021 8:10:57 GMT 1
Good to see your posting again Mark.
Pity about the weld leaking. It always seems to be awkward when the Ally has been in contact with coolant.
|
|
|
|
Post by beardy on Sept 14, 2021 8:53:57 GMT 1
It often makes me smile reading this thread.
What would be a catastrophic disaster for me is just a minor irritant to you.
👍🏻
|
|
|
|
Post by yamark on Sept 19, 2021 14:49:58 GMT 1
Cheers, hudtm60, tobyjugs and beardy , So after asking Glenn (Dusty's welder) what size chamfer he needed on the plates and barrel edges, I prepared everything and Glenn welded the barrels and heads  SDC11989 SDC11989  SDC11990 SDC11990  SDC11991 SDC11991 They were ground back flat, and pressure tested - one minor pinhole on the right hand head which was soon sorted Next up, the rear wheel. As I'm getting very close to having powdercoating done, a thing that niggles me, is the sunk writing cast into the rear wheel I'm using(Bandit 600).  SDC11992 SDC11992  SDC11993 SDC11993 So I had Glenn build weld up to fill the voids in the 3 areas  SDC11994 SDC11994  SDC11995 SDC11995  SDC11997 SDC11997 Glenn used minimal heat, and we checked the rim for distortion. because of Glenns skill, there was no distortion I've just got to dress the welds back for a flat rim and it can be powder coated. I'm getting close to assembly Cheers, Mark |
|
|
|
Post by abar121 on Sept 19, 2021 17:29:29 GMT 1
Brilliant! Looking forward to more updates on this fabulous project.
|
|


