|
|
Post by andrel on Nov 26, 2018 13:55:55 GMT 1
Hi Dusty, thanks for the info on the pistons and pins, it is much appreciated.
Took the cases today to the bloke who is my go-to guy for crank rebuilds or when i run out of talent or the right tools and he confirmed what you said - cases torqued close with the pin incorrectly located so it buried itself there where i found it.
A good thing i have decided to rather open up the motor. Suspect that the crank will also be fubar.
Pity about the powervalves being so rough - they are more expensive than i anticipated.
He is going over everything at the moment so will see what the outcome is.
|
|
|
|
Post by andrel on Dec 15, 2018 14:16:14 GMT 1
As suspected the crank was fubar and the pistons also not to great either. I am lucky enough have Mario (specialises in two stroke bikes) live just down the road from me and within a day or so these arrived at his workshop 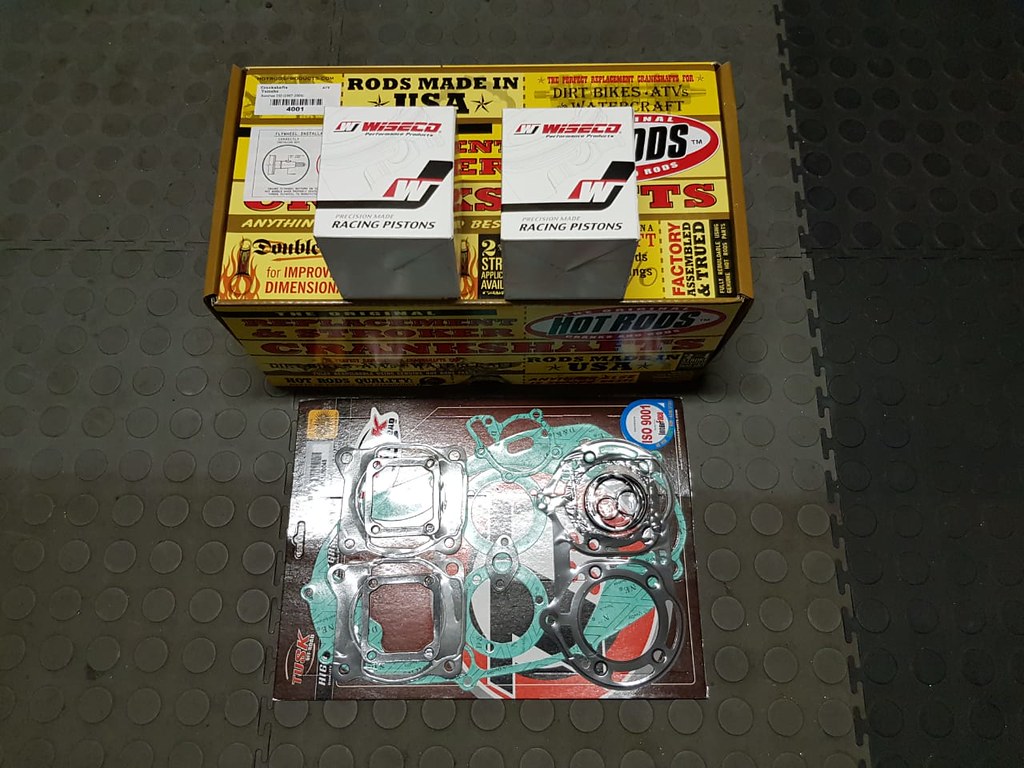 Have also ordered OEM head gasket and crank shaft seals (suprisingly cheap from our local Yamaha dealer). Diufficult time of year with everything pretty much shutting down for the Christmas holidays, but looking forward to start the engine rebuild within the next few weeks. |
|
|
|
Post by brucie on Dec 15, 2018 15:09:01 GMT 1
What a great write up on the restoration project will be fantastic when it's done look forward to more updates
|
|
|
|
Post by tooslow on Dec 20, 2018 10:18:33 GMT 1
well done great job so far
|
|
|
|
Post by andrel on Jun 13, 2019 20:08:10 GMT 1
Getting ready to start with the engine rebuild - but then around each corner I seem to run into some other little surprise the previous owner left for me. Whilst cleaning the gunk / spraypaint of the bearing plate I noticed the blue discolouration before realising that, somehow, someone managed to break it, then welded it together (very flimisly) and then re-used it. The mind boggles  20190609_172711 20190609_172711  20190609_172720 20190609_172720 |
|
|
|
Post by dusty350 on Jun 13, 2019 20:29:36 GMT 1
Someone was penny pinching ! Still available from Yamaha. Fowlers stock them - £6.76, part no. 4l0 17471 00. Dusty  |
|
|
|
Post by muttsnuts on Jun 13, 2019 20:33:57 GMT 1
that suggests the engine might have been raced, it was a common thing to do in the pro-ams etc, to cut the retainer plate in half as the screws can be a pain to undo, so cutting them in half meant you could split the crank cases alot easier without the need to touch the retainer plate, but as Dusty says, still available from Yamaha
|
|
|
|
Post by andrel on Jun 13, 2019 20:41:51 GMT 1
Thanks, will order a new one. The screw heads does look suprisingly good so might well have been purposefuly cut. I have some nice JIS scredrivers and JIS impact bits so did not struggle unduly to remove it, but a normal philips is probably going to struggle.
|
|
|
|
Post by midlifecrisisrd on Jun 14, 2019 8:43:01 GMT 1
As mutts says it's a racer mod
It also allows the cases to be split without removing the clutch basket
Steve
|
|
|
|
Post by andrel on Jun 14, 2019 9:33:53 GMT 1
As mutts says it's a racer mod It also allows the cases to be split without removing the clutch basket Steve One learns something new every day on this site, which is why i enjoy it so much i guess. |
|
|
|
Post by shaunthe2nd on Jun 14, 2019 9:46:43 GMT 1
Great thread. Keep up the good work and keep us posted.
|
|
|
|
Post by andrel on Jun 22, 2019 19:59:28 GMT 1
Time to stick up a few pictures of the progress to date. Phase 1 of the project was getting the frame, rolling chassis, brakes and electrics sorted and this has been largely completed. Phase 2 is the engine rebuild - it has been slow going, but making steady progress. Had the cases and barrels bead blasted and then painted the top case and the head. Not fully standard, I know, but I like the look. Did a quick mock-up to see what it would look like eventually 
 |
|
|
|
Post by dusty350 on Jun 22, 2019 20:02:50 GMT 1
Engine looks great. I like the contrast instead of it being all black. Good job  Dusty |
|
|
|
Post by andrel on Jun 22, 2019 20:05:00 GMT 1
First the selector forks, drum and gear clusters  Then spending what seemed like many pleasant hours twirling the shafts and watching with pleasure the gear engagements and the selector drum operation  |
|
|
|
Post by andrel on Jun 22, 2019 20:06:37 GMT 1
Engine looks great. I like the contrast instead of it being all black. Good job Dusty Thanks Dusty |
|
|
|
Post by andrel on Jun 22, 2019 20:12:40 GMT 1
Hotrods crank ready to go in   I followed a slightly different approach from Dusty's build by fitting the crankshaft seal and primary gear and nut (not tightened), as well as the alternator side crankshaft seal and then lowering the crankshaft into position. Felt that it was easier to locate the seals in their grooves as well as the primary gear into the seal. Mock mounted the cases and nearly forgot to check (a bit late ) but numbers matching cases for my numbers matching bike.  Then I made a big error - had some quality sealant still lying in my cabinet, applied it and closed up the cases. Later that night I opened them up again - I was concerned that the sealand was old and not doing its work properly. Turned out that I was right. Spend the next morning lifting everything out again, cleaning the sealant off properly and then off to Yamaha for some Yamabond. This time there was no issues.  |
|
|
|
Post by andrel on Jun 22, 2019 20:24:03 GMT 1
After previously discovering that the bearing retainer plate was cut and then re-welded I went to the local Yamaha dealer to enquire how many months would they need to get me one - to my utter amazement I got it within 3 days Shiny new retainer fitted  Clutch and alternator to follow. Have a clutch holding tool, but must just figure out what is the quickest and safest way to secure the alternator for torquing the nut. I dont exactly want to make a tool to fit through the two holes because I see that the magnets portrude slightly on the outer edges and I am not keen on damaging them. Thinking of a combination of the copper pipe gear jamming and round rod through conrod small-end trick |
|
|
|
Post by stusco on Jun 22, 2019 20:39:36 GMT 1
I made a scissor type tool out of flat bar made pegs from bolts just make sure they only just go through the flywheel so they don’t go near the magnets you don’t want to risk twisting your new crank
|
|
|
|
Post by andrel on Jun 22, 2019 20:44:13 GMT 1
I made a scissor type tool out of flat bar made pegs from bolts just make sure they only just go through the flywheel so they don’t go near the magnets you don’t want to risk twisting your new crank Thanks, reason I am so nervous of the magnets is that I also had a Husqvarna SM610 project and those magnets were as fragile as glass - if you dropped the bike hard enough on its side they would de-laminate and break. The end result would be hugely expensive as the magnets could not be sourced seperately or reliably re-affixed. I knew a bloke that bought an enitre second hand 610 engine just to get the alternator  |
|
|
|
Post by stusco on Jun 22, 2019 20:46:57 GMT 1
You’ll be fine I think you can buy a clutch/ alternator tool or you can easily make one I bought the flat bar from b&q
oops didn’t know you were in SA do you have b&q😁
|
|
|
|
Post by andrel on Jun 22, 2019 21:22:46 GMT 1
You’ll be fine I think you can buy a clutch/ alternator tool or you can easily make one I bought the flat bar from b&q oops didn’t know you were in SA do you have b&q😁 here we have a number of small to medium sized steel retailers - no real dominant player. Seems i must drag the old welder out and give it a go. |
|
|
|
Post by panzermatt on Jun 23, 2019 13:11:54 GMT 1
you dont have ebay?
|
|
|
|
Post by andrel on Jun 23, 2019 16:43:37 GMT 1
Can access eBay, but we have no functioning postal service and using a courier is expensive. Took a look at a TUSK clutch tool i bought some time ago (I used the fancy Yambits clutch holder for this build) and lo and behold it has two raised bosses on the one side - so basically a combination clutch and alternator holder tool. With a few small modicications to clear they fit nicely into the two alternator holes without being too close to the magnets and with the vice-grip type closing action they hold on well.  I was quite chuffed. That, however, lasted all of 5 minutes until I realised that I have managed to lose / hide the new woodruff key that I bought months ago for this job. It was nowhere to be found so the best that I could do was sort out the wiring and temporarily mount the generator.  Then went back to the other side to fit the clutch, water pipe and kickstart mechanism.  I like a clutch with a soft pull and fitted new OEM springs as the free length of the old ones were no longer in spec. Amazingly my local dealer had these immediately in stock. Yamaha must use the same springs in a number of bikes for that to have happened. I wonder which models use the same? A while ago I discovered that the YZ125, for example, uses the exact same size of front fork seals as the RD - probably a pretty standard size. Set the clutch actuating arm to the index mark and that was all she wrote.  Will take a pause now waiting for some more spares, including (expensive) powervalve bushes. Tempted to re-use my old ones but the new valves I have sits pretty loose in them and I have not been able to establish wat an acceptable tolerance for those are. Any advice? |
|
|
|
Post by panzermatt on Jun 23, 2019 18:28:20 GMT 1
i love how parts "disapear" where do they go?
|
|
|
|
Post by panzermatt on Jun 23, 2019 18:34:50 GMT 1
by the way i am loving the pctures, the missus keeps coming in and catching me watching porn as ahe calls the bikes on this forum.
|
|
|
|
Post by andrel on Jun 23, 2019 18:53:56 GMT 1
Thanks Matt, it has been tough going and at times quite frustrating. Some builds go relatively easy, but this one is fighting me every step of the way. Having to keep a garage of bikes running means i must also pace myself as far as budget goes. |
|
|
|
Post by andrel on Dec 18, 2019 17:41:17 GMT 1
It has been six months since my last confession Father........ Holidays are here and I can spend some time again on my favourite frustraion having spent the last few months scraping parts together and getting ready for the big re-assembly. Back went the oil pump with new seal and the water pump with new impeller, seal and bearing - all from my favourite Yamaha dealer. Incidently the OEM impeller was much cheaper than the Yambits equivalent. Then struggled a bit to fit the alternator over the new woodruff key and torque it down. With new pistons, rings, YPVS valves, connector block and gaskets in hand I set to work on finishing up the cylinders and refitting to the bottom end. All went swimmingly until I discovered that two of the head bolt threads could not take torque and was, in fact, basically stripped out. Off everything came again and new inserts were fitted - two base gaskets and a nice yamaha head gasket wasted in the process. At the last minute, in the interest of keeping the standard look, I painted the cylinders black. Not sure if I did the right thing as I really liked the naked aluminium look. Finally I could re-fit the engine in the frame. I thought that I would struggle alone, but it was relatively easy - I did not scratch the paint or bugger anything up, so a good result  |
|
|
|
Post by andrel on Dec 18, 2019 17:54:02 GMT 1
Two more pictures - still some ways to go, but getting there. Having an interesting time figuring out the routing of the wiring harnass from the alternator up to the frame, the tacho meter cable, clutch cable, throttle cable, etc and spending some time on the remaining wiring (alternator to CDI to Rectifier). I really hope the CDI is still in working condition as the previous owner fitted a RD250 CDI and I sourced a 2nd hand 31K unit. Not a very smart move, i know (given their reputation for failing), but at the price a viable option for me. The idea is to get the bike ready to start but still without all the fancy parts fitted so that I can better see what is going on (spark, fuel, coolant, oil pump feed, etc).   Rebuilding the carbs is next |
|
|
|
Post by dusty350 on Dec 18, 2019 18:35:23 GMT 1
Looking really good mate I think the barrels look great painted black, or left silver - either or works well I think Dusty |
|
|
|
Post by 123 on Dec 18, 2019 22:01:36 GMT 1
looks really nice best of luck with rest of the biuld
|
|


