|
|
Post by bazzer5115 on Jul 9, 2018 7:56:05 GMT 1
I feel for you dusty,
The reason phlllpots re-chrome service is busy is 2 fold.
They do a top good,with hard chrome finish
Most pattern stanchions are poorly made,probably in China
I bought a set for my first rgv hybrid about 6 yrs ago from
All bike engineering,and there was a problem with the fit.
I can’t remember what it was now,but I had to have a small amount of machining done to them to get them right.
Same with a lot of pattern stuff!!!!
Baz
|
|
|
|
Post by badger1 on Jul 9, 2018 8:02:47 GMT 1
Just had two sets done by phillpots they did them in 6 weeks
|
|
|
|
Post by reggieperrin on Jul 9, 2018 12:13:54 GMT 1
Be careful with some NOS stuff as well..
I bought 2 x NOS stanchions for my little 50ER and the inside of the tubes was so badly corroded that it was flaking off.
Looked fine from the outside...
|
|
|
|
Post by dusty350 on Jul 9, 2018 18:33:24 GMT 1
Hi I know Philpots have been the go to guys for rechroming for years, and of course, if you are good, then you are busy ! That's why I thought I would go for the pattern tubes, thinking Tarozzi have been around a long time, and the fact Brooksbarn sell them as well as Wemoto made me think they would be fine. I spoke to them today and they are looking into it. They said they have not had problems before, but the fella on the phone didn't know the difference between VJ21 and VJ22 ! Looks like I will be getting my money back as there seem to be no other options they can offer. Real pita  Dusty |
|
|
|
Post by midlifecrisisrd on Jul 9, 2018 19:18:11 GMT 1
Hi I know Philpots have been the go to guys for rechroming for years, and of course, if you are good, then you are busy ! That's why I thought I would go for the pattern tubes, thinking Tarozzi have been around a long time, and the fact Brooksbarn sell them as well as Wemoto made me think they would be fine. I spoke to them today and they are looking into it. They said they have not had problems before, but the fella on the phone didn't know the difference between VJ21 and VJ22 ! Looks like I will be getting my money back as there seem to be no other options they can offer. Real pita Dusty Call All Bike Engineering I spoke to them when I was rebuilding vj21 forks years ago They wanted my old stanchions to get the shuttle bush out for the new ones so not simply buying a ready made pattern item I only decided to get my originals reformed as they only had 1 chromed one so would need to send another for chroming which would take 3 weeks Philpotts had said 3 weeks too so just went with them Took 5 weeks as one leg kept having a pinhole in the chrome Took 4 attempts which was evident by the area the chrome stopped Steve |
|
|
|
Post by andy748 on Jul 9, 2018 20:23:30 GMT 1
|
|
|
|
Post by dusty350 on Jul 9, 2018 20:29:23 GMT 1
Hi Steve I've been searching the net for answers and found some interesting info. It would appear the very first VJ21, the J model - Japan only - differs slightly from the K and L that we got. One area it differs is suspension bushes ! Robinsons and Fowlers don't list J parts  . I wonder if the plastic piston ring from a UK K or L would fit the damper rod I have, allowing it to work ? I may, possibly, have J model forks and internals, and they wont fit the K/L model pattern tubes. Without a piston ring fitted the damper fits the new tube easily with some slack so I wonder if the piston ring on the J has a bigger diameter making it tight in the tube?. Fowlers stock the later rings at £6.71 each so maybe worth a gamble ? Dusty |
|
|
|
Post by midlifecrisisrd on Jul 9, 2018 21:19:57 GMT 1
Worth a punt Dusty
There were many imports brought in so very possibly jap internals
Steve
|
|
|
|
Post by dusty350 on Jul 9, 2018 21:27:56 GMT 1
I will order them tomorrow. Fingers crossed !!
|
|
|
|
Post by dusty350 on Jul 13, 2018 21:42:12 GMT 1
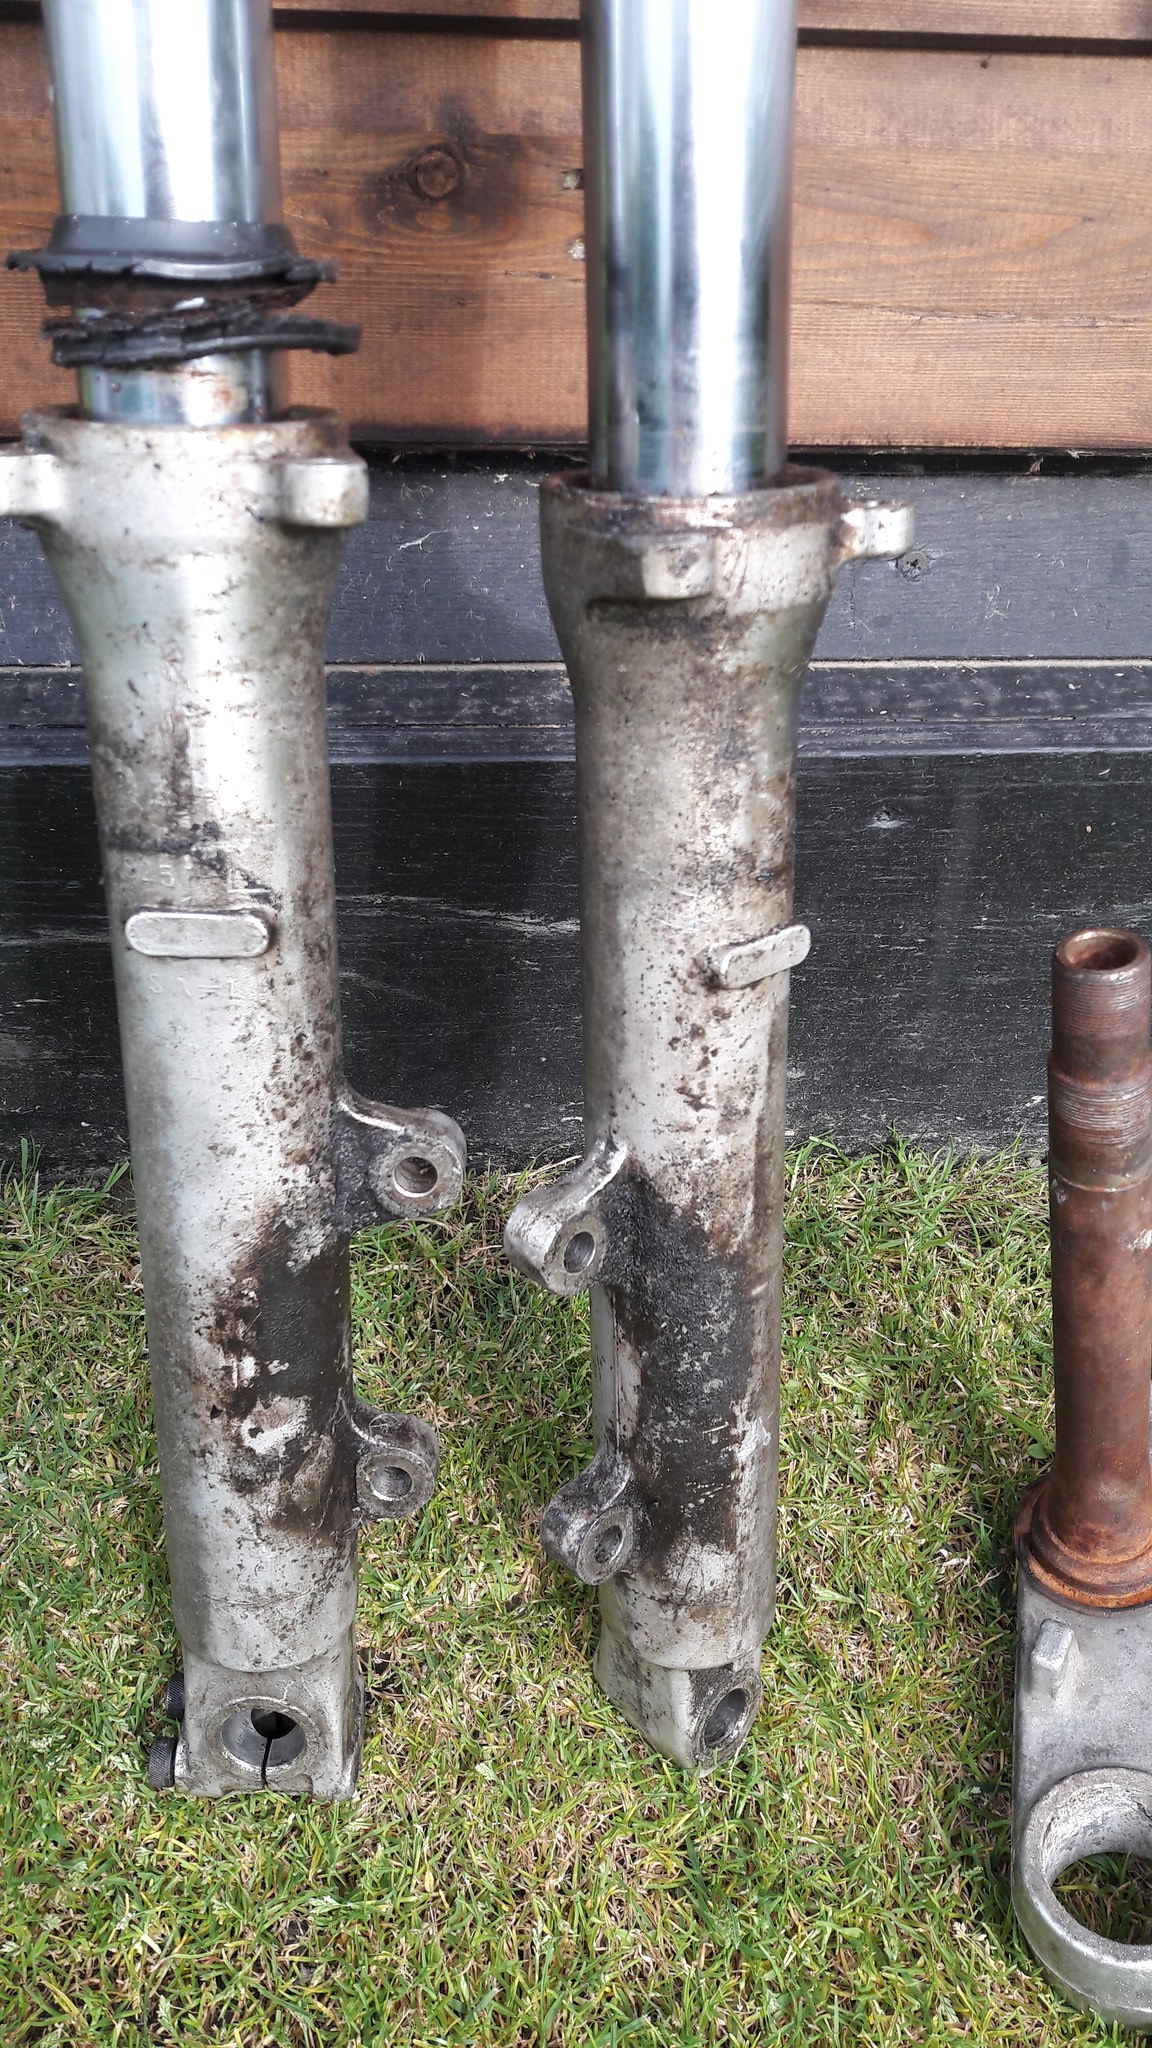
Hi I ordered the piston rings for the damper rods in the forks - got the last 2 that Fowlers had ! Fitted them to the damper rods and offered them up to the new tubes and.. wont fit Too tight, so now I'm thinking it must be the new tubes having a slightly smaller id than standard. I was looking at having to get the old tubes rechromed, when Truebrit rang me out of the blue. He had read on here the problems I was having, and kindly offered me a set of Vj21 forks he had - what a STAR !! He posted them for next day delivery and they turned up today. Stanchions are great - no pitting, and generally in very good nic ! The spindle must differ from mine as there is no threaded hole for the spindle to screw into on one leg, so I'm not sure whats going on there ? I decided to strip the forks Dave sent, and use the stanchions, along with my new springs and other parts in my fork bottoms as my spindle works with them. Another interesting point is the spacer tubes. I bought 2 new from Suzuki, but after stripping Dave's forks, his spacer tubes are shorter; 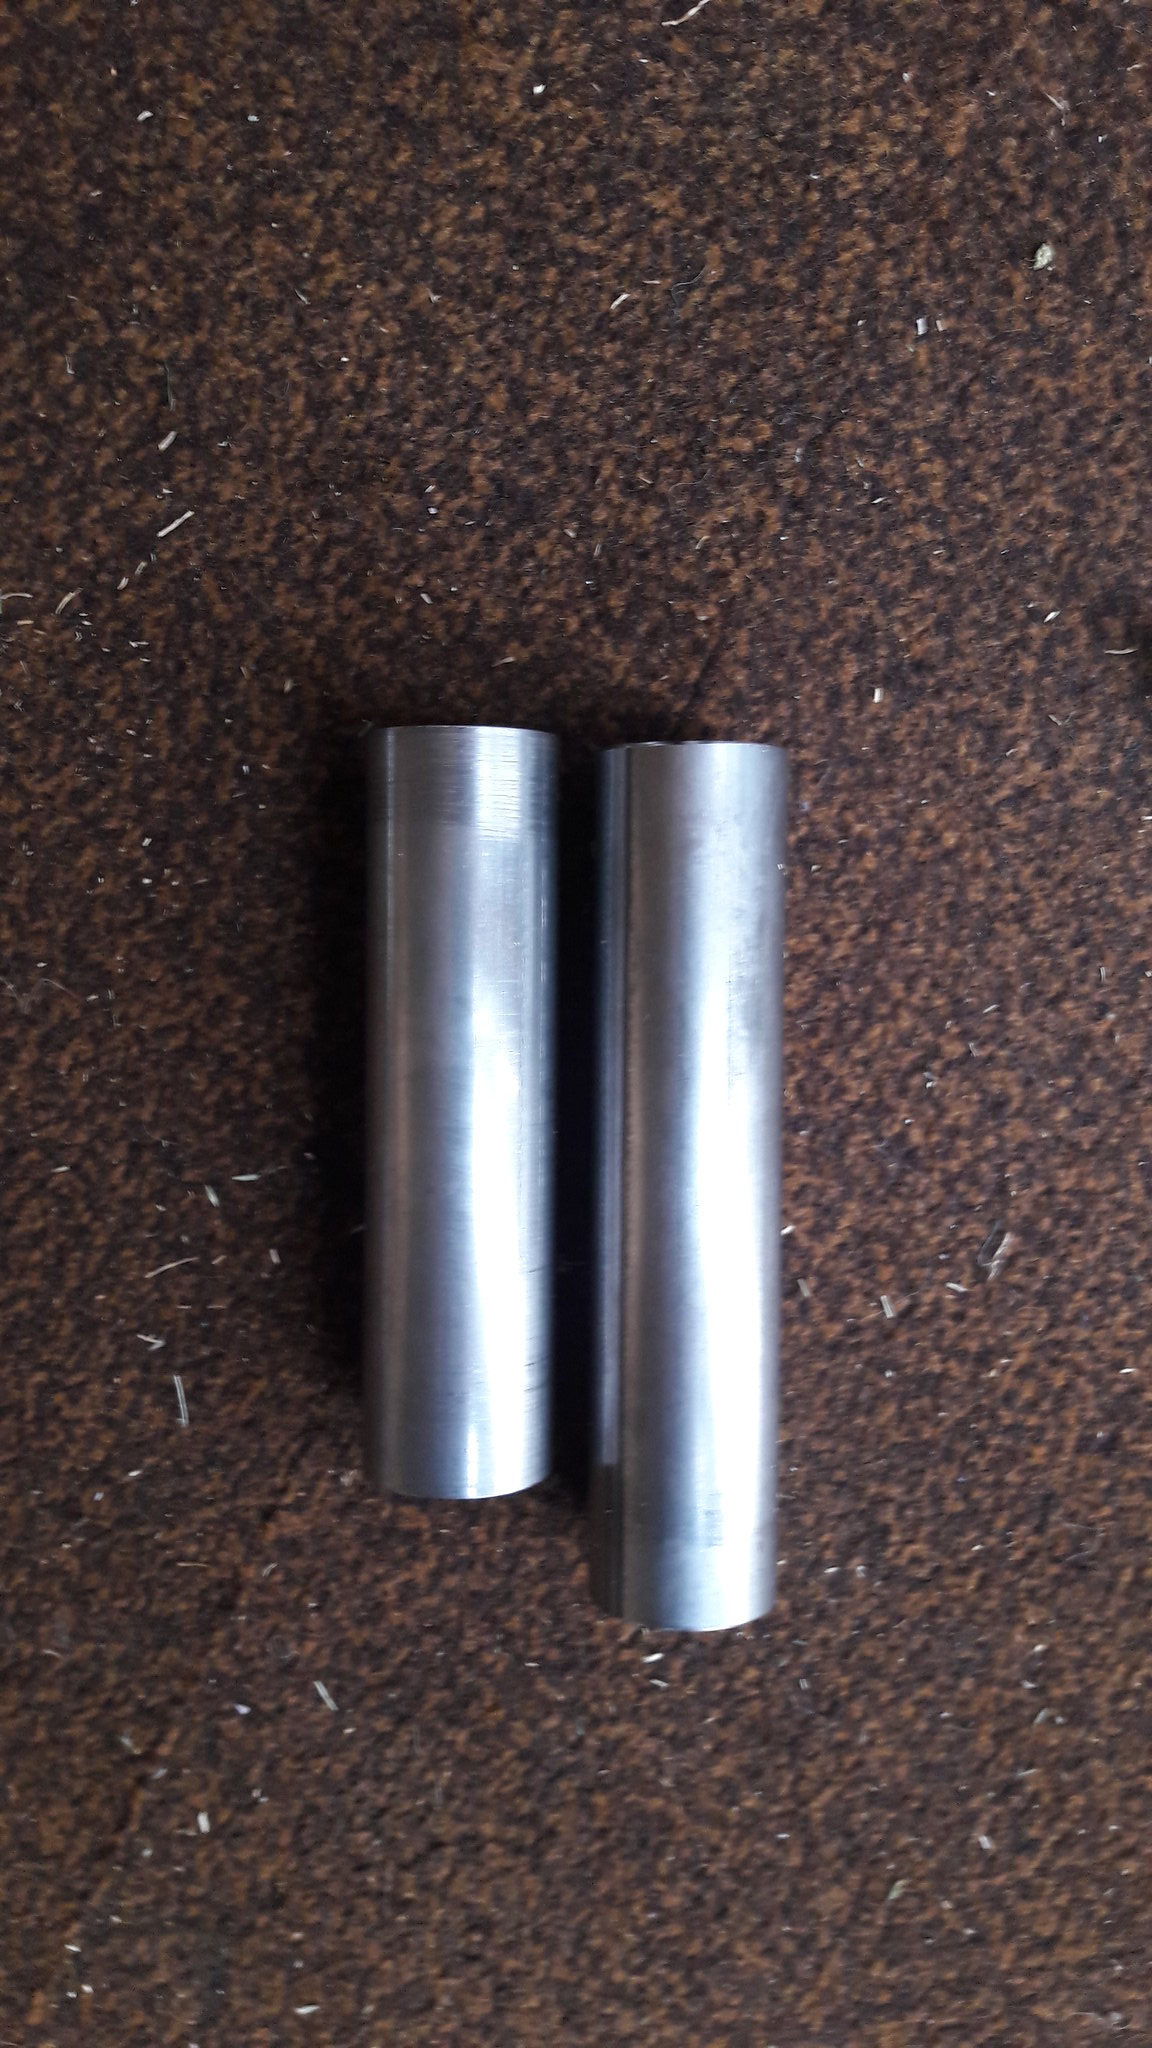 20180713_202053 20180713_202053 by David Miller, on Flickr Don't know why that is, but I've gone with the shorter tubes, new springs/oil/seals/dust seals/piston rings/copper washers and a couple of other bits, so I'm basically building one good set from 2 sets and some new parts. I did one side tonight, will do the other tomorrow if I get time; 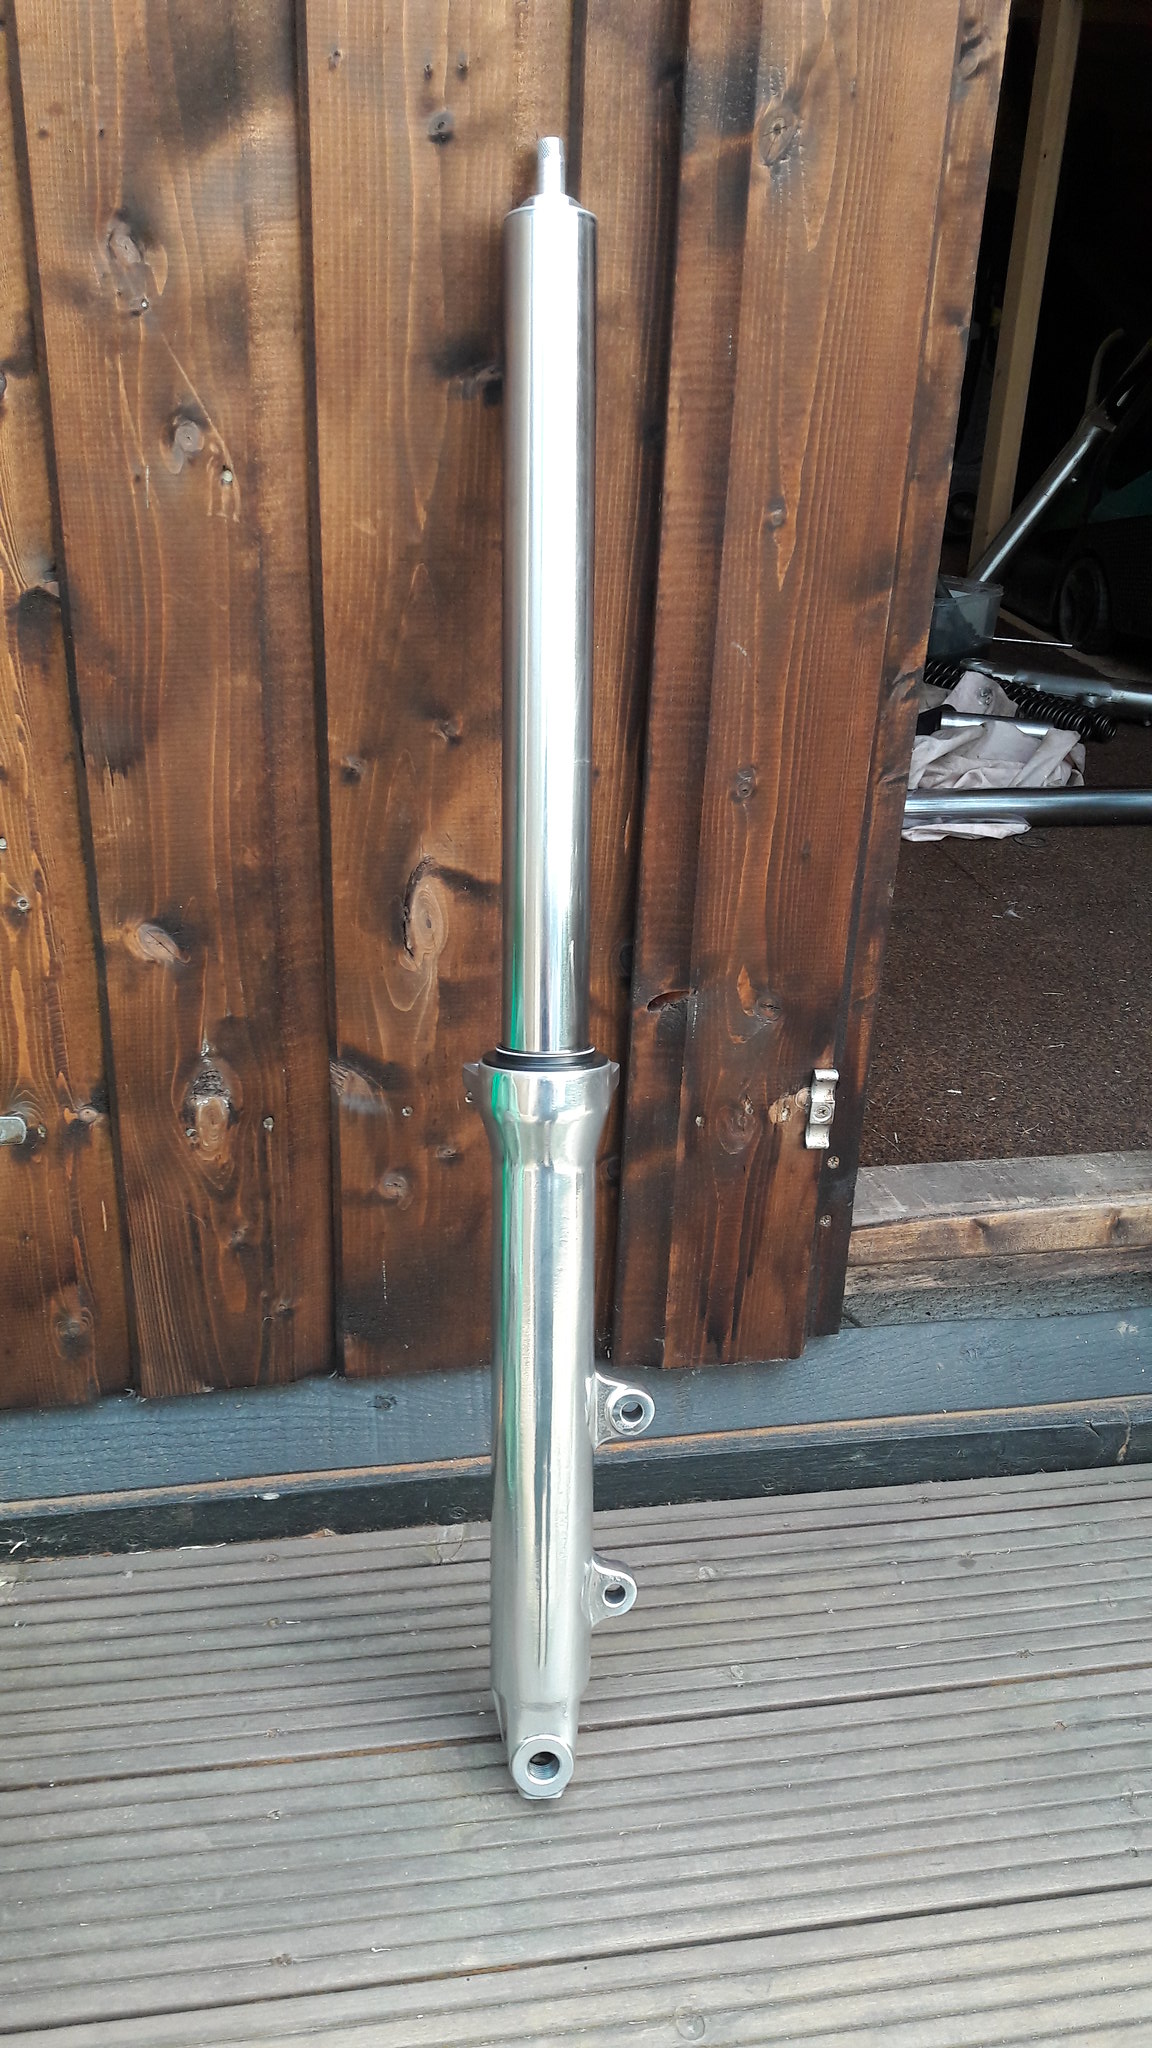 20180713_201958 20180713_201958 by David Miller, on Flickr Wemoto have been very good regards the stanchions they supplied, and are sending a courier to collect and will reimburse my money and postage fees so cant fault them there. A tool I recently bought paid for itself today too  I was in Lidl the other week and they were selling a 20v rattle gun. Not something I would normally need, but with 2 engines on the bench and the forks to do, I thought it might be useful. Really glad I got it now. The bolt that passes up into the damper rod from the bottom of the fork can be a pig to undo. Normally strip everything out of the forks and wedge a broom handle in to stop the damper rod spinning, and then undo the bolt - that's normally what I have to do. With the rattle gun, leave it all intact - the fork spring tension helps lock the damper rod, and the rattle gun just whizzed the bolt straight out !! Never been so easy  The gun, and battery and charger were about £35 I think. Great tool, even if seldom used; 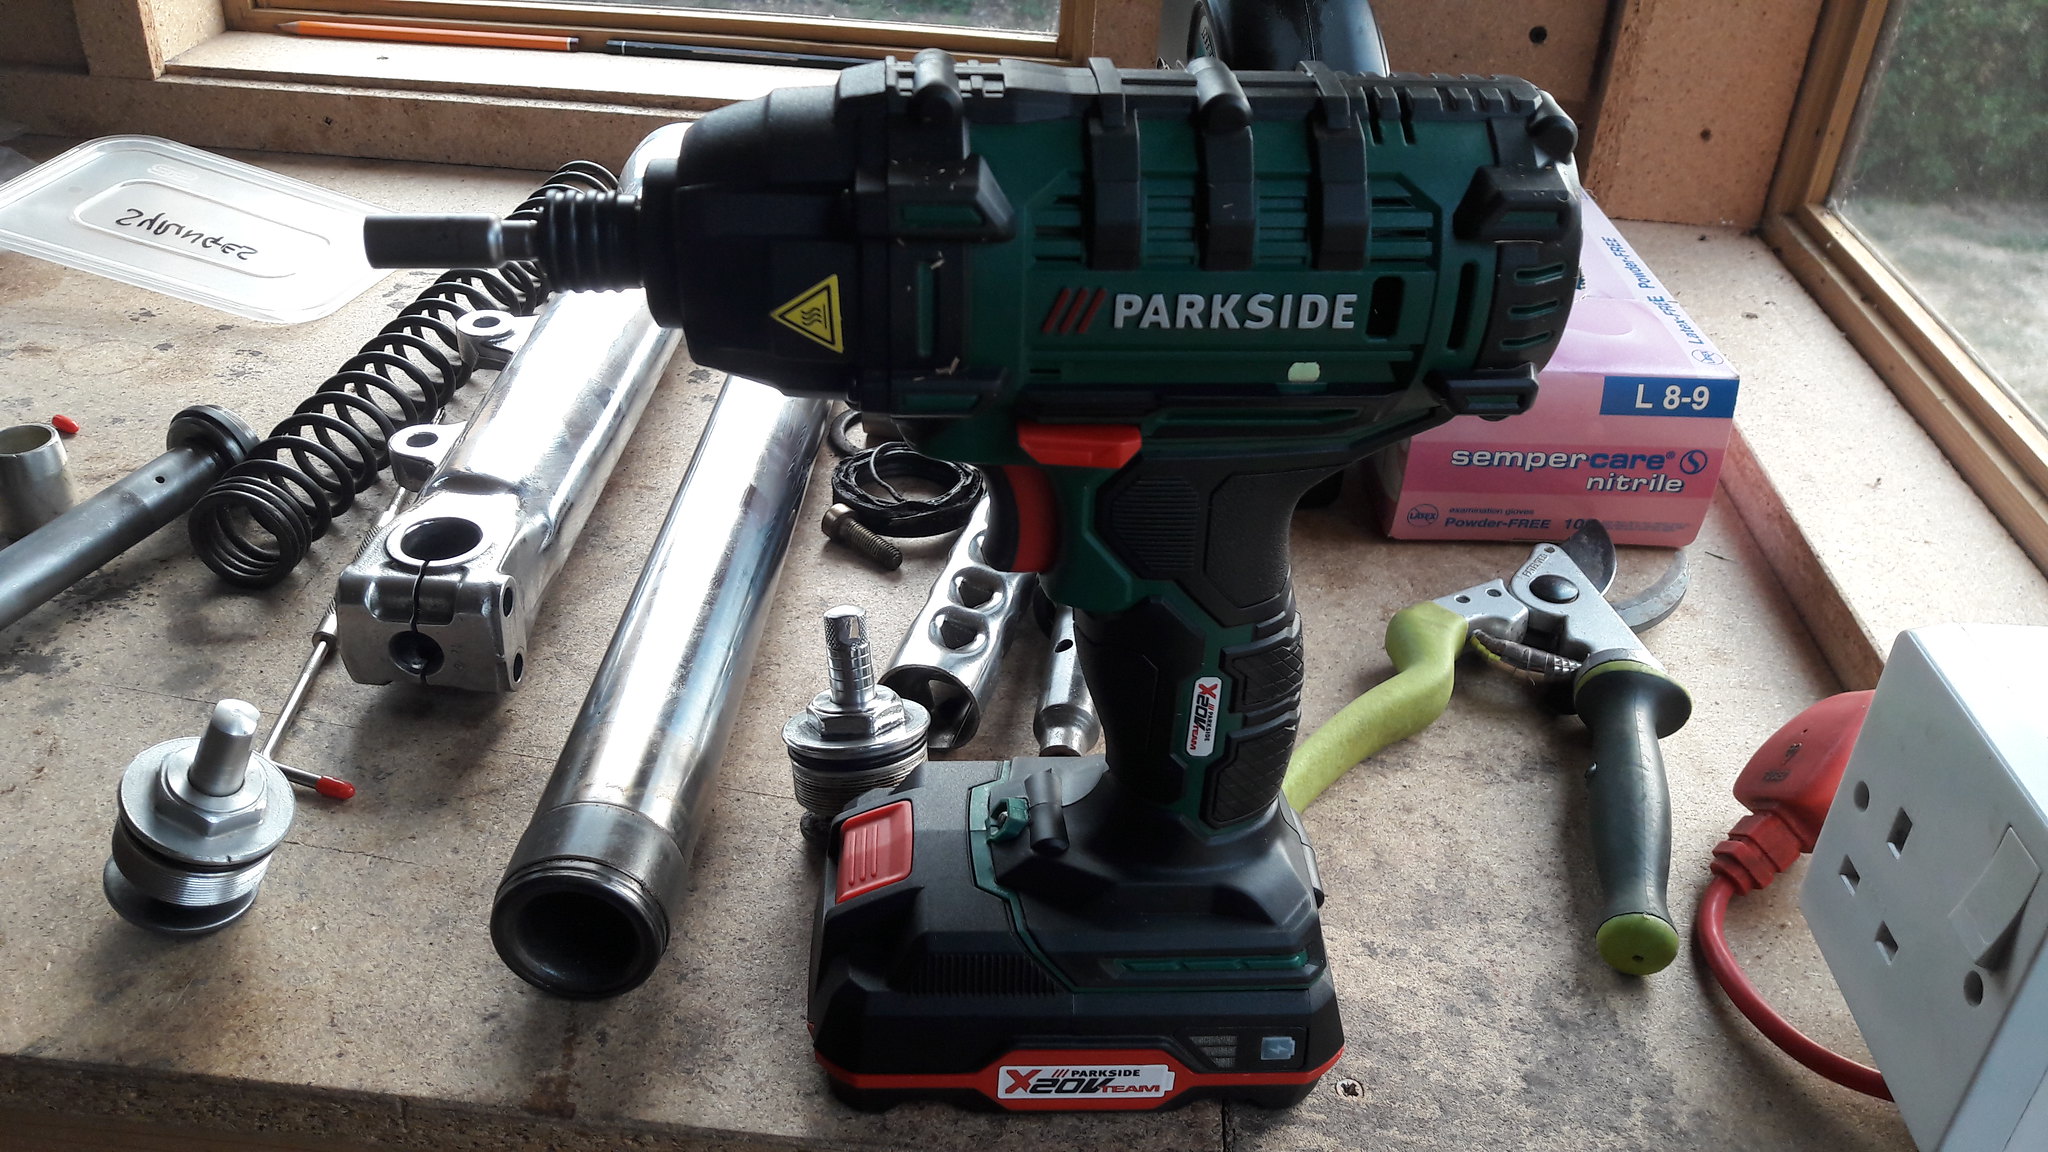 20180713_202030 20180713_202030 by David Miller, on Flickr So I'm back on track, thanks to Truebrit Once the forks are back in the yokes I can try and sort the lock stop issue. I plan on drilling and tapping the bottom yoke and fitted cap head bolts to act as the stops, but I think the stem may foul the pillar drill so will have to give that some thought ! Dusty |
|
|
|
Post by bid on Jul 13, 2018 21:53:14 GMT 1
well done dusty i was genuinely gutted for you, been there, guys on here blow me away fab community, love a happy ending,
all go again super!
atb
dave😉👍
|
|
|
|
Post by dusty350 on Jul 13, 2018 22:00:26 GMT 1
I'm pretty impatient once I get going on something ! The fork issue was more annoying than anything, as I was looking at 6-8 weeks for a rechrome, and although there are lots of jobs to do, this is the one I was/am focusing on and wanted to get sorted. I want to get the frame up on it's wheels so I can try something out regards a side stand mount too, so the forks are key to the rest of the frame mods. Dusty |
|
|
|
Post by donkeychomp on Jul 13, 2018 22:18:53 GMT 1
Lidl...£35? I'm getting one! Hang on do you need a compressor?
Alex
|
|
|
|
Post by dusty350 on Jul 13, 2018 22:24:12 GMT 1
I don't think the Lidl compressors are powerful enough or big enough capacity wise for serious bike work. I remember the question was asked on here before, and the minimum needed for say, a blasting gun or paint spraying meant the lidl item wasn't quite up to it unfortunately. Certain tools you can do on the cheap, but a compressor isn't one of them Dusty |
|
|
|
Post by mouse on Jul 15, 2018 7:41:45 GMT 1
What a great result on the forks Dusty and Truebrit, what a star!
Mouse
|
|
|
|
Post by dusty350 on Jul 15, 2018 22:08:32 GMT 1
Hi mate Yes, what a lovely gesture The forks were good enough to use straight away but I stripped them down to fit the new parts I had already bought, and utilise my bottom legs as I had the spindle to fit them. They are all built now; 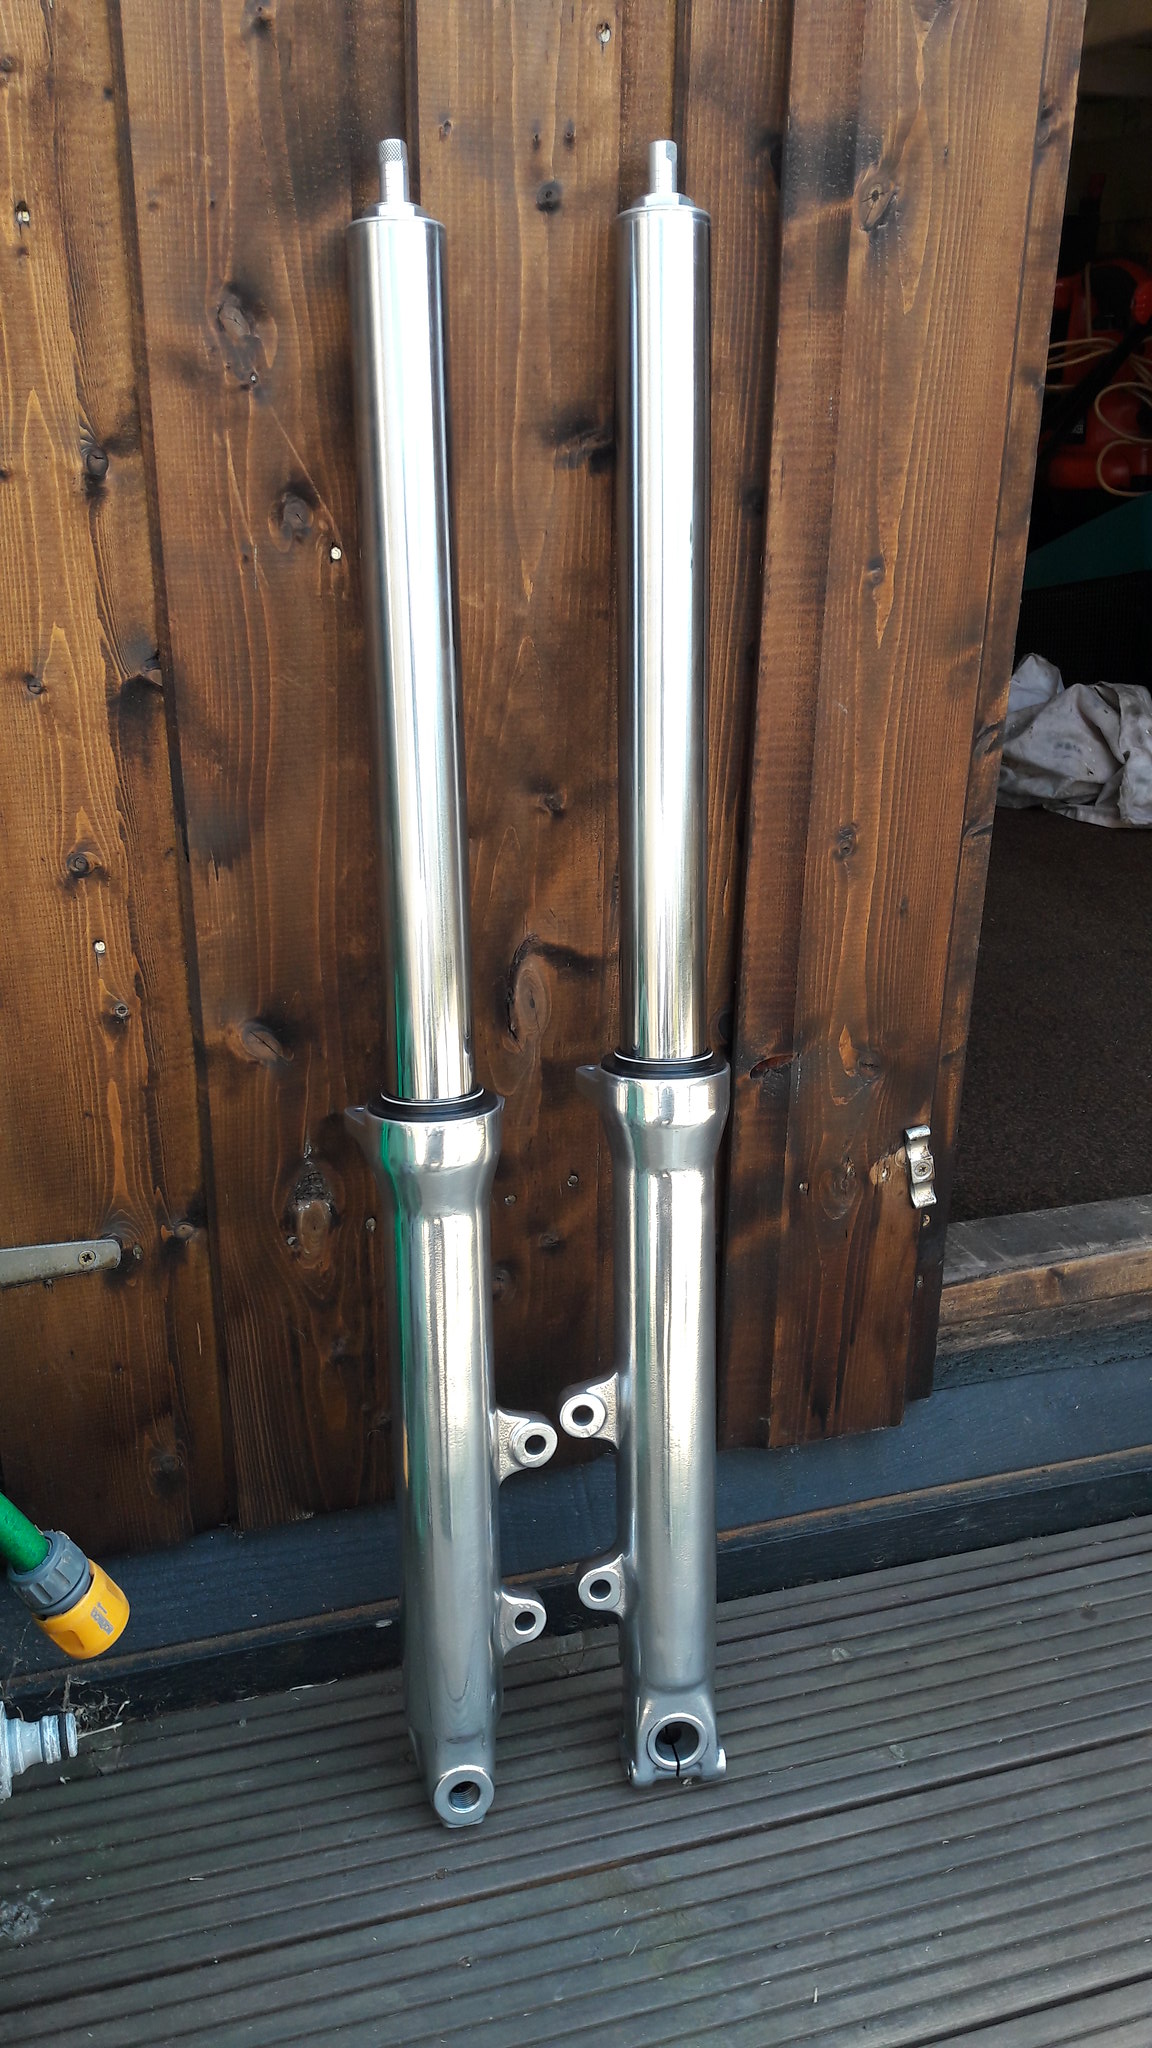 20180714_161504 20180714_161504 by David Miller, on Flickr Will give them one last lick on the polishing wheel but I don't want too shiny as I don't think it would suit the build. I now need taper bearings for the yokes and I can offer the front end up to the frame to work out the lock stops. I wanted to drill and tap the bottom yoke, but it's gonna be close to the stem, and I might struggle on my bench drill, plus I have to be able to use the tap to cut the thread and the stem will make it awkward. The other option is to leave the yoke stops on the yoke, and get new stops welded onto the frame. The other thing I'm considering is the side stand. I had the cross member welded in which has the aircooled stand bracket mounted on it. I needed a stand, and Donkeychomp kindly donated what looks like a Tzr stand with a mounting bracket. An idea might be to get something welded to the frame to bolt that bracket to - in the area that an Lc bracket would be - and then cut the aircooled bracket off the cross member to allow more room for the exhausts to run under the engine. I feel it important to have that cross member welded in as it helps brace the 2 main tubes but the side stand mount location on it does limit space under the engine. Once it's on it's wheels I can gauge more easily what needs to be done. I have 2 Banshee coils from Norbo now so can look at locations for those, and a possible location for a pv servo motor. I also need to make a template for an electrics tray under the seat tail. I will probably go for a bolt on version rather than welded on just in case I ever change the style of seat, so that could be made at a later date. I am probably gonna fit lights and wasn't sure what to go for. I was in my local bike shop on Friday getting some fork oil, and they had 2 new bikes delivered for the showroom. I had never heard of them before, but I liked the number board on the front that had a projector style beam moulded into it. The bike is a French "Mash" Dirt track 50cc model; www.bing.com/images/search?q=mash++dirt+track+motorcycle&qpvt=mash++dirt+track+motorcycle&FORM=IGREThat might suit this build More food for thought !! Dusty |
|
|
|
Post by dusty350 on Jul 15, 2018 22:15:43 GMT 1
|
|
|
|
Post by reedpete on Jul 15, 2018 22:25:51 GMT 1
Lidl...£35? I'm getting one! Hang on do you need a compressor? Alex Not for a battery powered rattle gun.... |
|
|
|
Post by donkeychomp on Jul 15, 2018 22:31:54 GMT 1
Yes Peter lol I didn't spot that first time round lol!
Forks look brilliant Dusty!
Alex
|
|
|
|
Post by dusty350 on Jul 17, 2018 20:00:28 GMT 1
Had a bit of time this afternoon, so I started preparing the frame for it's second visit to the engineers/welder. There are now 3 jobs to do. 1. Lock stops. I offered up the forks and yokes - without bearings - I ordered those from Norbo today so until I fit them I cant get exact positioning for the new stops on the yoke, but you can see how far out the originals are; 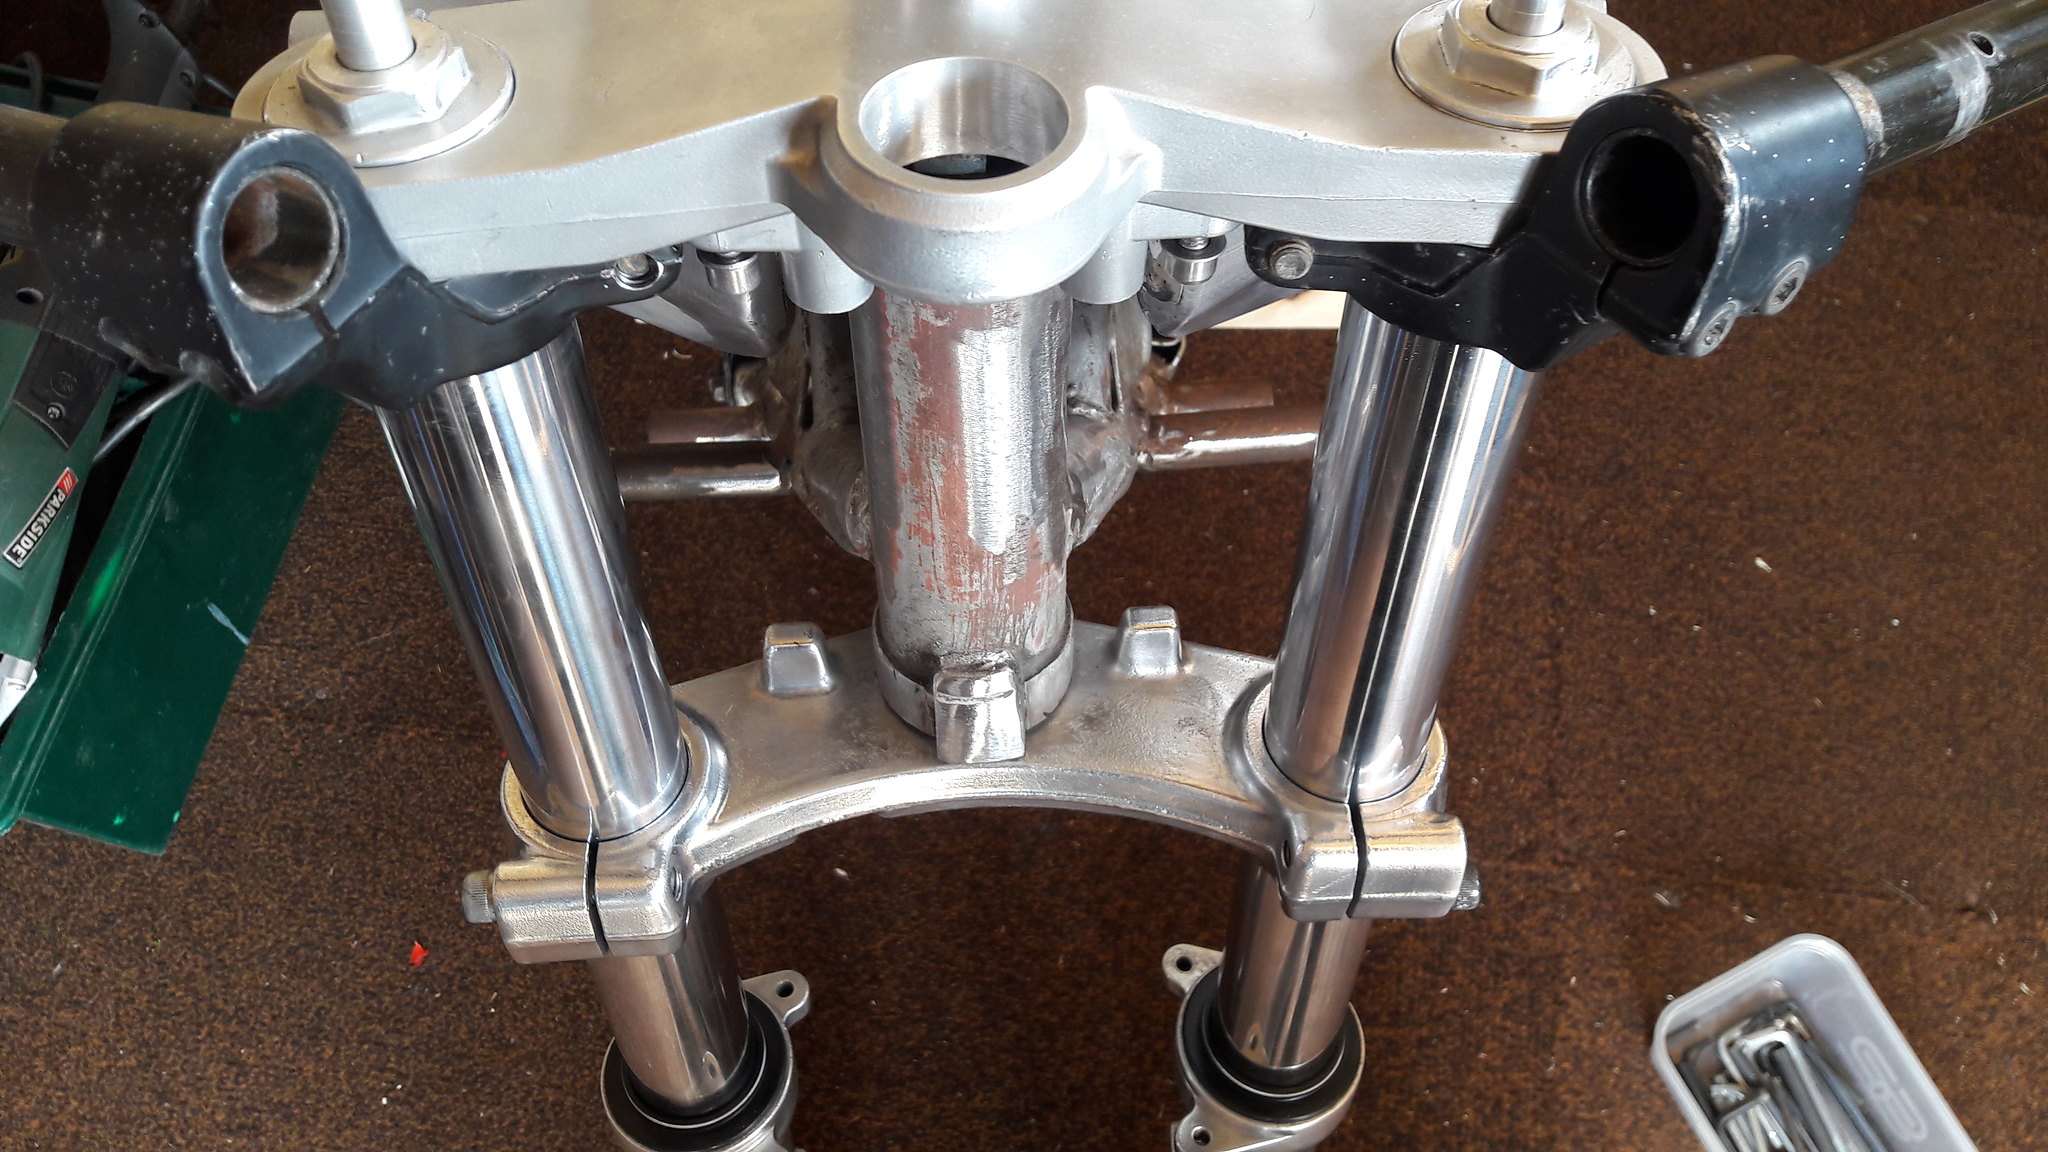 20180717_142249 20180717_142249 by David Miller, on Flickr They will end up getting cut off and holes drilled and tapped for bolts to act as stoppers. I did offer the yoke up to my pillar drill today, and after removing the chuck guard, I might just be able to drill without hitting the stem with the chuck, but I will take it to Clive to see what he reckons first. I think this front end will really suit the style of the bike - not as chunky as the RGV USD forks I was originally going to fit. The clip ons, which are standard VJ21 fit perfectly, so they will get powdercoated and used, saving me buying another pair; 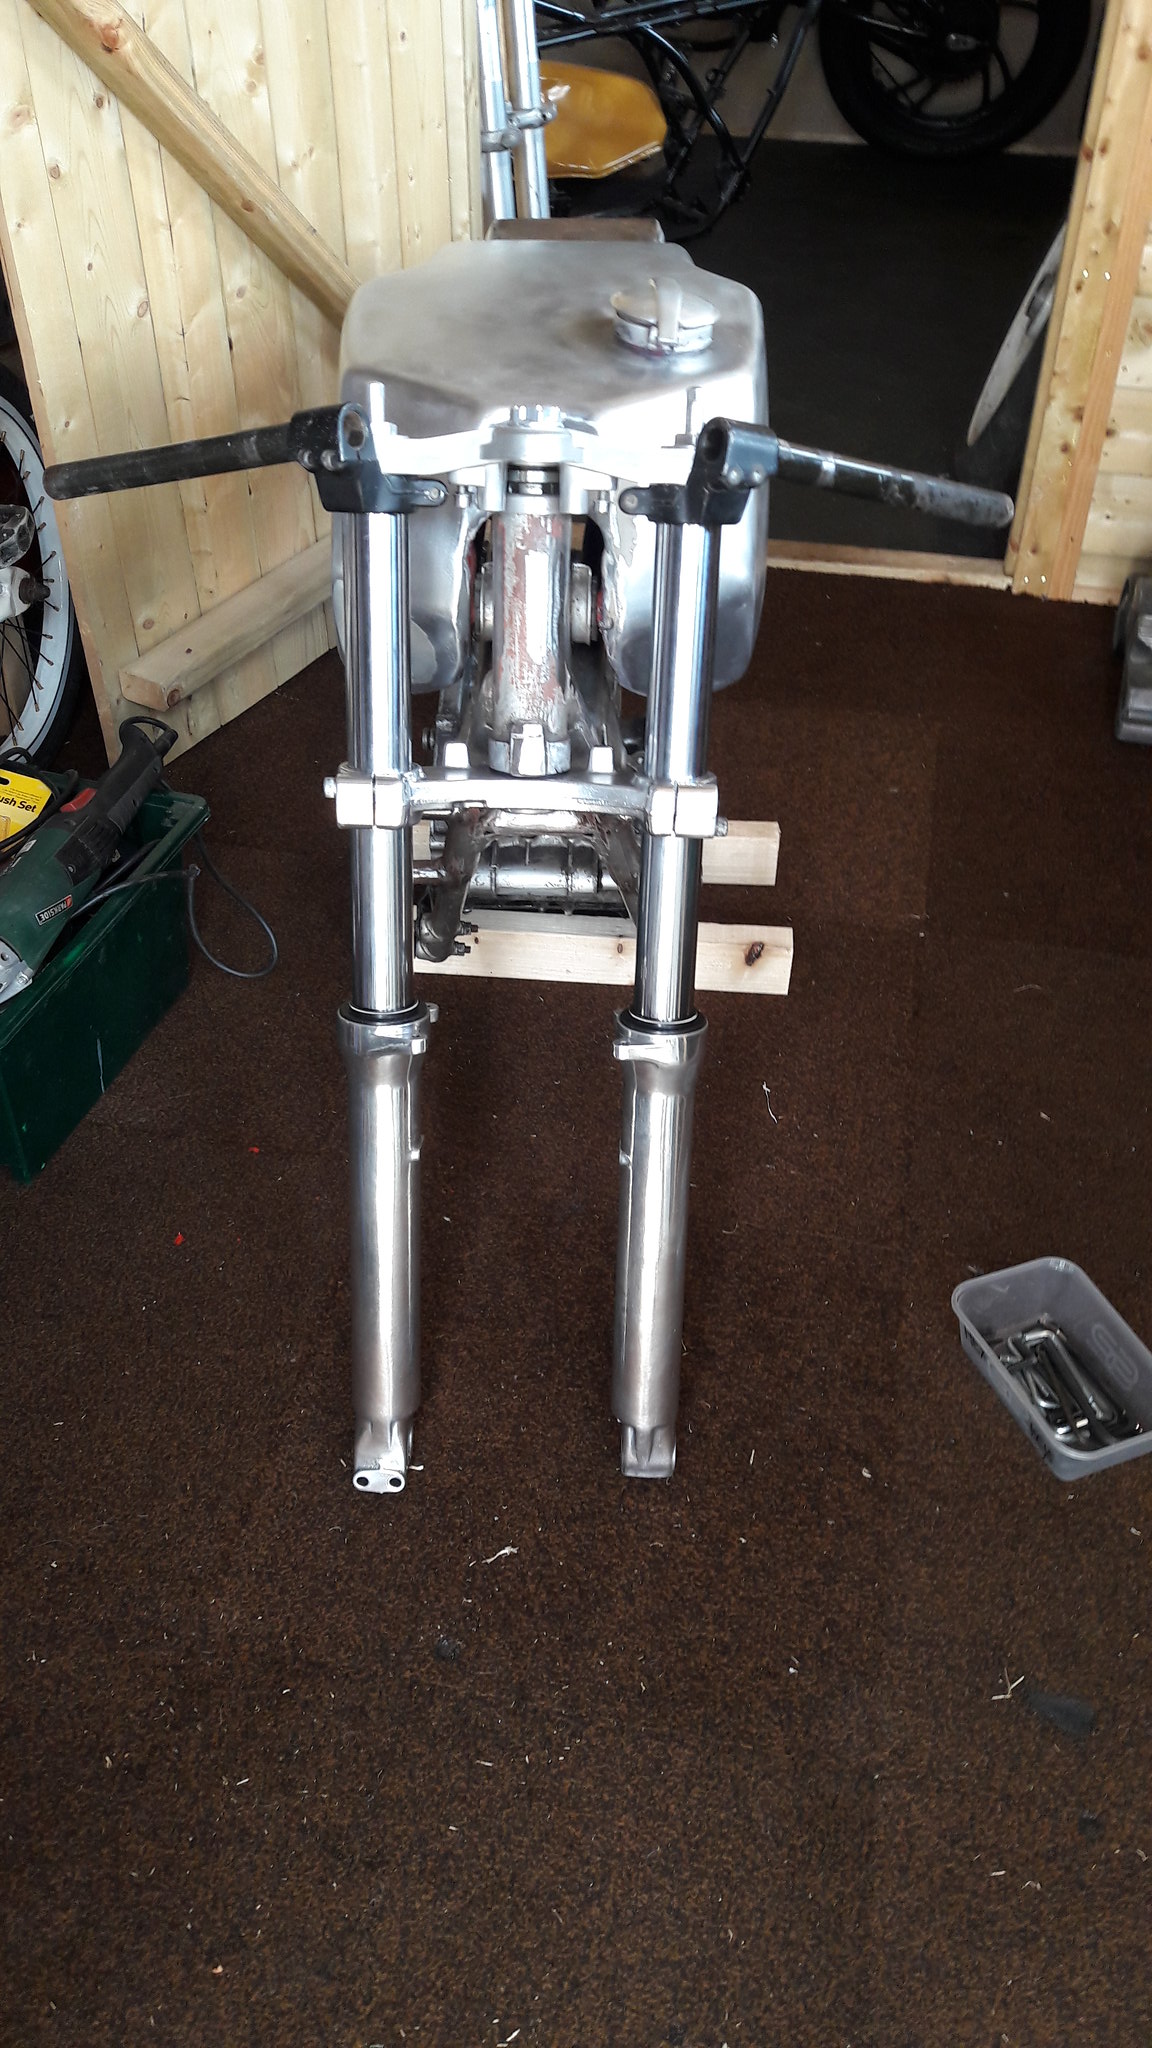 20180717_142206 20180717_142206 by David Miller, on Flickr And carrying on with the headlight, I offered up a small light I have - don't want an Lc sized headlight - and I quite like the look; 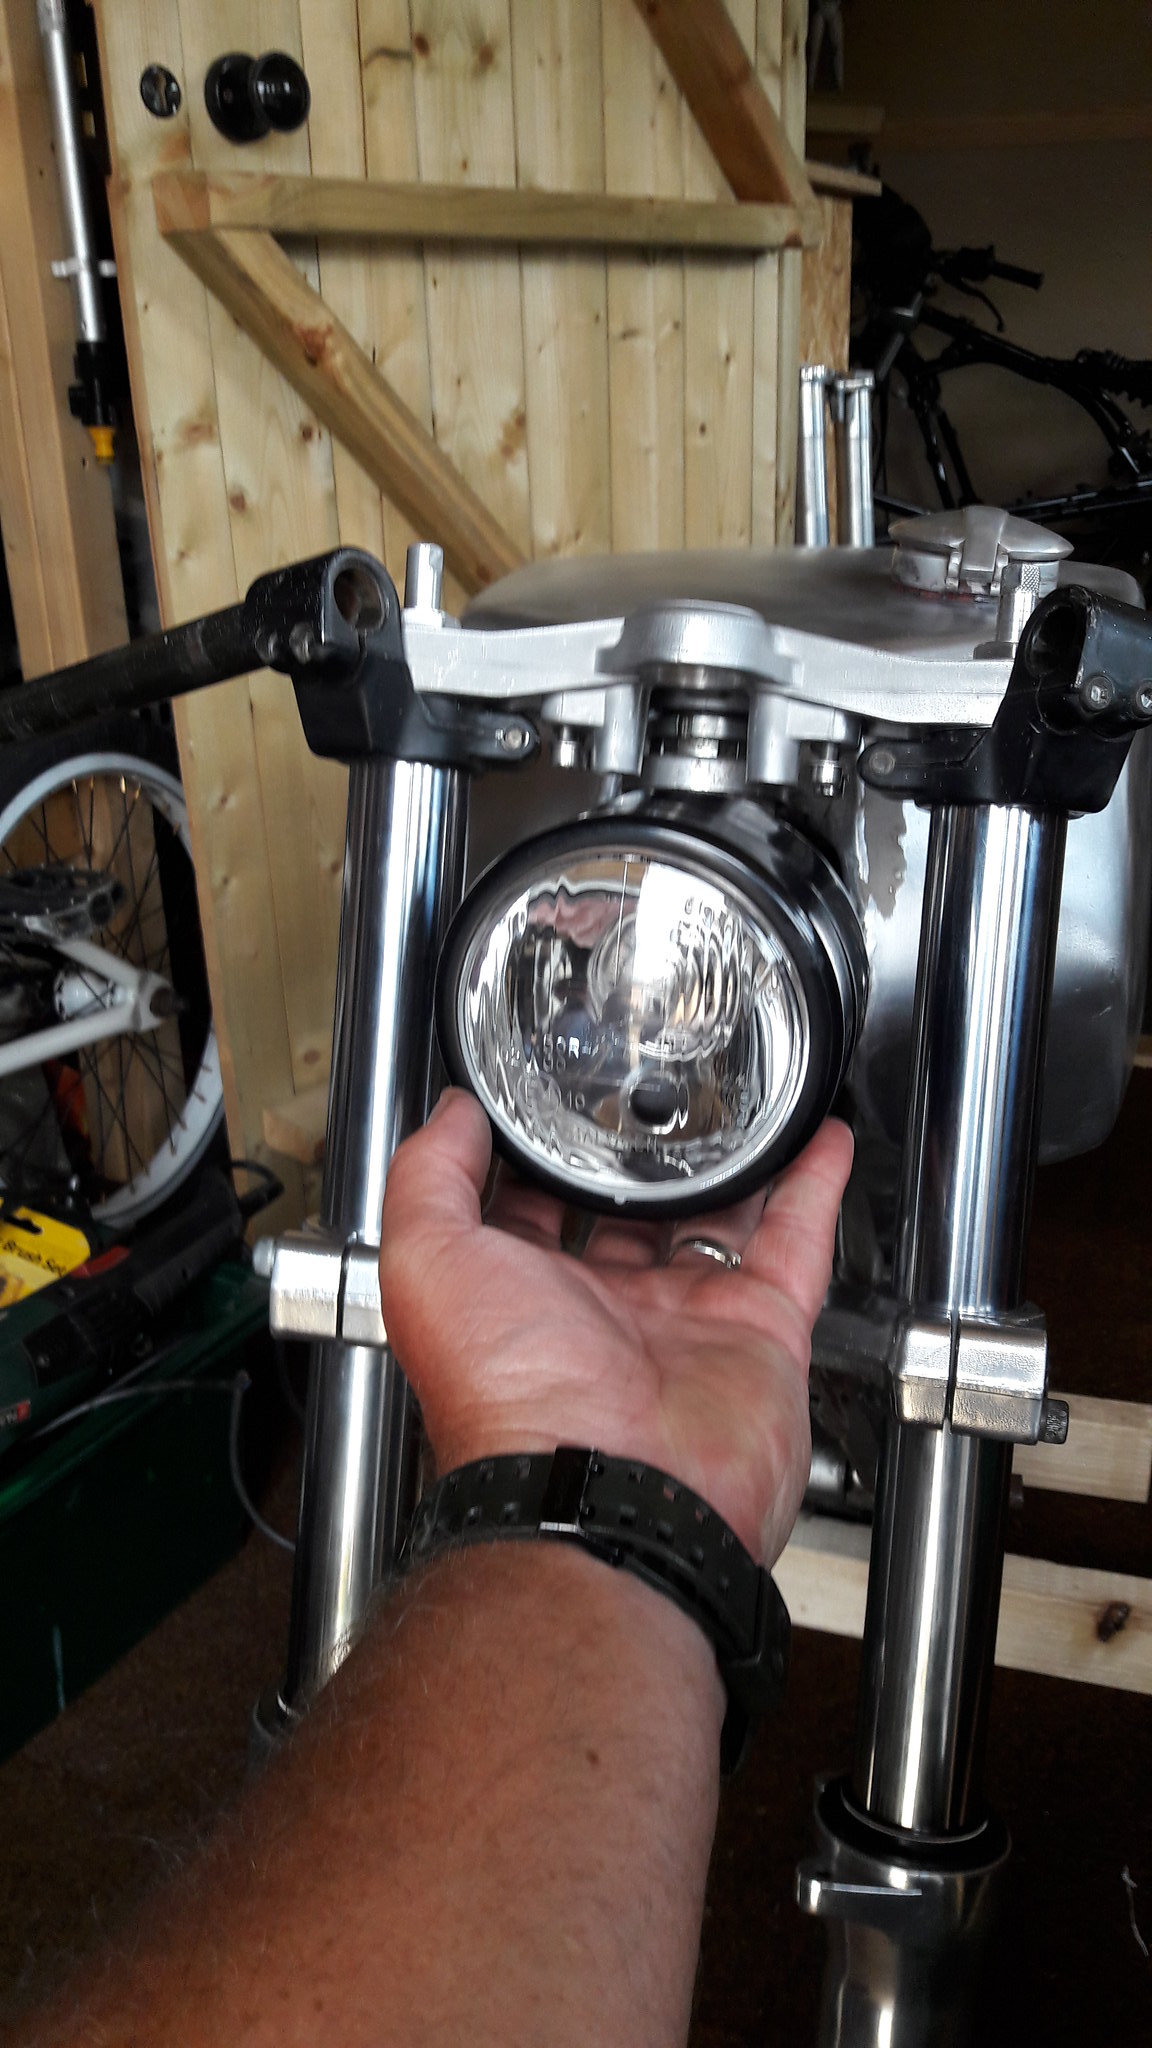 20180717_142511 20180717_142511 by David Miller, on Flickr No firm decision yet ! 2. Side stand. Again, may or may not do this but the stanard aircooled side stand bracket can foul the exhaust run a it's tucked under the engine rather than to the side of it like an Lc/Pv; 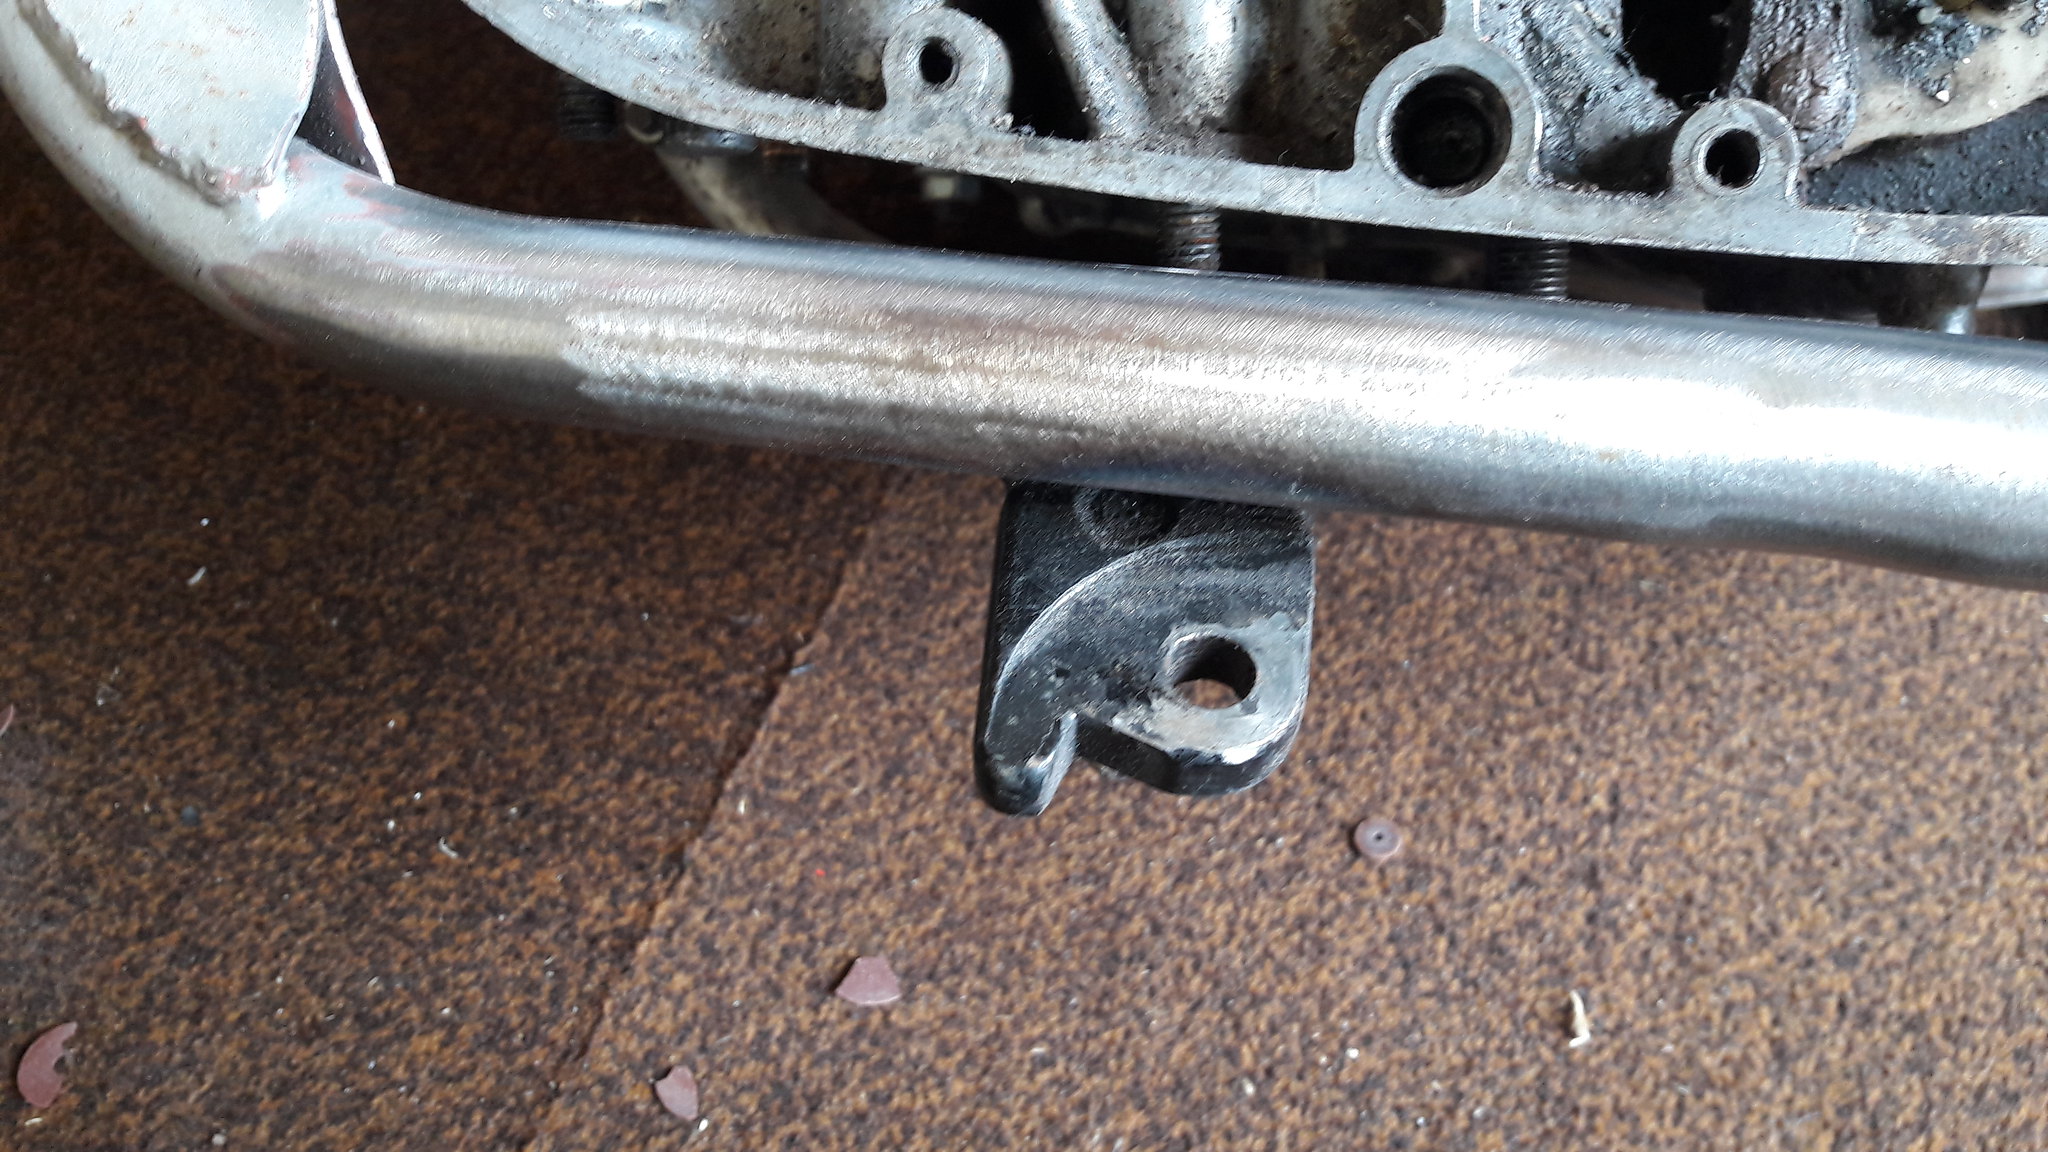 20180717_160209 20180717_160209 by David Miller, on Flickr 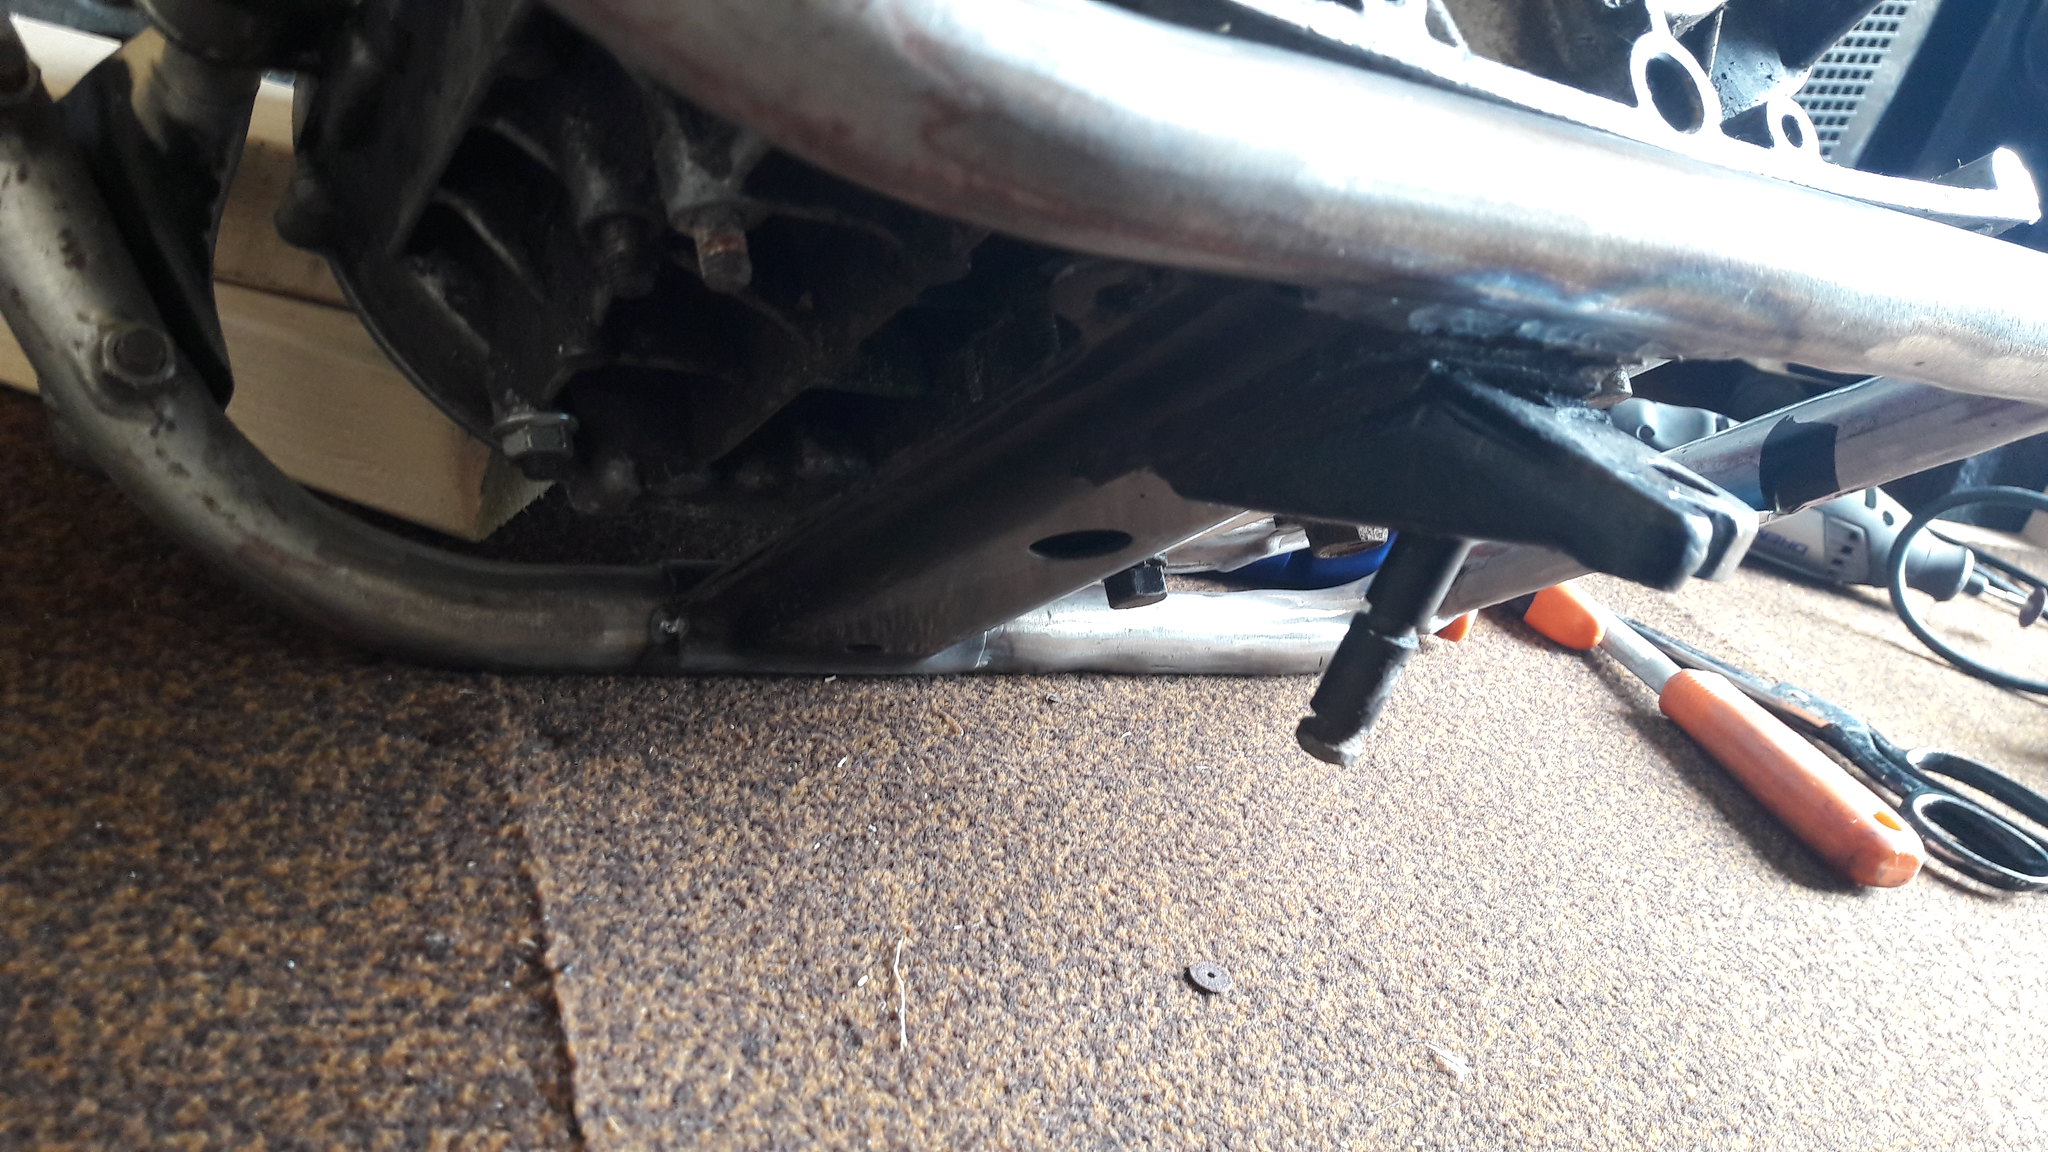 20180717_160217 20180717_160217 by David Miller, on Flickr Alex kindly gave me a different stand which has a bolt on mounting bracket, like a TZR. This could be mounted to a new frame bracket directly under the frame tube, thus moving the whole lot outwards; 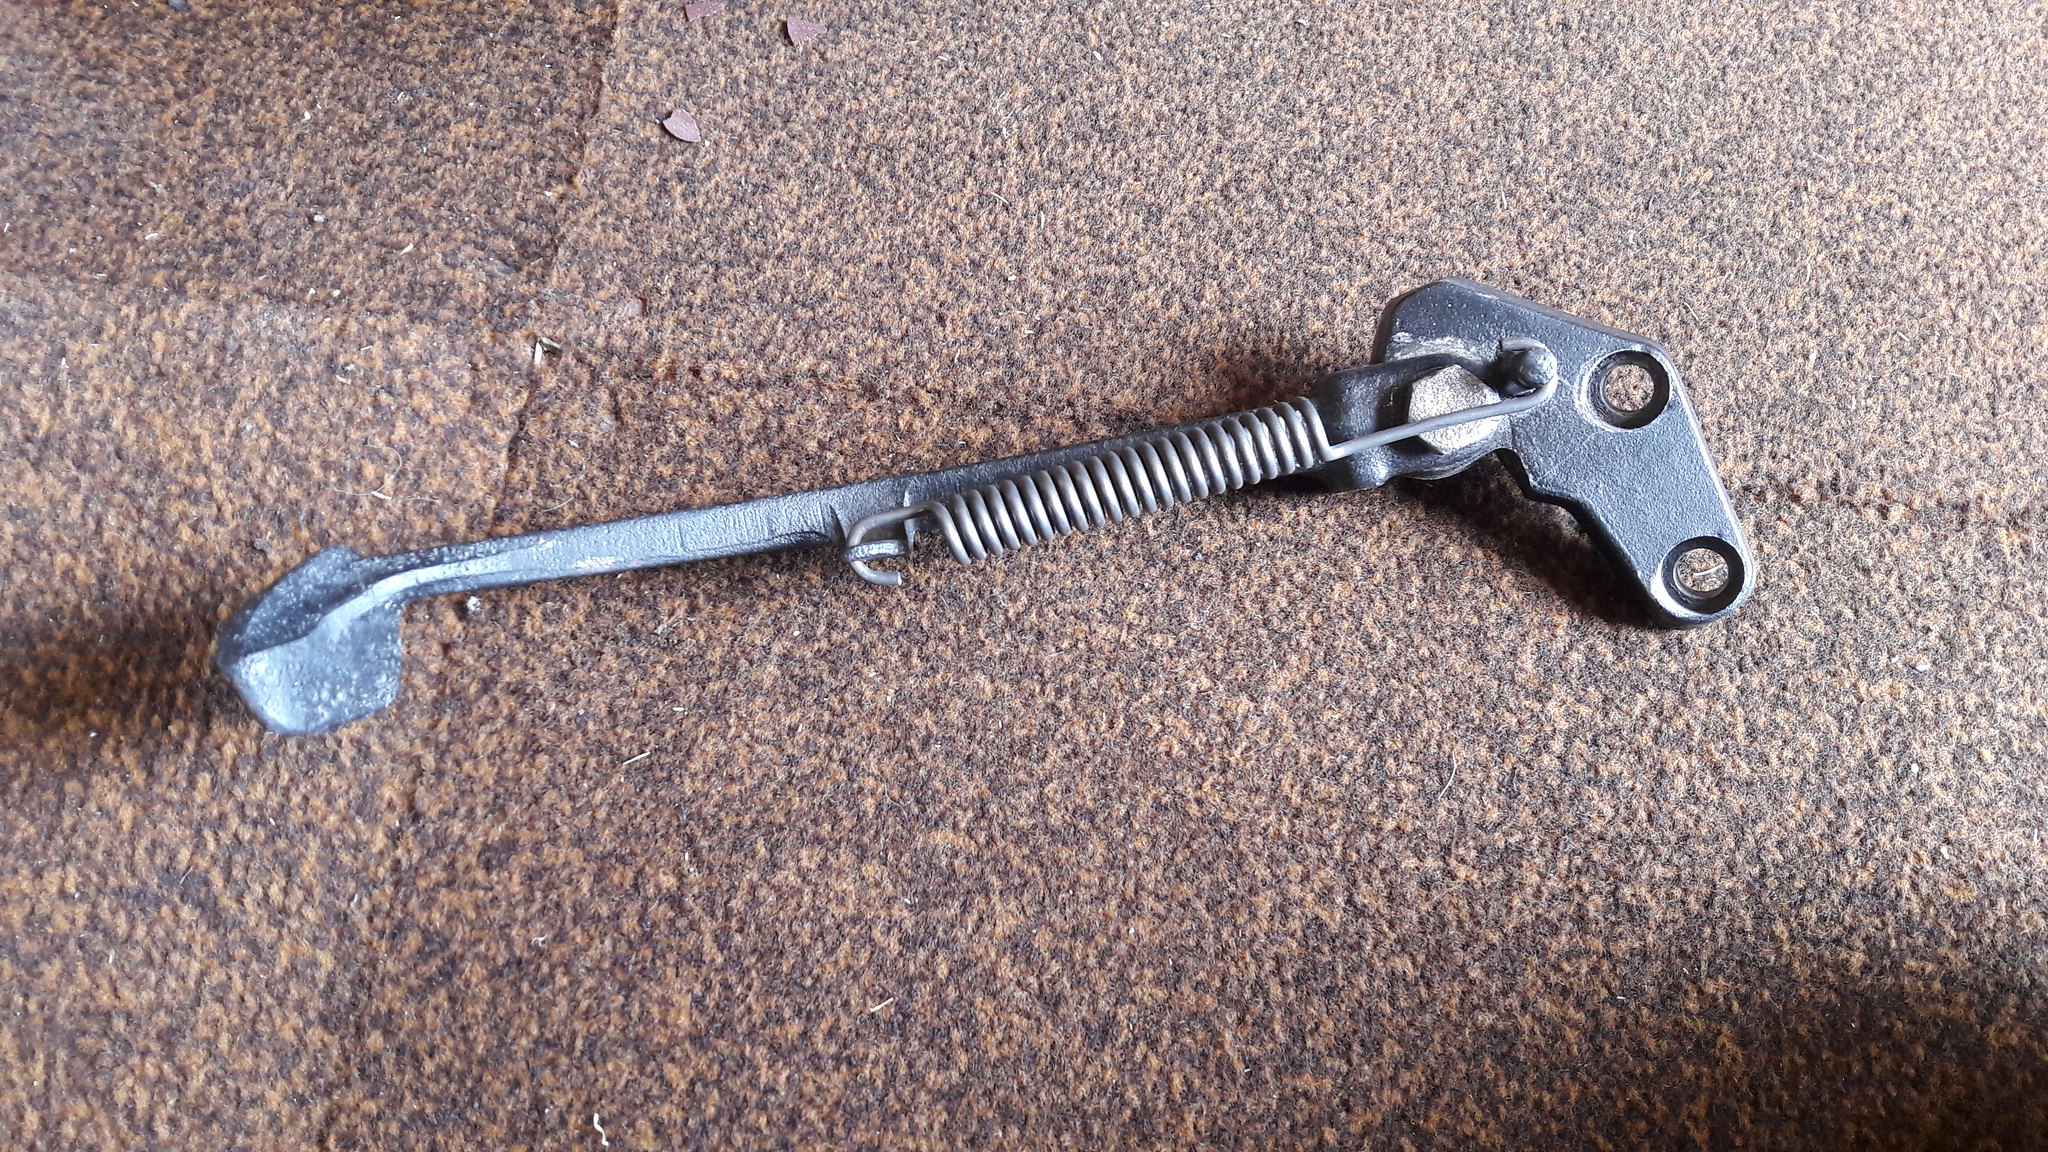 20180717_160326 20180717_160326 by David Miller, on Flickr 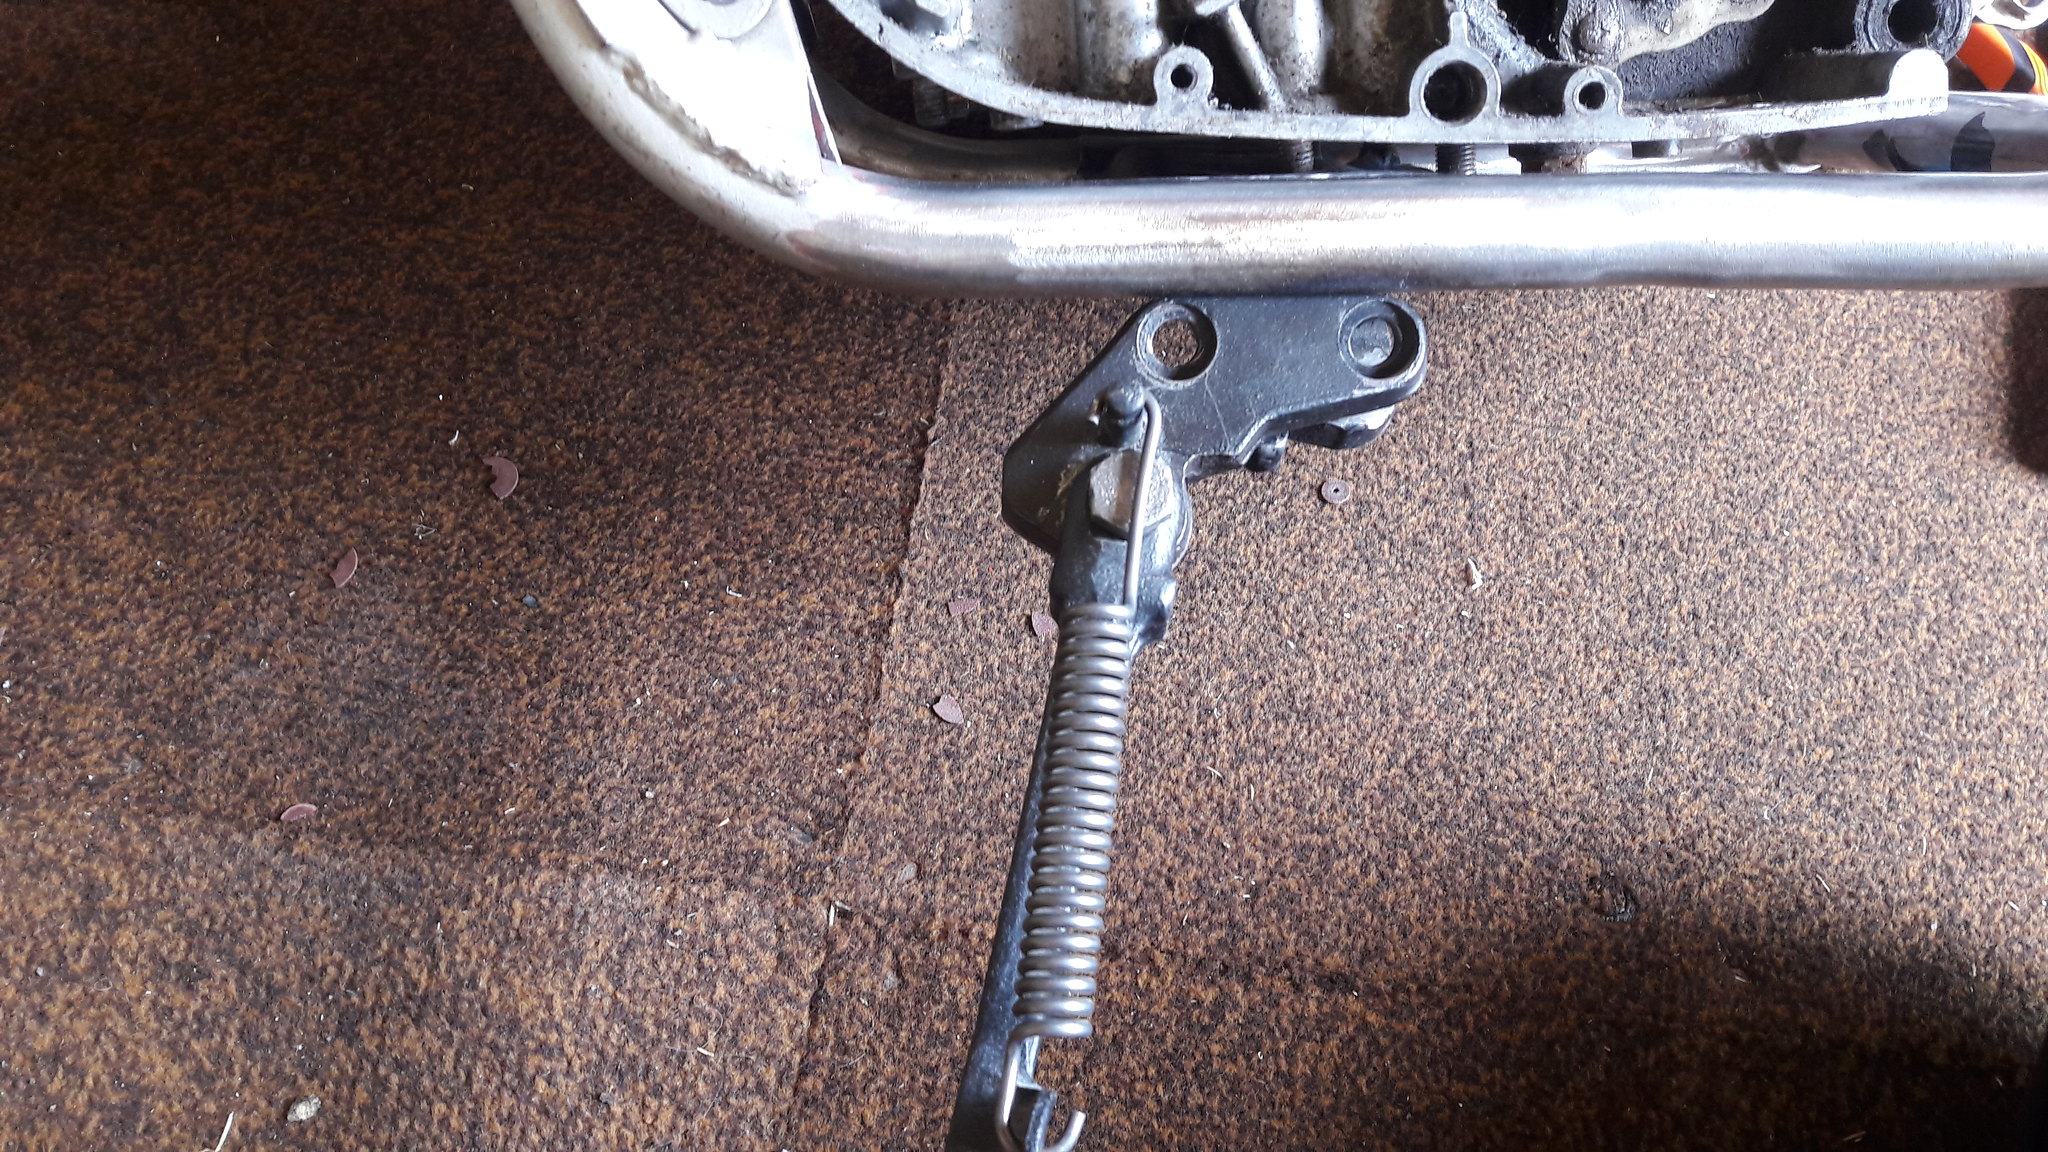 20180717_160301 20180717_160301 by David Miller, on Flickr This will make the exhaust routing much easier and puts this stand in virtually the same place as an Rd item. 3. Tie Bars. I've tried all sorts to get the standard tie bars to work, but there are no easy options. I think the best bet is to make a "T" piece that fixes to the engine tie bar mounts and then to a new tab on the frame; 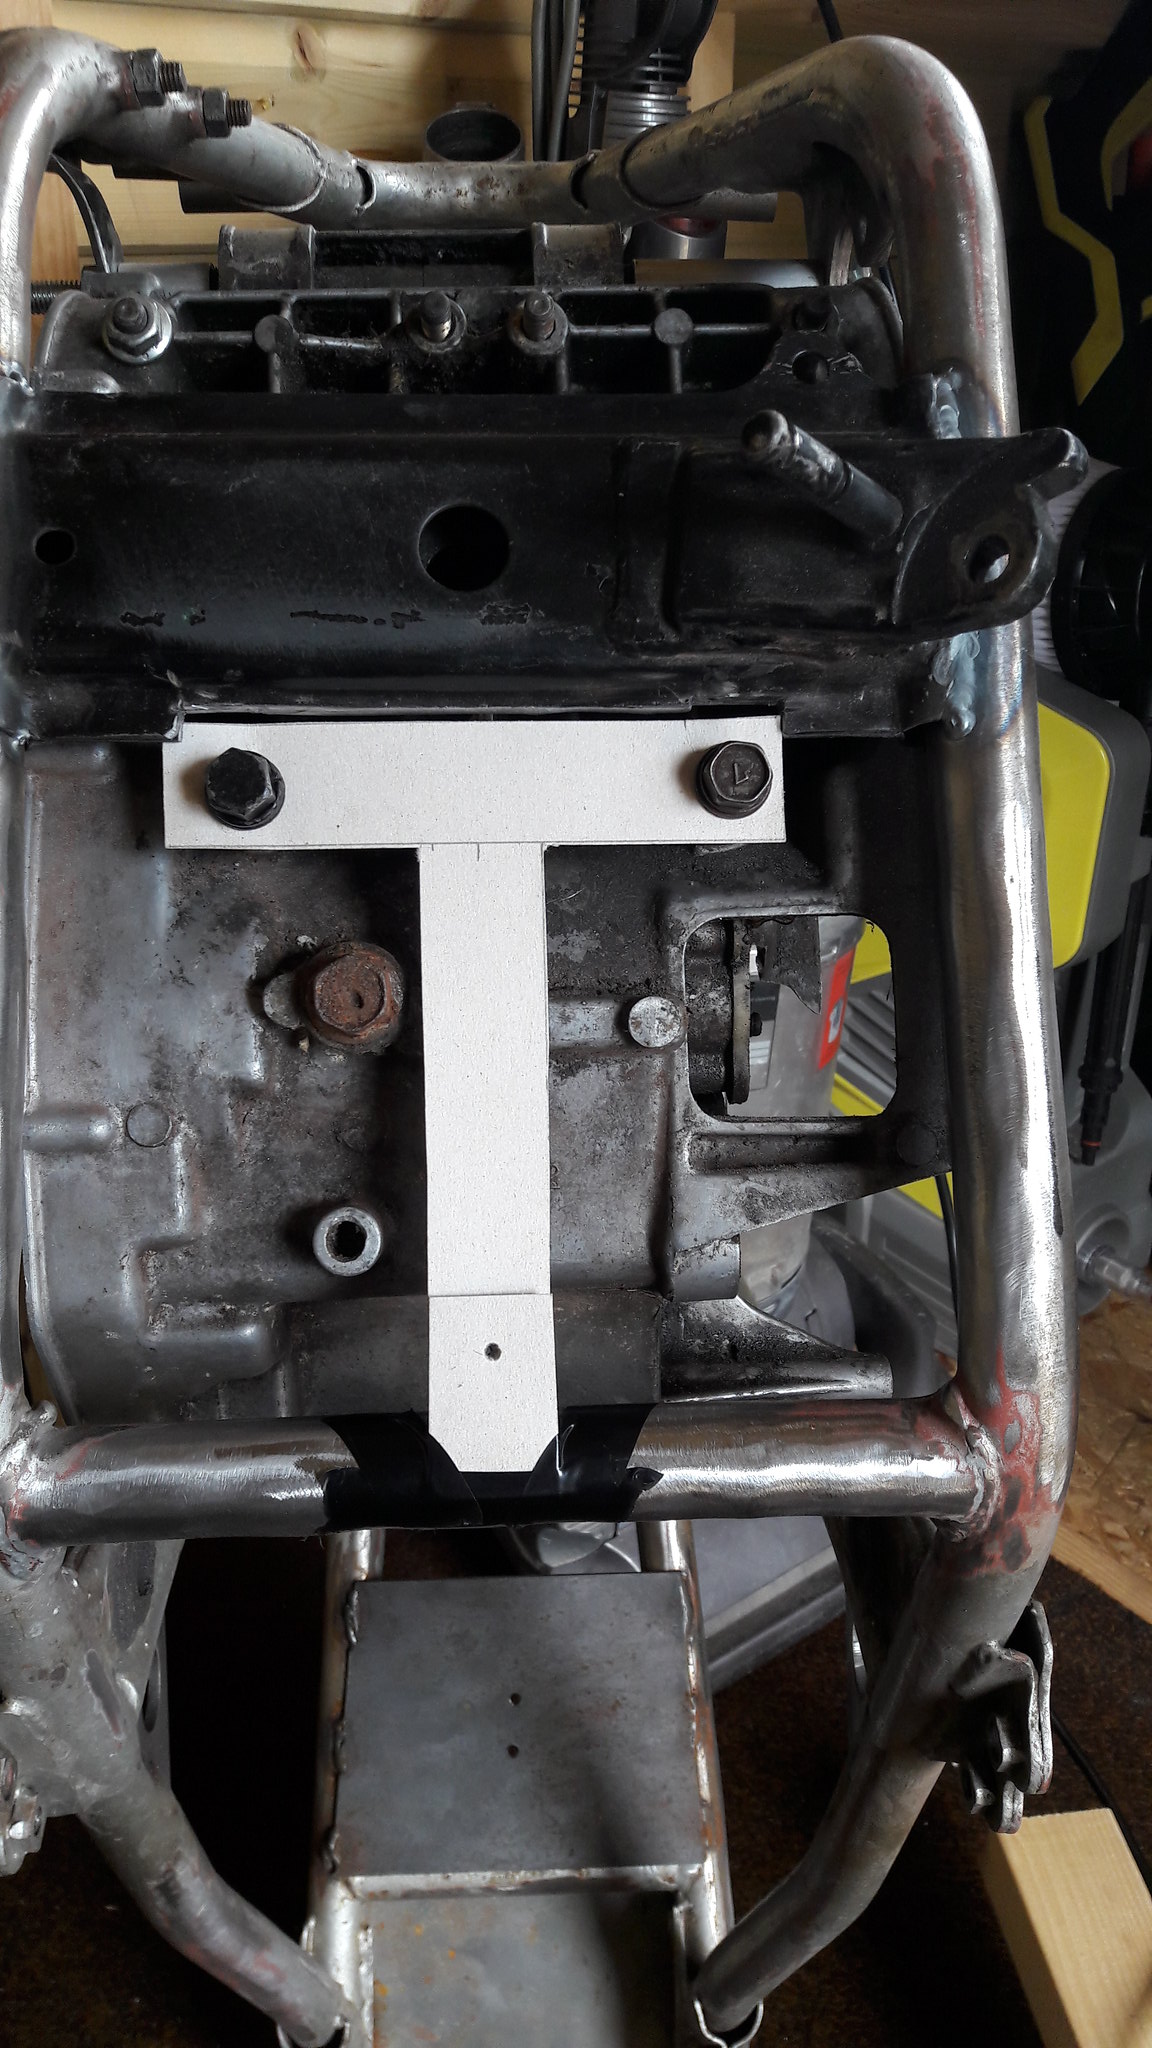 20180717_155935 20180717_155935 by David Miller, on Flickr 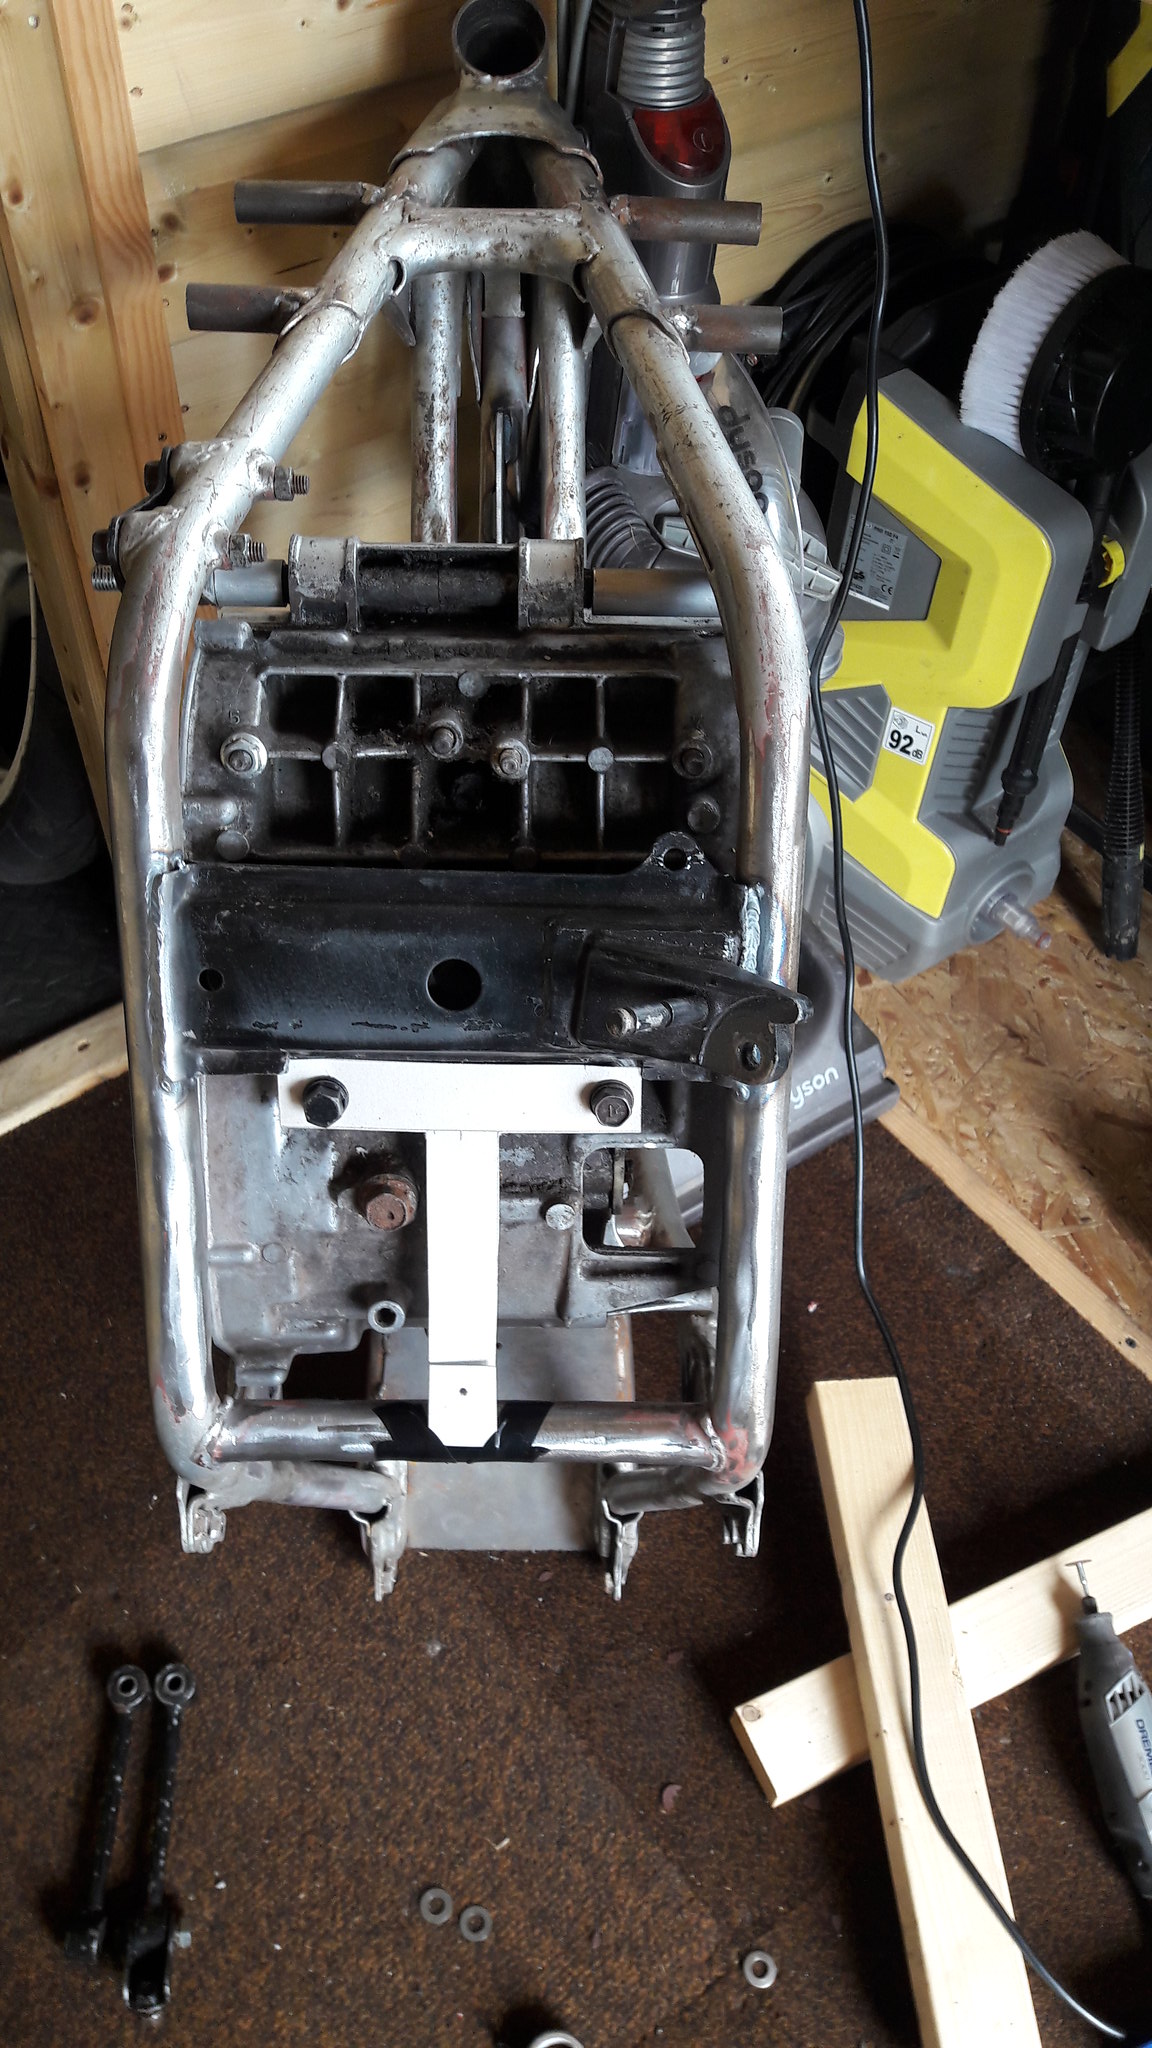 20180717_155941 20180717_155941 by David Miller, on Flickr I can cut the "eyes" off the end of the tie bars and use them as shock absorbing spacers at the engine end, and squash a thick rubber washer between the brackets at the frame end; 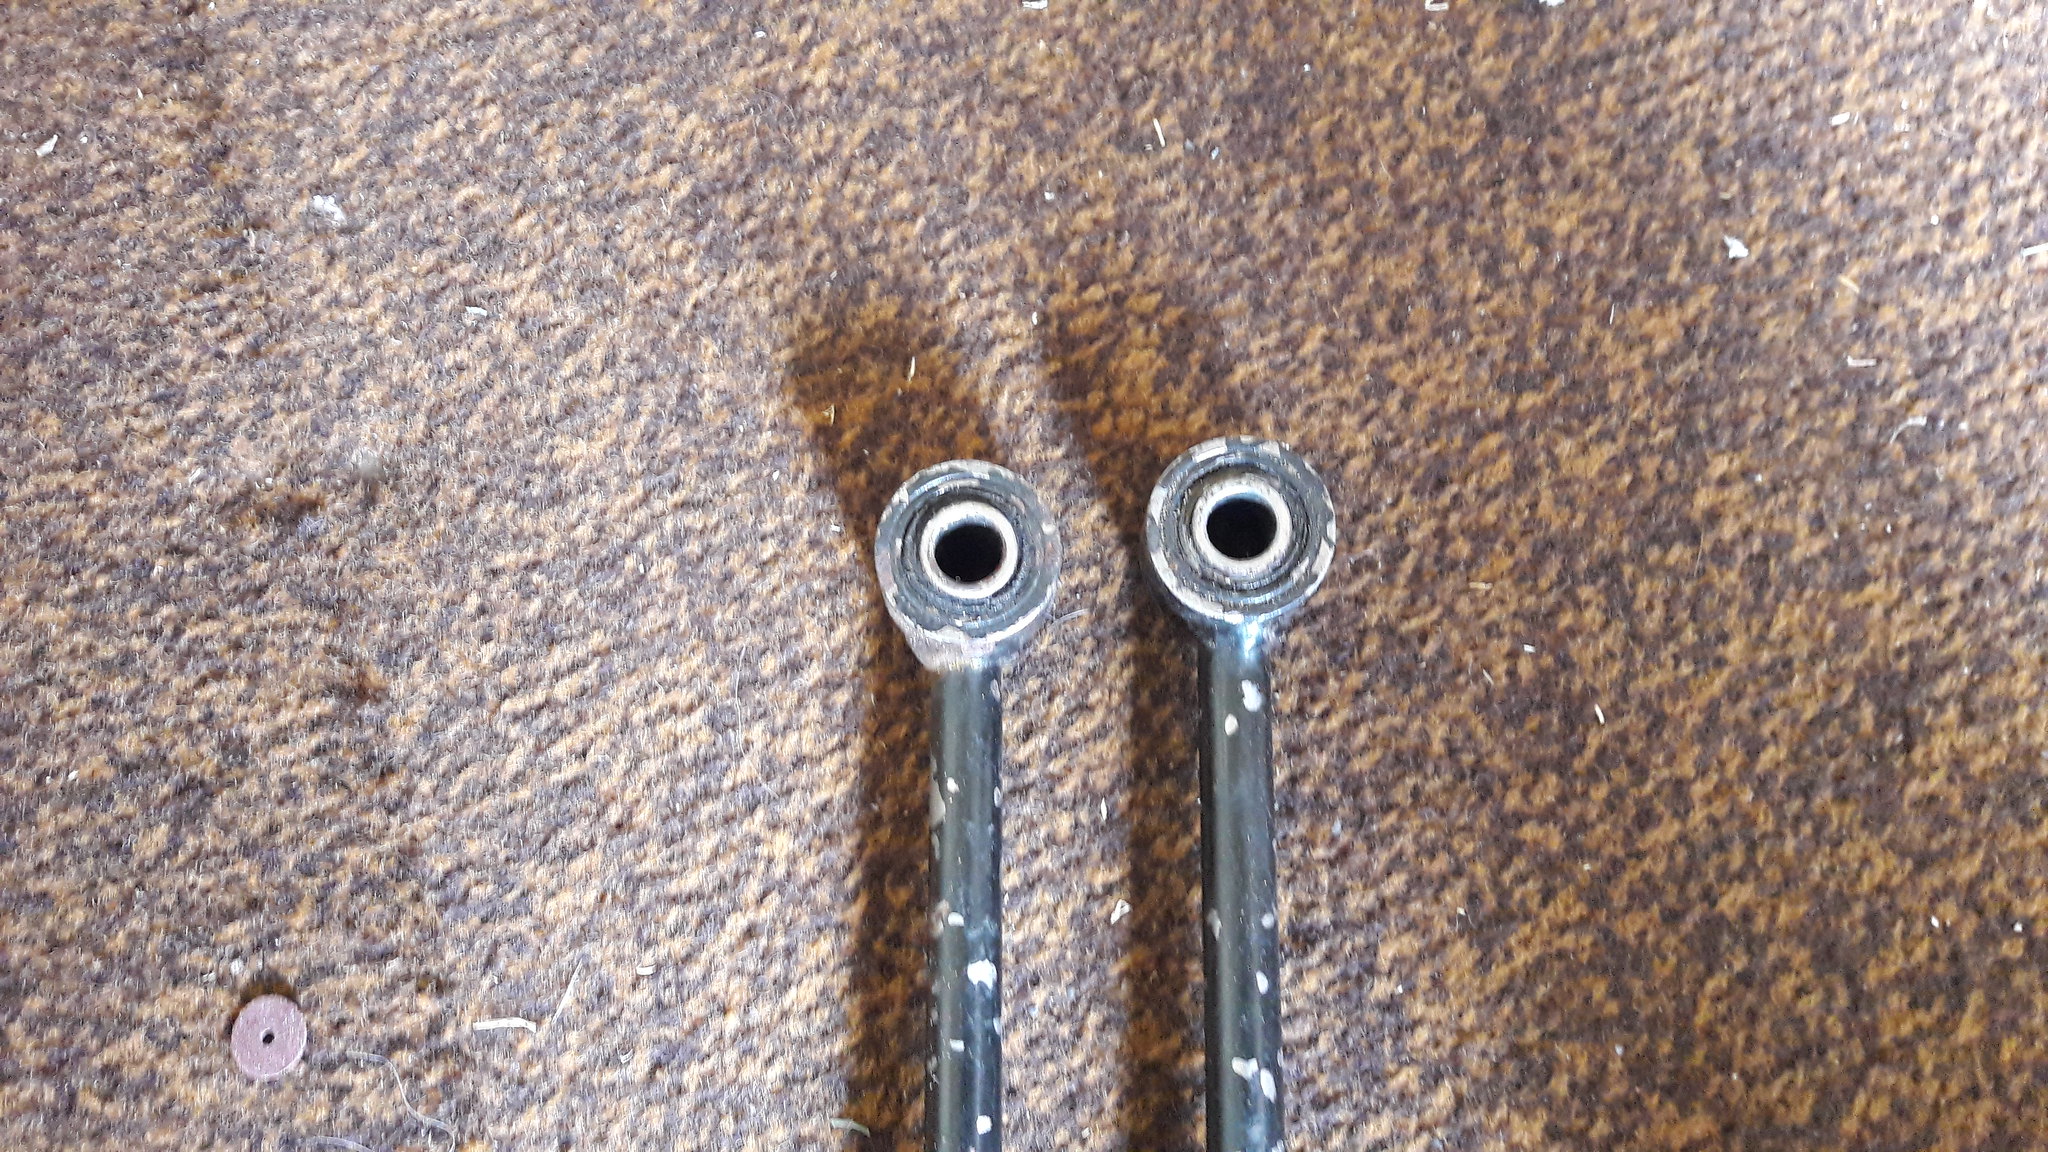 20180717_155950 20180717_155950 by David Miller, on Flickr I wasn't going to bother with tie bars but whilst at this stage I might as well do it. I'm also going to get Clive to make me a bracket so I can fix the rear of the tank to the frame - a nice, simple "L" bracket will do the trick; 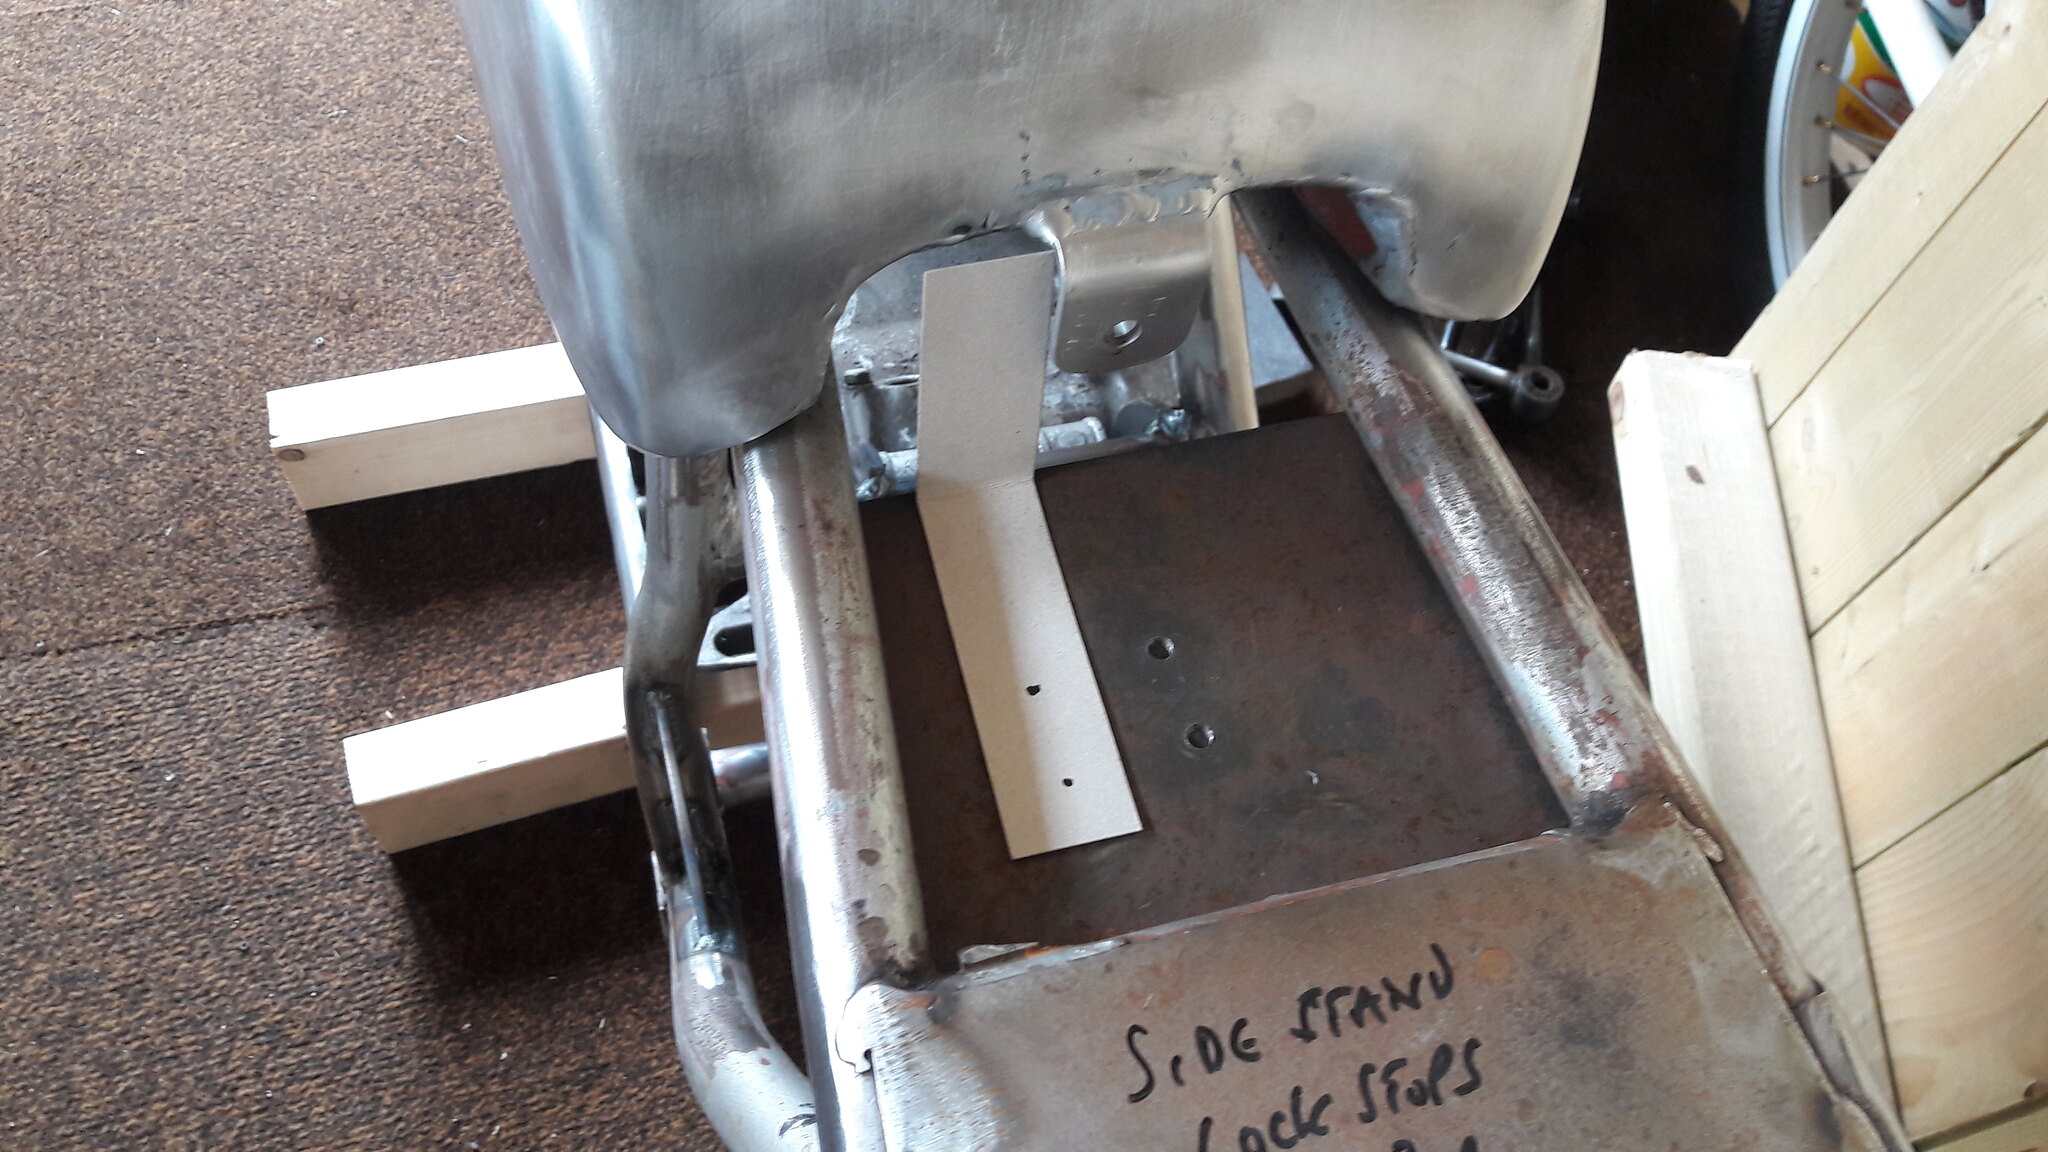 20180717_164440 20180717_164440 by David Miller, on Flickr Dusty |
|
|
|
Post by donkeychomp on Jul 17, 2018 21:38:06 GMT 1
Like the ideas mate. See you are adopting the 'dinky' headlight option. I'm doing the same on the RD. Glad the side stand works!
Alex
|
|
|
|
Post by reggieperrin on Jul 18, 2018 10:08:14 GMT 1
Dusty,
From an engineering point of view, the T shaped tie bar mount won't offer any real resistance to the forces that are a problem.
It would have to be such a large structure as that shape that it would be obstructive and pretty heavy..
If the manifolds aren't rigidly mounted, better just to go without tie bars..?
wouldn't mind a cuppa soon and a look at the progress..
Reg
|
|
|
|
Post by dusty350 on Jul 18, 2018 12:12:43 GMT 1
Hi Reg It's not an ideal solution I know, but after reading about a member on here watching his engine twisting whilst on the dyno, I thought something may be better than nothing. I will be going with spring manifolds on the exhausts anyway so not a major issue. Be good to catch up. Kettle is always hot and you are always welcome Dusty |
|
|
|
Post by midlifecrisisrd on Jul 18, 2018 13:10:47 GMT 1
Like the side stand, got a tzr one on mine
As for the engine twisting I'm using a non tie frame for my lc hybrid so sprung manifolds and using 4 of the thrust plates.
One on each end of the mounts. Was told that helps
Steve
|
|
|
|
Post by dusty350 on Jul 18, 2018 19:55:02 GMT 1
Hi Steve There is room for a rubber mount on each side of the rear mounting point, and I can probably squeeze one each side at the front too. The frame was dropped off at the engineers today for the next round of mods. My day started with some taper head bearings being delivered - ordered from Norbo yesterday, so great service as always I sweated the spacer and bottom bearing onto the stem, and fitted the shells after freezing them for a couple of hours. I could then check positioning for the stops, with the yokes correctly fitted. Then it was off to Clive to see what he thought. After casting his eye over it, he came up with some changes. The tie bar will be an "I" shaped plate as opposed to the original "T" shape, so will mount to 2 brackets on the frame. Made sense really. I probably don't need a tie bar anyway - the exhausts will be sprung at the front, and the engine will be basically standard power wise, but I did want something there. He understood the need for a strong bracket for the side stand, so I've left that with him. Biggest change to what I envisaged will be the lock stops. The bottom yoke is cast ally, as opposed to a Vj22 being steel. The ally yoke has "pockets" on the underside, and wouldn't give much material to support a bolt. Clive wasn't keen to weld a plug of ally underneath as he felt it may have a detrimental effect on the structure of the casting' so he is going to try and do something using the existing stops that are on the yoke, so just as well I didn't chop them off ! So the frame is away for a week or 2, but hopefully this will be the last of the welding/fabricating jobs covered. Any other bits like clock bracket and electrics plate can be made from templates. The good thing is that as I dropped the frame off, I picked up my Lc bottom case with the steel gear shaft bush pressed in, so another job ticked off the list Dusty |
|
|
|
Post by midlifecrisisrd on Jul 18, 2018 20:02:57 GMT 1
Good progress
I've done a vj21 front end on a ypvs before
I put brackets on the rear of the headstock so I could use the original ones on the yoke
Doesn't affect the original mount so no problem if resorting to yam set up
Steve
|
|
|
|
Post by jon on Jul 18, 2018 20:15:19 GMT 1
Reg, 100% agree the original T piece design was not worth the effort for what it would offer.
Dusty, 100% agree the I section is an option that should work as well as the originals depending on dimensions.
Jon
|
|
|
|
Post by dusty350 on Jul 18, 2018 20:29:10 GMT 1
I have left Clive to sort it out. My engineering know how is limited to a CSE grade 3 in 1983 !! I tend to sit and look at things for hours, take it to Clive who takes seconds to come up with something better !! That's why he is an engineer and I'm not !  None of this is that involved compared to some builds of course, but it makes a basic pv engine into an Lc build seem easy in comparison. I will be pleased when all the frame mods are done as everything else will be fairly straightforward (hopefully !) Dusty |
|
|
|
Post by Tobyjugs on Jul 18, 2018 20:56:54 GMT 1
Hi Dusty i sit and look at my projects for hours as well. I also like to ask for other peoples view. It does not mean you have to use them
|
|
|
|
Post by galant2nz on Jul 19, 2018 13:35:13 GMT 1
Hi Dusty
Just came across this awesome build and will be watching with great interest.
I’ve started something similar and was searching for info on fitting a LC into a 400 frame when I came across your thread.
So my plan is also to loosely base it on a TZ replica that’s road legal and have decided I want to only use Yamaha parts for the build.
So far in the mock up I have a RD400 “C” frame and have fitted RZ F2 yokes and forks, 400 “E” wheel with twin Elsie disks and FZ750 calipers, for the rear I have fitted 83 RZ swinger ,400 “E” wheel, Elsie disk, RZ caliper.
I’m still in 2 minds as to go with twin shocks or mono using the RZ setup also not sure if I will go P/valve or Elsie to provid the horse power.
I did consider doing as you have done with the front mounts but have decided to copy the way the engines are mounted in the RZ so will be able to use factory tie bars as well, I’m starting on the mounts this’s weekend using empty P/valve cases.
I’m also thinking I will use the 400 C tank, race style tail and TZ replica full fairing, I’m also going to use the factory airbox, oil tank and right side panel.
Well that’s the plan but nothing is set in concrete and may change during the mock up stage.
Well that’s enough of my waffling on and as said will be watching with great interest.
Cheers Jason
|
|


 . I wonder if the plastic piston ring from a UK K or L would fit the damper rod I have, allowing it to work ? I may, possibly, have J model forks and internals, and they wont fit the K/L model pattern tubes. Without a piston ring fitted the damper fits the new tube easily with some slack so I wonder if the piston ring on the J has a bigger diameter making it tight in the tube?. Fowlers stock the later rings at £6.71 each so maybe worth a gamble ?
 I was in Lidl the other week and they were selling a 20v rattle gun. Not something I would normally need, but with 2 engines on the bench and the forks to do, I thought it might be useful. Really glad I got it now. The bolt that passes up into the damper rod from the bottom of the fork can be a pig to undo. Normally strip everything out of the forks and wedge a broom handle in to stop the damper rod spinning, and then undo the bolt - that's normally what I have to do. With the rattle gun, leave it all intact - the fork spring tension helps lock the damper rod, and the rattle gun just whizzed the bolt straight out !! Never been so easy
  The gun, and battery and charger were about £35 I think. Great tool, even if seldom used;


 None of this is that involved compared to some builds of course, but it makes a basic pv engine into an Lc build seem easy in comparison. I will be pleased when all the frame mods are done as everything else will be fairly straightforward (hopefully !)