|
|
Post by Yogi on Mar 31, 2017 18:46:10 GMT 1
|
|
|
|
Post by rostrumorhospital on Mar 31, 2017 23:14:16 GMT 1
Your bike looks the dogs balls Dusty, really like the colours and still think the chrome allspeeds are the best looking pipes on an LC.
With reguards the chain allignment i've got the gsxr 400 wheel/sprocket carrier on mine with 10mm removed off the face of the sprocket carrier and a 5mm offset front sprocket along with the longer YPVS collar behind it, I know they're all diferent and i've no doubt you'll get to the bottom of it, as a very basic check on frame allignment and to check the front wheel is alligned with the back, run a straight edge up each side of the back wheel and check the gap to the front wheel is equal on both sides, I put my bike on a rear paddock stand and ran a bit of sring up each side of the rear wheel about 6" off the ground to do this check, I'm sure you've allready considered this or even done the check already but just on the off chance i can offer some advice after the help / advice you've gave me with my build
|
|
|
|
Post by dusty350 on Apr 1, 2017 15:13:55 GMT 1
Hi Thanks Yogi - great link - very useful for anyone doing this mod. Rostrum - excellent advice, thank you, again, useful info for a predicament such as mine, or indeed for basic maintainance. Problem is solved, thanks to Mark "Hawkeye" Yamark  Mark popped over today, and with the Lc making a rare outing onto the driveway, Mark spotted a few issues immediately. The front wheel didn't look in line with the rest of the bike - only obvious when you stood a good few feet back from it. That issue was easily resolved by loosening the clamp bolts and easing it into line, so a simple fix. The rear end was more challenging though. Again, standing well back behind the bike showed the wheel to be twisted in the arm, and although it looked central it was actually steering to the left side. We messed around a fair bit loosening bolts and spindles, but the eureka moment came when we attempted to adjust the rear wheel spindle to get the chain tight. Adjusting the spindle on the chain side by turning it either clockwise or anticlockwise should move the wheel evenly but it became apparent that the wonderful Metmachex adjusters weren't moving equally - in fact the right side (brake side) wasn't moving at all, so tightening the chain had the effect of twisting the wheel towards the left of the bike. This is a brand new arm and spindle, bought from Metmachex by the previous owner. The Metmachex spindle has a woodruff key at the head end, and a flat in the spindle at the nut end, so it fits in line and everything should move together as it is keyed. With Mark adjusting the head of the spindle, I could see my side wasn't moving at all, so the wheel was just twisting in the arm. In the end, Mark adjusted it one side and tightened the 2 locking cap head bolts, and then I adjusted my side with a few taps of a hammer and a wooden drift. Chain run is now nigh on perfect ! And the wheel is running true. Chain is still close to the frame, but has enough clearance. At a later date, on Mark's suggestion, I will get some new spacers made to move the whole wheel to the left by 2mm - this will mean the chain runs equally between tyre and frame. This is to get it perfect really, but it's certainly good to go now, so a big thanks to Mark, who could spot the smallest of adjustment errors a mile away !! The moral of the story is this. Don't assume a bespoke, new part will work exactly as it should do. I didn't even consider the adjusters weren't doing their job - I should of really, considering the trouble I've had with a previous new Metmachex arm, and a second pair of eyes makes a huge difference too. Adjusting the chain in the future wont be the simple job it should be, but at least I know that a bit of messing around I can get it right. Thanks again for everyone's ideas, and especially Mark, who's enthusiastic approach to problem solving is a joy to behold  I owe you a beer mate Dusty |
|
|
|
Post by Yogi on Apr 1, 2017 15:20:39 GMT 1
So what your saying is alls wheel that ends wheel  Glad your sorted Matt |
|
|
|
Post by dusty350 on Apr 1, 2017 15:31:44 GMT 1
Hahaha Very good Matt . The nice thing is Mark sorted it before I had too much time to think about it. It was funny - I wheeled the bike onto the drive, Mark took a few steps back and almost instantly spotted the problems. I think I may need to get my eyes checked again !! Dusty |
|
|
|
Post by yamark on Apr 1, 2017 16:22:21 GMT 1
Thanks Dusty, I feel that the problem needed 2 people, and was very difficult to see until the left chain adjuster was turned with a second pair of eyes watching. The effect was "something else"! The wheel moved about 12mm in the vertical plane and the rear tyre moved closer and then further away from the swingarm! Once the wheels were "parallel" and upright (The forks were a touch twisted in the yokes), the chain alignment was very close to perfect. As Dusty said, the rear wheel needs to move 2mm to the right to be dead centre of the frame; that can be sorted at a later date.
Seeing Dusty's bikes in the sunshine was a real treat. I can not overstate the finish/build quality. I've not seen better. The cylinder head that Dusty painted looks as flat as glass. The polishing of the alloy is also perfect. His detailing is far better than anything I can achieve. Awesome work - the finished bike will be a work of art.
Mark |
|
|
|
Carbon Lc
Apr 1, 2017 17:52:37 GMT 1
via mobile
Post by veg on Apr 1, 2017 17:52:37 GMT 1
Dusty interesting what you say about the swing arm and not all together surprising Nigel had to skim 2 thou of my new spindle as it didn't fit he wasn't exactly complimentary. I will keep my eyes open when I do mine although to be fair Nigel has made ll spacers etc so should be fine. Glad you have it sorted now
|
|
|
|
Post by dusty350 on Apr 1, 2017 21:33:17 GMT 1
Thanks Mark, kind words And your time today was much appreciated. You solved the problem before it became a problem , if you know what I mean ! Can't think of anyone more qualified to take on a triple build !! Veg' I'm sure if Nigel has cast his eye over it, the swingarm will be fine. When we looked closely at the operation of the adjusters, it's incredible how "out" they are. Shame as I always lusted after a Metmachex arm, and now I have 2 and they both were flawed. I'd never buy another ! Moving the wheel 2 mm to the right will mean a new spacer on the sprocket side, machining the spacer down on the caliper side, and modifying the Tyga caliper carrier so it wont foul the steel peg that it locates on. That will be a winter job. For now it looks fine and should operate as it should. Dusty |
|
|
|
Post by Eyrey1 on Apr 1, 2017 22:31:23 GMT 1
I feel that the problem needed 2 people, and was very difficult to see until the left chain adjuster was turned with a second pair of eyes watching.
The effect was "something else"! The wheel moved about 12mm in the vertical plane and the rear tyre moved closer and then further away from the swingarm!
whats causing all that ? seems very strange
|
|
|
|
Post by dusty350 on Apr 2, 2017 9:25:02 GMT 1
Hi Gary It's the wonderful Eccentric adjusters ! The left side spindle head would be at 7 o clock position, whilst the right side would be at the 5 o clock position !! Everything is new and in new condition - it just allows too much twist before the right catches up with the left. So now, you set one side then go round and set the other to match, just like on a conventional chain pull, except there are no marks on this arm like on a chain pull, so you have to use a straight edge to check everything  I didn't buy the arm, the previous owner did, so can't easily sort it with Metmachex, not that I would bother anyway cause their customer service is sh*te ! Everything lines up now - once the wheel adjusters were matched the 10mm mis alignment disappeared and the chain runs true. It's not the end of the world - just annoying. I'm gonna make another chain slipper today - still getting the shape right, coz without one the chain will definitely contact the swingarm. Then I can fit the split link and move on. Dusty |
|
|
|
Post by headcoats on Apr 2, 2017 10:21:59 GMT 1
I had a second hand Metmachex swing arm for my Buell and it hadn't been fitted by the previous owner, but I did contact Metmachex and they did sort a few niggles out, wouldn't say they went the full mile but were helpful to a certain point LOL
|
|
|
|
Post by dusty350 on Apr 2, 2017 12:55:21 GMT 1
You had better luck than I did then, when I bought a brand new Lc/Rgv arm from them ! I'm gonna live with it. Once you know the issue it's easy enough to adjust the chain, just more hassle than it should be. And in spite of that, it is a stunning looking swingarm imo. Dusty |
|
|
|
Carbon Lc
Apr 2, 2017 14:01:20 GMT 1
via mobile
Post by Tobyjugs on Apr 2, 2017 14:01:20 GMT 1
I always thought JMC looked nicer
|
|
|
|
Carbon Lc
Apr 2, 2017 14:02:02 GMT 1
via mobile
Post by Tobyjugs on Apr 2, 2017 14:02:02 GMT 1
I always thought JMC looked nicer but I like both |
|
|
|
Post by dusty350 on Apr 2, 2017 21:17:15 GMT 1
Hi Unfortunately JMC are no longer trading. There is very little competition for Metmachex in the swingarm market, and that's not good for punters like us  So the chain is sorted now, and I made a Mk3 version of a chain slipper that is now in place - the bike rolls along with hardly a sound now I fitted the clutch cable today, but had to remove the clutch actuator from the side case to free the lock nut - it was so tight ! Once done it all went back together and I adjusted the clutch as best I could - will need to wait until it's running to fine tune the clutch actuation. I'm also wondering which seat to use on the bike. I have the Gully style seat that came with the bike, but I also have the standard Lc seat that has been recovered. Not sure which looks better; 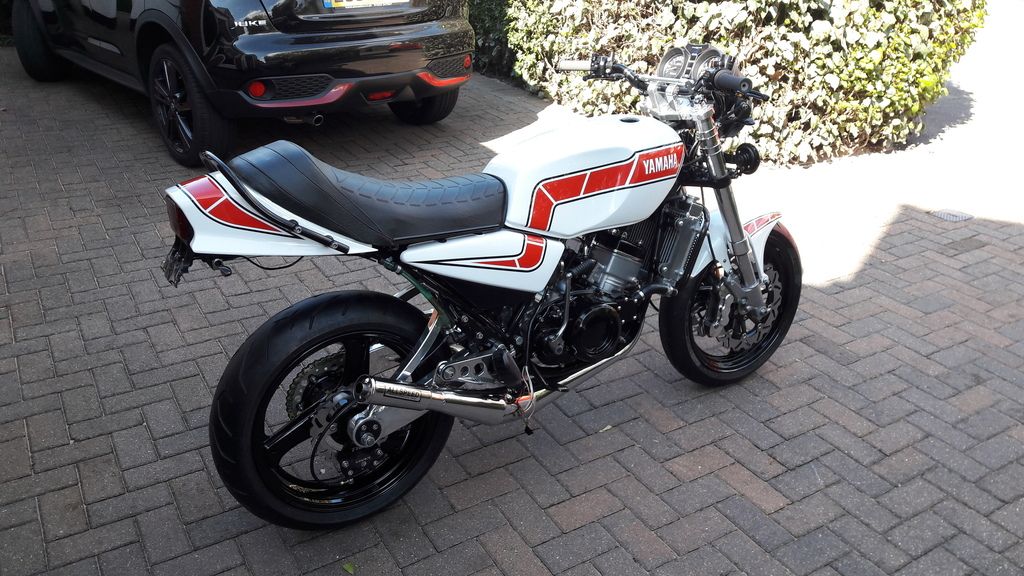 Or 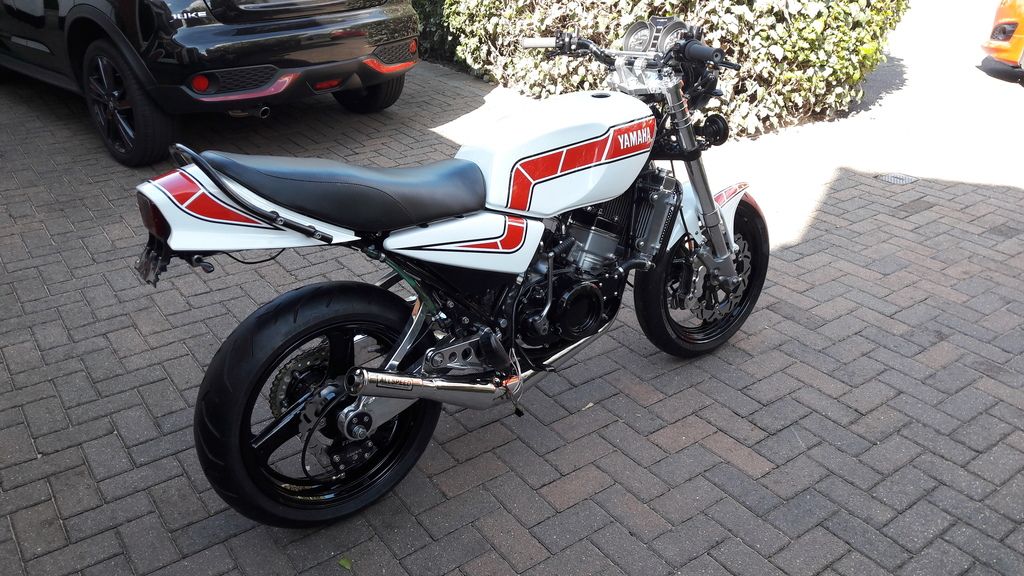 Ignore the "fit" of the seats, the right side seat catch is off for painting. I like the gully style one, but the standard Lc seat really suits it too. The gully style looks good on the other hybrid in the garage; 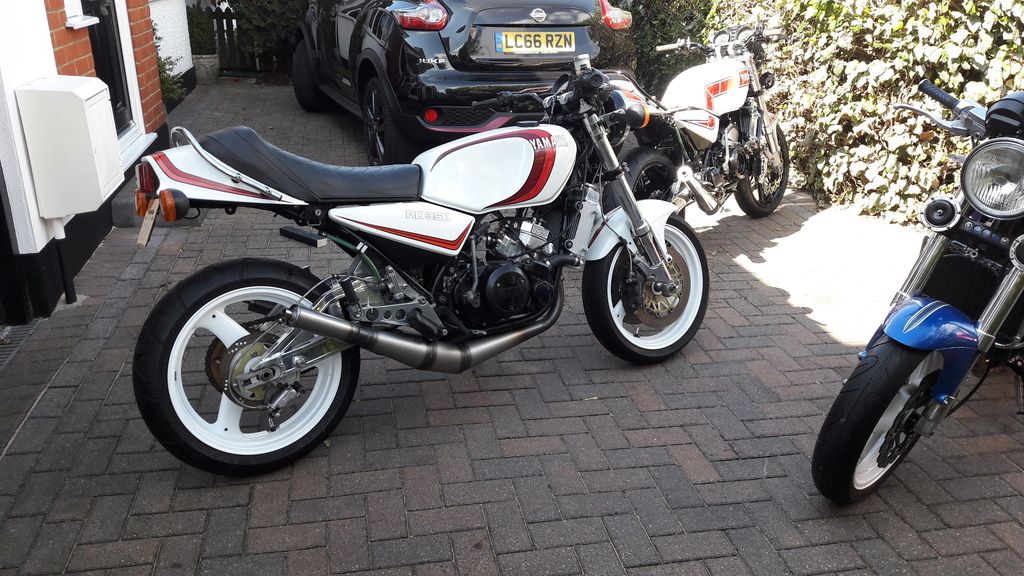 Loom fitting is "looming" next !! Dusty |
|
|
|
Post by Tobyjugs on Apr 2, 2017 22:10:59 GMT 1
Personally i like the standard seat but that gully seat suits the build very good indeed. It looks very nice  |
|
|
|
Post by mouse on Apr 3, 2017 7:43:49 GMT 1
Standard seat if you ask me!
Mouse
|
|
|
|
Post by mouse on Apr 3, 2017 8:07:24 GMT 1
Hi Dusty, really glad you got the chain run sorted with old 'Hawkeyes' help! Well done Mark. Good job you didn't start machining bits!
When we buy something new, regardless of cost, isn't it reasonable to expect it to work as it is supposed to, nothing more. I bet your experience with the swingarm has left a bitter taste and rightly so!
Why do people seem to think it acceptable to sell things that clearly do not work as they should, i think it stinks and i bet i can guess the response if you took the issue up with the manufacturer!!
Anyway glad it is now sorted and i bet in a few months this bad memory will fade and you will just be enjoying the bike.
Also, i too (like Yamark) can vouch for Dusty's build quality, it really is outstanding
Mouse
|
|
|
|
Post by Yogi on Apr 3, 2017 8:07:32 GMT 1
Standard seat for me it's follows the lines better
|
|
|
|
Post by dusty350 on Apr 3, 2017 18:12:43 GMT 1
Hi
Standard seat is winning at the moment - I think it suits it a bit better too. I showed the pic of the other hybrid as I think that gully style seat looks well on that bike - maybe because of the longer swingarm.
Hi Mouse, not as bothered about the swingarm now I know it can be adjusted - just a bit of a ball ache to do when it should be a simple job. The swingarm I bought for my blue bike is the one that really pi**ed me off, and Dean's attitude is what really soured it for me, though again, I sorted it and the arm is now fine. Shame as they are a lovely addition to any build (as long as they work !!)
Dusty
|
|
|
|
Post by iwantalc on Apr 3, 2017 18:30:49 GMT 1
standard seat suits the bike better ..looking good ..
|
|
|
|
Post by rostrumorhospital on Apr 3, 2017 20:26:45 GMT 1
The standard seat just shades it for me but have to admit the gully style seat does look well
|
|
|
|
Post by yamark on Apr 3, 2017 20:47:52 GMT 1
Standard seat gets my vote |
|
|
|
Carbon Lc
Apr 3, 2017 21:04:25 GMT 1
via mobile
Post by dllc on Apr 3, 2017 21:04:25 GMT 1
standard seat would get my vote
|
|
|
|
Post by dusty350 on May 15, 2017 19:34:59 GMT 1
Hi Not done much with the bikes lately - the shed base took over, plus a few other jobs meant the bikes have been dormant. I did fit the refurbed oil pump from Arrow today, with the new gasket, and the shim that fits on the end of the worm drive; 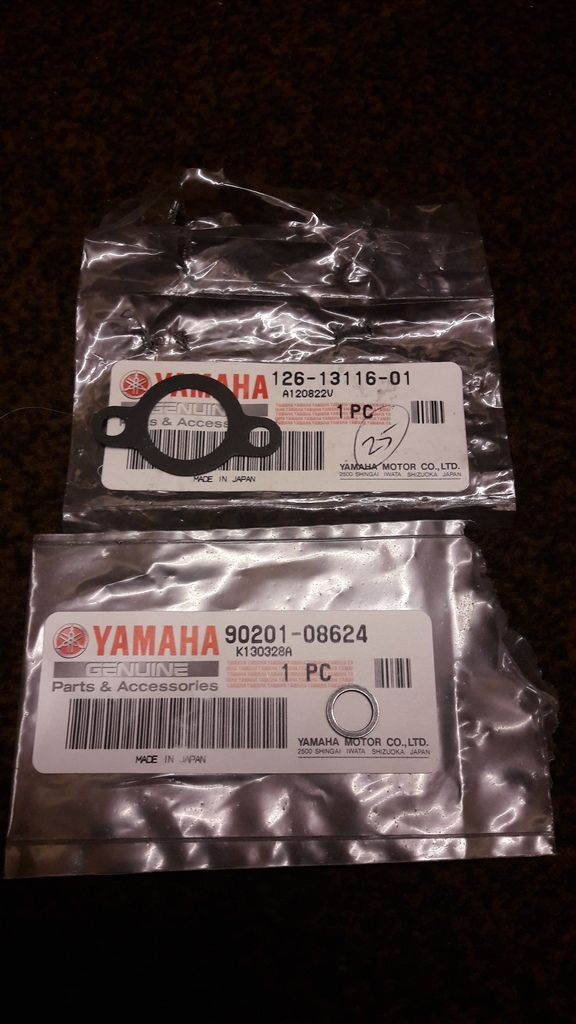 I bought some clear oil hose, but the o.d of the tank to pump hose is too big to go through the rubber grommet in the casing, and because of it's greater o.d, it has to bend more than I would like to exit through the case, so I ordered a standard black hose from Fowlers today. The 2 clear pipes from pump to carbs are ok so I will still use those. I also used the ally disc I found in a box of spares, for the centre of the clutch case. It had a few scratches on it so I had some work to do to get it nice. I've left it with a satin finish as I wanted it to match the cases and barrels, and I think it looks fairly good; 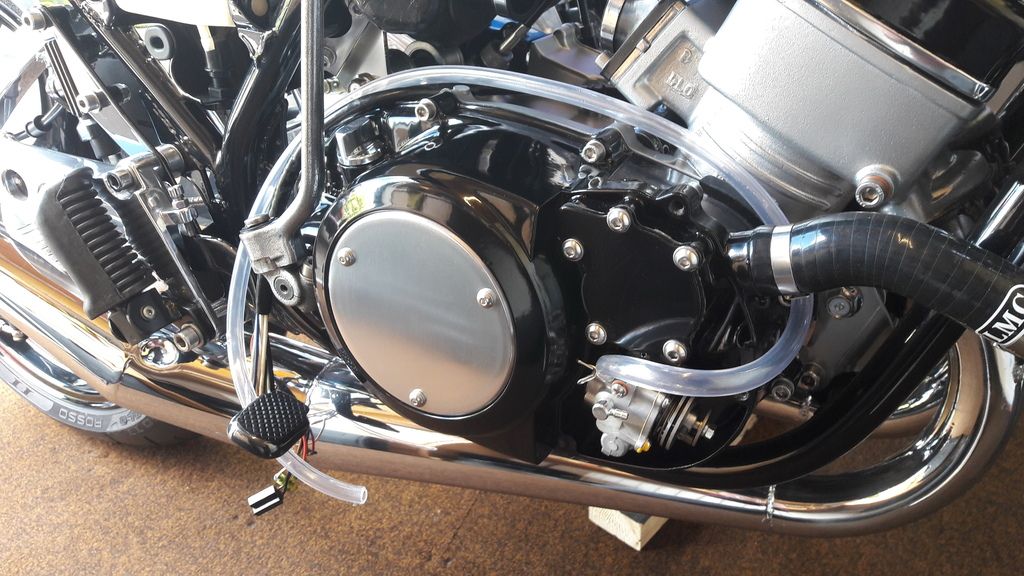 Must pull my finger out and get this finished, ready for MOT and then register it. Dusty |
|
|
|
Post by dusty350 on May 15, 2017 19:38:12 GMT 1
Forgot to add, I fitted a kickstart repair kit from Norbo some time back, and it's made a huge difference No more "baggy" kickstart lever, and 1 thing less to rattle !! Dusty |
|
|
|
Post by mouse on May 16, 2017 7:28:39 GMT 1
She's looking good Dusty, i know what you mean about the clear oil hose!
Mouse
|
|
|
|
Post by dusty350 on Jun 4, 2017 9:36:25 GMT 1
Right, I need to pull my finger out and get this finished !! I would love to take it to Brands in July, so I need to get it ready for an Mot and registration before then ! All the talk recently about brass balls in carbs made me decide to do mine, so I ordered some off ebay, and yesterday drilled a 2.5 hole in the existing balls on my pillar drill. Then, as members here recommended, I screwed in a self tapper, and wiggled the balls out; 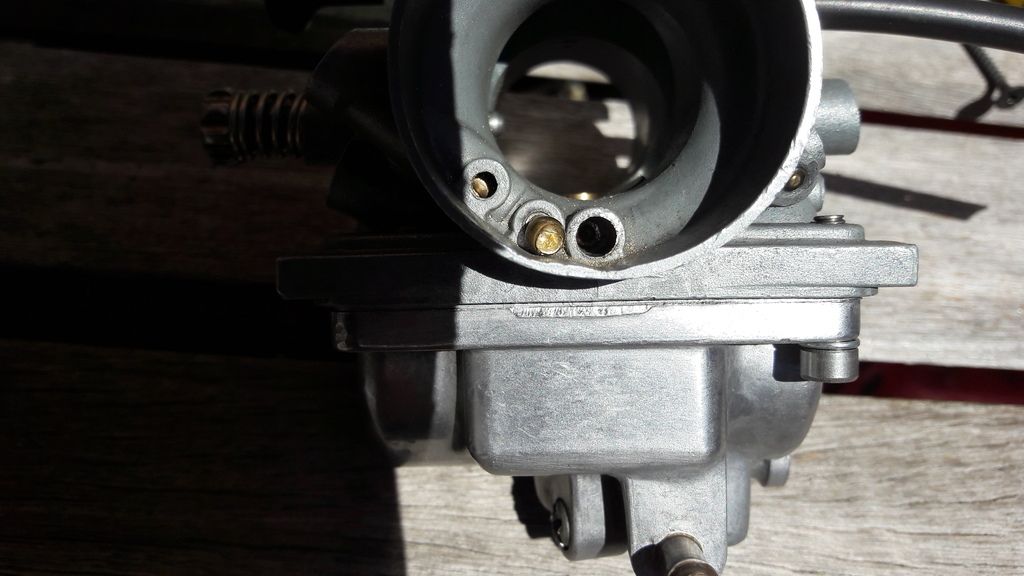 These are 31k carbs that were on my blue hybrid. They had been through my ultrasonic bath quite a lot of times in the past. Even so, the tiny airway now visible with the balls removed were blocked in both carbs !! So another half hour each in the ultrasonic, and then a steam clean. We have one of those floor mop steam cleaners which breaks down into a hand held unit with a small attachment on the end, perfect for small items like carbs. After all that, the airway was nice and clear. I then assembled the carbs with some nice red hose that Mouse gave me ; 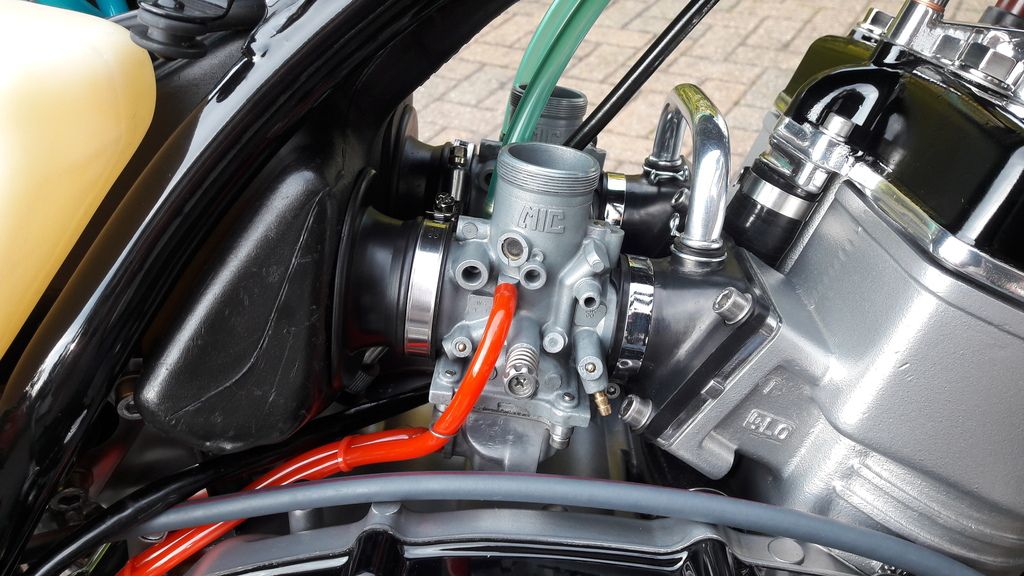 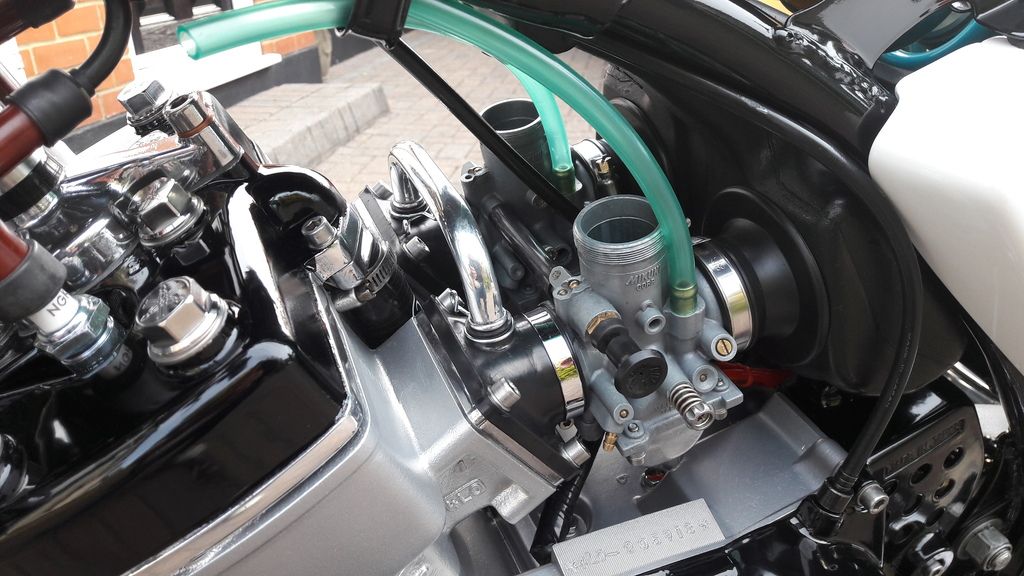 I fitted new standard main jets and bigger 27.5 pilots, all bought from Allens, so hopefully the carbs will be about right. Dusty |
|
|
|
Post by dusty350 on Jun 4, 2017 9:40:08 GMT 1
Plus, I fitted the new brass balls with a tiny drop of low strength threadlock. The balls were about a fiver for 10, and it's an ease enough job to do. Hardest part was centre punching the old brass ball !! Dusty |
|
|
|
Post by dusty350 on Jun 4, 2017 17:23:14 GMT 1
So, this afternoon I attempt to fit the throttle cable. It looks new, has "Made in Japan" stamped on it and came fitted with the carbon bike. About an hour of faffing about and I cant get the adjustment right at all. So off with the cable, and hunt out an old knackered cable, and sure enough, it's slightly too long The junction box of the cable wont sit in the clip under the airbox without kinking the cables running to the carbs. And to top it all the junction box connections have come apart and I cant get the oil pump cable to work when the throttle is pulled Fowlers have genuine cables in stock. £75 plus vat plus post so about £100 then ! Wish I had a cheaper hobby !! Dusty |
|


 I owe you a beer mate


 I didn't buy the arm, the previous owner did, so can't easily sort it with Metmachex, not that I would bother anyway cause their customer service is sh*te ! Everything lines up now - once the wheel adjusters were matched the 10mm mis alignment disappeared and the chain runs true. It's not the end of the world - just annoying.


