Post by seanrd on Jun 16, 2012 14:40:33 GMT 1
Norbo,
Feel free to move this to some where more appropriate but I've made a guide on how i do my own for about a fiver
Afternoon All, I thought I’d write a quick guide on how I make my clear clutch covers. I havn’t got any fancy CNC laser cutters mills or secret cutting tools so it should be fairly straight forward. Providing you have access to a lathe.
Time: 2 hours included casing.
Tools required:
• Small lathe
• Lathe tools HSS
• Steel Ruler
• Vernier Calipers
• 6mm drill bit
• Drill/pillar drill
• Hacksaw
• Punch
• Set of basic files/dremel
Parts required:
• Lexan sheet 10mm/8mm
• 3 small 5mm o-rings
• 1 large o-ring (from clutch basket)
• 3 M5 x20mm bolts
1: First thing to do is remove the centre part from the casing. I found the easiest way for me to do this was to chain drill round the edge with a 6mm bit.
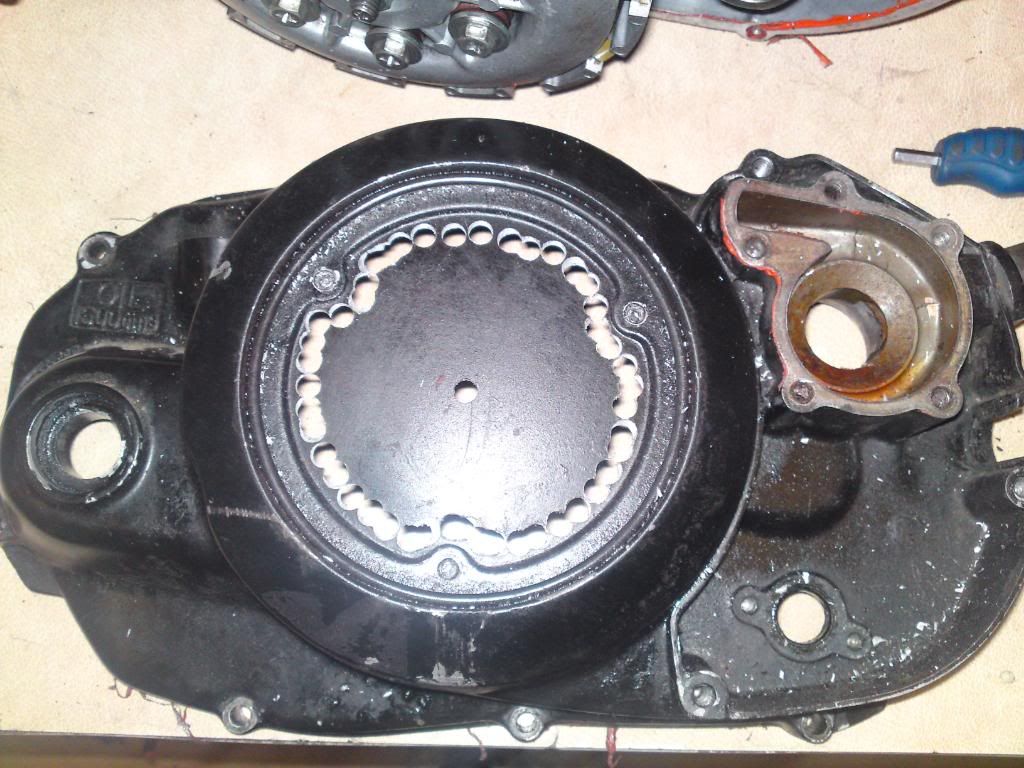
2: Once drilled I gave it a tap with the hammer and out it comes. Now its time to tidy up the edge with a file or even better a dremel if you have one.
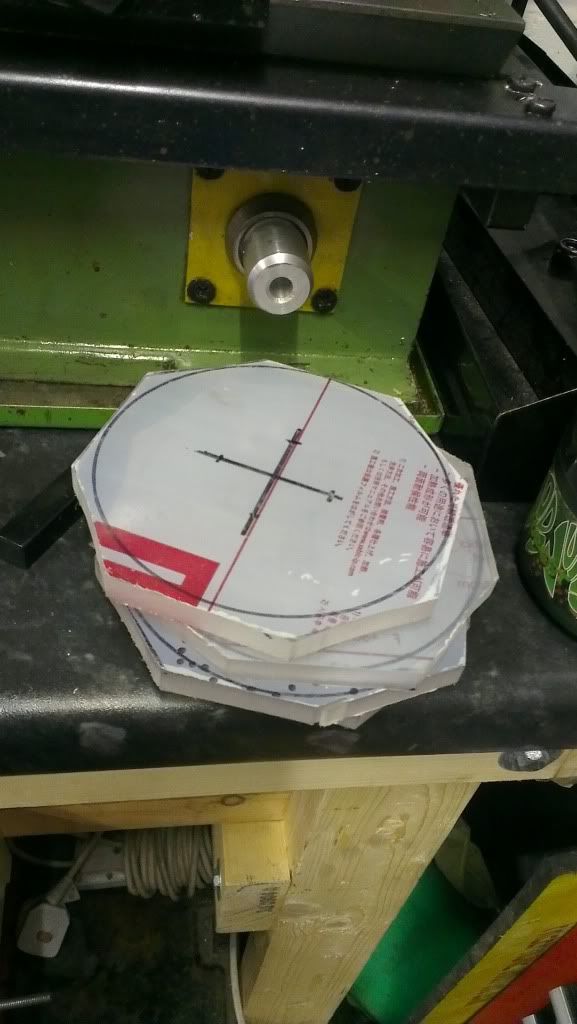
3: Onto the cover its self. Take your lexan sheet and draw onto it several 120mm circles in a marker pen. Leaving on the protective sheets either side as you will see later. Once this has been done cut the basic shape out using a fine toothed hacksaw. I buzzed these through a band saw after hours at work.
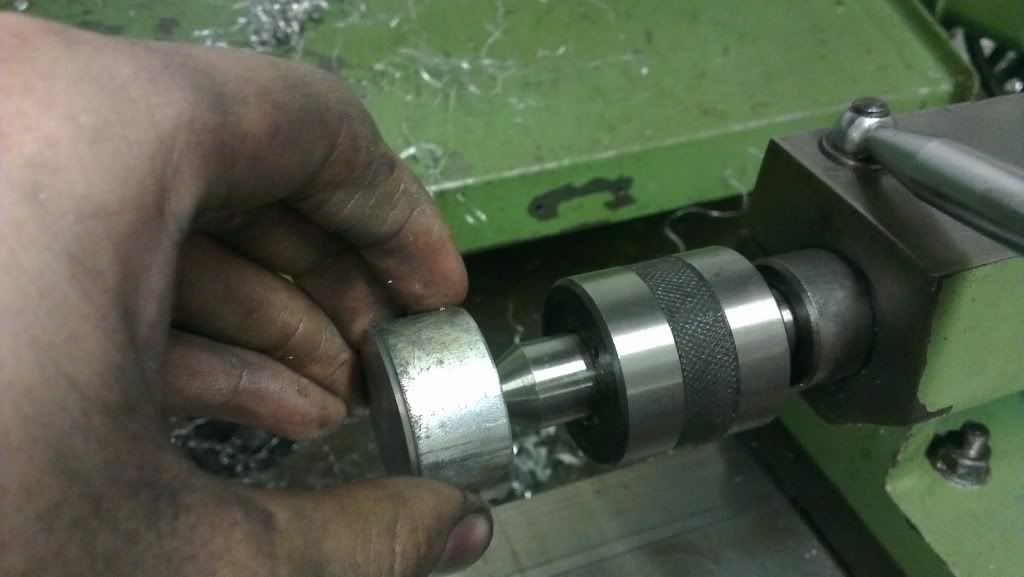
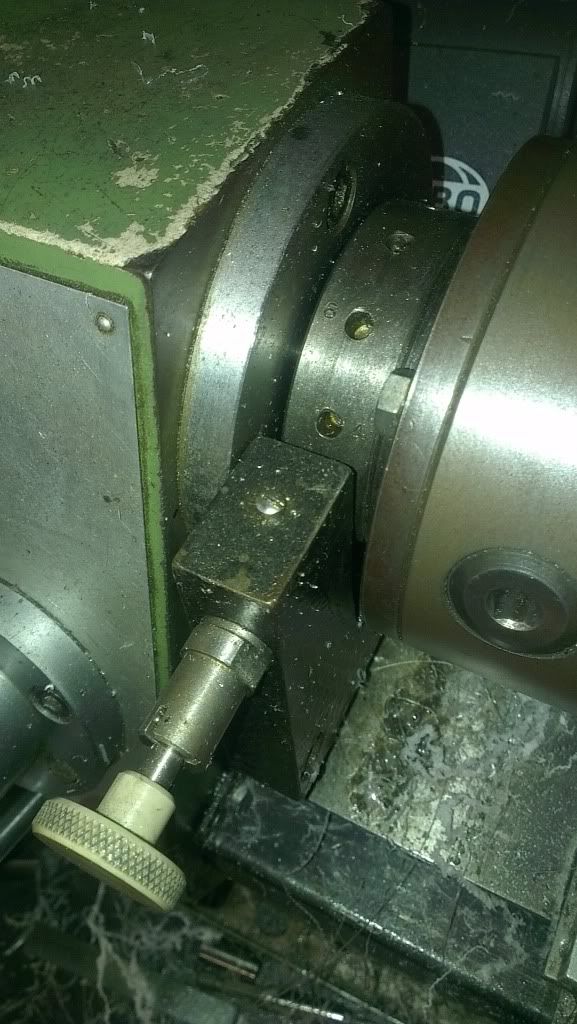
4: Now the fun part begins. I made 2 small aluminium parts out of some scrap I had laying around. Face off both parts and make sure the edges are chamfered as this will stop them scratching the lexan. Place one in the chuck of the lathe insuring its square. The other using a centre drill bit create a small hole just large enough for a live centre to fit into.

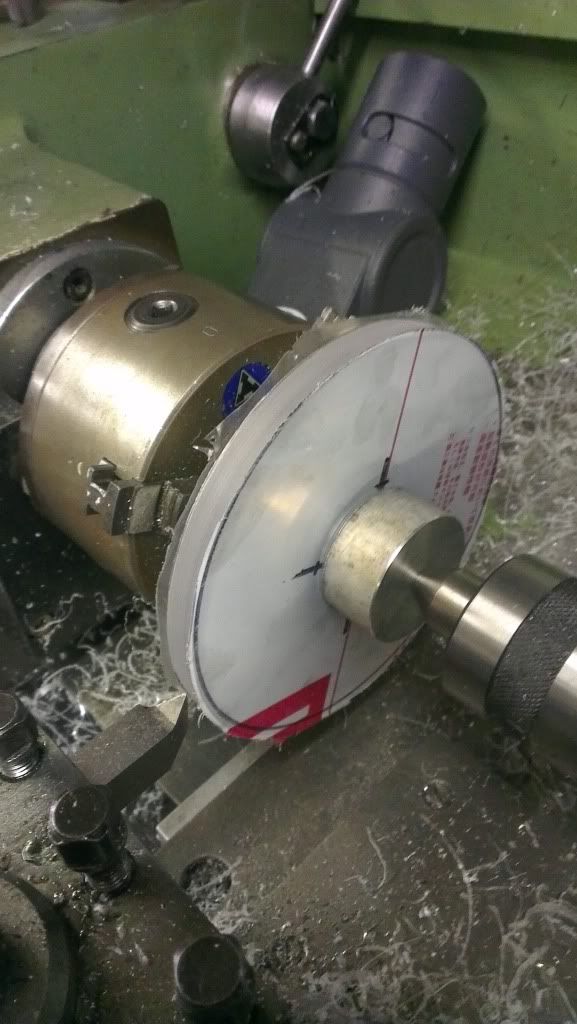
5: Place the roughly cut lexan onto the one fitted in the live centre and wind this into the chuck. Nice and tight and lock off the stock to stop anything shifting. This is why the protective sheets must be left on.
6: Begin to skim off the high spots very slowly. Yes its only a plastic but the swarf is still sharp and gets very hot.

7: Eventually you will get to a point where it forms a perfect circle. 119.5mm I found gave the best fit. I finished the surface with 800grit whilst it was in the lathe.
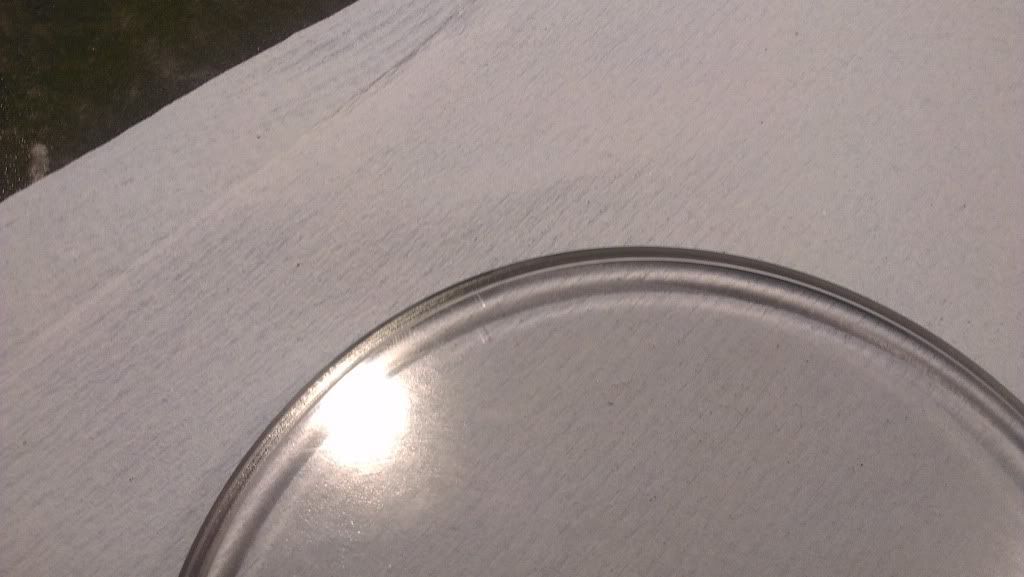
8: On one side (outside) I created a 2mm chamfer. Now it’s time to create the groove for the large o-ring.
3.5mm into the cover from the outside edge and 2.5mm into the face. I then created a 1mm chamfer on both new edges.

9: I’m fortunate enough that my lathe has a system where I can lock the chuck at set positions. This is how I mark out the 120 degree intervals at which the bolt holes need to be drilled. 9.5mm in from the outside edge. This can be done with a protractor.
10: Once these are marked on the disc, use a centre punch with your hand (DO NOT USE A HAMMER) to mark the position in which it needs to be drilled.
11: Now take your 6mm drill bit (They are M5 bolts but will need some slop to allow it to fit easier) and go for it taking care to drill nice and square. A wood bit performs the best here.
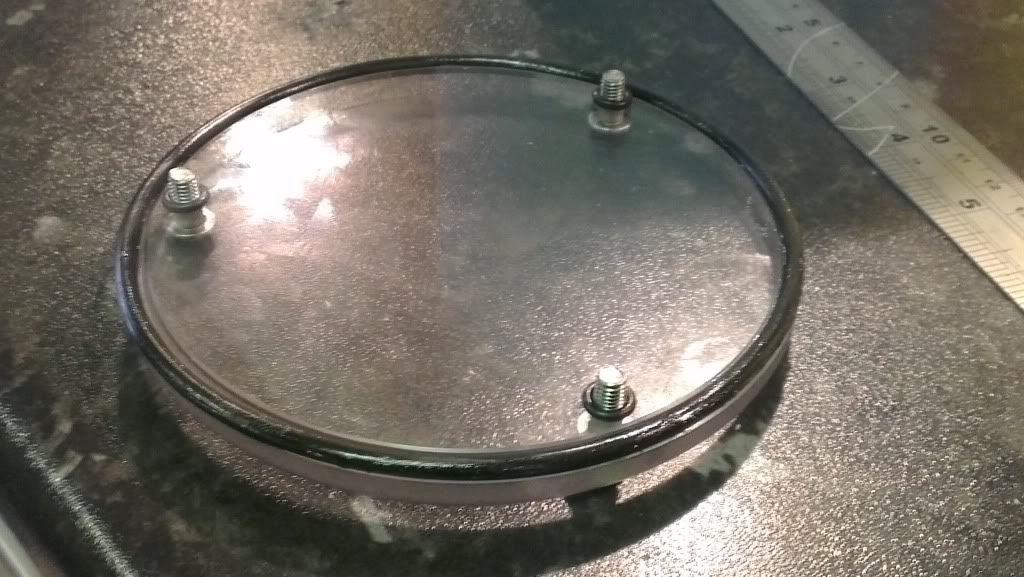
12: Now take the large o-ring and slot it into the outside groove, place the bolts through the cover and smaller o-rings and fit it
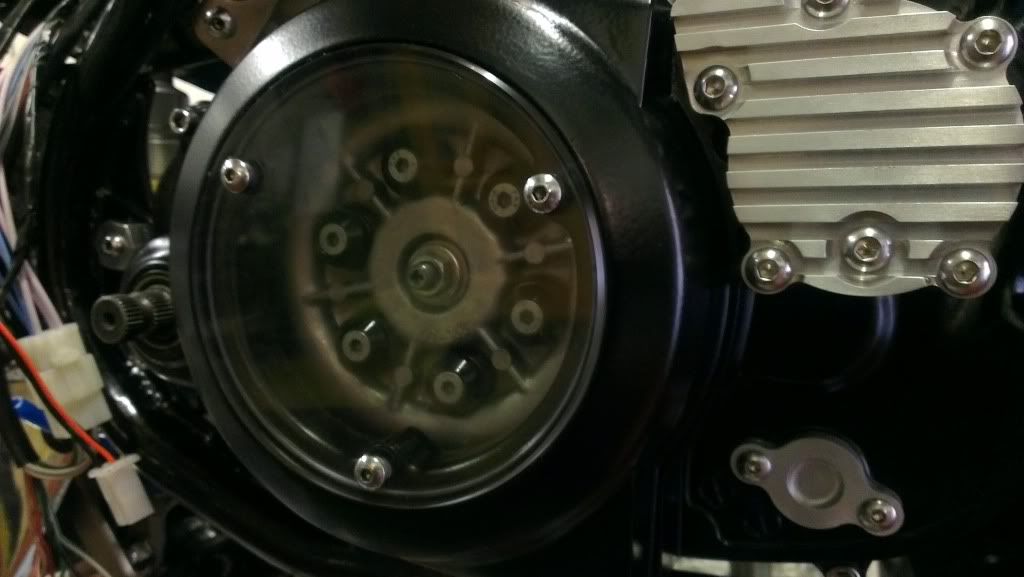
Note!! That although it is said to be bullet proof, it is NOT scratch proof so take care avoiding laying it down on metal swarf or grit etc.
Happy days.
Let me know if you get stuck ;D
Feel free to move this to some where more appropriate but I've made a guide on how i do my own for about a fiver

Afternoon All, I thought I’d write a quick guide on how I make my clear clutch covers. I havn’t got any fancy CNC laser cutters mills or secret cutting tools so it should be fairly straight forward. Providing you have access to a lathe.
Time: 2 hours included casing.
Tools required:
• Small lathe
• Lathe tools HSS
• Steel Ruler
• Vernier Calipers
• 6mm drill bit
• Drill/pillar drill
• Hacksaw
• Punch
• Set of basic files/dremel
Parts required:
• Lexan sheet 10mm/8mm
• 3 small 5mm o-rings
• 1 large o-ring (from clutch basket)
• 3 M5 x20mm bolts
1: First thing to do is remove the centre part from the casing. I found the easiest way for me to do this was to chain drill round the edge with a 6mm bit.
2: Once drilled I gave it a tap with the hammer and out it comes. Now its time to tidy up the edge with a file or even better a dremel if you have one.
3: Onto the cover its self. Take your lexan sheet and draw onto it several 120mm circles in a marker pen. Leaving on the protective sheets either side as you will see later. Once this has been done cut the basic shape out using a fine toothed hacksaw. I buzzed these through a band saw after hours at work.
4: Now the fun part begins. I made 2 small aluminium parts out of some scrap I had laying around. Face off both parts and make sure the edges are chamfered as this will stop them scratching the lexan. Place one in the chuck of the lathe insuring its square. The other using a centre drill bit create a small hole just large enough for a live centre to fit into.
5: Place the roughly cut lexan onto the one fitted in the live centre and wind this into the chuck. Nice and tight and lock off the stock to stop anything shifting. This is why the protective sheets must be left on.
6: Begin to skim off the high spots very slowly. Yes its only a plastic but the swarf is still sharp and gets very hot.
7: Eventually you will get to a point where it forms a perfect circle. 119.5mm I found gave the best fit. I finished the surface with 800grit whilst it was in the lathe.
8: On one side (outside) I created a 2mm chamfer. Now it’s time to create the groove for the large o-ring.
3.5mm into the cover from the outside edge and 2.5mm into the face. I then created a 1mm chamfer on both new edges.
9: I’m fortunate enough that my lathe has a system where I can lock the chuck at set positions. This is how I mark out the 120 degree intervals at which the bolt holes need to be drilled. 9.5mm in from the outside edge. This can be done with a protractor.
10: Once these are marked on the disc, use a centre punch with your hand (DO NOT USE A HAMMER) to mark the position in which it needs to be drilled.
11: Now take your 6mm drill bit (They are M5 bolts but will need some slop to allow it to fit easier) and go for it taking care to drill nice and square. A wood bit performs the best here.
12: Now take the large o-ring and slot it into the outside groove, place the bolts through the cover and smaller o-rings and fit it
Note!! That although it is said to be bullet proof, it is NOT scratch proof so take care avoiding laying it down on metal swarf or grit etc.
Happy days.
Let me know if you get stuck ;D


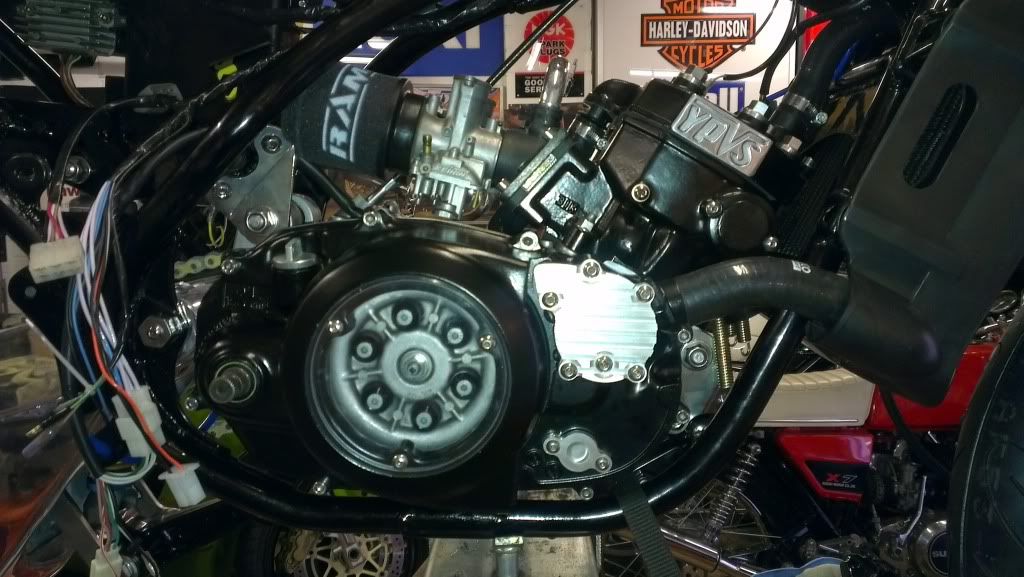
 I used a paper gasket with threebond 1104 on each side. It's oil tight but would be better with O rings.
 It's drilling the holes thats the hardest bit i find.