|
|
Post by copper99 on Jun 16, 2013 14:51:53 GMT 1
Lovely build mate, thats going to be a real head turner.
|
|
|
|
Post by dusty350 on Jun 20, 2013 22:07:11 GMT 1
Hi, Thanks, I hope it will look good when it's done. I've done a bit more on the engine this week. I cleaned some corrosion off the stator and repaired the neutral switch wire as it had frayed, then bolted it on; 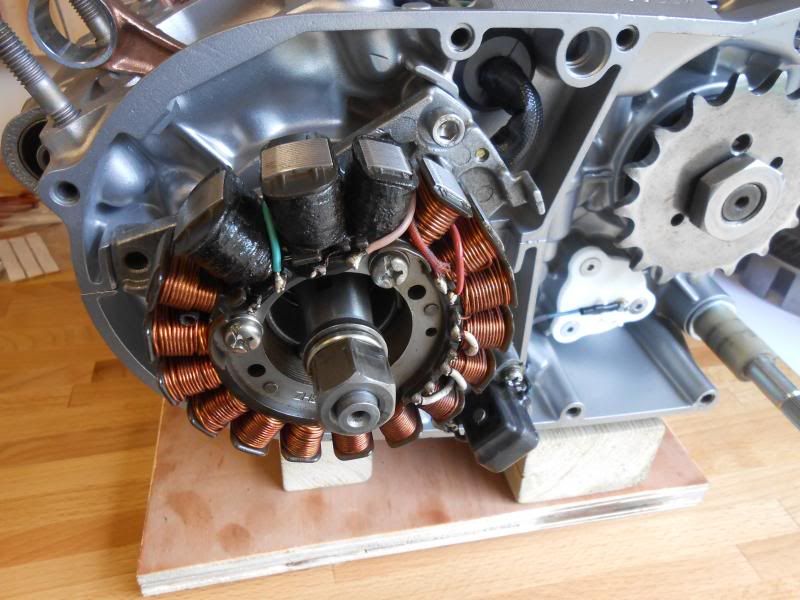 As this is an F2 engine there is no adjustment for timing, so it just bolts into one position. Then on goes the flywheel, with a new woodruff key; 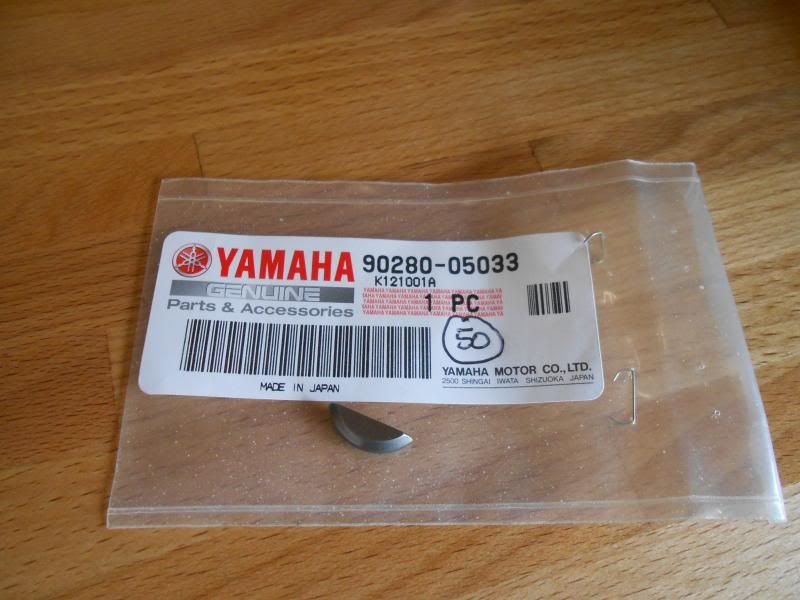 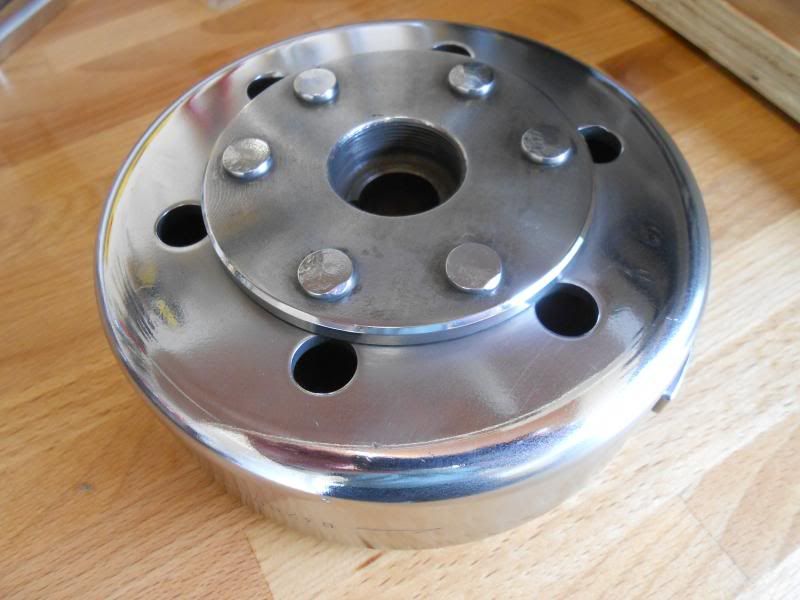 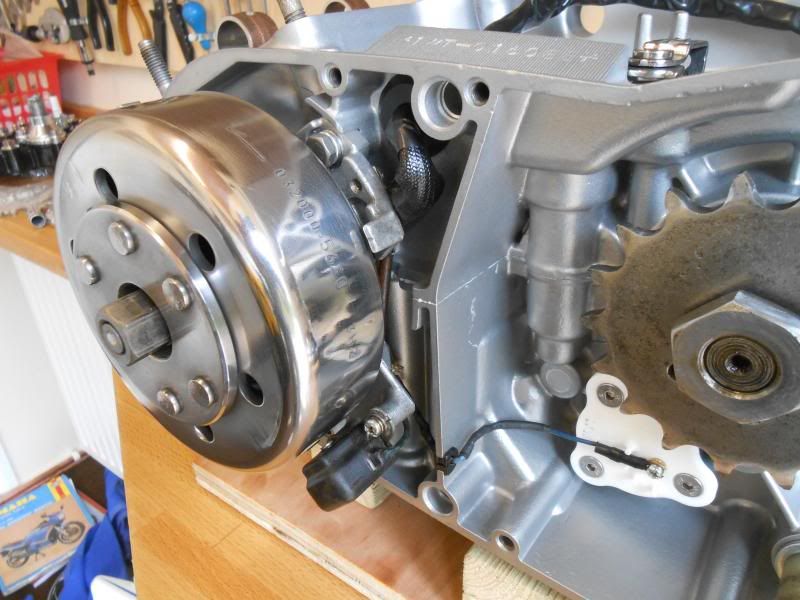 I took the opportunity to clean up the connector blocks in the Ultrasnic cleaner. It shifted a lot of crap !!;  Cleaned up the sprocket and nut too; 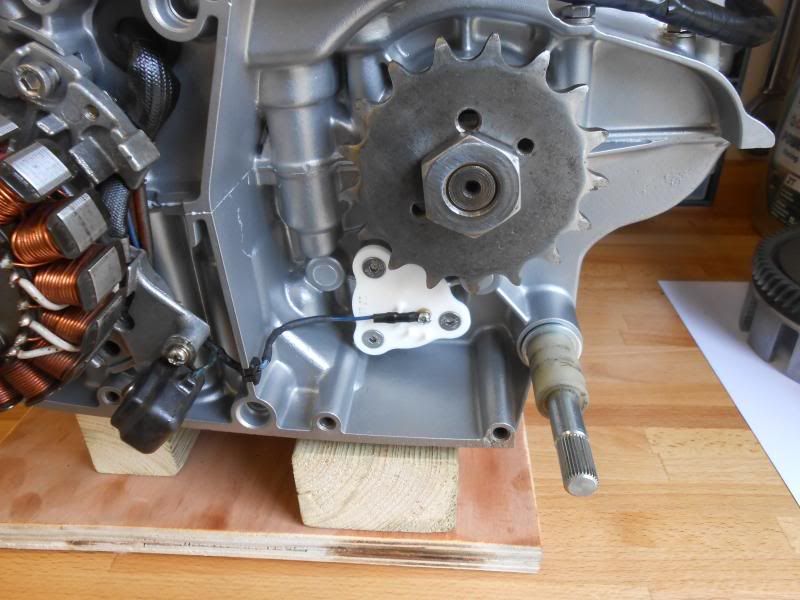 Dusty  |
|
|
|
Post by dusty350 on Jun 20, 2013 22:11:28 GMT 1
Also fitted the clutch actuating arm, with a new washer and spring from Norbo; 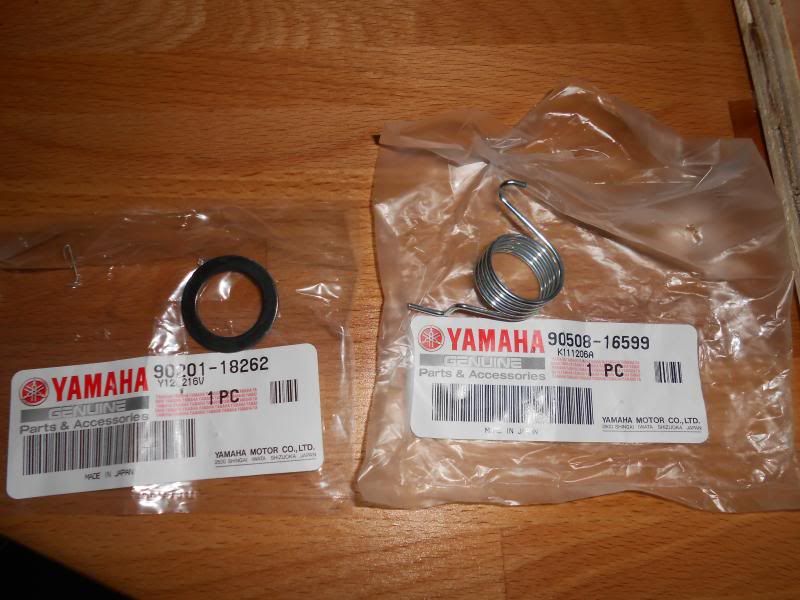 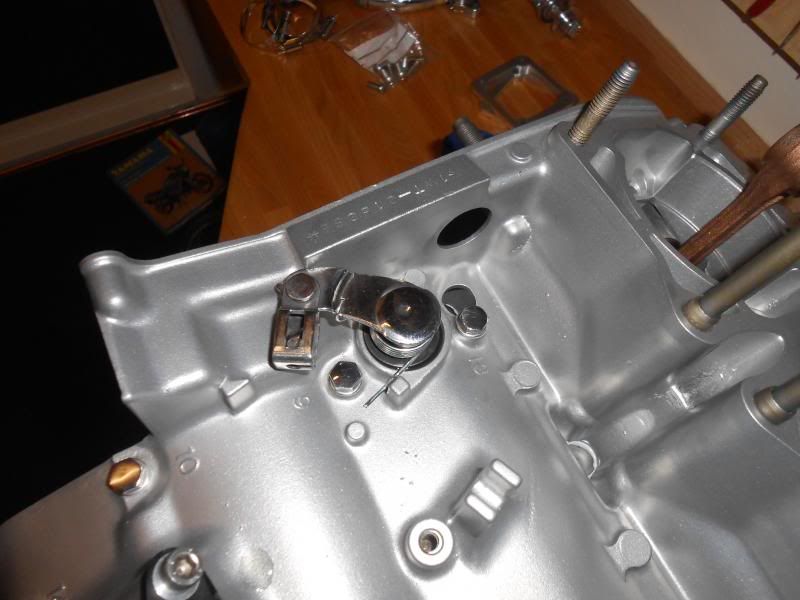 Dusty |
|
|
|
Post by dusty350 on Jul 12, 2013 19:25:42 GMT 1
Had a problem with my computer, and a lot of the photo's I've taken of the engine build are, at the moment, unable to be uploaded, so I'll update with what I've got at the mo. I stripped the side casing down, and the water pump and casing looked pretty manky; 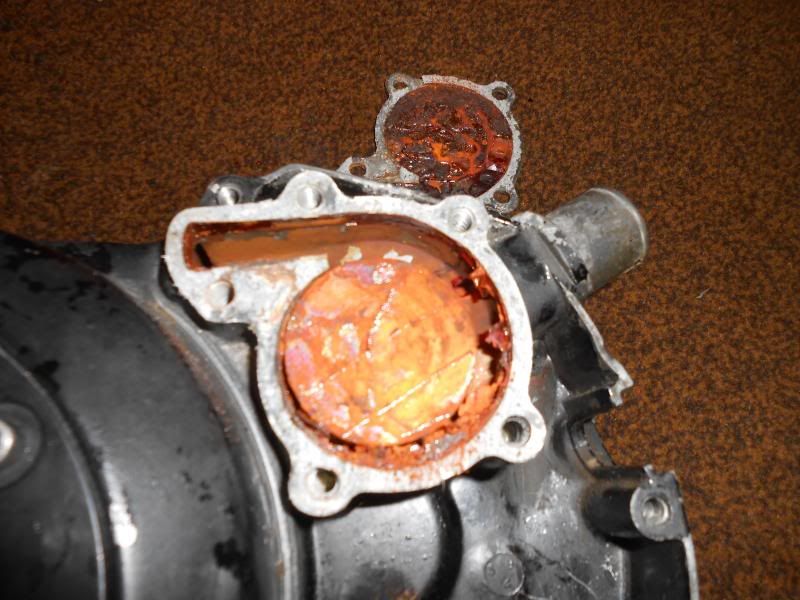  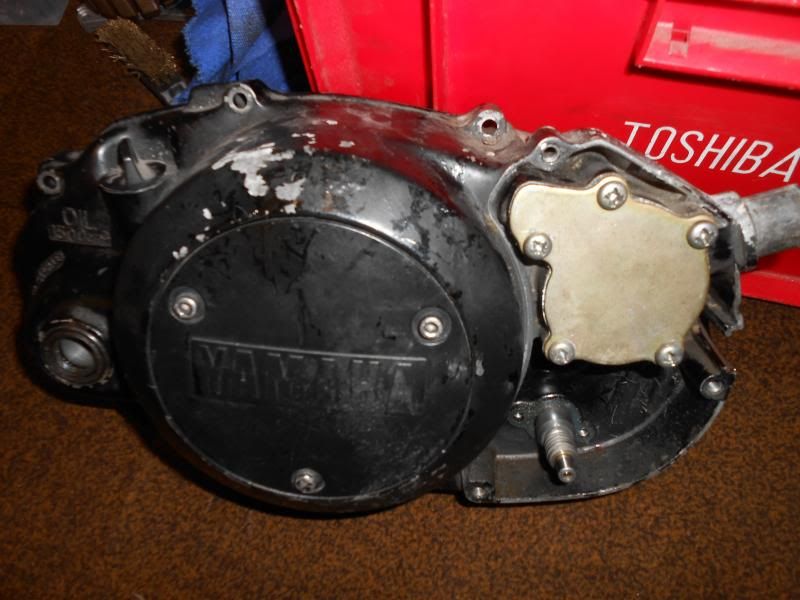 So I cleaned up the pump housing prior to taking it for gloss powder coat; 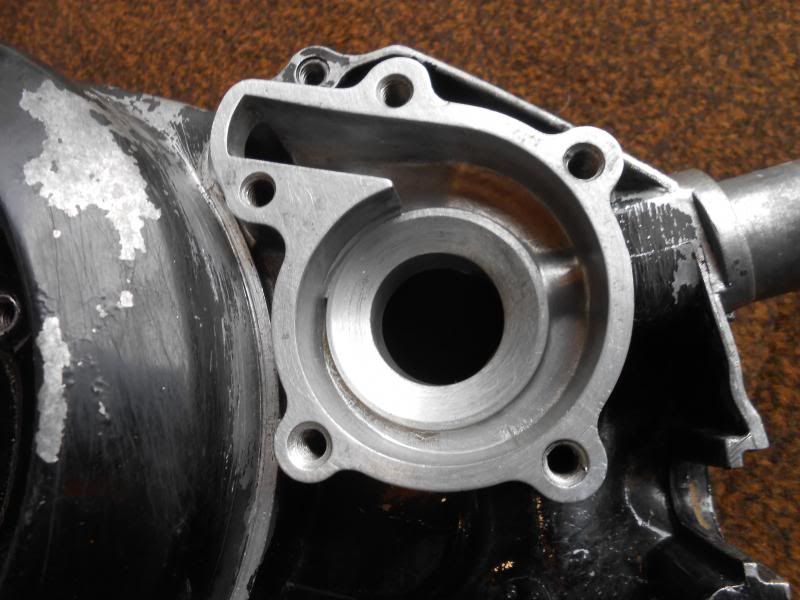  Microblast at Windsor heated the casing before applying the powder to reduce the chance of the alloy "blowing"; 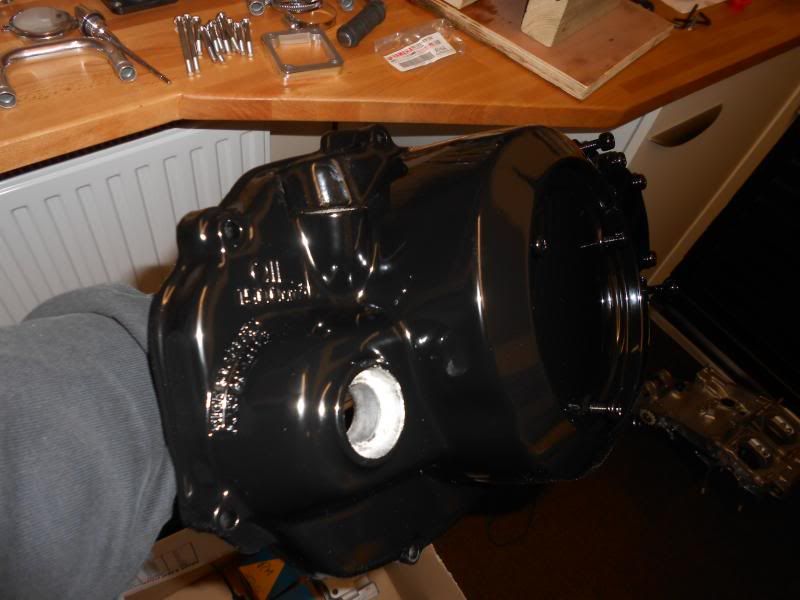 I ordered an alloy pump impellor as the old plastic one looked pretty knacked; 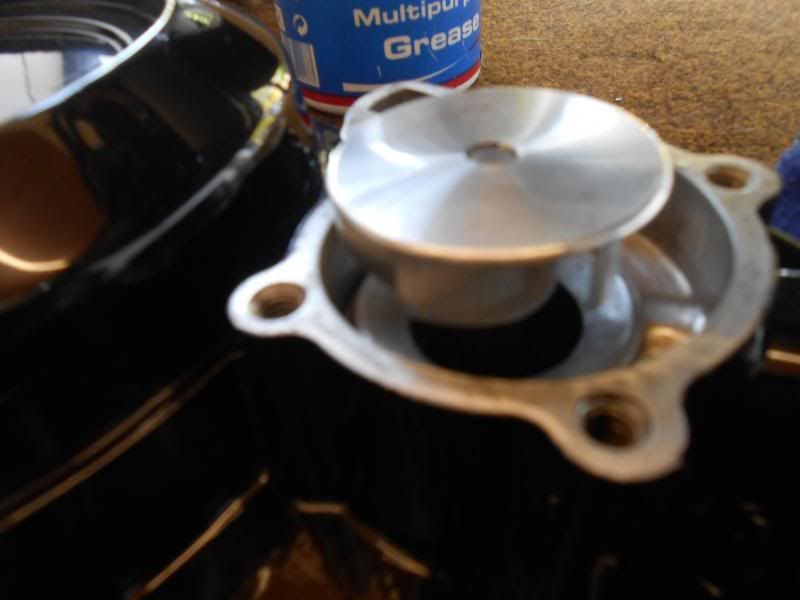 A new bearing and seal from Norbo; 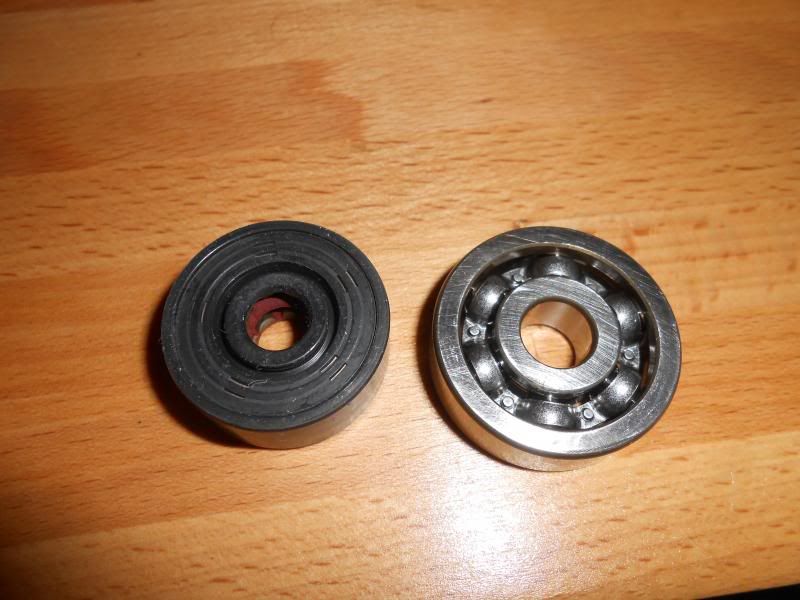 And ebay came up with an NK Racing water pump cover, and as I'm running premix on this engine, an oil pump blanking plate; 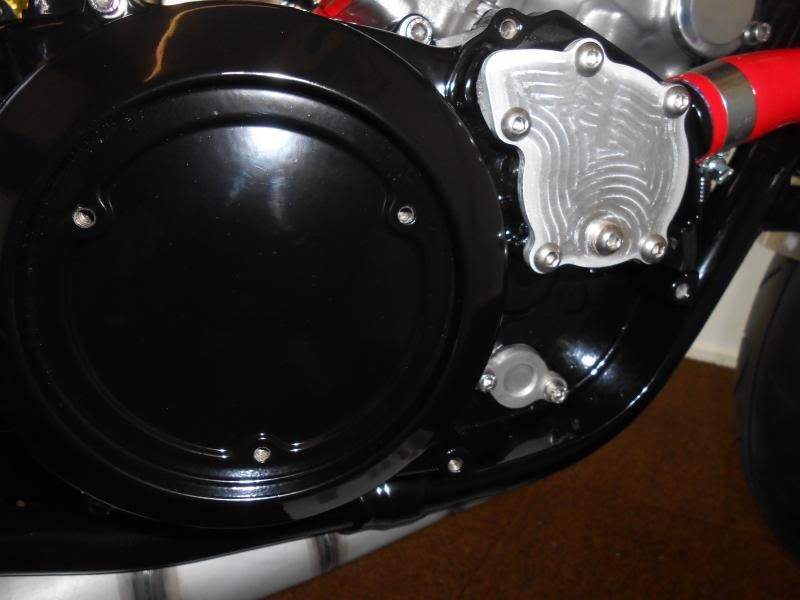 Dusty |
|
|
|
Post by dusty350 on Jul 12, 2013 19:30:02 GMT 1
I also rebuilt the clutch, using a Mitaka basket from Norbo and Wiseco damper rubbers from NK racing; 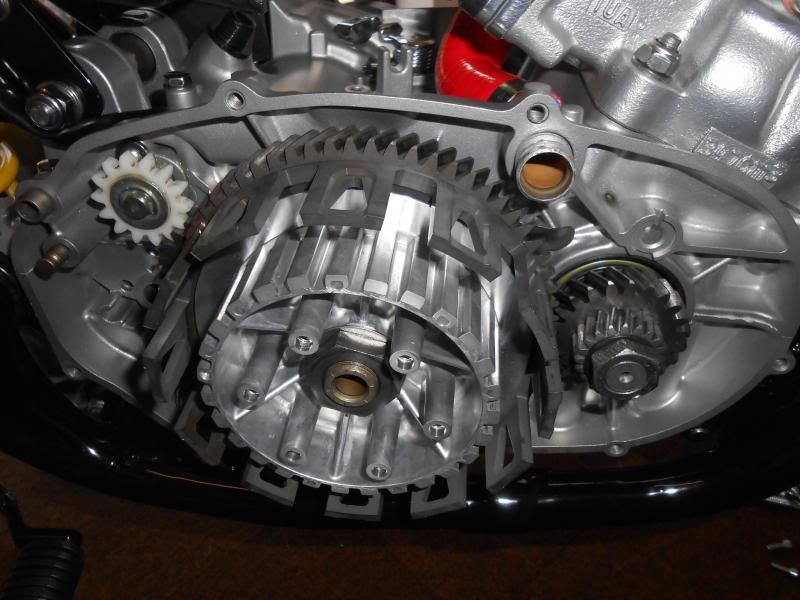 I also got new clutch plates from Norbo; 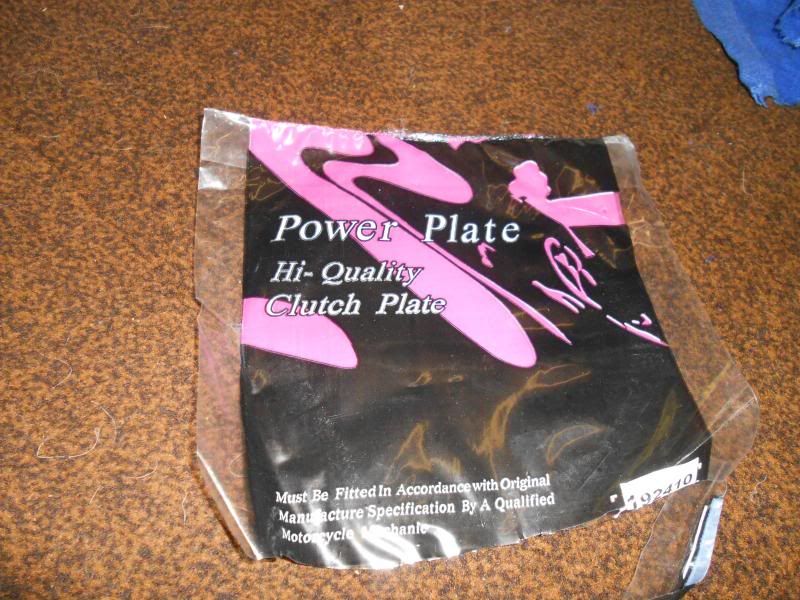 And rebuilt it; 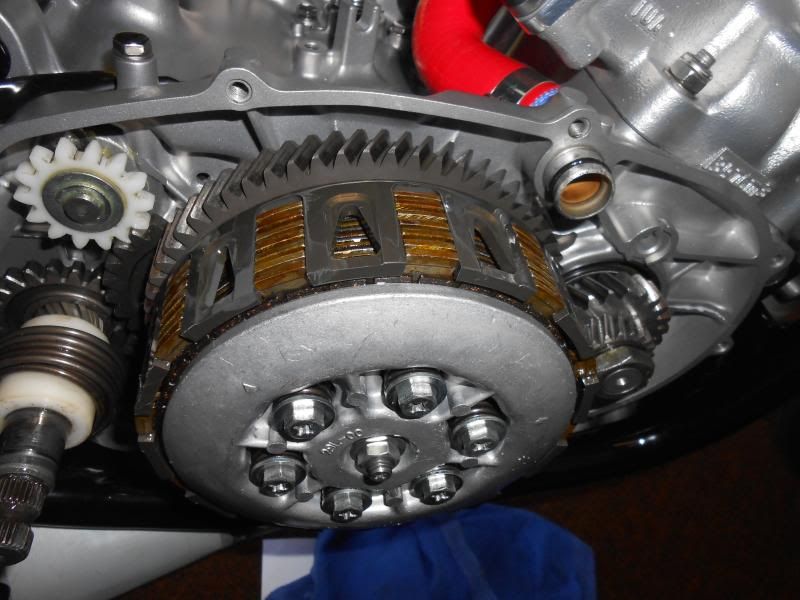 Dusty |
|
goodpw
Weekend rider

Posts: 87
|
Post by goodpw on Jul 12, 2013 20:17:23 GMT 1
Hi, Went to Wolverhampton on Thursday to pick up my rebuilt crank and rebored barrels from PJME. Excellent workmanship as usual; Who did you use in Wolverhampton ?? Our Chris's RD400 needs quite a bit of work to the Crank Barrels & heads. The engines stripped but need a good/reliable repair shop. Cheers. Goody |
|
|
|
Post by billyboy on Jul 12, 2013 21:57:13 GMT 1
wow , much shiny flywheel , how have you got that finish ?
|
|
|
|
Post by dusty350 on Jul 12, 2013 22:15:12 GMT 1
Hi, Pjme in Wednesfield have now done 4 cranks and a rebore for me, and are excellent. 10% discount for forum members too. They did a 400e crank for me, from this; 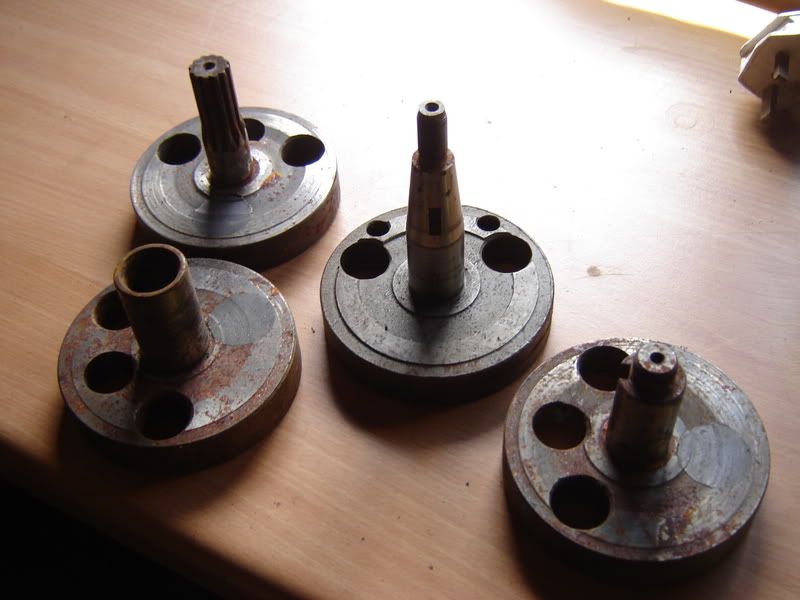 To this; 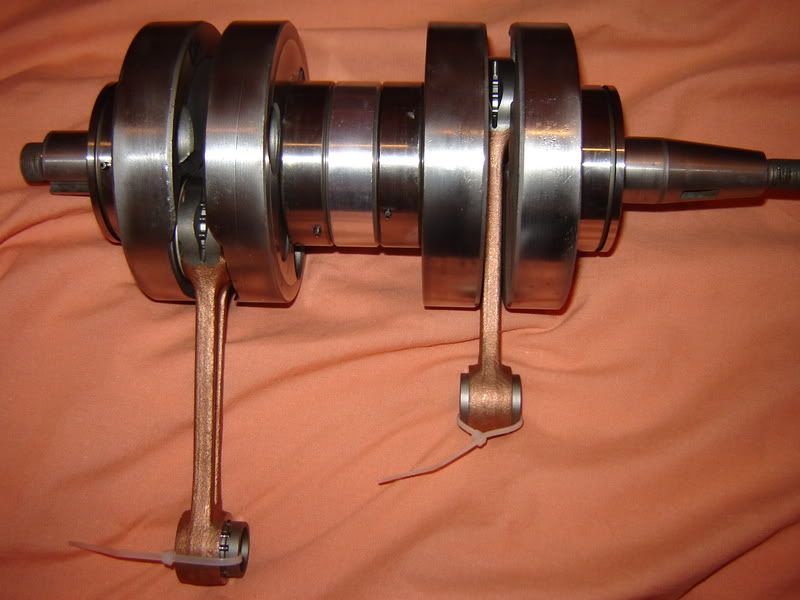 Billyboy, I used a polishing wheel to remove some light corrosion from the flywheel and got a bit carried away !!. Didn't take much effort or time to get it like that. Dusty |
|
|
|
Post by dusty350 on Jul 12, 2013 22:26:27 GMT 1
Hi, Forgot to add, I bought a new clutch centre hub via ebay back in December to replace the one I damaged getting the clutch undone. Only £26.00 from Bob yp for a genuine Yamaha item in it's box. I got a new water pipe "O" ring and retaining clip, plus a new kick start oil seal from Granby's along with a new Yam clutch casing gasket. Norbo supplied some silicon hoses in red, along with some red powervalve cables. I have used an Lc left side engine casing as I will get it powdercoated gloss black to match the clutch side. I have now fitted the engine back into the frame, the first time they have been reunited in years ! 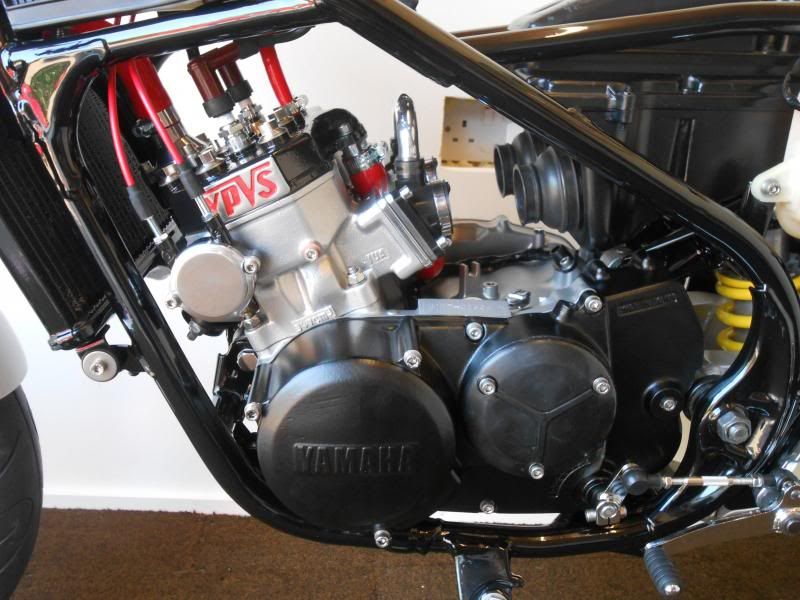 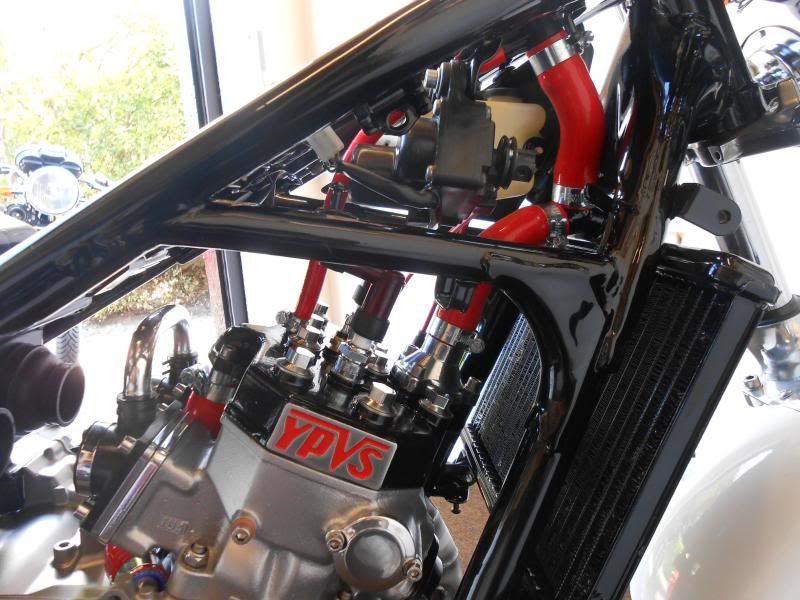 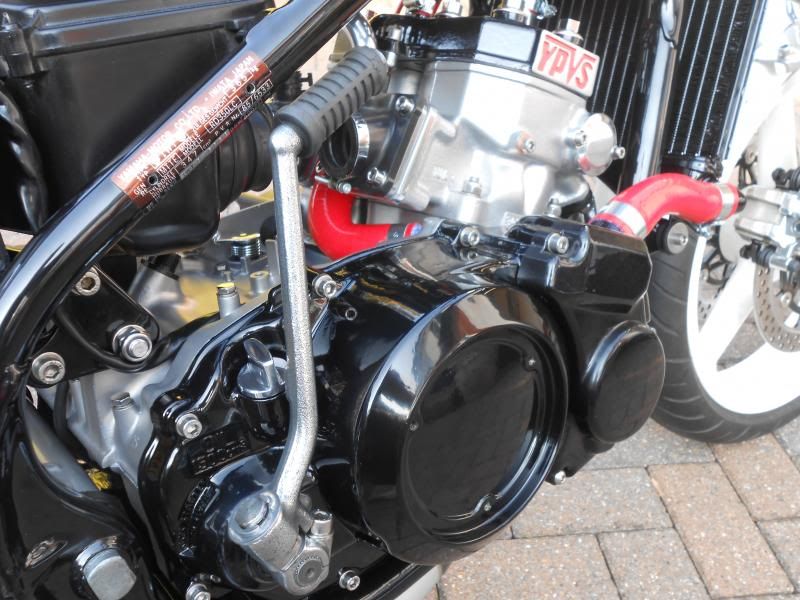 Dusty |
|
|
|
Post by dusty350 on Jul 12, 2013 22:34:58 GMT 1
|
|
|
|
Post by kevsypvs on Jul 13, 2013 12:35:38 GMT 1
pity you couldnt leave pipes as they are they look awesome mate , your making good progress ,top job /where did you get the pipes and what roughly did they cost?
|
|
|
|
Post by kevsypvs on Jul 13, 2013 12:38:27 GMT 1
just had a thought couldnt you paint the pipes in grey between the black bands and then paint in the black bands so it looks exactly the same as on the bike now ? just an idea ,would look ace and different
|
|
|
|
Post by dusty350 on Jul 13, 2013 14:45:00 GMT 1
I got the pipes from a forum member, who bought them brand new from Kenny at TSA, but never fitted them to his bike. They cost £450.00 from Kenny I believe, and that's for zintec coated mild steel with ally end cans. They get rave reviews from everyone that's fitted them, are incredibly light and well made too. It is a shame to paint them, and if they had been stainless I would have got them polished, but they will get a black heat proof spray job at some point.
Dusty
|
|
|
|
Post by mick858 on Jul 14, 2013 15:43:09 GMT 1
Just read through both your build threads, excellent build quality and great looking bikes. Do you do it all in that half a garage? It's so clean.
|
|
|
|
Post by dusty350 on Sept 22, 2013 10:04:46 GMT 1
Hi, Bit of an update. Haven't done much with this lately, but have had some time and funds having sold the Ducati. I wasn't happy with the front calipers. I had stripped the paint off and run them over the polishing wheel but they just didn't look right. These calipers are unique to the Kr1 so I couldn't easily source alternatives. Kr1s calipers are different and wont fit without major work, so I decided to send them off to Nick Chambers from the Aircooled forum, who stripped them, gloss powdercoated them and made stainless pistons slightly longer than standard to remove the need for the plastic inserts that sit inside the standard pistons. New stainless bleed nipples and caps finished them off, and I bought 2 pairs of new pads;  Originally these calipers ran without a brake splitter, with two lines straight from the master cylinder. The hoses are pretty rank, so I bought a good splitter and will get a 3 line set up made locally. I've hurt my back pretty badly so no pics at the mo but will post more soon. Rgards Dusty |
|
|
|
Post by zx9landie on Sept 22, 2013 22:29:17 GMT 1
lots of work there then
|
|
|
|
Post by dusty350 on Sept 27, 2013 20:19:50 GMT 1
The ignition switch mounting point sat the switch too low with my set up. It fouled the headlight which I wanted to sit higher, and it also meant I couldn't get the key in because of the bars. I made a small ally plate that enabled the switch to sit higher thus solving all the problems; 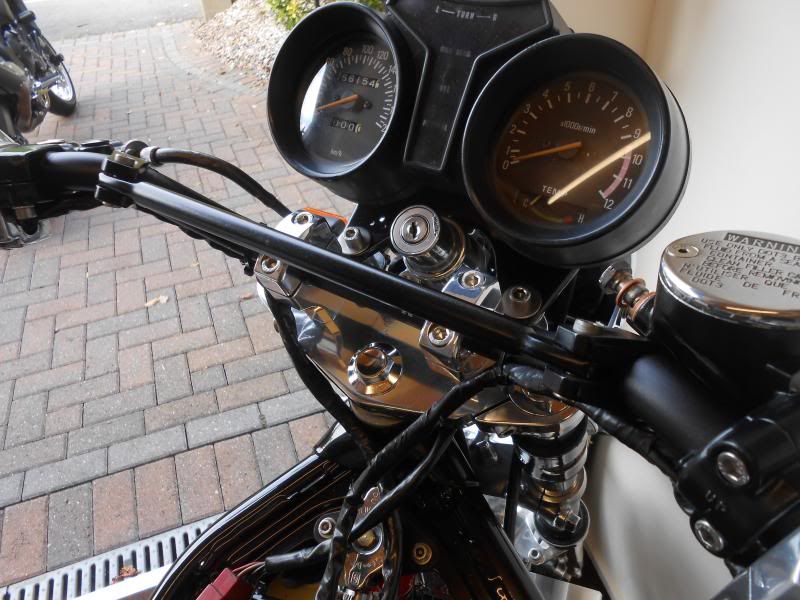 I picked up some used Renthals the other day and decided to use the cross brace on my bars;  I had the PJ carbs soda blasted and ultrasonically cleaned ages ago, so I though now was a good time to fit them. I did give them a go in my ultrasonic bath just to make sure they were spotless. I also fitted some 240 mains that I had, probably a bit large but rather that than lean; 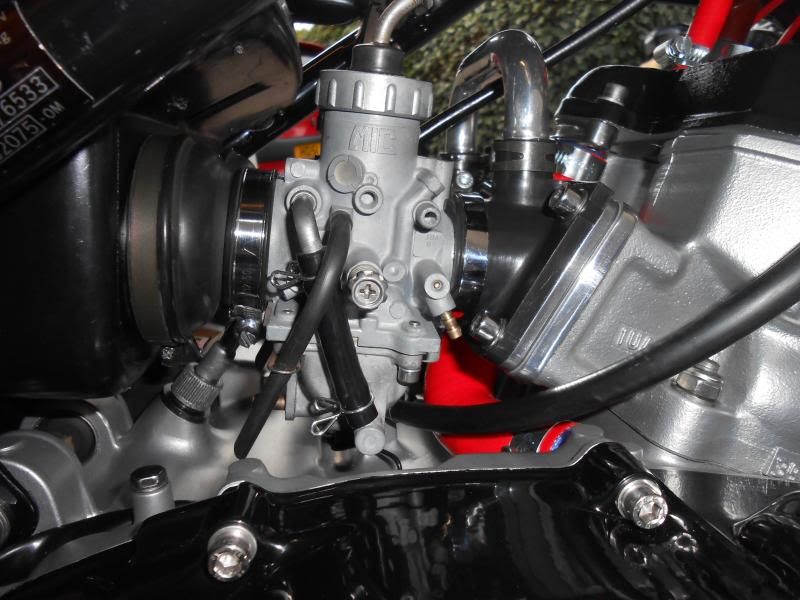 They were awkward to fit because of the 6mm reed spacers, but they are all bolted up now. Need some new fuel pipe and some drain hose plus a new throttle cable. I also need some front brake lines. I was going to go with a 3 line set up using a Kawasaki splitter I bought, but I am now going with a 2 line set up as it's cheaper. I am planning on using Goodridge designed for a Gsx1400 as the length and banjo angles match my front end. Also, the KR1 speedo cable is way too short, so a cable from a Zephyr 1100 should work with the speedo drive and also be long enough. I picked up my LC generator side case from the powdercoater this week, and it now matches the clutch side; 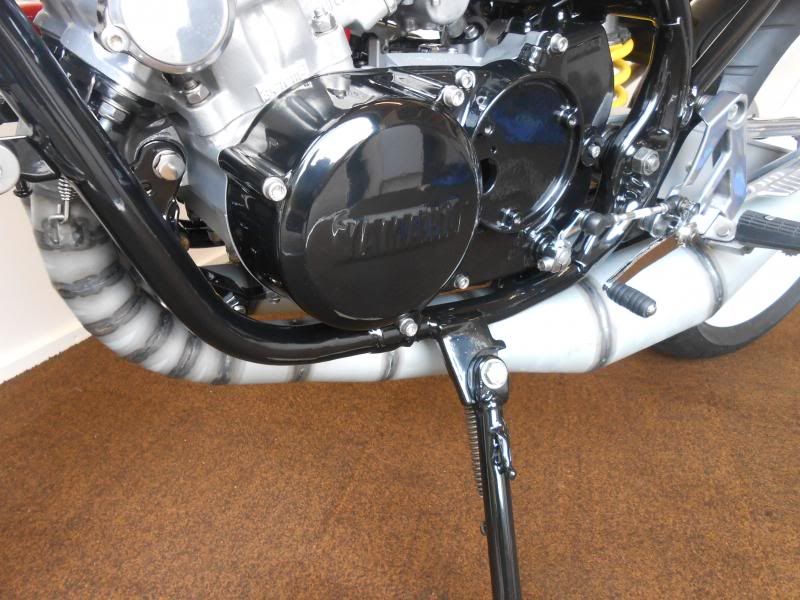 I also fitted my ally radiator that I got from Norbo. Same width as standard but with a deeper profile; 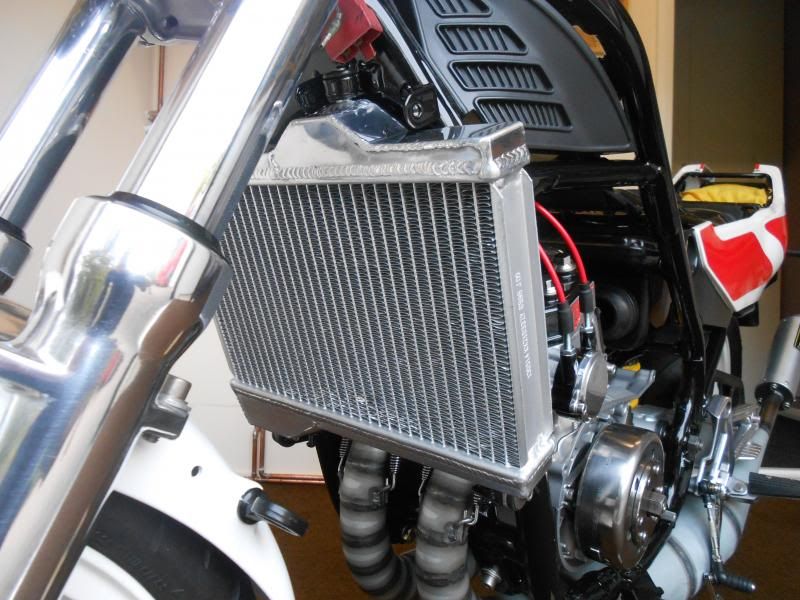 Other jobs that need doing are a 39 tooth rear sprocket as the KR1 item is 41 tooth. I want to completely rebuild the clocks too with new dials and cases. The loom is ready to fit and I have bought a new AGM battery. I also need to decide how to finish the pipes. I am also planning a paintjob for the bodywork but can't decide what to go for. I want to keep the white wheels as they are too good to strip. Dusty |
|
|
|
Post by raccoon on Sept 27, 2013 20:57:28 GMT 1
looking amazing dave, keep going
|
|
|
|
Post by johna on Sept 27, 2013 22:17:59 GMT 1
stunning looking bike there great photos
|
|
|
|
Post by foxyjohn on Sept 28, 2013 11:43:19 GMT 1
Quality build  |
|
|
|
Post by carioca656 on Sept 28, 2013 14:02:51 GMT 1
looks mega that fella coming along real nicely
|
|
|
|
Post by dusty350 on Oct 11, 2013 20:20:08 GMT 1
Hi, Bit more done this week. I fitted the Goodridge front hoses, originally meant to fit a Gsx1400. I reckoned that the length and orientation of the banjos would suit my set up; 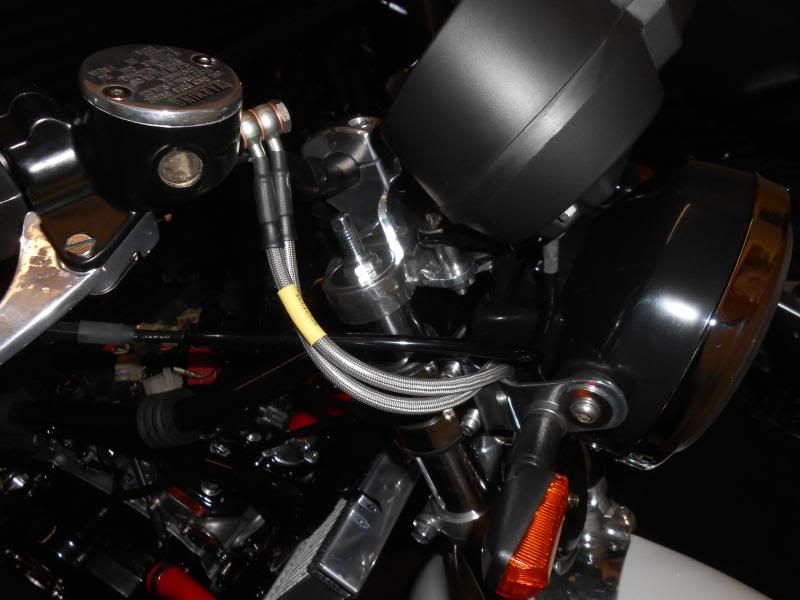 I also fitted the 1100 zephyr speedo cable, again longer than the standard KR1 item; 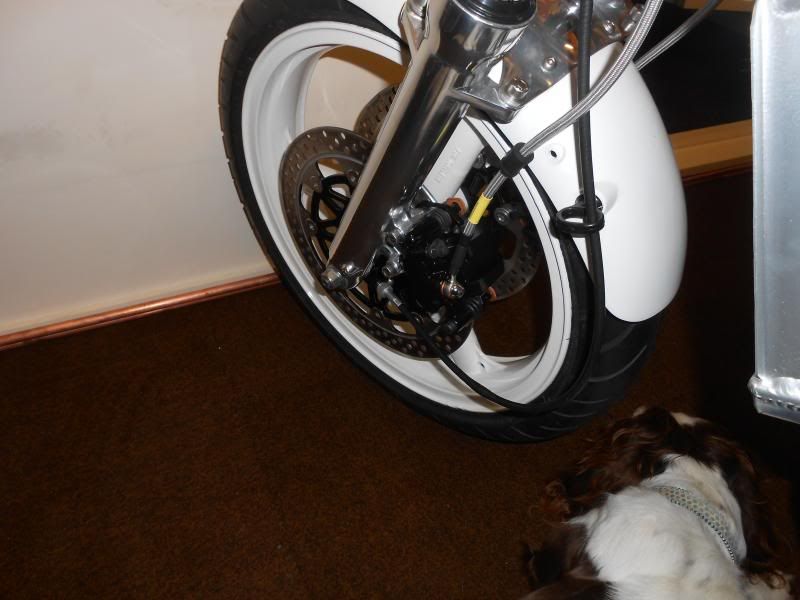 I fitted the throttle cable - talk about fiddly trying to get the slides in  . Then found the throttle tube was the wrong one but luckily I had a spare Ypvs item, so it all works as it should now. The clocks were next to refurb. The Lc clocks I had were made up from spares I had - knackered cases, Kmh speedo, faded dials and broken trip knob. So I got some repro dials off ebay and set about fitting them. First job is to "peel" back the crimped edge; 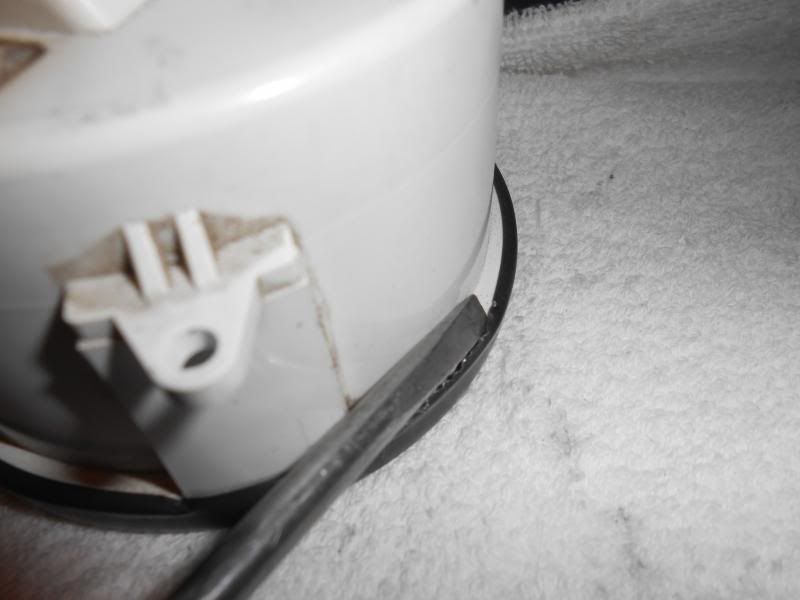 Then the rim and glass can be removed; 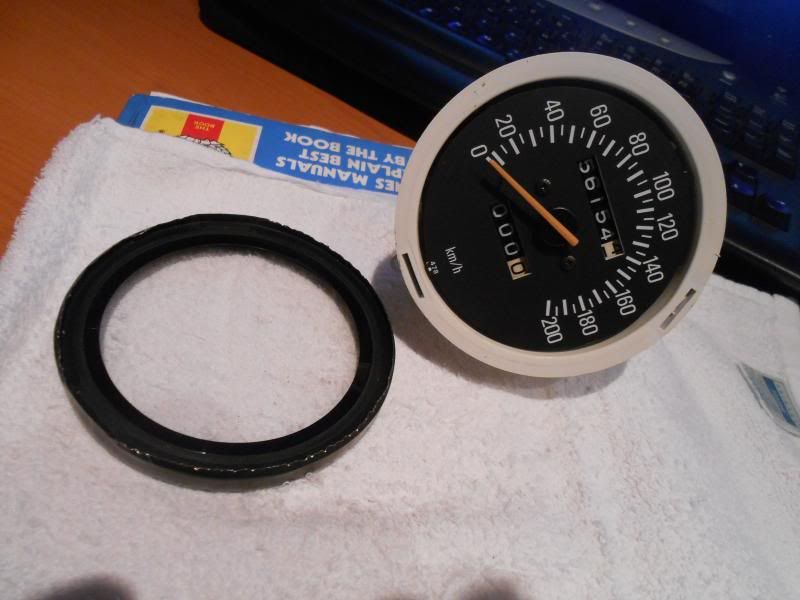 Then gently lift the needle over the pin rest and see where it settles, and draw a pencil line on the edge of the casing as you need to put the needle back in the same position later; 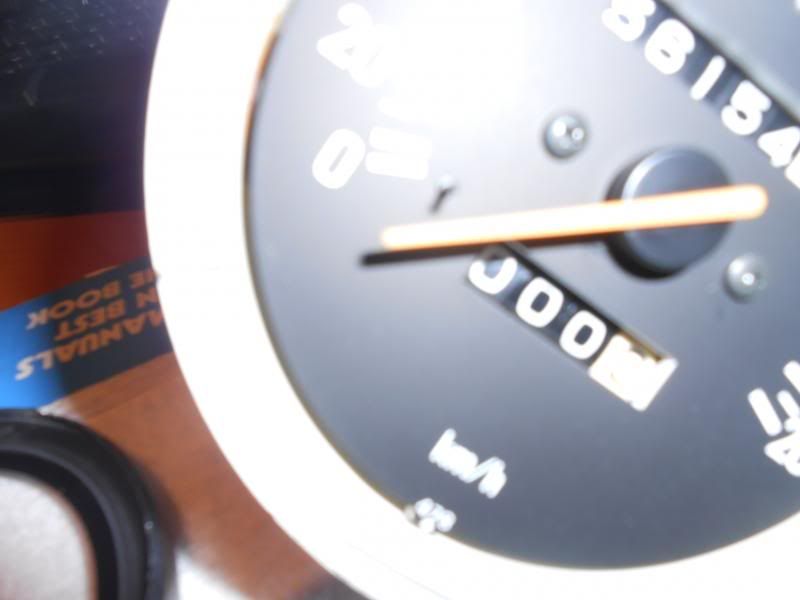 The needle can be gently prised off now. I was going to make something up but settled on a pair of scissors !; 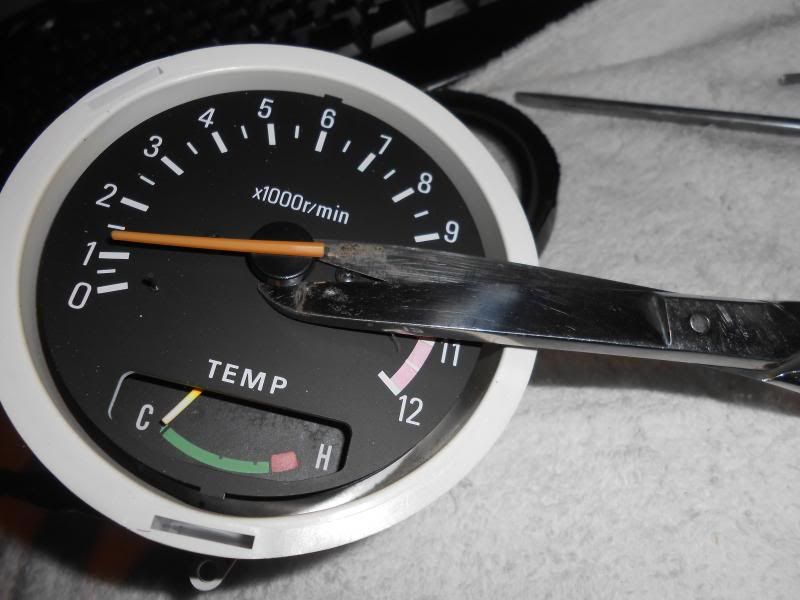 With the needle off, undo the two screws and remove the original face, gently warm it and the new dial with a hair dryer, then carefully apply the new Mph dial. Screw back on, line up your needle with the pencil mark and position it on the correct side of the needle rest before pushing it down carefully to seat it on the spindle. Give the glass a really good clean on the inside face and you are ready to refit. I use a pair of pliers to work the crimped edge back down. Some insulating tape prevents the rim getting scratched; 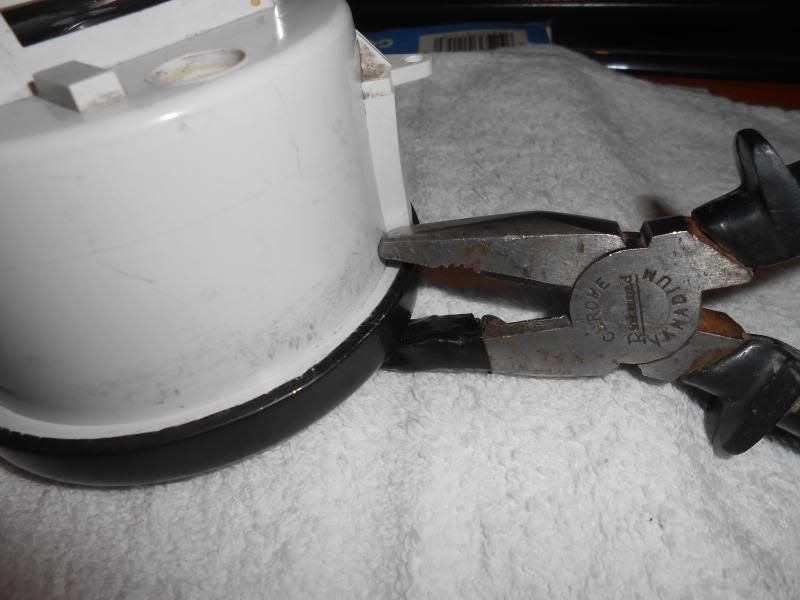 Same process with the tacho gauge; ] 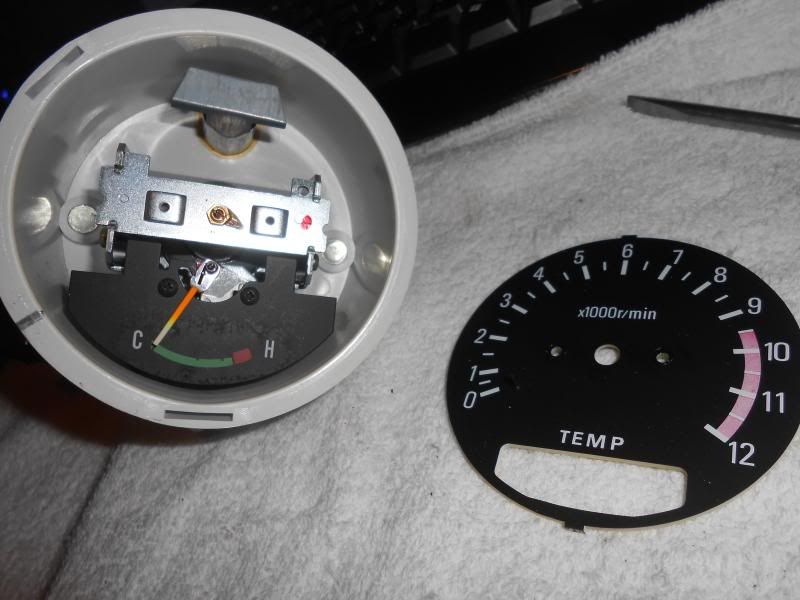 I removed the internals on both gauges to clean inside the cases, and on the tacho that also allows the removal of the temp gauge face allowing easy application of the new dial decal;  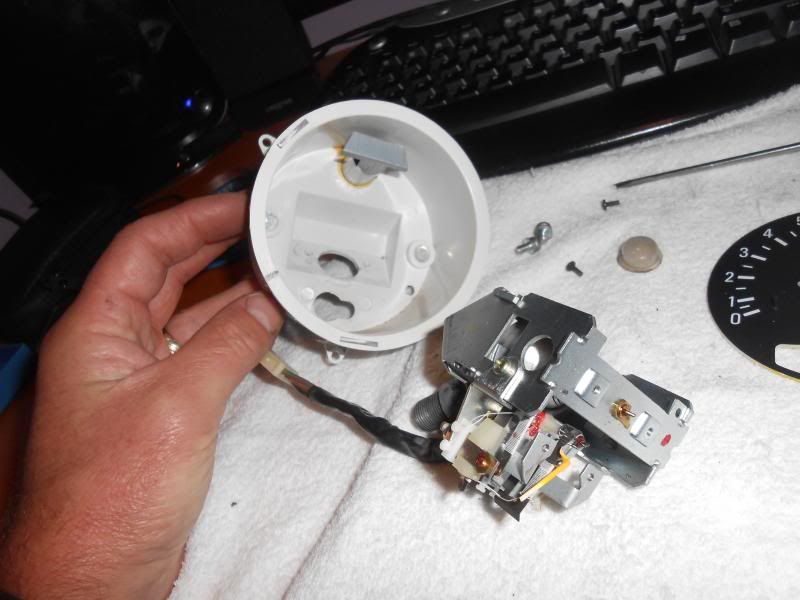 Once the clocks were finished I assembled them in new top and bottom cases and fitted one of Norbo's trick trip knobs. Last job was to remove the wiring connector blocks and extend the wires, using the correct coloured wires from an old loom; 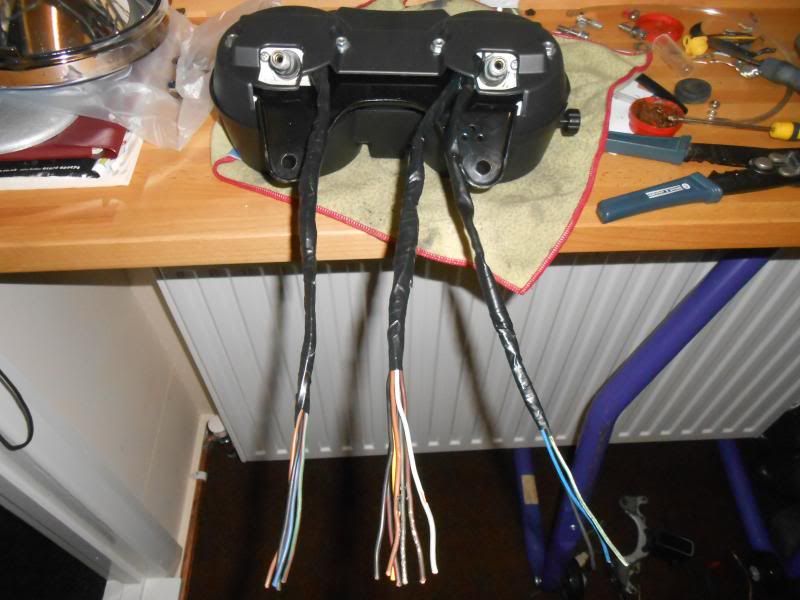 The wires were a bit too short as standard, so I extended them so I had plenty to play with when I connect them up to the F2 loom. Clocks are now finished and bolted in place; 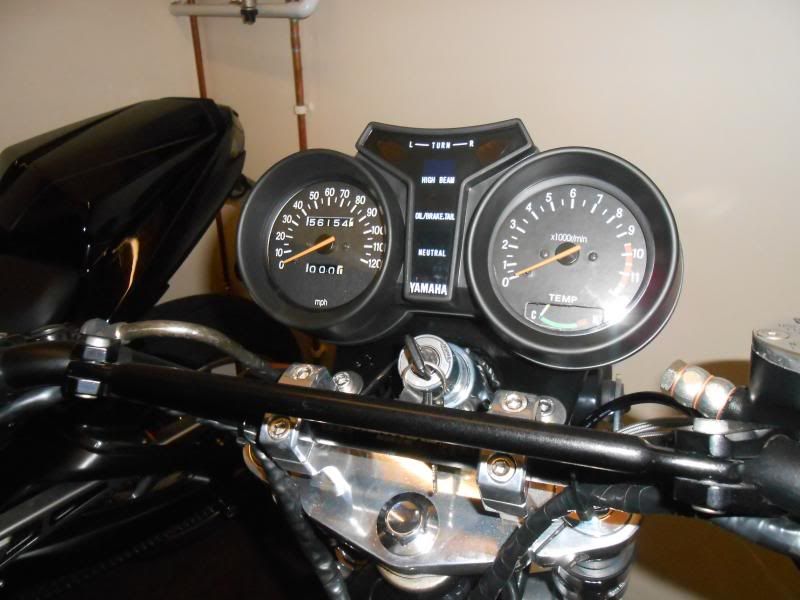 Next job is the loom. Dusty |
|
|
|
Post by oldelsieboy on Oct 11, 2013 20:51:26 GMT 1
 Dusty Nice work Dusty, could have reset the odometer tho'  OEB |
|
|
|
Post by dusty350 on Oct 11, 2013 21:06:57 GMT 1
Hi Nigel, I did consider doing that, but didn't want to risk damaging the mechanism, what with the price of Lc clocks !! The mileage on the clocks doesn't relate to this bike anyway, so I wasn't bothered too much. Dusty  |
|
oldman
Weekend rider
Posts: 73
|
Post by oldman on Oct 11, 2013 22:12:59 GMT 1
nice work, well done
|
|
Deleted
Deleted Member
Posts: 0
|
Post by Deleted on Oct 11, 2013 22:17:39 GMT 1
Great thread, Dusty... The build quality and info are fantastic! Will be a hell of a bike when it's done.
|
|
|
|
Post by dusty350 on Oct 12, 2013 7:59:03 GMT 1
Hi, Thanks for the comments. It's starting to get there now. Loom next, then add oil and water and see if we can get her running. I got a quote for chroming the TSA's - £125.00 each  Not sure on that one yet. Then a respray, but still undecided on a scheme. Dusty |
|
|
|
Post by marsbar350 on Oct 12, 2013 18:45:09 GMT 1
great work dusty
enjoyed reading the clock refurb
are they new dials or stickers over the top
regarding the chroming thats what i paid for mine
|
|
|
|
Post by dusty350 on Oct 12, 2013 20:22:19 GMT 1
Hi,
The dials are sticky backed semi rigid decals that stick over the existing faces. Hardest part is cutting out the tacho dial where it covers the temp gauge. It is not precut so you need a super sharp scapel. They were £20 off ebay although I think Norbo sells them too.
As for the chroming, I would love to get them done but don't know if I can justify the cost when a can of bbq paint is a tenner!
Biggest expenditure will be the respray which I would like to get done this year if possible.
Dusty
|
|
stevep
Thrash Merchant

Posts: 396
|
Post by stevep on Nov 6, 2013 22:40:42 GMT 1
Great thread , lots of usefull info , looking forward to seeing the end result
|
|


 . Then found the throttle tube was the wrong one but luckily I had a spare Ypvs item, so it all works as it should now.


 Not sure on that one yet. Then a respray, but still undecided on a scheme.
