|
|
Post by oldbritguy on Oct 21, 2019 22:51:26 GMT 1
The wiring loom which came in the box of bits was in poor shape. It was a 31k LC2 loom but had been butchered over the years so I decided to tidy it up as best I could. I fitted new bullet and block connectors where needed so that most of the original stuff would still fit, but also accommodate the ignitec. After a bit of crimping and soldering, the multimeter said we were ready to go. My preference would also have been to use some proper plastic sleeving (thought about it too late doh!)but I am happy with the overall condition under the black tape so it will get fitted as is.  I also made up a small bracket to secure the ignitec unit where the CDI unit sits using a strip of ali bar and a bit inner tube to provide a some grip and a little abrasion protection. 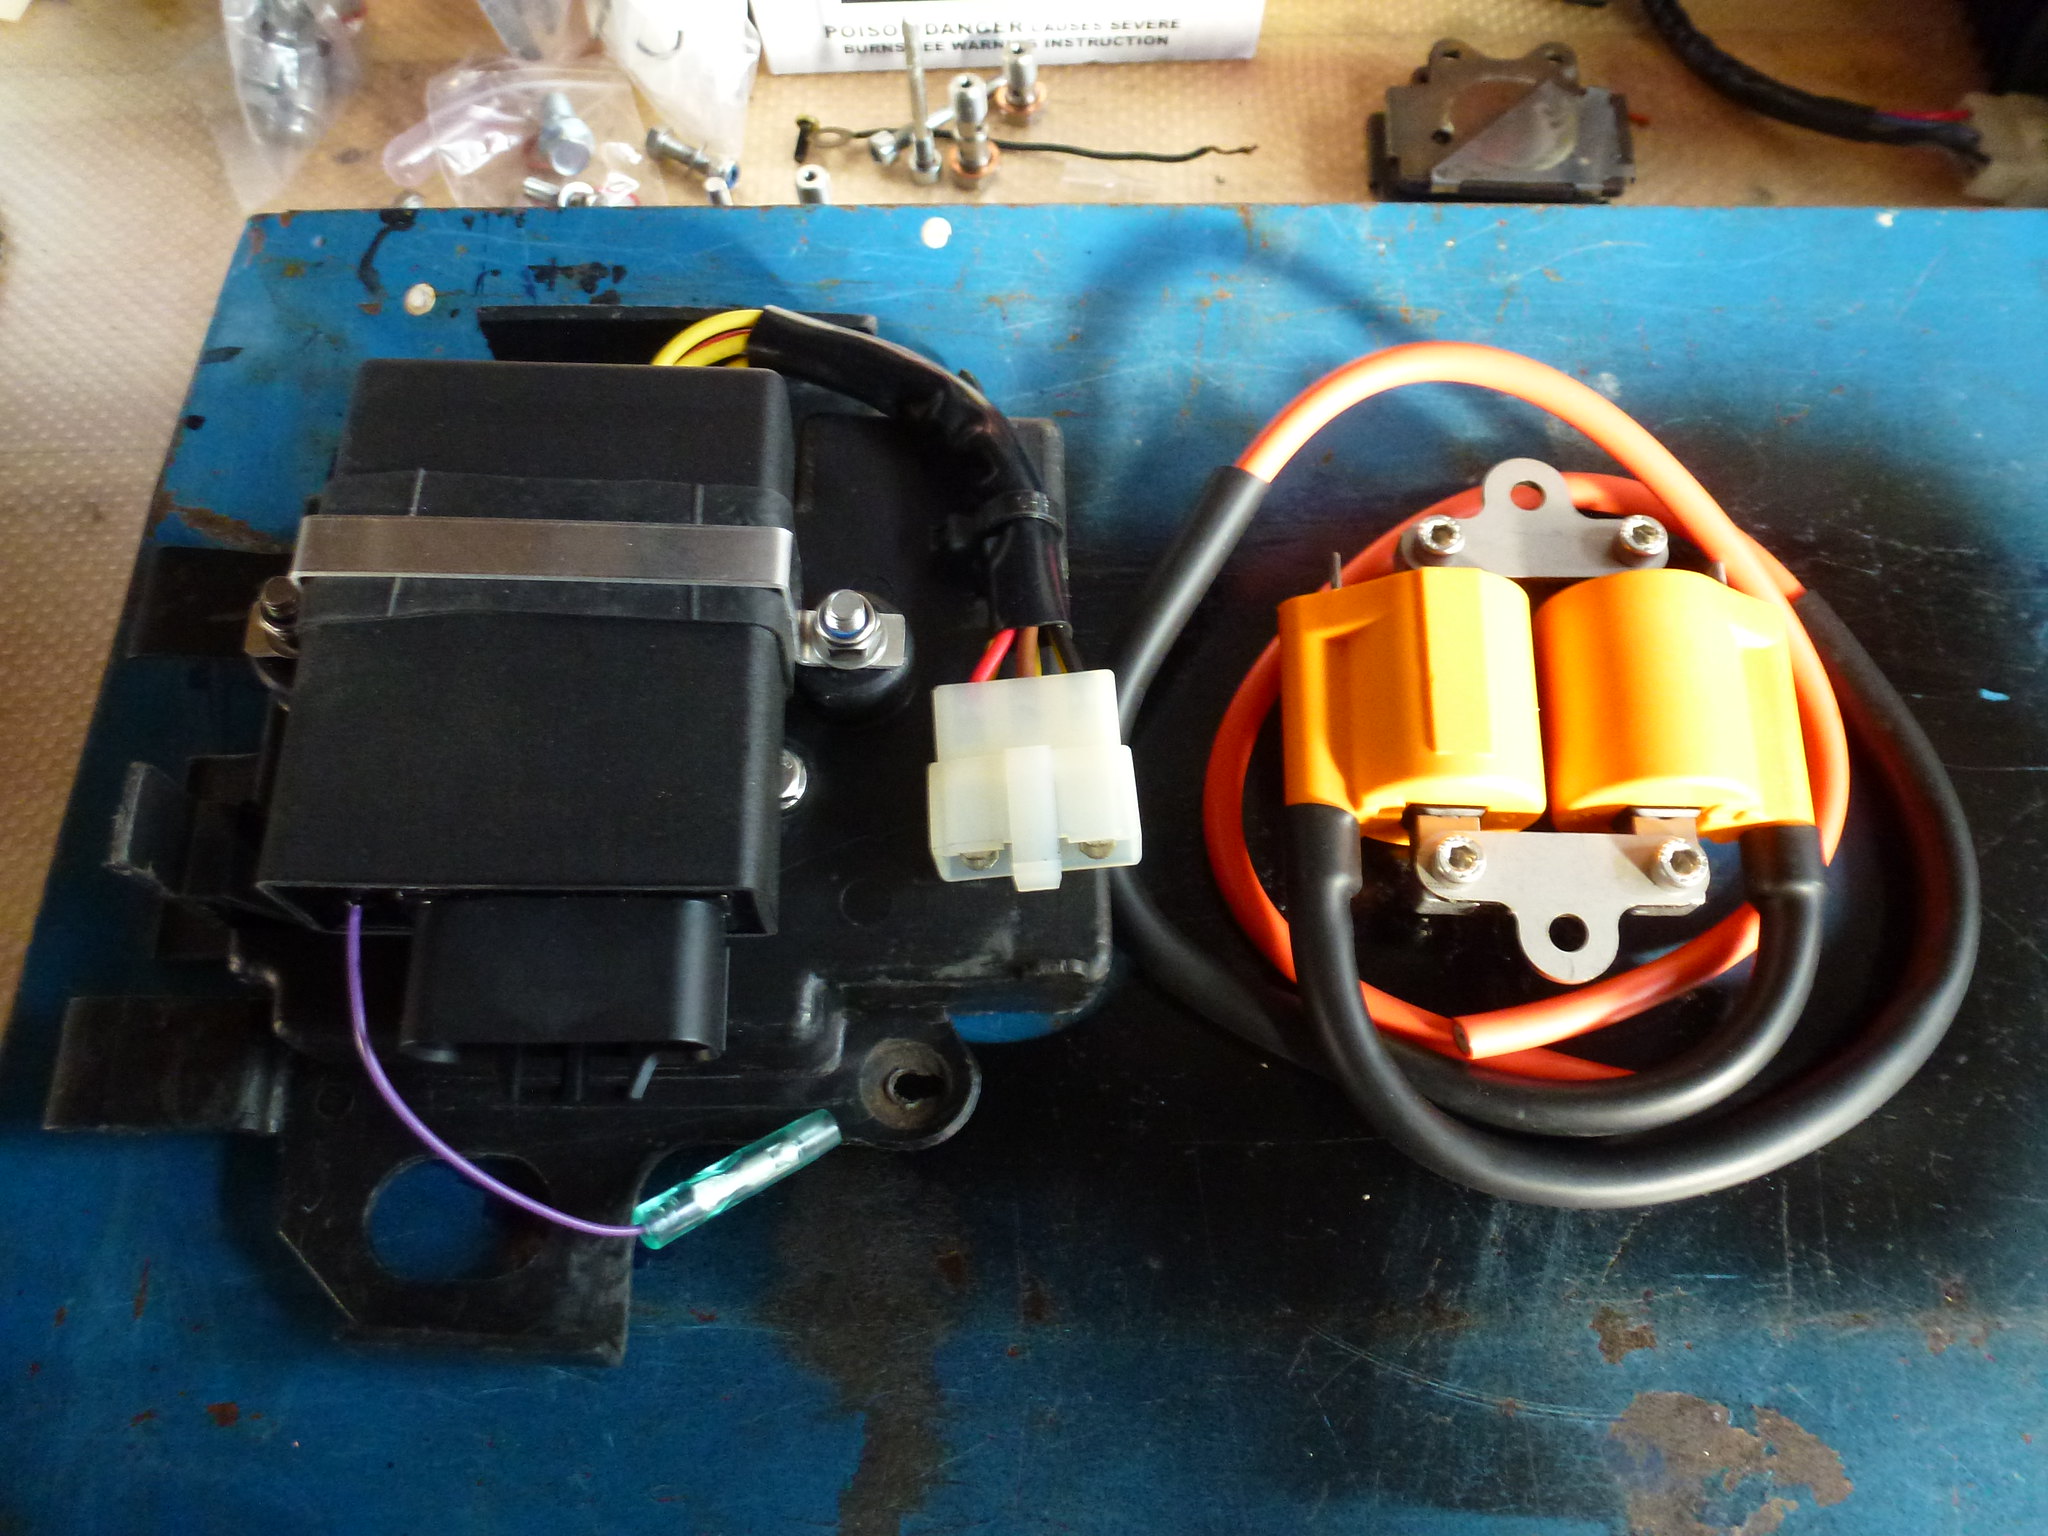 Then I looked at the wiring for the ignitec unit and separated what I need for operating the PV servo and also the ignition itself. Easy enough however I am a little uncertain what to do with all of the rest of the wiring.  Wires on the right are what is needed and the wires on the left are not! I know I will not be the first to have looked at this so would ask what the rest of you have done: Chop them off or secure them out of the way in case they are need at a later date for "future development"? I have trawled through as many of the older threads I could compare to but couldn't find any clear pics or solutions. Thoughts on this would be gratefully received John |
|
|
|
Post by lb on Oct 22, 2019 6:45:22 GMT 1
John whete did you go for plugs & such for the loom?
|
|
|
|
Post by yamark on Oct 22, 2019 7:59:18 GMT 1
Nice work on the loom. I like the use of the original style bullet connectors |
|
|
|
Post by midlifecrisisrd on Oct 22, 2019 9:30:38 GMT 1
Don't know if this is what's supposed to be done but in the ignitech box there were a load of little plastic pins.
Seeing no use for these I used them on the spare wires
I cut the spares to a length that allowed then to tuck down the rear inner muddy so they were out the way but long enough to use if needed
I then cut 30mm sections of heat shrink tubing and placed half of it over the wire then put a plastic pin in the other end (I cut them smaller to fit in flush) then heated the tubing so it shrunk on the wire and pin so it seals the end.
When I had done them all I took a larger bit of heat shrink and put it over all the spare wires and heated it to hold them all together
As for the loom covering I use self amalgamating tape. It's like rubbery electrical tape that you peel the backing off and it doesn't just stick with the adhesive which goes off over time but actually bonds together
Steve
|
|
|
|
Post by oldbritguy on Oct 22, 2019 21:48:35 GMT 1
|
|
|
|
Post by oldbritguy on Oct 22, 2019 21:53:43 GMT 1
Nice work on the loom. I like the use of the original style bullet connectors Cheers Mark Yeah, the original style bullets are nice and much better than those horrible pre insulated red and blue efforts which seem to be all that is available in auto accessory shops. Plus they fit existing things such as indicators and brake light switches which is nice.  I should have taken pictures of some of the ham fisted efforts previous owners had used to carry out repairs. Unbelievable. |
|
|
|
Post by oldbritguy on Oct 22, 2019 22:05:07 GMT 1
Don't know if this is what's supposed to be done but in the ignitech box there were a load of little plastic pins. Seeing no use for these I used them on the spare wires I cut the spares to a length that allowed then to tuck down the rear inner muddy so they were out the way but long enough to use if needed I then cut 30mm sections of heat shrink tubing and placed half of it over the wire then put a plastic pin in the other end (I cut them smaller to fit in flush) then heated the tubing so it shrunk on the wire and pin so it seals the end. When I had done them all I took a larger bit of heat shrink and put it over all the spare wires and heated it to hold them all together As for the loom covering I use self amalgamating tape. It's like rubbery electrical tape that you peel the backing off and it doesn't just stick with the adhesive which goes off over time but actually bonds together Steve Nice one Steve I did wonder what those little plastic pins were for so now I have a use for them. I have ordered up some more heat shrink and will do just what you have described. Same as yourself, I dont want to chop out the redundant wiring "just in case" there are some changes further down the line and they might be needed. Never thought about using self amalgamating tape either to wrap the loom and I have got loads of it in the garage. I'll have a go at the weekend and see how it looks. If it is an improvement then I will probably run with it. Cheers again for your experience and wisdom John |
|
|
|
Post by urbantangleweed on Oct 24, 2019 7:54:20 GMT 1
|
|
|
|
Post by lb on Oct 26, 2019 2:33:06 GMT 1
Thanks for the links John & others,good info.
|
|
|
|
Post by oldbritguy on Nov 13, 2019 18:35:12 GMT 1
After several weeks of inactivity I managed to get a couple of things done today Got the coils and ignition module fitted and fitted some block connectors to get the whole lot into the loom   Fitted the carbs and then hit a slight puzzle. When I fitted the oil feed pipe from the tank to the pump I realized I am unsure of the correct route for the pipe to go. It is the grey pipe in the pic as the black ones are no longer available  Then took a look at the route of the wiring loom from below the headstock into the headlight/kidney clocks. Another question arose as to the correct run of the loom (under or over the bottom yoke?)  Started to run out of daylight at this point so put the tools away and will trawl through some of the rebuild threads tonight to find answers to todays conumdrums John  |
|
|
|
Post by midlifecrisisrd on Nov 13, 2019 19:22:23 GMT 1
Under the bottom yoke with the loom mate
Steve
|
|
|
|
Post by oldbritguy on Nov 13, 2019 23:32:52 GMT 1
Cheers Steve, I kinda thought that as I am sure I saw it in an earlier thread but I'll be bug*ered if I can find it.
I will also assume the loom is secured up front with some clips or does it also tuck behind the bracket for the clocks/headlight. Building from scratch here so not got a clue and decent pics are rare!
I am also struggling to find a decent pic of the route of the oil line from the tank to the pump. Easy enough when it runs along the top of the primary cover but it is the route from the tank over the top of the cases and in particular it's route around the rear frame spars and engine mount at the left hand side.
I am not keen on the pipe just lying on top of the engine due to vibration and heat which in turn may damage the pipe leading to failure. Or am I worrying about nothing here and just secure it any way I can?
John
|
|
|
|
Post by oldbritguy on Nov 23, 2019 23:36:50 GMT 1
Been finding it busy this past couple of weeks to get anything done and on top of that I am now totally stumped with getting the ignition to spark. I will get to the bottom of it eventually so I have been chipping away at the other things needing done Radiator fitted and new guard fitted on top   Then fitted the nice shiny refurbed oil pump from the magician that is Arrow  Oil pipes fitted with new clips. These are tricky little fellas to get on eh?  New thrust washer fitted to pump drive  New gasket and a tighten up, job done.   |
|
|
|
Post by oldbritguy on Nov 24, 2019 23:38:16 GMT 1
The clocks I got in one of the boxes of bits were quite ruff.. They had been down the road at some point with a big hole in the front plus the surround for the ignition had been cut off. I patched up the hole using some JB Weld then a little bit of plastic filler to smooth things off  a couple of coats of primer  Then some satin black paint and ready for reassembly. I didn't bother trying to fabricate a surround for the ignition as I never had any of the original to work from so I will keep an eye out for a decent set of covers which are not too expensive or with a decent surround which I can graft onto these ones.  Clocks back on the bike. 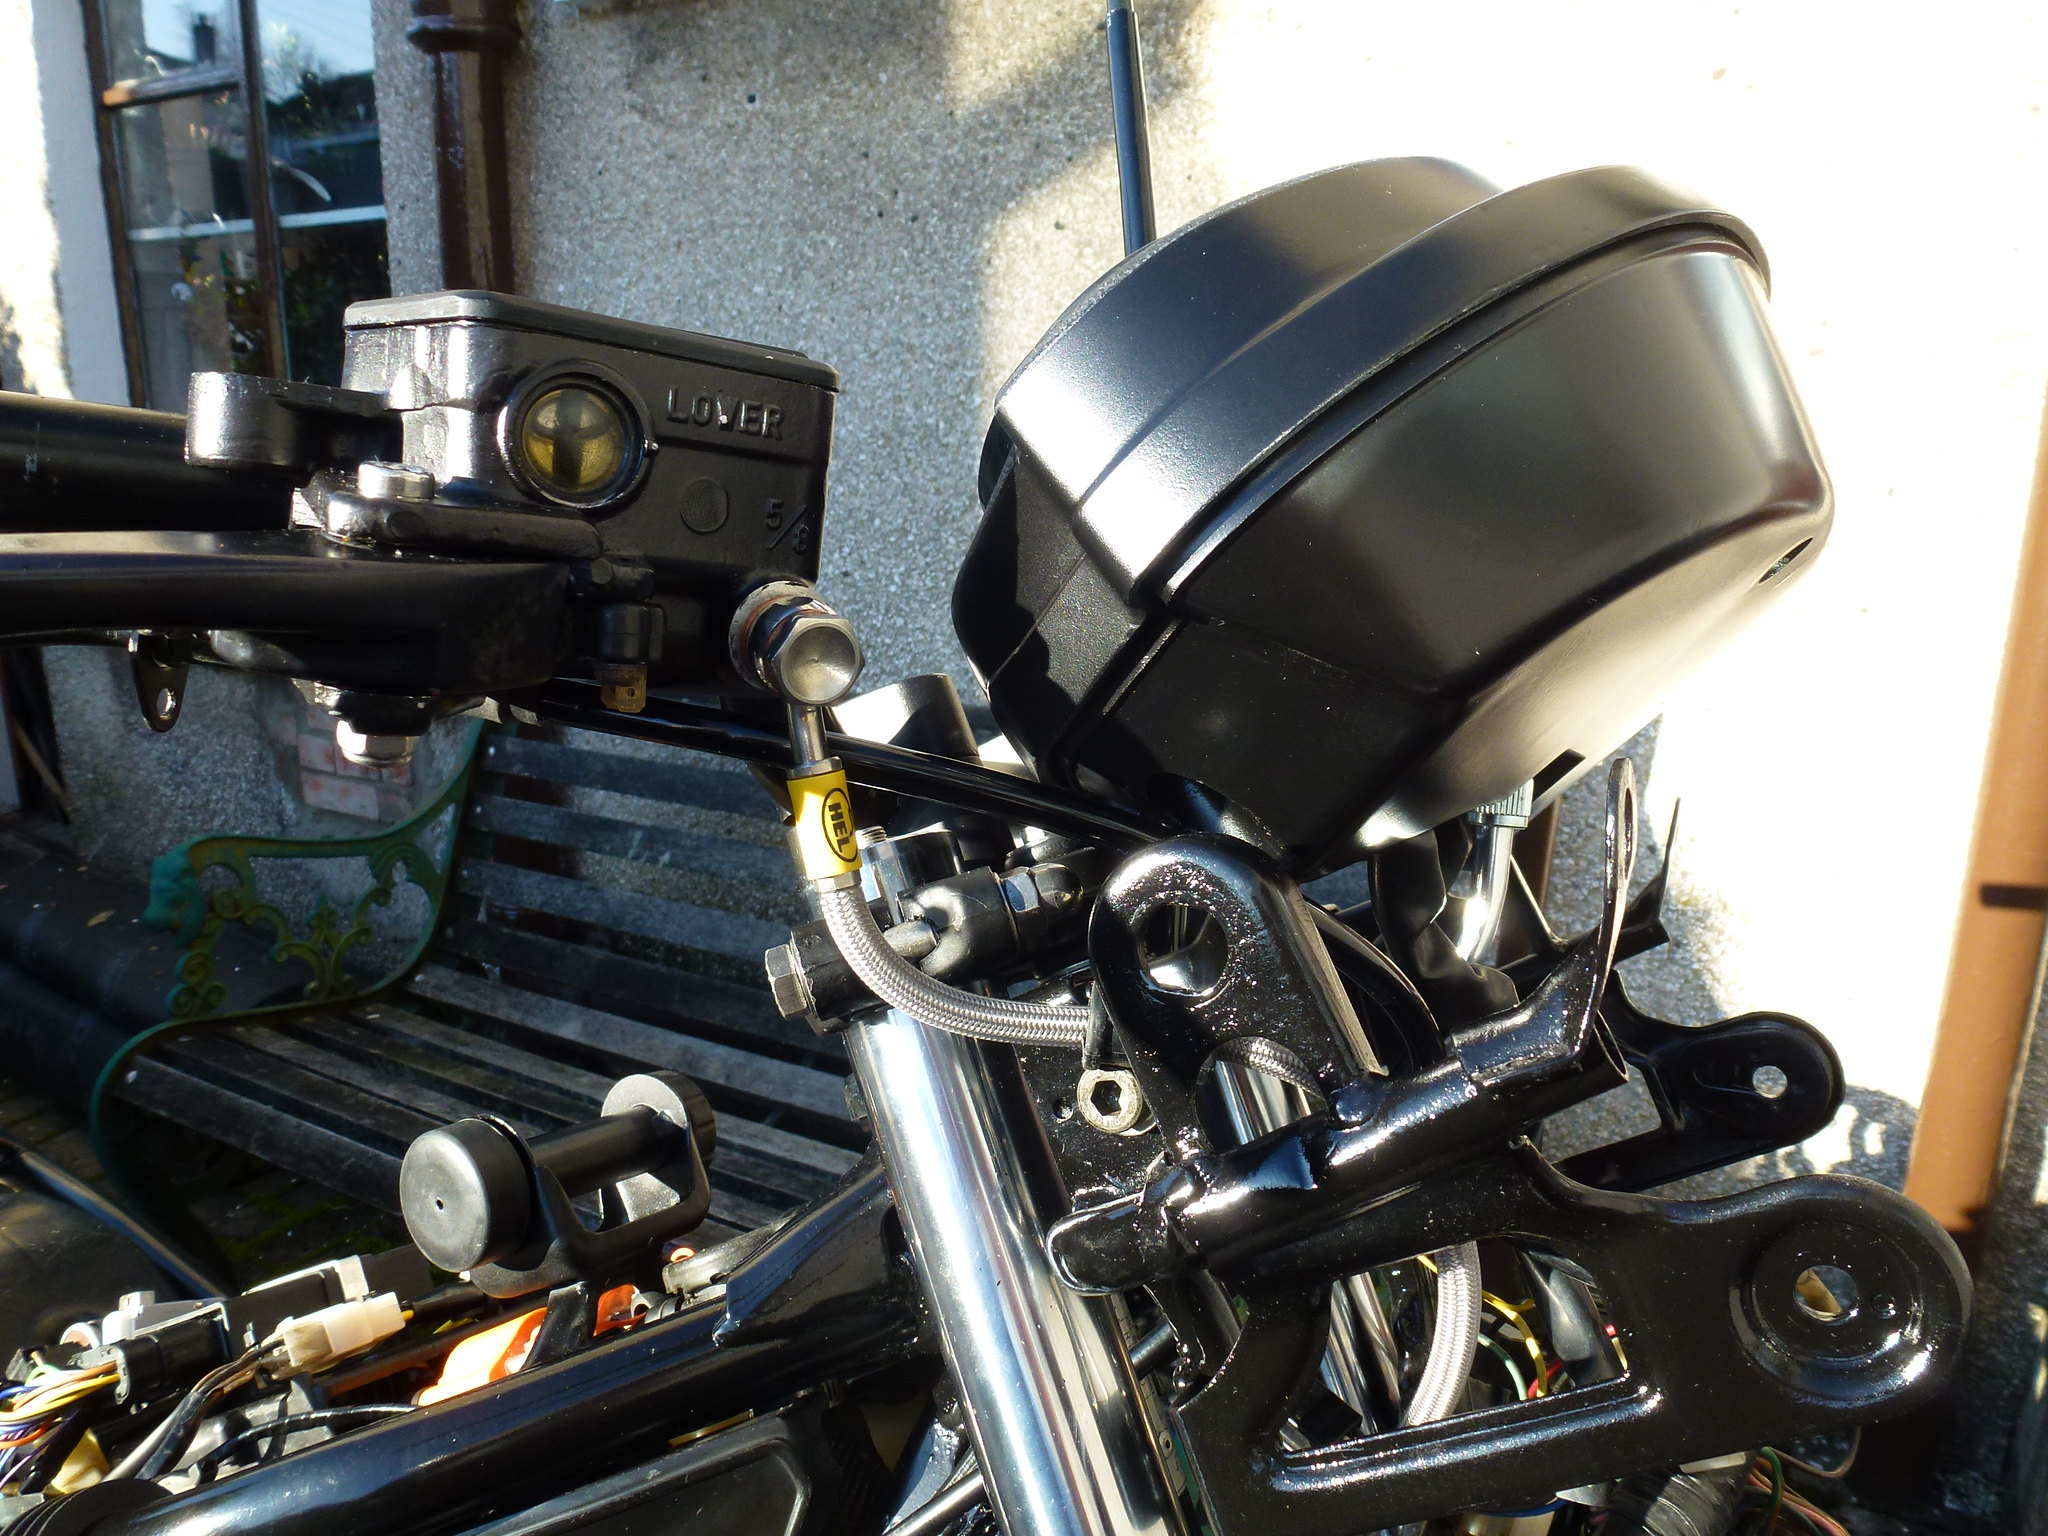 Then fitted the last bit of plastic for the day  Indicators and pipes next methinks |
|
|
|
Post by donkeychomp on Nov 25, 2019 0:19:20 GMT 1
Nice work on the clocks!
Alex
|
|
|
|
Post by JonW on Nov 25, 2019 2:14:38 GMT 1
There was a guy on the RDRZ500 forum (hes in the UK) who was 3D printing an ignition surround for these. See my LC2 31K build for what its like, i fitted one to my dash and its great.
|
|
|
|
Post by JonW on Nov 25, 2019 2:16:01 GMT 1
|
|
|
|
Post by oldbritguy on Nov 27, 2019 23:50:01 GMT 1
Cheers for the info jonw That looks to be a better option rather than sourcing another clock housing and hoping it is undamaged. Unfortunately the link leads to dead end as the item is no longer available but if they are out there, I will keep looking. To be honest, the clocks/ignition doeas not look to bad without the surround albeit a bit bare but I can live with it for now Cheers John |
|
|
|
Post by JonW on Nov 27, 2019 23:52:08 GMT 1
Ahh, surely if you can track him down using PMs he could print one? Or did you talk to him already? He was a nice bloke IIRC and I'd have thought would help out.
|
|
|
|
Post by urbantangleweed on Nov 28, 2019 9:56:30 GMT 1
|
|
|
|
Post by oldbritguy on Nov 28, 2019 21:32:28 GMT 1
[br Well spotted Unfortunately it is the top half I would be looking for. I have another set of clocks which also have the top cover in poor shape and needing clock lenses as well. Cheers for the heads up though John |
|
|
|
Post by urbantangleweed on Nov 29, 2019 0:16:00 GMT 1
[br Well spotted Unfortunately it is the top half I would be looking for. I have another set of clocks which also have the top cover in poor shape and needing clock lenses as well. Cheers for the heads up though John No worries, I'd rather mention it and you don't need it than not and you did. |
|
|
|
Post by oldbritguy on Dec 5, 2019 1:29:26 GMT 1
It would appear that the problem surrounding the lack of sparks from the ignition lies with the ignitech unit itself. Mr Mutts has kindly looked over the unit and hopefully diagnosed the issue and waved his magic touch which should hopefully get us running. Work commitments have scuppered any real progress with the bike which is so frustrating as winter is now upon us and I am very close to finishing. As such I have been trying to tidy up the bodywork and get it ready for fitting. I ordered up a new screen for the nose cone fairing from Norbo a while back and it looks really nice. Light tint with decals front and side so was looking forward to fitting it. I sat it on the fairing to check all the bolt holes lined up and to see how it looked. Decided at that point that I had made a mistake either with the paint, or the screen as I now have a double YAMAHA logo up front  Not really happy with the look and not sending the fairing back to the painter, a new screen was ordered up. Two days later we were back in business  I really liked the screen with the decals however I think it looks much better now with the plain screen.  I then fitted the bolts and the interior side brackets as well as the bottom bracket which took a little bit of fettling but sits nice now.  Then finally the rubber trim  Fitted new rubber grommets in the tail piece and bolted the grabrail back on 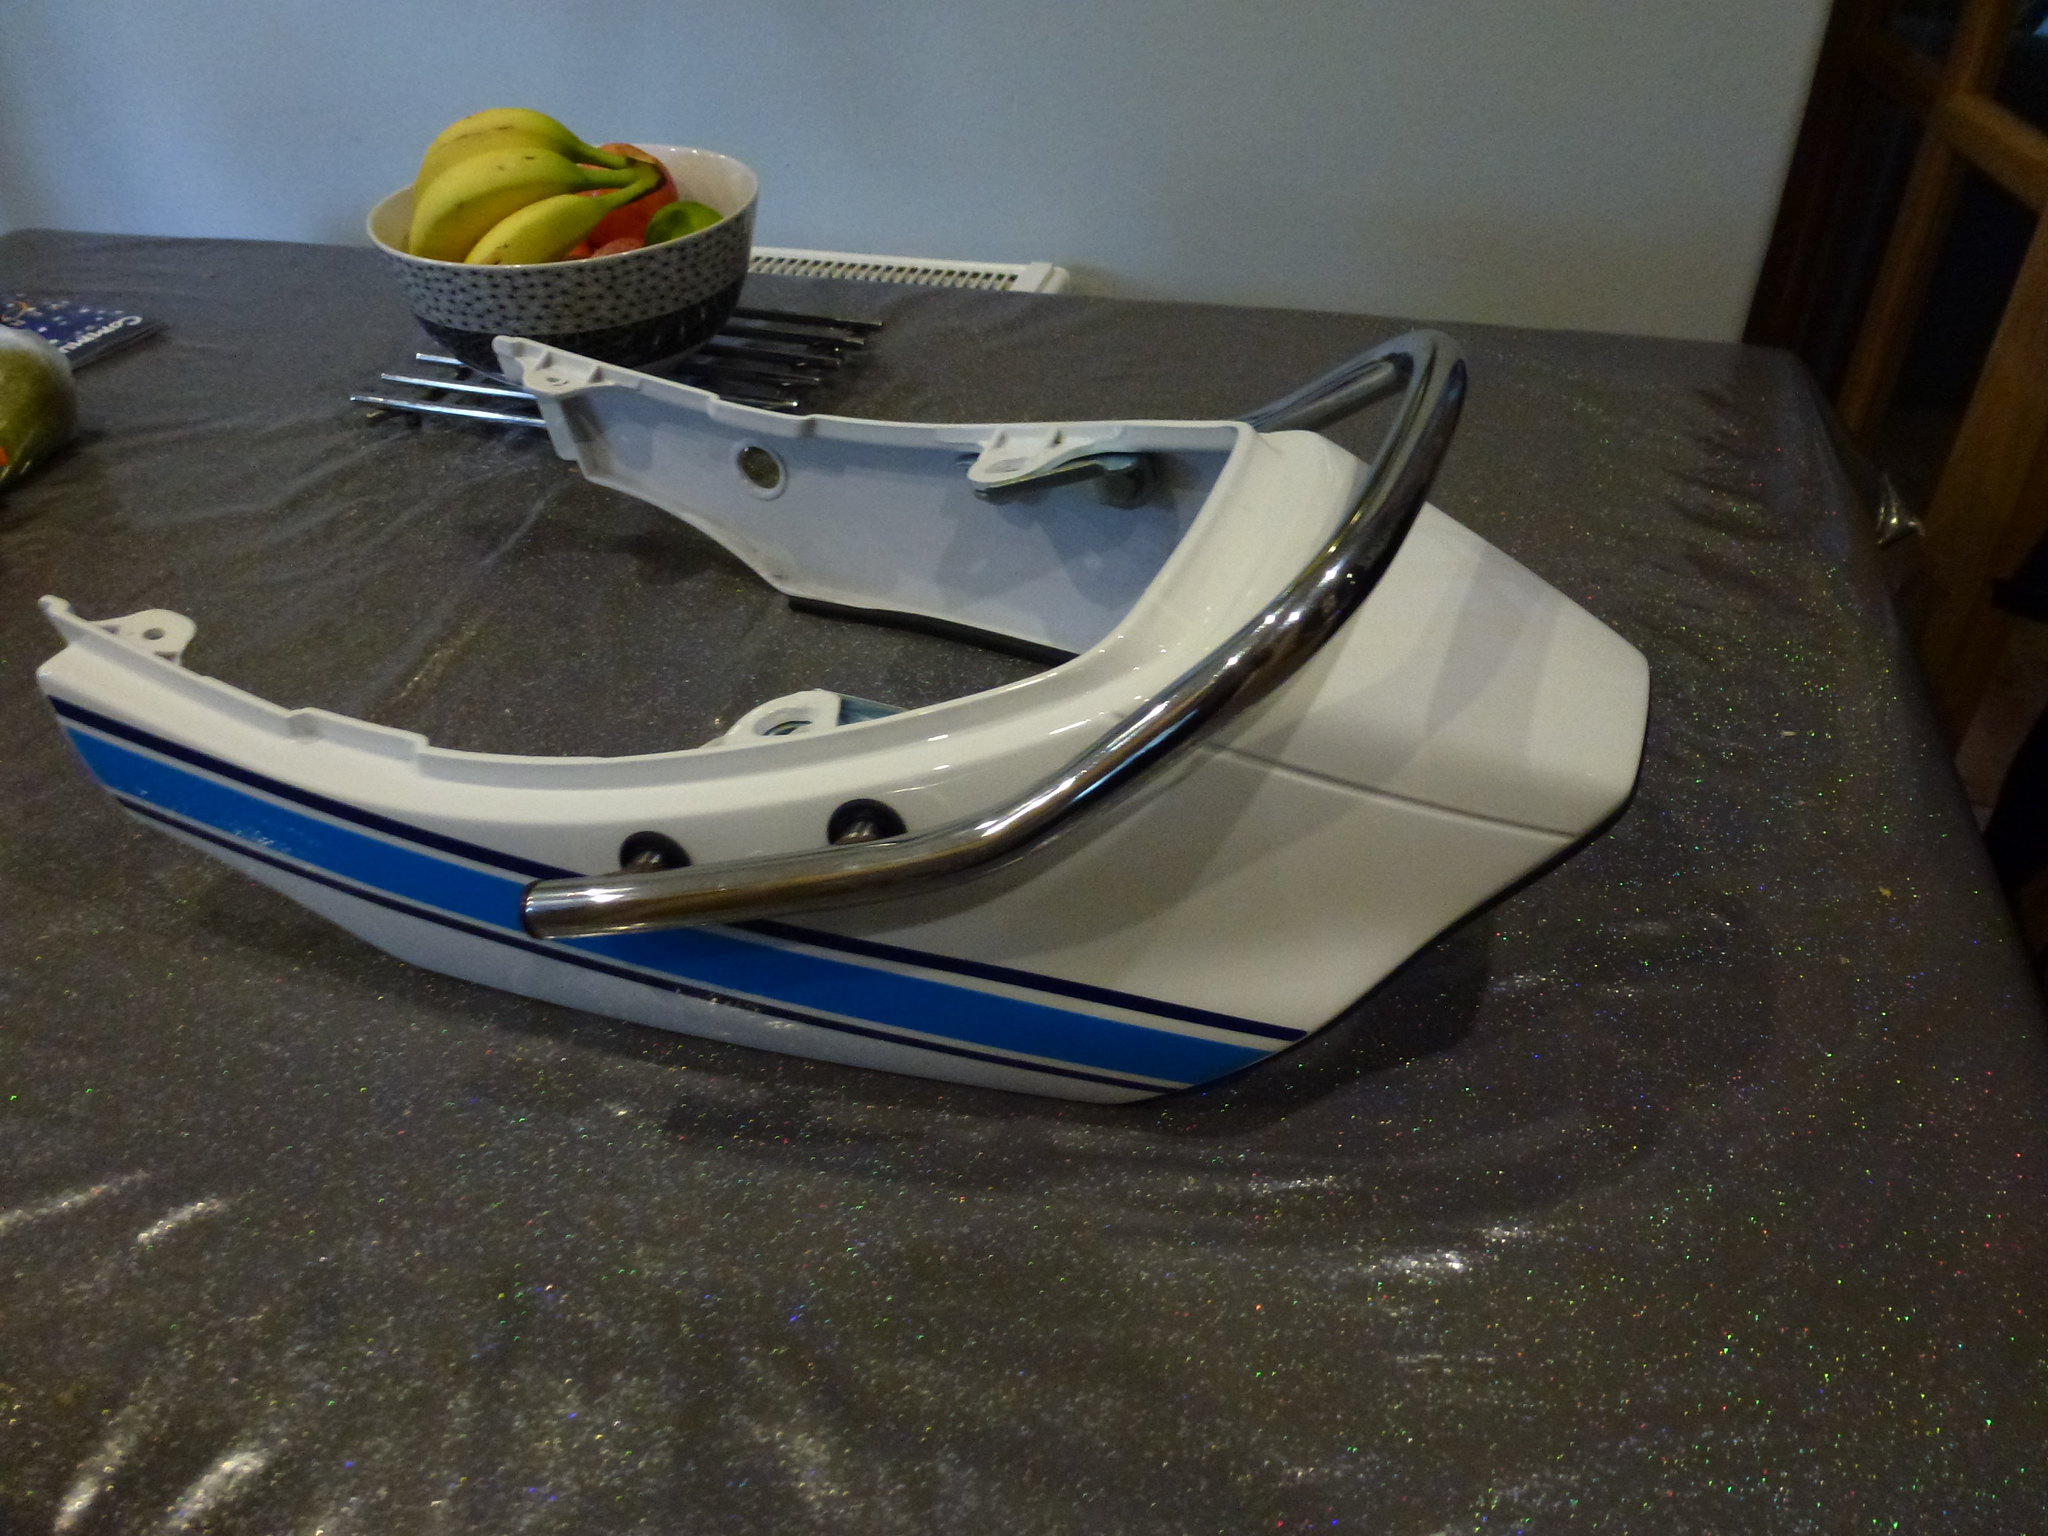 And finished off with the rubber trim at the rear. 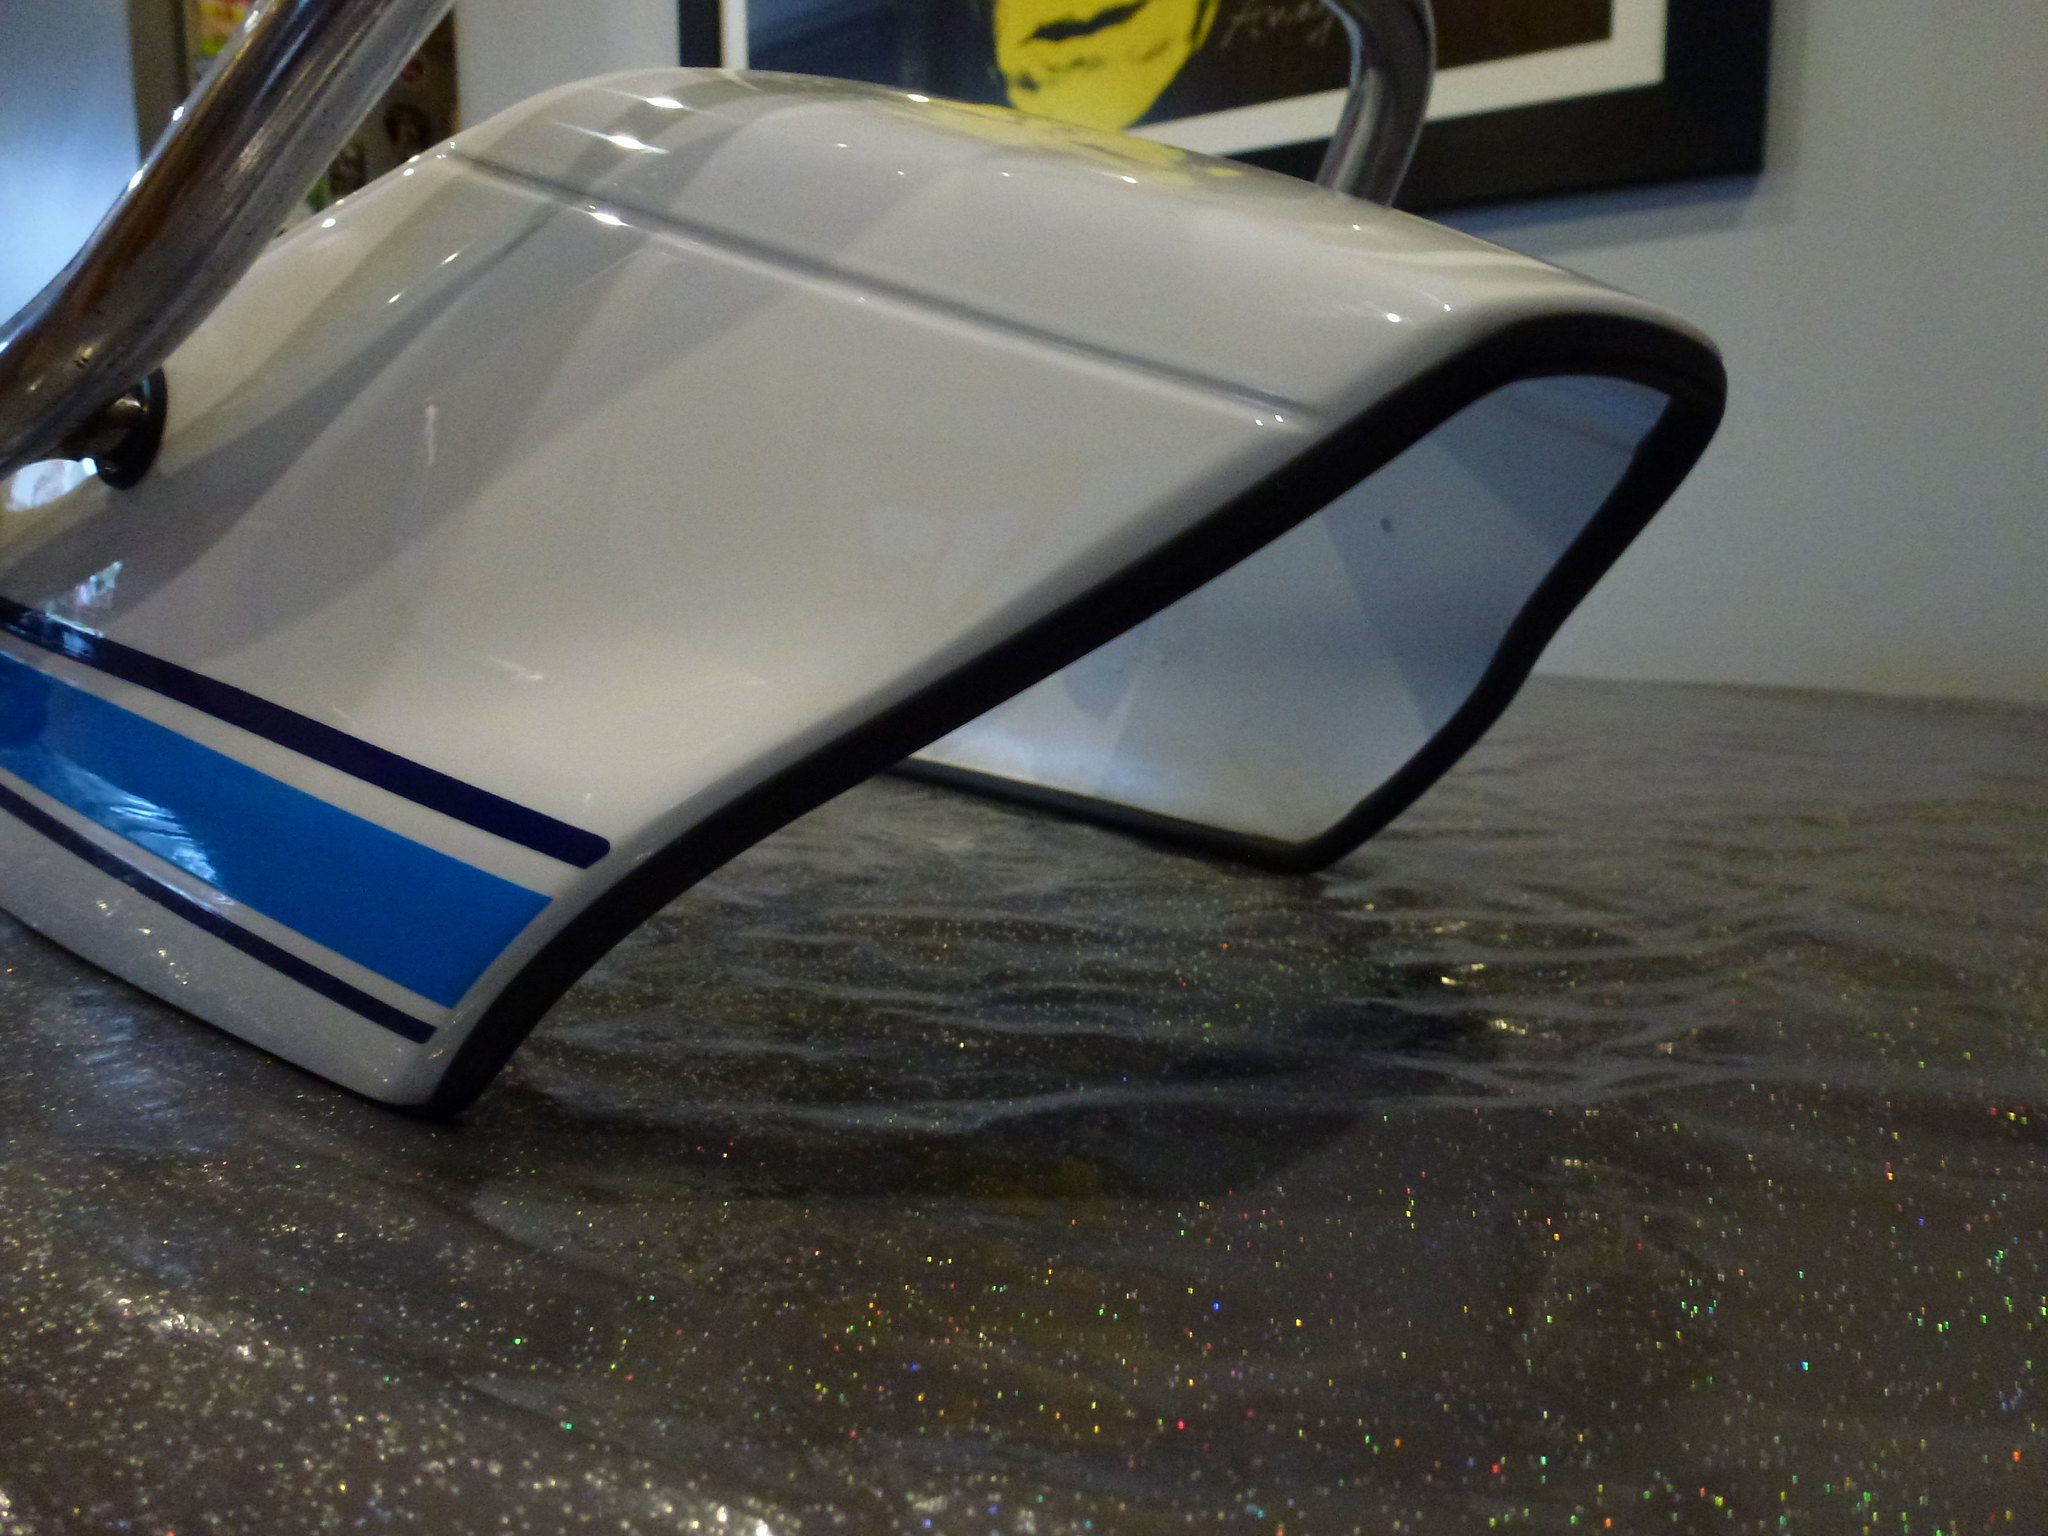 Just need to keep these two safe until I get a chance to fit them which hopefully wont be too long John |
|
|
|
Post by Yogi on Dec 5, 2019 7:47:50 GMT 1
Looking good mate
Lots have made the same mistake with the screen
,including me🥴
|
|
|
|
Post by mouse on Dec 5, 2019 7:48:24 GMT 1
Like the choice of colour! I had the same thought with the screen on mine and did the same as you
Mouse
|
|
|
|
Post by dusty350 on Dec 5, 2019 8:08:30 GMT 1
Looking great now John  I love that shade of blue for the paintwork - really suits the early Pv's. Nearly there now Dusty |
|
|
|
Post by marrcel on Dec 5, 2019 8:48:18 GMT 1
Looking good mate Lots have made the same mistake with the screen ,including me🥴 Me too😤 I used a rattlecan to make the yamaha letters black again. |
|
|
|
Post by midlifecrisisrd on Dec 5, 2019 13:11:38 GMT 1
Got a real soft spot for the white/blue
May go that way if I decide to build my other hybrid rather than punting it
Now got me worrying which NOS screen I have 😢
Steve
|
|
|
|
Post by oldbritguy on Dec 6, 2019 21:54:07 GMT 1
I feel much better now realizing I am not the first to have had two goes at getting the screen right lol  . Probably won't be the last either. I have had two goes at a few things on this build now but on the bright side, I will have a few nice bits to sell when I am finished John |
|
|
|
Post by oldbritguy on Dec 6, 2019 21:55:56 GMT 1
Like the choice of colour! I had the same thought with the screen on mine and did the same as you Mouse Cheers Mouse I must confess though I got the idea for this colour scheme from your own Hybrid If you are gonna nick someone elses ideas, make sure they are good 'uns John |
|


 . Probably won't be the last either.