|
|
Post by jon on Aug 23, 2018 18:11:34 GMT 1
That's going to be a monster what Bob do think it's going to make 😀 I don’t think he’s interested in how much bob he’ll get for it if he sells?  If you meant BHP, then my guesstimate would be 85+ depending on what’s done. Be an interesting sweepstake. Jon |
|
|
|
RD700LC
Aug 24, 2018 11:43:26 GMT 1
Post by yamark on Aug 24, 2018 11:43:26 GMT 1
Your in the area Jon, I'm hoping for 90 BHP after Mr Abbey works his magic on the top end |
|
|
|
Post by JonW on Aug 25, 2018 8:34:41 GMT 1
Another great project Mark and I'll be watching with interest again. Interestingly when I was in the UK I stood in WHS in Chester and read the triple article in PS, and today in Castle Towers Mall in Sydney I read it again while killing some more time. |
|
|
|
Post by tony1964 on Aug 25, 2018 19:08:35 GMT 1
Looks like it's going to be another fantastic build Mark, why oh why can't i have a neighbour like your good self Tony |
|
|
|
RD700LC
Aug 26, 2018 17:42:59 GMT 1
Post by yamark on Aug 26, 2018 17:42:59 GMT 1
Another great project Mark and I'll be watching with interest again. Interestingly when I was in the UK I stood in WHS in Chester and read the triple article in PS, and today in Castle Towers Mall in Sydney I read it again while killing some more time. Jon, I do the same, about every 4 weeks I read the article, and I always seem to read something that I missed before. It still seems unreal to see my bike on a front cover. I keep looking out for a new build thread from you, I keep thinking it must be soon
|
|
|
|
Post by yamark on Aug 26, 2018 18:09:42 GMT 1
On with the frame. The next sequence of images were again taken by Jon as work progressed.
Once the jig is clamped in position, cutting starts. The cross tube is removed (the one with the centre stand mounts), and the rear engine mount tube is carefully cut away from the frame at both ends
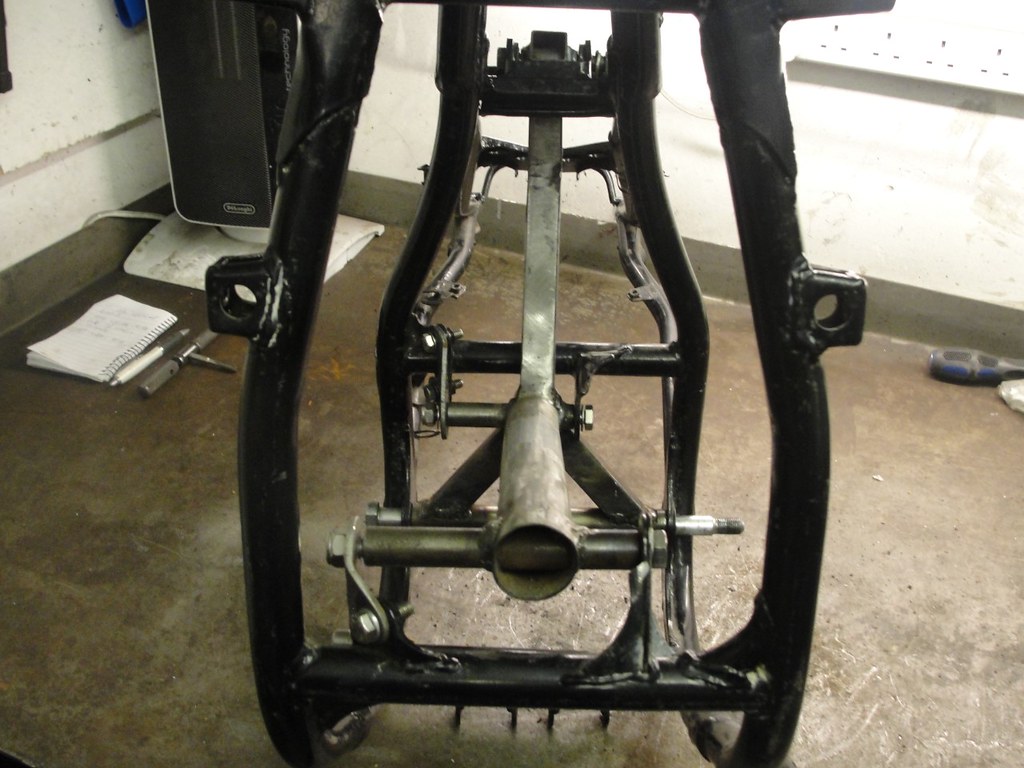 thumbnail_DSC02159[1] thumbnail_DSC02159[1]
The frame is then heated and "jacked apart"
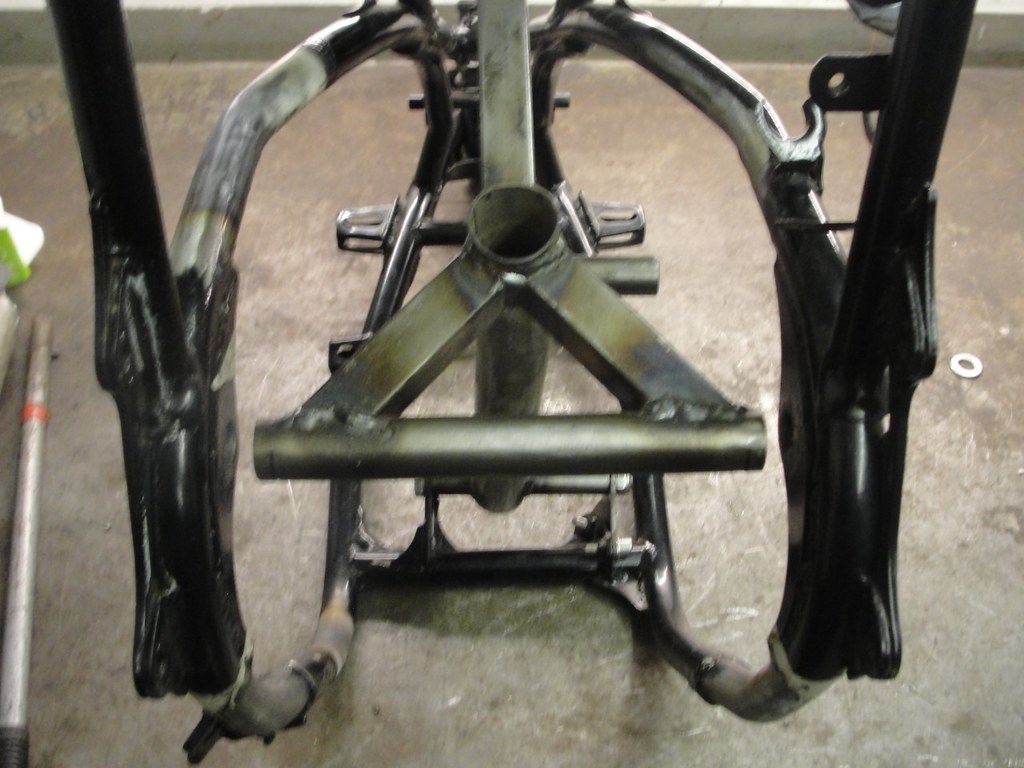 thumbnail_DSC02170[1] thumbnail_DSC02170[1]
10mm spacers are inserted to give the 20mm total spread
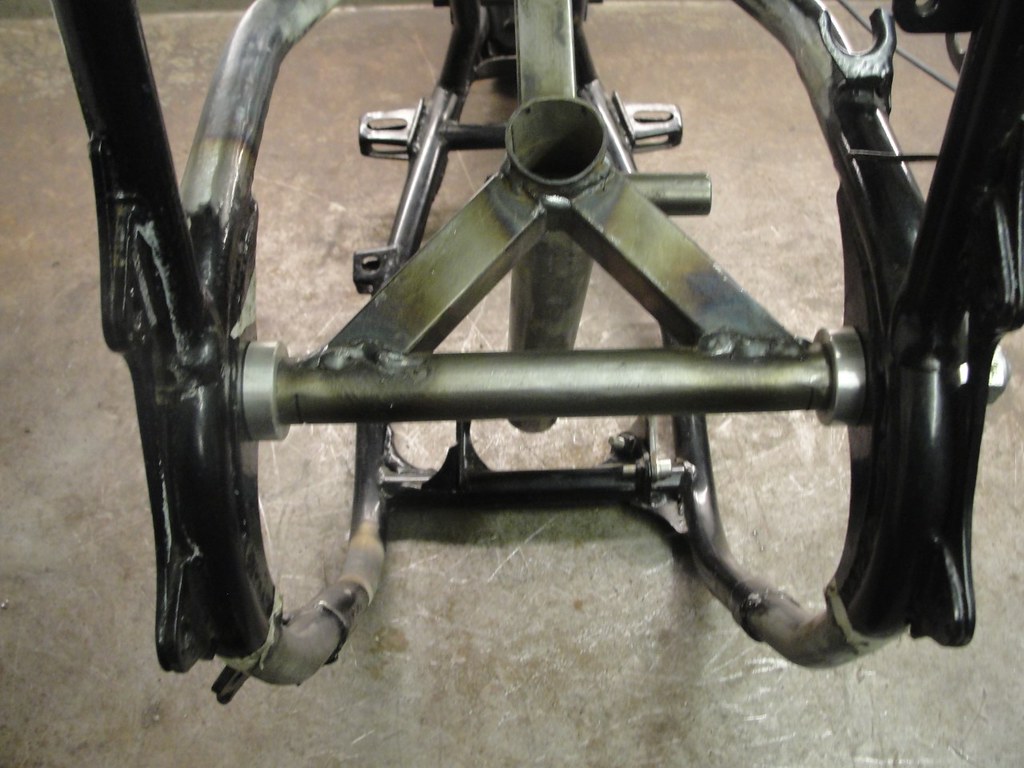 thumbnail_DSC02171[1] thumbnail_DSC02171[1]
Jon, talented chap that he is then makes the extension pieces (and side stand spring post) to be fitted
 thumbnail_DSC02172[1] thumbnail_DSC02172[1]
The extension pieces are then inserted ready to be welded
 thumbnail_DSC02173[1] thumbnail_DSC02173[1]
Template made for the small brace that now has to be extended (rear engine mount tube)
 thumbnail_DSC02174[1] thumbnail_DSC02174[1]
Welded in place
 thumbnail_DSC02183[1] thumbnail_DSC02183[1]
Then Jon welds it all together, including a new cross tube to replace the centre stand section. I'm sure Jon could explain it better, but what shows is his skill and precision.
 thumbnail_DSC02189[1] thumbnail_DSC02189[1]
Final part next week on the frame spread and extra bracing
Cheers, Mark 
|
|
|
|
Post by bezzer on Aug 26, 2018 18:41:48 GMT 1
👍🏻 This series of photos will be an invaluable resource as my build takes shape Mark, thanks for posting, and hats off too, to Jon for his obvious engineering talents.
Looking good already.
|
|
|
|
Post by dusty350 on Aug 26, 2018 18:53:03 GMT 1
+1 on that. A lot of good work has gone into that frame, with no room for error. Great job Dusty |
|
|
|
Post by JonW on Aug 27, 2018 1:00:04 GMT 1
Another great project Mark and I'll be watching with interest again. Interestingly when I was in the UK I stood in WHS in Chester and read the triple article in PS, and today in Castle Towers Mall in Sydney I read it again while killing some more time. Jon, I do the same, about every 4 weeks I read the article, and I always seem to read something that I missed before. It still seems unreal to see my bike on a front cover. I keep looking out for a new build thread from you, I keep thinking it must be soon
I can imagine, but you deserved it mate, it was a cracking build Ive been quiet of late, Ive been playing with my new Evo and all my projects are in limbo for a bit, tho ive updated my website and the RDRZ forum with the latest of where they are at if you havent look at those for a while. Im not sure which project will get to take center stage when I restart, but probably the 51L 250 ypvs LC to back to back it with the resto one Ive nearly finished. Loving the frame work, real quality. Great base for this new beast! |
|
|
|
Post by mouse on Aug 27, 2018 9:58:23 GMT 1
This is fantastic Yamark,
I shall be keen to watch your progress with this, good luck with it all, not that you need it!
So, finished by end of August!!
Mouse
|
|
|
|
Post by yamark on Aug 27, 2018 19:23:47 GMT 1
👍🏻 This series of photos will be an invaluable resource as my build takes shape Mark, thanks for posting, and hats off too, to Jon for his obvious engineering talents. Looking good already. I'm looking forward to your progress mate, I hope you do a build thread
Mouse, progress is speeding up - but this is suppose to be a slow burn build. You didn't say which August 
I was over at Dusty's yesterday and as usual, he helped out with so many parts. His generosity/hospitality are overwhelming at times. Great to see his TZ/LC as well.
|
|
|
|
Post by rostrumorhospital on Aug 28, 2018 7:16:11 GMT 1
Nice to see the engineering involved in spreading the frame, with the jig / inserts etc, looking forward to seeing the extra bracing, has been a few threads on this recently and is something i have considered myself.
Looks a really tidy job, great to see forum members helping each other out - well done lads.
ATB
Davey
|
|
|
|
RD700LC
Sept 2, 2018 16:39:02 GMT 1
Post by yamark on Sept 2, 2018 16:39:02 GMT 1
Nice to see the engineering involved in spreading the frame, with the jig / inserts etc, looking forward to seeing the extra bracing, has been a few threads on this recently and is something i have considered myself. Looks a really tidy job, great to see forum members helping each other out - well done lads. ATB Davey Cheers Davey, hope your good mate. I feel the frame spreading is almost essential on these expanded LC's as the chain has so much more room. The extra bracing is, I think a matter of opinion, but it can't do any harm. I hope you make Stafford this year mate. Your mates last year were superb, a right laugh at the show.
Cheers, Mark
|
|
|
|
Post by yamark on Sept 2, 2018 17:18:14 GMT 1
Last part of the frame mods by Jon,
The frame I'm using is an earlyish (W reg) LC without tie bars. So Jon supplied the tie bar frame brackets and welded them in position, he also checked the side panel alignment, which sometimes goes out of "kilter" when the frame is spread.
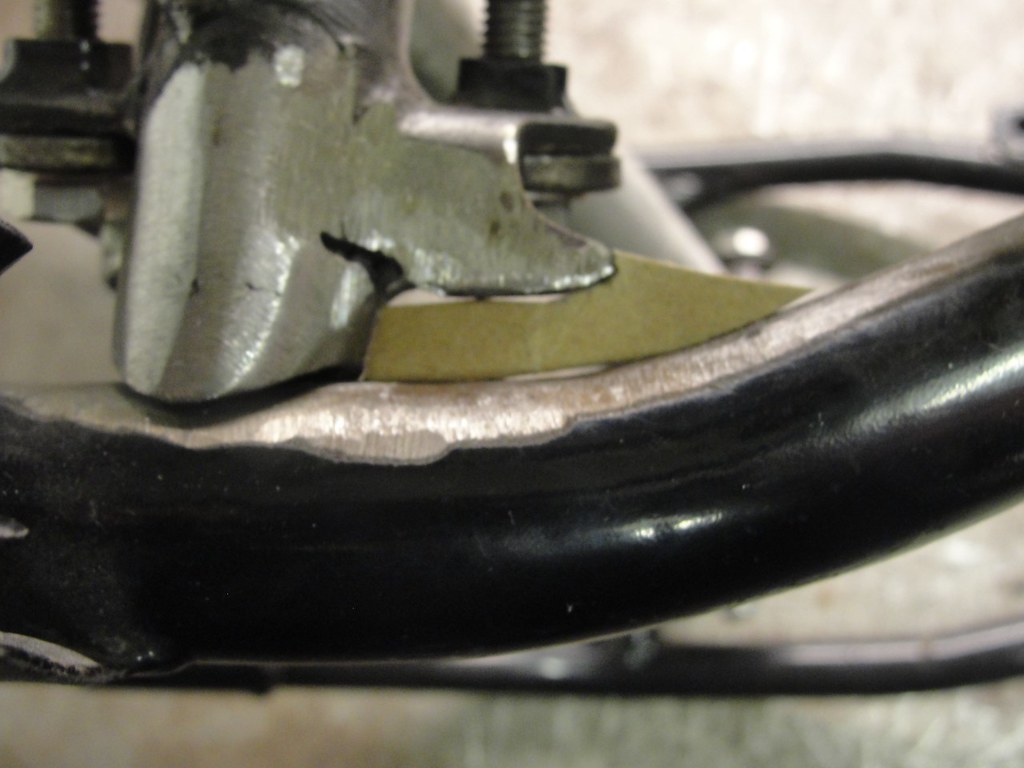
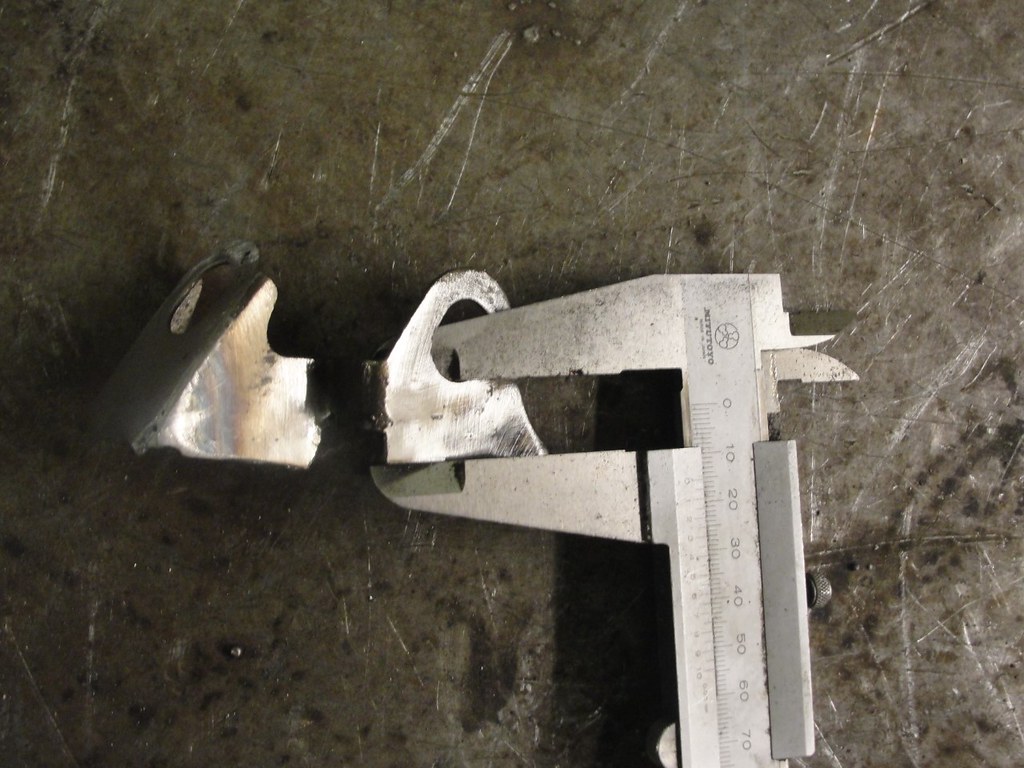
The left side panel mount needed work, so Jon had to extend the grommet mount a little.
First measured
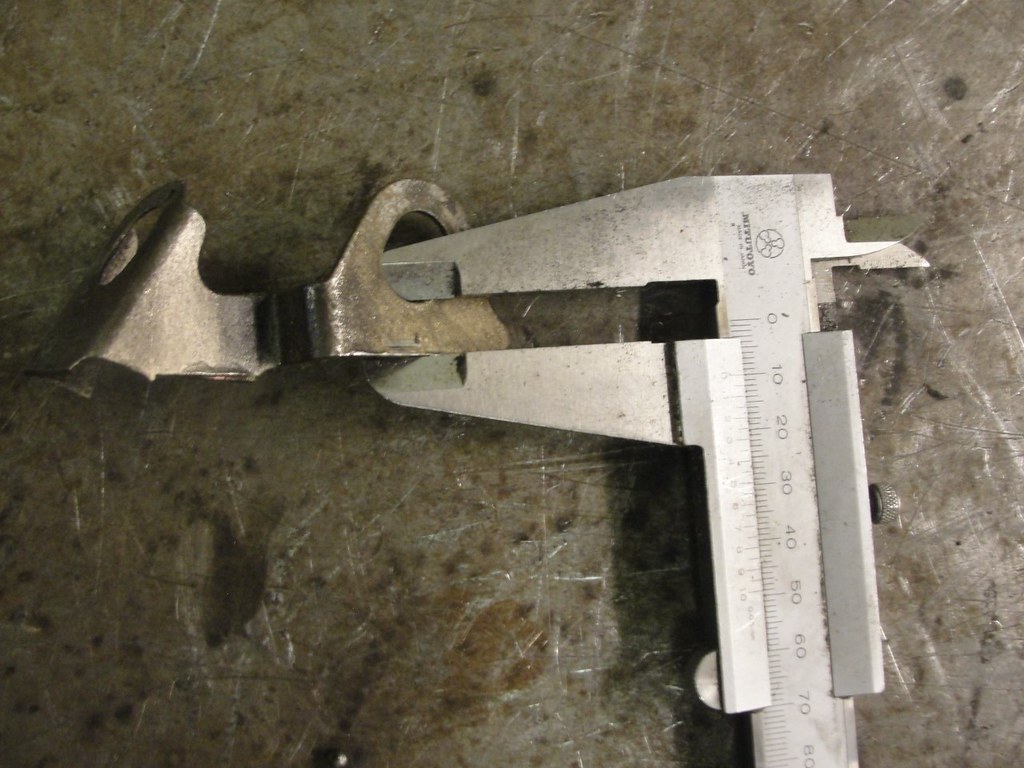 thumbnail_DSC02190[1] thumbnail_DSC02190[1]
Then extended
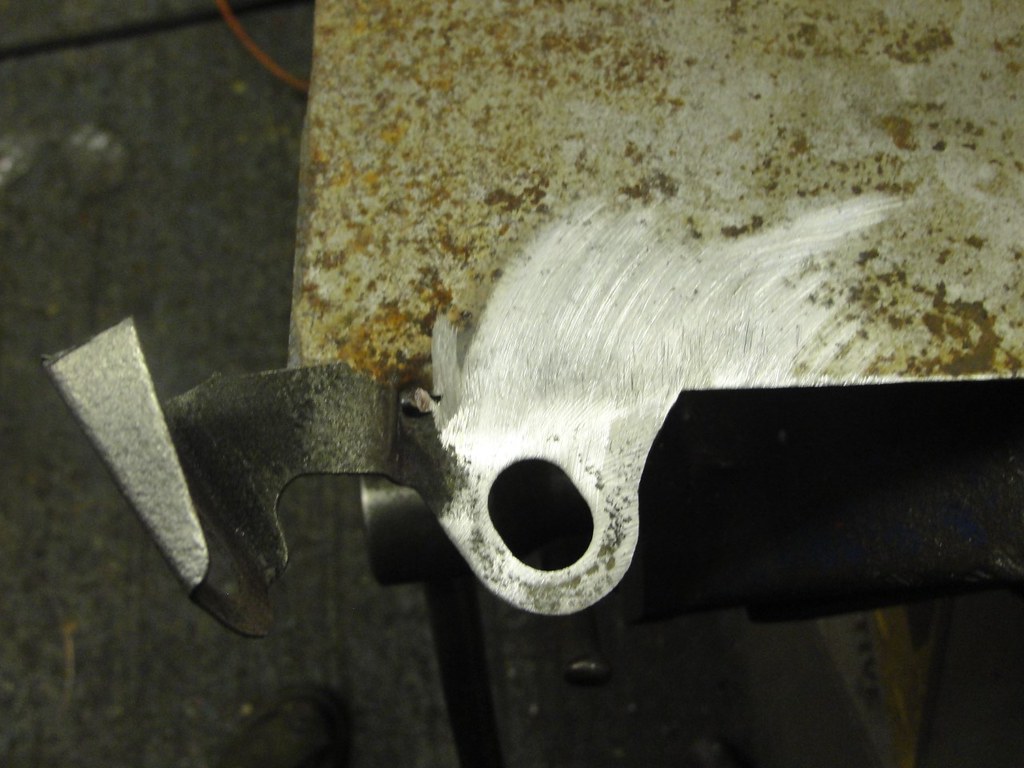 thumbnail_DSC02191[1] thumbnail_DSC02191[1]
Re cut
 thumbnail_DSC02192[1] thumbnail_DSC02192[1]
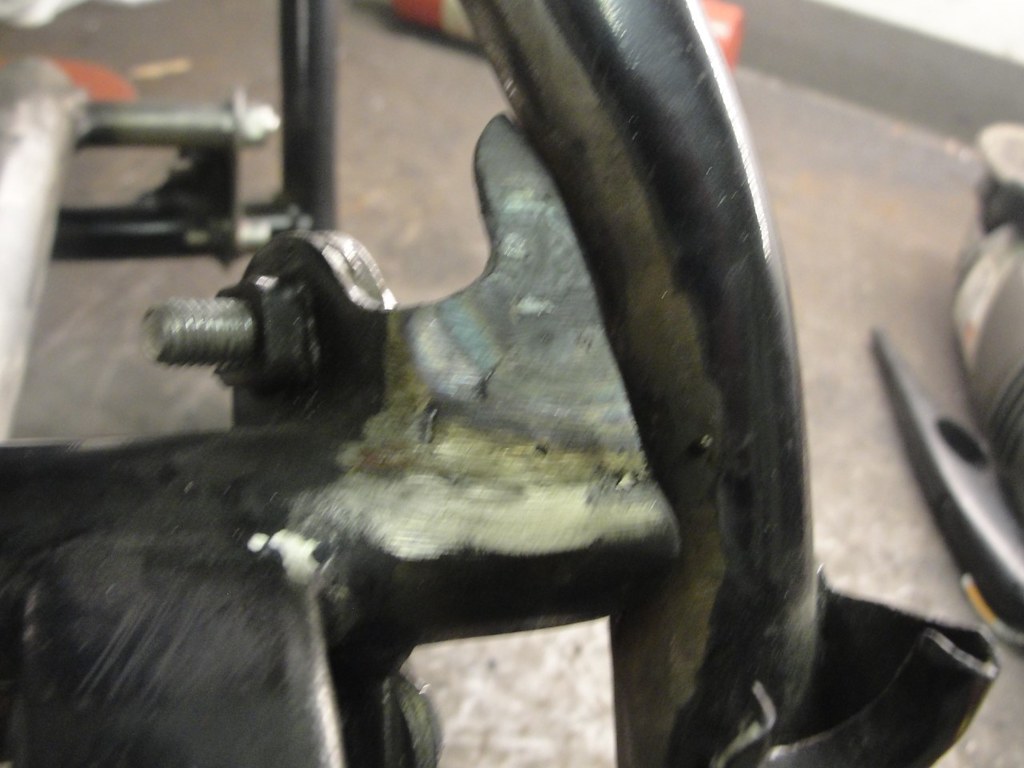
Welded in place, and checked
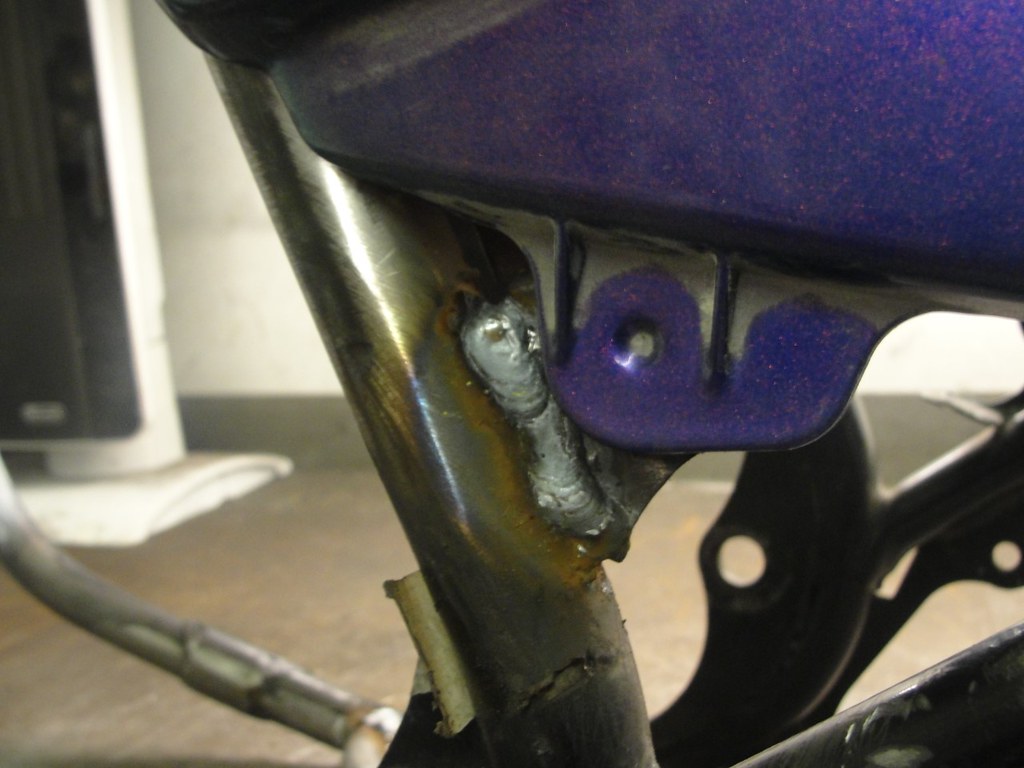 thumbnail_DSC02195[1] thumbnail_DSC02195[1]
 thumbnail_DSC02194[1] thumbnail_DSC02194[1]
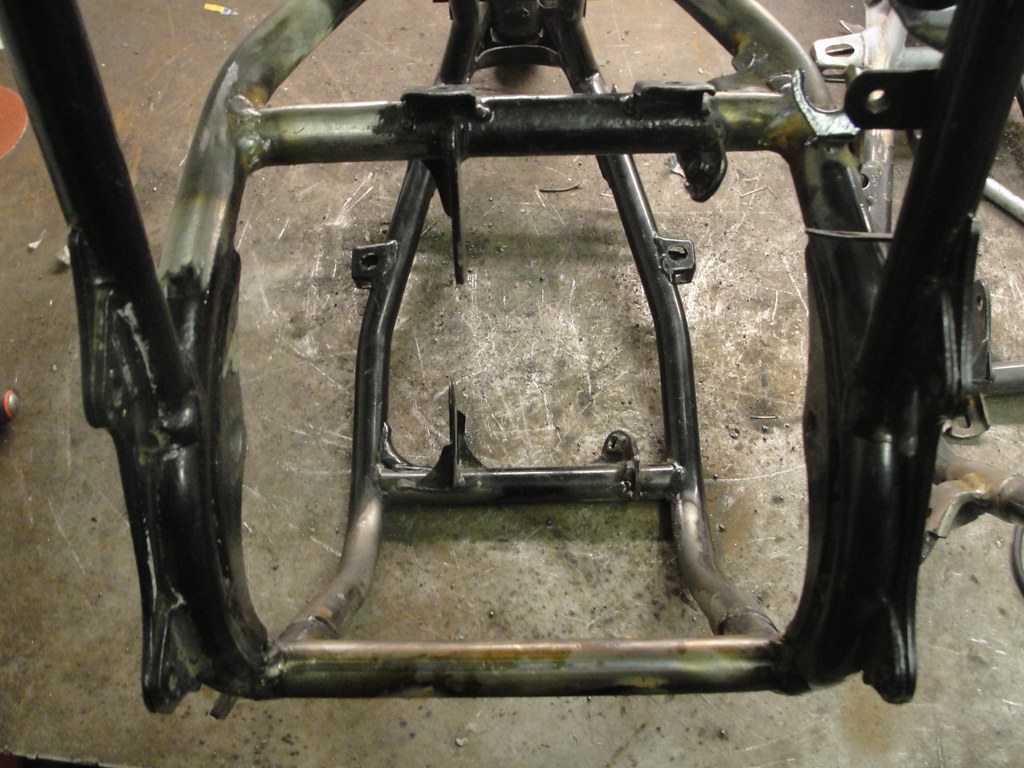
Jon suggested extra bracing, as he has experience of this I gladly agreed, and he welded in these swept tubes
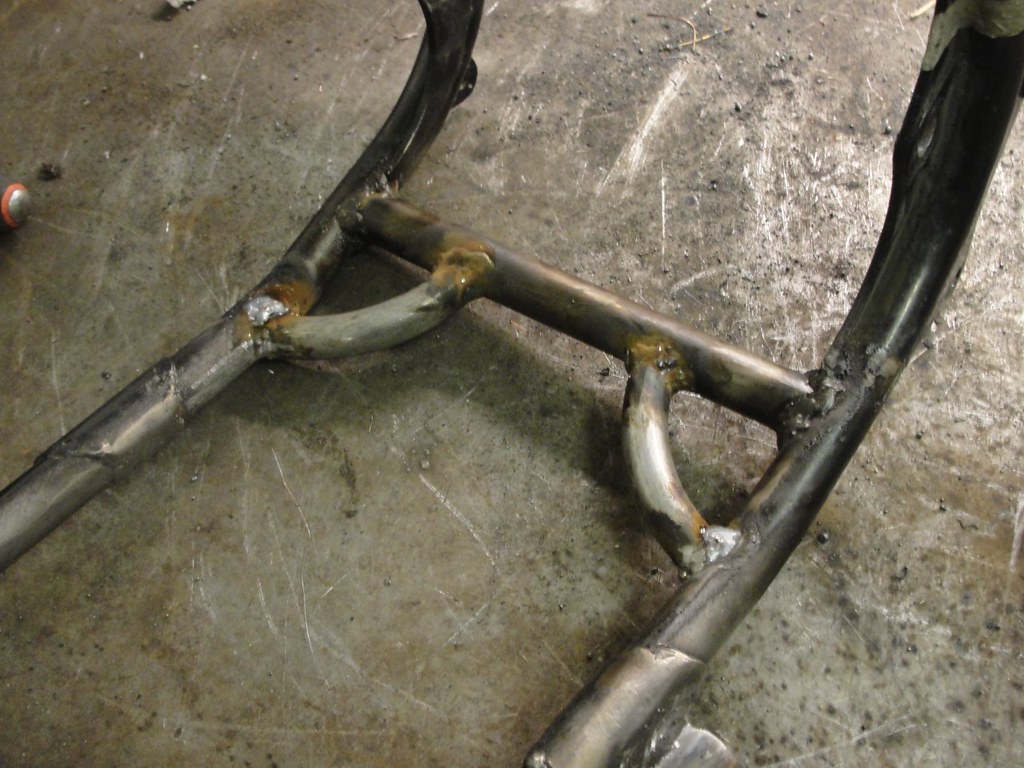 thumbnail_DSC02188[1] thumbnail_DSC02188[1]
Image of the new tie bar mounts welded and checked by installing a bottom end
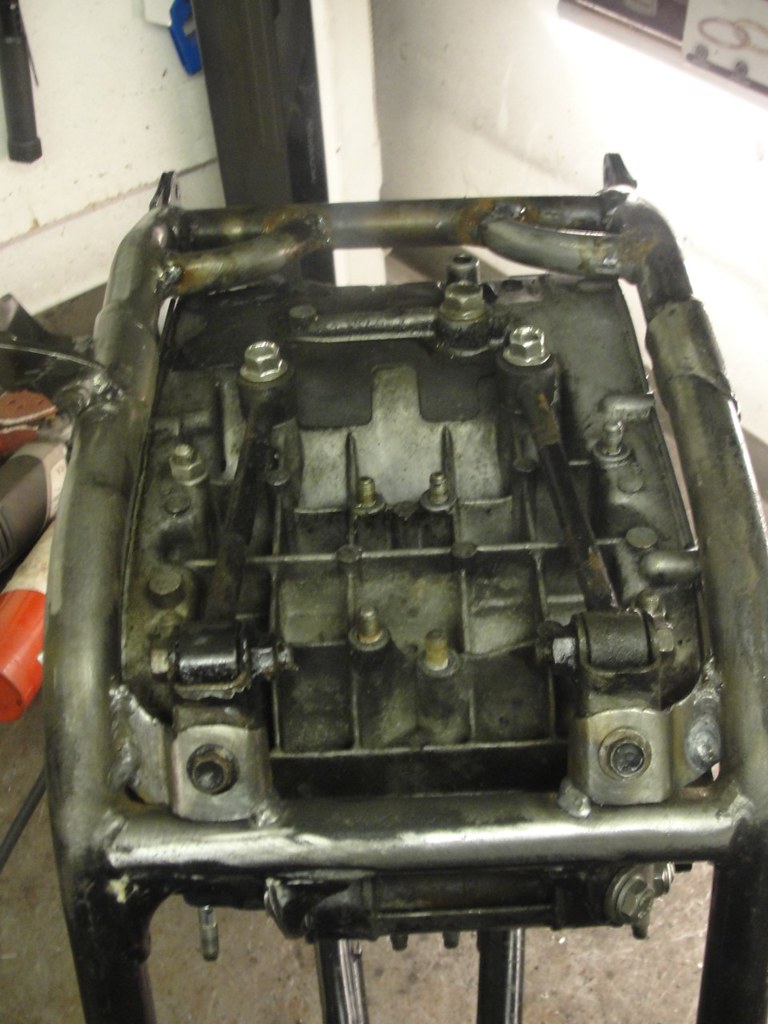 thumbnail_DSC02193[1] thumbnail_DSC02193[1]
Finally my frame on the left, and Jon's own frame on the right
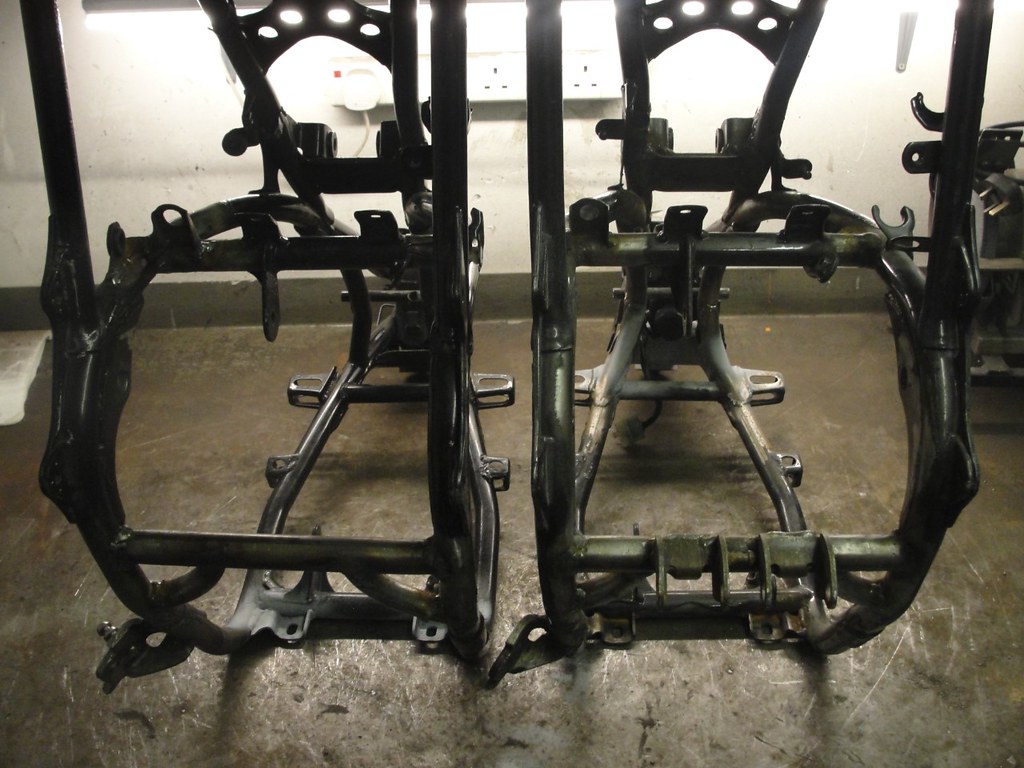 thumbnail_DSC02196[1] thumbnail_DSC02196[1]
At this point, I would like to thank Jon for all his hard work and expertise in carrying out my major frame mods. His care and accuracy are obvious- meticulous understates it. I am very confident of Jon's work- Top man
I'm still researching if any extra bracing is needed, but that's a big chunk of the frame sorted. I know I need more brackets fabricated/welded for coils, rad etc.
Cheers, Mark
|
|
|
|
Post by jon on Sept 2, 2018 17:55:12 GMT 1
Glad your pleased with the frame Mark,
It’s done in the same way I’d did mine. I usually only do things for myself, but when you PM’d me I was stuck with how to progress my three projects.
I admired you triple build, and was pleased you’d asked me to do the spread. I think it’s the best way to approach this from an engineering point of view, i.e. leave the outer frame intact, cut out the centre braces and extend.
Jon
|
|
|
|
Post by rostrumorhospital on Sept 2, 2018 22:56:44 GMT 1
Great work,
With regards the Staffod show, my 2 mates are goin again but unfortunately I can't make it, will you have the triple there again
ATB
Davey
|
|
|
|
Post by mouse on Sept 3, 2018 7:32:40 GMT 1
Those frame mods look amazing, very factory. Well done both of you
Mouse
|
|
|
|
Post by yamark on Sept 9, 2018 17:10:44 GMT 1
Now that the frame is spread to 220mm at the swing arm, I'm starting work on the rear suspension. The choice is a Honda NC29 arm (CBR400RR), so as I am keeping the standard shock layout, NK Racing will do the conversion. I spoke to Nigel and we went through the setup I was after. He was most helpful and said the NC29 arm needs to be scalloped to miss the right hand frame tube. But as my frame is wider at that point, I'm going to see how much the arm will foul the frame.
So here is the swing arm in standard trim
 SDC11526 SDC11526
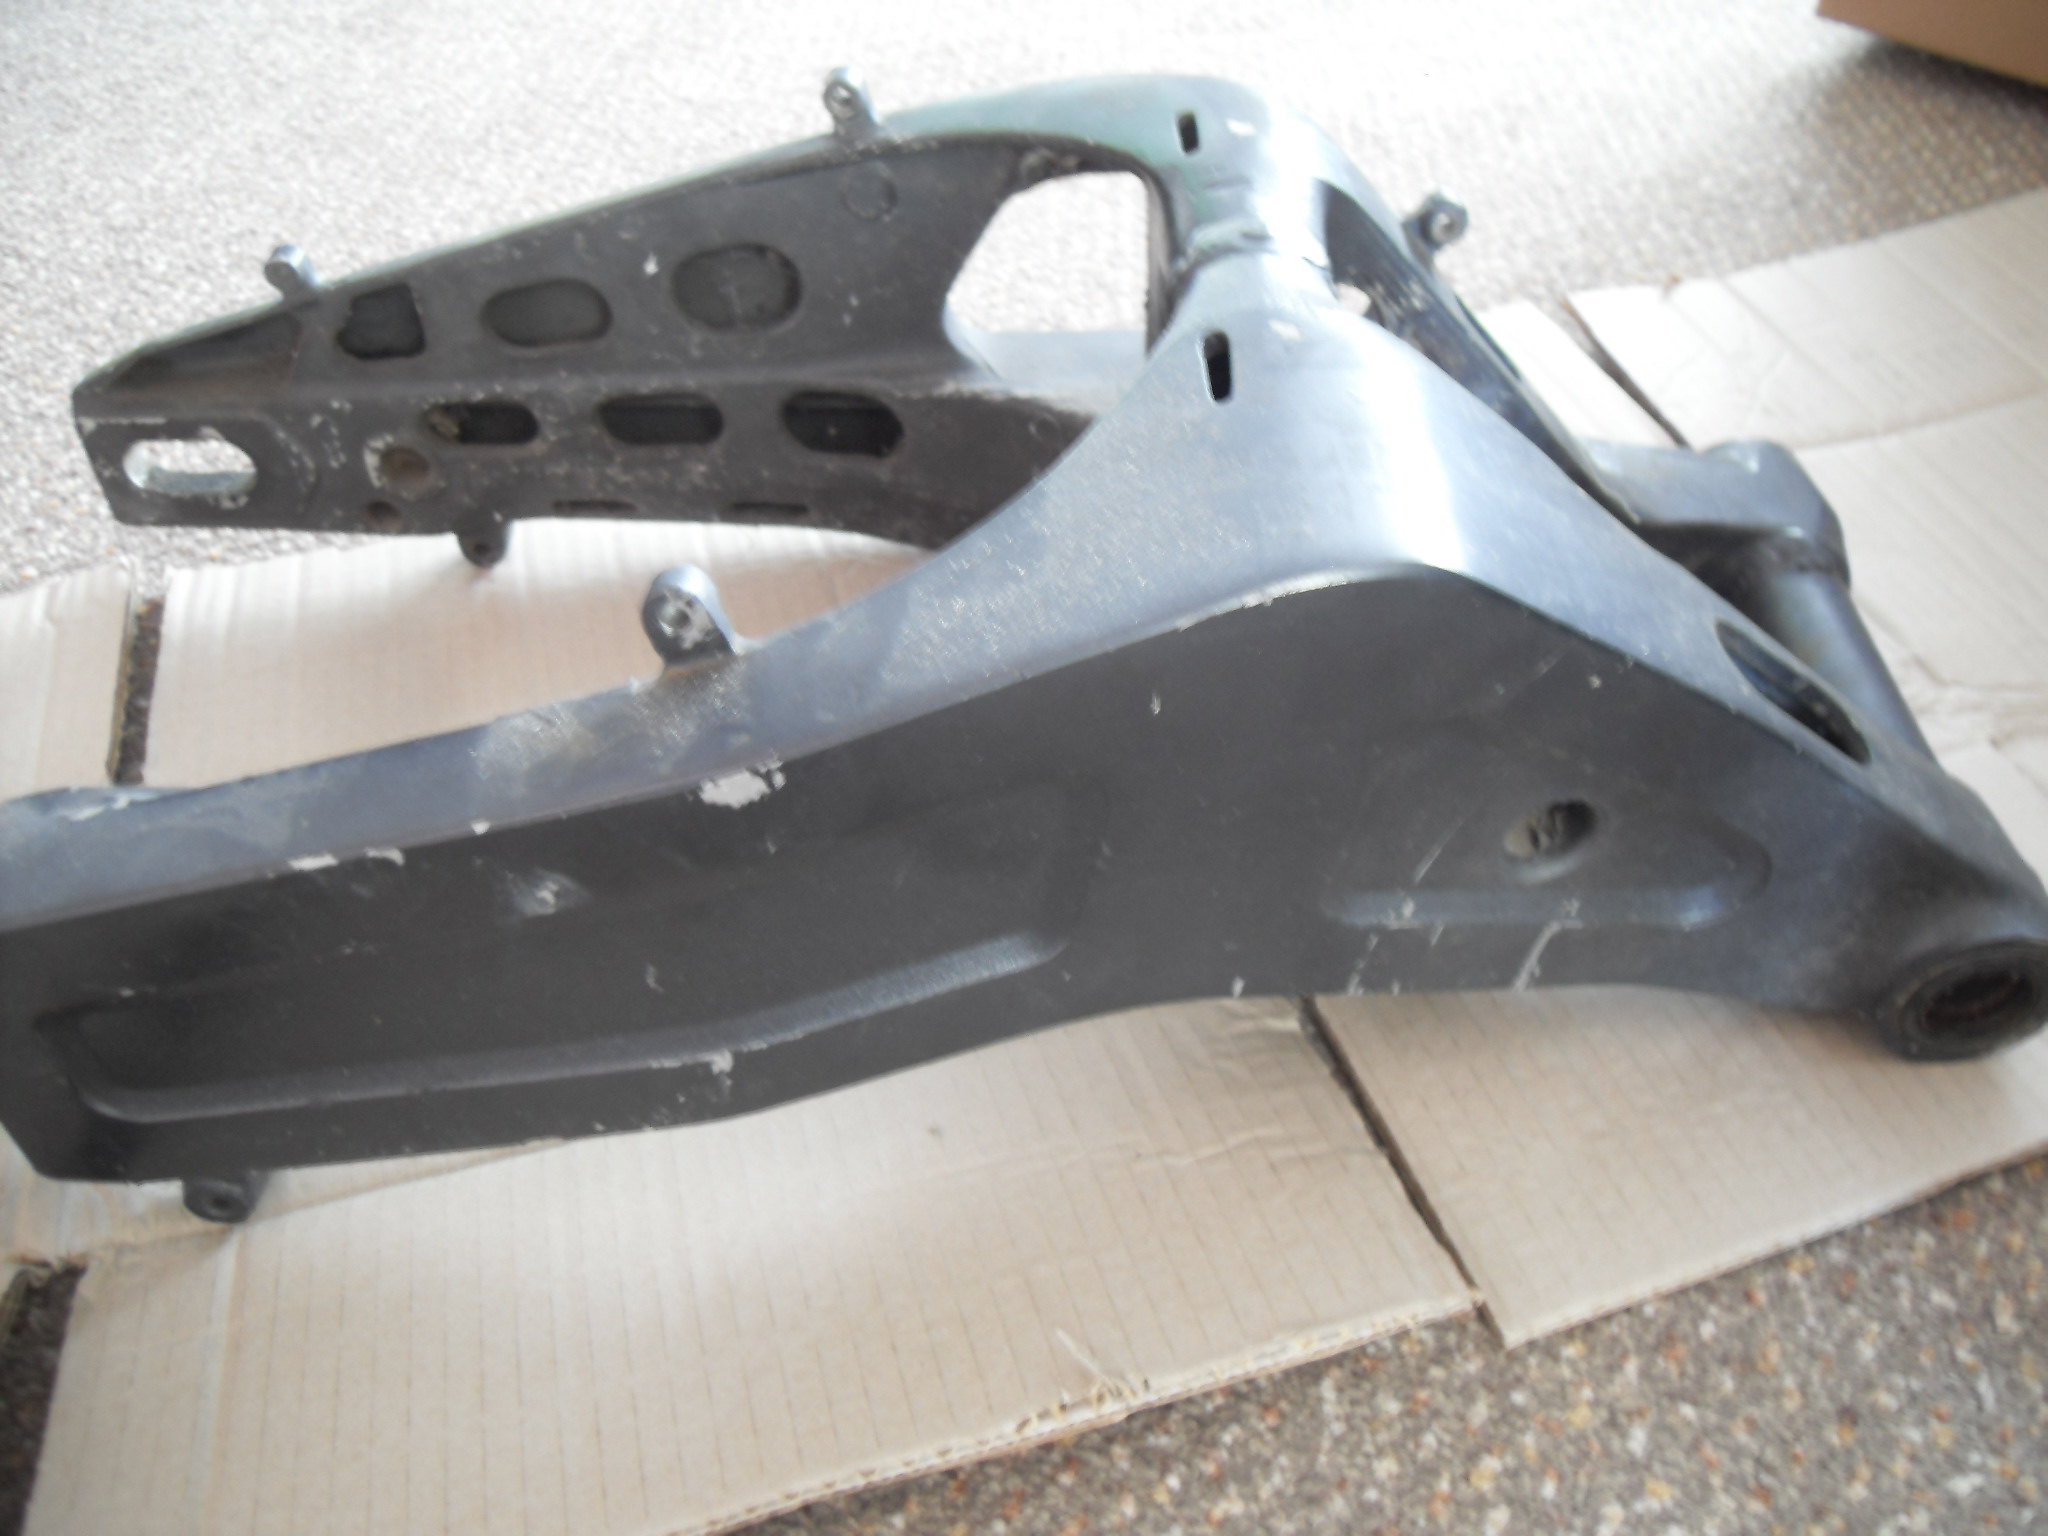 SDC11528 SDC11528
Nigel said 3 - 4 weeks to complete the work.
Moving back to bit your all interested in - the engine
One of the cylinder studs is missing, and a crankcase studs is the wrong length.
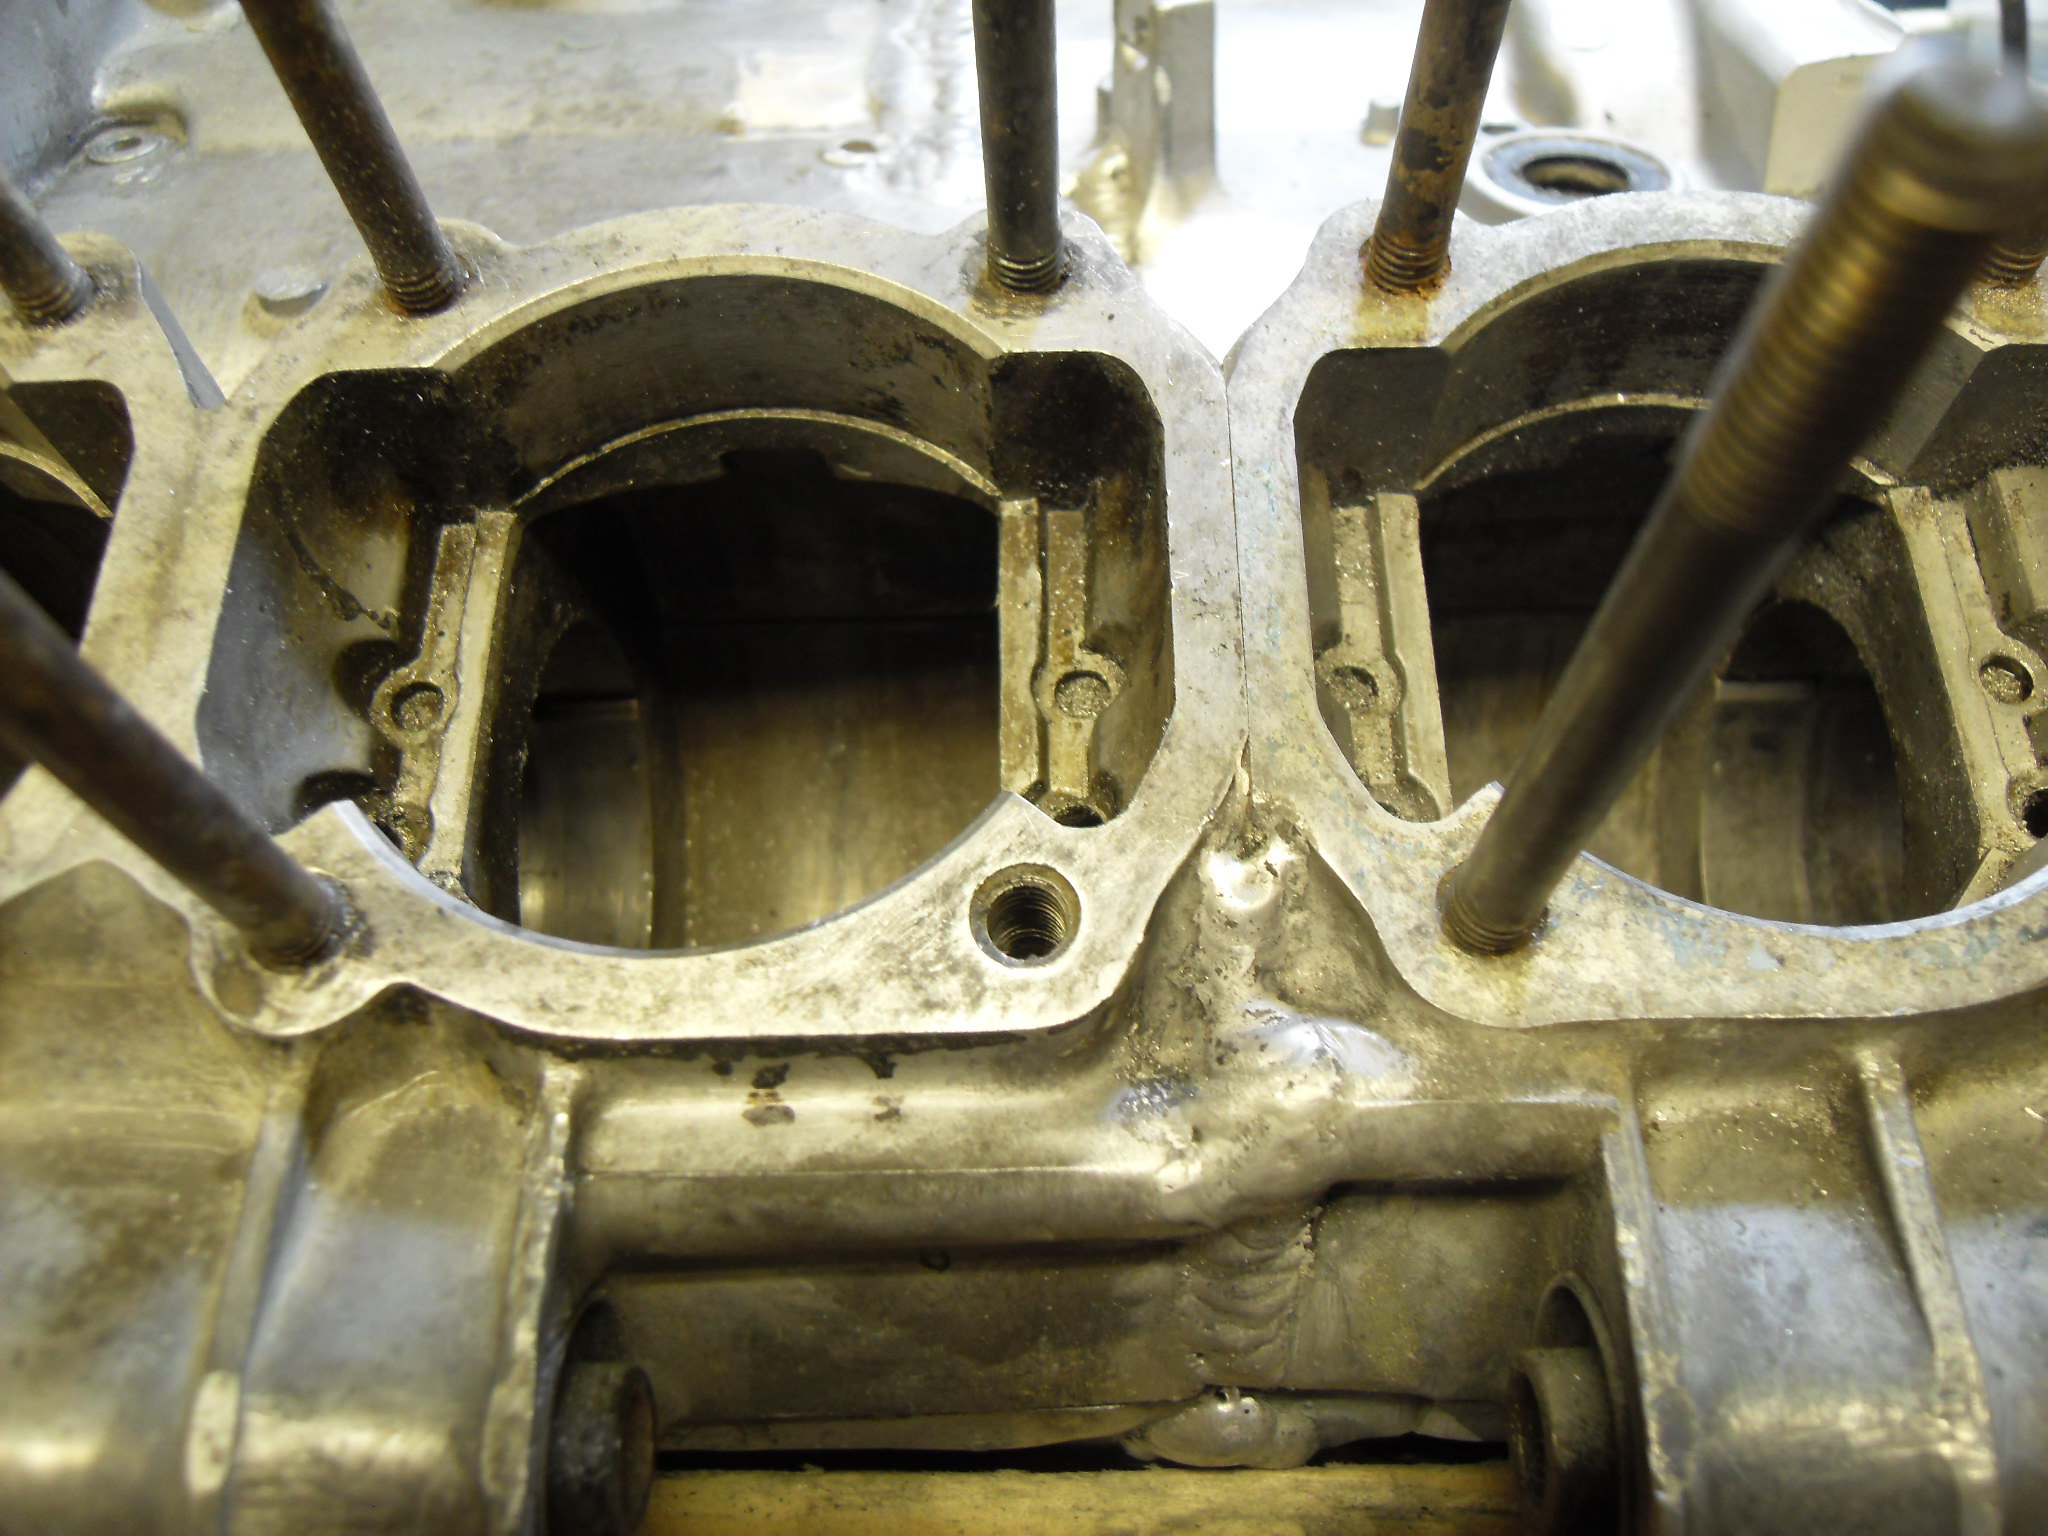 SDC11529 SDC11529
I've a few studs, so I installed a nice condition 2nd hand one
 SDC11530 SDC11530
The crankcase stud with the blue marker dot is too short, so has to be changed for a longer stud
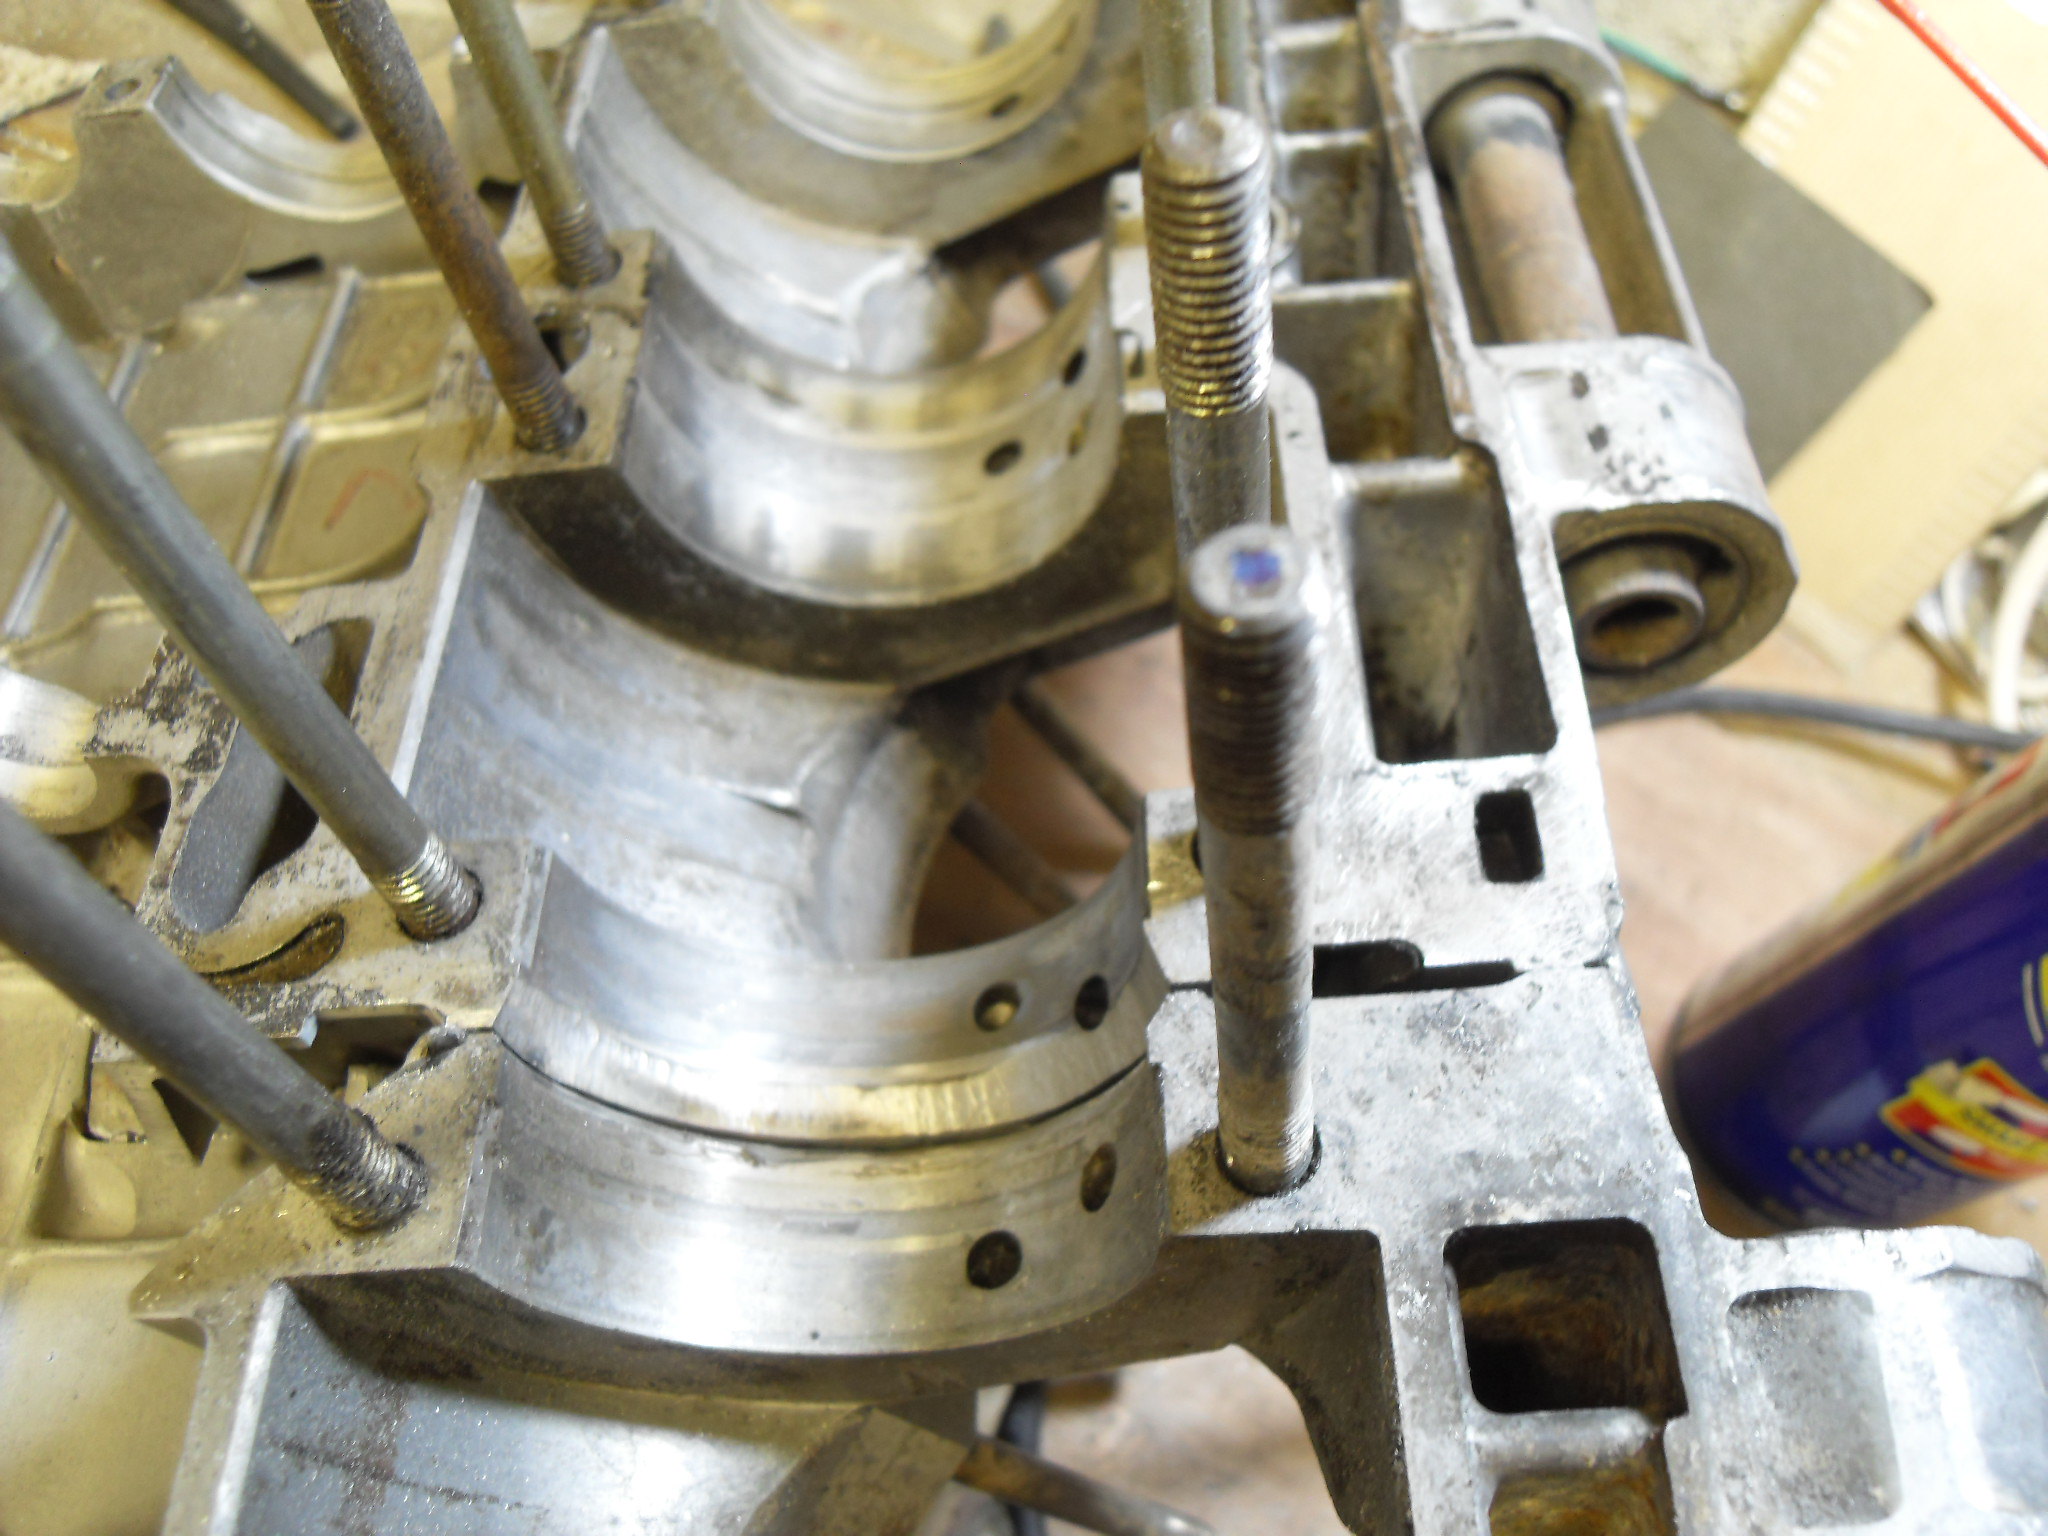 SDC11531 SDC11531
Removed
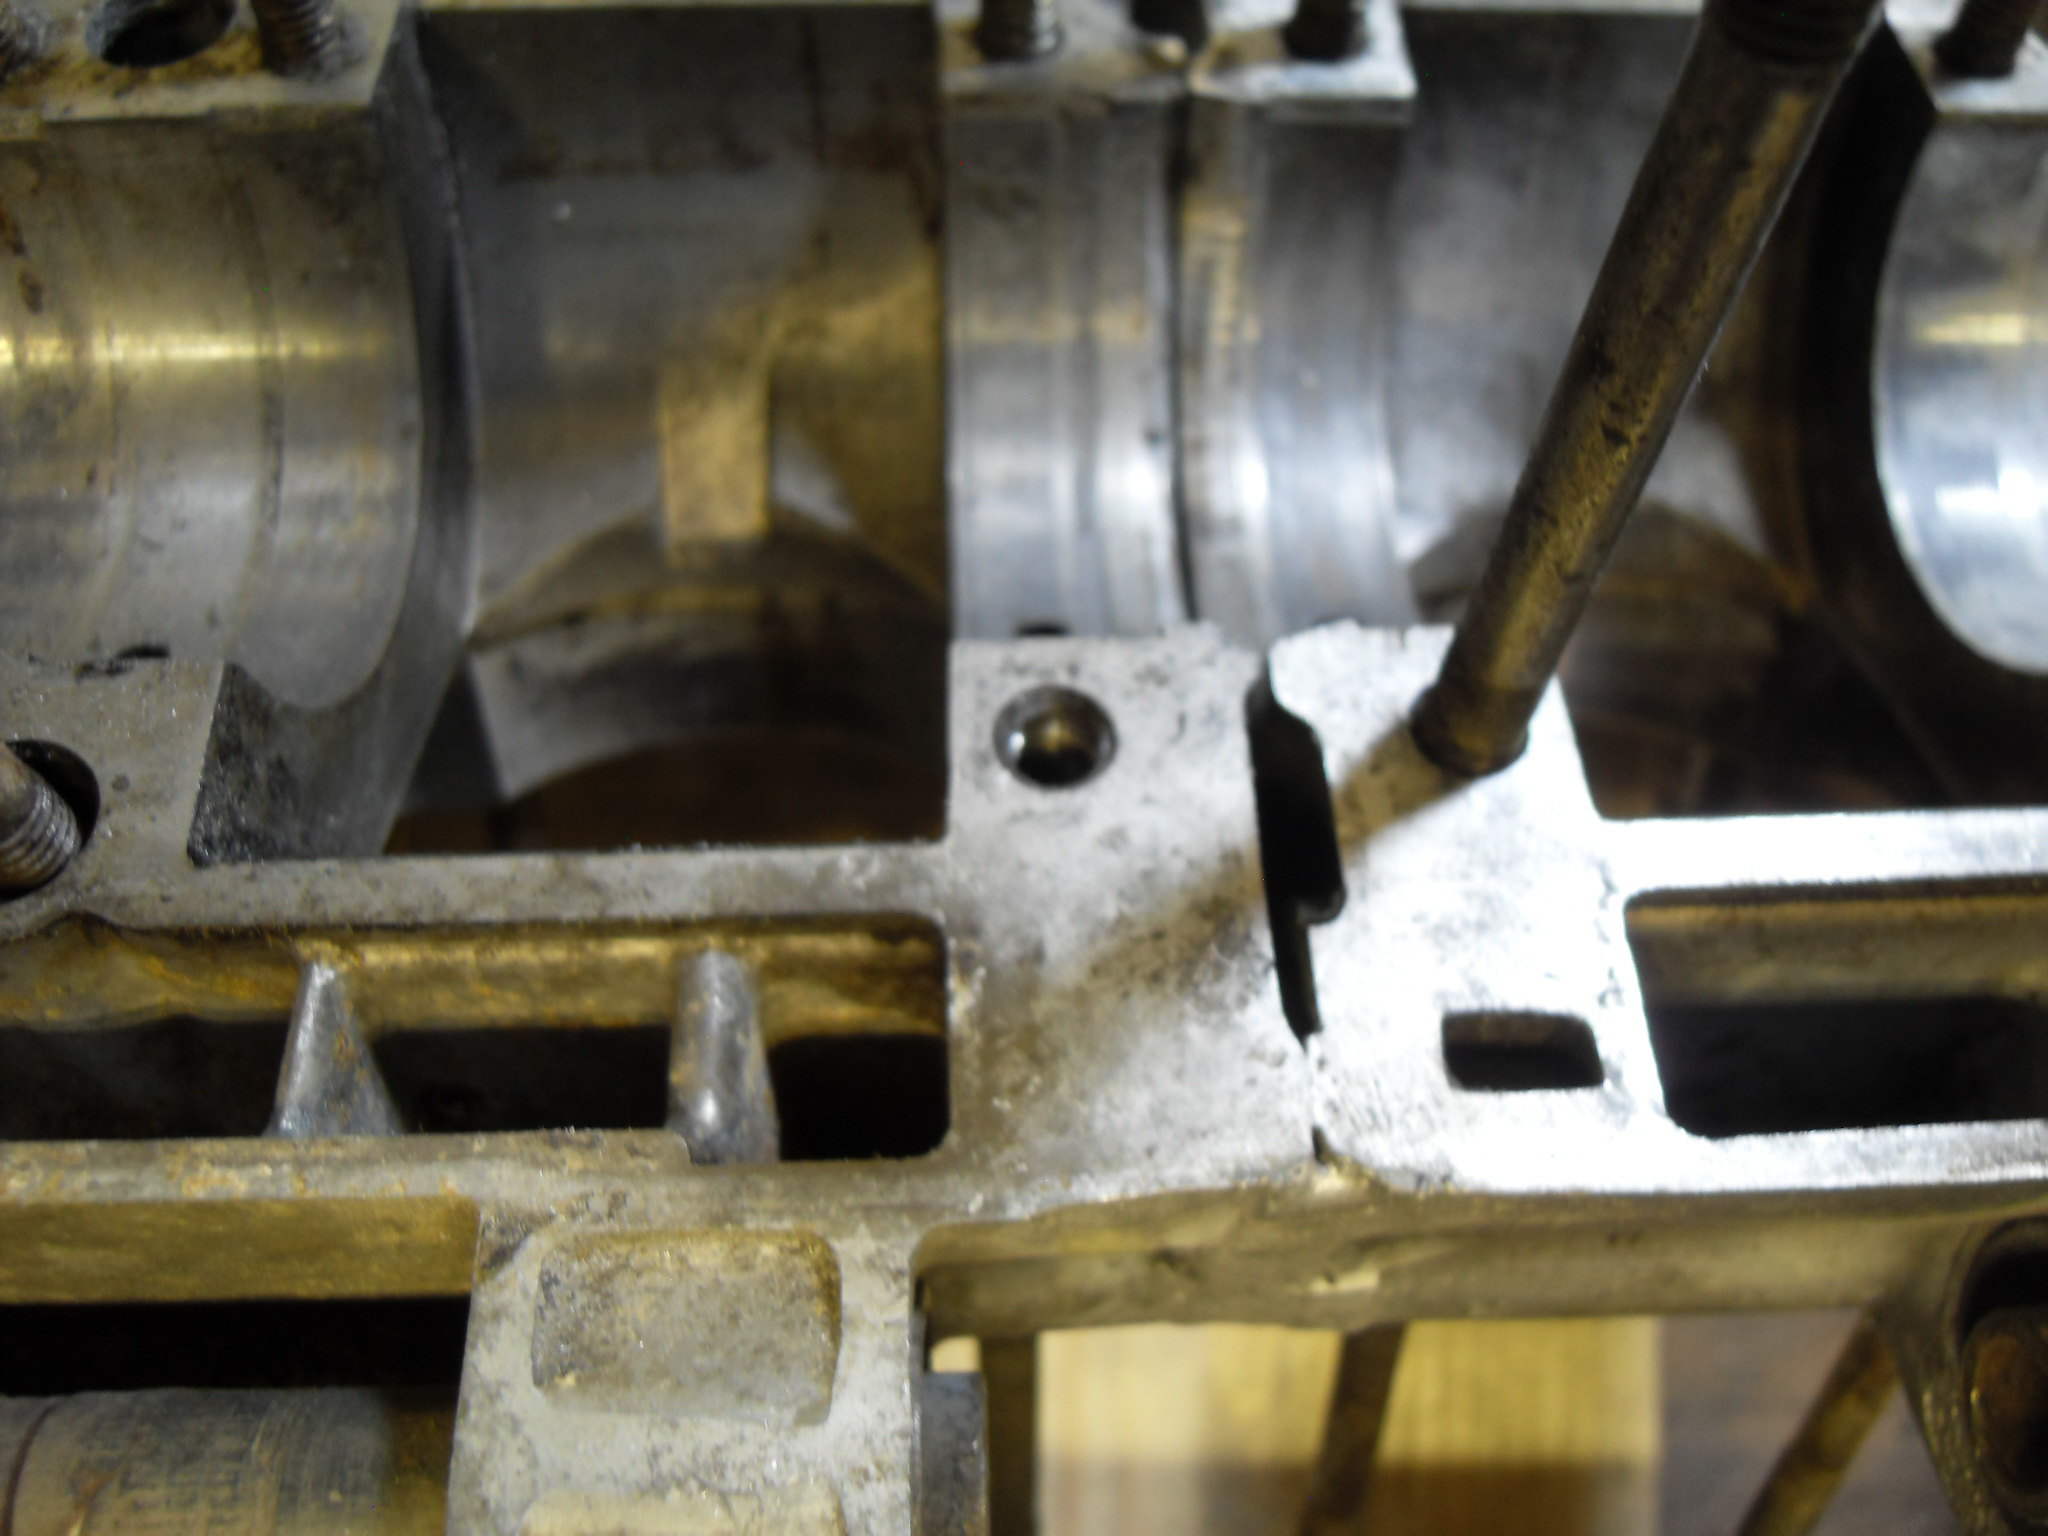 SDC11532 SDC11532
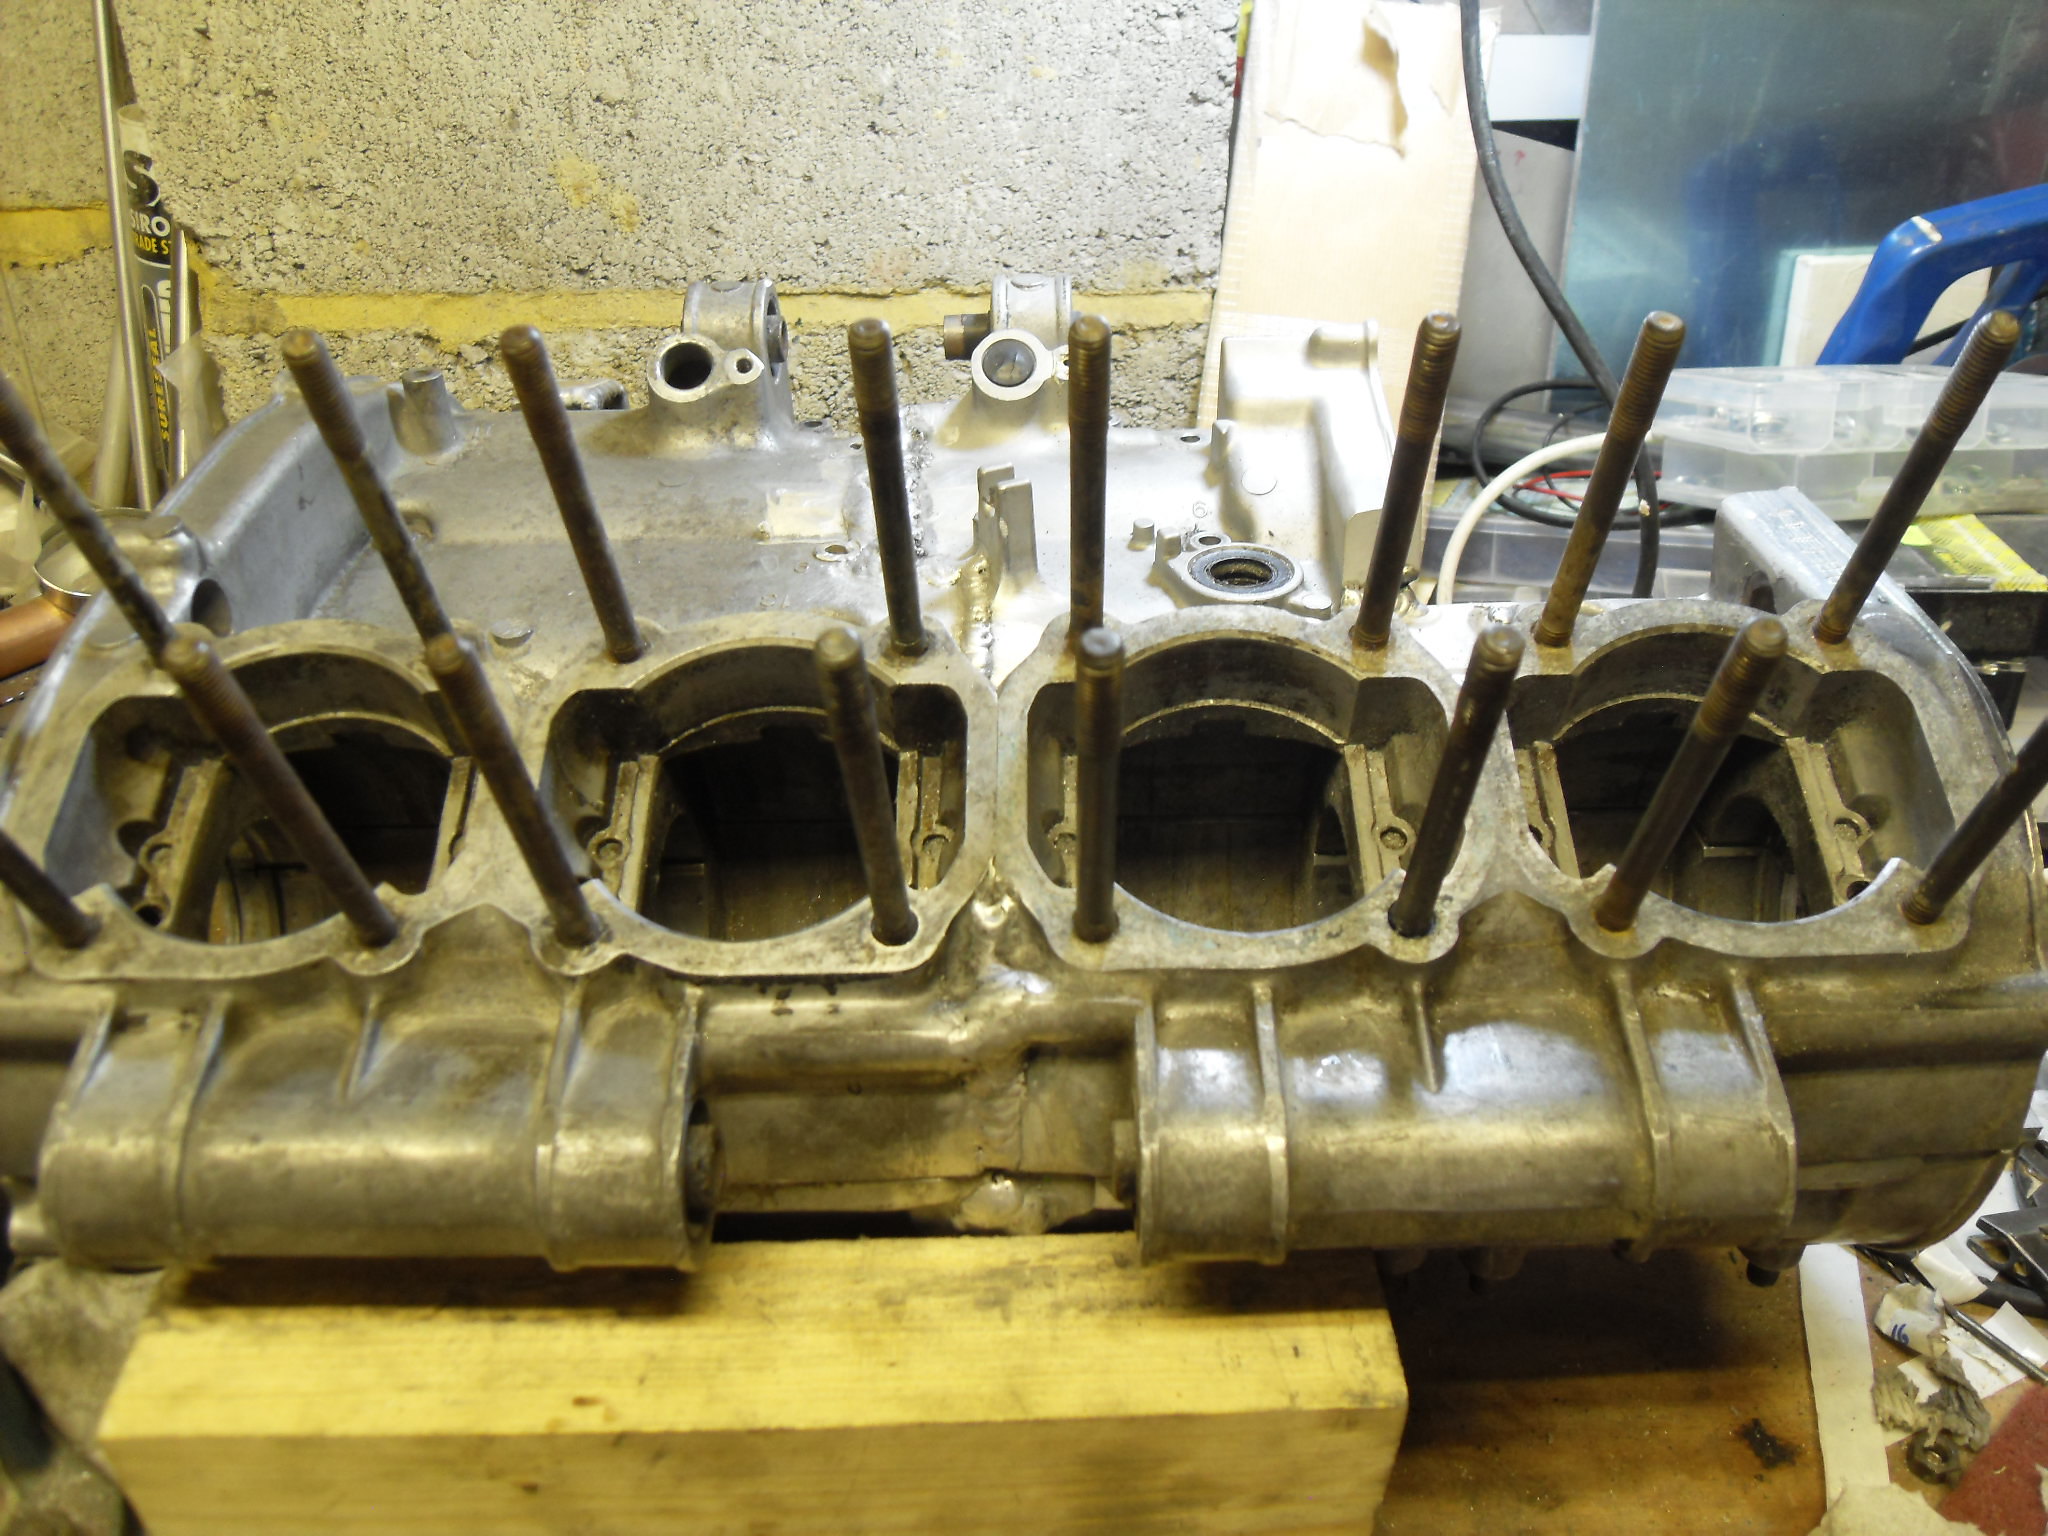
I again installed a good 2nd hand stud, and then took a photo of the engine. You can clearly see the YPVS section
 SDC11534 SDC11534
In some of the images, you can see the V trench formed under the centre Lab seal, where the cases are joined. These trenches will be filled with JB weld.
Next time, the gear shift shaft and left engine covers.
Cheers, Mark
|
|
|
|
Post by bezzer on Sept 9, 2018 17:37:48 GMT 1
Nice one Mark 👍🏻, watching with great interest! 🤗 especially the JB Weld masterclass.
|
|
rddave
L plate rider.

Posts: 16 
|
Post by rddave on Sept 9, 2018 19:21:52 GMT 1
Another mind blowing build that us mere mortals can only dream of building. I especially enjoy the detail of your builds that explain all the steps and decision making.
Simply brilliant - Dave |
|
|
|
Post by donkeychomp on Sept 9, 2018 21:46:48 GMT 1
Still gobsmacked here. And loving the choice of swinger Mark.
Alex
ps do you have any more cylinder head studs? I'm missing one also!
|
|
|
|
Post by dusty350 on Sept 10, 2018 7:14:17 GMT 1
Think I've got a spare stud if Mark hasn't. Looking good Mark - that engine is just mental !! Dusty |
|
|
|
Post by barney on Sept 10, 2018 7:42:45 GMT 1
Looking great mark I can’t imagine how you go about starting anything like this so great to see 👍👍
|
|
|
|
Post by 4l04ever on Sept 10, 2018 8:33:41 GMT 1
Are you going to relocate the drain plugs on the two middle cylinders?
|
|
|
|
RD700LC
Sept 10, 2018 20:26:14 GMT 1
Post by yamark on Sept 10, 2018 20:26:14 GMT 1
Still gobsmacked here. And loving the choice of swinger Mark. Alex ps do you have any more cylinder head studs? I'm missing one also! Thanks Alex, I like the NC29 arm. It's a bit harder to install than the RGV swinger, but is not as long as the RGV. I'm sure I'll have a stud for you
|
|
|
|
Post by yamark on Sept 10, 2018 20:32:41 GMT 1
Think I've got a spare stud if Mark hasn't. Looking good Mark - that engine is just mental !! Dusty Cheers Dusty, I put both engine covers on the other day, and the engine is immense! It takes up most of my workbench
|
|
|
|
RD700LC
Sept 10, 2018 20:39:45 GMT 1
Post by yamark on Sept 10, 2018 20:39:45 GMT 1
Looking great mark I can’t imagine how you go about starting anything like this so great to see 👍👍 Thanks Barney, you just have to plan ahead and give it a go. Being a little unhinged helps as well
|
|
|
|
RD700LC
Sept 10, 2018 20:41:59 GMT 1
Post by yamark on Sept 10, 2018 20:41:59 GMT 1
Are you going to relocate the drain plugs on the two middle cylinders? I haven't got my cylinders or heads back yet, but drain plugs are something I've been thinking about. |
|
|
|
RD700LC
Sept 10, 2018 21:40:37 GMT 1
Post by donkeychomp on Sept 10, 2018 21:40:37 GMT 1
Thanks both Mark and Dusty. One is enough lol next time I'm over your place Dusty.
Is the swing arm going to be black Mark?
Alex
|
|
|
|
RD700LC
Sept 15, 2018 18:36:00 GMT 1
Post by yamark on Sept 15, 2018 18:36:00 GMT 1
Thanks both Mark and Dusty. One is enough lol next time I'm over your place Dusty. Is the swing arm going to be black Mark? Alex Hi Alex, sorry for the late reply. Yes, frame and swingarm in black, probably painted.
|
|


