|
|
Post by dusty350 on Mar 2, 2020 8:08:51 GMT 1
That's a long drive in one day Mark  I thought I did well driving to Mark Cordwell, then back to Paul at PJME and then home in one day ! Few hundred less than you ! My back was screaming by the end  Be good to see those pipes on the bike - another big part of the jigsaw sorted  Dusty |
|
|
|
Post by veg on Mar 5, 2020 7:55:42 GMT 1
How the hell did you do that perfectly with a jigsaw? Looks like it was done by a computer laser thing. Brilliant work Mark. Alex Alex I thought you realised mark isn’t human he’s a one man fabrication machine, he doesn’t have blood in his veins but cutting fluid, his eyes work in thou’s and he has nerves of steel. He is in fact our very own humanoid lc hybrid the perfect final symbiosis of lc and man. Bloody hell man stop you make us all look bad 😁👍 |
|
|
|
Post by yamark on Mar 8, 2020 20:23:52 GMT 1
How the hell did you do that perfectly with a jigsaw? Looks like it was done by a computer laser thing. Brilliant work Mark. Alex Alex, you're too kind fella. Fine tooth blade, cut close to the line, thick lining paper under the jigsaw to protect the ali, then do your final cut- the remaining ali is so thin it bends and breaks away easily. Finish with a multi tool and then a fine file 
|
|
|
|
Post by yamark on Mar 8, 2020 20:34:31 GMT 1
How the hell did you do that perfectly with a jigsaw? Looks like it was done by a computer laser thing. Brilliant work Mark. Alex Alex I thought you realised mark isn’t human he’s a one man fabrication machine, he doesn’t have blood in his veins but cutting fluid, his eyes work in thou’s and he has nerves of steel. He is in fact our very own humanoid lc hybrid the perfect final symbiosis of lc and man. Bloody hell man stop you make us all look bad 😁👍 Thanks Dusty (my back stands up really well)
Veg - PMSL - a colourful way to describe me! I sound like the male version of the "Borg Queen" in star trek  . .
Cheers lads for your comments |
|
|
|
Post by yamark on Mar 8, 2020 21:11:28 GMT 1
Rear Tray
Once the rear tray is cut, I clamp it in a vice between 2 blocks of steel and form a bend. Then I test fit and Dremel so I have an even small clearance. Mark and drill a few mount holes and that's all there is to it
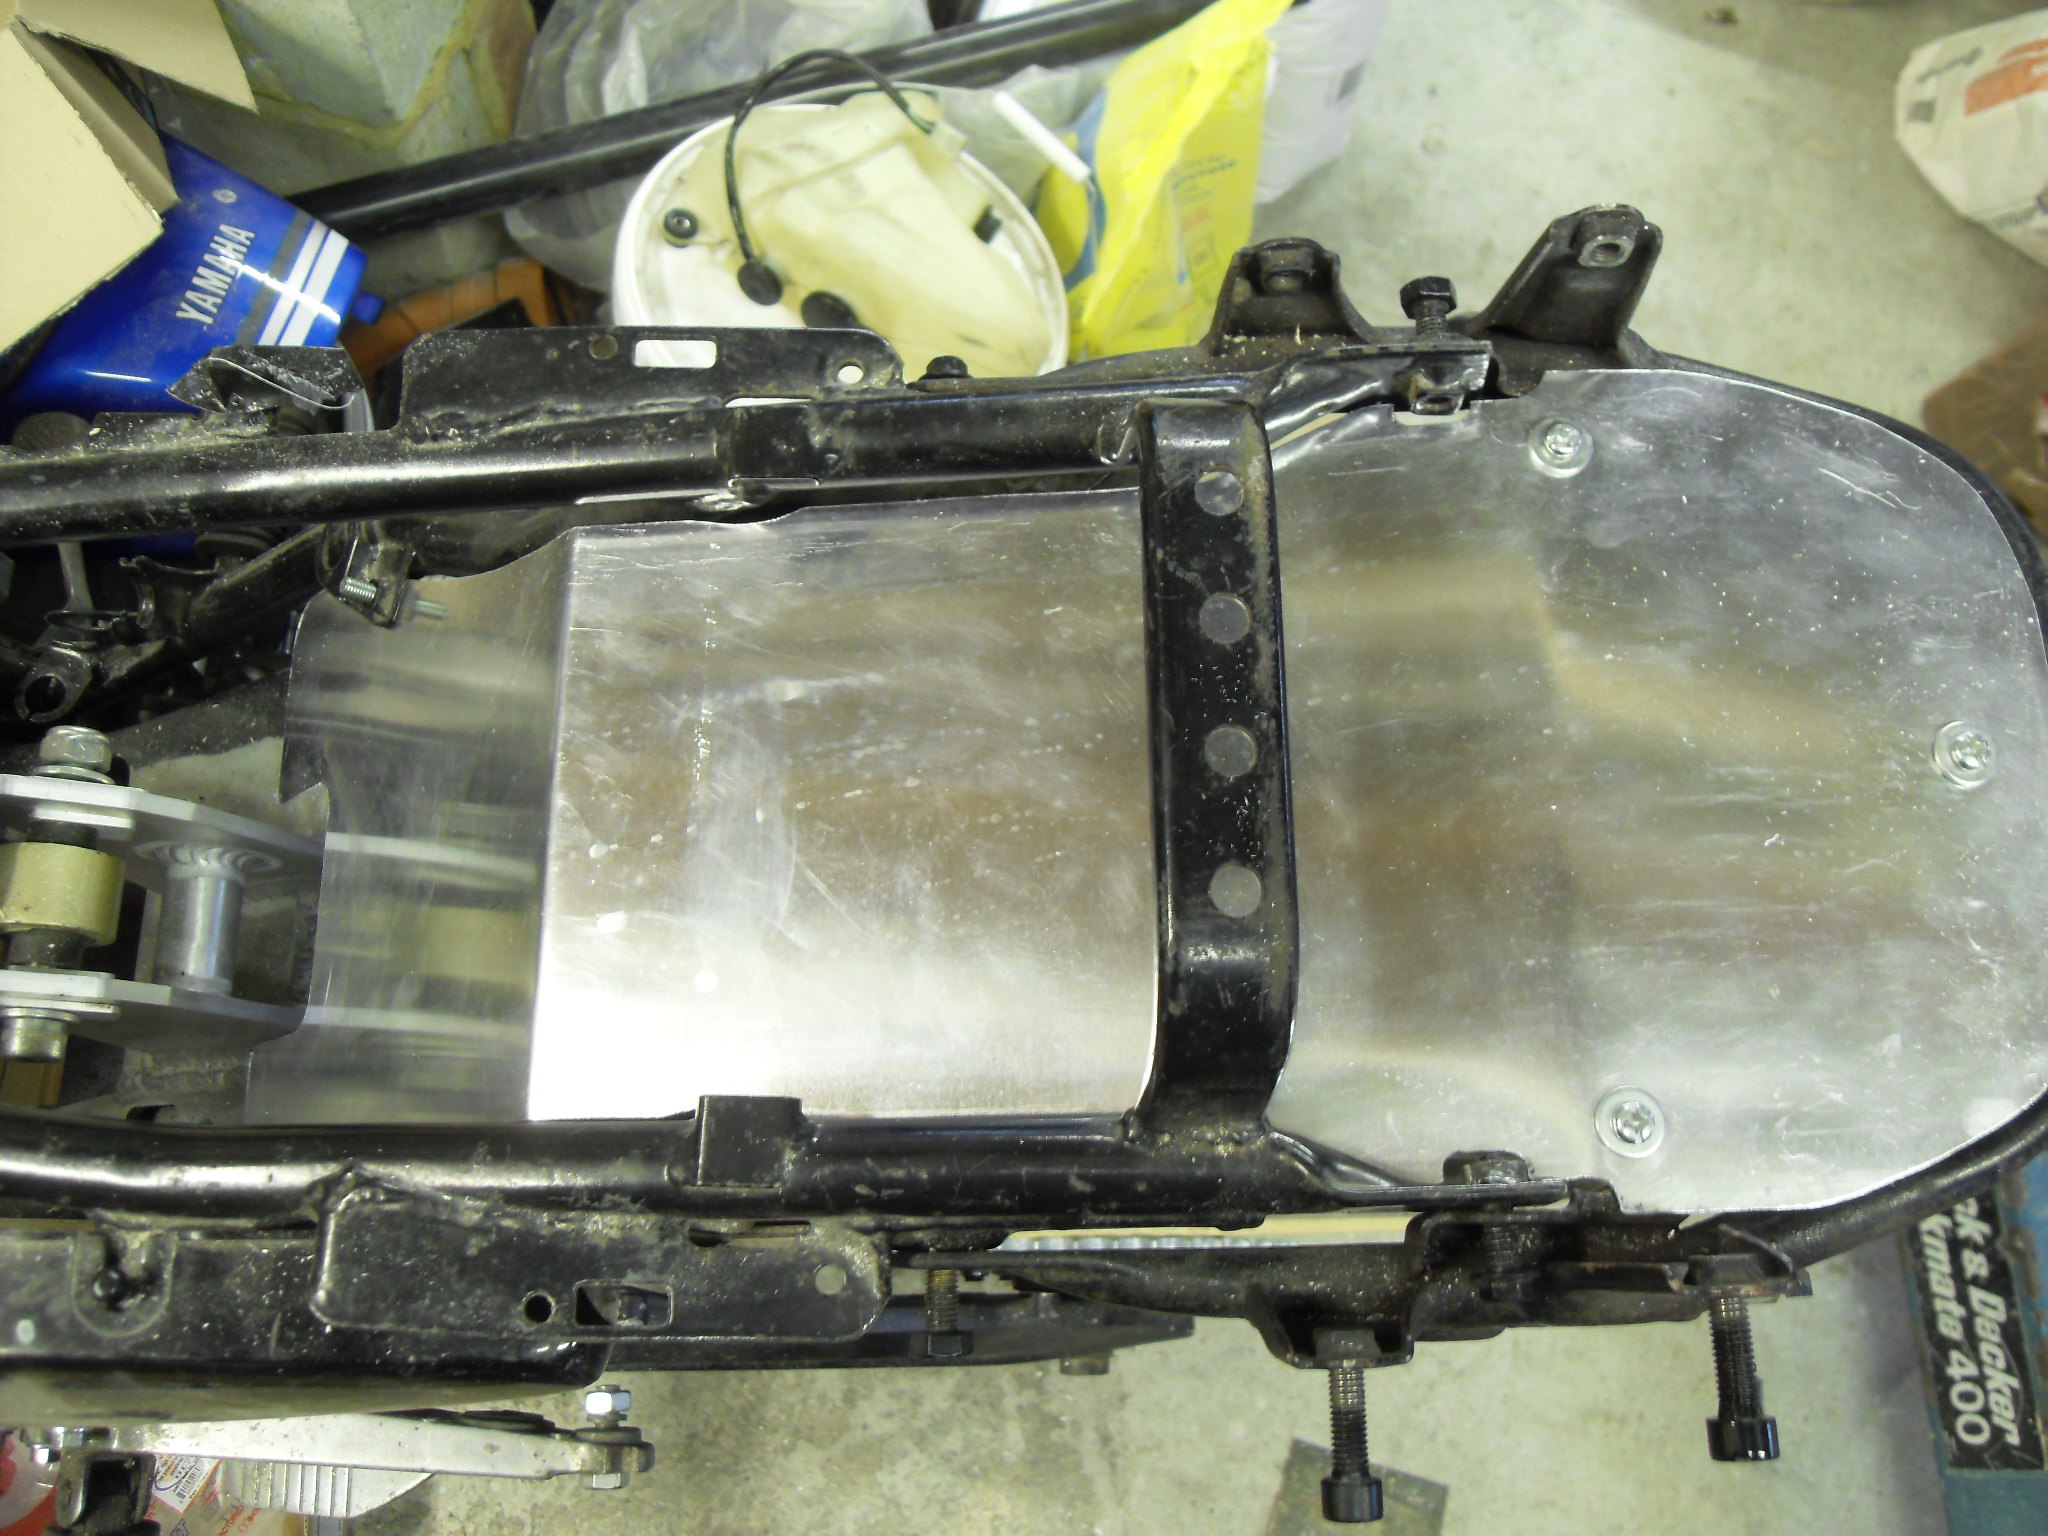 SDC11743 SDC11743
An image from the underside
 SDC11744 SDC11744
One of the last sections of welding, was the rear engine mount. The original LC mount can be used, but, while it lines up- the removable bracket is located inside the engine mount. So you end up with (hard to picture) the bolt passing through the rear right engine mount, removable bracket, rear left engine mount, then rear left threaded engine bracket. This means the rear right engine mount sits outside the bracket, so I measured up to see if I could fabricate a bracket to fit outside the mount to give the engine more rigidity.
Sorry for the out of focus image, but you get the idea. I made the frame bracket first, with welded nuts, and then the removable bracket. The engine cases are tight to fit in, but "comfortable", the bracket can't sit too high, or it will foul the airbox. I checked this with my wooden airbox templates
 SDC11745 SDC11745
 SDC11747 SDC11747
I need to make a spacer between the engine mounts,and grind off the original bracket. The stock LC front engine bolt is the right length (supplied by Dusty) - that completes the engine mounts.
I ordered loads from Dave (Muttsnutts) this week, mainly ignition parts, Dave couldn't have been more helpful- another "top man" on this Forum.
Cheers, Mark
r |
|
firebird67
L plate rider.
 2 strokes forever 😍😍😍
Posts: 31
|
Post by firebird67 on Mar 8, 2020 23:05:24 GMT 1
Fantastic work keep it up can't wait to see this finished if it's anything like your 500lc it's going to be great 😊
|
|
|
|
Post by steve h on Mar 8, 2020 23:53:29 GMT 1
How the hell did you do that perfectly with a jigsaw? Looks like it was done by a computer laser thing. Brilliant work Mark. Alex It's because Mark is "hands on" It's a gift, being able to use your hands. And sadly in this techno world it's undervalued. Artist without a brush... |
|
|
|
Post by tsa on Mar 9, 2020 10:14:01 GMT 1
Mark Just a word on the airbox mate. Its not all about Volumes its also direction and air needs as straight an entry as it can get it hates hard turns. When you make the airbox try to make all the internal direction changes as rounded as you can and I mean large radii on the inside of the bend. This will help keep eddies down to a minimum and make jetting easier too. I know you arent after max power and the cc will generate its own midrange but the carbs need straight turbulent free air cuz if it doesnt carburate it it will make nothing.#
If I were doing it I would have a serperate feeds from an airbox under the sidepanels for the outer pair of carbs.
|
|
|
|
RD700LC
Mar 12, 2020 10:04:53 GMT 1
Post by yamark on Mar 12, 2020 10:04:53 GMT 1
Mark Just a word on the airbox mate. Its not all about Volumes its also direction and air needs as straight an entry as it can get it hates hard turns. When you make the airbox try to make all the internal direction changes as rounded as you can and I mean large radii on the inside of the bend. This will help keep eddies down to a minimum and make jetting easier too. I know you arent after max power and the cc will generate its own midrange but the carbs need straight turbulent free air cuz if it doesnt carburate it it will make nothing.# If I were doing it I would have a serperate feeds from an airbox under the sidepanels for the outer pair of carbs. Thanks Kenny for your info, I can certainly round off the internal passageways as much as possible. Your timing is perfect as I'm due to start the airbox next week.
Cheers, Mark |
|
|
|
RD700LC
Mar 14, 2020 14:39:15 GMT 1
Post by bezzer on Mar 14, 2020 14:39:15 GMT 1
Mark, I worry about how much air those end carbs will actually get at full bore but expect youve checked that. I say that as I did worry about the volume of the OEM LC airbox on my 421 and for that reason went for pods. The issue as ever with the LC is packaging as its a small bike with a shock absorber right where the airbox needs to go. I was thinking that you could possibly have a more normal shaped 'two' cyl box and then come around the frame spar and through the side panel with a curved rubber or plastic tube? Obviously it depends if youre using the oil tank and battery box etc. Hi Jon, hope your good. I researched this heavily on the triple, and have almost doubled the area of the passageways in the airbox. The passage feeding the inlet rubbers (carb to airbox) is over 6 times larger than the carb area (reed block side). I also measured the airbox volume on my H1 500 (very similar to the H2 750), and found the LC's standard airbox has over 6 times the volume!! The H1's and H2's seem to go alright . My understanding is the size of the airbox has an impact on midrange, two strokes like a smooth flow of air into the carbs, some pod filters (the ones with the end blanked off) make the air turbulent. I assume your beautiful 421 makes serious power- 80/90 HP. The 700LC will make hopefully 95/100 HP, but it's engine capacity will mean loads of midrange.
You are spot on with the shock absorber is in the way, and oil tank and battery box to spread side wards.
Your right, in that a smoother, straighter airflow would be achieved by ducting through the side panels.
For me the look of the bike is just as important as the performance.
My airbox also looks very much like a GS 1000, similar widths as well.
Cheers, Mark
Hi Mark, Hope this finds you well mate, fantastic to see the 700 at such an advanced stage!. I’m reading with great interest your airbox and oil pump fabrication/testing solutions, as these are the things causing me the most sleepless nights with mine! 😁. As ever, keep up the good work, as I know you will bud 👍🏻. All the best Iain |
|
|
|
Post by yamark on Mar 15, 2020 20:42:16 GMT 1
Quote Bezzer
Hi Mark, Hope this finds you well mate, fantastic to see the 700 at such an advanced stage!. I’m reading with great interest your airbox and oil pump fabrication/testing solutions, as these are the things causing me the most sleepless nights with mine! 😁.
As ever, keep up the good work, as I know you will bud 👍🏻.
I can chat through everything mate. As you know, with building an LC multi there are hard decisions to make where you have to compromise. Everything you change "ripples" it's way through the bike to affect something else.
What's important is how YOU envisage the bike that affects your choice- look, performance, handling, safety. That is my order. But you will always have peoples opinions, collect everyone's thoughts, research and work out the compromises you're happy with. Don't forget you never stop learning and there are people on the Forum who specialise in areas you working on- tap into their knowledge.
In the early stages of the triple, I had a few people saying, indirectly "but that's not how Yamaha intended the bike to be" Surely that's the whole point of what I'm trying to achieve .
Always phone or message me if your stuck on something mate, don't ever feel you are bothering me- you won't be.
Cheers, Mark
|
|
|
|
Post by yamark on Mar 15, 2020 21:03:46 GMT 1
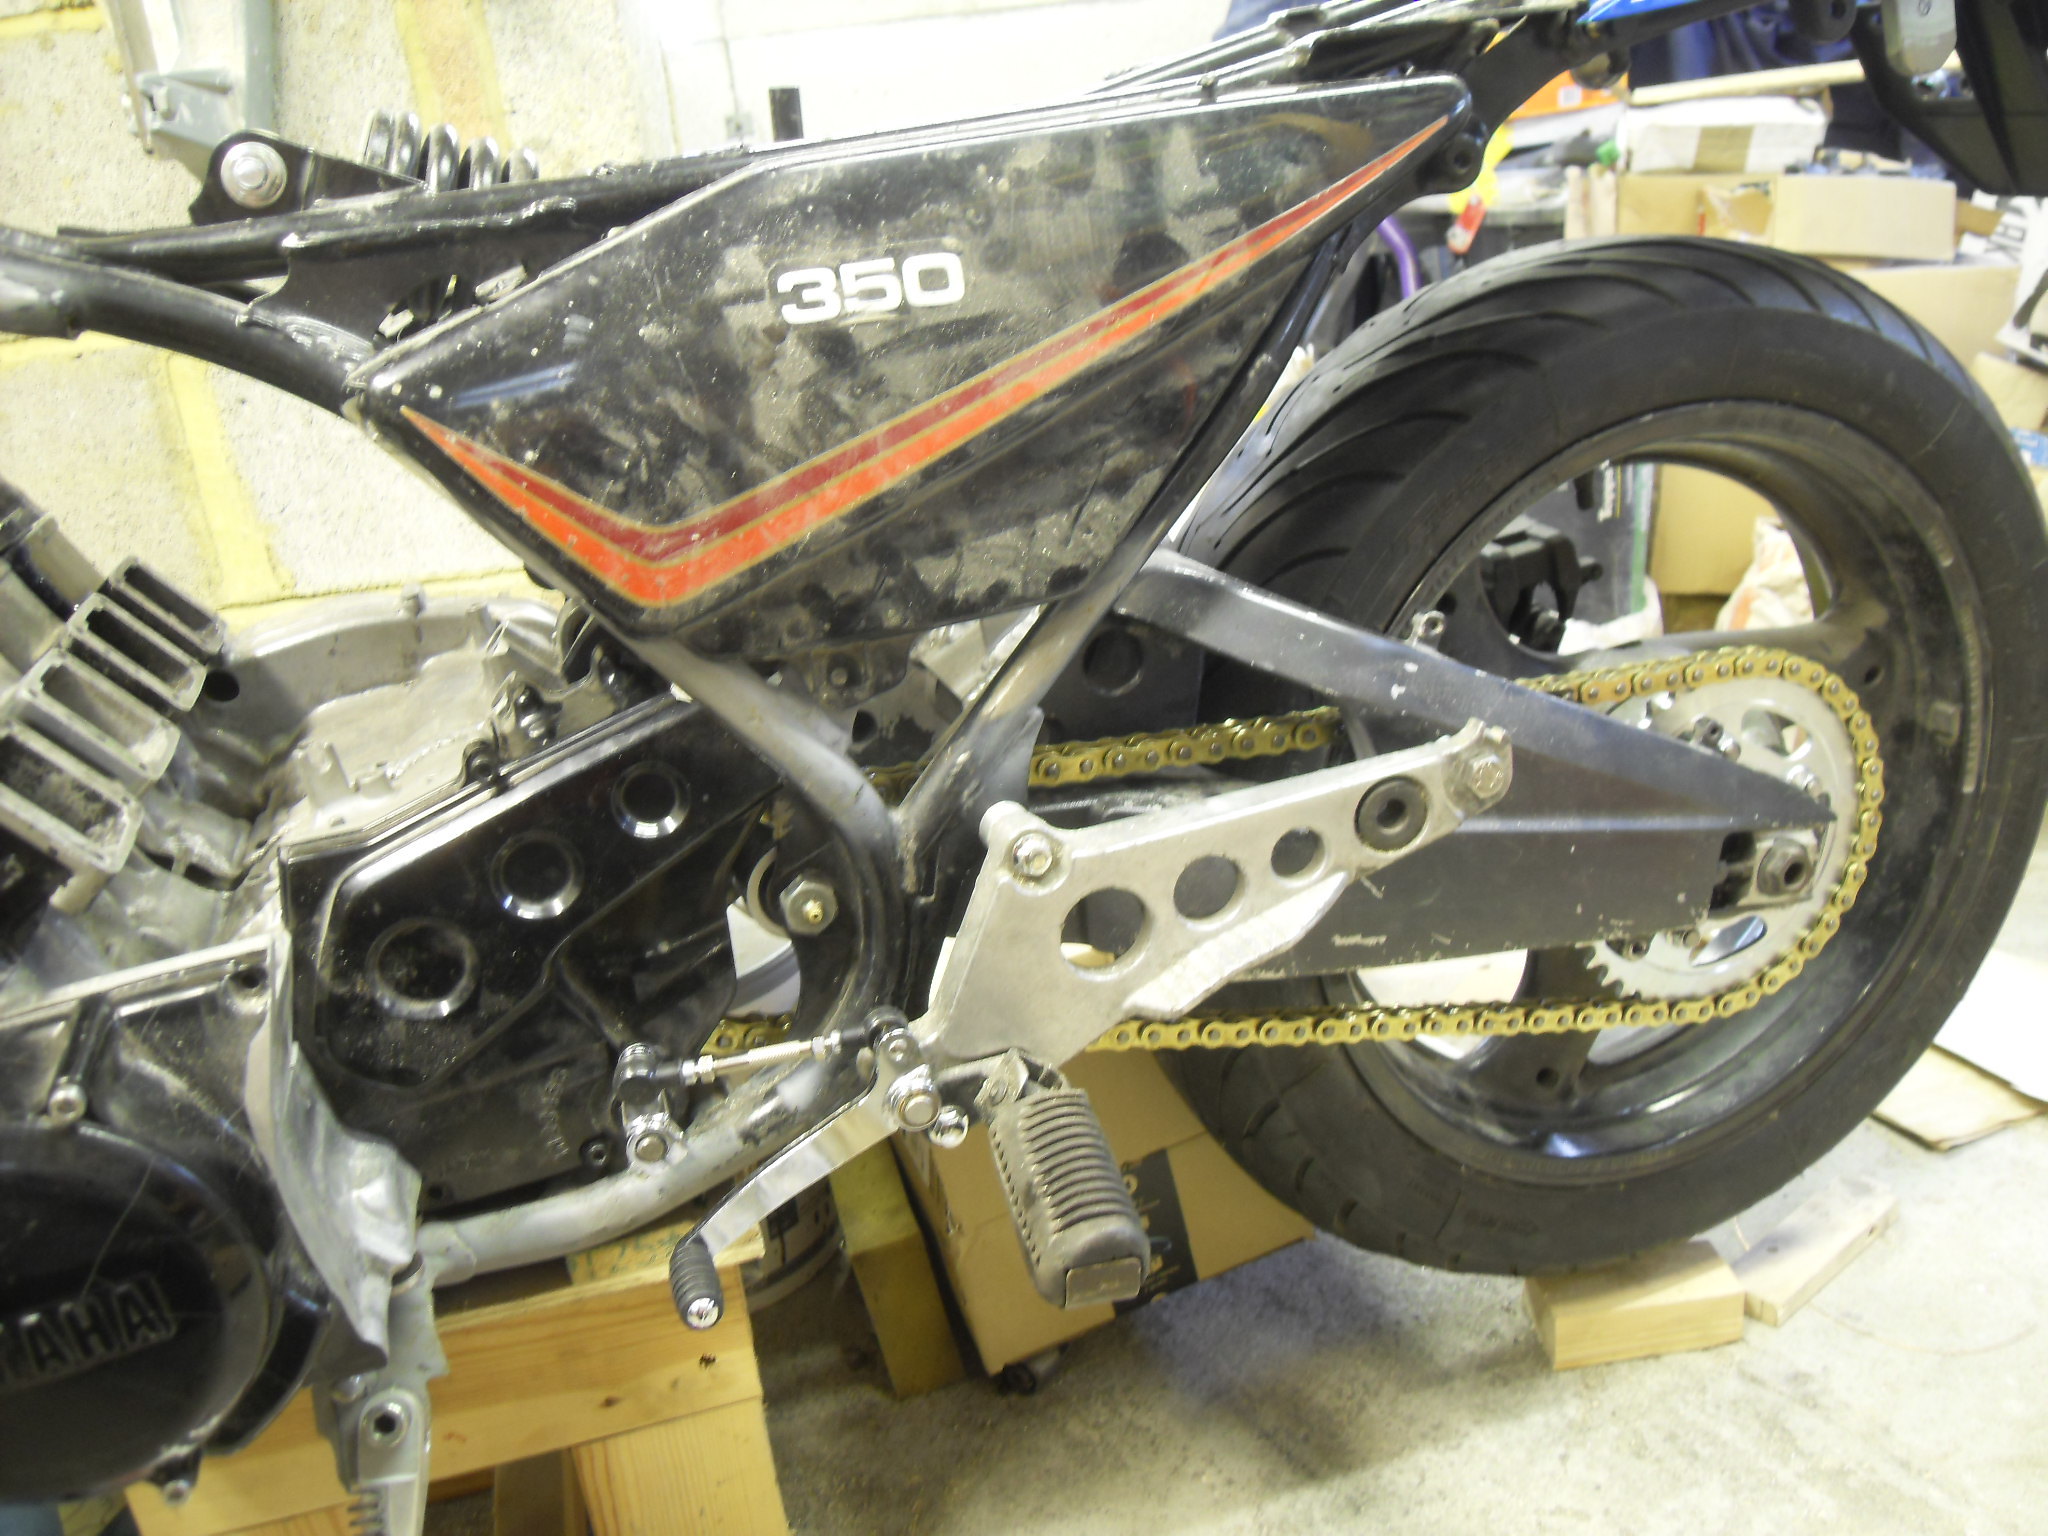
Rear mudguard
I've decided to copy the rear mudguard on the triple. With a 150 rear tyre, the stock LC rear muddy looks to narrow. So an XJ900 one is used.
First, I grind off the remains of the damaged indicator mount
 SDC11750 SDC11750
The XJ's mudguard being cut up
 SDC11751 SDC11751
Then shape it and drill a couple of holes
 SDC11752 SDC11752
I then made the mounting bracket and silver soldered a couple of nuts on
 SDC11753 SDC11753
The nearly finished article (I will shorten the mudguard and attach an LC reflector and bracket).
 SDC11754 SDC11754
Cheers, Mark
|
|
|
|
Post by yamark on Mar 22, 2020 21:24:46 GMT 1
For me, a major milestone happens when you have the dry build complete and the exhausts can be made. I chatted to Mick Abbey about exhausts and tuning a while back, and quickly realised the problems of having 4 exhausts on a relatively small bike. Mick will have to fabricate (from scratch) 2 pipes on both sides of the 700. The problem is the left side. Not only has he got the side stand bracket to route round (I've moved the side stand spring to the outside), the chain becomes a headache.
To give Mick the best chance of success, I cobble together the secondary drive. So first up is a temporary output shaft, with 1" diameter copper tube acting as spacers to get my sprocket in the right place.
 SDC11748 SDC11748
I then re assemble my engine cases, back in the frame and cut down the drive chain. I use a laser to check the chain alignment, so now Mick can route the left pipes with no "guess work". The bike has been with Mr Abbey for a few weeks now.
 SDC11749 SDC11749
I'm hoping the exhausts will be finished soon. Meanwhile, I've been working on my check valves for the oil pump, and started to sort the charging and ignition system.
Cheers, Mark |
|
|
|
Post by donkeychomp on Mar 22, 2020 23:46:48 GMT 1
Can't wait to see the pipes Mark!
Alex
|
|
|
|
Post by cbm on Mar 23, 2020 5:14:23 GMT 1
Can't wait to see the pipes Mark! Alex Me thinks neither can he 🤣🤣🤣 |
|
|
|
Post by bezzer on Mar 23, 2020 14:27:04 GMT 1
Looks the Biz, just mocked up Mark!, looking forward to another stunning special 👍🏻🤗.
|
|
|
|
Post by hudtm60 on Mar 24, 2020 4:55:15 GMT 1
legendary work Mark and your efforts in keeping us all up to speed is appreciated, even if I rarely understand it!
|
|
|
|
Post by hudtm60 on Mar 25, 2020 23:24:05 GMT 1
|
|
|
|
Post by JonW on Mar 26, 2020 0:28:38 GMT 1
Thanks for the scans Chris. What a bike that was, this one should be even better!
|
|
|
|
Post by cbm on Mar 26, 2020 7:50:02 GMT 1
Thanks for the scans Chris. What a bike that was, this one should be even better!  , it still "is" 🤷♂️ , it still "is" 🤷♂️ |
|
|
|
RD700LC
Mar 29, 2020 15:20:38 GMT 1
Post by yamark on Mar 29, 2020 15:20:38 GMT 1
And allow me to barge in to point our Mark’s last great creation, and my favourite special ever, got some more print in Practical Sportbikes. In the April 2020 10th anniversary issue, the journos voted for the top 10 Reader Specials they’ve seen in it’s 10 year lifetime. The 550LC triple got #6...clearly deserved #1 ...but considering the 100’s of specials (and most likely loads more money) it was up against...well played Mr Graham....well played indeed.    Cheers hudtm60, I'm not sure if they were in any order, but what the pleasing part for me was I was the only "special build of the year" to make their 10 favourites. They didn't run the competition in 2019 and this year(I assume). So my thinking is like boxing- I'm the reigning SBOTY champion
|
|
|
|
RD700LC
Mar 29, 2020 16:07:26 GMT 1
Post by hudtm60 on Mar 29, 2020 16:07:26 GMT 1
Yes! Long live the 550LC.
|
|
|
|
Post by yamark on Mar 29, 2020 22:38:47 GMT 1
Before the bike went to Mick Abbey, I measured the gearbox output shaft for it's spacers. For those that don't know, a new longer output shaft is made and this needs to be supported by a bearing, we call this the outrigger bearing. The outrigger bearing will need to have 2 spacers to be made. 1- between the left gearbox bearing spacer and outrigger bearing. 2- between the outrigger bearing and final drive sprocket.
So I get to work on my lathe, this is spacer 1 (I reduced the middle to save weight)
 SDC11755 SDC11755
And a picture of all the spacers that will be used, the top spacer will be kept (the factory one that bears against the oil seal)
 SDC11759 SDC11759
On my list of to do, is the final part of the oil pump. I chatted to Allen Millyard about the looming check valve problem I had and we thrashed out a solution, well mostly Allen So that's next week.
Cheers, Mark
|
|
|
|
Post by yamark on Apr 5, 2020 20:10:12 GMT 1
The RG500 oil pump has no check valves installed, so the plan is to fit inline check valves to the oil lines. The RG500 oil lines are a slightly different bore size to the 350LC. Remember the pump is RG, carbs are 31K. This influenced my decision to use inline valves, so they can accommodate the variation in bore size.
Check valves are 3mm OD, so I ordered some 3mm OD brass rod
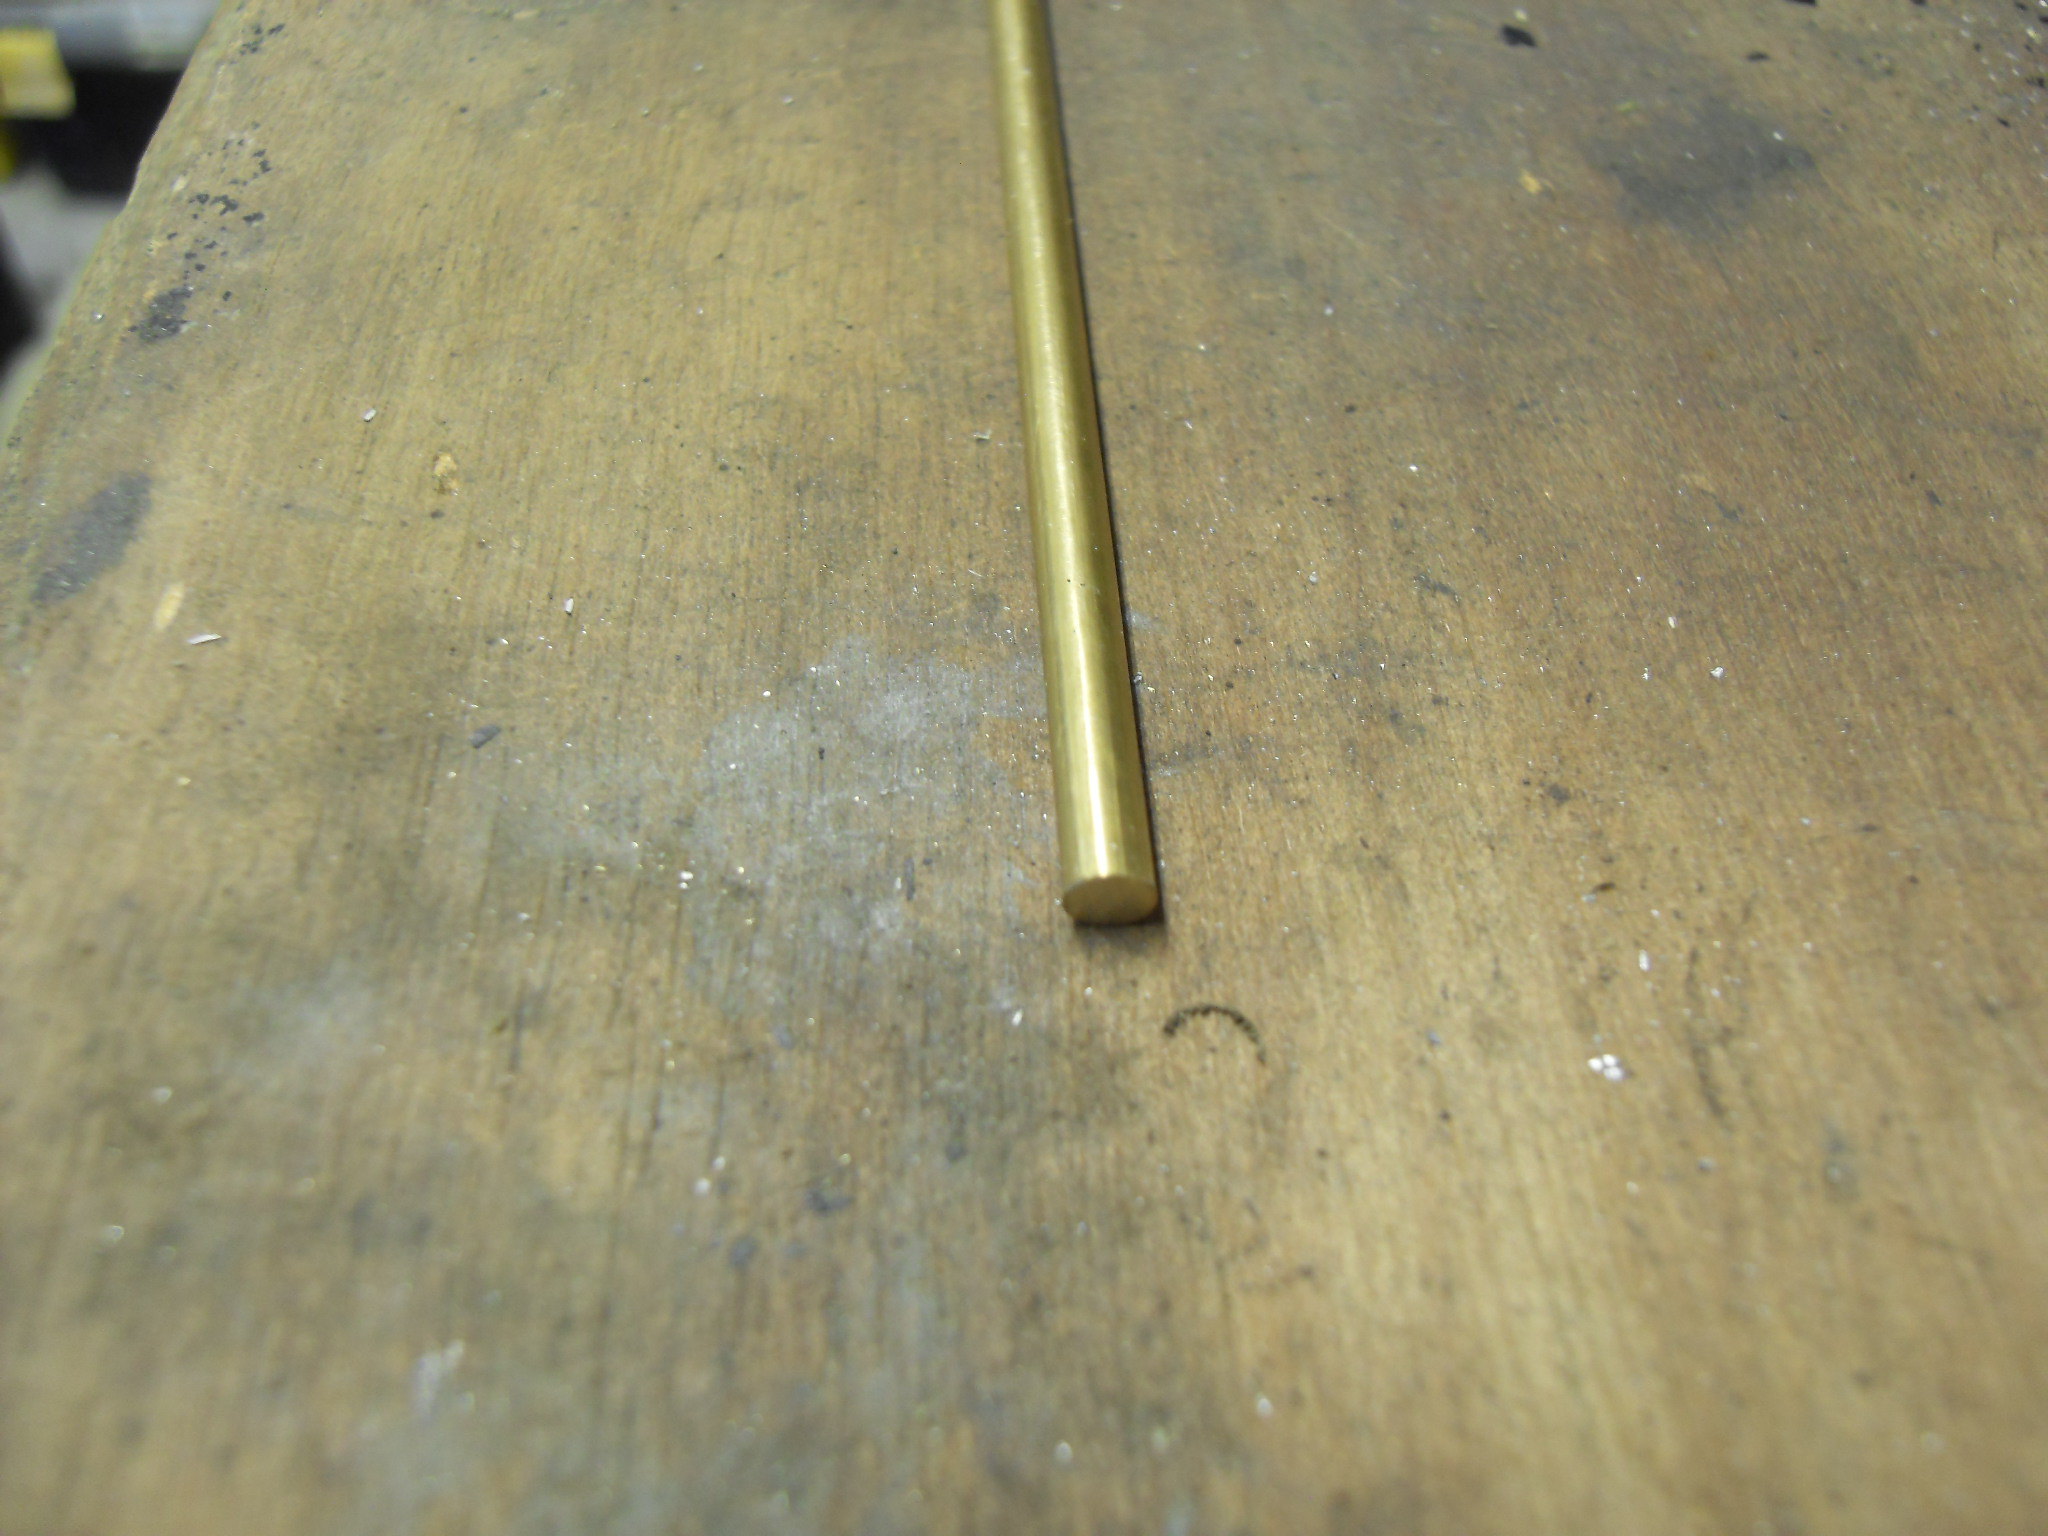 SDC11758 SDC11758
Next, I drilled through the rod making use of my lathe and then machined the correct diameter to accept the oil lines. I need 4 of each
 SDC11756 SDC11756
When I pushed a pipe into the outlet side of the check valve, it stops the ball bearing from moving and so remains shut! So I machined a groove and installed a circlip to stop the brass pipe from stopping the check valve from working
 SDC11757 SDC11757
Next, a few parts that I've been collecting, ready for when it all goes together
 SDC11760 SDC11760
 SDC11761 SDC11761
 SDC11762 SDC11762
With no way of working at the moment, I've had a lot more time in the workshop- getting loads done
Cheers, Mark
|
|
|
|
Post by yamaha341 on Apr 8, 2020 23:41:56 GMT 1
Hi Mark, good job on another cracking build. another great addition to your portfolio. where did you source your checkvalves or what else are they fitted to ? they look similar to the type of pipe fittings on my small air compressor I assume they are directional ? are these in place of the check valves as fitted to the Kawasaki oil lines . finally is Ellis making you another output shaft .. keep up the good work
|
|
|
|
Post by yamark on Apr 10, 2020 13:45:19 GMT 1
Hi Mark, good job on another cracking build. another great addition to your portfolio. where did you source your checkvalves or what else are they fitted to ? they look similar to the type of pipe fittings on my small air compressor I assume they are directional ? are these in place of the check valves as fitted to the Kawasaki oil lines . finally is Ellis making you another output shaft .. keep up the good work Thanks for your kind words, the valves were from Ebay, they are directional and when I messaged the seller, was told should work with oil. I am going to see if they alter the output of my oil pump. I have more valves on the way. The 250/350LC has check valves in the outlets of the oil pump. I believe check valves were never fitted to "thin bodied oil pumps". Kawasaki fitted them in the oil lines next to the banjo connections. The RG500 has (I think) check valves in the carbs, so I'm installing valves in the oil lines, to stop the oil from dribbling into the carbs.
I heard that Ellis is not working at the moment as he had a big accident. If that information is correct, I wish him a speedy full recovery. I have another engineering firm to make the shaft for me.
Cheers, Mark
|
|
|
|
Post by muttsnuts on Apr 10, 2020 13:54:57 GMT 1
Hi Mark, good job on another cracking build. another great addition to your portfolio. where did you source your checkvalves or what else are they fitted to ? they look similar to the type of pipe fittings on my small air compressor I assume they are directional ? are these in place of the check valves as fitted to the Kawasaki oil lines . finally is Ellis making you another output shaft .. keep up the good work Thanks for your kind words, the valves were from Ebay, they are directional and when I messaged the seller, was told should work with oil. I am going to see if they alter the output of my oil pump. I have more valves on the way. The 250/350LC has check valves in the outlets of the oil pump. I believe check valves were never fitted to "thin bodied oil pumps". Kawasaki fitted them in the oil lines next to the banjo connections. The RG500 has (I think) check valves in the carbs, so I'm installing valves in the oil lines, to stop the oil from dribbling into the carbs.
I heard that Ellis is not working at the moment as he had a big accident. If that information is correct, I wish him a speedy full recovery. I have another engineering firm to make the shaft for me.
Cheers, Mark
Mark you are correct, unfortunately Ellis is no longer able to do any machining, he had a big off at a race track last year (Aintree I think) and is no longer able to work, so his business has folded I think I've got to find somebody else now to make some gears for me, another job to my list to sort ! BTW - top work as always |
|
|
|
Post by yamark on Apr 12, 2020 20:32:59 GMT 1
A while back, I decided to go with a screamer, not a big bang engine. For those of you that aren't sure of what I mean, most people when building a 4 cylinder LC will keep the 180 deg firing interval. So 2 pistons are at TDC (the top) and at the same time 2 pistons at BDC (the bottom), this is big bang. This makes the ignition easier to sort out as you only need 1 pick up coil and 2 magnets in the flywheel.
For the screamer engine, I'll have a 90 deg firing interval, so no 2 pistons will be at TDC together. My firing order will be 1-4-2-3 (I think), so as number 1 piston fires, number 4 piston will be 90 deg behind. When number 4 fires, number 2 will be 90 deg behind etc.
To make this happen, I'll be using a power dynamo, ignitech, 2 pick ups, 4 secondary coils. I ran through my ideas with Dave (Muttsnuts), and he supplied parts for the ignition, clutch and a rear shock.
Clutch first, billet basket and lock up conversion, also my rear shock.
 SDC11765 SDC11765
Ignitech, pre programmed by Dave
 SDC11764 SDC11764
Generator, regulator/rectifier, coils and the 2nd pick up. Two things to note- the 2nd mounting plate for the pick up, supplied by Graham King (top man), and the Power Dynamo is for a YPVS as I don't need source coils(or charge coils if you prefer).
 SDC11763 SDC11763
So the first job was to mount the 2nd pick up, 90 degrees anticlockwise to the existing pick up. Dismantling starts!
 SDC11766 SDC11766
I'll be asking questions later
Cheers, Mark
|
|
|
|
Post by yamaha341 on Apr 12, 2020 21:08:26 GMT 1
Thanks Mark for the answer re oil line checkvalves, after I sent you that message midweek I came across a classic forum racing link that said ellis had injured himself, and he was not doing any work for the time. I was going to post again about ellis, but muttsnuts clears it up . I too hope he is on the mend as I didnt realize how bad he was. Who is making your gearbox shaft now? and did you choose another engineering company because ellis couldnt help with the longer version needed this time..... thanks
|
|
|
|
Post by donkeychomp on Apr 12, 2020 22:05:37 GMT 1
I keep on forgetting just how much stuff needs doubling up on this build. Coils, pipes, carbs...keep it up Mark!
Alex
|
|


 .
.


 , it still "is" 🤷♂️
