firebird67
L plate rider.
 2 strokes forever 😍😍😍
Posts: 31
|
Post by firebird67 on Oct 11, 2018 15:27:57 GMT 1
Looks cool love the slotted chain adjusters 👍
|
|
|
|
Post by dereckerick on Oct 11, 2018 16:35:38 GMT 1
As ever, just a perfect job!! Bit of shine and a bit of carbon, right up my street  |
|
|
|
Post by wallcraft on Oct 11, 2018 21:06:39 GMT 1
Cheers mate Fitted the rear brake switch and found the correct bolt for the front torque arm mount. Also fitted the brake rod. Bike moved from shed to garage now for the winter ( a lot warmer in the garage !!) 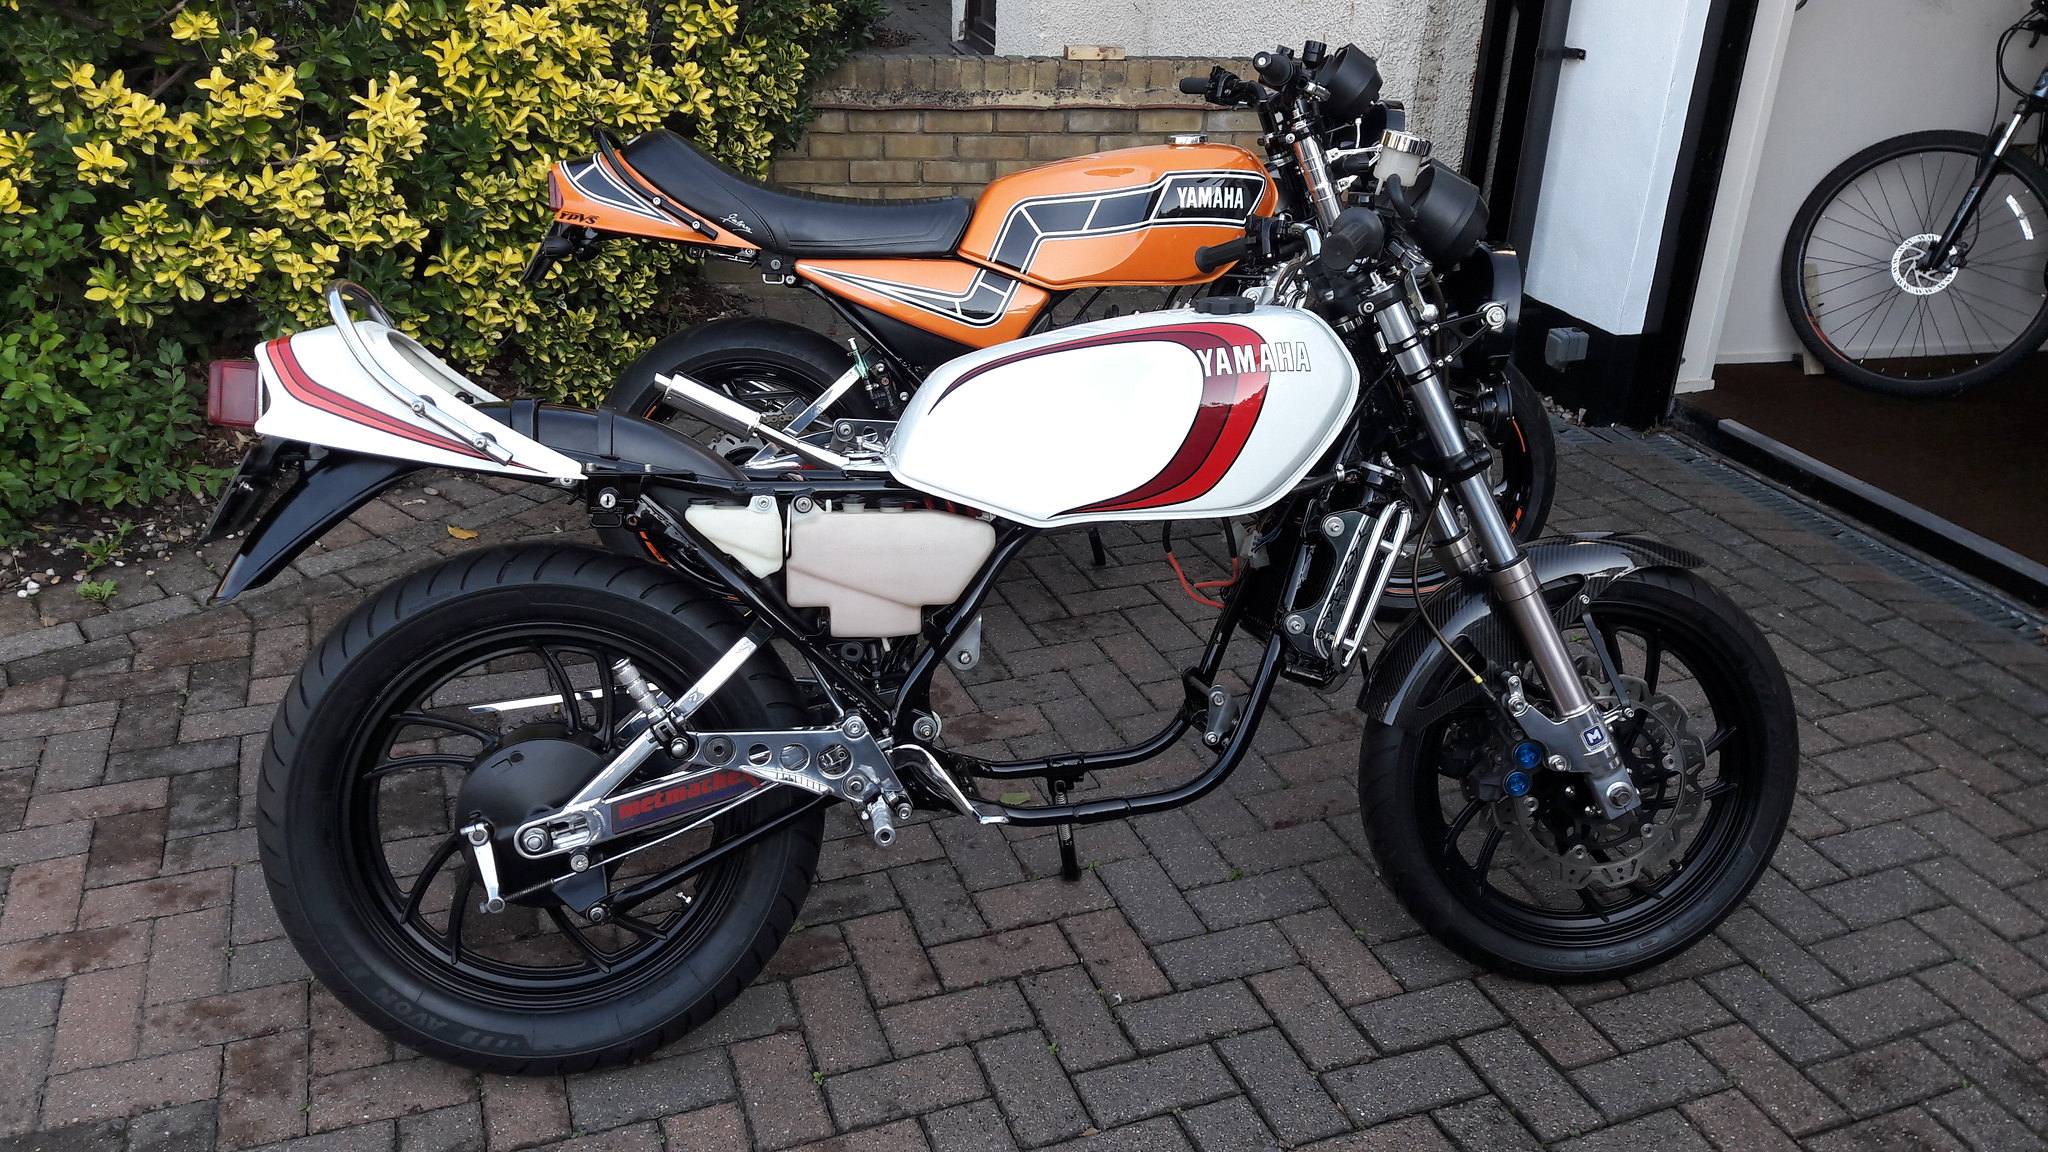 20181010_161415 20181010_161415 by David Miller, on Flickr Dusty The swinger contrast nicely with the all black wheels. Looks like an oversize tyre on the back? Mark |
|
|
|
Post by donkeychomp on Oct 11, 2018 22:53:54 GMT 1
Great pic Dusty! I know you don't like it but I think the front mudguard is brilliant Alex |
|
|
|
Post by dusty350 on Oct 12, 2018 7:25:24 GMT 1
Hi Alex It's grown on me - I would still prefer it to match the rest of the bodywork, as I think it gives it balance, but it looks better now I have shortened it at the back. I certainly won't bother changing it. Dusty |
|
|
|
Post by dusty350 on Oct 12, 2018 21:02:55 GMT 1
Starting to gear up for the engine build now. The bike came with the engine dismantled and in boxes. Emptied one of the boxes today to see what I've got; 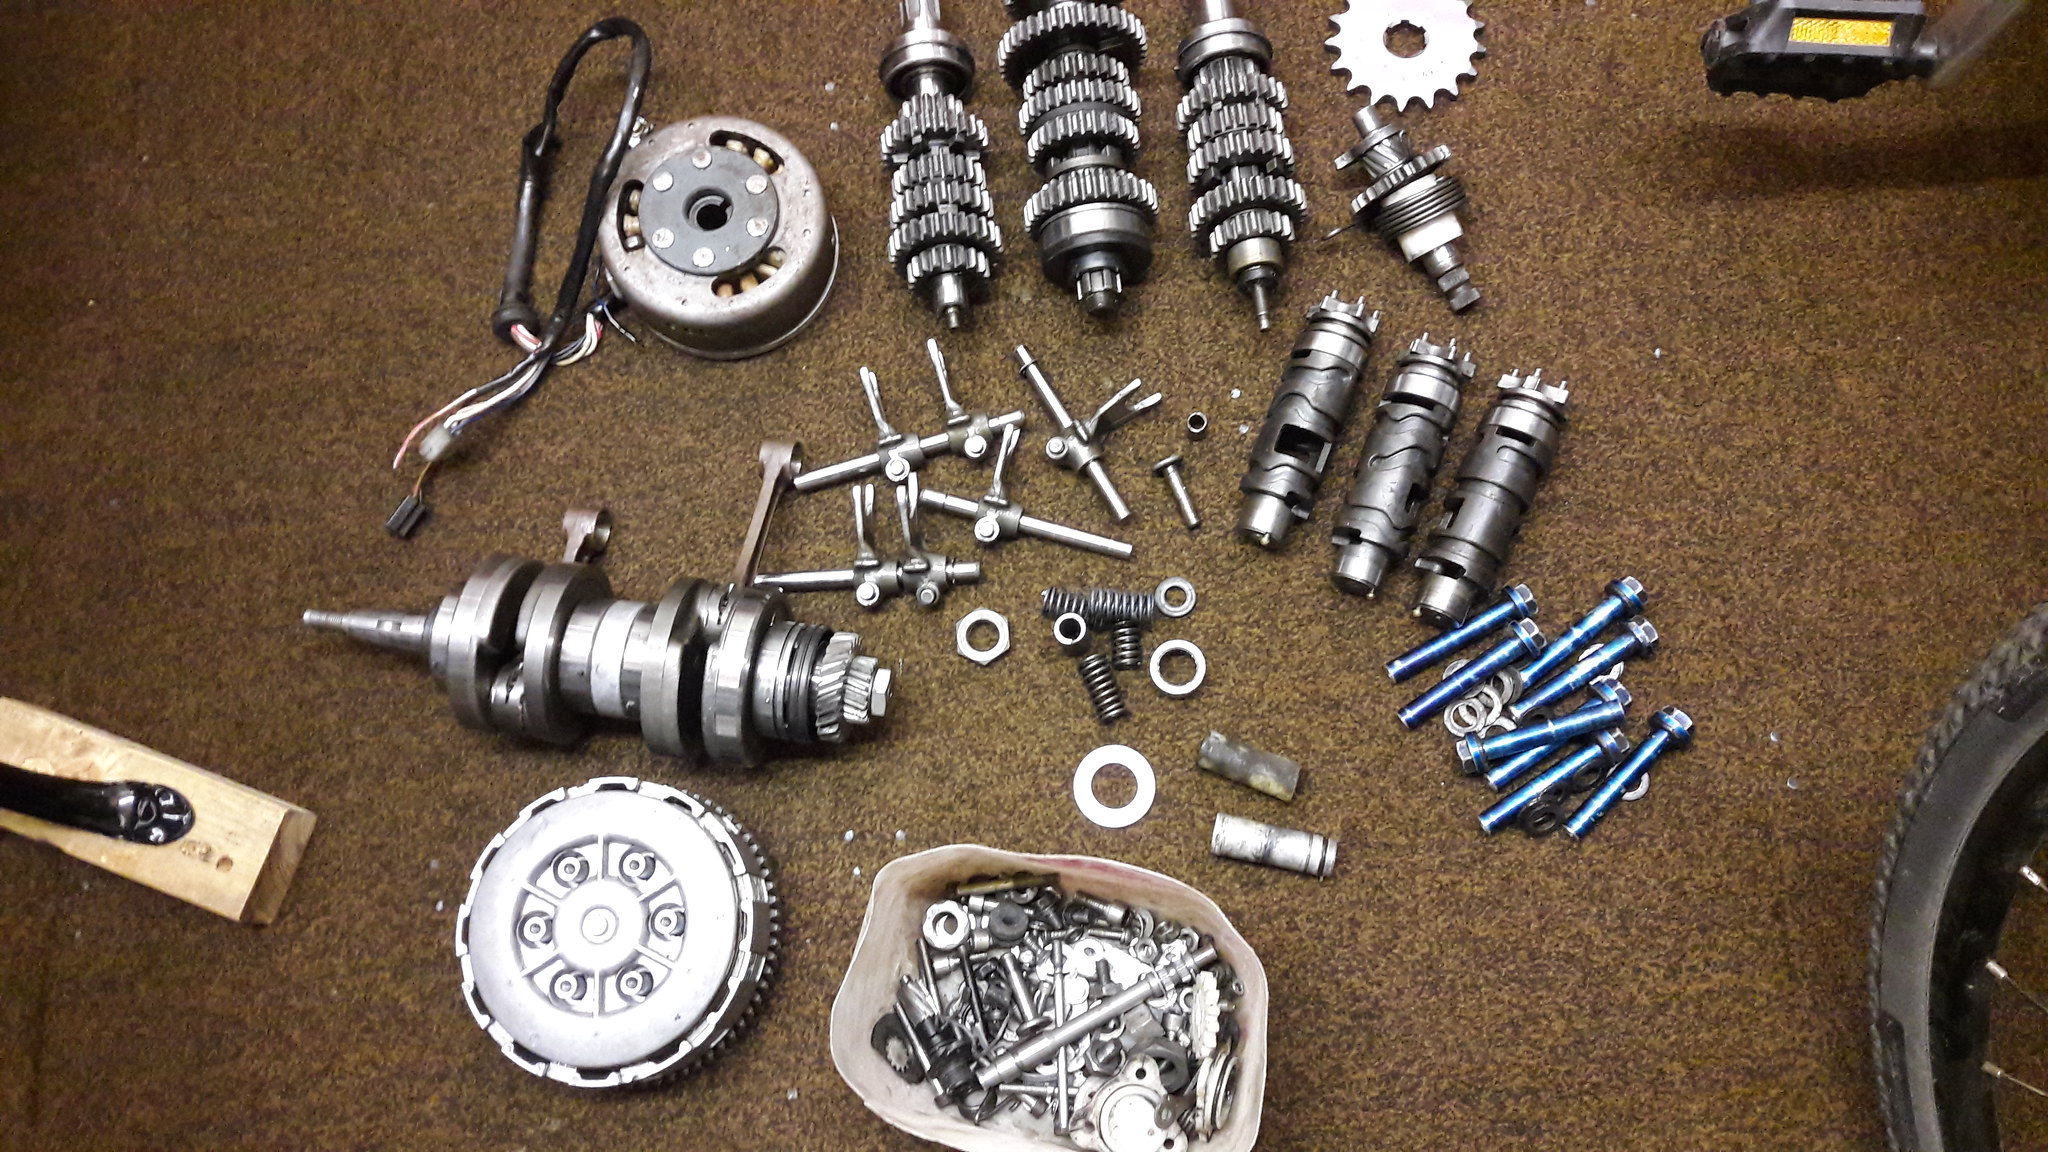 20181012_203142 20181012_203142 by David Miller, on Flickr Before I took that pic, I had to remove the sprocket from the output shaft as the bike had been dismantled with the sprocket in place. I know why - it was unbelievably tight !! I ended up cutting the nut off; 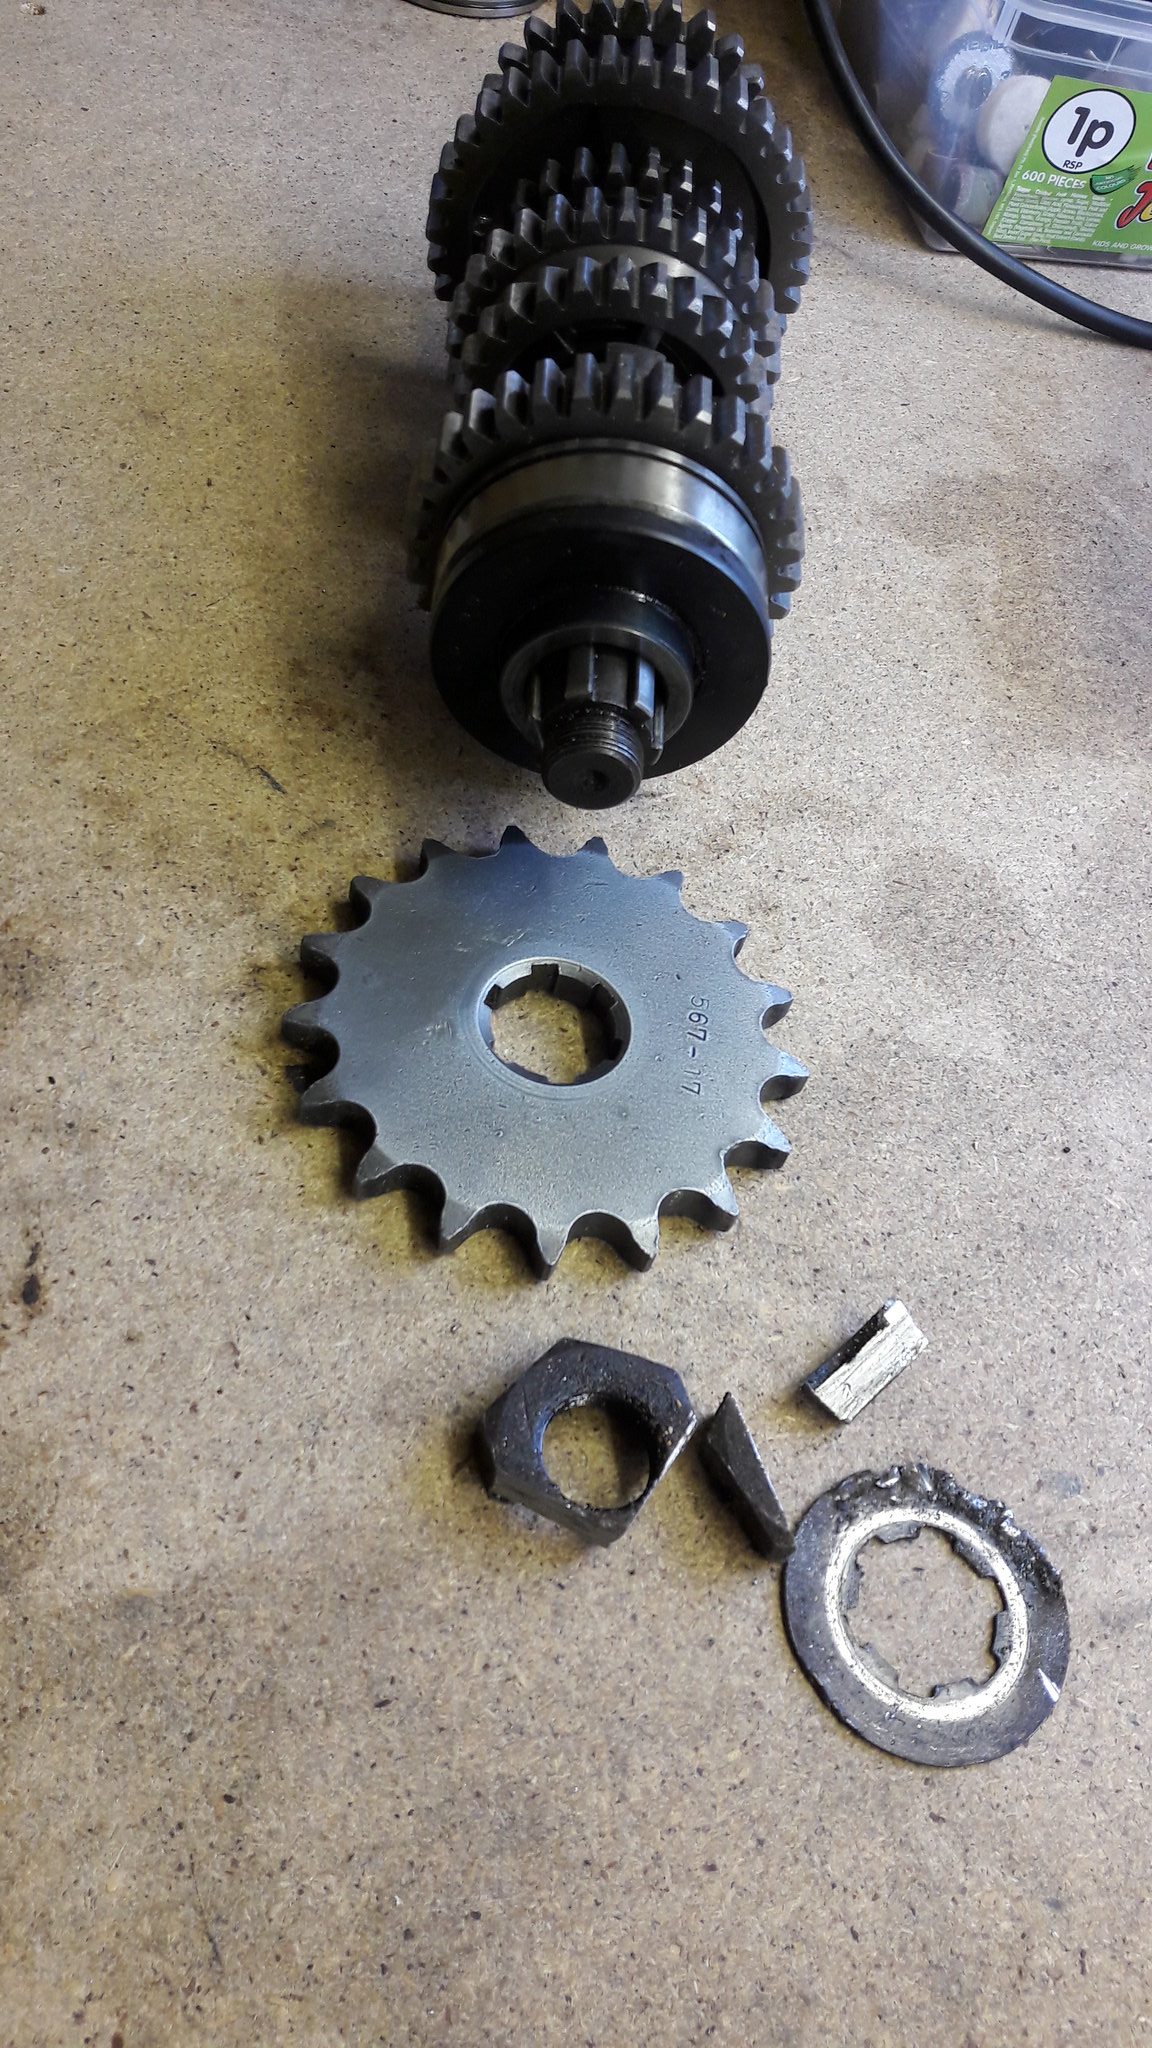 20181012_163129 20181012_163129 by David Miller, on Flickr Fairly painless and I have a spare sprocket nut. The crankcases have already been vapour blasted - apparently the reason it was stripped down, so that has saved me a job. The crank has, supposedly, been rebuilt but I will drop into Pjme to get it checked. It will get new seals anyway. Barrels are the 375 conversion which I'm not going to use now - I bought a pair of standard 350 barrels so will use those with a NOS head that I have and some chromed headbolts I found in a box. I had planned to build my Ypvs engine for the Café Racer bike first, and bought a load of parts for it, but I will now use them on this engine. Luckily 3 out of 4 gearbox bearings are the same, as is the gear change shaft, neutral switch and a few other bits I bought. Providing the crank is ok, then I can get a bottom end built fairly readily. I'm also going to fit the Mitaka clutch basket that was destined for the pv - I will get another one when I build that engine. Dusty |
|
|
|
Post by dusty350 on Oct 18, 2018 18:56:37 GMT 1
Picked some parts up from Norbo whilst at Stafford on Saturday. Biggest part to fit was the ally torque arm;  20181018_111305 20181018_111305 by David Miller, on Flickr Also got some parts for the airbox and a billet trip knob that completes the clocks. I also bought some nice Pv carbs from Shaun, and I will be using those instead of the 28mm Mikunis that originally came with the 375 top end. I've been through my parts lists now, and I have everything to rebuild the bottom end, apart from the crank which I need to get checked before I fit it. Not sure whether to do a separate engine build thread like before, or just include it in this thread ? I suppose a separate thread will be easier to reference in the future. Dusty |
|
|
|
Post by wallcraft on Oct 18, 2018 20:59:33 GMT 1
Starting to gear up for the engine build now. The bike came with the engine dismantled and in boxes. Emptied one of the boxes today to see what I've got; 20181012_203142 by David Miller, on Flickr Before I took that pic, I had to remove the sprocket from the output shaft as the bike had been dismantled with the sprocket in place. I know why - it was unbelievably tight !! I ended up cutting the nut off; 20181012_163129 by David Miller, on Flickr Fairly painless and I have a spare sprocket nut. The crankcases have already been vapour blasted - apparently the reason it was stripped down, so that has saved me a job. The crank has, supposedly, been rebuilt but I will drop into Pjme to get it checked. It will get new seals anyway. Barrels are the 375 conversion which I'm not going to use now - I bought a pair of standard 350 barrels so will use those with a NOS head that I have and some chromed headbolts I found in a box. I had planned to build my Ypvs engine for the Café Racer bike first, and bought a load of parts for it, but I will now use them on this engine. Luckily 3 out of 4 gearbox bearings are the same, as is the gear change shaft, neutral switch and a few other bits I bought. Providing the crank is ok, then I can get a bottom end built fairly readily. I'm also going to fit the Mitaka clutch basket that was destined for the pv - I will get another one when I build that engine. Dusty Hi Dusty, which gearbox bearing is different? Mark |
|
|
|
Post by dusty350 on Oct 19, 2018 8:19:27 GMT 1
Hi Mark
When i cross referenced the lc gearbox bearings against the pv, the fiche showed the input shaft bearing on the generator side as a different part number. I have since found that the lc part number has superceded to the pv number, according to Fowlers, so all 4 main gearbox bearing are the same between Lc and Pv 😉
I originally thought the differing part numbers may be down to the way the clutch actuation differs between the 2 models but its just a superceded part😁
Dusty
|
|
|
|
Post by muttsnuts on Oct 19, 2018 9:39:10 GMT 1
I was going to say that all 4 are the same between the models as I stock all of them and fit the same bearings to both engines, I had to go and double check !
|
|
|
|
Post by dusty350 on Oct 19, 2018 16:24:11 GMT 1
The last set of bearings I ordered - only a year or so ago, had all the original Lc part numbers - that's what threw me. So they could only have changed that part number recently, unless I got an old packet that had sat on a shelf for years ! Dusty |
|
|
|
Post by aid22 on Nov 8, 2018 12:19:24 GMT 1
Busy week, so haven't done loads, but did refurb the rad. It was in pretty good nic anyway, but I gave it a good wash inside and out after giving the paint a key with some fine sanding blocks. Resprayed it in gloss black, found some better rad guard spacers, polished up the rad guard, and fitted the 2 polished side plates that came in a box of spares; 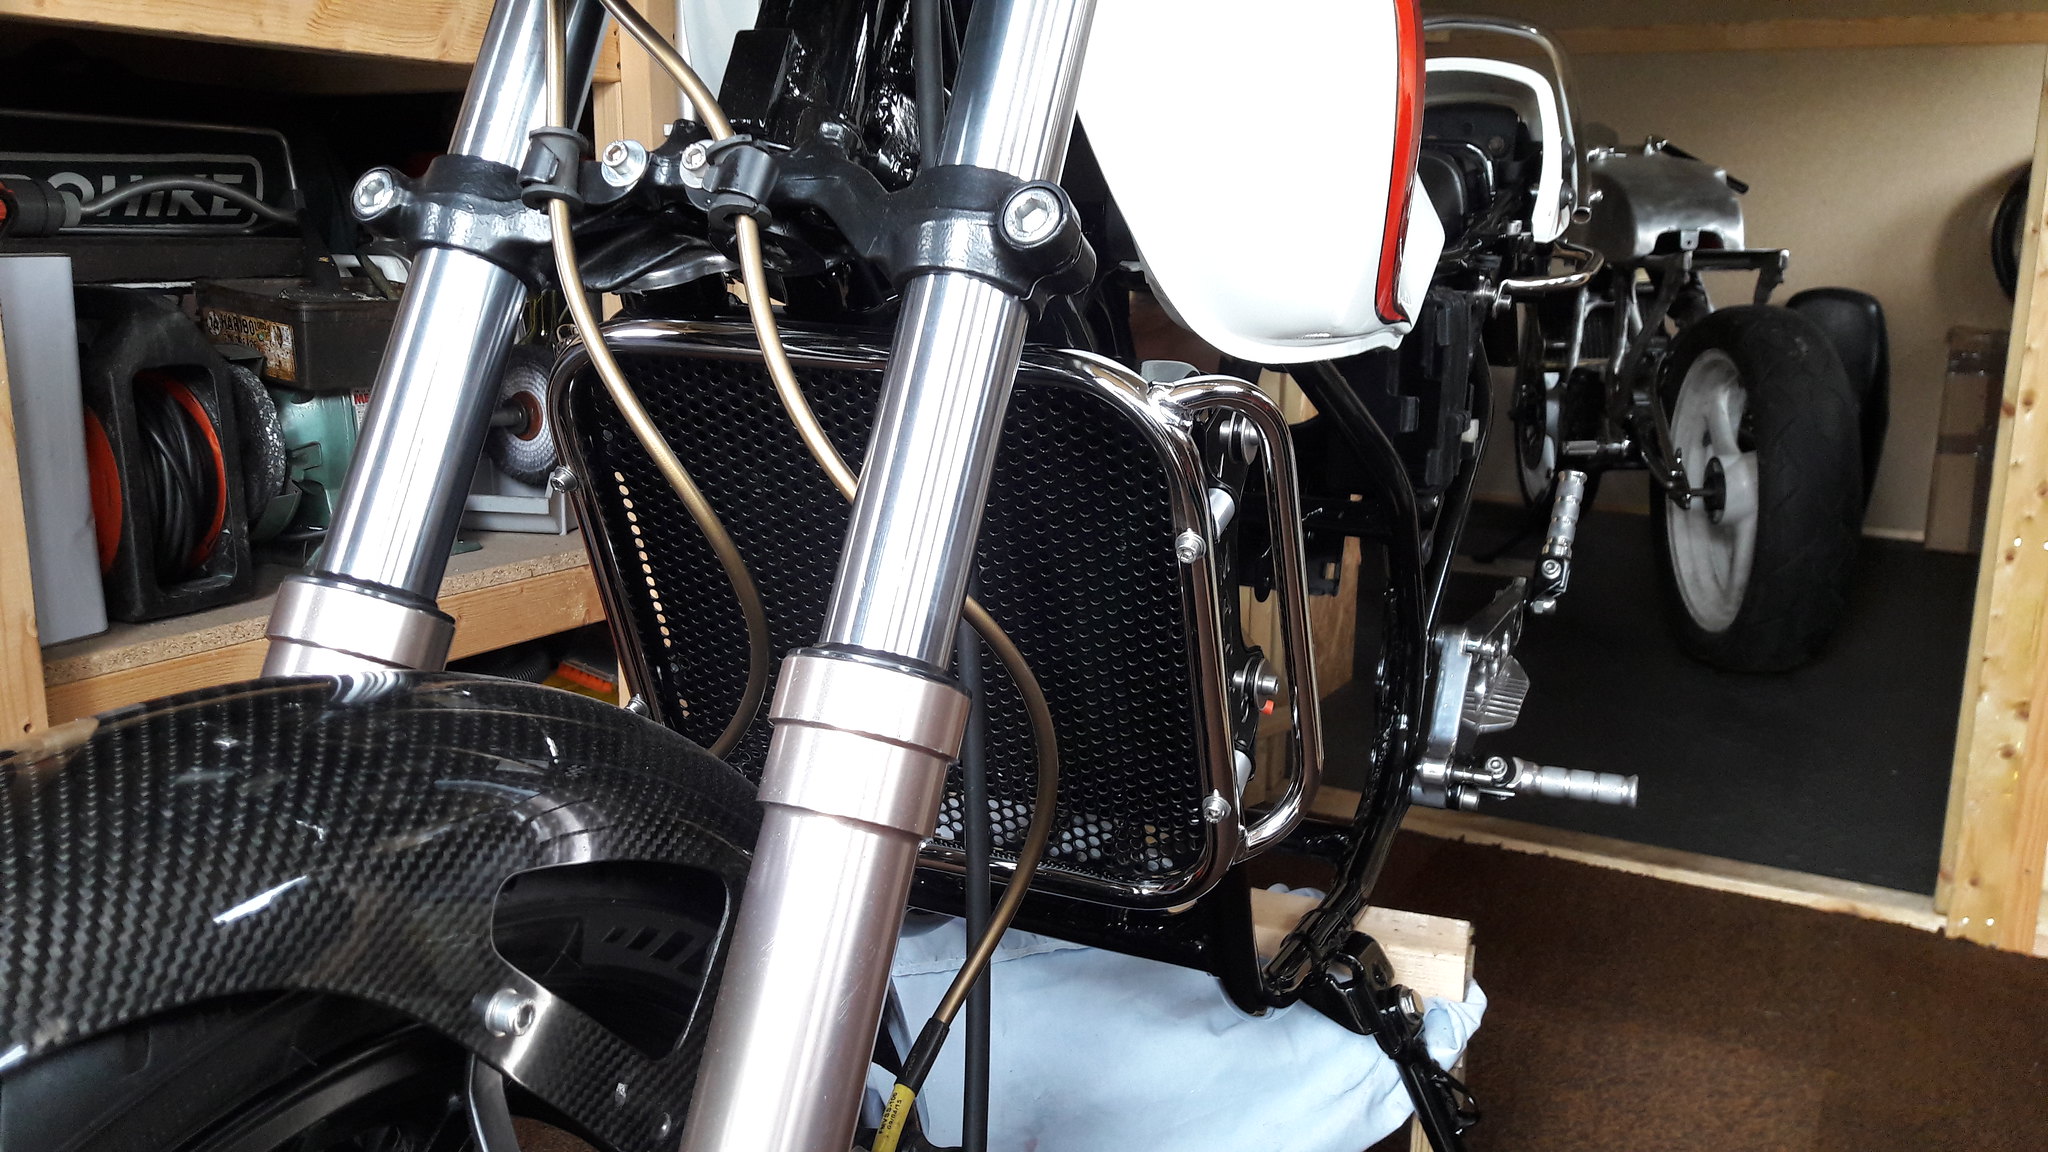 20180912_161110 20180912_161110 by David Miller, on Flickr  20180912_161021 20180912_161021 by David Miller, on Flickr 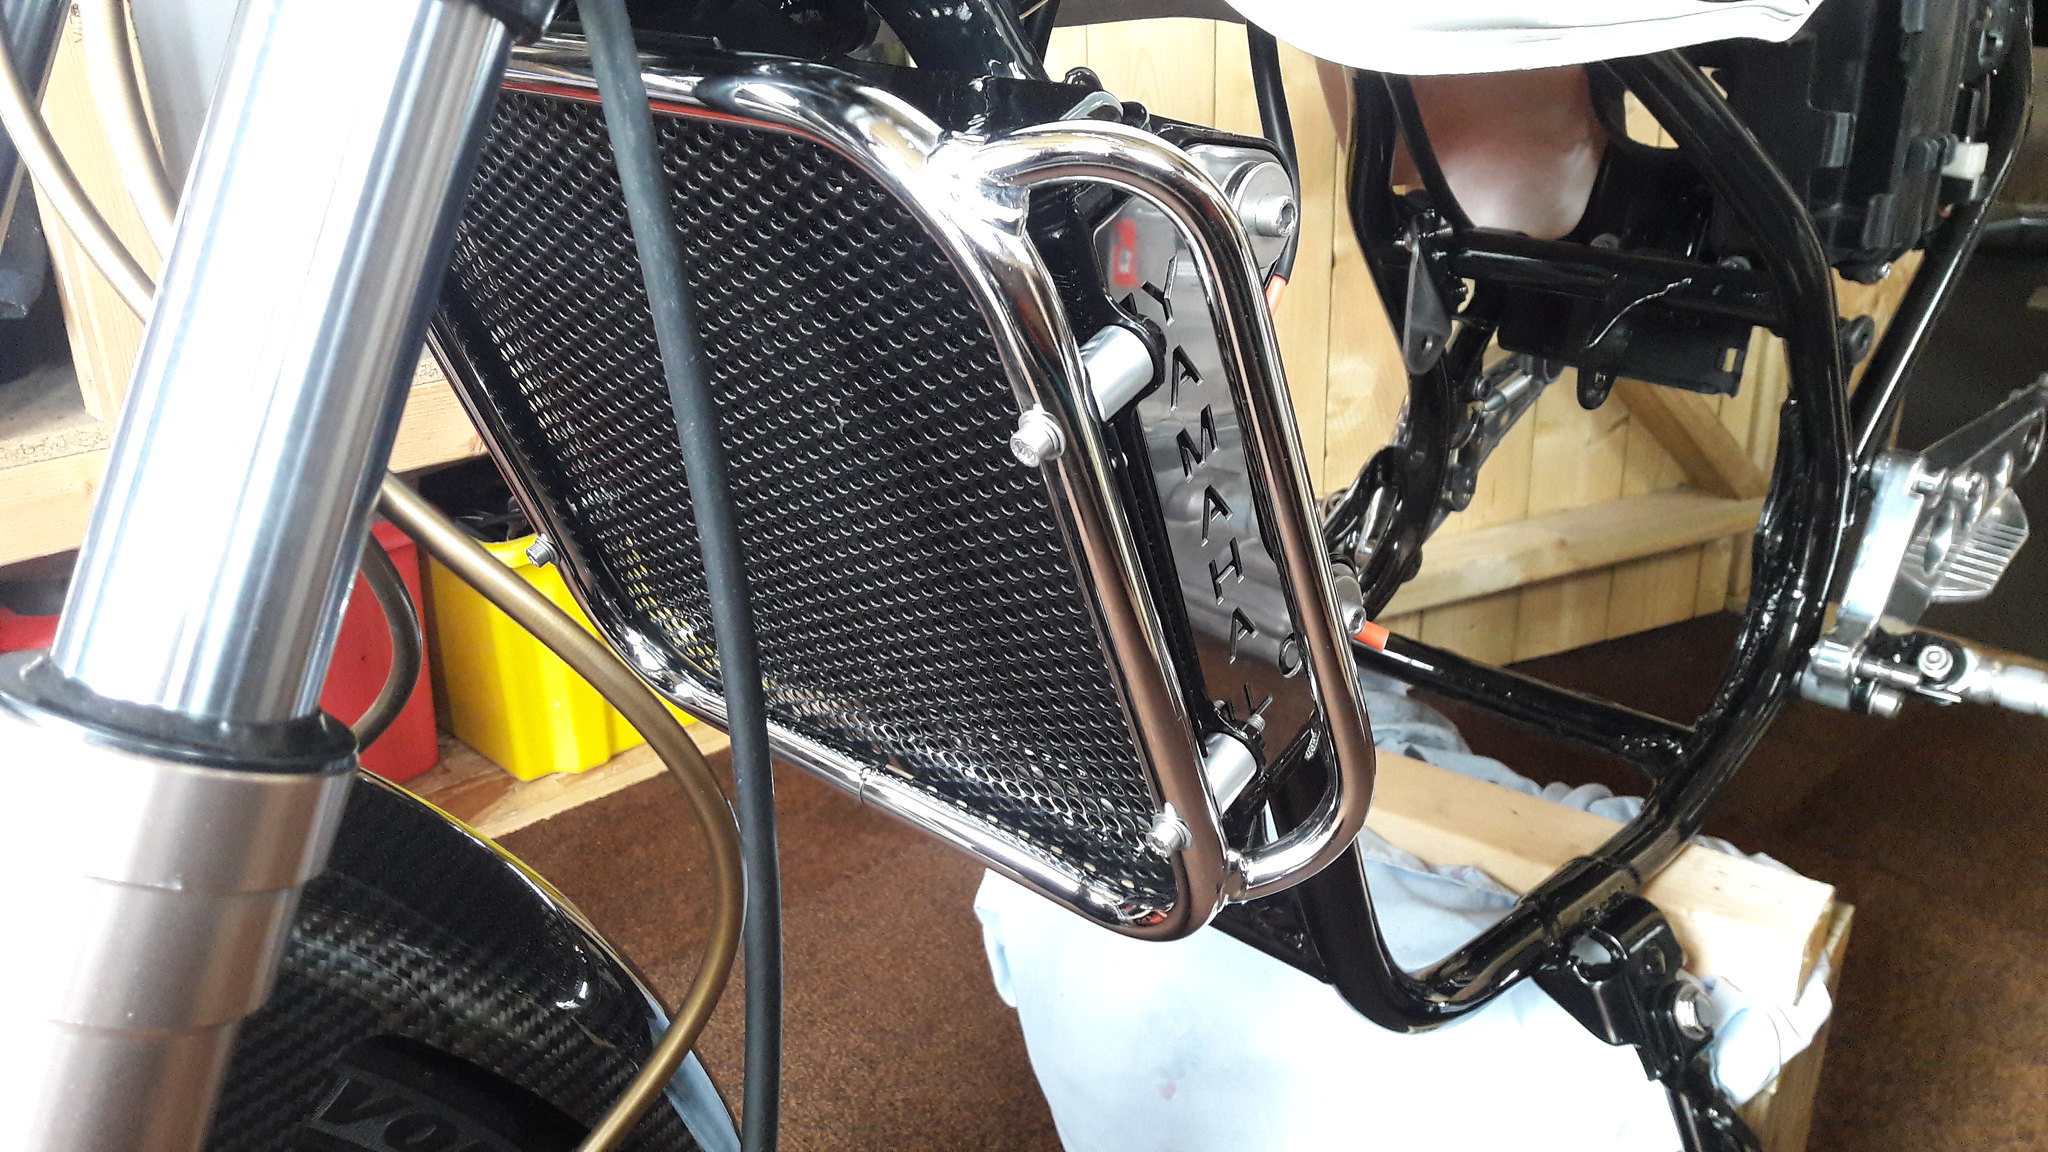 20180912_161008 20180912_161008 by David Miller, on Flickr Wouldn't normally fit something like those plates but I think they look ok. Next job is to make a plate to mount some horns to. Dusty Hi Dusty, Do you know where I could get some of those rad plates? Years ago Foxy John,(LC Club), was selling them. I have tried to contact him but no reply. Thanks, Aid. |
|
|
|
Post by dusty350 on Nov 8, 2018 12:59:22 GMT 1
Hi Aid Pretty sure Norbo lists a few different styles in his shop Dusty |
|
|
|
Post by aid22 on Nov 8, 2018 13:54:21 GMT 1
Oh yes, I have seen those but it is the ones you have that I'm after.
Thanks, Aid.
|
|
|
|
Post by dusty350 on Nov 8, 2018 14:15:21 GMT 1
Ah, in that case I wouldn't know I'm afraid. They were in a box that came with other spares when I bought the bike. Didn't know if they were going to suit the bike but I think they do. Dusty |
|
|
|
Post by morgy on Nov 8, 2018 15:23:11 GMT 1
Your flying along.. looking great as always...
|
|
|
|
Post by philmill on Nov 8, 2018 16:28:00 GMT 1
Looking awesome, she's going to be another thing of beauty thats for sure.
Phil
|
|
|
|
Post by dusty350 on Dec 29, 2018 16:30:38 GMT 1
Update time. Engine rebuild thread is virtually complete now so the updates will be on this thread. Engine went into the frame today; 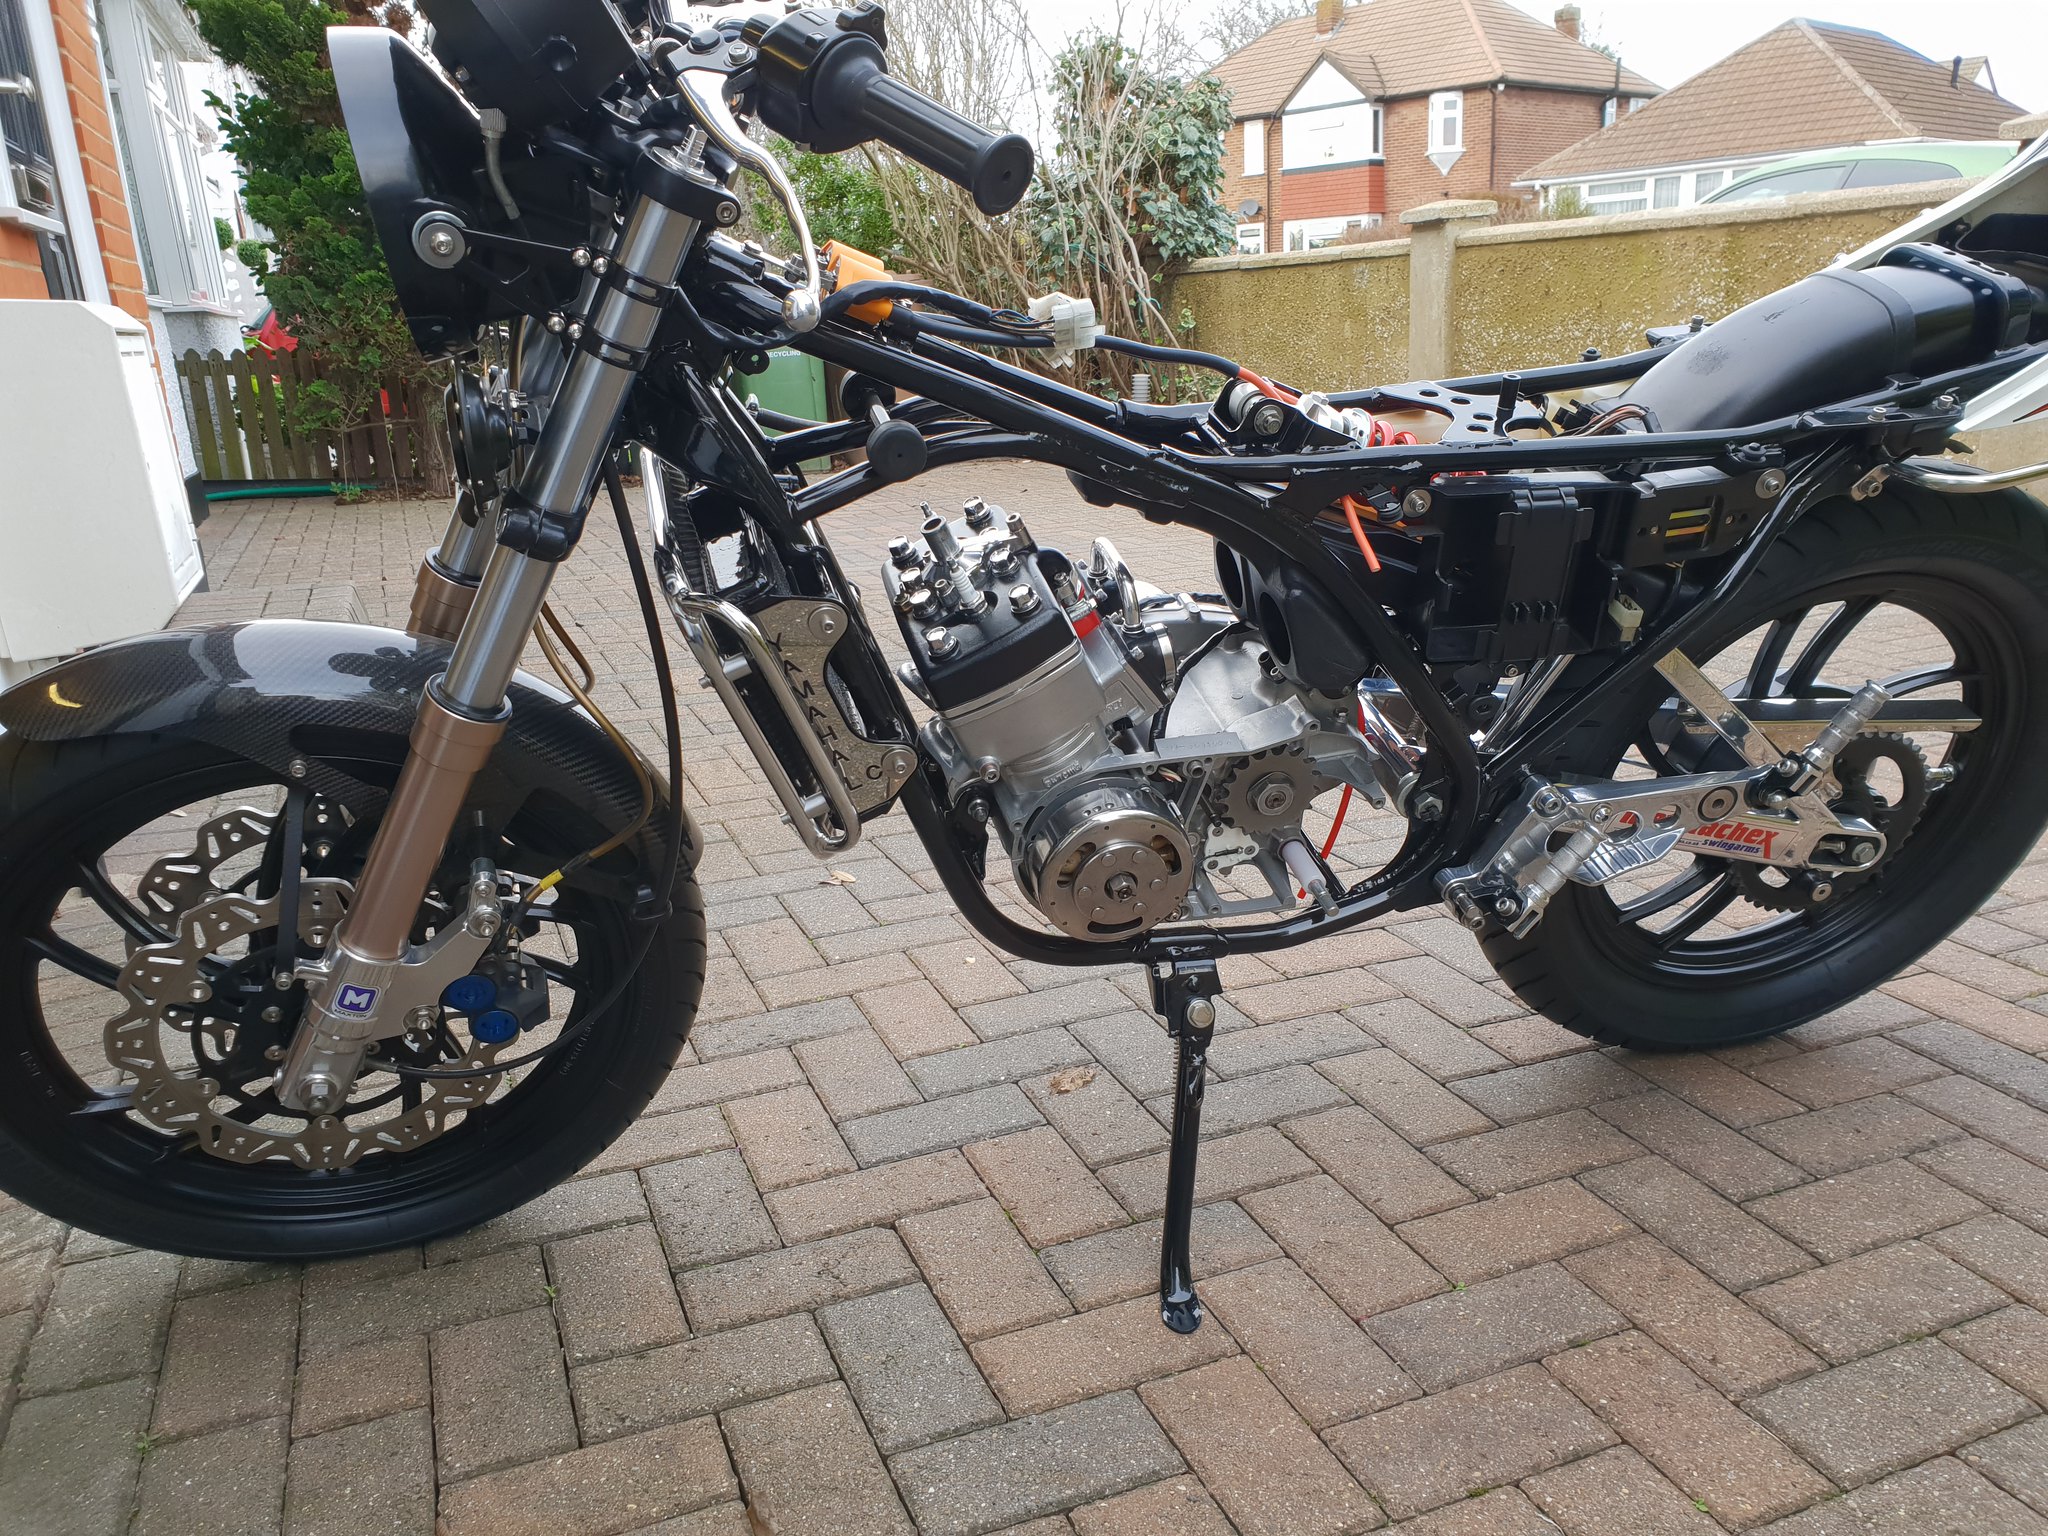 20181229_133401 20181229_133401 by David Miller, on Flickr 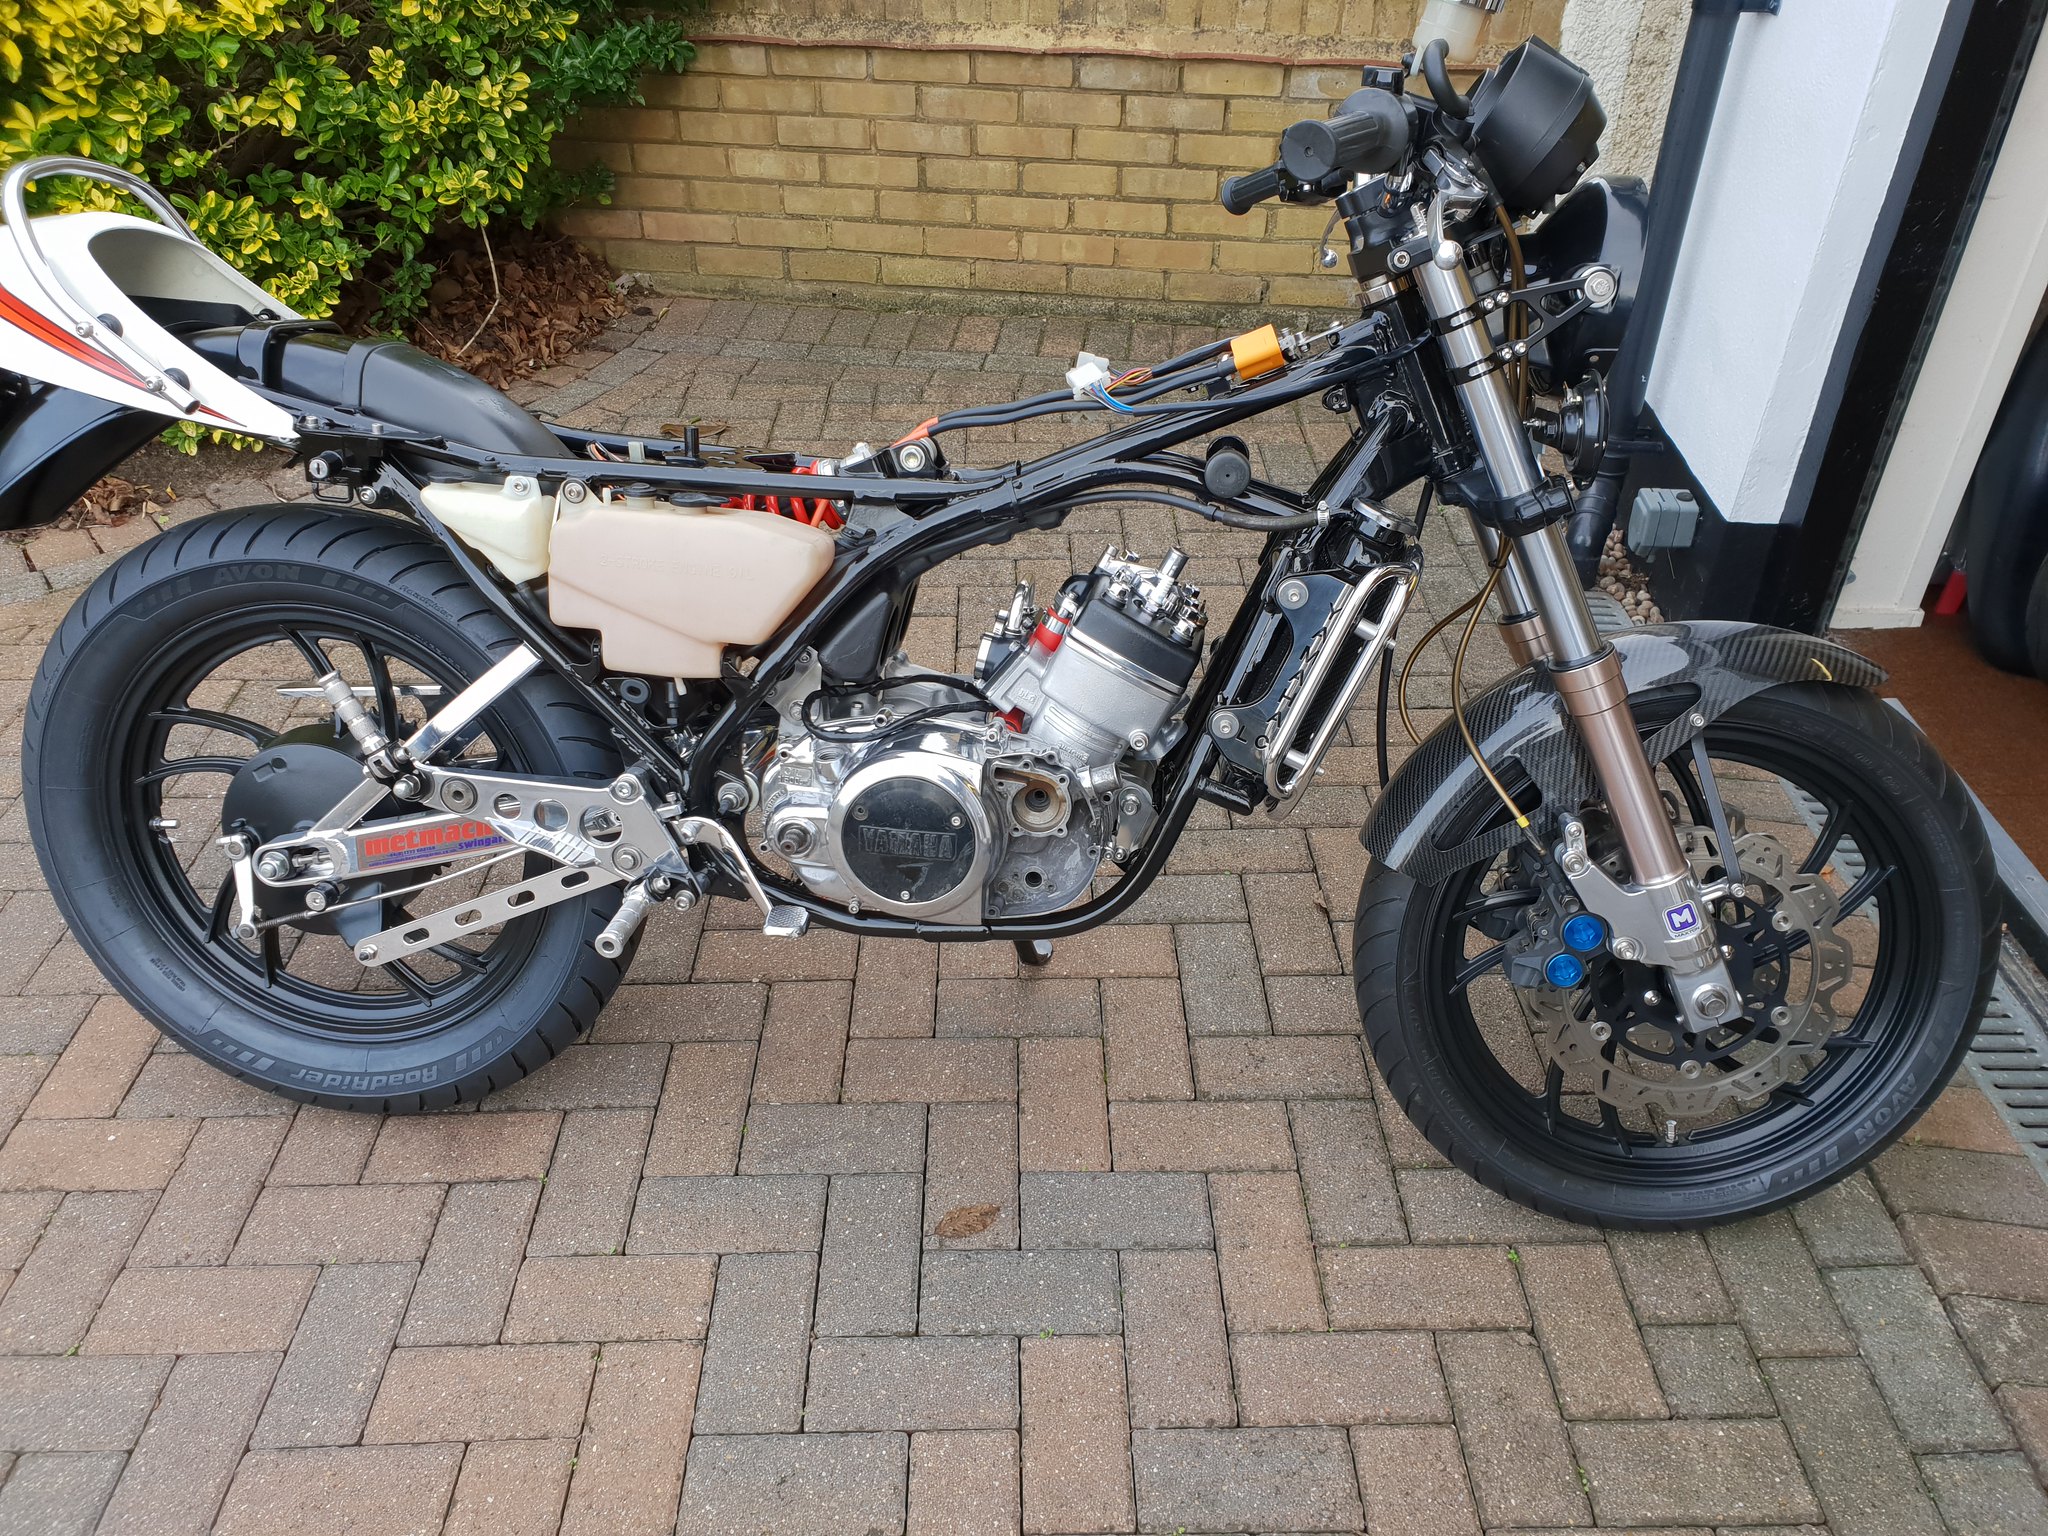 20181229_133346 20181229_133346 by David Miller, on Flickr Just need to check the timing and repair a stripped thread in the casing. Side case was fitted to enable me to lift the engine into the frame more easily. It's off again now and the plan is to powdercoat it satin black. Rebuild oil pump and water pump and then that can go on with a new gasket. I need a new water pump impellor as mine has a fair groove worn into it. Other jobs to do to finish are; cut Ht leads to length and fit the new Ngk caps, fit the loom and connect everything up, fit the carbs and all cables, buy a battery and a chain and fit them. Fit the stainless pipes I bought from Mutts - had a cheeky go at offering one up and it looks great  and I think that's about it. Will probably sell it once it's done as I'm itching to start the café racer project- got lots of ideas bouncing around for that one !! Dusty |
|
|
|
Post by dusty350 on Jan 2, 2019 16:19:35 GMT 1
My helicoil repair kit arrived today. Bought for £9 posted via ebay, I had 2 threads to repair on the bottom crankcase on the clutch side. These need repairing to save any messy oil leaks. I have bought "Recoil" kits in the past with great results, but this "Neilsen" kit looks an exact copy, and a helluva lot cheaper; 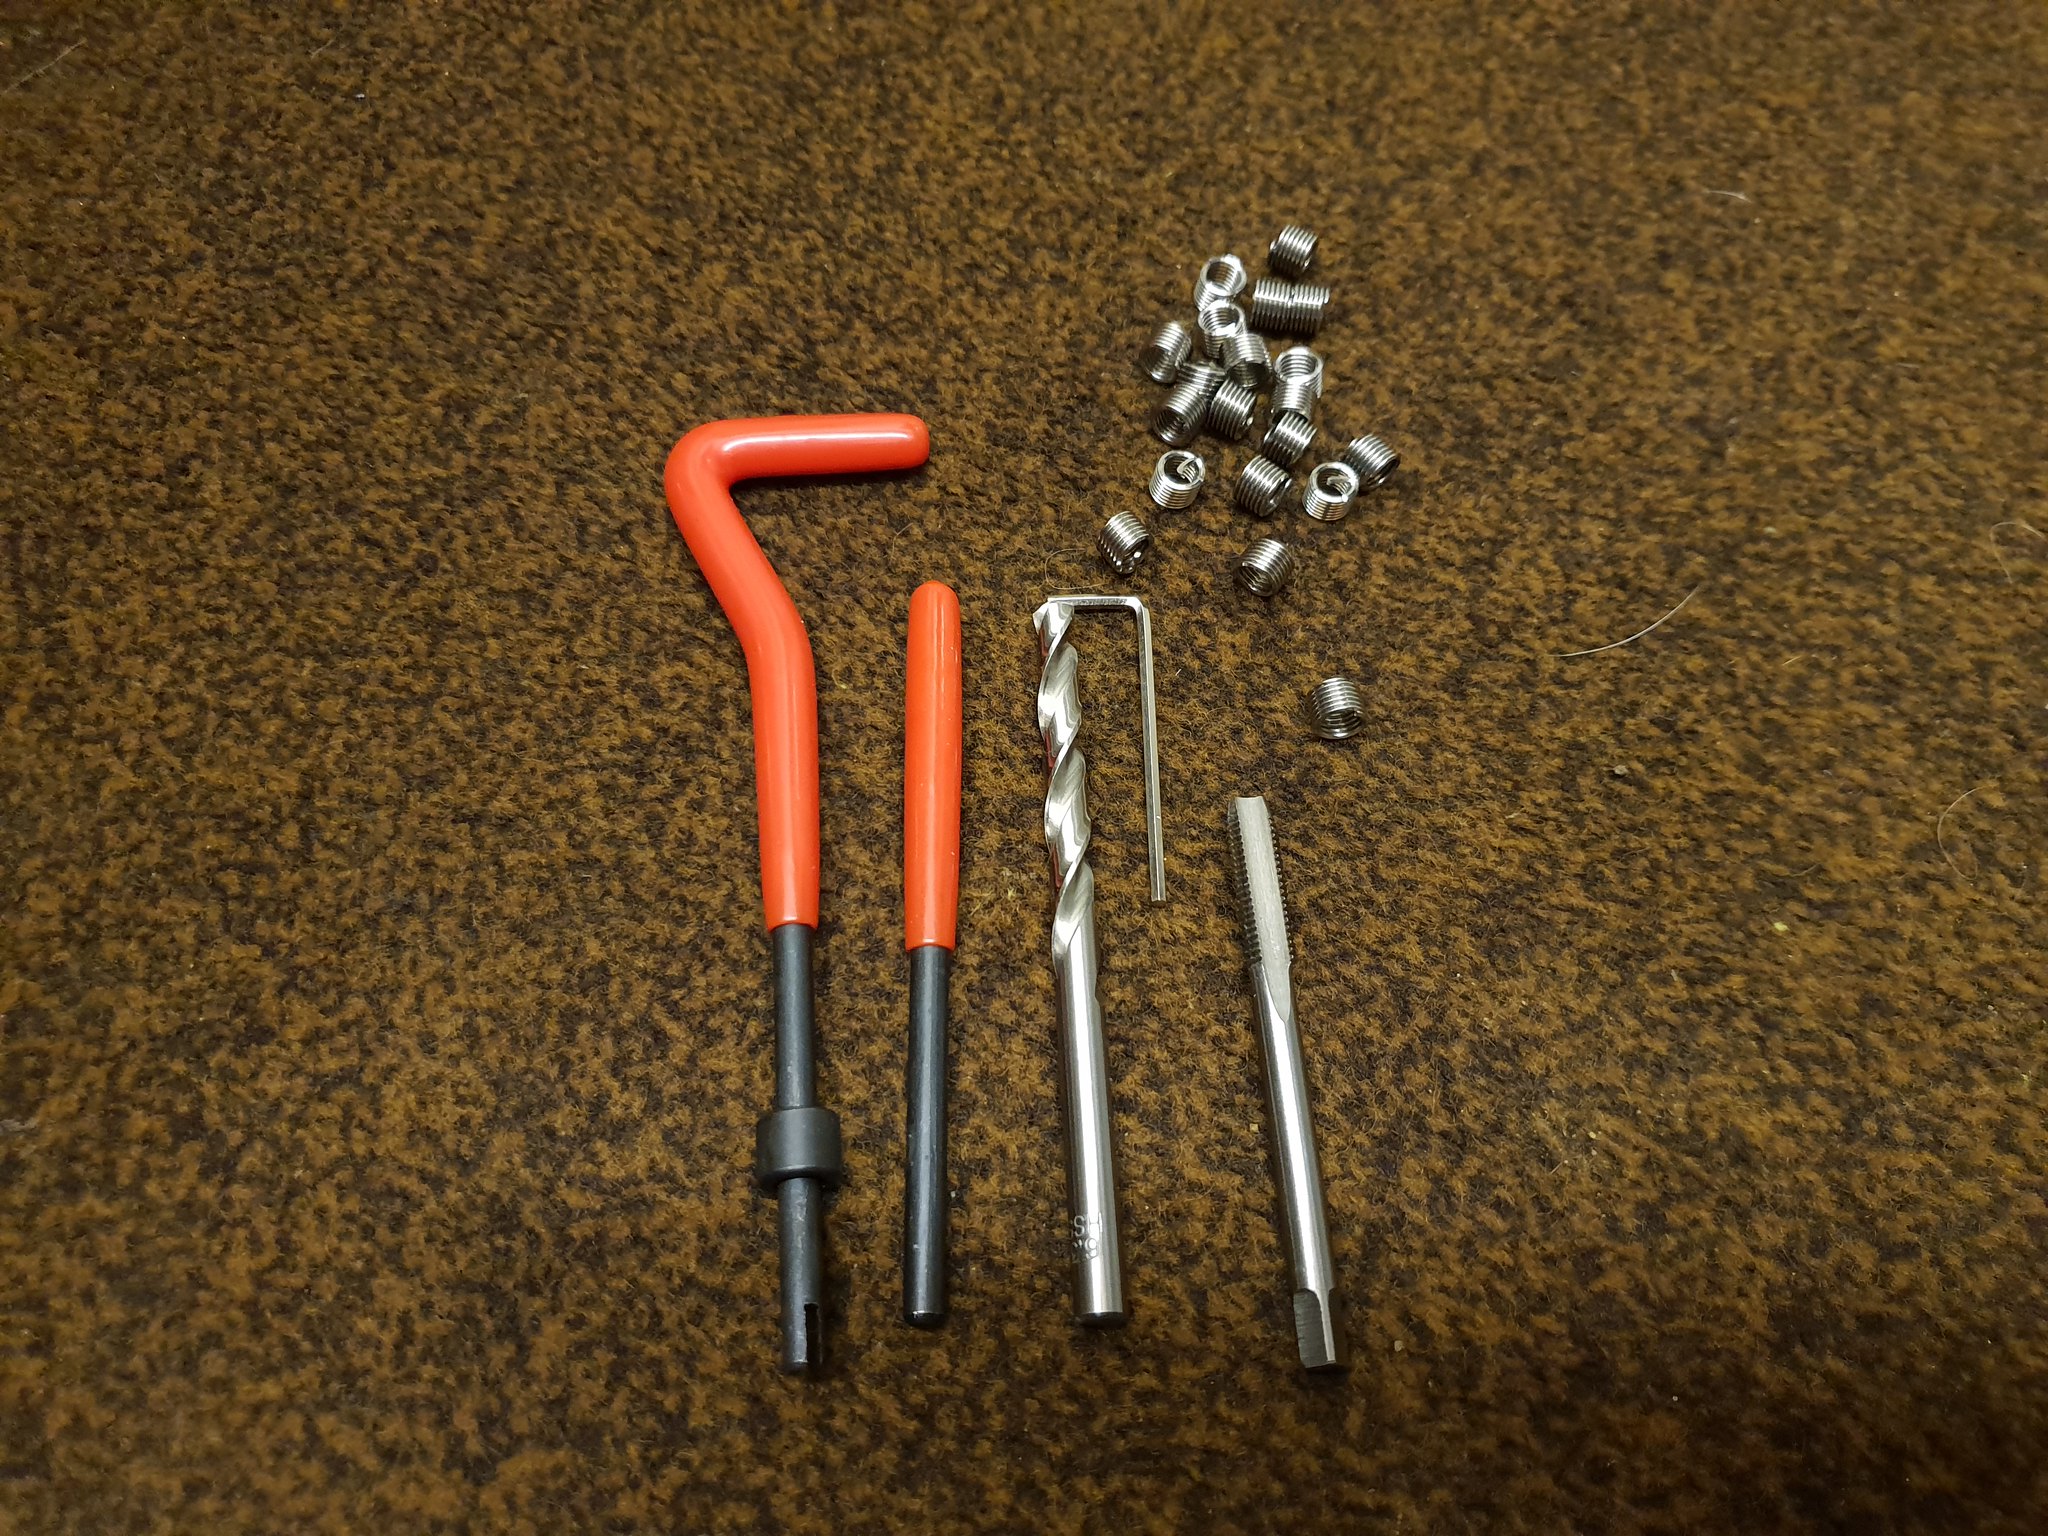 20190102_134600 20190102_134600 by David Miller, on Flickr They are easy to use. First, you drill out the hole with the drill bit provided - a bit of tape to act as a depth gauge stops you drilling too far !!. I then cleaned the swarf out and then you tap the hole; 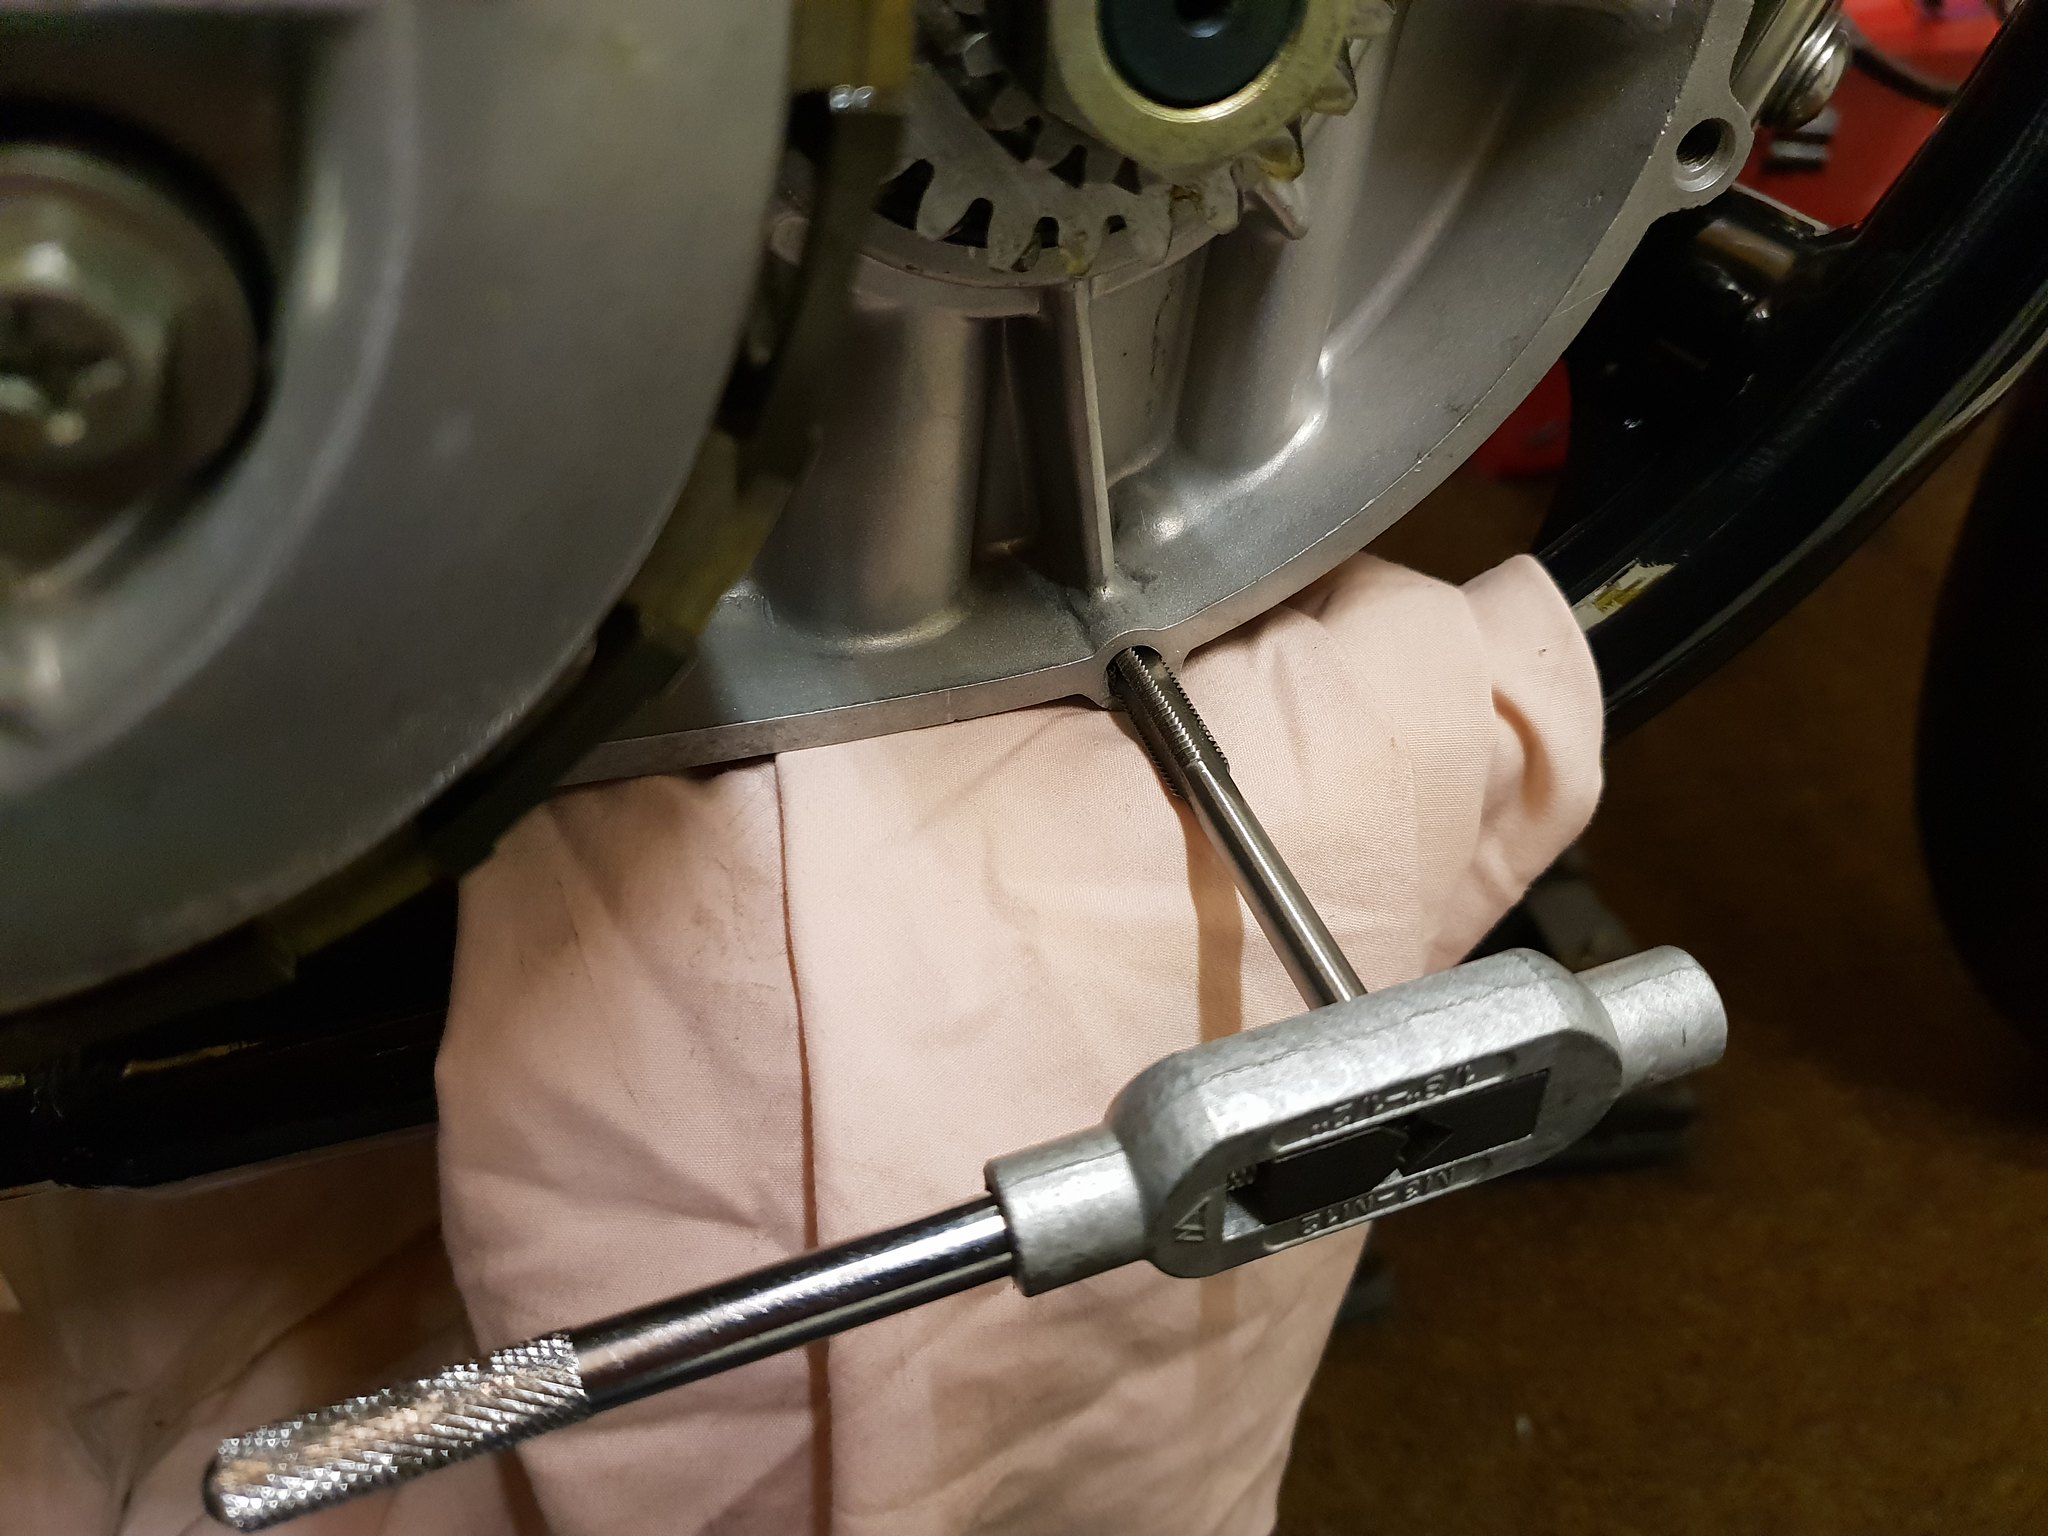 20190102_135245 20190102_135245 by David Miller, on Flickr Clear the swarf out again, and now you can wind the stainless insert in using the special tool;  20190102_135540 20190102_135540 by David Miller, on Flickr Once it's slightly under flush to the surface of the case, you use the small punch provided to break of the little tang that the tool locates on. I use a cotton bud with a bit of grease to fish the broken tang out of the bottom of the hole and it's job done; 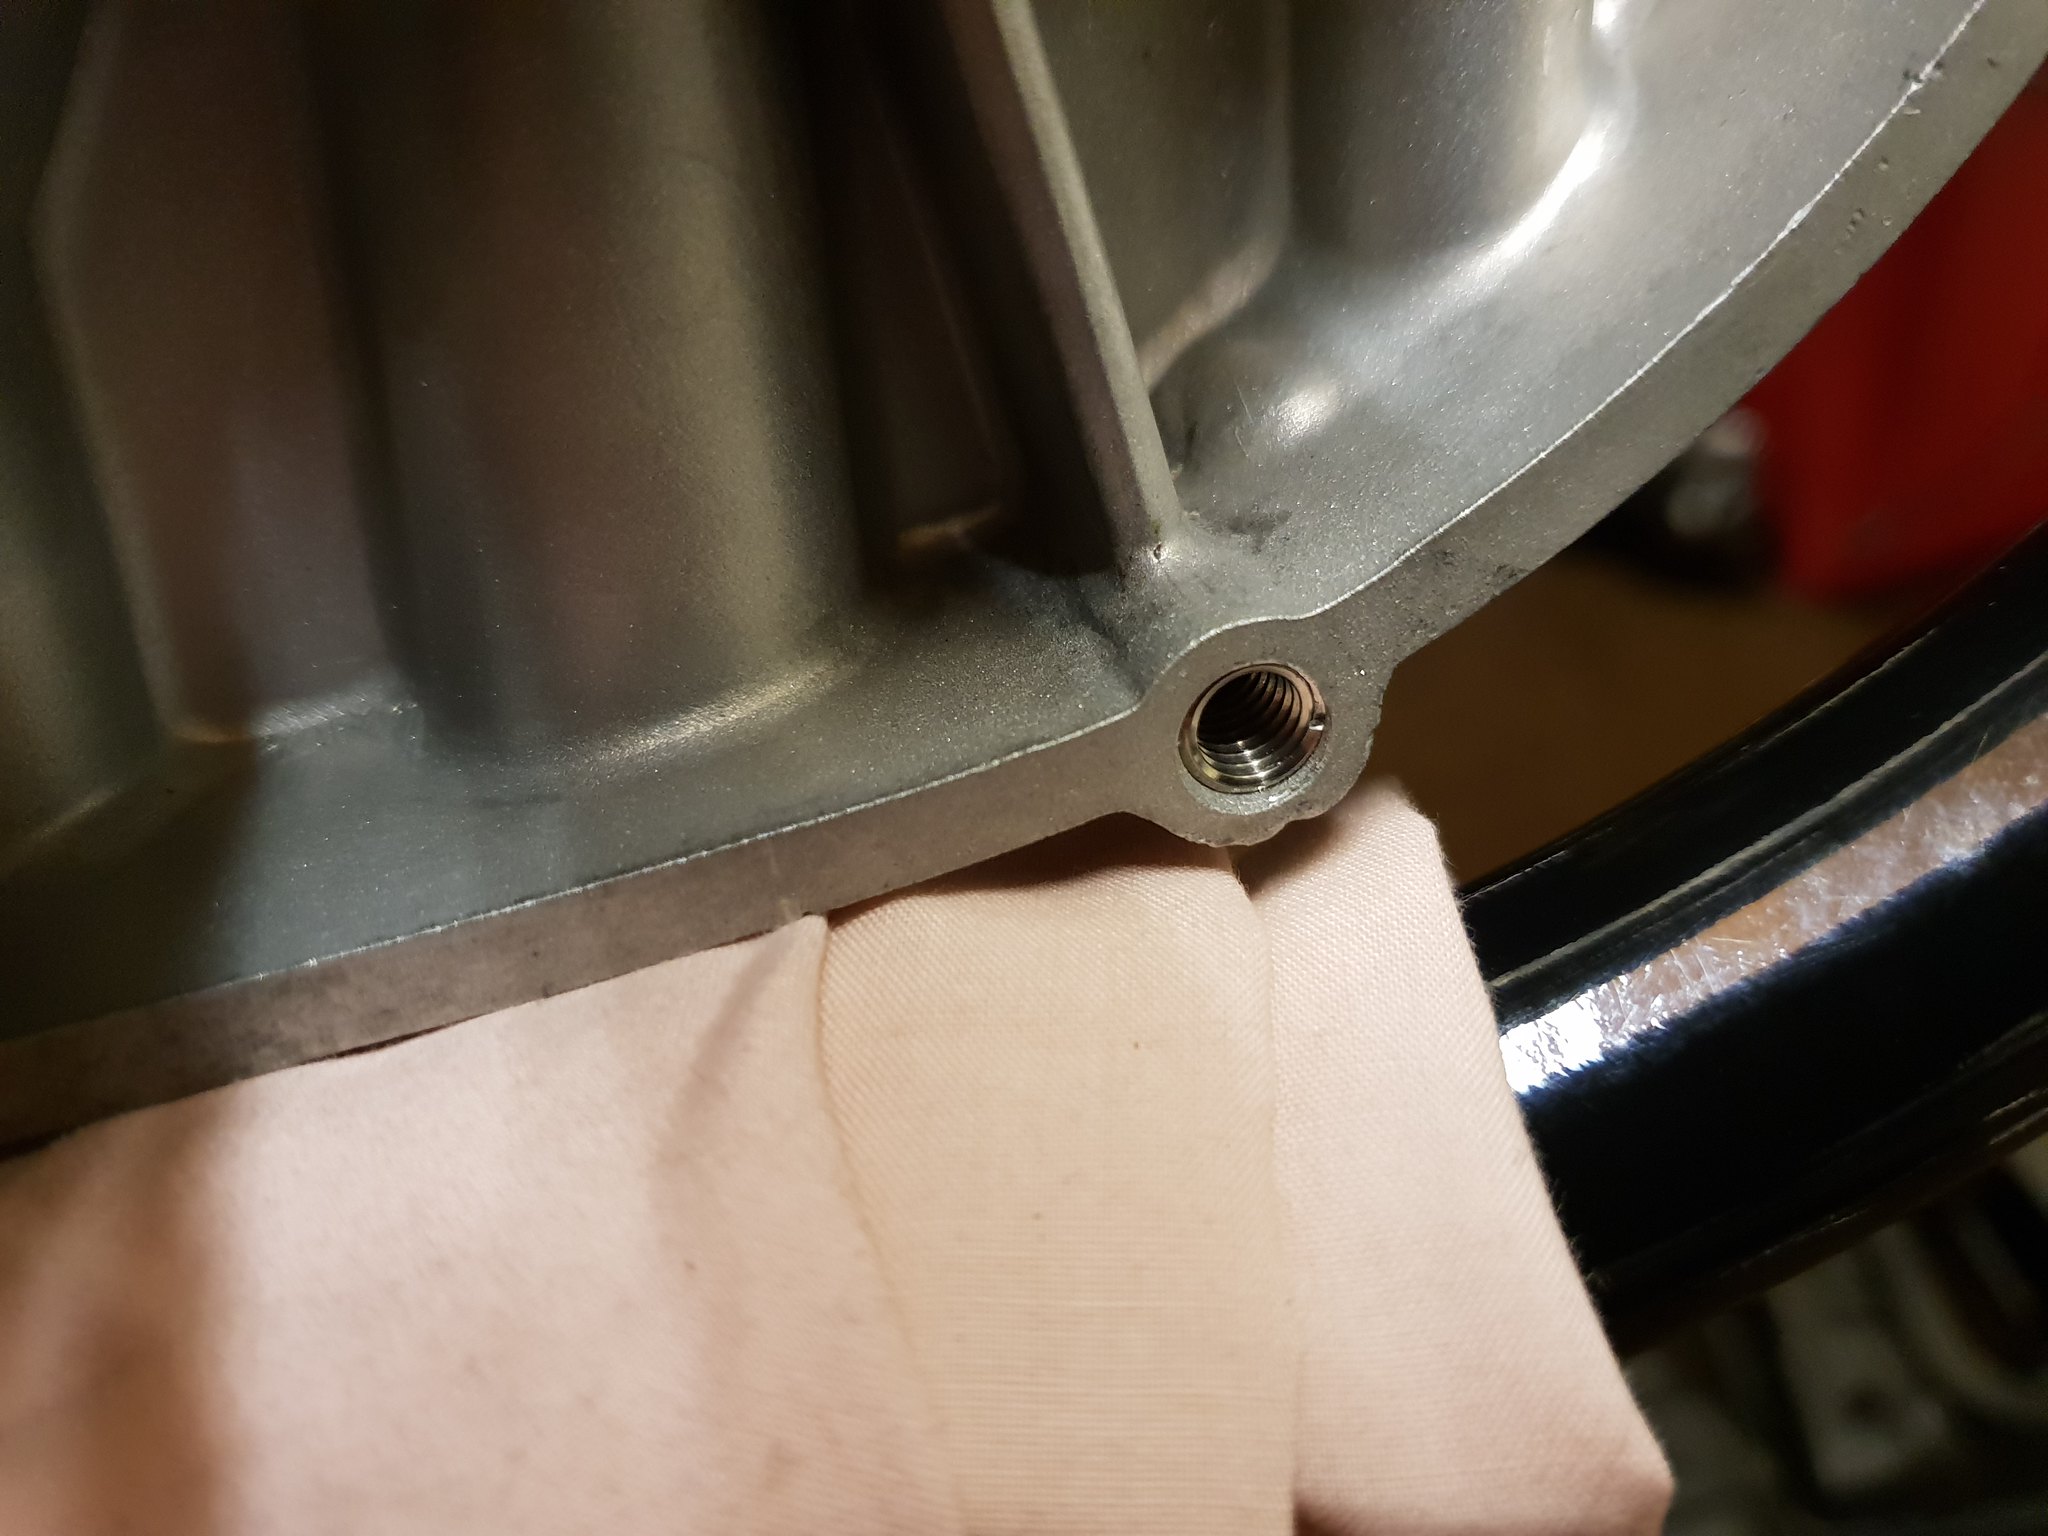 20190102_135642 20190102_135642 by David Miller, on Flickr 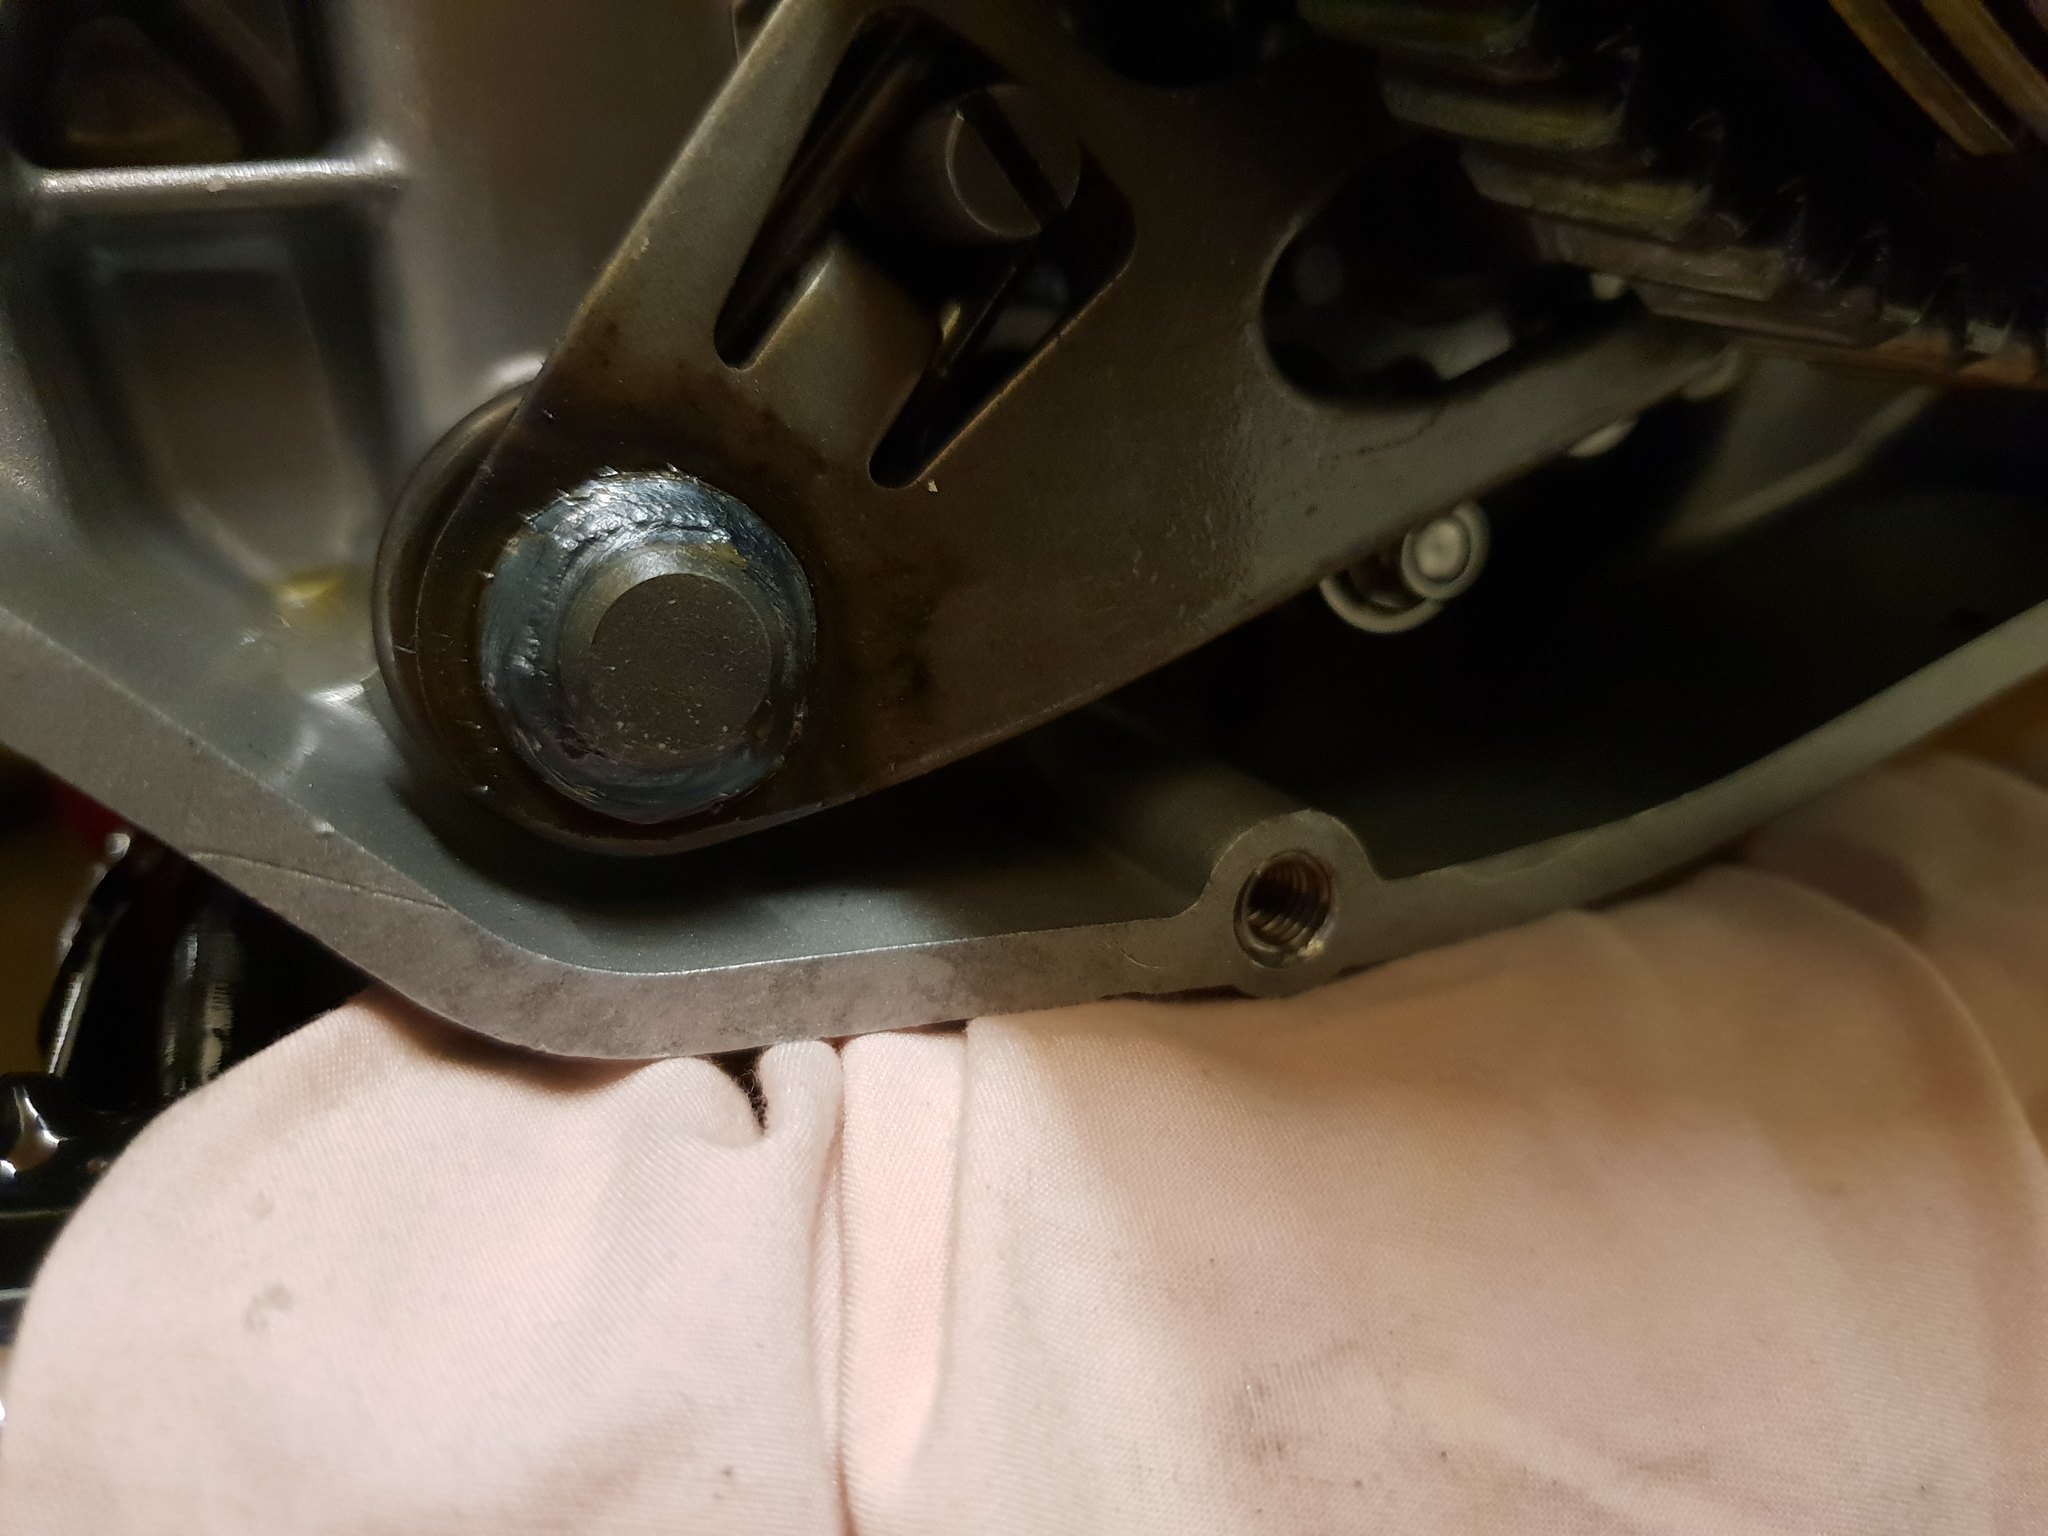 20190102_141240 20190102_141240 by David Miller, on Flickr Dusty |
|
|
|
Post by dusty350 on Jan 2, 2019 16:23:16 GMT 1
|
|
|
|
Post by Dangerous on Jan 2, 2019 16:36:11 GMT 1
Looks fantastic Dusty, nice work👍👍
|
|
|
|
Post by mikee on Jan 2, 2019 16:37:51 GMT 1
Are they not cross over pipes ?
Mike
|
|
|
|
Post by dusty350 on Jan 2, 2019 17:46:38 GMT 1
Cheers Dangerous Hi Mike, no not crossovers. They are Dave's "all round" performance pipes. Just need to get a few parts and I can fit them permanently. Dusty |
|
|
|
Post by Mr Kipling on Jan 2, 2019 17:52:49 GMT 1
looking great there Dusty...
|
|
|
|
Post by philmill on Jan 2, 2019 21:08:38 GMT 1
I love those pipes, I hope they look the same for 31k, I will be getting some soon.
Phil
|
|
|
|
Post by dusty350 on Jan 2, 2019 21:53:15 GMT 1
Pipes are great. Really light, the stainless polished up nicely, and they look fantastic I think. Only had to wait about 10 days from order too - would have been sooner but they were on holiday !! My 350 barrels are the early type with the smaller exhaust ports, so I'm gonna get the spacers that Norbo sells, and then plan to use the Pv type copper exhaust crush gaskets to try and make it leak proof. Dusty |
|
|
|
Post by donkeychomp on Jan 2, 2019 23:29:40 GMT 1
Those pipes.... Do you have a link to the helicoil thing? I need to do one on my engine... Alex |
|
|
|
Post by dusty350 on Jan 3, 2019 8:49:44 GMT 1
|
|
|
|
Post by wallcraft on Jan 3, 2019 20:27:21 GMT 1
Thanks for the helicoil how to guide Dusty, it's given me confidence to tackle that sort of thing myself now.
Mark.
|
|
|
|
Post by dusty350 on Jan 3, 2019 20:30:45 GMT 1
After I put the engine in the other day, I realised I hadn't fitted the 2 damper washers  Did exactly the same when I built my last Lc less than a year ago !! Then I realised I hadn't actually seen the damper washers in any of the boxes. Had a rummage through my spares this afternoon and found 2 good washers, so got the bike on a paddock stand, and then supported the engine with a jack, and managed to fit both washers with it in the frame (had some practice with the last bike !!) I got the bike out of the garage to have a better look at the pipes fitted (temporarily); 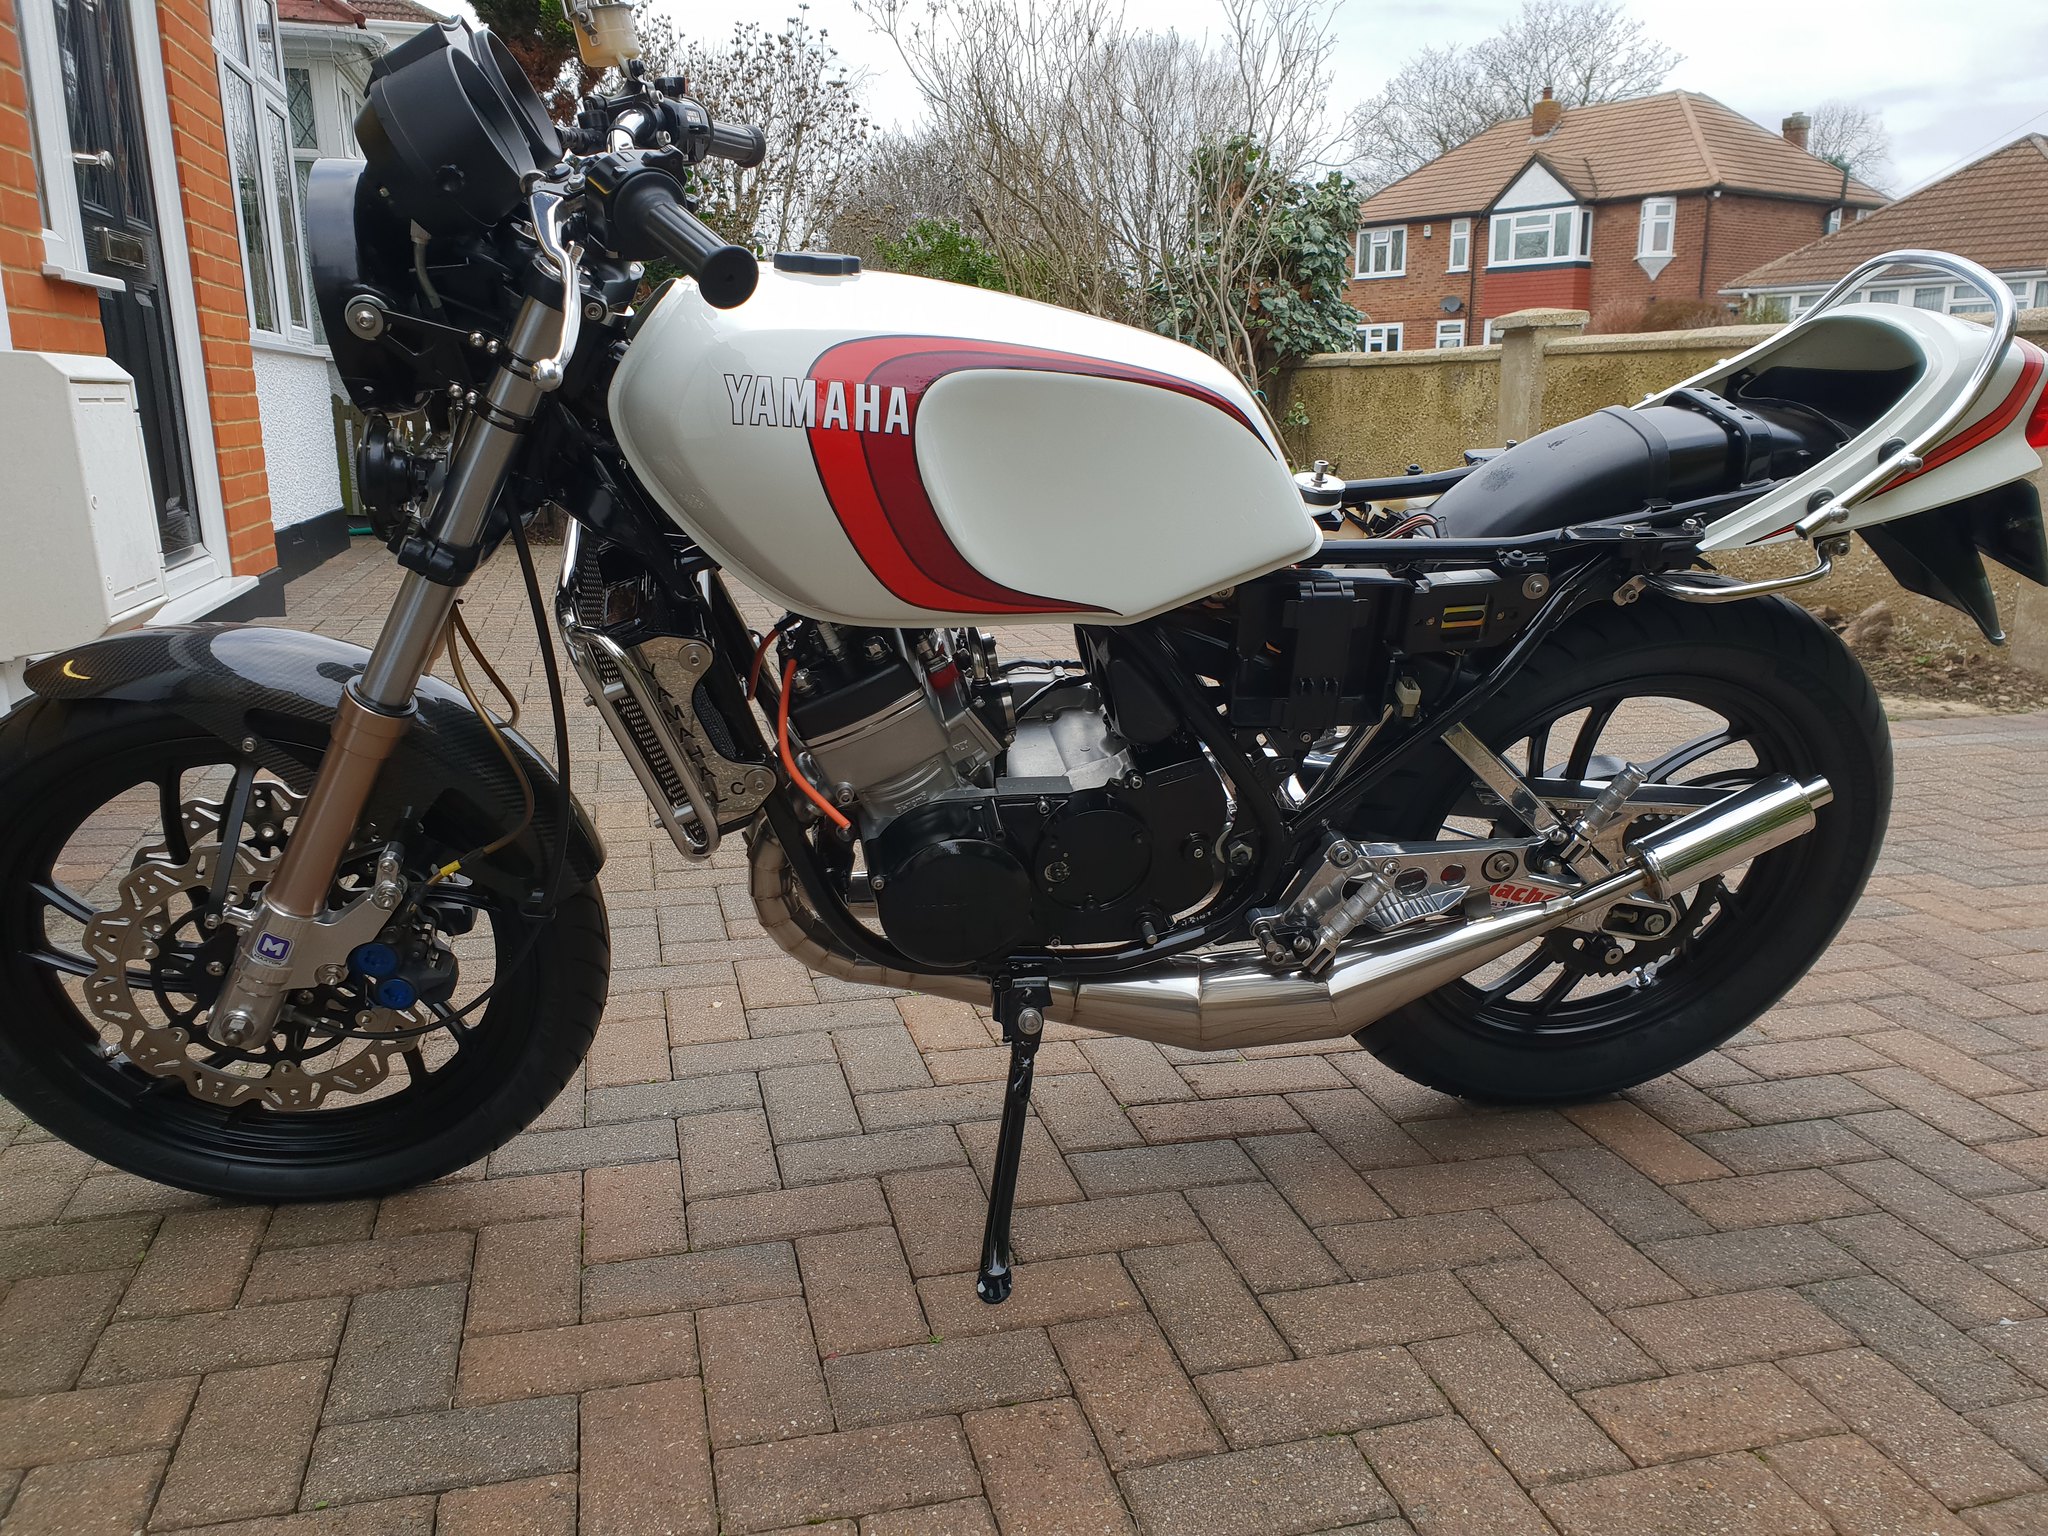 20190103_134336 20190103_134336 by David Miller, on Flickr 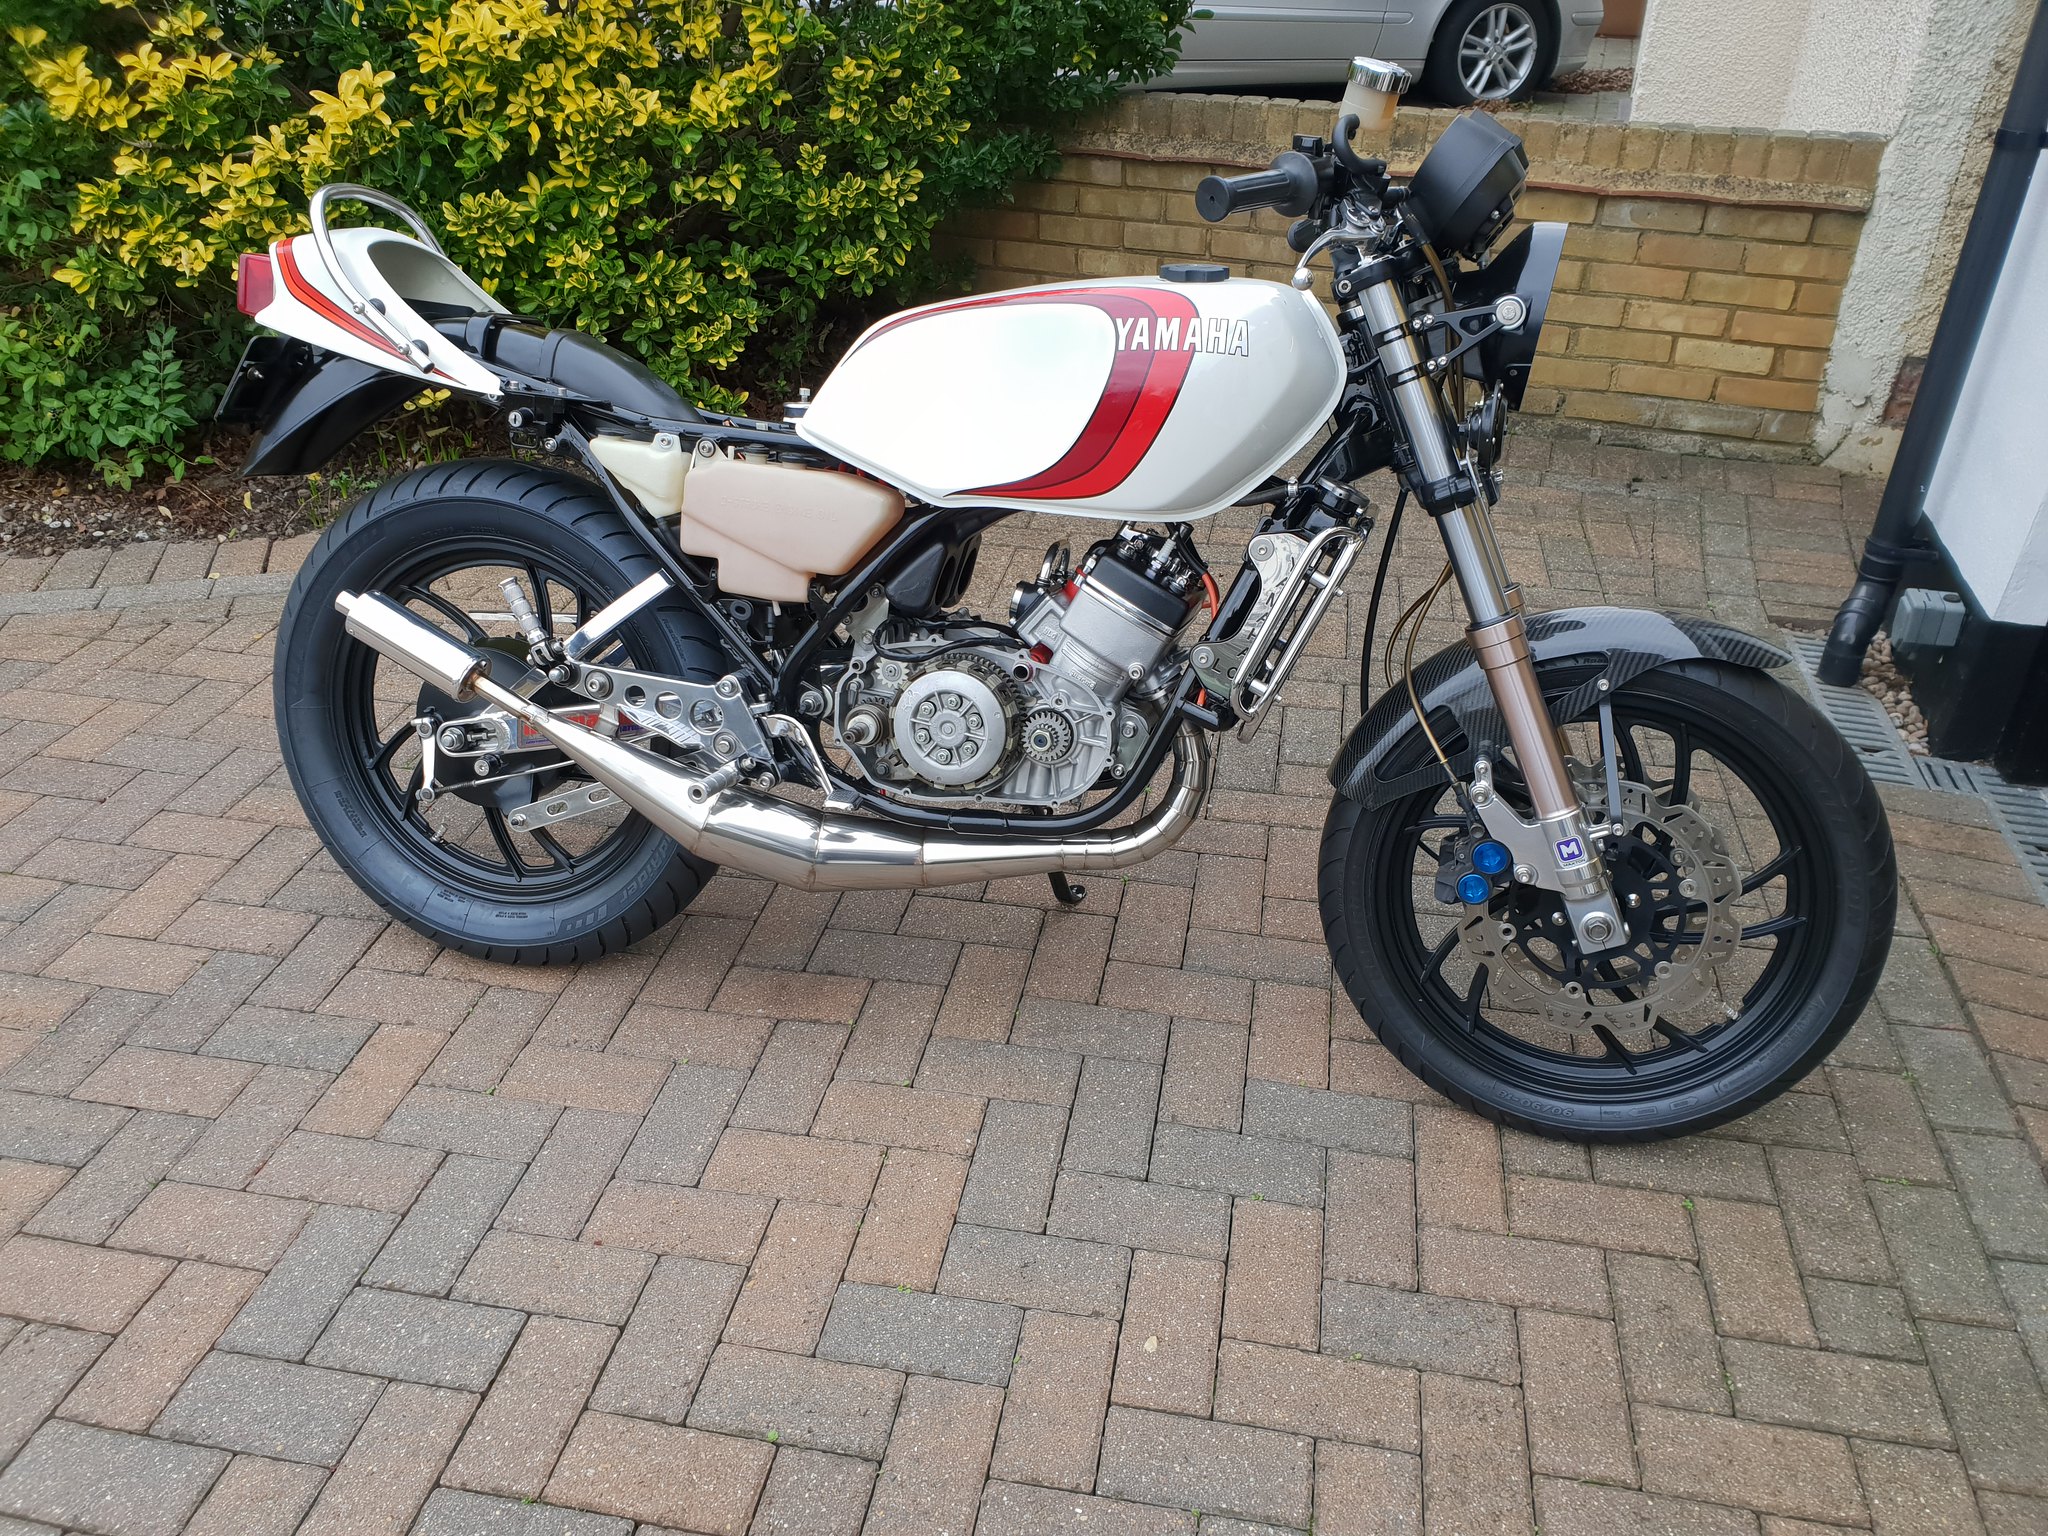 20190103_133308 20190103_133308 by David Miller, on Flickr 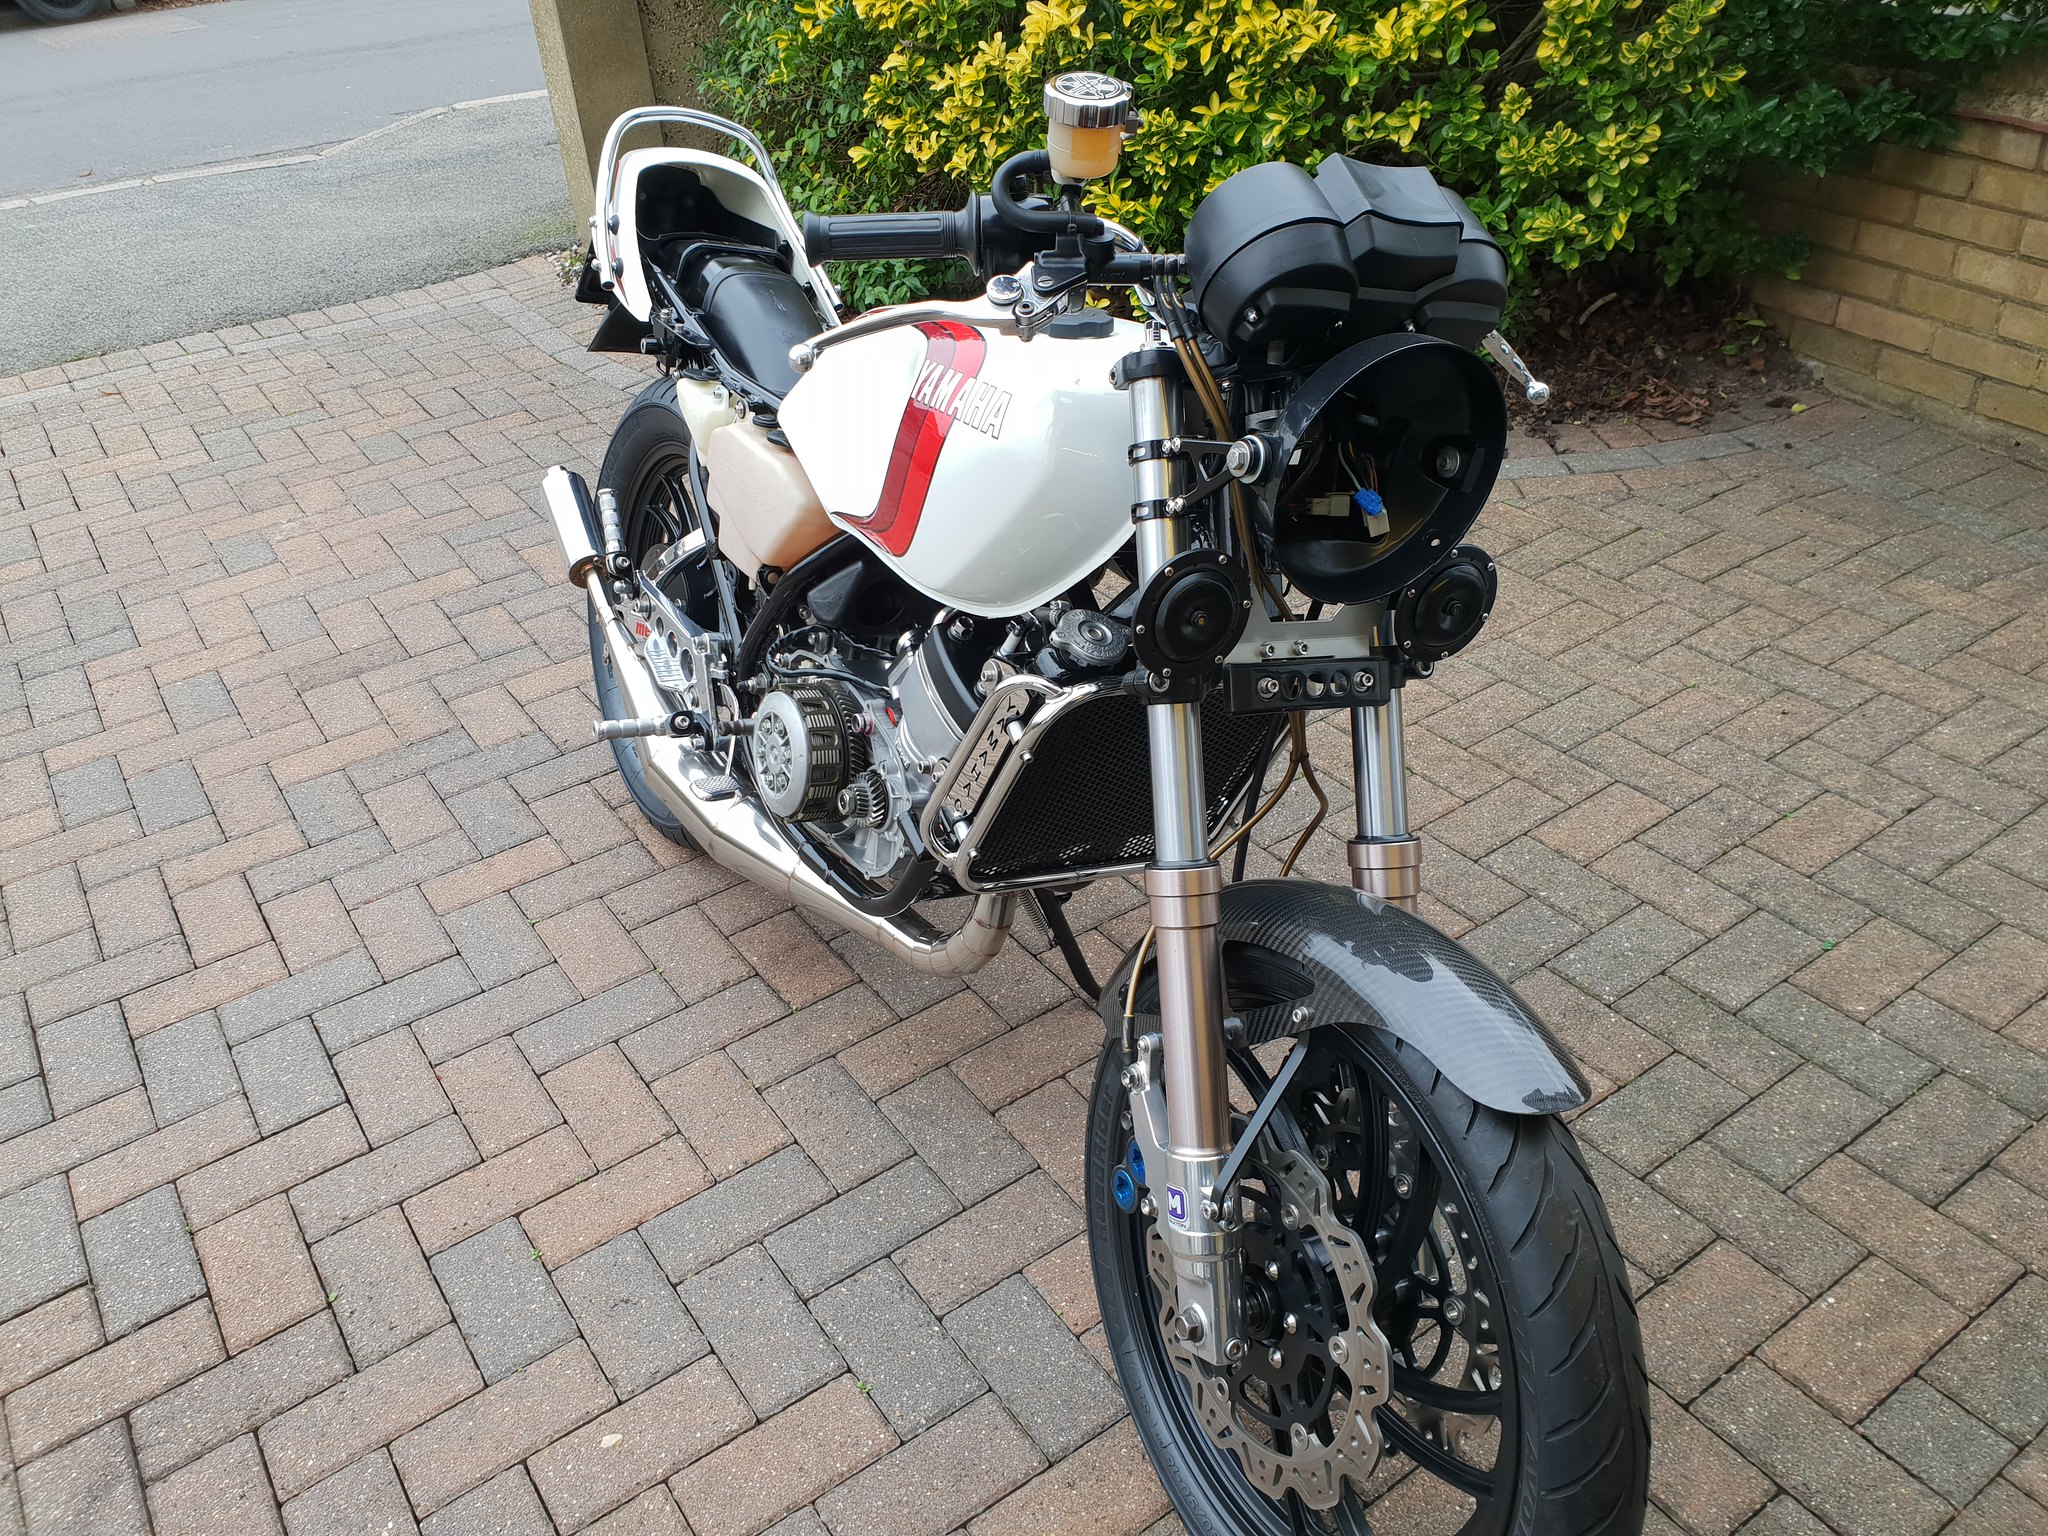 20190103_133315 20190103_133315 by David Miller, on Flickr They tuck in really nicely too; 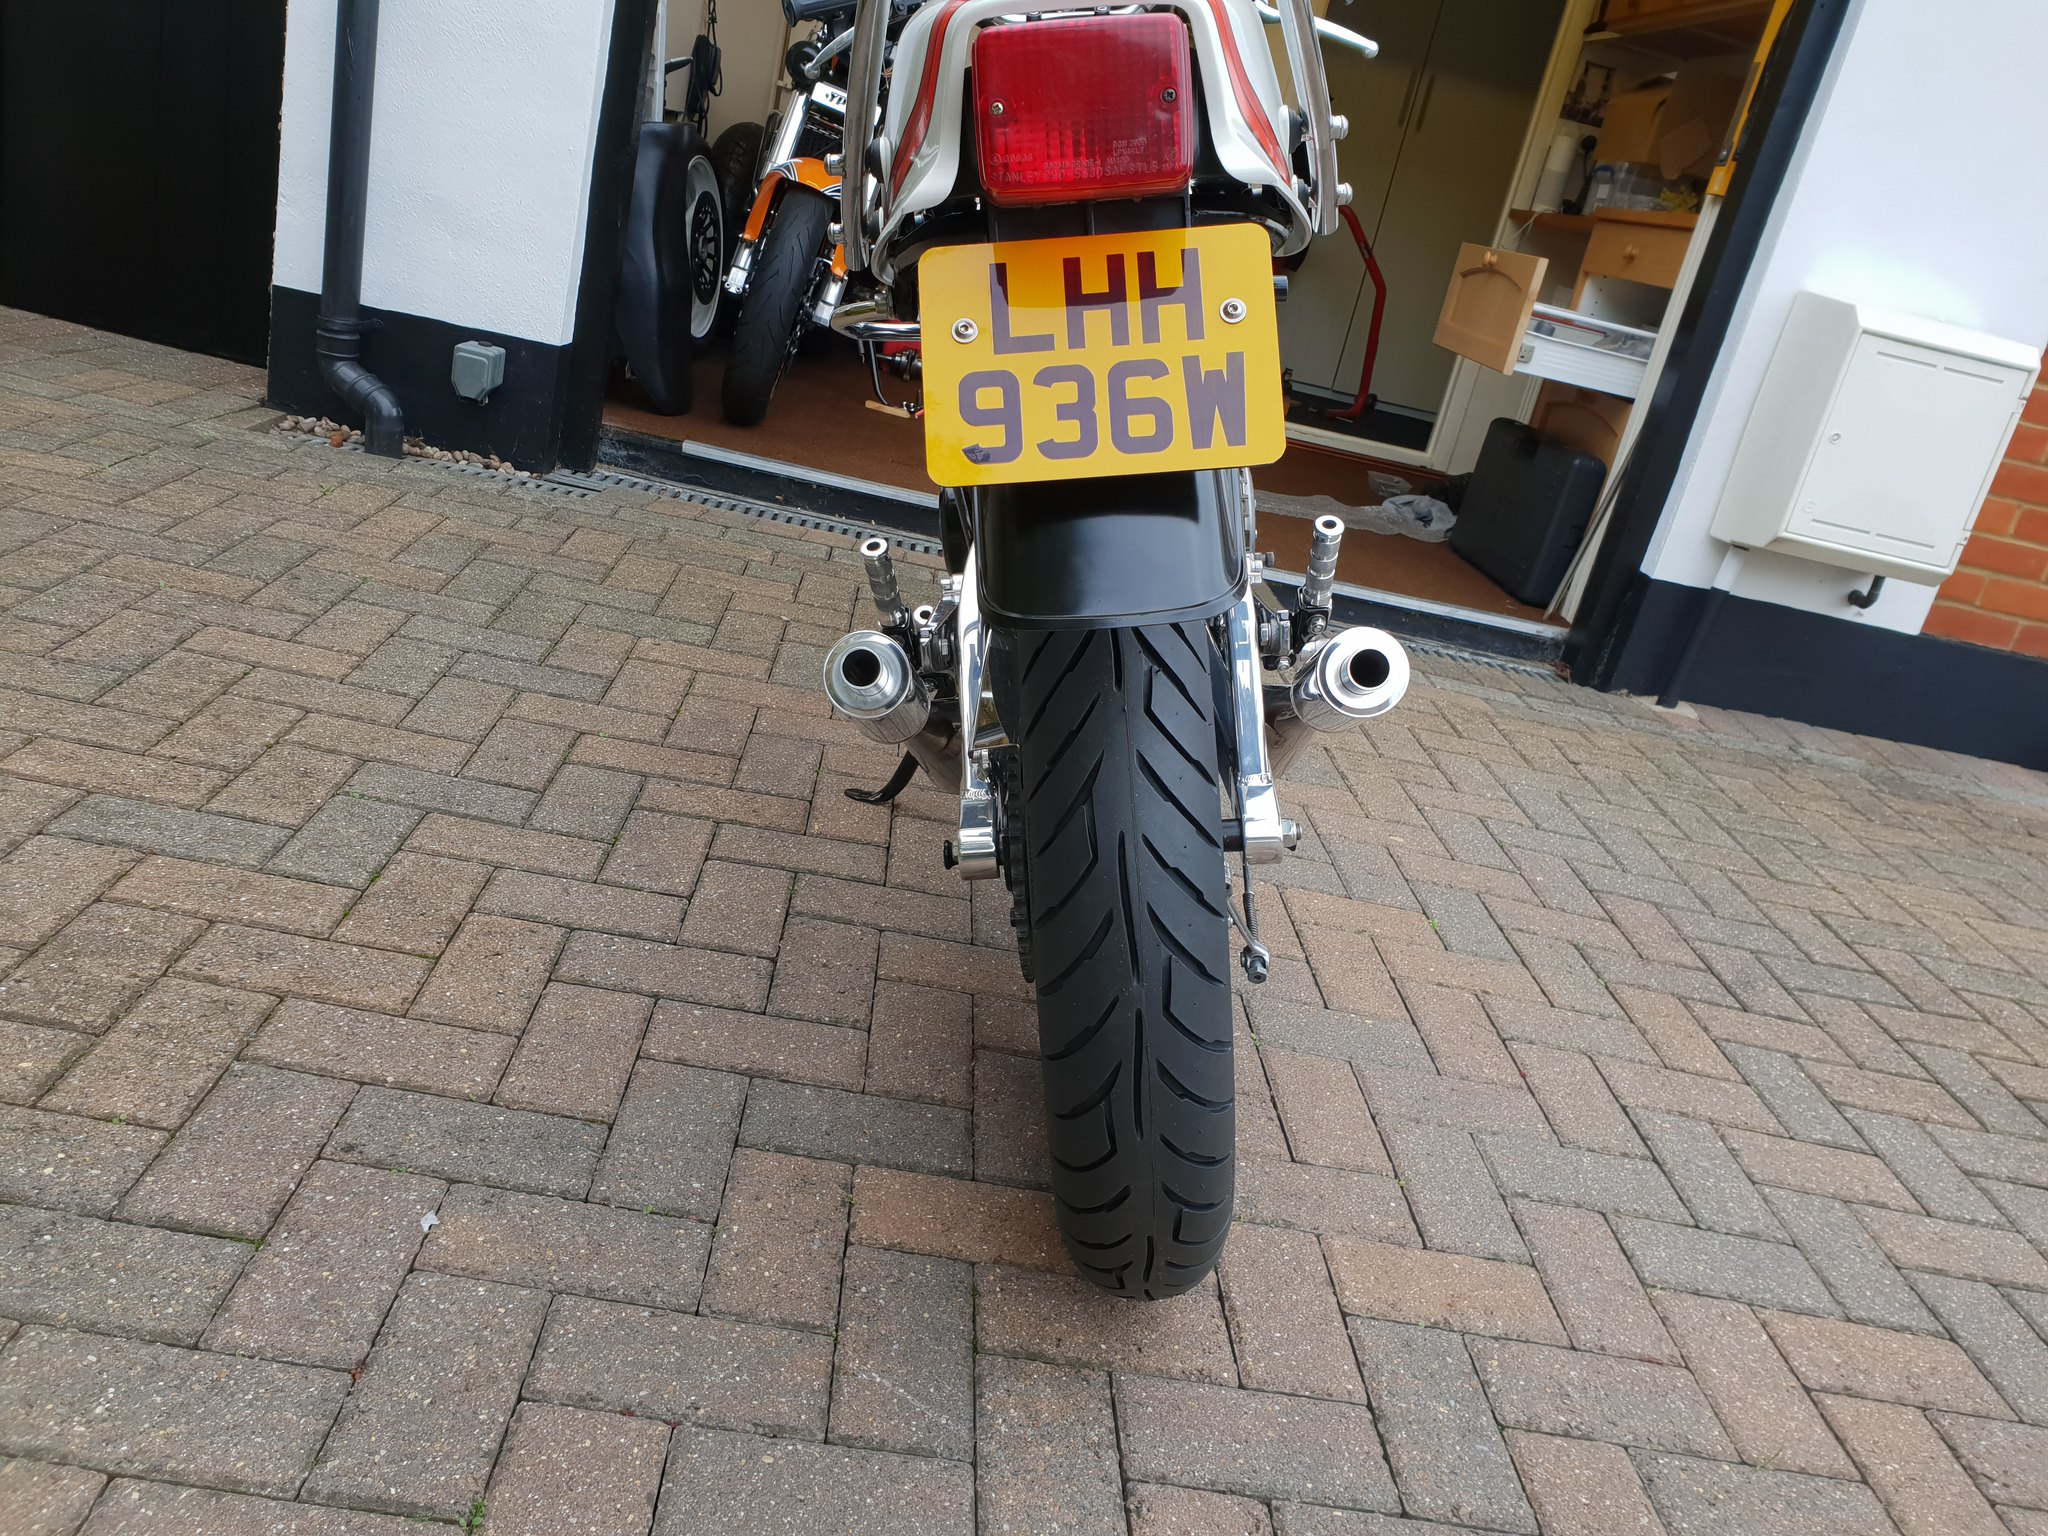 20190103_134357 20190103_134357 by David Miller, on Flickr Hope to have those on permanently by the weekend. I also dropped my clutch casing off at Windsor today for powdercoating, so hopefully get that back next week. Dusty |
|


 and I think that's about it. Will probably sell it once it's done as I'm itching to start the café racer project- got lots of ideas bouncing around for that one !!
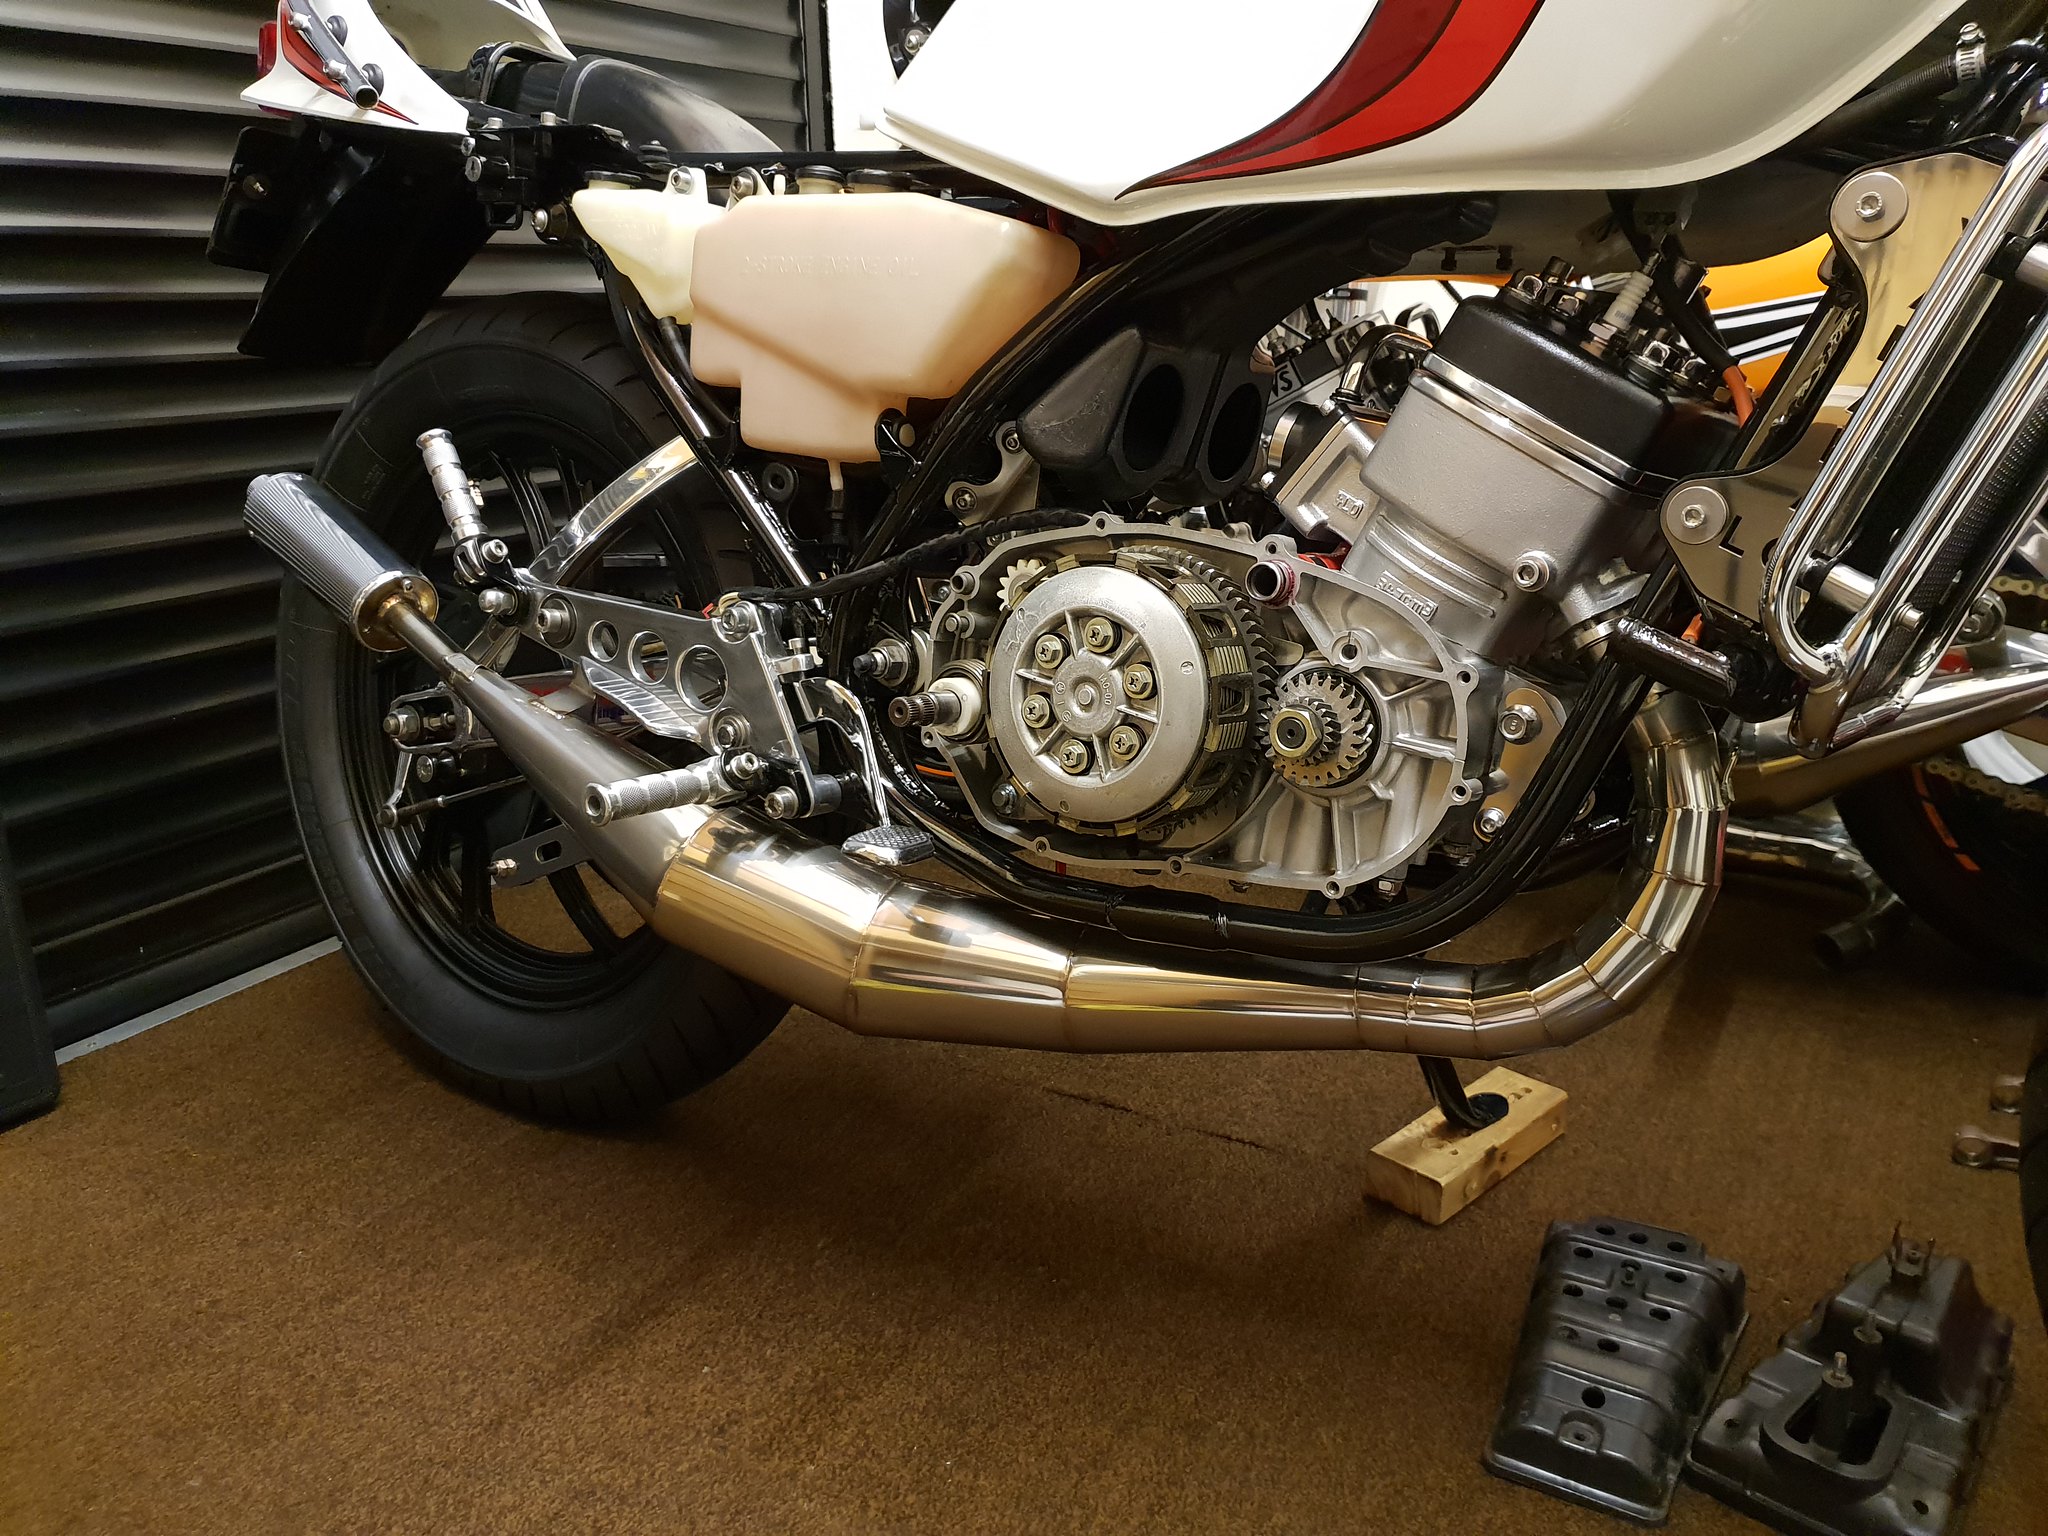


 Did exactly the same when I built my last Lc less than a year ago !!