|
|
Post by midlifecrisisrd on Jul 21, 2018 16:07:50 GMT 1
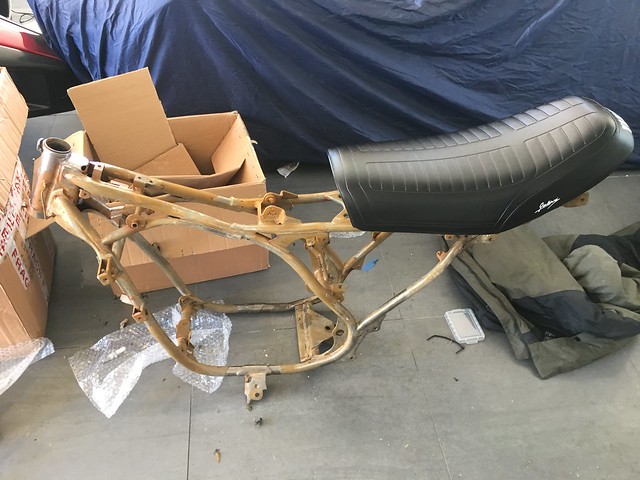
Yes dipping goes like that I have only had stuff dipped to remove powder coat. Modern powder a lot better. Maybe not an ideal pic but here's a frame I got done recently. You can compare the gloss on the frame to the gloss painted engine case Steve  |
|
|
|
Post by dusty350 on Jul 21, 2018 17:33:43 GMT 1
|
|
|
|
Post by loudpipes on Jul 21, 2018 20:50:03 GMT 1
If you did have it blasted before you had it welded it would still of rusted like that after a day or two, even touching bare metal sweat starts it rusting. i dont see a problem finish welding it up sand blast it job done. TBH if you are thinking of putting a big power motor in it you need a lot more bracing.  Oh.. where would it need more bracing? Headstock needs bracing on inside of upper and lower crossmembers. Swing arm main bolt area needs beefing up double plating. Bottom crossmember centre stand one wants tubes in corners to triangulate main frame. 😁 |
|
|
|
Post by dusty350 on Jul 21, 2018 22:12:36 GMT 1
|
|
|
|
Post by morgy on Jul 22, 2018 8:03:59 GMT 1
Oh.. where would it need more bracing? Headstock needs bracing on inside of upper and lower crossmembers. Swing arm main bolt area needs beefing up double plating. Bottom crossmember centre stand one wants tubes in corners to triangulate main frame. 😁 I think most of that has already been done Mate.. Not sure on the Head stock area, But i will have to check.. From memory something has been done to it.. Rear swing arm area 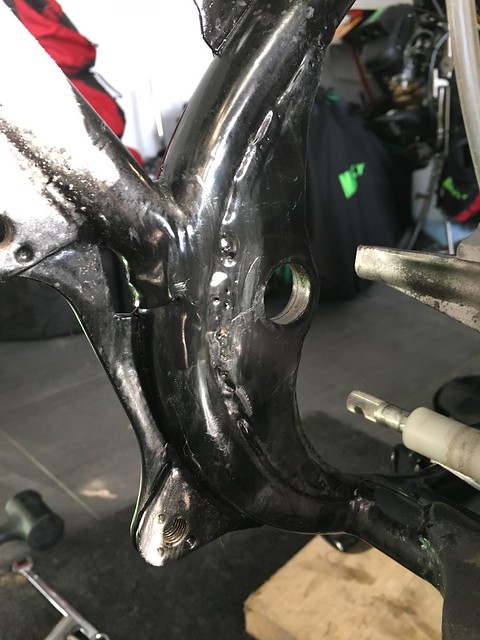 IMG_0501 IMG_0501 by mark.morgan07, on Flickr Rear Cross member 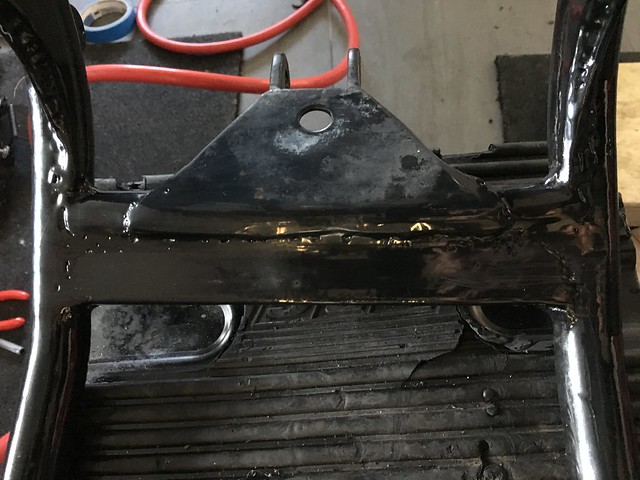 IMG_0535 IMG_0535 by mark.morgan07, on Flickr 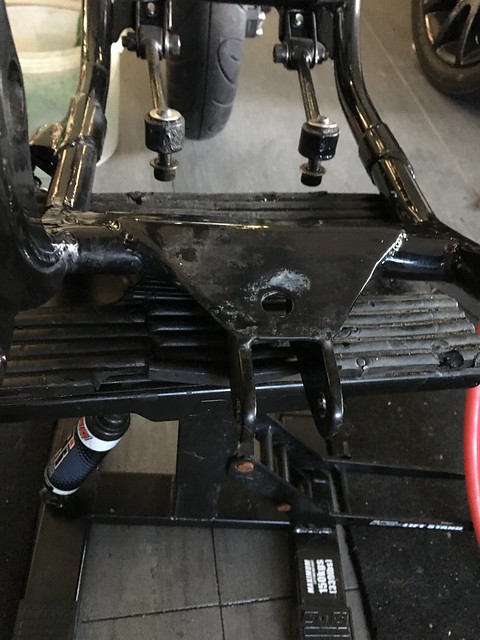 IMG_0536 IMG_0536 by mark.morgan07, on Flickr If you have any photos of the headstock bracing I can easily make a set up... |
|
|
|
Post by morgy on Jul 22, 2018 8:18:57 GMT 1
Thanks Dusty/Steve...
As your Local (ish) to me Dusty may i ask who you used?
|
|
|
|
Post by dusty350 on Jul 22, 2018 10:39:34 GMT 1
Hi Mark I use Microblast in Windsor, although I may try a new place even nearer to me that Donkeychomp has used with good results. I say new place, I actually used them back in the 80's for my 400 frame but thought they had disappeared, but they are still going. Ask Alex - Donkeychomp - what he thinks  www.decorrosion.co.uk/ www.decorrosion.co.uk/They do vapour blasting as well, plus I'm sure Alex said they are doing the chrome powder coat  Dusty |
|
|
|
Post by morgy on Jul 22, 2018 10:50:50 GMT 1
Hi Mark I use Microblast in Windsor, although I may try a new place even nearer to me that Donkeychomp has used with good results. I say new place, I actually used them back in the 80's for my 400 frame but thought they had disappeared, but they are still going. Ask Alex - Donkeychomp - what he thinks www.decorrosion.co.uk/They do vapour blasting as well, plus I'm sure Alex said they are doing the chrome powder coat Dusty Thanks very helpful. I think a chrome frame might be to much bing for my bling bike...  |
|
|
|
Post by dusty350 on Jul 22, 2018 11:05:06 GMT 1
Yea, wouldn't recommend a chrome effect frame ! I only mention it as not many places seem to do it (yet). Might suit a swingarm though Dusty |
|
|
|
Post by donkeychomp on Jul 22, 2018 21:16:26 GMT 1
I did. They do. Will be going there hopefully tomorrow or Tuesday to get my LC swingarm done...in chrome!
Alex
|
|
|
|
Post by morgy on Jul 23, 2018 14:54:55 GMT 1
|
|
|
|
Post by morgy on Aug 10, 2018 10:41:51 GMT 1
Bought a media/sand blasting pot too sort out the frame as it came back from looking like it had been sat in the rain for 20 years after it was dipped. It's now looking much better so will be going off to have the welding done by a friend.. 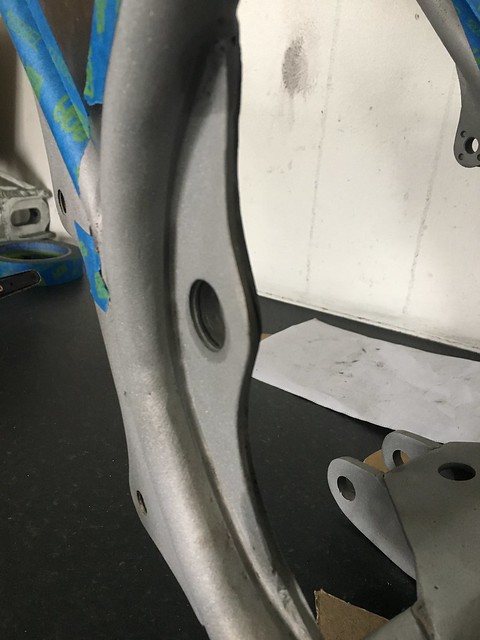 IMG_1696 IMG_1696 by mark.morgan07, on Flickr |
|
|
|
Post by morgy on Aug 14, 2018 16:05:07 GMT 1
|
|
|
|
Post by jon on Aug 14, 2018 19:02:54 GMT 1
Nice work.
I’m sure you’ll be pleased you did it once the bike is finished.
Jon
|
|
|
|
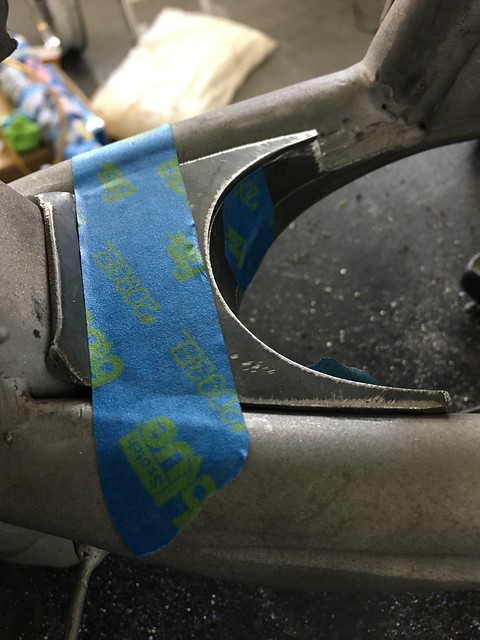
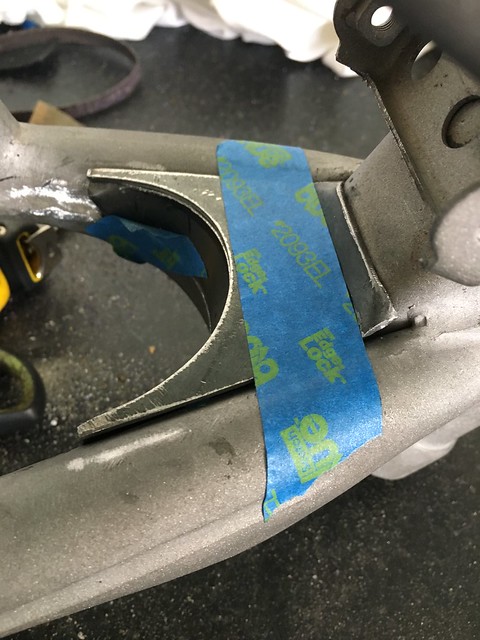
Post by morgy on Aug 15, 2018 16:29:35 GMT 1
So.... It seems and i have only just worked it out while i was sorting all my Spindles,Bolts washers and nuts out for the suspension and wheels, that the Previous owner has used a Cut down in length Rear wheel spindle for the swing arm Spindle... It has been shortened and re tepped with an M18 1.5mm thread, The shank is still at 20mm. The plates that are currently welded to the frames swing arm location are some 10-11mm thick with the two plates... 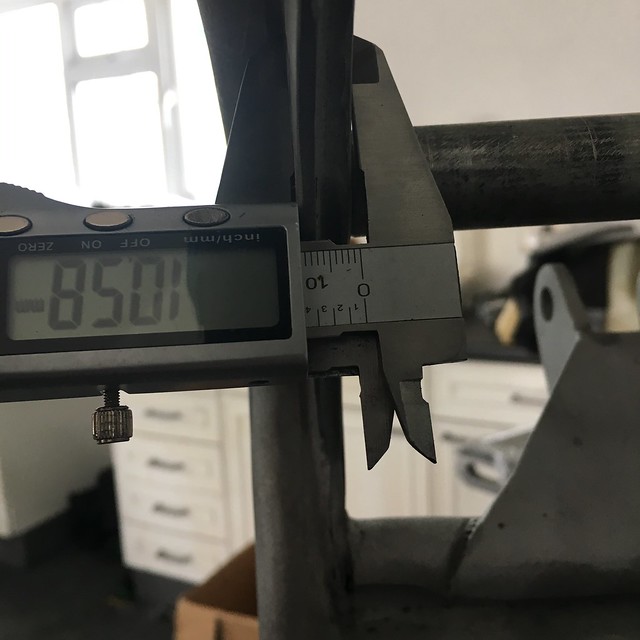 IMG_1726 IMG_1726 by mark.morgan07, on Flickr 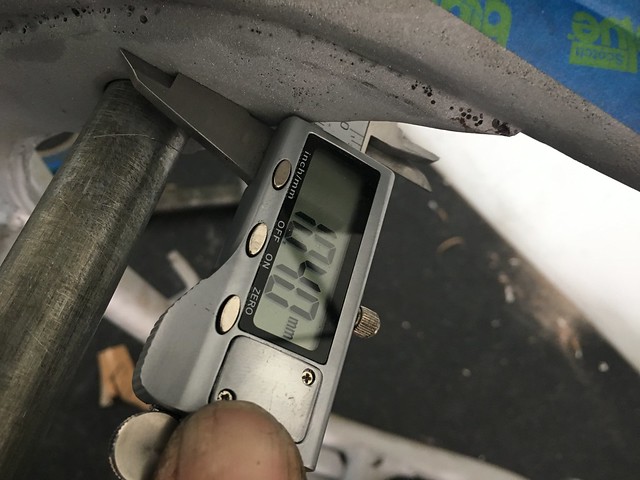 IMG_1729 IMG_1729 by mark.morgan07, on Flickr I have cut one of the swing arm bushes in half and used those, one each side for the frame strengthening plates, This took ages to cut through with a hawk saw by hand!! Then ground down to the correct size .. 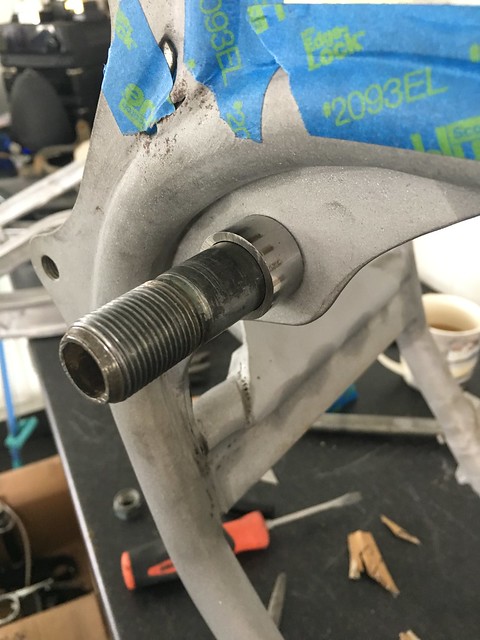 IMG_1722 IMG_1722 by mark.morgan07, on Flickr The OS plate has a 18mm hole ready for me to get the bolt machined down and then re threaded. The NS plate had to have a 20mm hole, obviously... ;-) 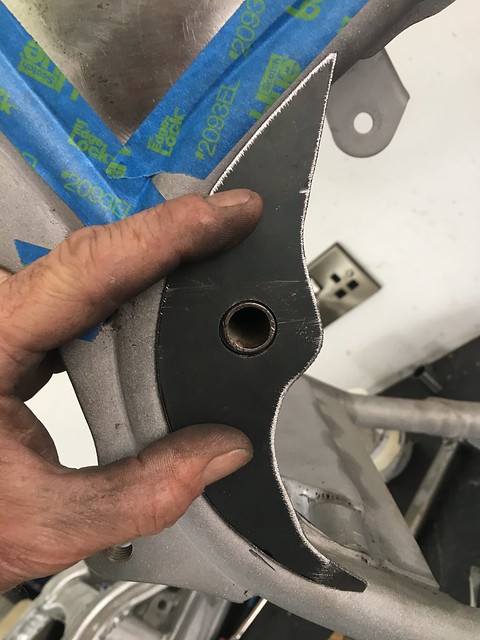 IMG_1723 IMG_1723 by mark.morgan07, on Flickr The plates are only roughly cut and need more finishing to get them to fit they way i want or would like... 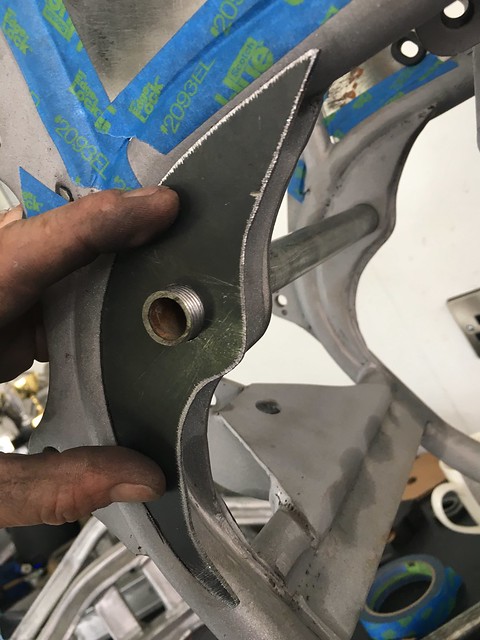 IMG_1725 IMG_1725 by mark.morgan07, on Flickr |
|
|
|
Post by dusty350 on Aug 16, 2018 7:23:04 GMT 1
Hi Mark Great looking work there mate An aircooled Rd swingarm bolt is longer than an Lc bolt, solid, and has grease nipples. Don't know if that is an option for you ? I can measure it for dims if you need me to Dusty |
|
|
|
Post by morgy on Aug 16, 2018 7:54:29 GMT 1
Hi Mark Great looking work there mate An aircooled Rd swingarm bolt is longer than an Lc bolt, solid, and has grease nipples. Don't know if that is an option for you ? I can measure it for dims if you need me to Dusty Thanks dusty.. i have a rear wheel spindle i have been using for the assembly and will just buy another RGV250 VJ22 one and have it machined down and re-tapped to suit once i have made all the plates.. Not sure how i missed they were the same part but modified.. I have another slack day today so hopefully will have all the plates finished by the end of the day, Just need the ypvs brackets now... |
|
|
|
Post by morgy on Aug 16, 2018 14:01:05 GMT 1
Well we have some progress!! I hope these are made correctly... ;-) I do need to do a little bit of adjustments on them but it's virtually impossible to do by hand as they keep moving so will have to be done while being welded.. Just a little tap here and there and they should fit perfectly... No to shabby considering the tools to have, Hammer, Grinder (stone) no 20 or 18mm drill bit so Filed out by hand.. My little detail grinder had to go off for repair.. 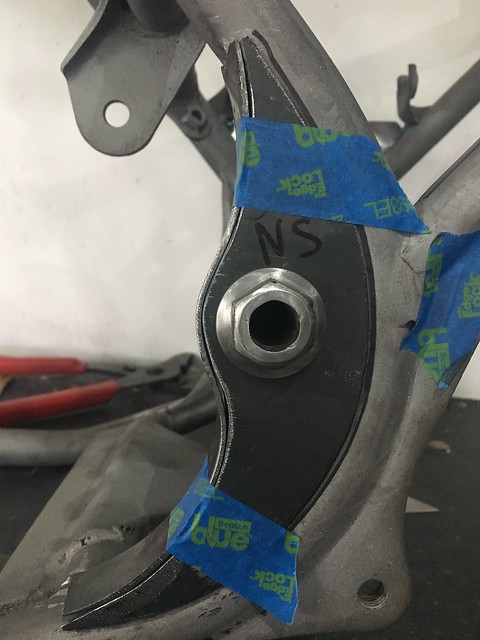 IMG_1746 IMG_1746 by mark.morgan07, on Flickr 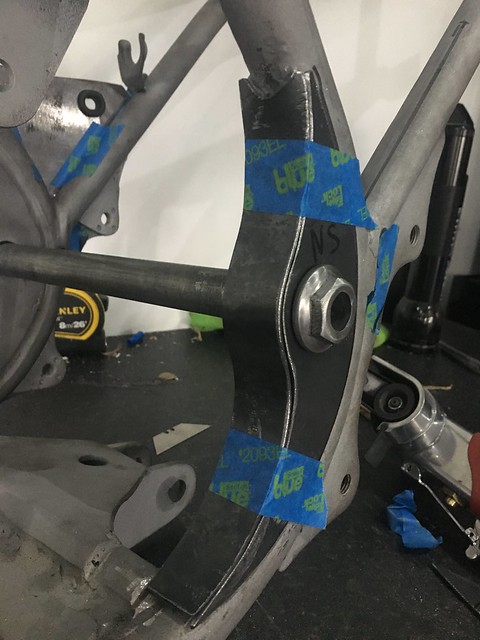 IMG_1747 IMG_1747 by mark.morgan07, on Flickr There is a small section where this plate butts up to the frame that will need filling with weld as the two Original plates were different sizes...  IMG_1748 IMG_1748 by mark.morgan07, on Flickr 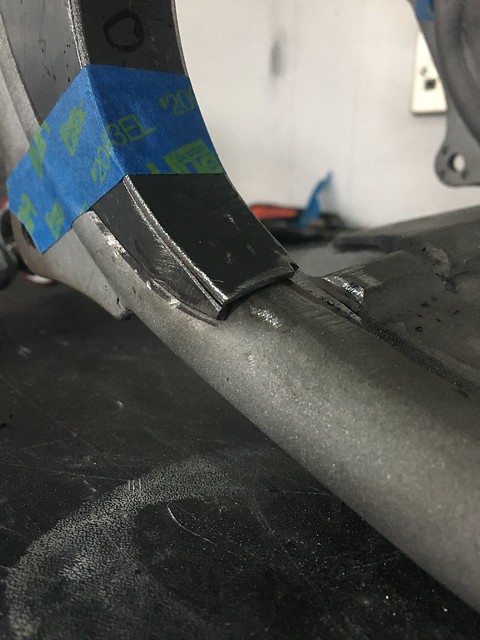 IMG_1749 IMG_1749 by mark.morgan07, on Flickr 18mm side 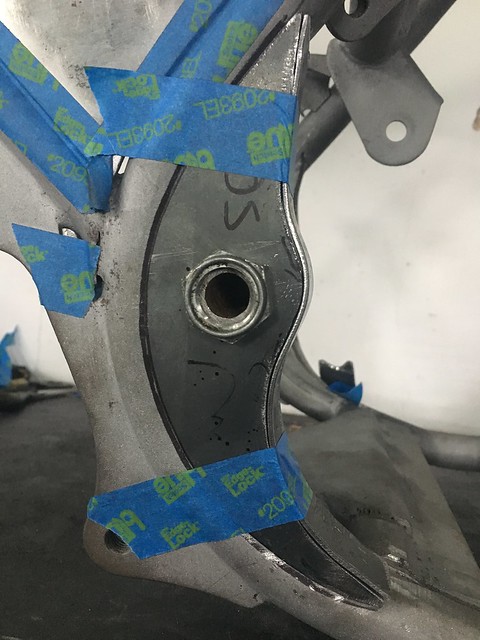 IMG_1750 IMG_1750 by mark.morgan07, on Flickr |
|
|
|
Post by dusty350 on Aug 16, 2018 18:42:36 GMT 1
That looks brilliant Mark Especially without specialist tools. I like the fact you've boxed in the front - looks really neat. Well done mate Dusty |
|
|
|
Post by morgy on Aug 18, 2018 6:47:21 GMT 1
Thanks Dusty.. Took a long time but i think it came out ok... I really can't wait to have thing welded up, so i can sort out all the little jobs before she goes off for Powered..
|
|
|
|
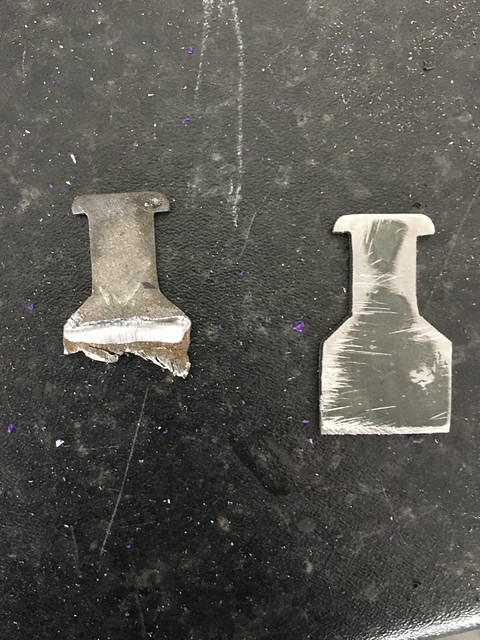
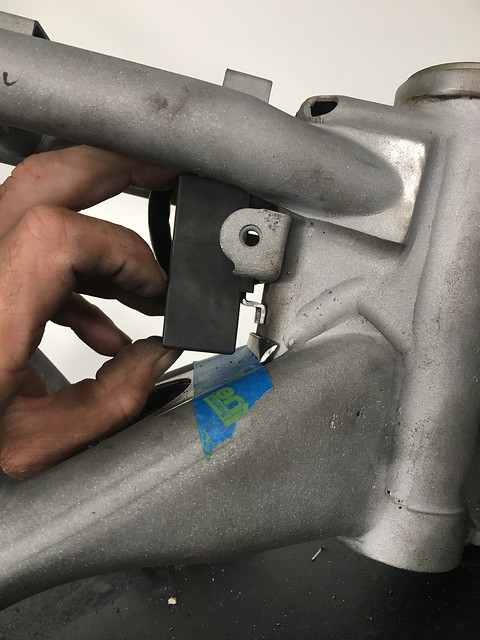
Post by morgy on Aug 25, 2018 17:17:46 GMT 1
Thanks to FoxyJohn for sending me these frame strengthening brackets.. All cut down, trimmed to fit and ready for a quick media blast before welding... 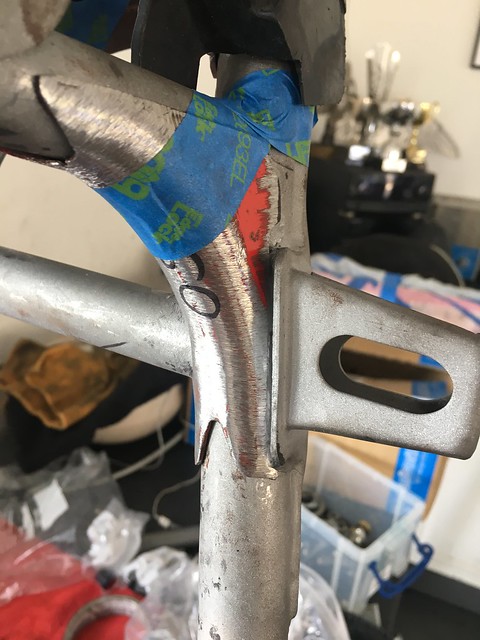 IMG_1792 IMG_1792 by mark.morgan07, on Flickr 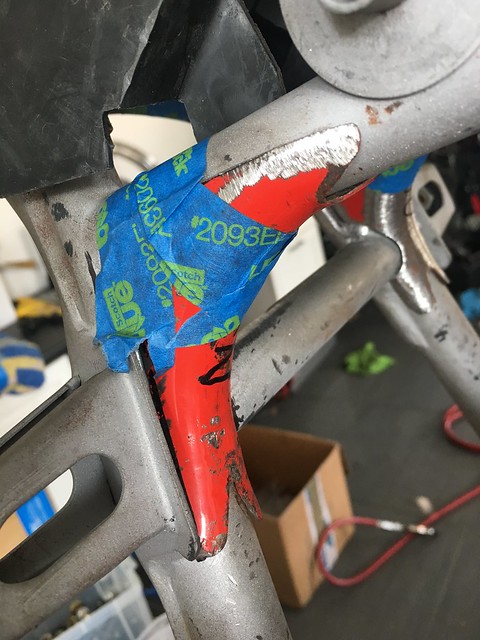 IMG_1795 IMG_1795 by mark.morgan07, on Flickr |
|
|
|
Post by morgy on Oct 21, 2018 8:58:14 GMT 1
Not much has been happening to my project for a while, I've been waiting for a part to arrive from the states and i've also sent my Swing arm out to a good friend for some welding work to remove the globby Factory welds.. 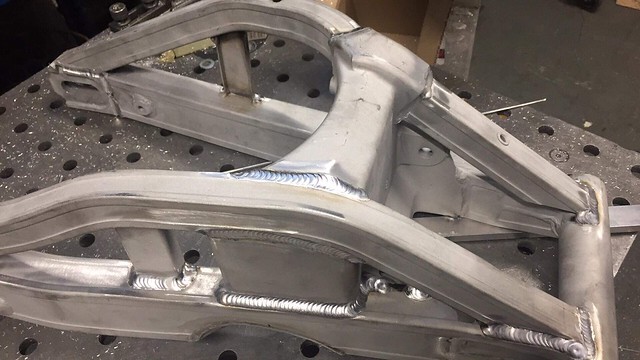 IMG_1987 IMG_1987 by mark.morgan07, on Flickr 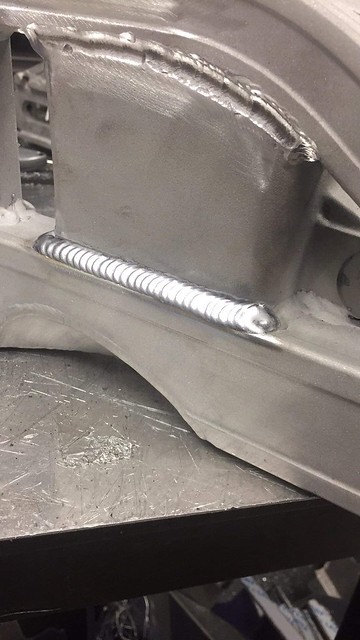 IMG_1989 IMG_1989 by mark.morgan07, on Flickr 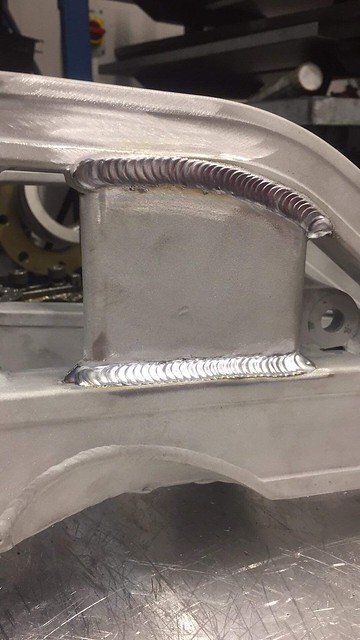 IMG_1988 IMG_1988 by mark.morgan07, on Flickr As soon as the swing arm is back i will be able to finish mocking up the rear brake union position and then finally send the frame of for welding.... |
|
|
|
Post by mikee on Oct 21, 2018 10:23:35 GMT 1
All looking very good
For the swinginarm pivot you can weld 2 triangular gussets above and below the pivot , the stiffener plate already there is a guide to fit them .
6mm ms plate does the trick , a lot less hassle and just as effective as the (very nice ) box structure you have done
Mike
|
|
|
|
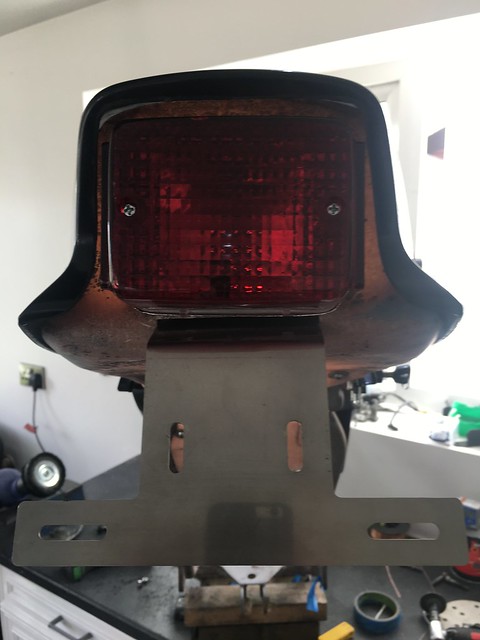
Post by morgy on Oct 28, 2018 9:54:27 GMT 1
I've been trying to sort out the Tail of the bike. Tidying it up... I have cut down the inner mud guard so you can't see it from the sides but it now has fairly big holes at the sides underneath...  IMG_2050 IMG_2050 by mark.morgan07, on Flickr 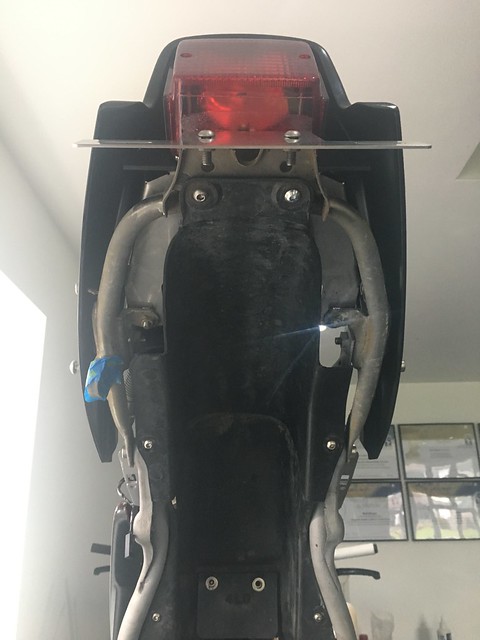 IMG_2054 IMG_2054 by mark.morgan07, on Flickr I do have another rear section that has the number plate fixing bracket cut off, I could use this to clean it up further but will make the number plate and rear tail tidy loose so will need another plate/Bracket making and welding to hold the tail tidy tight... |
|
|
|
Post by morgy on Oct 30, 2018 8:31:25 GMT 1
I had some time to try and sort out the tail of the bike and found some Green house Glass/Plastic so i thought i would try and use this to make a template or plug to either glass or try my hand at some Carbon.. My first attempt 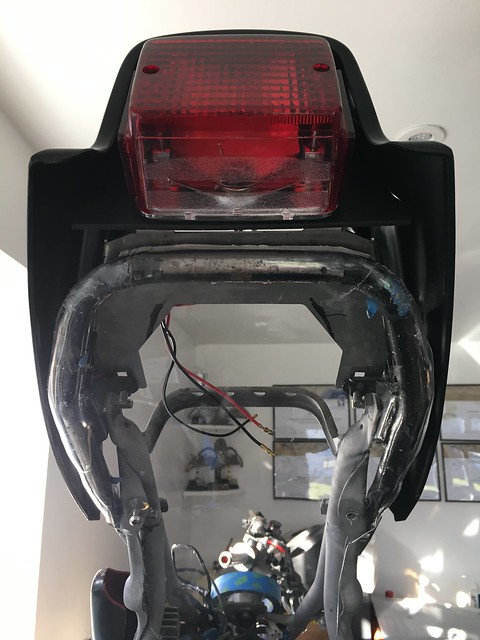 IMG_2062 IMG_2062 by mark.morgan07, on Flickr 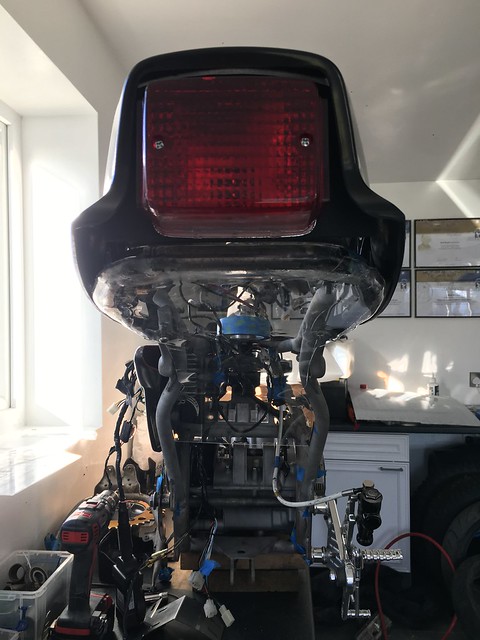 IMG_2060 IMG_2060 by mark.morgan07, on Flickr Glass fibre for the mould 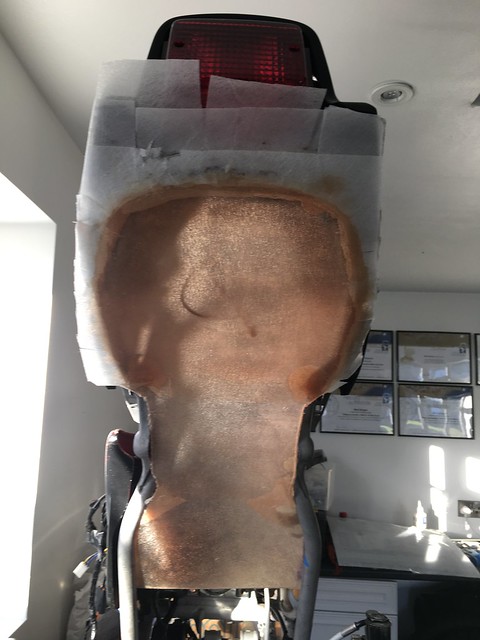 IMG_2064 IMG_2064 by mark.morgan07, on Flickr  IMG_2067 IMG_2067 by mark.morgan07, on Flickr And after spending what seemed to be hours cutting and shaping, I tried to remove the plug from the mould....... I say tried!!! I don't think i used enough release agent or it was just to cold... I put a huge crack right the way through both the mould and the plastic plug... SO PISSED OFF!!! |
|
|
|
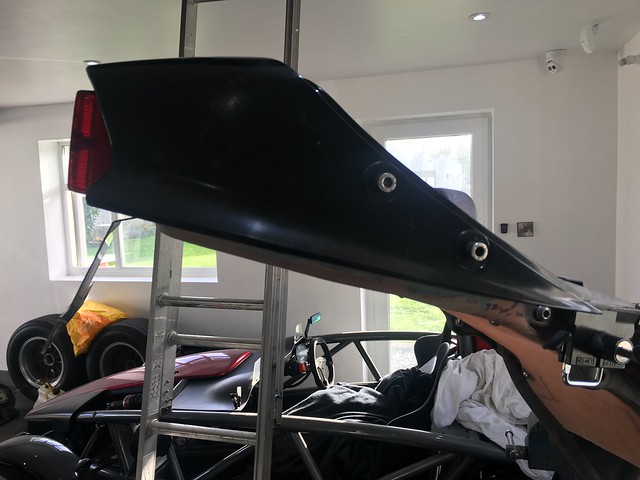
Post by morgy on Nov 7, 2018 15:25:31 GMT 1
I managed to sort out making my template and then glassing it, This time around i was able to get the mould off. But it broke in the process but the glass stayed in one bit so all good... I don't think that it is going to be good enough to use as a mould so i can make a panel out of Carbon so i will tight it up and have it painted  IMG_2100 IMG_2100 by mark.morgan07, on Flickr At the moment there are two panels one for the under side and one for the tail light but these will be joined together to make one complete panel inclosing the rear end.. 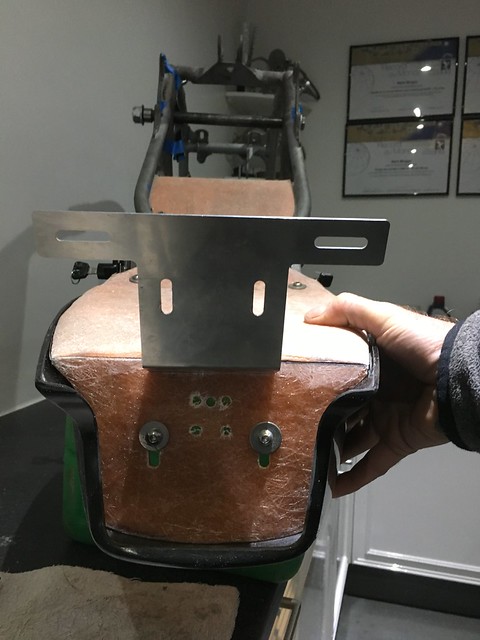 IMG_2093 IMG_2093 by mark.morgan07, on Flickr 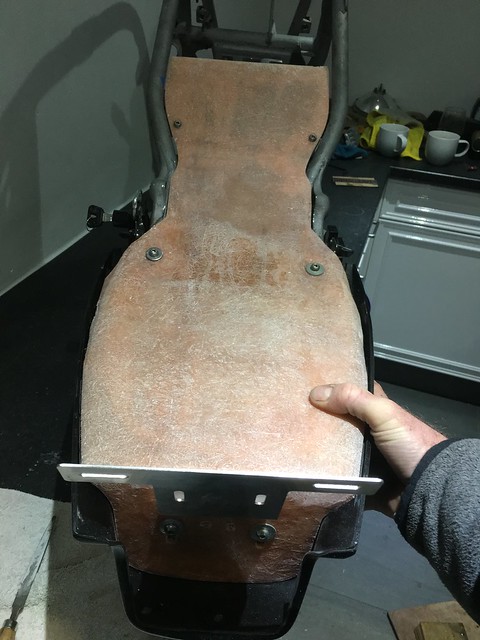 IMG_2094 IMG_2094 by mark.morgan07, on Flickr It still needs some work tidying up the edges and making good but i think it will look ok when done... One concern is the rear wheel smashing into the underside on our lovely country roads... |
|
|
|
Post by Tobyjugs on Nov 7, 2018 19:54:46 GMT 1
Morgy this build is great.
I love to see all the different methods used on this forum to solve problems.
|
|
|
|
Post by morgy on Nov 11, 2018 8:27:24 GMT 1
|
|
|
|
Post by morgy on Nov 11, 2018 20:09:24 GMT 1
|
|
|
|
Post by morgy on Nov 14, 2018 20:51:20 GMT 1
|
|